Tag Archives: avoid dragging heavy objects

How to Build Outdoor Wooden Steps on a Slope: A Step-by-Step Guide

If you have a sloped yard, building outdoor wooden steps can be a great way to add both functionality and aesthetic appeal to your property. However, building steps on a slope can be a challenging task that requires some planning and preparation. In this article, we will provide you with some helpful tips and step-by-step instructions on how to build outdoor wooden steps on a slope.

Before you start building, it’s important to assess the slope of your yard and determine the best location for your steps. You’ll also need to gather the necessary tools and materials, including wood posts, deck screws, landscape fabric, and stones. Once you have everything you need, you can begin the process of building your steps.

Building steps on a slope can be a bit more complicated than building them on level ground, but with the right tools and techniques, it’s definitely doable. By following our step-by-step instructions and taking the time to plan and prepare, you can create a beautiful and functional set of outdoor wooden steps that will enhance the look and usability of your yard. So, let’s get started!

Understanding the Slope

Building outdoor wooden steps on a slope can seem daunting, but with the right knowledge and tools, it can be a manageable project. Before you start building, it’s important to understand the slope and how it will affect your project.

Slope Measurement

To measure the slope of your yard, you will need a level, a tape measure, and a string. First, tie the string to two stakes and stretch it across the slope. Use the level to make sure the string is level. Then, measure the distance between the string and the ground at both ends. The difference in height between the two points is the slope.

You can also use a slope calculator to determine the slope of your yard. Simply enter the distance and the change in elevation, and the calculator will give you the slope percentage.

Slope Analysis

Once you have measured the slope, you will need to analyze it to determine the best way to build your steps. A gentle slope of 2-3 degrees can be stepped over without the need for steps. However, a steeper slope will require steps to be built.

When analyzing the slope, consider the following factors:

  • The height of the slope: The higher the slope, the more steps you will need to build.
  • The length of the slope: The longer the slope, the more steps you will need to build.
  • The angle of the slope: A steeper slope will require shorter steps with a steeper rise and a deeper tread.

By taking these factors into account, you can determine the number of steps you will need to build and the dimensions of each step.

Understanding the slope is an essential step in building outdoor wooden steps on a slope. By measuring and analyzing the slope, you can determine the best way to build your steps and ensure a safe and stable structure.

Materials and Tools

Choosing the Right Wood

When building outdoor wooden steps on a slope, it’s important to choose the right type of wood. Cedar, redwood, and pressure-treated pine are all popular choices for outdoor projects. They’re all durable and resistant to rot and decay, making them ideal for outdoor use.

Cedar and redwood are both naturally resistant to insects and decay, but they can be more expensive than pressure-treated pine. Pressure-treated pine is chemically treated to resist rot and decay, but it may not be as attractive as cedar or redwood.

When choosing your wood, keep in mind the color and grain pattern you prefer, as well as the durability and cost.

Essential Tools

To build outdoor wooden steps on a slope, you’ll need a few essential tools. Here’s a list of the most important ones:

  • Measuring tape
  • Circular saw or jigsaw
  • Drill
  • Hammer
  • Level
  • Shovel
  • Tamper
  • Safety glasses and gloves

You may also need additional tools depending on the complexity of your project, such as a miter saw or router. It’s important to have the right tools on hand to ensure that your project is completed safely and efficiently.

Planning the Steps

Before you start building outdoor wooden steps on a slope, it is important to plan the steps properly. This will ensure that the steps are safe, functional, and aesthetically pleasing. In this section, we will discuss the two main aspects of planning outdoor wooden steps on a slope: step design and step placement.

Step Design

When designing the steps, there are several things to consider. Firstly, you need to decide on the size and height of each step. The size of each step should be large enough to comfortably fit your foot, but not so large that it becomes difficult to climb the stairs. The height of each step should be consistent to make it easier to climb the stairs.

Secondly, you need to decide on the type of wood to use for the steps. Cedar, redwood, and pressure-treated pine are popular choices for outdoor wooden steps. Cedar and redwood are more expensive but are more resistant to rot and insects. Pressure-treated pine is cheaper but needs to be maintained regularly to prevent rot and decay.

Thirdly, you need to decide on the style of the steps. Straight steps are the simplest and most common, but curved steps can add an interesting design element to your outdoor space.

Step Placement

When placing the steps, you need to consider the slope of the land. The steps should be placed in a way that is safe and easy to climb. Here are some tips for placing the steps:

  • The steps should be placed at a comfortable angle. A slope of 30-35 degrees is ideal.
  • The steps should be placed in a way that minimizes erosion. This can be done by placing the steps in a zigzag pattern.
  • The steps should be placed in a way that is visually appealing. Consider using landscaping and lighting to enhance the look of the steps.

By considering the design and placement of the steps, you can ensure that your outdoor wooden steps on a slope are safe, functional, and beautiful.

Building the Steps

Building outdoor wooden steps on a slope is a great way to enhance the look of your backyard and provide safe access to different levels of your property. Here’s how you can build outdoor wooden steps on a slope.

Cutting the Wood

The first step in building outdoor wooden steps is to cut the wood to the desired size. You will need to cut the stringers, risers, and treads. The stringers are the long, diagonal pieces that support the steps. The risers are the vertical pieces that fit between the treads, while the treads are the horizontal pieces that you step on.

When cutting the wood, it’s important to measure carefully to ensure that all the pieces are the same size. You can use a circular saw or a handsaw to cut the wood. Make sure to wear safety goggles and gloves when cutting the wood.

Assembling the Steps

Once you have cut all the wood pieces to size, it’s time to assemble the steps. Start by attaching the stringers to the deck or patio using metal brackets. Make sure that the stringers are level and secure.

Next, attach the risers to the stringers using wood screws. Make sure that the risers are evenly spaced and level. Then, attach the treads to the risers using wood screws. Make sure that the treads are evenly spaced and level.

Finally, sand the steps to smooth out any rough edges and apply a coat of wood stain or paint to protect the wood from the elements. You can also add non-slip strips to the treads to make the steps safer to use.

Building outdoor wooden steps on a slope requires some basic carpentry skills, but with a little patience and attention to detail, you can create a beautiful and functional set of steps that will last for years to come.

Securing the Steps

When building outdoor wooden steps on a slope, it is important to ensure that the steps are secure and stable. Here are some steps you can take to make sure your steps are anchored and stable.

Anchoring the Steps

One way to anchor your steps is to use rebar. Rebar is a steel bar that is used to reinforce concrete and masonry structures. To use rebar, drill holes in the bottom of your steps and hammer in the rebar. Make sure the rebar is long enough to go through the steps and into the ground.

Another way to anchor your steps is to use concrete. To use concrete, dig a hole at the bottom of your steps and pour in some concrete. Make sure the concrete is level and let it dry. Once the concrete is dry, you can attach your steps to the concrete with screws.

Checking Stability

To check the stability of your steps, stand on each step and shift your weight back and forth. If the step moves or wobbles, it is not stable and needs to be adjusted. You can adjust the stability of your steps by adding more screws or rebar, or by adjusting the height of the step.

It is also important to check the stability of your steps after heavy rain or snowfall. If the ground around your steps has shifted or eroded, it can affect the stability of your steps. Make sure to check your steps regularly and make any necessary adjustments to ensure they remain stable and secure.

By following these steps, you can ensure that your outdoor wooden steps on a slope are anchored and stable, providing a safe and secure way to navigate your outdoor space.

Finishing Touches

Once you have built your outdoor wooden steps on a slope, you will want to add some finishing touches to make them look great and ensure safety.

Painting and Sealing

Painting your wooden steps can help protect them from the elements and give them a polished look. Before painting, make sure the wood is clean and dry. You can use a pressure washer or a stiff brush to clean the surface. Once the surface is clean, apply a coat of primer to help the paint adhere to the wood. After the primer has dried, apply a coat of paint. You may want to add a second coat for better coverage. Allow the paint to dry completely before using the steps.

Sealing your wooden steps can also help protect them from the elements. A sealer can help prevent water damage and rot. Before sealing, make sure the wood is clean and dry. Apply the sealer according to the manufacturer’s instructions. You may need to apply more than one coat. Allow the sealer to dry completely before using the steps.

Adding Safety Features

Adding safety features to your outdoor wooden steps can help prevent accidents. Here are some options:

  • Install handrails: Handrails can provide support and stability when going up and down the stairs. Make sure the handrails are securely attached to the steps and that they are at a comfortable height.

  • Add non-slip treads: Non-slip treads can help prevent slips and falls. You can purchase treads that can be attached to the steps or you can apply a non-slip coating to the steps.

  • Install lighting: Lighting can help make the steps more visible and prevent accidents. You can install lights on the steps or nearby.

By adding these finishing touches, you can make your outdoor wooden steps on a slope both functional and attractive.

Maintenance Tips

Maintaining your outdoor wooden steps is important to ensure their longevity and safety. Here are some tips to help you keep your steps in good condition.

Regular Inspection

Regularly inspect your steps for any signs of damage or wear and tear. Look for cracks, splinters, loose boards, or any other damage that could cause a safety hazard. If you notice any issues, address them immediately to prevent further damage or injury.

Cleaning

Cleaning your steps regularly will help keep them looking great and prevent the buildup of dirt and debris. Use a broom or leaf blower to remove any loose debris, and then use a garden hose to wash away any remaining dirt. For tougher stains, you can use a scrub brush and a mild detergent.

Repairs

If you notice any damage to your steps, it’s important to address it as soon as possible. Small cracks or loose boards can be fixed with wood filler or by replacing the damaged board. Larger repairs may require the help of a professional.

In addition to regular inspections and repairs, it’s important to take steps to prevent damage to your steps. Avoid using harsh chemicals or power washers, as these can damage the wood. Use mats or rugs to protect the steps from heavy foot traffic, and avoid dragging heavy objects across the surface.

By following these maintenance tips, you can keep your outdoor wooden steps in great condition for years to come.
how-to-apply-polyurethane-on-stained-wood

Polyurethane and Stained Wood: A Quick Guide

Are you wondering if you need to put polyurethane on wood that was stained? The answer is yes, you should use a protective finish, such as polyurethane, to safeguard the wood’s beauty and integrity. Applying polyurethane over stain is essential to achieve a smooth, even finish, but it is important to ensure that the stain is completely dry before applying the polyurethane.

Polyurethane is a clear, durable finish that protects wood from scratches, stains, and water damage. It also enhances the natural beauty of the wood and adds a glossy or matte finish, depending on your preference. While you do not have to put polyurethane over the wood stain, it is highly recommended, especially if the wood will be exposed to wear and tear or moisture.

Choosing the right type of polyurethane based on the type of wood and the intended use of the project is important. There are two basic types of polyurethane: oil-based and water-based. Both have different pros and cons, such as drying time, odor, and exposure to heat or the elements. By understanding the benefits and drawbacks of each type, you can make an informed decision on which type of polyurethane to use on your stained wood project.

Understanding Polyurethane

Polyurethane is a popular finish used on wood surfaces to protect them from scratches, water damage, and other types of wear and tear. It is a synthetic polymer that is available in both oil-based and water-based forms.

Here are a few things you should know about polyurethane:

  • Oil-based vs. Water-based: Oil-based polyurethane is more durable and provides a richer finish, but it takes longer to dry and has a strong odor. Water-based polyurethane, on the other hand, dries faster, has a clear finish, and is low-odor. It is recommended for surfaces that see little exposure to heat or the elements.
  • Gloss vs. Satin vs. Matte: Polyurethane comes in a variety of sheens, including gloss, satin, and matte. Gloss provides a shiny finish, while satin and matte provide a more subdued finish. The sheen you choose depends on your personal preference and the look you are trying to achieve.
  • Application: Proper application of polyurethane is essential to achieving a smooth, even finish. It is best to apply polyurethane in thin coats using a high-quality brush or roller. Sanding between coats is also recommended to ensure a smooth finish.
  • Curing Time: Polyurethane takes time to cure, and it is important to avoid using the surface until it is fully cured. Oil-based polyurethane can take up to 24 hours to dry, while water-based polyurethane dries in as little as 2 hours. However, both types of polyurethane take several days to fully cure.

Overall, polyurethane is an excellent choice for protecting and enhancing the beauty of wood surfaces. Understanding the different types of polyurethane and how to properly apply them can help you achieve a beautiful, long-lasting finish on your wood projects.

The Purpose of Staining Wood

the-purpose-of-staining-wood

Staining wood is a popular way to enhance its natural beauty and add color to it. It is a process of applying a pigmented liquid to the surface of the wood to change its color. The purpose of staining wood is to:

  • Enhance the natural beauty of the wood: Staining wood can bring out the natural grain patterns and textures of the wood, making it more visually appealing.
  • Add color to the wood: Staining wood can add color to the wood, which can help it blend in with other interior design elements.
  • Protect the wood: Staining wood can help protect it from damage caused by moisture, sunlight, and other environmental factors.
  • Create a uniform appearance: Staining wood can help create a uniform appearance by covering up any imperfections or blemishes in the wood.

It’s important to note that staining wood alone does not provide protection against moisture, heat, or checking. For this reason, it’s essential to use a protective finish, such as polyurethane, after staining to safeguard the wood’s beauty and integrity.

Applying Polyurethane on Stained Wood

If you have stained your wood, it is recommended to apply polyurethane to protect the wood and give it a polished look. Polyurethane is a clear, protective coating that can be applied on top of the stained wood to provide a durable finish. In this section, we will discuss the steps to apply polyurethane on stained wood.

Step 1: Choose the Right Type of Polyurethane

There are two types of polyurethane – oil-based and water-based. Oil-based polyurethane takes longer to dry, has a strong odor, and can yellow over time. On the other hand, water-based polyurethane dries quickly, has a low odor, and does not yellow over time. If you have a light-colored stain or want to maintain the natural color of the wood, water-based polyurethane is the best choice.

Step 2: Prepare the Surface

Before applying polyurethane, ensure that the surface is clean and free of dust and debris. Sand the surface with fine-grit sandpaper and wipe it down with a tack cloth to remove any remaining dust. If the surface has any imperfections, fill them with wood filler and sand them down until smooth.

Step 3: Apply the First Coat

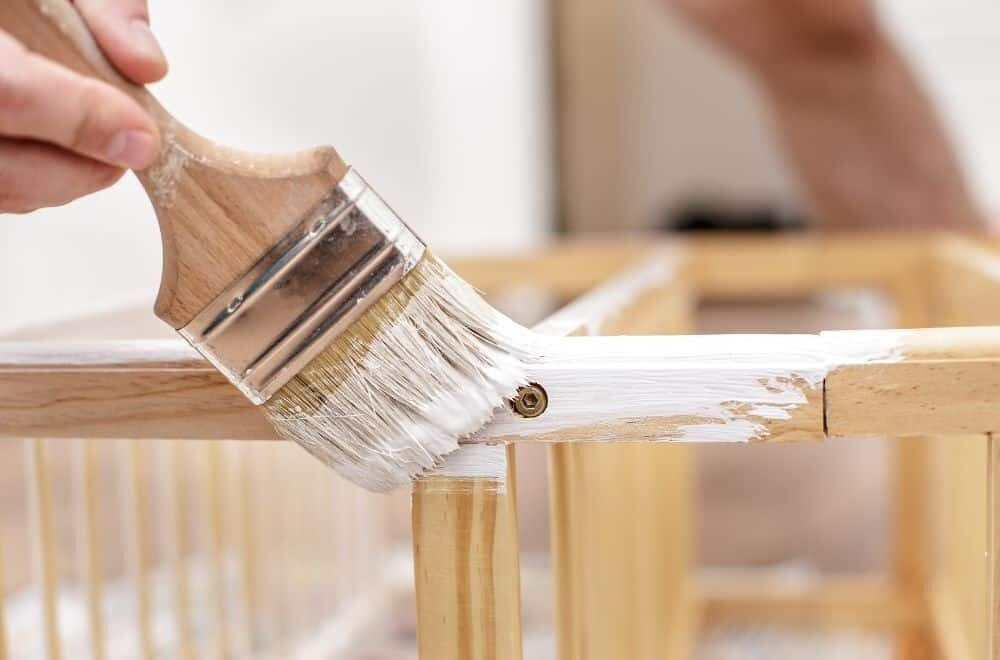
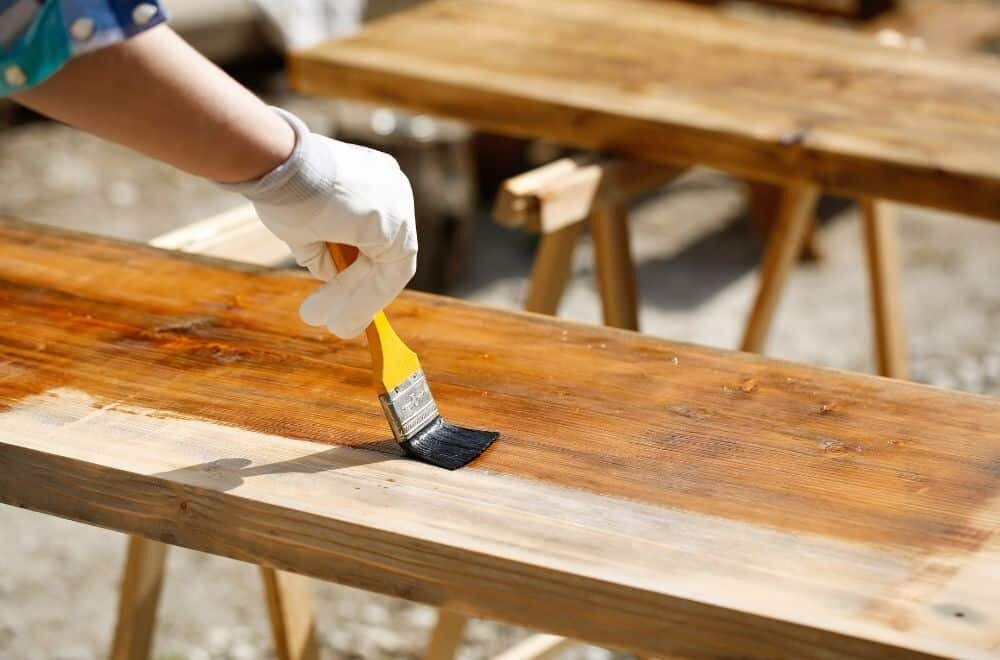
Using a natural bristle brush, apply a thin layer of polyurethane to the surface. Apply the polyurethane in long strokes in direct horizontal motions with the grain of the wood. Ensure that the brush strokes are even and smooth. Let the first coat dry completely before applying the second coat.

Step 4: Apply the Second Coat

Apply the second coat of polyurethane in the same manner as the first coat. The second coat will provide additional protection and give the wood a polished look. Let the second coat dry completely before using the surface.

In conclusion, applying polyurethane on stained wood is an important step to protect the wood and give it a polished look. By following these simple steps, you can apply polyurethane on stained wood and achieve a professional-looking finish.

Benefits of Applying Polyurethane on Stained Wood

benefits-of-applying-polyurethane-on-stained-wood

When it comes to preserving the look and feel of your wooden furniture, applying polyurethane on stained wood can be a game-changer. Here are some benefits of applying polyurethane on stained wood:

1. Protection from Scratches and Stains

Polyurethane is a durable and scratch-resistant coating that can help protect your wooden furniture from scratches and stains. By applying polyurethane on stained wood, you can ensure that your furniture stays looking new for longer.

2. Smooth and Shiny Finish

Polyurethane gives a smooth and shiny finish to the stained wood. It enhances the natural beauty of the wood and gives it a glossy look that can make it stand out in any room.

3. Longevity

Polyurethane can help extend the life of your wooden furniture. By providing a protective layer over the stained wood, polyurethane can help prevent damage caused by exposure to sunlight, moisture, and other environmental factors.

4. Easy Maintenance

Polyurethane makes maintenance of the stained wood easy. It prevents dust from settling on the surface of the wood and makes it easier to clean. You can simply wipe the surface of the wood with a damp cloth to keep it looking clean and shiny.

5. Versatility

Polyurethane can be used on a variety of wooden surfaces, from floors to furniture. It can be applied over different types of stains and finishes, making it a versatile coating for any wooden surface.

Overall, applying polyurethane on stained wood can be a great way to protect and enhance the natural beauty of your wooden furniture.

Potential Drawbacks of Applying Polyurethane on Stained Wood

If you are planning to apply polyurethane on stained wood, there are a few potential drawbacks that you should consider:

1. Polyurethane can alter the color of the stain

Polyurethane can have a slight yellowing effect on the wood, which can alter the color of the stain. This is especially true for oil-based polyurethane. If you want to maintain the color of the stain, it’s important to choose a water-based polyurethane that won’t yellow over time.

2. Polyurethane can create a plastic-like appearance

Polyurethane can create a plastic-like appearance on the wood, which can detract from the natural beauty of the grain. This is especially true for high-gloss polyurethane. If you want to maintain a natural look, it’s important to choose a satin or matte finish.

3. Polyurethane can be difficult to apply

Polyurethane can be difficult to apply, especially if you are not experienced with the process. It can be prone to drips, bubbles, and uneven coverage. It’s important to follow the manufacturer’s instructions carefully and to apply the polyurethane in thin, even coats.

4. Polyurethane can be difficult to remove

Polyurethane can be difficult to remove once it has been applied. If you make a mistake during the application process, it can be challenging to fix without sanding down the entire surface and starting over. It’s important to take your time and work carefully to avoid any mistakes.

Overall, there are some potential drawbacks to applying polyurethane on stained wood. However, if you choose the right type of polyurethane and apply it carefully, you can achieve a beautiful, durable finish that will protect your wood for years to come.

How to Apply Polyurethane on Stained Wood

how-to-apply-polyurethane-on-stained-wood

If you have recently stained your wood and are wondering whether to apply polyurethane on top of it or not, the answer is yes. Polyurethane is a protective coating that helps to prevent scratches and water damage while also enhancing the wood’s natural beauty. Here are the steps to follow when applying polyurethane on stained wood.

Preparation

Before you start applying polyurethane, make sure your wood is clean and free of any dust or debris. You can use a tack cloth or a vacuum cleaner to remove any dirt or sawdust. If you notice any imperfections on the wood surface, sand it down gently with a fine-grit sandpaper.

Next, choose the type of polyurethane you want to use. There are two types of polyurethane: water-based and oil-based. Water-based polyurethane is easy to clean up and dries faster, while oil-based polyurethane is more durable and gives a richer finish. Make sure to read the label carefully and follow the manufacturer’s instructions.

Application

When applying polyurethane, use a high-quality brush or a foam applicator. Start by applying a thin coat of polyurethane in the direction of the wood grain. Make sure to spread the polyurethane evenly and avoid leaving any brush marks or bubbles. If you notice any bubbles, gently brush them out with a dry brush.

Wait for the first coat to dry completely before applying the second coat. Depending on the type of polyurethane you are using, this may take anywhere from 2 to 24 hours. Once the first coat is dry, lightly sand the surface with a fine-grit sandpaper to remove any imperfections. Then, apply a second coat of polyurethane in the same manner as the first coat.

Drying and Curing

After applying the final coat of polyurethane, wait for it to dry completely before using the wood surface. This can take anywhere from 24 to 72 hours, depending on the type of polyurethane and the humidity level in your area.

Once the polyurethane is dry, it will still need to cure for several days before it reaches its maximum hardness and durability. Avoid placing any objects on the wood surface or exposing it to water or heat until the polyurethane has fully cured.

In summary, applying polyurethane on stained wood is a simple process that requires a bit of patience and attention to detail. With the right tools and techniques, you can protect and enhance the natural beauty of your wood for years to come.

Maintenance of Polyurethane-Coated Wood

Once you have applied polyurethane to your stained wood, it is important to properly maintain it to ensure its longevity and beauty. Here are some tips to help you maintain your polyurethane-coated wood:

Regular Cleaning

Regular cleaning is essential to maintain the appearance and durability of your polyurethane-coated wood. You can use a soft cloth or a damp mop to clean the surface. Avoid using harsh chemicals or abrasive cleaners, as they can damage the polyurethane coating. Instead, use mild soap and water to clean the surface.

Avoid Scratches and Dents

Polyurethane-coated wood is durable, but it is not indestructible. Avoid dragging heavy objects across the surface, as this can cause scratches and dents. Use furniture pads or coasters to protect the surface from scratches and dents.

Avoid Extreme Temperatures

Polyurethane-coated wood can withstand moderate temperatures, but it is not designed to withstand extreme temperatures. Avoid placing hot objects directly on the surface, as this can cause the polyurethane coating to melt or warp. Similarly, avoid exposing the surface to extreme cold, as this can cause the polyurethane coating to crack.

Recoating

Over time, the polyurethane coating may start to wear away. When this happens, you can recoat the surface to restore its appearance and durability. Before recoating, clean the surface thoroughly and sand it lightly to remove any rough spots. Apply a thin coat of polyurethane and allow it to dry completely before applying a second coat.

By following these tips, you can maintain the beauty and durability of your polyurethane-coated wood for years to come.

Alternatives to Polyurethane for Stained Wood

alternatives-to-polyurethane-for-stained-wood

If you’re looking for alternatives to polyurethane for stained wood, you’re in luck! There are several options available that can provide a protective finish for your stained wood without using polyurethane.

Tung Oil

Tung oil is a natural oil that is derived from the seeds of the tung tree. It is a popular alternative to polyurethane because it is easy to apply and provides a durable finish that enhances the natural beauty of the wood. Tung oil is also resistant to water and stains, making it a great choice for high-traffic areas.

Shellac

Shellac is a natural resin that is derived from the secretions of the lac bug. It has been used for centuries as a wood finish and is still a popular choice today. Shellac is easy to apply and dries quickly, providing a hard, protective finish that resists water, alcohol, and heat.

Lacquer

Lacquer is a synthetic finish that is made from nitrocellulose and other chemicals. It is a popular alternative to polyurethane because it dries quickly and provides a hard, durable finish. Lacquer is also resistant to water and stains, making it a great choice for high-traffic areas.

Wax

Wax is a traditional finish that has been used for centuries to protect and enhance the natural beauty of wood. There are several types of wax available, including beeswax, carnauba wax, and candelilla wax. Wax is easy to apply and provides a low-luster finish that enhances the natural grain of the wood. However, wax is not as durable as other finishes and may require more frequent reapplication.

In conclusion, there are several alternatives to polyurethane for stained wood, each with its own unique benefits and drawbacks. Consider your specific needs and preferences when choosing a finish for your stained wood project.

Frequently Asked Questions

How do you apply polyurethane to wood that has been stained?

When applying polyurethane to stained wood, it is important to ensure that the surface is clean and free of dust. You can use a clean cloth or brush to apply the polyurethane in thin, even coats. Be sure to follow the manufacturer’s instructions for drying times and the number of coats recommended.

Is it necessary to apply polyurethane after staining wood?

While it is not absolutely necessary to apply polyurethane after staining wood, it is highly recommended. Polyurethane provides a protective layer that helps to prevent scratches and other damage to the stained surface. It also helps to enhance the color and grain of the wood.

Do you need to sand between staining and applying polyurethane?

Yes, it is recommended to sand between staining and applying polyurethane. This helps to ensure a smooth and even surface for the polyurethane to adhere to. Use a fine-grit sandpaper and be sure to remove all dust before applying the polyurethane.

How long should you wait after staining wood before applying polyurethane?

The recommended wait time before applying polyurethane after staining wood varies depending on the type of stain used. It is best to follow the manufacturer’s instructions for the specific stain you are using. In general, it is recommended to wait at least 24 hours before applying polyurethane.

Can you use water-based polyurethane on stained wood?

Yes, you can use water-based polyurethane on stained wood. However, it is important to ensure that the stain is completely dry before applying the water-based polyurethane. Water-based polyurethane dries faster than oil-based polyurethane, so be sure to work quickly and apply thin, even coats.

Do you need to seal wood after staining before applying polyurethane?

It is not necessary to seal wood after staining before applying polyurethane. However, if you are using a stain that is not compatible with polyurethane, you may need to apply a sealer before applying the polyurethane. Be sure to check the manufacturer’s instructions for compatibility and application guidelines.