Tag Archives: avoid inhaling sawdust

how-to-make-a-wooden-flag

How to Make a Wooden Flag: Step-by-Step Guide for Beginners

Do you want to show your love for your country and your woodworking skills at the same time? Making a wooden flag is a great way to do both. With just a few tools and materials, you can create a beautiful wooden flag that you can display in your home or office.

There are many different ways to make a wooden flag, from simple designs to more complex ones. You can use a variety of woods, stains, and finishes to create a unique look that reflects your personal style. Whether you are a beginner or an experienced woodworker, making a wooden flag is a fun and rewarding project that you can enjoy for years to come.

In this article, we will show you how to make a wooden flag step-by-step. We will cover everything from choosing the right wood to cutting and assembling the pieces. Whether you want to make a rustic American flag or a sleek modern design, we have the tips and techniques you need to create a beautiful wooden flag that you can be proud of.

Understanding the Basics of Woodworking

how-to-make-a-wooden-flag

Woodworking is a rewarding and enjoyable hobby that can produce beautiful and functional pieces. If you’re interested in making a wooden flag, it’s important to understand the basics of woodworking before you start. This section will cover the basics of choosing the right wood, the required tools and accessories, and safety measures to keep in mind.

Choosing the Right Wood

When making a wooden flag, it’s important to choose the right type of wood. Cedar is a popular choice because it’s durable, lightweight, and has a natural resistance to decay. Pine and reclaimed wood are other options to consider. Make sure the wood you choose is about 3/4″ thick and has a smooth surface.

Required Tools and Accessories

To make a wooden flag, you’ll need a few basic tools and accessories. These include:

  • Saw (hand saw, jig saw, circular saw, or miter saw)
  • Palm sander (or sandpaper and sanding block)
  • Hammer or drill
  • Wood glue (optional)

Having the right tools and accessories can make the woodworking process much easier and more enjoyable.

Safety Measures

Woodworking can be dangerous if proper safety measures aren’t taken. Here are a few safety tips to keep in mind:

  • Wear safety goggles to protect your eyes from sawdust and debris.
  • Use a dust mask to avoid inhaling sawdust.
  • Always use sharp tools to prevent accidents.
  • Keep your work area clean and organized to avoid tripping hazards.
  • Use clamps to hold your workpiece in place while you’re cutting or sanding.

By following these safety measures, you can enjoy woodworking safely and without incident.

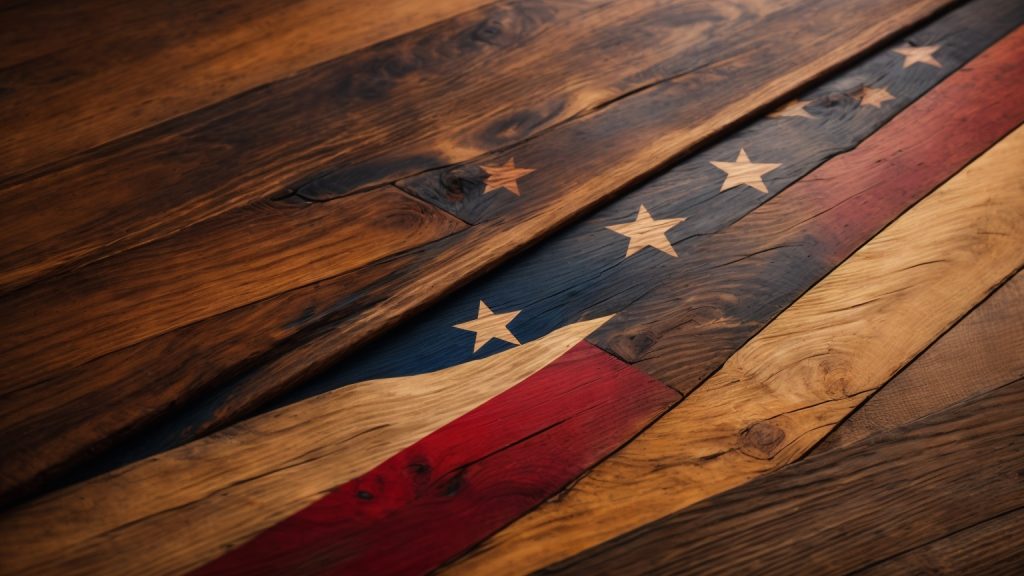
Designing Your Wooden Flag

designing-your-wooden-flag

When making a wooden flag, designing the flag is an essential step that determines the final look of your project. Here are some sub-sections that will guide you on how to design your wooden flag.

Sketching the Design

Before starting the project, you need to sketch the design of your flag on paper. This step helps you to visualize how the final product will look like and make necessary adjustments before starting. You can sketch the flag using a pencil and paper or use a computer program to design it.

When sketching, consider the number of stripes you want, the size of the union, and the placement of the stars. You can also decide to add other features such as text or symbols. Remember, the design should be simple and easy to replicate.

Determining the Size

The size of your wooden flag depends on the location where you plan to hang it. If you plan to hang it indoors, you can make it smaller than an outdoor flag. If you plan to hang it outdoors, you need to consider the distance from which it will be viewed.

A standard size for an outdoor flag is 3 feet by 5 feet. However, you can make it larger or smaller depending on your preference. When determining the size, consider the size of the wooden boards you plan to use and the number of stripes you want.

In conclusion, designing your wooden flag is an important step in creating a beautiful and unique flag. By sketching the design and determining the size, you can create a flag that meets your specific needs and preferences.

Cutting and Shaping the Wood

Before you can assemble your wooden American flag, you’ll need to cut and shape the wood. Here’s what you need to know:

Making the Stripes

To make the stripes, you’ll need seven 1 1/2″ x 3/4″ pine boards, each 8 feet long. You can find these at Menards, Lowes, or other home improvement stores. Cut each board down to 37 inches in length. Sand the edges of each board to smooth out any rough spots.

Creating the Union

For the union, you’ll need a piece of pine cut to size. You can use the same type of pine as the stripes, or you can use a different type of wood for contrast. Cut the union to 19 1/2 inches wide by 13 inches tall. Sand the edges to smooth them out.

Once you have all of your pieces cut, it’s time to shape them. You can use a jigsaw or a circular saw to create the shape of the flag. Here’s how:

  1. Lay out your stripes in the correct order, with the union in the top left corner.
  2. Use a pencil to sketch out the shape of the flag on the top board.
  3. Use a jigsaw or circular saw to carefully cut along the pencil lines.
  4. Sand the edges of the flag to smooth out any rough spots.

Congratulations! You’ve now cut and shaped the wood for your wooden American flag. It’s time to move on to the next step: painting.

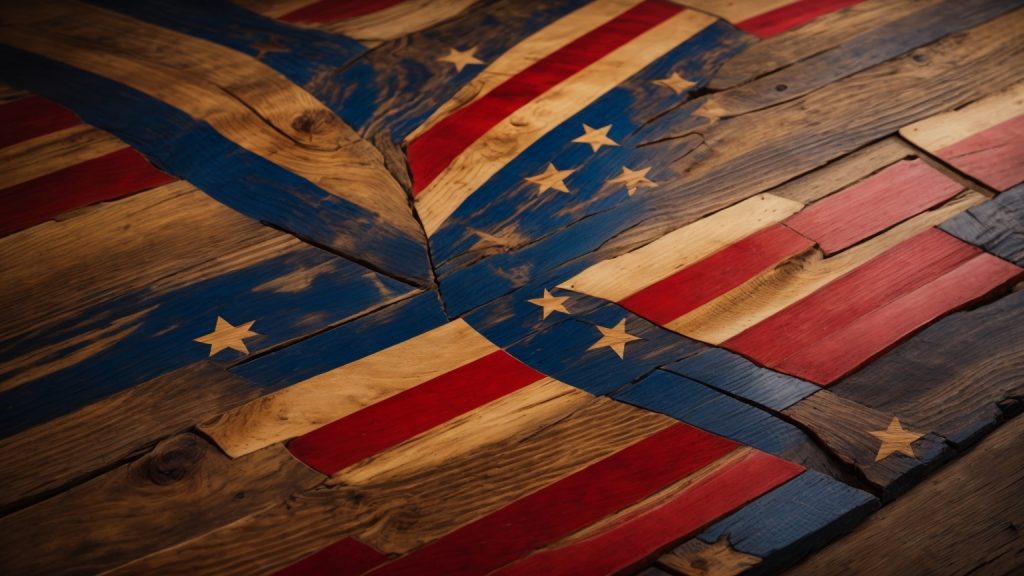
Assembling the Wooden Flag

Once you have completed the cutting and sanding of the wooden pieces, it is time to assemble the flag. This section will guide you through the process of attaching the stripes and fixing the union.

Attaching the Stripes

To attach the stripes, you will need wood glue and clamps. Apply a thin layer of wood glue to the back of each stripe and carefully place it onto the backing board. Use clamps to hold the stripe in place while the glue dries. Repeat this process for all the stripes, making sure to leave space between each stripe for the union.

Fixing the Union

The union is the blue field with the stars on the flag. To fix the union, you will need to cut a piece of wood to size and sand it smooth. Once you have the wood ready, you can start marking out the position of the stars. Use a stencil or a star-shaped cookie cutter to trace the stars onto the wood.

Once you have marked out the stars, you can start drilling holes for them. Use a drill bit that is slightly larger than the diameter of the dowels you will use for the stars. Drill the holes to a depth that is slightly shorter than the length of the dowels.

Next, apply a thin layer of wood glue to the back of the union and carefully place it onto the backing board, making sure to align it with the stripes. Insert the dowels into the holes you drilled earlier and tap them in gently with a mallet. Allow the glue to dry completely before moving on to the next step.

Congratulations, you have now assembled your wooden American flag!

Finishing Touches

Once you have constructed your wooden flag, it is time to add the finishing touches. This section will guide you through the process of sanding, painting, and applying a sealant to your flag.

Sanding the Wood

Before you start painting, you need to sand your flag to ensure that the surface is smooth and free of any rough spots or splinters. Start with a coarse grit sandpaper and work your way up to a finer grit until the wood is smooth to the touch. Be sure to wipe away any dust or debris before moving on to the next step.

Painting Your Flag

Now it’s time to add some color to your flag. You can use any combination of colors you like, but for a traditional American flag, you will need red, white, and blue paint. You can use spray paint or brush-on paint, but be sure to use a paint that is suitable for wood surfaces.

Start by painting the blue rectangle in the top left corner of your flag. Once the blue paint has dried, use painter’s tape to mask off the areas of the flag that will be painted red. Apply the red paint and allow it to dry completely. Finally, remove the painter’s tape and mask off the areas that will be painted white. Apply the white paint and allow it to dry completely.

Applying the Sealant

The final step in finishing your wooden flag is to apply a sealant to protect it from the elements. There are many types of sealants available, but for this project, we recommend using a clear polyurethane spray. Apply the spray in a well-ventilated area and follow the manufacturer’s instructions for best results.

Once the sealant has dried, your wooden flag is complete. Hang it on a wall or display it proudly in your home. Congratulations on a job well done!

make-a-wooden-door-hanger

How to Make a Wooden Door Hanger: A Simple DIY Guide

Wooden door hangers are a great way to add a touch of personality to your home decor. They can be customized to fit any style or theme, and can be made using a variety of materials. In this article, we will show you how to make a wooden door hanger using simple materials and techniques.

To start, you will need a wooden base for your door hanger. You can purchase pre-cut wooden rounds or squares from a craft store, or cut your own using a saw. Next, you will need to choose a design for your door hanger. This can be a simple shape or a more intricate design, depending on your skill level and preferences.

Once you have your design, you can begin painting or staining your wooden base. You can use acrylic paint or wood stain to achieve the desired look. After your base is dry, you can add any additional details such as lettering or embellishments. Finally, attach a hanger to the back of your door hanger and it’s ready to be displayed on your front door or in your home.

Understanding the Basics of Door Hangers

make-a-wooden-door-hanger

If you’re looking for a fun and easy way to add some personality to your front door, a wooden door hanger is a great option. But before you start crafting, it’s important to understand the basics of door hangers.

Materials

The first thing you’ll need is a wooden round or plaque. You can find these at most craft stores or online. You’ll also need some paint, brushes, and any other decorations you want to add, such as ribbon, flowers, or vinyl lettering.

Design

When it comes to designing your door hanger, the possibilities are endless. You can choose a theme, such as seasonal or holiday, or simply create a design that matches your home’s decor. Don’t be afraid to get creative and add your own personal touch.

Construction

To construct your door hanger, start by painting your wooden round or plaque. Once it’s dry, you can add any decorations or vinyl lettering. If you’re adding a bow or ribbon, attach it with hot glue or wire. Finally, attach a hanger to the back of your door hanger so you can hang it on your front door.

Maintenance

To keep your door hanger looking its best, be sure to protect it from the elements. If you’re using it outside, consider adding a coat of sealant to protect it from rain and sun damage. And if it does get dirty, simply wipe it down with a damp cloth.

Now that you understand the basics of door hangers, it’s time to get crafting! With a little creativity and some basic supplies, you can create a beautiful and unique wooden door hanger that will add some personality to your front door.

Materials Needed

Making a wooden door hanger is a fun and easy project that requires only a few materials. Here are the things you’ll need to get started:

Wood

The first thing you’ll need is a piece of wood to use as the base for your door hanger. You can use any type of wood you like, but MDF (medium-density fiberboard) is a popular choice because it’s easy to work with and doesn’t splinter. You can purchase pre-cut wooden bases from craft stores or cut your own from a larger piece of wood.

Paint and Brushes

Once you have your wooden base, you’ll need to choose a paint color and gather some brushes. Acrylic paint is a good choice because it dries quickly and is easy to clean up. You’ll also want to have a few different sizes of brushes on hand so you can paint both large and small areas.

Decorative Elements

To make your door hanger stand out, you’ll want to add some decorative elements. This can include things like ribbon, greenery, or pre-made bows. You can also use stencils or stickers to add designs or words to your door hanger.

Tools

Finally, you’ll need a few tools to help you put everything together. A staple gun can be useful for attaching ribbon or other decorative elements, while a drill can be used to make holes for hanging your door hanger. You’ll also want to have some sandpaper on hand to smooth out any rough edges on your wooden base.

With these materials in hand, you’re ready to start creating your own beautiful wooden door hanger.

Choosing the Right Wood

When making a wooden door hanger, selecting the right type of wood is crucial. You want to choose a wood that is both lightweight and smooth, so it won’t be too heavy on the door and will be easy to paint or decorate.

Here are some popular types of wood to consider:

Medium-Density Fiberboard (MDF)

MDF is a popular choice for wooden door hangers because it is easy to work with and has a smooth surface. It’s made by breaking down hardwood and softwood and contains tiny wood fibers, so it won’t have any wood grain. MDF is also affordable and readily available at most hardware stores.

Birch Plywood

Birch plywood is a strong and durable option for door hangers. It has a beautiful wood grain that can add a rustic touch to your project. However, it can be more expensive than other types of wood.

Pine

Pine is another affordable option for door hangers. It’s lightweight and easy to work with, but it may have knots or other imperfections that can affect the final look of your project.

Cedar

Cedar is a great choice if you want a natural wood look for your door hanger. It’s lightweight, durable, and has a pleasant aroma. However, it can be more expensive than other types of wood.

When choosing the right wood for your door hanger, consider the look you want to achieve, your budget, and the tools you have available to work with. With the right wood and a little creativity, you can create a unique and beautiful door hanger that will add charm to any door.

Designing Your Door Hanger

designing-your-door-hanger

When it comes to designing your wooden door hanger, there are a few things to consider. From sketching your design to choosing the right size, each step is important to ensure that you end up with a door hanger that you love.

Sketching Your Design

Before you start cutting your wood, it’s important to sketch out your design. This will give you a better idea of what your door hanger will look like and help you make any necessary adjustments before you start cutting.

When sketching your design, consider the following:

  • What shape do you want your door hanger to be?
  • What design elements do you want to include (e.g. text, images, patterns)?
  • What colors do you want to use?

Once you have a rough sketch of your design, you can start refining it and making any necessary changes.

Choosing the Right Size

The size of your door hanger will depend on a few factors, including the size of your door and the design you have in mind. Here are a few things to keep in mind when choosing the right size:

  • Make sure your door hanger is proportional to the size of your door. A door hanger that is too small or too large can look awkward.
  • Consider the placement of your door hanger. If you plan to hang it on the front door, you may want to choose a larger size to make it more visible from the street.
  • Think about the design elements you want to include. If you have a lot of text or images, you may need a larger size to fit everything.

Once you have a general idea of the size you want, you can start cutting your wood and bringing your design to life.

Cutting the Wood

Cutting the wood is one of the most important steps in making a wooden door hanger. It requires precision and attention to detail. In this section, we will discuss the safety precautions you should take before cutting the wood and the cutting techniques you can use.

Safety Precautions

Before cutting the wood, it is important to take some safety precautions to avoid accidents. Here are some tips to keep in mind:

  • Wear safety goggles to protect your eyes from flying wood chips.
  • Wear earplugs to protect your ears from the noise of the saw.
  • Wear a dust mask to avoid inhaling sawdust.
  • Keep your fingers away from the saw blade.
  • Keep the saw blade guard in place.
  • Make sure the wood is properly secured before cutting it.
  • Always use a sharp blade.

Cutting Techniques

There are several cutting techniques you can use to cut the wood for your door hanger. Here are some of the most common techniques:

  • Jigsaw: A jigsaw is a versatile tool that can be used to make curved cuts in the wood. It is perfect for cutting out the shape of your door hanger. To use a jigsaw, clamp the wood to a workbench and follow the outline of your design with the blade.
  • Circular Saw: A circular saw is a powerful tool that can be used to make straight cuts in the wood. It is perfect for cutting the wood to the desired size. To use a circular saw, clamp the wood to a workbench and use a straight edge as a guide for the saw blade.
  • Scroll Saw: A scroll saw is a specialized tool that can be used to make intricate cuts in the wood. It is perfect for cutting out small details in your design. To use a scroll saw, clamp the wood to a workbench and follow the outline of your design with the blade.

Remember to take your time and be patient when cutting the wood. It is better to make slow, steady cuts than to rush and make mistakes.

Finishing Your Door Hanger

Once you have painted your wooden door hanger, it’s time to finish it off with a protective coat. This will not only make your door hanger look more professional, but it will also help to protect it from the elements.

Sanding the Wood

Before applying any finish, it’s essential to sand your wooden door hanger. Sanding will remove any rough spots or imperfections, leaving you with a smooth surface to work with.

Start by using a coarse-grit sandpaper to remove any large bumps or ridges. Then, switch to a fine-grit sandpaper to smooth out the surface. Be sure to sand all sides of the door hanger, including the edges.

Once you have finished sanding, wipe the door hanger down with a damp cloth to remove any dust or debris.

Applying Finish

There are many different finishes you can use on your wooden door hanger, including varnish, polyurethane, and wax. Each has its own advantages and disadvantages, so it’s essential to choose the right one for your project.

Varnish is a popular choice for wooden door hangers as it provides a durable and long-lasting finish. It’s also available in a range of sheens, from matte to high gloss.

Polyurethane is another popular choice, as it’s easy to apply and dries quickly. It’s also very durable and resistant to scratches and stains.

Wax is a more traditional finish that provides a soft, natural look. It’s easy to apply and can be buffed to a high shine.

When applying your chosen finish, be sure to follow the manufacturer’s instructions carefully. Apply the finish in thin, even coats, and allow each coat to dry completely before applying the next.

With a little bit of sanding and the right finish, your wooden door hanger will look beautiful for years to come.

Adding Details

Now that you have your wooden door hanger base, it’s time to add some personality to it! Here are some tips on how to add details to your door hanger:

Painting Your Door Hanger

Painting is a great way to add color and design to your door hanger. Here are some steps to follow when painting your door hanger:

  1. Sand the surface of your wooden door hanger with fine-grit sandpaper to create a smooth surface for painting.
  2. Choose your paint colors and apply a base coat to your door hanger. You can use acrylic or spray paint depending on your preference.
  3. Once the base coat is dry, use stencils, paint pens, or brushes to add designs, patterns, or lettering to your door hanger.
  4. Allow the paint to dry completely before adding any accessories or hanging your door hanger.

Adding Accessories

Accessories can add a unique touch to your door hanger and make it stand out. Here are some ideas for accessories to add to your door hanger:

  • Ribbon or Twine: Attach a ribbon or twine to your door hanger to create a hanger. You can also use ribbon or twine to create bows or knots for added decoration.
  • Flowers or Greenery: Add silk or dried flowers or greenery to your door hanger to create a natural touch. You can use hot glue or wire to attach them securely.
  • Embellishments: Buttons, beads, and other small embellishments can add a fun touch to your door hanger. Use hot glue to attach them securely.
  • Vinyl Decals: Use vinyl decals to add lettering or designs to your door hanger. You can find pre-made decals or create your own using a vinyl cutter.

Remember, the key to adding details to your door hanger is to be creative and have fun! Experiment with different colors, designs, and accessories until you find the perfect combination that reflects your style.

Hanging Your Door Hanger

Once you’ve finished creating your wooden door hanger, it’s time to hang it up! Here are a few tips to ensure your door hanger looks great and stays securely in place.

Choosing the Right Spot

Before you hang your door hanger, take a moment to consider where it will look best. You’ll want to choose a spot that is visible from the street and complements your home’s overall aesthetic. Consider hanging your door hanger on the front door, a side door, or even a fence or gate.

Hanging Hardware

To hang your door hanger, you’ll need to attach some hanging hardware to the back. You can use a simple picture hanger or a sawtooth hanger, depending on the weight of your door hanger. Make sure the hardware is securely attached to the back of the hanger and centered so that it hangs straight.

Hanging Your Door Hanger

Once your hardware is attached, it’s time to hang your door hanger. Hold the hanger up to the desired spot and mark where the hardware will go. Then, use a drill or screwdriver to attach the hardware to the surface. Make sure the hardware is securely attached and can support the weight of the door hanger.

Maintenance

To keep your wooden door hanger looking great, you may need to perform some maintenance from time to time. If the hanger becomes dirty or dusty, simply wipe it down with a damp cloth. If the finish begins to fade or wear away, you can apply a fresh coat of paint or stain to restore its appearance.

By following these simple tips, you can ensure that your wooden door hanger looks great and stays securely in place for years to come.

How to Make a Wooden Cup: A Beginner's Guide to Crafting Your Own Rustic Drinkware

Making your own wooden cup can be a fun and rewarding project for anyone who loves woodworking. With a few simple tools and some basic knowledge, you can create a beautiful and functional cup that will last for years to come. Whether you’re a seasoned woodworker or just starting out, making a wooden cup is a great way to hone your skills and create something unique.

Before you begin, it’s important to choose the right type of wood for your cup. Look for a hardwood that is strong and durable, such as oak, maple, or cherry. Avoid softwoods like pine or spruce, which are more prone to cracking and splitting. You’ll also want to consider the grain and color of the wood, as well as any knots or other imperfections that may affect the final product. Once you’ve selected your wood, you can begin the process of shaping and carving your cup.

Understanding the Basics of Woodworking

Types of Wood

When it comes to woodworking, choosing the right type of wood is crucial to the success of your project. Different types of wood have different properties that make them better or worse for certain projects. Here are some of the most common types of wood used for making wooden cups:

Type of Wood Characteristics
Maple Hard, durable, and easy to work with.
Cherry Smooth and fine-grained, with a warm, reddish-brown color.
Walnut Strong and durable, with a rich, dark color.
Oak Hard and durable, with a distinctive grain pattern.

Essential Tools

To make a wooden cup, you’ll need a few essential tools. Here are some of the most important ones:

  • Lathe: A lathe is a machine that rotates a piece of wood while you shape it with cutting tools.
  • Chisels: Chisels are used to shape the wood on the lathe. You’ll need a variety of sizes and shapes to create different cuts and designs.
  • Sandpaper: Sandpaper is used to smooth and finish the wood. You’ll need a variety of grits, from coarse to fine.
  • Saw: A saw is used to cut the wood to the right size and shape before you start turning it on the lathe.
  • Drill: A drill is used to create holes in the wood, such as for the cup’s handle.

With these tools and some practice, you’ll be able to make a beautiful wooden cup that you can use for years to come.

Safety Measures in Woodworking

Woodworking can be a fun and rewarding hobby, but it can also be dangerous if proper safety measures are not taken. Here are some safety tips to keep in mind when making a wooden cup:

Wear Appropriate Safety Equipment

Wearing appropriate safety equipment is crucial in woodworking. Always wear safety glasses to protect your eyes from flying debris, and use a dust mask to avoid inhaling sawdust. Gloves can also be useful in protecting your hands from splinters and cuts.

Use Sharp Tools

Using sharp tools is not only more efficient, but it is also safer. Dull tools can slip and cause accidents. Keep your tools sharp and well-maintained, and always use them properly.

Keep Your Work Area Clean and Organized

A clean and organized workspace is essential in woodworking. Keep your work area free of clutter and debris to avoid tripping hazards. Make sure all tools and materials are stored properly when not in use.

Use Proper Techniques

Using proper techniques is crucial in avoiding accidents. Always follow the manufacturer’s instructions when using tools and equipment. Use the appropriate tool for the job and make sure it is properly set up before use.

Avoid Distractions

Avoiding distractions is crucial in woodworking. Focus on the task at hand and avoid distractions like your phone or television. If you need to take a break, step away from your work area and come back when you are ready to focus again.

By following these safety tips, you can enjoy woodworking while staying safe. Remember to always prioritize safety in your woodworking projects.

Choosing the Right Wood for Your Cup

When it comes to making a wooden cup, the first thing you need to consider is the type of wood you’ll be using. The right wood will not only provide durability but also enhance the overall aesthetic of your cup. Here are some factors to consider when choosing the right wood for your cup:

Durability

The durability of the wood is crucial when it comes to making a wooden cup. You want to choose a wood that can withstand frequent use and will not easily crack or warp. Some of the most durable wood options for a wooden cup include walnut, rosewood, and cedar.

Grain Pattern

The grain pattern of the wood can significantly impact the appearance of your cup. Some wood grains are more intricate and visually appealing than others. For instance, the grain pattern of rosewood is known for its unique swirls and patterns, which can make for a beautiful and eye-catching cup.

Texture

The texture of the wood can also play a role in the final appearance of your cup. Some woods have a smooth, polished finish, while others have a more natural, rustic texture. Consider the look and feel you want for your cup and choose a wood that will achieve that desired effect.

Sustainability

Sustainability is an essential factor to consider when choosing the right wood for your cup. Make sure to choose a wood that is sustainably sourced and harvested. Some sustainable wood options for a wooden cup include bamboo, acacia, and maple.

In conclusion, choosing the right wood for your wooden cup is a crucial step in the cup-making process. Consider the durability, grain pattern, texture, and sustainability of the wood when making your selection. With the right wood, you can create a beautiful and long-lasting wooden cup that you’ll enjoy using for years to come.

Creating Your Cup Design

Before you start making your wooden cup, you need to decide on the design you want to create. This will affect the type of wood you choose, the size of the cup, and the shape of the cup. Here are some things to consider when creating your cup design:

Wood Type

Different types of wood have different characteristics that can affect the look and feel of your cup. Some types of wood are more durable than others, while others have a unique grain pattern that can add visual interest to your cup. Some popular types of wood for cups include:

  • Maple
  • Cherry
  • Walnut
  • Oak
  • Mahogany

Cup Size

The size of your cup will depend on how you plan to use it. If you want to use it for coffee or tea, you may want a smaller cup that holds around 8-12 ounces. If you want to use it for beer or other beverages, you may want a larger cup that holds around 16-20 ounces.

Cup Shape

The shape of your cup can affect how comfortable it is to hold and drink from. Some popular cup shapes include:

  • Straight-sided cups
  • Tulip-shaped cups
  • Flared cups
  • Rounded cups

When designing your cup, consider how the shape will affect the overall look and feel of the cup, as well as how comfortable it will be to hold and drink from.

Once you have decided on your cup design, you can start gathering the materials and tools you will need to make your wooden cup.

Cutting the Wood

To make a wooden cup, you’ll need to start by selecting the right type of wood. You want a strong, durable wood that won’t easily crack or split. Hardwoods like cherry, maple, and oak are good choices.

Once you’ve selected your wood, you’ll need to cut it to the right size. Use a saw to cut a block of wood that is slightly larger than the finished size of your cup. This will give you some extra material to work with as you shape the cup.

Next, mark the center of the block of wood. This will help you keep your cuts even and symmetrical. You can use a ruler or a marking gauge to make your mark.

Now it’s time to start cutting the wood. You can use a variety of tools for this, including a saw, a chisel, or a lathe. If you’re using a saw or a chisel, make sure to cut slowly and carefully to avoid making any mistakes.

If you’re using a lathe, you’ll need to mount the wood securely and use a turning tool to shape the cup. This can take some practice to get the hang of, but with patience and persistence, you’ll be able to create a beautiful wooden cup.

Remember to take your time and work carefully when cutting the wood. This will ensure that your cup turns out just the way you want it.

Carving the Cup

Now that you have your wooden blank ready, it’s time to start carving your cup. Here are the steps to follow:

  1. Mark the center: Draw a line from one end of the blank to the other, crossing the center. This will help you keep your carving symmetrical.

  2. Rough out the shape: Using a carving knife or chisel, start removing the excess wood from the blank. Begin by carving away the corners and edges, creating a rough shape of the cup.

  3. Hollow out the cup: Once you have the rough shape, start hollowing out the cup. Use a gouge or spoon knife to scoop out the wood from the center of the cup. Work slowly and carefully, making sure to keep the walls of the cup even.

  4. Smooth out the surface: After you have hollowed out the cup, use sandpaper to smooth out the surface. Start with a rough grit and work your way up to a finer grit to achieve a smooth finish.

  5. Finish the cup: Apply a food-safe finish to your cup, such as mineral oil or beeswax. This will protect the wood and give it a nice shine.

Remember to take your time and work carefully when carving your cup. Don’t rush the process, as it can be easy to accidentally remove too much wood and ruin your cup. With patience and practice, you’ll be able to create a beautiful and functional wooden cup that you can enjoy for years to come.

Sanding and Smoothing

Once you have carved out the shape of your wooden cup, it’s time to sand and smooth it to perfection. This step is crucial in achieving a polished and professional-looking final product. Here are some tips to help you sand and smooth your wooden cup:

Sandpaper Grits

Start with a coarse sandpaper grit, such as 60 or 80, to remove any rough spots or tool marks on the surface of the cup. Move on to a finer grit, such as 100 or 150, to smooth out the surface. Finally, use an even finer grit, such as 180 or 240, to achieve a polished finish. Be sure to sand evenly and consistently, and don’t forget to sand the inside of the cup as well.

Sanding Tools

There are a variety of sanding tools you can use to sand the inside of your wooden cup. If you have a lathe, you can use a sanding pad or sanding disc to sand the inside of the cup. If you don’t have a lathe, you can use sandpaper wrapped around a dowel or a small piece of wood to sand the inside of the cup by hand.

Smoothing the Surface

Once you have sanded the cup to your desired level of smoothness, you can further smooth the surface by using sanding sponges. Sanding sponges are flexible and can conform to the shape of the cup, making it easier to smooth out any curves or contours. You can also use a sanding sealer or wood conditioner to help fill in any small imperfections and create a smooth surface for finishing.

Finishing Touches

After sanding and smoothing your wooden cup, you’re ready for the final step: finishing. You can use a variety of finishes, such as oil, wax, or varnish, to protect and enhance the beauty of your wooden cup. Apply the finish according to the manufacturer’s instructions, and allow it to dry completely before using your new wooden cup.

Finishing Touches

Once you have completed carving your wooden cup, it’s time to add the finishing touches to make it look polished and professional. Here are some tips to help you apply sealant and polish the cup.

Applying Sealant

Sealing your wooden cup is crucial to prevent it from cracking or warping over time. Here are the steps to follow when applying sealant:

  1. Sand the cup: Before applying sealant, make sure to sand the cup to remove any rough edges or splinters. Start with a coarse grit sandpaper and gradually move to a finer grit.

  2. Choose a sealant: There are several types of sealants available, including beeswax, mineral oil, and walnut oil. Beeswax is a popular choice for its natural, non-toxic properties.

  3. Apply the sealant: Using a clean cloth, apply the sealant evenly over the surface of the cup. Make sure to cover all areas, including the inside of the cup and the handle.

  4. Let it dry: Allow the sealant to dry completely before using the cup. This may take several hours or even overnight.

Polishing the Cup

Polishing your wooden cup will give it a smooth, shiny finish. Here’s how to do it:

  1. Sand the cup: Start by sanding the cup with a fine grit sandpaper to remove any rough areas or scratches.

  2. Apply polish: There are several types of polish you can use, including beeswax and carnauba wax. Apply the polish evenly over the surface of the cup using a clean cloth.

  3. Buff the cup: Use a clean cloth to buff the cup in a circular motion until it shines.

  4. Repeat: If necessary, repeat the process until you achieve the desired level of shine.

With these finishing touches, your wooden cup is now ready to use or display. Enjoy your new handmade creation!