Tag Archives: medium-density fiberboard

How to Make a Wooden Frame: A Beginner's Guide

How to Make a Wooden Frame: A Beginner's Guide

If you’re looking for a way to display your favorite photos or artwork, making a wooden frame is a simple and rewarding DIY project. With just a few basic tools and some inexpensive materials, you can create a custom frame that perfectly fits your style and decor.

To get started, you’ll need to choose the wood for your frame. Pine boards or plywood are affordable options that are easy to cut and paint, while hardwoods like oak or maple will give your frame a more polished look. Once you have your wood, you can cut it to size using a circular saw or miter saw. If you don’t have access to these tools, most home improvement stores will cut the wood for you.

Once you have your wood cut to size, it’s time to assemble the frame. There are several ways to do this, including using screws and carpenter’s glue or using a handheld router to create a groove for the glass and artwork to sit in. Whichever method you choose, be sure to measure carefully and use clamps to hold the pieces in place while the glue dries. With a little patience and some attention to detail, you’ll have a beautiful wooden frame that you can be proud to display in your home or give as a gift.

Understanding Wood Types

When it comes to making a wooden frame, choosing the right type of wood is crucial. Different types of wood have different properties and characteristics that affect their durability, strength, and appearance. Here are the three main types of wood you should consider:

Hardwood

Hardwood comes from deciduous trees, which are trees that lose their leaves in the fall. Hardwood is known for its strength and durability, making it a great choice for furniture and other high-traffic items. Some common types of hardwood include oak, maple, cherry, and walnut. Hardwood is more expensive than softwood, but it can also be more beautiful and long-lasting.

Softwood

Softwood comes from coniferous trees, which are trees that have needles instead of leaves. Softwood is generally less expensive than hardwood and is often used for construction, such as framing and decking. Some common types of softwood include pine, spruce, and cedar. Softwood is less dense than hardwood, which means it is more susceptible to dents and scratches.

Engineered Wood

Engineered wood is made by bonding together layers of wood veneers or fibers with adhesives. This type of wood is often used for furniture and other decorative items because it can be made to look like hardwood at a lower cost. Some common types of engineered wood include plywood, particleboard, and MDF (medium-density fiberboard). Engineered wood is often more stable and consistent than natural wood, which means it is less likely to warp or shrink.

When choosing the type of wood for your frame, consider the look you want to achieve, the durability you need, and your budget. Remember that different types of wood have different strengths and weaknesses, so choose wisely.

Choosing the Right Wood

When it comes to making a wooden frame, choosing the right wood is crucial. The type of wood you choose will affect the overall look and durability of your frame. Here are some factors to consider when selecting the right wood for your frame:

Wood Type

Different types of wood have different characteristics that can affect the look and feel of your frame. Some common woods used for frames include:

  • Pine: This is a softwood that is easy to work with and is ideal for painting or staining.
  • Oak: This hardwood is durable and has a distinctive grain pattern that can add character to your frame.
  • Maple: This hardwood has a smooth, even texture and is ideal for staining.

Wood Thickness

The thickness of the wood you choose will affect the overall weight and sturdiness of your frame. Thicker wood will be heavier and more durable, while thinner wood will be lighter and easier to work with.

Grain Pattern

The grain pattern of the wood can also affect the look of your frame. Some woods, like oak, have a distinctive grain pattern that can add character to your frame. Other woods, like maple, have a more subtle grain pattern that can provide a smoother, more uniform look.

Finish

The finish you choose for your frame can also affect the look and durability of your frame. Some common finishes include:

  • Stain: This can enhance the natural color and grain pattern of the wood.
  • Paint: This can provide a uniform color and finish to your frame.
  • Varnish: This can provide a protective layer that can help prevent scratches and damage to your frame.

Overall, choosing the right wood for your frame will depend on your personal preferences and the look you are trying to achieve. Consider the characteristics of different woods and finishes to find the perfect fit for your project.

Required Tools

required-tools-2

To make a wooden frame, you will need a few tools to help you along the way. Here are the essential tools you will need to make a wooden frame:

Saw

A saw is one of the most important tools you’ll need when making a wooden frame. A circular or miter saw is recommended to cut the wood according to the cut list. You can obtain cheap scrap wood, pine boards, or plywood at many home improvement or hardware stores.

Hammer

A hammer is a necessary tool for driving in nails to hold the frame together. A claw hammer is the most common type of hammer, and it has a claw on the back for removing nails.

Nails

Nails are needed to hold the frame together. The size of the nails will depend on the thickness of the wood you are using. It is recommended to use finishing nails for a more professional look.

Remember to always wear protective gear, such as safety goggles and gloves, when using power tools or handling sharp objects. With these essential tools, you will be well on your way to creating a beautiful wooden picture frame.

Cutting the Wood

Before you start cutting the wood, make sure you have all the necessary tools and materials. You will need a saw, measuring tape, pencil, and the wood you will be using to make your frame.

The first step is to measure and mark the wood to the desired length. Use the measuring tape to measure the length you need and then mark it with a pencil. Make sure the marks are straight and even, so your cuts will be accurate.

Once you have marked the wood, it’s time to start cutting. Use a saw to cut the wood to the desired length. If you are using a circular saw, make sure the blade is set to the correct depth and angle before you start cutting. If you are using a hand saw, make sure you have a firm grip on the saw and use long, even strokes to make your cuts.

When cutting the wood, be sure to follow all safety precautions. Wear safety glasses and keep your fingers away from the blade. If you are using a power saw, make sure the blade is sharp and the saw is properly maintained.

After you have cut the wood to the desired length, you may need to make additional cuts to create the desired shape for your frame. Use the same techniques as before to make these cuts, and be sure to measure and mark the wood accurately before you start cutting.

Overall, cutting the wood is an important step in making a wooden frame. Take your time and be careful to ensure your cuts are accurate and safe.

Assembling the Frame

assembling-the-frame-1

Now that you have all the necessary materials and have cut your wood to the appropriate lengths, it’s time to assemble your wooden frame.

  1. First, lay out your four frame sections on a flat surface, making sure they are lined up correctly and the corners form a perfect 90-degree angle.
  2. Apply a drop of wood glue to each of the eight miter faces. Spread the glue thinly over the miter faces.
  3. Take one of the plastic pegs and insert it into the hole at the end of one of the frame sections. Repeat this process for the other three frame sections.
  4. Gently press the four frame sections together, making sure the pegs are fully inserted into the holes.
  5. Wipe off any excess glue that may have seeped out of the joints with a damp cloth.
  6. Clamp the frame together with corner clamps or use a strap clamp to hold the frame securely while the glue dries.
  7. Allow the glue to dry completely according to the manufacturer’s instructions.
  8. Once the glue is dry, remove the clamps and sand any rough spots or excess glue from the frame.

Congratulations! You have now successfully assembled your own wooden frame.

Sanding the Frame

Once you have joined the wooden pieces of your frame together, it’s time to sand it down. Sanding is a crucial step in creating a custom frame that looks professional and polished. However, it’s also where a frame can easily be ruined, so it’s important to take your time and be careful.

The first thing to keep in mind is that over-sanding is a common mistake that novice sanders make. If you sand too much, you can end up with a frame that is uneven or has rough spots. So, start with a coarse grit sandpaper and work your way up to a finer grit as you go. This will help you avoid removing too much material at once.

When sanding your frame, you should also pay attention to the direction of the grain. Sanding with the grain will help you achieve a smoother finish and prevent the wood from splintering or tearing. You can use a sanding block or a power sander to make the process easier, but be careful not to apply too much pressure or you could damage the wood.

Another thing to consider is the type of wood you are sanding. Some woods, like oak or maple, are harder and more difficult to sand than others. If you’re working with a harder wood, you may need to use a finer grit sandpaper or spend more time sanding to get the desired finish.

Finally, it’s important to clean your frame thoroughly after sanding. Use a tack cloth or a soft brush to remove any dust or debris, and make sure the surface is completely smooth before moving on to the next step. With these tips in mind, you should be able to sand your wooden frame like a pro!

Finishing Touches
finishing-touches-12

When it comes to creating a wooden frame, the finishing touches are what can really make it stand out. Here are some tips to help you add those final touches to your wooden frame.

Staining

Staining your wooden frame can help bring out the natural beauty of the wood and give it a more polished look. Here are some steps to follow when staining your wooden frame:

  1. Sand the frame: Before you begin staining, make sure the frame is smooth and free of any rough spots or imperfections. Sand the frame with a fine-grit sandpaper to achieve a smooth surface.
  2. Choose the right stain: Choose a stain that matches the color or tone you want to achieve. Test the stain on a small area of the frame to make sure it’s the right color before applying it to the entire frame.
  3. Apply the stain: Using a brush or cloth, apply the stain in the direction of the grain. Apply a thin, even coat and let it dry completely before applying a second coat if necessary.
  4. Seal the stain: Once the stain has dried, apply a clear sealer to protect the wood and give it a polished look.

Polishing

Polishing your wooden frame can give it a smooth, shiny finish and make it look more professional. Here are some steps to follow when polishing your wooden frame:

  1. Sand the frame: Sand the frame with a fine-grit sandpaper to achieve a smooth surface.
  2. Apply the polish: Apply a small amount of polish to a soft cloth and rub it onto the frame in a circular motion. Apply a thin, even coat and let it dry completely before applying a second coat if necessary.
  3. Buff the frame: Once the polish has dried, use a clean, dry cloth to buff the frame to a shine.

Remember to always work in a well-ventilated area and wear protective gear such as gloves and a mask when working with stains and polishes. With these tips, you can add the perfect finishing touches to your wooden frame and make it look like a professional piece of art.

Safety Precautions

When working with wood, it is important to take safety precautions to prevent accidents and injuries. In this section, we will cover two important safety precautions: protective gear and safe handling.

Protective Gear

Wearing the right protective gear can help prevent injuries. Here are some items you should consider wearing when working with wood:

  • Safety glasses: Protect your eyes from flying debris.
  • Work gloves: Protect your hands from splinters and cuts.
  • Dust mask: Protect your lungs from sawdust and other particles.
  • Earplugs or earmuffs: Protect your ears from loud noises.
  • Work boots with a heel and slip-resistant sole: Prevent falls.

Make sure your protective gear fits properly and is in good condition. Replace any damaged or worn-out gear.

Safe Handling

In addition to wearing protective gear, it is important to handle wood safely. Here are some tips:

  • Stack job materials near the work area to prevent tripping hazards.
  • Use mechanical lifting devices or a team to lift heavy or unstable loads.
  • Don’t lift and move loads that are too heavy or unstable.
  • Keep a first aid kit at your disposal in case of accidents.
  • Avoid drugs and alcohol when working with wood.

By following these safety precautions, you can help prevent accidents and injuries when making wooden frames.
How to Make a Wooden Door Hanger: A Simple DIY Guide

How to Make a Wooden Door Hanger: A Simple DIY Guide

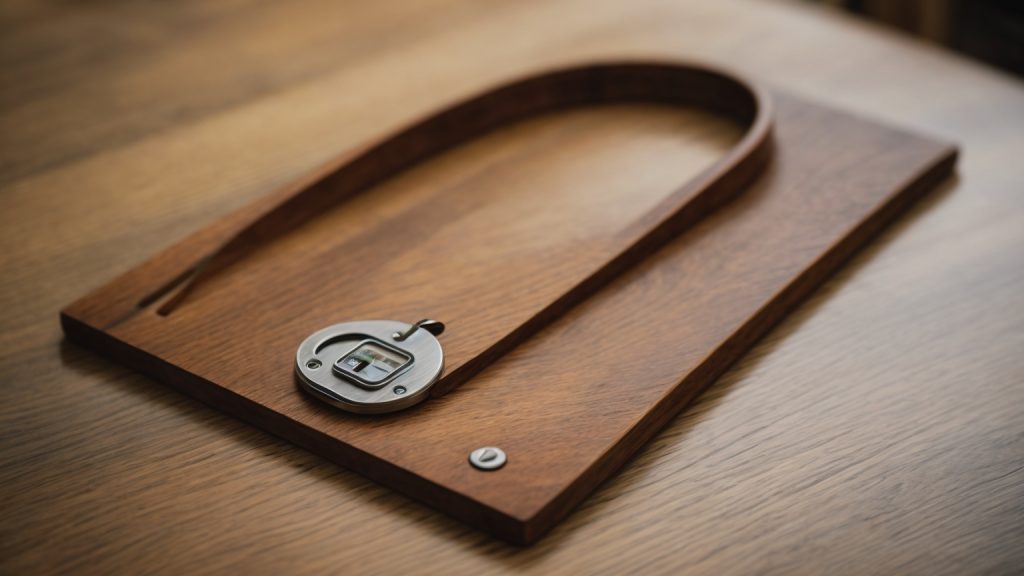
Wooden door hangers are a great way to add a touch of personality to your home decor. They can be customized to fit any style or theme, and can be made using a variety of materials. In this article, we will show you how to make a wooden door hanger using simple materials and techniques.

To start, you will need a wooden base for your door hanger. You can purchase pre-cut wooden rounds or squares from a craft store, or cut your own using a saw. Next, you will need to choose a design for your door hanger. This can be a simple shape or a more intricate design, depending on your skill level and preferences.

Once you have your design, you can begin painting or staining your wooden base. You can use acrylic paint or wood stain to achieve the desired look. After your base is dry, you can add any additional details such as lettering or embellishments. Finally, attach a hanger to the back of your door hanger and it’s ready to be displayed on your front door or in your home.

Understanding the Basics of Door Hangers

make-a-wooden-door-hanger

If you’re looking for a fun and easy way to add some personality to your front door, a wooden door hanger is a great option. But before you start crafting, it’s important to understand the basics of door hangers.

Materials

The first thing you’ll need is a wooden round or plaque. You can find these at most craft stores or online. You’ll also need some paint, brushes, and any other decorations you want to add, such as ribbon, flowers, or vinyl lettering.

Design

When it comes to designing your door hanger, the possibilities are endless. You can choose a theme, such as seasonal or holiday, or simply create a design that matches your home’s decor. Don’t be afraid to get creative and add your own personal touch.

Construction

To construct your door hanger, start by painting your wooden round or plaque. Once it’s dry, you can add any decorations or vinyl lettering. If you’re adding a bow or ribbon, attach it with hot glue or wire. Finally, attach a hanger to the back of your door hanger so you can hang it on your front door.

Maintenance

To keep your door hanger looking its best, be sure to protect it from the elements. If you’re using it outside, consider adding a coat of sealant to protect it from rain and sun damage. And if it does get dirty, simply wipe it down with a damp cloth.

Now that you understand the basics of door hangers, it’s time to get crafting! With a little creativity and some basic supplies, you can create a beautiful and unique wooden door hanger that will add some personality to your front door.

Materials Needed

Making a wooden door hanger is a fun and easy project that requires only a few materials. Here are the things you’ll need to get started:

Wood

The first thing you’ll need is a piece of wood to use as the base for your door hanger. You can use any type of wood you like, but MDF (medium-density fiberboard) is a popular choice because it’s easy to work with and doesn’t splinter. You can purchase pre-cut wooden bases from craft stores or cut your own from a larger piece of wood.

Paint and Brushes

Once you have your wooden base, you’ll need to choose a paint color and gather some brushes. Acrylic paint is a good choice because it dries quickly and is easy to clean up. You’ll also want to have a few different sizes of brushes on hand so you can paint both large and small areas.

Decorative Elements

To make your door hanger stand out, you’ll want to add some decorative elements. This can include things like ribbon, greenery, or pre-made bows. You can also use stencils or stickers to add designs or words to your door hanger.

Tools

Finally, you’ll need a few tools to help you put everything together. A staple gun can be useful for attaching ribbon or other decorative elements, while a drill can be used to make holes for hanging your door hanger. You’ll also want to have some sandpaper on hand to smooth out any rough edges on your wooden base.

With these materials in hand, you’re ready to start creating your own beautiful wooden door hanger.

Choosing the Right Wood

When making a wooden door hanger, selecting the right type of wood is crucial. You want to choose a wood that is both lightweight and smooth, so it won’t be too heavy on the door and will be easy to paint or decorate.

Here are some popular types of wood to consider:

Medium-Density Fiberboard (MDF)

MDF is a popular choice for wooden door hangers because it is easy to work with and has a smooth surface. It’s made by breaking down hardwood and softwood and contains tiny wood fibers, so it won’t have any wood grain. MDF is also affordable and readily available at most hardware stores.

Birch Plywood

Birch plywood is a strong and durable option for door hangers. It has a beautiful wood grain that can add a rustic touch to your project. However, it can be more expensive than other types of wood.

Pine

Pine is another affordable option for door hangers. It’s lightweight and easy to work with, but it may have knots or other imperfections that can affect the final look of your project.

Cedar

Cedar is a great choice if you want a natural wood look for your door hanger. It’s lightweight, durable, and has a pleasant aroma. However, it can be more expensive than other types of wood.

When choosing the right wood for your door hanger, consider the look you want to achieve, your budget, and the tools you have available to work with. With the right wood and a little creativity, you can create a unique and beautiful door hanger that will add charm to any door.

Designing Your Door Hanger

designing-your-door-hanger

When it comes to designing your wooden door hanger, there are a few things to consider. From sketching your design to choosing the right size, each step is important to ensure that you end up with a door hanger that you love.

Sketching Your Design

Before you start cutting your wood, it’s important to sketch out your design. This will give you a better idea of what your door hanger will look like and help you make any necessary adjustments before you start cutting.

When sketching your design, consider the following:

  • What shape do you want your door hanger to be?
  • What design elements do you want to include (e.g. text, images, patterns)?
  • What colors do you want to use?

Once you have a rough sketch of your design, you can start refining it and making any necessary changes.

Choosing the Right Size

The size of your door hanger will depend on a few factors, including the size of your door and the design you have in mind. Here are a few things to keep in mind when choosing the right size:

  • Make sure your door hanger is proportional to the size of your door. A door hanger that is too small or too large can look awkward.
  • Consider the placement of your door hanger. If you plan to hang it on the front door, you may want to choose a larger size to make it more visible from the street.
  • Think about the design elements you want to include. If you have a lot of text or images, you may need a larger size to fit everything.

Once you have a general idea of the size you want, you can start cutting your wood and bringing your design to life.

Cutting the Wood

Cutting the wood is one of the most important steps in making a wooden door hanger. It requires precision and attention to detail. In this section, we will discuss the safety precautions you should take before cutting the wood and the cutting techniques you can use.

Safety Precautions

Before cutting the wood, it is important to take some safety precautions to avoid accidents. Here are some tips to keep in mind:

  • Wear safety goggles to protect your eyes from flying wood chips.
  • Wear earplugs to protect your ears from the noise of the saw.
  • Wear a dust mask to avoid inhaling sawdust.
  • Keep your fingers away from the saw blade.
  • Keep the saw blade guard in place.
  • Make sure the wood is properly secured before cutting it.
  • Always use a sharp blade.

Cutting Techniques

There are several cutting techniques you can use to cut the wood for your door hanger. Here are some of the most common techniques:

  • Jigsaw: A jigsaw is a versatile tool that can be used to make curved cuts in the wood. It is perfect for cutting out the shape of your door hanger. To use a jigsaw, clamp the wood to a workbench and follow the outline of your design with the blade.
  • Circular Saw: A circular saw is a powerful tool that can be used to make straight cuts in the wood. It is perfect for cutting the wood to the desired size. To use a circular saw, clamp the wood to a workbench and use a straight edge as a guide for the saw blade.
  • Scroll Saw: A scroll saw is a specialized tool that can be used to make intricate cuts in the wood. It is perfect for cutting out small details in your design. To use a scroll saw, clamp the wood to a workbench and follow the outline of your design with the blade.

Remember to take your time and be patient when cutting the wood. It is better to make slow, steady cuts than to rush and make mistakes.

Finishing Your Door Hanger

Once you have painted your wooden door hanger, it’s time to finish it off with a protective coat. This will not only make your door hanger look more professional, but it will also help to protect it from the elements.

Sanding the Wood

Before applying any finish, it’s essential to sand your wooden door hanger. Sanding will remove any rough spots or imperfections, leaving you with a smooth surface to work with.

Start by using a coarse-grit sandpaper to remove any large bumps or ridges. Then, switch to a fine-grit sandpaper to smooth out the surface. Be sure to sand all sides of the door hanger, including the edges.

Once you have finished sanding, wipe the door hanger down with a damp cloth to remove any dust or debris.

Applying Finish

There are many different finishes you can use on your wooden door hanger, including varnish, polyurethane, and wax. Each has its own advantages and disadvantages, so it’s essential to choose the right one for your project.

Varnish is a popular choice for wooden door hangers as it provides a durable and long-lasting finish. It’s also available in a range of sheens, from matte to high gloss.

Polyurethane is another popular choice, as it’s easy to apply and dries quickly. It’s also very durable and resistant to scratches and stains.

Wax is a more traditional finish that provides a soft, natural look. It’s easy to apply and can be buffed to a high shine.

When applying your chosen finish, be sure to follow the manufacturer’s instructions carefully. Apply the finish in thin, even coats, and allow each coat to dry completely before applying the next.

With a little bit of sanding and the right finish, your wooden door hanger will look beautiful for years to come.

Adding Details

Now that you have your wooden door hanger base, it’s time to add some personality to it! Here are some tips on how to add details to your door hanger:

Painting Your Door Hanger

Painting is a great way to add color and design to your door hanger. Here are some steps to follow when painting your door hanger:

  1. Sand the surface of your wooden door hanger with fine-grit sandpaper to create a smooth surface for painting.
  2. Choose your paint colors and apply a base coat to your door hanger. You can use acrylic or spray paint depending on your preference.
  3. Once the base coat is dry, use stencils, paint pens, or brushes to add designs, patterns, or lettering to your door hanger.
  4. Allow the paint to dry completely before adding any accessories or hanging your door hanger.

Adding Accessories

Accessories can add a unique touch to your door hanger and make it stand out. Here are some ideas for accessories to add to your door hanger:

  • Ribbon or Twine: Attach a ribbon or twine to your door hanger to create a hanger. You can also use ribbon or twine to create bows or knots for added decoration.
  • Flowers or Greenery: Add silk or dried flowers or greenery to your door hanger to create a natural touch. You can use hot glue or wire to attach them securely.
  • Embellishments: Buttons, beads, and other small embellishments can add a fun touch to your door hanger. Use hot glue to attach them securely.
  • Vinyl Decals: Use vinyl decals to add lettering or designs to your door hanger. You can find pre-made decals or create your own using a vinyl cutter.

Remember, the key to adding details to your door hanger is to be creative and have fun! Experiment with different colors, designs, and accessories until you find the perfect combination that reflects your style.

Hanging Your Door Hanger

Once you’ve finished creating your wooden door hanger, it’s time to hang it up! Here are a few tips to ensure your door hanger looks great and stays securely in place.

Choosing the Right Spot

Before you hang your door hanger, take a moment to consider where it will look best. You’ll want to choose a spot that is visible from the street and complements your home’s overall aesthetic. Consider hanging your door hanger on the front door, a side door, or even a fence or gate.

Hanging Hardware

To hang your door hanger, you’ll need to attach some hanging hardware to the back. You can use a simple picture hanger or a sawtooth hanger, depending on the weight of your door hanger. Make sure the hardware is securely attached to the back of the hanger and centered so that it hangs straight.

Hanging Your Door Hanger

Once your hardware is attached, it’s time to hang your door hanger. Hold the hanger up to the desired spot and mark where the hardware will go. Then, use a drill or screwdriver to attach the hardware to the surface. Make sure the hardware is securely attached and can support the weight of the door hanger.

Maintenance

To keep your wooden door hanger looking great, you may need to perform some maintenance from time to time. If the hanger becomes dirty or dusty, simply wipe it down with a damp cloth. If the finish begins to fade or wear away, you can apply a fresh coat of paint or stain to restore its appearance.

By following these simple tips, you can ensure that your wooden door hanger looks great and stays securely in place for years to come.

How to Build a Wooden Cabinet: A Beginner's Guide

How to Build a Wooden Cabinet: A Beginner's Guide

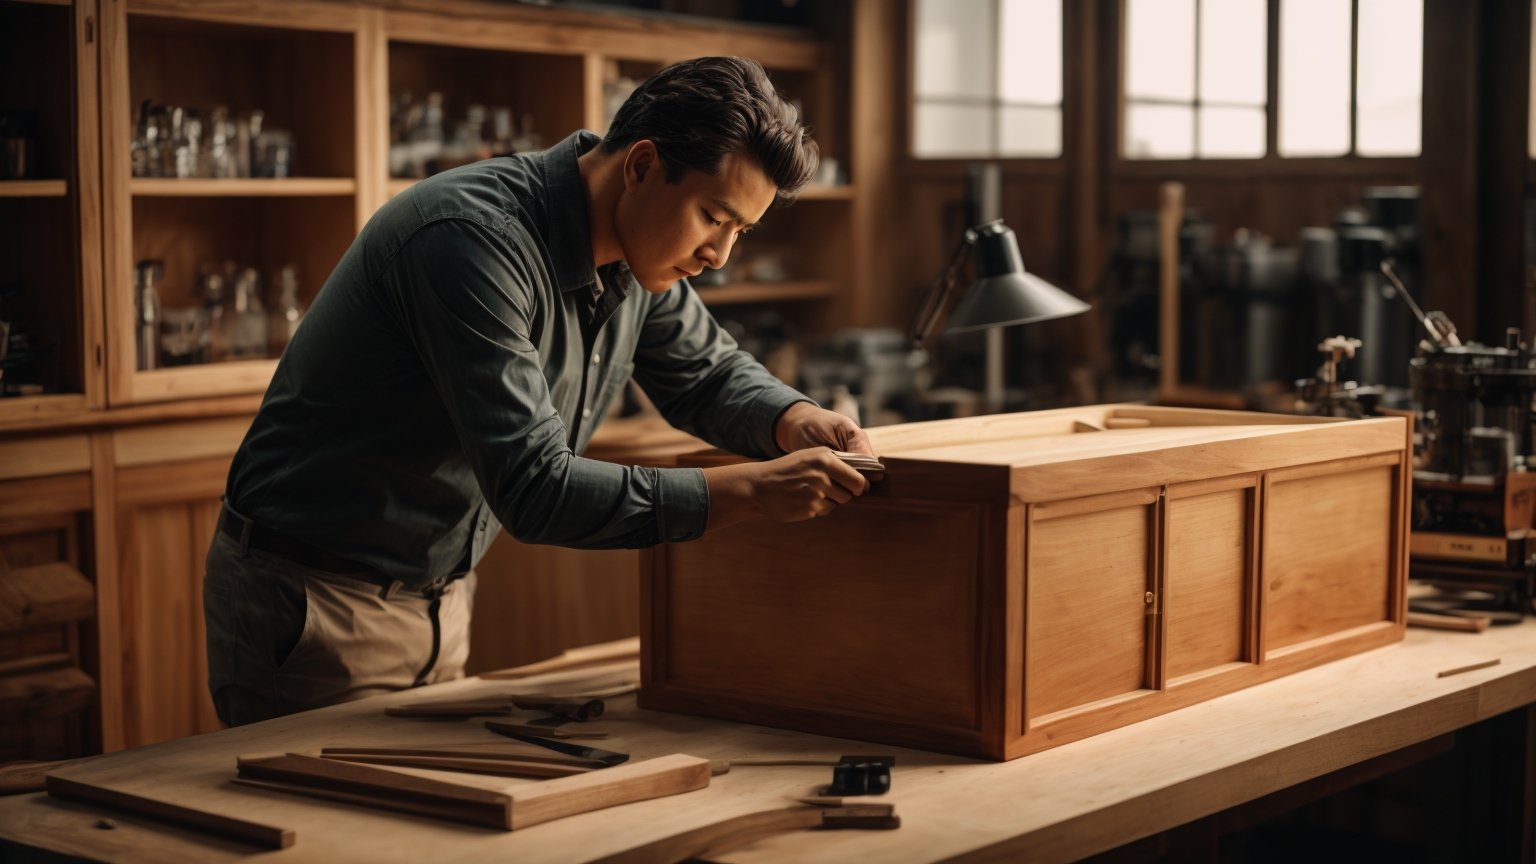
Are you looking to build a wooden cabinet but don’t know where to start? Building a cabinet can seem like a daunting task, but with the right tools and guidance, it can be a rewarding and satisfying project. In this article, we will guide you through the process of building a wooden cabinet, step by step.

Before you begin building your cabinet, you will need to gather the necessary materials and tools. This will include wood boards, screws, nails, wood glue, a saw, a drill, and sandpaper. You will also need to measure the space where you plan to install the cabinet to ensure that it fits properly. Once you have everything you need, you can begin building your cabinet.

The first step in building a wooden cabinet is to create a plan or blueprint. This will help you visualize the design of your cabinet and ensure that you have all the necessary materials. Next, you will need to cut the wood boards to the appropriate size and shape. You can then assemble the cabinet using screws, nails, and wood glue. Once the cabinet is assembled, you can sand and finish it to give it a polished look.

Understanding the Basics

build-a-wooden-cabinet

If you’re new to woodworking, building a cabinet can seem like a daunting task. However, with the right tools and materials, it can be a rewarding project that adds both functionality and aesthetic appeal to your living space. In this section, we’ll cover the basics of building a wooden cabinet.

Types of Wood

When it comes to choosing the right wood for your cabinet, there are several options available. Here are some of the most common types of wood used in cabinet-making:

  • Plywood: A popular choice for its affordability and durability, plywood is made by layering thin sheets of wood together. It comes in various grades and thicknesses, so be sure to choose the right one for your project.
  • Solid Wood: This type of wood is more expensive than plywood but is known for its natural beauty and durability. Popular types of solid wood for cabinets include oak, maple, and cherry.
  • MDF: Medium-density fiberboard is a man-made material that is made by breaking down wood fibers and combining them with resin. It’s a popular choice for painted cabinets due to its smooth surface.

Required Tools

Before you start building your cabinet, you’ll need to gather the necessary tools. Here are some of the most important tools you’ll need:

  • Table Saw: This tool is essential for cutting large sheets of plywood or solid wood into the right size and shape.
  • Circular Saw: A circular saw is useful for making straight cuts on smaller pieces of wood.
  • Jigsaw: A jigsaw is a handheld saw that can be used for cutting curves and intricate shapes.
  • Drill: You’ll need a drill to make holes for screws and other fasteners.
  • Sander: A sander is used to smooth out rough edges and surfaces before applying finish.
  • Clamps: Clamps are used to hold pieces of wood together while glue dries or while you’re making cuts.

By understanding the basics of wood selection and required tools, you’ll be well on your way to building a wooden cabinet that you can be proud of.

Planning Your Cabinet

Before you start building your wooden cabinet, it’s essential to plan it out properly. This will ensure that you have all the necessary materials and tools, and that your cabinet will fit perfectly in the space you have designated for it. Here are some steps to follow when planning your cabinet.

Determining the Size

The first step in planning your cabinet is to determine its size. Measure the space where you want to install the cabinet, and write down the height, width, and depth of the area. Consider what you will be storing in the cabinet and how much space you will need. Keep in mind that it’s better to have a cabinet that’s slightly too big than one that’s too small.

Once you have the measurements, you can decide on the size of your cabinet. You can use a table saw to cut the wood to the exact size you need. Alternatively, you can purchase pre-cut wood pieces from a hardware store.

Choosing the Design

The next step is to choose the design of your cabinet. There are many different styles and designs to choose from, so take some time to research and find one that suits your needs and preferences. Some popular options include:

  • Wall-mounted cabinets
  • Base cabinets
  • Corner cabinets
  • Pantry cabinets
  • Open shelving cabinets

Consider the style of your room and the overall aesthetic you want to achieve. You can also choose to add decorative elements such as trim or molding to your cabinet to give it a more finished look.

Once you have determined the size and design of your cabinet, you can start gathering the necessary materials and tools. With proper planning, you can build a beautiful and functional wooden cabinet that will last for years to come.

Preparing the Materials

Before you start building your wooden cabinet, it’s important to prepare all of the necessary materials. This includes measuring and cutting the wood, as well as sanding it down to a smooth finish.

Cutting the Wood

The first step in preparing your materials is to measure and cut the wood. This will ensure that all of your pieces fit together properly and that your cabinet is the correct size. You will need a tape measure, a saw, and the wood that you will be using for your cabinet.

To begin, measure the height, width, and depth of the space where you will be placing your cabinet. Then, use these measurements to determine the size of each piece of wood that you will need. Mark the measurements on the wood and use the saw to cut each piece to the correct size.

Make sure to double-check your measurements before cutting to avoid any mistakes. It’s also a good idea to label each piece of wood as you cut it to keep track of which piece goes where.

Sanding the Wood

Once you have cut all of your pieces of wood, it’s time to sand them down to a smooth finish. Sanding will help to remove any rough edges or splinters and will ensure that your cabinet looks clean and professional.

You will need sandpaper and a sanding block or an electric sander. Start with a coarse grit sandpaper and work your way up to a finer grit for a smoother finish.

Hold the sandpaper or sander firmly and move it in a back-and-forth motion along the surface of the wood. Be sure to sand evenly and not to apply too much pressure, as this can damage the wood.

Once you have sanded all of your pieces, wipe them down with a damp cloth to remove any dust or debris. Your wood is now ready to be assembled into your cabinet.

By taking the time to properly prepare your materials, you will ensure that your cabinet is sturdy, well-fitted, and looks great.

Assembling the Cabinet

assembling-the-cabinet

Now that you have all the necessary components ready, it’s time to assemble your wooden cabinet. This section will guide you through the process of building the frame, adding shelves, and attaching the doors.

Building the Frame

Start by laying out the cabinet’s sides, top, bottom, and back on a flat surface. Use clamps to hold the pieces together while you drill pilot holes and then use screws to attach them. Make sure the corners are square by using a carpenter’s square.

Next, attach the face frame to the cabinet’s front. The face frame is the part of the cabinet that the doors will attach to. Use glue and clamps to hold the face frame in place while you drill pilot holes and then use screws to attach it to the cabinet.

Adding the Shelves

Measure and cut the shelves to fit inside the cabinet. Use a table saw or circular saw to make straight cuts. Drill pilot holes into the sides of the cabinet and then attach the shelves using screws. Make sure the shelves are level by using a level.

Attaching the Doors

Measure and cut the doors to fit the face frame. Use a router to create a groove on the inside of the door where the hinges will be attached. Install the hinges on the door and then attach the door to the face frame. Adjust the hinges so that the door hangs straight and opens and closes smoothly.

Finally, install any knobs or pulls on the doors. Make sure they are level and centered.

Congratulations! You have successfully assembled your wooden cabinet.

Finishing Touches

Once you have built your wooden cabinet, it’s time to add the finishing touches to make it look great. Here are some tips on how to finish your cabinet:

Painting or Staining

Painting or staining your cabinet is an important step in the finishing process. You can choose to paint or stain your cabinet depending on the look you want to achieve. If you want a more natural look, staining is the way to go. If you want a more colorful look, painting is the way to go.

Before you start painting or staining, you need to prepare the wood. Sand the wood with a fine-grit sandpaper to remove any rough spots. Then, wipe the wood with a damp cloth to remove any dust. Apply a wood conditioner to the wood to help the stain or paint adhere better.

When painting, apply a primer first to help the paint adhere better. Then, apply the paint in thin, even coats. Let each coat dry before applying the next coat. When staining, apply the stain with a brush or cloth, following the grain of the wood. Let the stain dry for at least 24 hours before applying a clear coat.

Adding Hardware

Adding hardware to your cabinet is another important step in the finishing process. Hardware includes knobs, handles, hinges, and locks. Choose hardware that complements the style of your cabinet.

When installing hardware, mark the location of the hardware on the cabinet with a pencil. Then, drill pilot holes for the screws. Install the hardware with screws, making sure they are tight.

Adding hardware can be a simple way to update the look of your cabinet. You can choose from a variety of styles and finishes to find the perfect hardware for your cabinet.

By following these tips, you can give your wooden cabinet a professional-looking finish that will make it stand out in your home.

Safety Precautions

When building a wooden cabinet, safety should be your top priority. Woodworking can be dangerous, and it is important to take the necessary precautions to prevent accidents. Here are some safety tips to keep in mind:

Wear Protective Gear

Always wear protective gear when working with power tools or sharp objects. This includes safety glasses, earplugs, gloves, and a dust mask. Safety glasses will protect your eyes from flying debris, earplugs will protect your hearing from loud noises, gloves will protect your hands from cuts and scrapes, and a dust mask will protect your lungs from sawdust and other airborne particles.

Keep Your Workspace Clean and Organized

A cluttered workspace can lead to accidents. Keep your workspace clean and organized to prevent tripping hazards and to ensure that you have enough space to work safely. Make sure that all tools are stored in their proper place when not in use.

Use Tools Safely

Always use tools according to their intended purpose and manufacturer’s instructions. Make sure that blades are sharp and in good condition, and that all guards and safety features are in place and working properly. Never remove guards or safety features from tools.

Take Breaks

Working for long periods of time without a break can lead to fatigue and increased risk of accidents. Take frequent breaks to rest and stretch your muscles. This will help you stay alert and focused while working.

Have a First Aid Kit on Hand

Accidents can happen even when you take all the necessary precautions. Keep a first aid kit on hand in case of minor injuries. The kit should include items such as bandages, antiseptic, and tweezers.

By following these safety precautions, you can help ensure that your woodworking project is completed safely and without incident.

Maintaining Your Wooden Cabinet

Now that you have built your wooden cabinet, it is important to maintain it properly to ensure its longevity and keep it looking its best. Here are some tips to help you maintain your wooden cabinet:

Regular Cleaning

Regular cleaning is essential to keep your wooden cabinet looking its best. Use a soft, damp cloth to wipe down the cabinet and remove any dust or dirt. Avoid using harsh chemicals or abrasive cleaners, as these can damage the wood.

Avoid Excessive Moisture

Excessive moisture can cause the wood to warp or crack, so it is important to avoid getting your wooden cabinet too wet. If you need to clean a spill or stain, use a damp cloth and dry the area immediately afterward.

Polish the Wood

Polishing your wooden cabinet can help protect the wood and keep it looking shiny and new. Choose a high-quality polish that does not contain silicone or wax, and follow the manufacturer’s directions for application.

Check for Damage

Regularly inspect your wooden cabinet for any signs of damage, such as cracks or scratches. If you notice any damage, address it promptly to prevent it from getting worse.

Avoid Direct Sunlight

Direct sunlight can cause the wood to fade or discolor, so it is important to avoid placing your wooden cabinet in direct sunlight. If you cannot avoid placing it in a sunny location, consider using curtains or blinds to block the sunlight.

By following these tips, you can keep your wooden cabinet looking beautiful for years to come.

How to Build a Wooden Frame: A Beginner's Guide

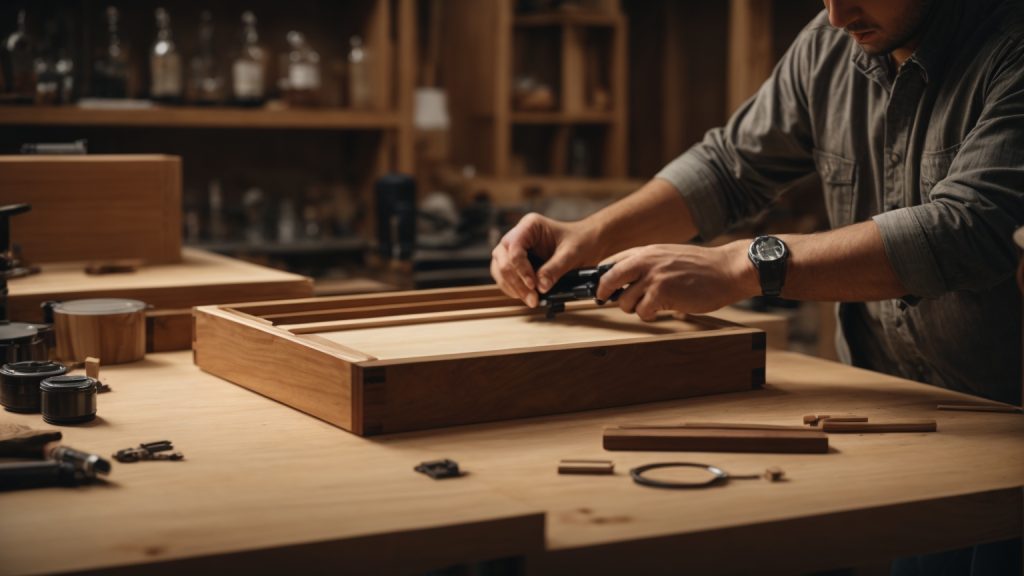
Building a wooden frame is a great way to showcase your favorite pictures or artwork. Whether you’re a beginner or an experienced woodworker, making a wooden frame is a simple and rewarding project that can be completed in just a few hours. With a few basic tools and some affordable materials, you can create a custom frame that perfectly complements your decor.

To build a wooden frame, you’ll need to start by selecting the right type of wood. Pine, poplar, and oak are all popular choices for frames, and each has its own unique characteristics. Once you’ve chosen your wood, you’ll need to cut it to the right size using a saw. From there, you’ll assemble the pieces using wood glue and clamps, and then finish the frame with sandpaper and stain or paint. Whether you’re making a frame for a family photo or a piece of art, building a wooden frame is a fun and rewarding project that anyone can tackle.

Understanding Wood Types

When building a wooden frame, it’s important to understand the different types of wood available to you. Here are the three most common types of wood used in framing:

Natural Wood

Natural wood is the most common type of wood used in framing. It’s easy to work with and has a natural beauty that makes it a popular choice. However, natural wood is susceptible to warping and splitting, so it’s important to choose the right type of wood for your project.

Finger-Jointed Poplar

Finger-jointed poplar is a type of wood that is made by joining smaller pieces of wood together. This process creates a stronger and more stable piece of wood that is less likely to warp or split. Finger-jointed poplar is also less expensive than natural wood, making it a popular choice for budget-conscious builders.

Medium-Density Fiberboard (MDF)

Medium-density fiberboard (MDF) is a type of wood that is made by compressing wood fibers together. It’s a very strong and stable type of wood that is resistant to warping and splitting. MDF is also less expensive than natural wood, but it’s not as strong as finger-jointed poplar.

When choosing the type of wood for your frame, consider the strength, stability, and cost of each option. Natural wood is a great choice for its natural beauty, but finger-jointed poplar and MDF are more stable and less expensive, making them great alternatives.

Tools and Materials Needed

When it comes to building a wooden frame, you will need a few tools and materials to get started. In this section, we will cover the essential tools and materials you need to build a wooden frame.

Choosing the Right Tools

To build a wooden frame, you will need a few essential tools. Here are some of the tools you will need:

Tools Description
Circular Saw Used for cutting the wood to the desired size
Miter Saw Used for making precise cuts at different angles
Hammer Used for driving nails into the wood
Nail Gun Used for driving nails into the wood quickly
Measuring Tape Used for measuring the wood
Carpenter’s Square Used for making sure the corners are square
Sandpaper Used for smoothing out rough edges

When selecting your tools, you want to make sure you choose high-quality tools that will last. You also want to make sure you choose tools that are appropriate for your skill level. If you are a beginner, you may want to start with basic hand tools and work your way up to power tools.

Material Selection

The materials you choose for your wooden frame are just as important as the tools you use. Here are some of the materials you will need:

Materials Description
Wood The main material used for building the frame
Wood Glue Used for joining the pieces of wood together
Wood Stain or Paint Used for finishing the frame
Picture Frame Hardware Used for hanging the frame

When selecting your wood, you want to make sure you choose a high-quality wood that is appropriate for your project. You also want to make sure you choose a wood that is free from knots and other defects that can weaken the frame.

In conclusion, by choosing the right tools and materials, you can build a wooden frame that is both beautiful and functional. Whether you are a beginner or an experienced woodworker, building a wooden frame is a fun and rewarding project that anyone can do.

Designing the Frame

When building a wooden frame, designing the frame is a crucial step that can make or break your project. In this section, we’ll cover the two main aspects of designing a frame: measuring and marking, and design considerations.

Measuring and Marking

Before you start cutting your wood, you’ll need to measure and mark it properly. This will ensure that your frame is the right size and that all the pieces fit together perfectly.

To measure your wood, use a tape measure and measure twice to ensure accuracy. Mark your measurements with a pencil or a marker, making sure to mark on the side of the wood that won’t be visible in the final product.

Once you have your measurements marked, use a saw to cut your wood to the desired size. Remember to cut slightly larger than your measurements to allow for sanding and finishing.

Design Considerations

When designing your frame, there are a few things to consider. These include:

  • Wood type: Different types of wood have different characteristics, such as hardness, grain pattern, and color. Choose a wood that fits your project’s needs and aesthetic.

  • Frame style: There are many different styles of frames, including simple and ornate designs. Choose a style that fits your project’s needs and complements the artwork or photo you’ll be framing.

  • Joinery: There are several ways to join wood together, including butt joints, miter joints, and lap joints. Choose a joinery method that fits your project’s needs and skill level.

  • Finish: The finish you choose can greatly affect the final look of your frame. Consider staining, painting, or leaving the wood natural, depending on your project’s needs.

By taking these considerations into account when designing your frame, you’ll be able to create a beautiful, functional, and long-lasting product.

Building the Frame

Building a wooden frame can be a fun and rewarding DIY project. Whether you’re framing a piece of art, a photograph, or a canvas, building your own frame allows you to customize the size, style, and finish to your liking. Here’s how to build a wooden frame in three simple steps.

Cutting the Wood

The first step in building a wooden frame is to cut the wood to the desired size. You will need four pieces of wood: two longer pieces for the top and bottom, and two shorter pieces for the sides. Use a table saw or miter saw to cut the wood to the correct length and width.

Make sure that the pieces are cut at a 45-degree angle so that they will fit together neatly. Use a miter gauge or miter saw to ensure that the angles are accurate. Sand the edges of the wood to remove any rough spots or splinters.

Assembling the Pieces

Once you have cut the wood to the correct size and angle, it’s time to assemble the pieces. Lay the pieces out on a flat surface and fit them together to form a rectangle. Use clamps to hold the pieces in place while you drill pilot holes for the screws.

Apply some wood glue to the joints and then screw the pieces together using wood screws. Be sure to countersink the screws so that they are flush with the surface of the wood. Once the frame is assembled, use a damp cloth to wipe away any excess glue.

Securing the Frame

The final step in building a wooden frame is to secure it to the artwork or canvas. Lay the frame face-down on a flat surface and place the artwork or canvas face-down on top of it. Use a staple gun to attach the canvas to the frame, starting at the center of each side and working your way outwards.

Once the canvas is secured to the frame, flip it over and admire your handiwork. You can now hang your artwork or canvas on the wall using picture hangers or wire.

Building a wooden frame is a simple and rewarding DIY project that anyone can do with a few basic tools and some patience. With a little practice, you’ll be able to create custom frames that perfectly complement your artwork or photographs.

Finishing Touches

After building your wooden frame, it’s time to put the finishing touches on it. This will not only enhance the appearance of your frame, but it will also protect it from wear and tear. In this section, we’ll cover two important sub-sections: Sanding the Frame and Applying Finish.

Sanding the Frame

Before applying any finish, it’s important to sand your frame properly. Sanding will smooth out any rough spots or imperfections on the surface of the wood, creating a clean and uniform finish. Here are some tips to keep in mind while sanding your frame:

  • Start with a coarse sandpaper (around 80 grit) and work your way up to a finer grit (around 220 grit).
  • Sand in the direction of the wood grain to avoid creating scratches.
  • Use a sanding block to ensure even sanding across the entire surface.
  • Wipe the frame with a tack cloth to remove any sawdust before applying the finish.

Applying Finish

Once your frame is sanded, it’s time to apply the finish of your choice. There are many different types of finishes available, including oil-based, water-based, and wax-based finishes. Here are some general tips to help you apply the finish:

  • Apply the finish in a well-ventilated area to avoid inhaling fumes.
  • Stir the finish thoroughly before applying it to ensure an even consistency.
  • Apply the finish with a brush, roller, or cloth, depending on the type of finish and the desired effect.
  • Apply multiple coats of finish, allowing each coat to dry completely before applying the next one.
  • Sand lightly between coats with a fine-grit sandpaper (around 220 grit) to ensure a smooth finish.
  • Once you’ve applied the final coat of finish, let it dry completely before handling the frame.

By following these tips, you can ensure that your wooden frame looks great and is protected from damage for years to come.

What is the best wood for a subwoofer box? A guide to choosing the perfect material

What is the best wood for a subwoofer box? A guide to choosing the perfect material

Are you planning to build a subwoofer box? If so, you might be wondering what type of wood is best for this project. The choice of wood is important because it can affect the sound quality of your subwoofer. In this article, we will discuss the different types of wood that are suitable for subwoofer boxes and why they are the best options.

One of the most popular types of wood for subwoofer boxes is Baltic Birch plywood. This hardwood is known for its density and remarkable rigidity, which makes it an excellent choice for subwoofer boxes. It is also highly resistant to distortion and warping, which helps to keep vibrations to a minimum. Baltic Birch plywood is available in varying thicknesses, which makes it easy to choose the right size for your subwoofer box.

Another type of wood that is suitable for subwoofer boxes is Medium Density Fiberboard (MDF). MDF is made from wood fibers that are bonded together with resin, which gives it a smooth and uniform surface. This type of wood is dense and heavy, which makes it an excellent choice for subwoofer boxes. MDF is also affordable and easy to work with, which makes it a popular choice for DIY projects. However, it is important to note that MDF can be susceptible to moisture damage, so it is important to seal it properly.

Understanding Subwoofer Boxes

When it comes to enhancing your audio experience, a subwoofer can make a world of difference. However, to get the most out of your subwoofer, you need to pair it with the right subwoofer box. In this section, we’ll explore the purpose of a subwoofer box and the different types available.

Purpose of a Subwoofer Box

A subwoofer box, also known as an enclosure, is designed to house a subwoofer and optimize its performance. The box serves several purposes, including:

  • Enclosing the subwoofer to prevent sound waves from canceling each other out
  • Reducing distortion and resonance for a cleaner sound
  • Controlling the movement of air to enhance bass response
  • Protecting the subwoofer from damage

Without a subwoofer box, your subwoofer may not produce the desired sound quality, and you may even risk damaging it.

Types of Subwoofer Boxes

There are several types of subwoofer boxes to choose from, each with its own advantages and disadvantages. The most common types include:

Type Description Pros Cons
Sealed Fully enclosed box Accurate, tight bass Less efficient, requires more power
Ported Box with a vent or port Louder, more efficient Larger size, can produce unwanted noise
Bandpass Two-chamber box with a port Loudest, most efficient Limited frequency range, can produce unwanted noise
Free-air Mounted on a board or panel Space-saving, easy installation Limited bass response, can produce unwanted noise

When selecting a subwoofer box, consider your listening preferences, available space, and the specifications of your subwoofer. Keep in mind that the type of wood used to construct the box can also affect sound quality. In the next section, we’ll explore the best types of wood for subwoofer boxes.

Identifying Quality Wood

identifying-quality-wood

When it comes to building a subwoofer box, the type of wood you choose can have a significant impact on the sound quality. Identifying quality wood is essential for achieving the best possible results. In this section, we will discuss the three key factors to consider when identifying quality wood for a subwoofer box: wood density, wood durability, and wood acoustics.

Wood Density

The density of the wood is one of the most critical factors to consider when building a subwoofer box. The denser the wood, the better it will be at reducing vibrations and preventing sound distortion. The table below shows the densities of some common types of wood used for subwoofer boxes.

Wood Type Density (lbs/ft3)
Baltic Birch Plywood 60-70
Medium-Density Fiberboard (MDF) 45-50
Pine 25-30
Oak 45-50
Maple 45-55

Wood Durability

The durability of the wood is another crucial factor to consider when building a subwoofer box. The box needs to be able to withstand the constant vibrations produced by the subwoofer without falling apart. Some types of wood are more durable than others, and the table below shows the durability of some common types of wood used for subwoofer boxes.

Wood Type Durability
Baltic Birch Plywood High
Medium-Density Fiberboard (MDF) Medium
Pine Low
Oak High
Maple High

Wood Acoustics

The acoustics of the wood are also important when building a subwoofer box. The wood needs to be able to resonate with the sound produced by the subwoofer and enhance the overall sound quality. The table below shows the acoustics of some common types of wood used for subwoofer boxes.

Wood Type Acoustics
Baltic Birch Plywood Excellent
Medium-Density Fiberboard (MDF) Good
Pine Fair
Oak Good
Maple Good

In conclusion, when identifying quality wood for a subwoofer box, you should consider the wood density, wood durability, and wood acoustics. Baltic Birch Plywood is often considered the best option due to its high density, durability, and excellent acoustics. MDF is also a popular choice due to its affordability and good performance. Ultimately, the choice of wood will depend on your budget, personal preferences, and the specific requirements of your subwoofer system.

Best Wood for Subwoofer Boxes

best-wood-for-subwoofer-boxes

When it comes to building a subwoofer box, choosing the right wood is crucial. The type of wood you use can affect the sound quality and durability of your subwoofer box. In this section, we’ll discuss the three most common types of wood used for subwoofer boxes: Medium-Density Fibreboard (MDF), Plywood, and Particle Board.

Medium-Density Fibreboard (MDF)

MDF is the most commonly used wood for subwoofer boxes. This manufactured wood is very durable and dense, which helps bring out the best sound quality from your subwoofer. MDF is made by breaking down hardwood or softwood residuals into wood fibres, often in a defibrator, combining it with wax and a resin binder, and forming panels by applying high temperature and pressure. MDF is also relatively inexpensive compared to other types of wood.

Plywood

Plywood is another popular choice for subwoofer boxes. It is made by gluing together thin layers of wood veneer, with the grain of each layer running in a different direction. Plywood is strong, lightweight, and has good acoustic properties. However, it is more expensive than MDF and can be more difficult to work with due to its tendency to splinter.

Particle Board

Particle board is a type of engineered wood made from wood chips, sawmill shavings, and sawdust. It is less dense than MDF and plywood, making it a less popular choice for subwoofer boxes. However, it is still used by some builders due to its low cost and ease of use.

In summary, MDF is the most popular and best overall material for subwoofer boxes for many reasons. It is dense, thick, and durable, which helps bring out the best sound quality from your subwoofer. Plywood is also a good choice but is more expensive and can be more difficult to work with. Particle board is a less popular choice due to its lower density, but it is still used by some builders due to its low cost and ease of use.

Factors to Consider When Choosing Wood

When it comes to building a subwoofer box, choosing the right type of wood is crucial for achieving the best sound quality. Here are some factors to consider when selecting the best wood for your subwoofer box:

Size of the Subwoofer

The size of your subwoofer will determine the size of the box you need to build. A larger subwoofer will require a bigger box to allow for proper air displacement, which means you will need a thicker and more durable wood to withstand the pressure. On the other hand, a smaller subwoofer can be housed in a smaller and lighter box, which means you can use a less expensive and lighter wood.

Type of Music

The type of music you listen to will also play a role in determining the best type of wood for your subwoofer box. If you listen to music that emphasizes bass, such as hip-hop or EDM, you will need a thicker and denser wood to minimize vibrations and distortion. On the other hand, if you listen to music that is more focused on vocals and instruments, you can use a lighter and less dense wood.

Budget Constraints

Your budget will also play a role in determining the type of wood you can use for your subwoofer box. While some types of wood are more expensive than others, they may offer better sound quality and durability. However, if you are on a tight budget, you can still achieve good sound quality by using a less expensive wood, such as MDF or pine.

In conclusion, choosing the right type of wood for your subwoofer box is crucial for achieving the best sound quality. Consider the size of your subwoofer, the type of music you listen to, and your budget constraints when selecting the best wood for your subwoofer box.

Frequently Asked Questions

What are the advantages of using Baltic Birch for a subwoofer box?

Baltic Birch is a popular choice for subwoofer boxes due to its density, rigidity, and varying thicknesses. This wood delivers exceptional acoustic performance and reduces vibrations to a minimum. It is also highly durable and resistant to distortion and warping, making it an excellent option for subwoofer enclosures.

How does the thickness of wood affect the performance of a subwoofer box?

The thickness of the wood used in a subwoofer box can significantly impact its performance. Thicker wood can provide more rigidity and reduce resonance, resulting in better sound quality. However, thicker wood can also add weight to the enclosure, making it challenging to move around.

What makes MDF a popular choice for speaker boxes?

Medium-density fiberboard (MDF) is a popular choice for speaker boxes due to its affordability, availability, and ease of use. It is also highly durable and provides excellent sound quality. MDF can be cut and shaped easily, making it an ideal material for creating custom speaker enclosures.

What are the benefits of using lightweight materials for a subwoofer box?

Using lightweight materials for a subwoofer box can make it easier to move around and transport. Lightweight materials can also reduce the overall weight of the enclosure, making it less likely to damage the vehicle or mounting surface. However, lightweight materials may not be as durable or rigid as heavier options, which can impact sound quality.

What is the best subwoofer box design for achieving deep bass?

There are several subwoofer box designs that can help achieve deep bass, including sealed enclosures, ported enclosures, and bandpass enclosures. Each design has its advantages and disadvantages, and the best option will depend on your specific needs and preferences.

What materials can be used to cover a subwoofer box for a professional look?

Several materials can be used to cover a subwoofer box, including carpet, vinyl, and paint. Carpet is a popular choice for its durability and easy installation. Vinyl can provide a sleek and modern look, while paint allows for complete customization of the enclosure’s appearance.

Baseboard: What is it and its Purpose in Your Home

Baseboard: What is it and its Purpose in Your Home

If you’re a homeowner or have ever been inside a house, you’ve probably noticed a piece of wood running along the bottom of the walls. It’s a common feature in most homes, but have you ever wondered what it’s called? This piece of wood serves both a functional and aesthetic purpose, but it’s not always referred to by the same name.

In England, this piece of wood is generally known as the skirting board, while Americans often refer to it as a kick board. However, it can also be called a baseboard, mopboard, or floor molding. Despite the different names, they all serve the same purpose of covering the gap between the wall surface and the floor, protecting the wall from damage and providing a finished look to the room.

Skirting boards come in a variety of materials, including wood, MDF, PVC, and plaster. They can be simple and plain or ornate and decorative, depending on the style of the room. In addition to its functional purpose, skirting boards can also be used to add character and style to a room, serving as a decorative feature that complements the overall design.

Understanding the Basics of House Structure

When it comes to understanding the basics of house structure, it’s important to know the different components that make up a house. One of these components is the piece of wood that runs along the bottom of the walls in a house, which is known as the baseboard or skirting board.

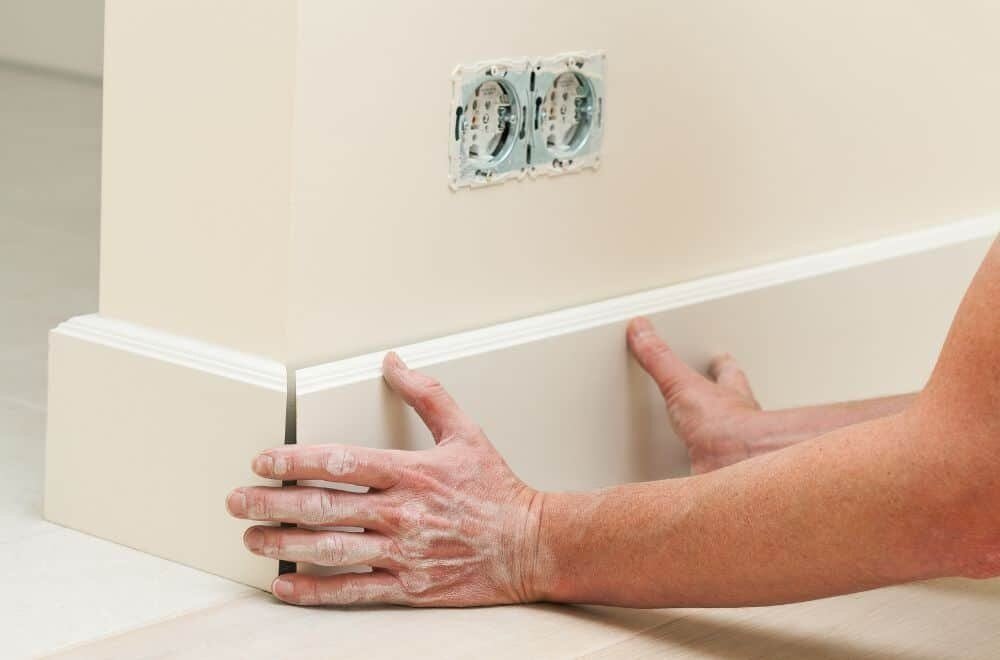
The baseboard is typically made from wood and is installed along the bottom of the walls to cover the joint between the wall and the floor. It serves both a functional and aesthetic purpose, as it helps to protect the wall from damage and also adds a finishing touch to the room.

In addition to the baseboard, there are other important components of house structure that you should be familiar with. These include the foundation, frame, roof, windows and doors, plumbing, electrical, and HVAC systems, as well as the finishes such as siding, drywall, paint, and flooring.

Overall, understanding the basics of house structure is essential for homeowners, builders, and anyone involved in the construction or maintenance of a house. By knowing the different components that make up a house, you can better understand how it all fits together and ensure that your home is safe, functional, and aesthetically pleasing.

The Role of the Piece of Wood at the Bottom of Walls

the-role-of-the-piece-of-wood-at-the-bottom-of-walls

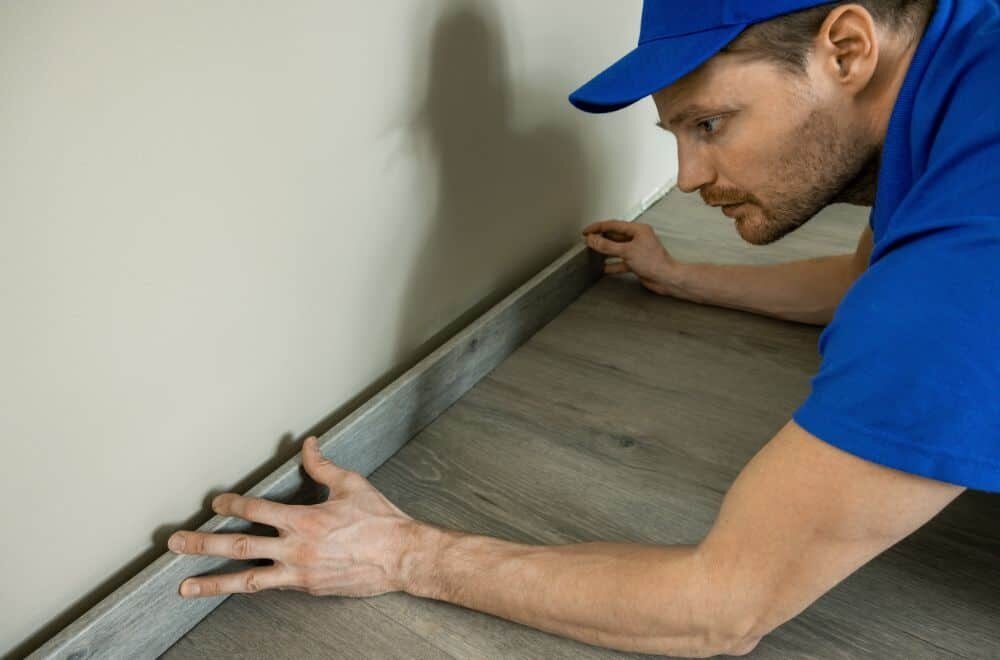
If you’ve ever looked closely at the bottom of the walls in your house, you may have noticed a piece of wood running along the length of the wall. This piece of wood is known as the baseboard or skirting board and serves several important purposes.

Firstly, the baseboard provides a finished look to the bottom of the wall. Without it, the wall would appear unfinished and rough. Additionally, it covers any gaps or imperfections between the wall and the floor, creating a smooth transition between the two surfaces.

Another important function of the baseboard is to protect the wall from damage caused by furniture, vacuums, and other household items. By providing a barrier between the wall and the floor, the baseboard prevents scratches, scuffs, and other types of damage.

Finally, the baseboard can also serve as a decorative element in your home. There are many different styles and designs of baseboards available, ranging from simple and understated to ornate and elaborate. Choosing the right baseboard can add a touch of elegance and sophistication to any room in your home.

In summary, the baseboard is an essential component of any home’s interior design. It provides a finished look to the bottom of the wall, protects the wall from damage, and can even serve as a decorative element.

Different Types of Baseboards

different-types-of-baseboards

When it comes to baseboards, there are a variety of materials and styles to choose from. Here are some of the most common types of baseboards:

  • MDF: Medium-density fiberboard is a popular choice for baseboards because it is affordable, easy to install, and can be painted to match any decor. However, it is not as durable as other materials and can be easily damaged.
  • Pine: Pine is another popular choice for baseboards because it is affordable and easy to work with. It can be stained or painted to match any decor, but it is not as durable as other materials and can dent or scratch easily.
  • Oak: Oak is a more expensive option, but it is also more durable and can be stained to bring out its natural beauty. It is a good choice for high-traffic areas.
  • Maple: Maple is another hardwood that is durable and can be stained to match any decor. It is more expensive than pine but less expensive than oak.
  • Vinyl: Vinyl baseboards are a good choice for bathrooms and other areas where moisture is a concern. They are easy to clean, durable, and come in a variety of colors and styles.
  • Hardwood: Other hardwoods like mahogany, cherry, and walnut can be used for baseboards, but they are more expensive than oak or maple.
  • Shoe molding: Shoe molding is a small molding that is installed at the bottom of baseboards to cover any gaps between the baseboard and the floor. It is available in a variety of materials, including hardwood, MDF, and vinyl.

When choosing a baseboard, consider the style of your home, your budget, and the durability you need for the area where it will be installed. With so many options available, you’re sure to find a baseboard that fits your needs and your style.

Material Choices for Baseboards

material-choices-for-baseboards

When it comes to choosing the material for your baseboards, there are a few options to consider. Each material has its own advantages and disadvantages, so it’s important to choose the one that best fits your needs and budget.

Wood

Wood is a popular choice for baseboards because it is durable and can be stained or painted to match your decor. Oak, pine, and maple are common types of wood used for baseboards. Pine is a popular choice because it is affordable and easy to work with. Oak is more expensive but is known for its durability and strength. Maple is also a strong and durable option but is more expensive than pine.

Medium-Density Fiberboard (MDF)

MDF is a composite material made from wood fibers and resin. It is a popular choice for baseboards because it is affordable and easy to work with. MDF can be painted to match your decor, but it cannot be stained like natural wood. It is also not as durable as wood and can be easily damaged.

PVC

PVC is a plastic material that is becoming more popular for baseboards. It is affordable, durable, and resistant to moisture and insects. PVC can be painted to match your decor, but it cannot be stained. It is also not as strong as wood and can be easily damaged.

Other Materials

Other materials used for baseboards include extruded polyurethane and natural wood such as poplar and cherry. These materials are more expensive than MDF and PVC but are stronger and more durable. They can also be stained and painted to match your decor.

Overall, the material you choose for your baseboards will depend on your needs and budget. Wood is a classic choice that offers durability and versatility, while MDF and PVC are more affordable options that are easy to work with. Consider your options carefully and choose the material that best fits your needs and style.

Installation Process of Baseboards

installation-process-of-baseboards

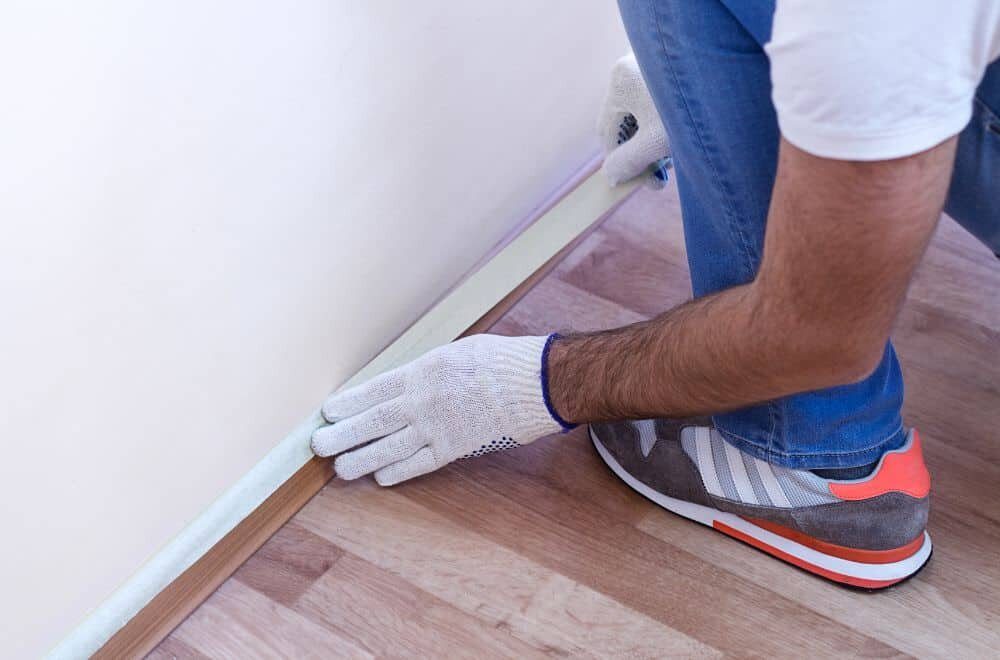
Installing baseboards is a simple process that can be completed by anyone with a few basic tools and some patience. Here are the steps you need to follow to install baseboards in your home:

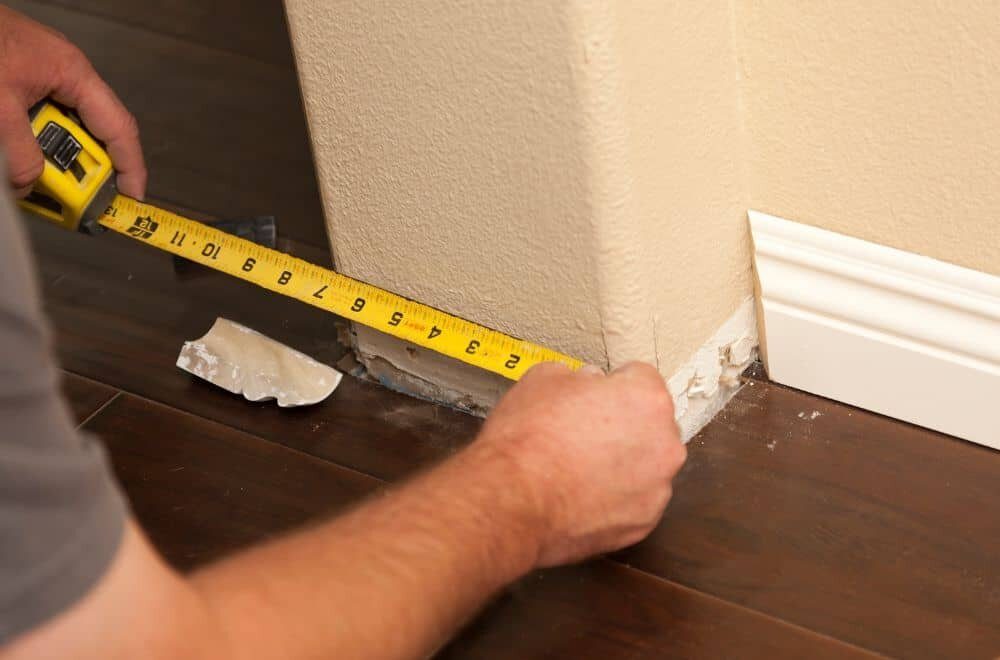
  1. Measure the room: Before you begin, you need to measure the length of each wall in the room where you will be installing the baseboards. This will help you determine how much baseboard material you will need.
  2. Choose your baseboard material: Baseboards can be made from a variety of materials, including wood, MDF, and PVC. Each material has its own advantages and disadvantages, so it’s important to choose the one that is right for your needs.
  3. Cut the baseboard to size: Using a miter saw, cut the baseboard to the appropriate length for each wall. Be sure to make precise cuts to ensure that the baseboards fit together properly.
  4. Install the baseboards: Using a nail gun, attach the baseboards to the wall. Be sure to nail the baseboards into the studs to ensure that they are secure.
  5. Fill in nail holes: Once the baseboards are installed, use spackle to fill in any nail holes or gaps between the baseboards and the wall.
  6. Caulk the baseboards: Using a caulk gun, apply caulk to the gaps between the baseboards and the wall. This will help create a seamless finish.
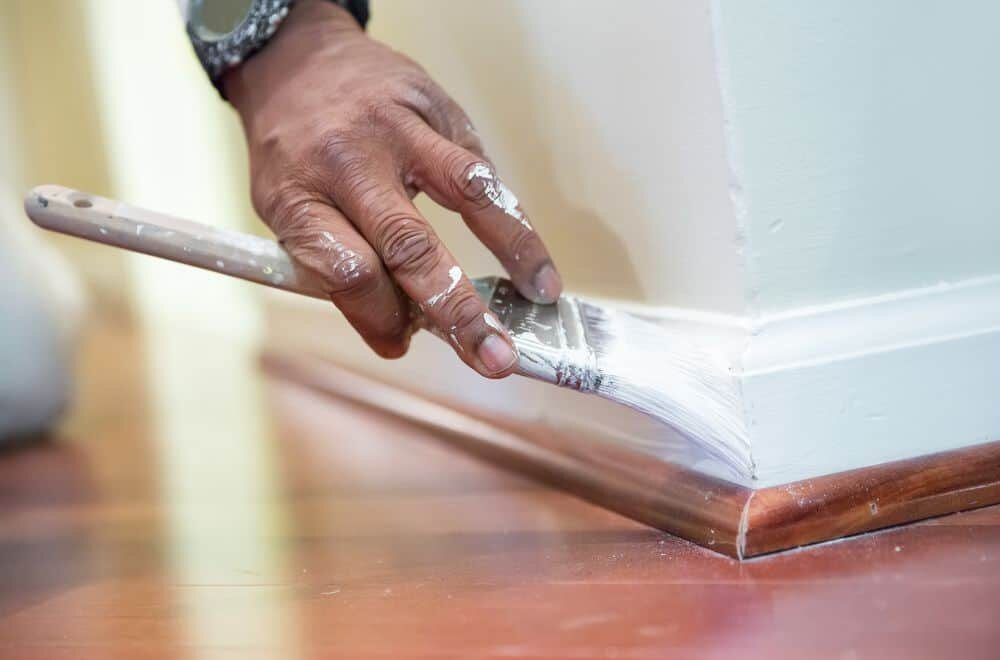
  7. Paint the baseboards: Finally, paint the baseboards to match the color of your walls. This will help create a cohesive look in the room.

Overall, installing baseboards is a relatively simple process that can be completed by anyone with some basic DIY skills. By following these steps, you can add a finishing touch to your home that will make it look more polished and complete.

Maintenance and Care of Baseboards

maintenance-and-care-of-baseboards

Baseboards are an essential part of any home’s interior design. They cover the gap between the wall and the floor and provide a finished look to the room. However, they can accumulate dirt, dust, and scuff marks over time, which can make them look unsightly. Here are some tips on how to maintain and care for your baseboards to keep them looking their best:

Regular Cleaning

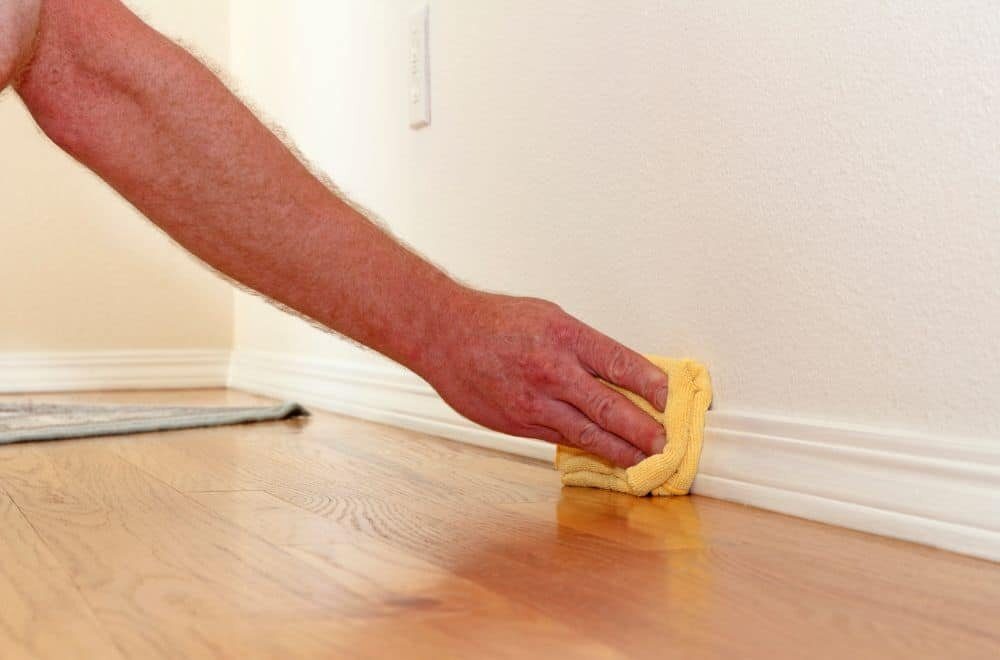
One of the best ways to keep your baseboards looking good is to clean them regularly. You can use a soft cloth or a microfiber duster to remove any dust or dirt that has accumulated on them. If there are any stubborn stains, you can use a magic eraser or a gentle all-purpose cleaner to remove them.

Deep Cleaning

If your baseboards are really dirty or have not been cleaned for a long time, you may need to do a deep cleaning. Start by removing any loose dirt or dust with a soft cloth or a microfiber duster. Then, mix some warm water with a gentle all-purpose cleaner and use a sponge or a microfiber cloth to clean the baseboards thoroughly. Be sure to rinse the cloth with clean water and wipe down the baseboards to remove any cleaner residue.

Protecting Your Baseboards

To keep your baseboards looking their best, you can take some steps to protect them from damage. For example, you can use a dryer sheet to rub them down after cleaning, which can help repel dust and dirt. You can also use furniture pads to protect them from scratches and scuff marks caused by moving furniture.

Repairing Baseboards

If your baseboards are damaged or have holes in them, you may need to repair or replace them. You can use a repair patch to fix small imperfections or holes, or you can replace the entire piece of baseboard if it is beyond repair. However, if you are not comfortable with DIY repairs, it may be best to hire a professional to do the job for you.

By following these tips, you can keep your baseboards looking their best and maintain the overall appearance of your home. Regular cleaning and maintenance can go a long way toward preserving the beauty and value of your property.

Impact of Baseboards on Interior Design

impact-of-baseboards-on-interior-design

Baseboards are an essential part of interior design that can make or break the overall aesthetic appeal of a room. They are the piece of wood or vinyl that runs along the bottom of the walls in a house, hiding the joint between the floor and wall. Here are some ways baseboards can impact interior design:

1. Aesthetic Appeal

Baseboards can add a finishing touch to a room, giving it a polished and complete look. They can be simple or ornate, depending on the style of the room. For example, minimalist baseboards can complement a modern and sleek design, while more detailed and decorative baseboards can enhance a traditional or vintage look.

2. Protection

Baseboards protect the walls from damage caused by furniture, vacuums, and other objects that come into contact with the walls. They also prevent dust and debris from accumulating in the gap between the wall and floor, making cleaning easier.

3. Visual Separation

Baseboards can visually separate different materials used in a room, such as different types of flooring or wallpaper. They can also create a transition between different colors or patterns used in the room.

4. Increased Home Value

Well-designed baseboards can add value to a home by enhancing its overall appearance. Potential buyers may be more interested in a home with attractive and well-maintained baseboards.

In conclusion, baseboards are an important part of interior design that can impact the overall look and feel of a room. They can enhance the aesthetic appeal, protect the walls, create visual separation, and increase home value.

Common Problems and Solutions with Baseboards

common-problems-and-solutions-with-baseboards

Baseboards are an essential part of any home’s interior design. They serve as a protective barrier between the walls and the floor, covering the gap that is often left between the two. However, baseboards can also present some problems. In this section, we’ll discuss some common issues with baseboards and their solutions.

Problem: Damaged or Cracked Baseboards

Baseboards can become damaged or cracked over time due to wear and tear or accidents. This can make them look unsightly and can even cause safety hazards.

Solution: Repair or Replace

If your baseboards are only slightly damaged, you can repair them using a repair patch. This is a simple and cost-effective solution that can be done in a few hours. However, if the damage is severe, it may be best to replace the baseboard entirely. This can be a more time-consuming and costly solution, but it will ensure that your baseboards are safe and look great.

Problem: Crooked Baseboards

Sometimes, baseboards can become crooked due to uneven walls or floors. This can make your home look unprofessional and can even cause gaps between the baseboard and the wall.

Solution: Install Properly

To avoid crooked baseboards, it’s important to install them properly. This means using the right tools and techniques to ensure that they are level and straight. You can also use tricks such as shimming and caulking to help close any gaps and make your baseboards look seamless.

Problem: Water Damage

Baseboards are often the first place to show signs of water damage. This can be caused by leaks from pipes or appliances, or even from floods or storms.

Solution: Dry and Repair

If you notice water damage to your baseboards, it’s important to act quickly. First, dry out the affected area using fans or dehumidifiers. Then, assess the damage and repair or replace the baseboard as needed. It’s also important to address the source of the water damage to prevent future issues.

Baseboards may present some challenges, but with the right solutions, you can ensure that they look great and protect your home for years to come.

Choosing the Right Baseboards for Your House

When it comes to choosing the right baseboards for your house, there are a few things to consider such as your house style, ceiling height, preferred material, and budget plan. Baseboards come in a wide variety of styles and materials, and selecting the right one can help to enhance the overall appearance of your home.

Baseboard Styles and Profiles

Baseboards come in a range of styles, including smooth, beaded, ornate, and many more. The style you choose will depend on the look you want to achieve and the overall style of your home. For instance, if you have a traditional-style home, you may want to consider a more ornate baseboard with intricate details. On the other hand, if you have a modern-style home, you may want to go for a simple and sleek baseboard.

Baseboard Materials

Baseboards can be made from a variety of materials, including solid wood, MDF (medium-density fiberboard), vinyl, and more. Solid wood is a popular choice because it can be painted or stained, and it can be repaired, sanded, and repainted as needed. However, keep in mind that solid wood can be slightly more expensive than other trim materials and may split when nailed. MDF is another popular choice because it is less expensive than solid wood and can be easily painted or stained. Vinyl is also a great option because it is affordable, easy to install, and requires little maintenance.

Baseboard Height

The height of your baseboard can also play a significant role in enhancing the overall look of your home. Generally, the taller the baseboard, the more elegant and luxurious your home will look. However, keep in mind that taller baseboards can also be more expensive. If you have a low ceiling, you may want to consider a shorter baseboard to avoid making your room feel cramped.

In conclusion, choosing the right baseboards for your house can help to enhance the overall appearance of your home. By considering your house style, ceiling height, preferred material, and budget plan, you can find the perfect baseboard to suit your needs.

Frequently Asked Questions

What is the name of the board that runs along the bottom of the walls in a house?

The board that runs along the bottom of the walls in a house is called a baseboard, skirting board, or kick board.

What is the purpose of the board that runs along the bottom of the walls in a house?

The purpose of the board that runs along the bottom of the walls in a house is to cover the joint between the wall and the floor, protect the wall from kicks and abrasions, and provide a decorative finish to the room.

What are other names for the board that runs along the bottom of the walls in a house?

Other names for the board that runs along the bottom of the walls in a house include base molding, base shoe, mopboard, and floor molding.

How do I clean the board that runs along the bottom of the walls in a house?

To clean the board that runs along the bottom of the walls in a house, use a soft cloth or sponge dampened with warm water and mild soap. Avoid using abrasive cleaners or scrubbers that can damage the finish.

What is the difference between baseboards and wainscoting?

Baseboards are boards that run along the bottom of the walls, while wainscoting is a decorative paneling that covers the lower part of the walls. Wainscoting can be installed above or below the baseboard.

Why do houses need a board that runs along the bottom of the walls?

Houses need a board that runs along the bottom of the walls to protect the wall from damage, cover the joint between the wall and the floor, and provide a decorative finish to the room. Baseboards also help to hide electrical wiring and other unsightly elements along the bottom of the walls.