Tag Archives: basic diy skills

How to Easily Attach a Headboard to Your Wooden Bed Frame

Attaching a headboard to a wooden bed frame can be a simple and easy process. Whether you’re looking to add a decorative touch to your bedroom or simply want to make your bed more comfortable, a headboard can be a great addition. In this article, we’ll go over the steps you need to take to attach a headboard to your wooden bed frame.

Before you begin, it’s important to gather all the necessary tools. You’ll need screws, bolts, washers, and a wrench. Once you have everything you need, you can start by positioning the headboard against the bed frame. Make sure the holes in the headboard align with the holes in the bed frame. Then, insert the screws and bolts through the holes and tighten them securely with the wrench.

If your headboard doesn’t have pre-drilled holes, you’ll need to drill them yourself. Use a drill bit that’s slightly smaller than the screws you’re using and make sure the holes are evenly spaced. Once you’ve drilled the holes, you can attach the headboard to the bed frame using the same process as before. With these simple steps, you can easily attach a headboard to your wooden bed frame and enjoy a more comfortable and stylish bedroom.

Understanding the Basics

Attaching a headboard to a wooden bed frame is a simple process that can be done by anyone with basic DIY skills. In this section, we will cover the basics of headboards and wooden bed frames to help you understand the different types and how they work together.

Types of Headboards

Headboards come in a variety of styles, materials, and sizes. Here are some of the most common types of headboards:

  • Upholstered headboards: These headboards are covered in fabric or leather and offer a soft and comfortable backrest for sitting up in bed.
  • Wooden headboards: These headboards are made from wood and come in a range of styles, from traditional to modern.
  • Metal headboards: These headboards are made from metal and are often designed to be decorative and stylish.

Types of Wooden Bed Frames

Wooden bed frames are another essential component of any bed setup. They come in different types, including:

  • Platform bed frames: These bed frames have a flat surface and do not require a box spring.
  • Slat bed frames: These bed frames have slats that support the mattress and do not require a box spring.
  • Panel bed frames: These bed frames have a headboard and footboard and require a box spring.

When it comes to attaching a headboard to a wooden bed frame, the type of bed frame you have will determine the method you use. For example, platform bed frames and slat bed frames often have pre-drilled holes for attaching a headboard, while panel bed frames may require additional hardware.

Understanding the basics of headboards and wooden bed frames is the first step in attaching a headboard to your bed frame. In the next sections, we will cover the different methods you can use to attach a headboard to a wooden bed frame, depending on the type of bed frame you have.

Gathering the Necessary Tools

Attaching a headboard to a wooden bed frame requires a few common tools that you may already have at home. Here are the tools you’ll need:

Screws and Bolts

Screws and bolts are essential for attaching the headboard to the bed frame. Make sure to choose the right size and length of screws and bolts that fit your bed frame and headboard.

Washers

Washers are small, flat, and circular metal pieces that go between the screw or bolt head and the surface of the headboard or bed frame. They help distribute the pressure and prevent the screw or bolt from digging into the wood.

Wrenches

You’ll need two types of wrenches: an adjustable wrench and a socket wrench. The adjustable wrench is used to hold the bolt head in place while tightening the nut with the socket wrench.

Drill and Drill Bits

If the headboard doesn’t come with pre-drilled holes, you’ll need a drill and drill bits to create holes in the headboard and bed frame. Make sure to choose the right size of drill bit that matches the screws or bolts you’re using.

Wall Mounts

If you want to attach the headboard to the wall, you’ll need wall mounts. Wall mounts come in different sizes and types, so choose the one that works best for your headboard and wall.

Level

A level is a tool used to ensure that the headboard is straight and level. It’s important to use a level to prevent the headboard from tilting or leaning to one side.

Optional Tools

If you want to add extra support to the headboard, you can use brackets or struts. Brackets are L-shaped metal pieces that attach the headboard to the bed frame, while struts are wooden pieces that go between the headboard and the bed frame.

Preparation Steps

Before attaching a headboard to your wooden bed frame, there are a few preparation steps you need to take. These steps will ensure that the headboard is properly secured to the bed frame and will not come loose over time.

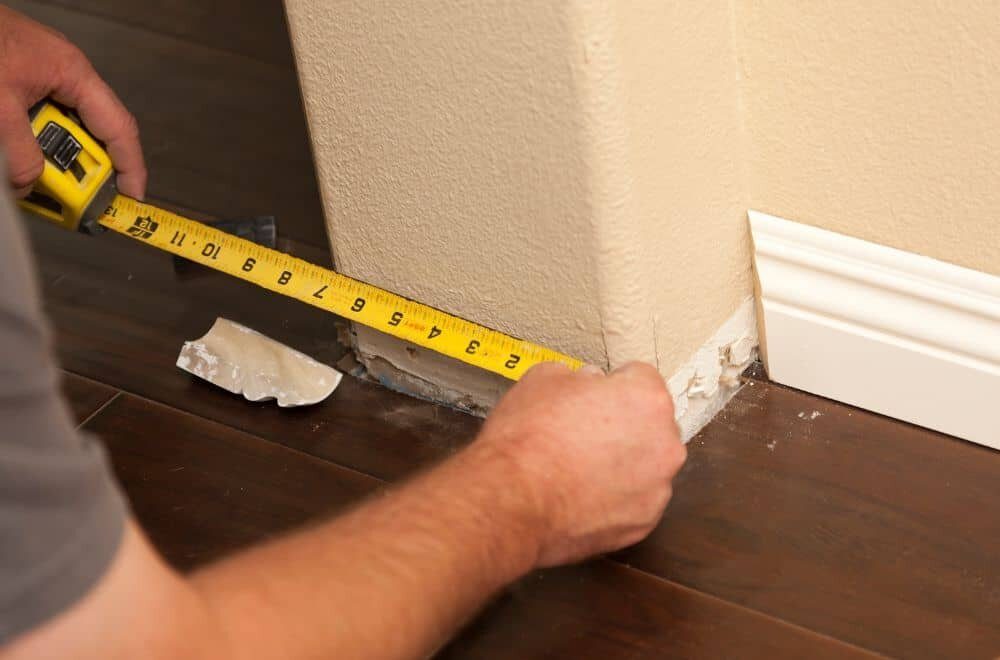
Measuring the Bed Frame

The first step is to measure the width and height of your bed frame. This is important because the headboard needs to be the same width as the bed frame in order to attach properly. You also need to make sure that the headboard is the correct height for your bed frame. If the headboard is too tall or too short, it may not attach properly or may not look aesthetically pleasing.

Marking the Attachment Points

Once you have measured your bed frame, the next step is to mark the attachment points for the headboard. You can do this by using a pencil to mark where the headboard will attach to the bed frame. Make sure to mark both the left and right sides of the bed frame, as well as the top and bottom.

After marking the attachment points, you can then drill holes into the bed frame where the headboard will attach. Make sure to use the correct size drill bit for the screws you will be using to attach the headboard.

Overall, taking these preparation steps will ensure that your headboard is properly attached to your wooden bed frame and will provide a sturdy and secure attachment for years to come.

Attaching the Headboard

Attaching a headboard to a wooden bed frame is a simple process that can be completed with just a few tools. Here are the steps to follow:

Aligning the Headboard

The first step is to align the headboard with the bed frame. Place the headboard against the wall, and then move the bed frame into position so that it is flush against the headboard. Make sure that the headboard is centered on the bed frame.

Securing the Headboard

Once the headboard is aligned, it’s time to secure it to the bed frame. There are a few different methods you can use to do this, including:

  • Using brackets: Many headboards come with brackets that can be attached to the bed frame. Simply line up the brackets with the holes in the headboard and bed frame, and then use screws to secure them in place.

  • Using bolts and washers: If your headboard doesn’t come with brackets, you can use bolts and washers to attach it to the bed frame. Drill holes in the headboard and bed frame where you want to attach them, and then insert bolts through the holes. Secure the bolts in place with washers and nuts.

  • Using screws: Another option is to attach the headboard directly to the bed frame using screws. Drill pilot holes through the headboard and into the bed frame, and then insert screws through the holes and tighten them in place.

No matter which method you choose, make sure that the headboard is securely attached to the bed frame. Give it a gentle tug to make sure that it doesn’t move or wobble.

That’s it! With just a few simple steps, you can attach a headboard to a wooden bed frame and give your bedroom a whole new look.

Safety Precautions

Attaching a headboard to your wooden bed frame is a simple process that can be done quickly with the right tools and instructions. However, it is important to take certain safety precautions to ensure that the process is done safely and without any accidents. Here are some safety tips to keep in mind:

1. Wear Protective Gear

Before you start attaching the headboard to your bed frame, make sure you are wearing the appropriate protective gear. This includes safety glasses to protect your eyes from any flying debris, gloves to protect your hands from sharp edges, and closed-toe shoes to protect your feet from any falling objects.

2. Use the Right Tools

Make sure you have all the necessary tools before you start attaching the headboard to your bed frame. This includes bolts, screws, and washers that are the right size for your bed frame and headboard. Using the wrong tools can be dangerous and can damage your bed frame or headboard.

3. Follow the Instructions Carefully

Make sure you read and follow the instructions carefully before you start attaching the headboard to your bed frame. This will help you avoid any mistakes that can lead to accidents or damage to your bed frame or headboard.

4. Get Help if Needed

If you are not comfortable with attaching the headboard to your bed frame, or if you are not sure how to do it safely, it is always better to ask for help. This can be a friend or family member who has experience with DIY projects or a professional who can do it for you.

5. Check for Stability

Once you have attached the headboard to your bed frame, make sure it is stable and secure. This will help prevent any accidents or injuries while you are sleeping. Check the bolts, screws, and washers to make sure they are tight and secure, and make any necessary adjustments to ensure that the headboard is stable.

Troubleshooting Common Issues

When attaching a headboard to a wooden bed frame, you may encounter some common issues. Don’t worry, though – these problems are usually easy to solve with a little troubleshooting.

Loose Headboard

If your headboard is loose, it may shift or rattle when you move around in bed. This can be frustrating and even lead to damage to the headboard or the bed frame. Here are a few troubleshooting steps to try:

  • Check that all bolts and screws are tightened properly. If any are loose, tighten them with a screwdriver or wrench.
  • Make sure the headboard is properly aligned with the bed frame. If it is crooked, it may not be secure.
  • Consider using brackets or braces to reinforce the connection between the headboard and the bed frame.

Uneven Headboard

If your headboard is uneven, it may not look right or it may not fit properly with your bedding. Here are some troubleshooting steps to try:

  • Check that the headboard is level. Use a level tool to ensure that it is straight and not leaning to one side.
  • Make sure that the headboard is properly aligned with the bed frame. If it is not, it may be causing the unevenness.
  • Consider using shims to adjust the height of the headboard. These can be placed between the headboard and the bed frame to even out the height.

By following these troubleshooting steps, you should be able to fix common issues when attaching a headboard to a wooden bed frame. If you’re still having trouble, consider consulting a professional or the manufacturer for further assistance.

Maintaining Your Attached Headboard

Once you have successfully attached your headboard to your wooden bed frame, it’s important to maintain it properly to ensure it stays secure and in good condition. Here are a few tips to help you maintain your attached headboard:

Regularly Inspect Your Headboard

To keep your headboard secure and in good condition, it’s important to inspect it regularly. Check the screws, bolts, and other attachments to make sure they are still tight and secure. If you notice any loose or missing screws, tighten or replace them as soon as possible.

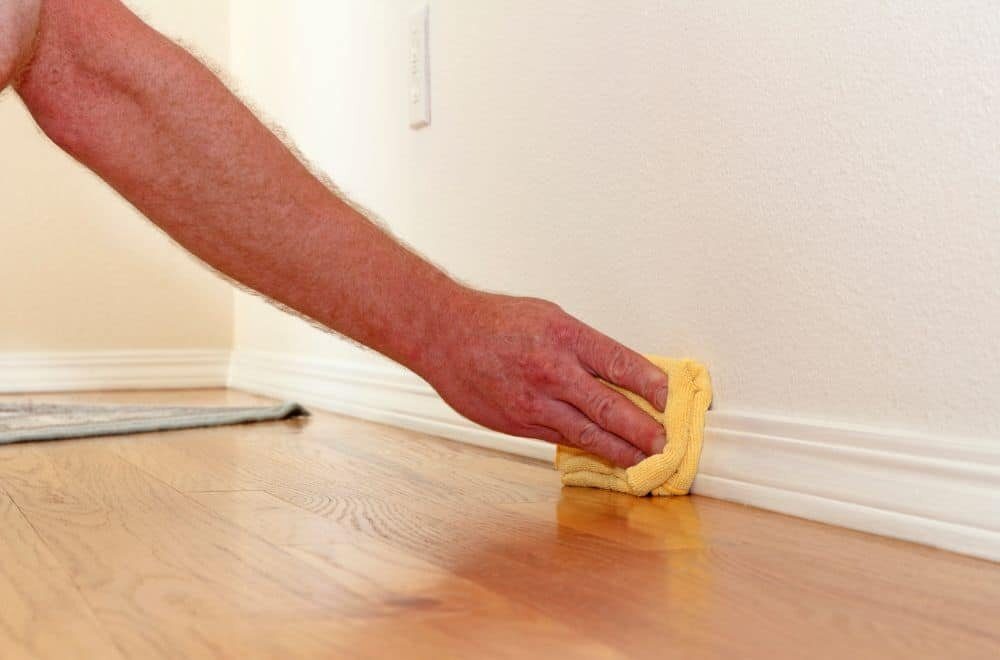
Clean Your Headboard

To keep your headboard looking its best, it’s important to clean it regularly. Use a soft cloth or brush to remove any dust or debris, and wipe it down with a damp cloth or sponge. Avoid using harsh chemicals or abrasive cleaners, as these can damage the finish on your headboard.

Protect Your Headboard

To prevent scratches, dents, or other damage to your headboard, it’s important to protect it from accidental bumps or impacts. You can do this by placing a soft cushion or pad between your headboard and the wall, or by using furniture pads or coasters under the legs of your bed frame.

Consider Upgrading Your Headboard

If you’ve had your headboard for a while and it’s starting to show signs of wear and tear, or if you simply want to update the look of your bedroom, consider upgrading to a new headboard. There are many different styles and materials to choose from, so you’re sure to find one that fits your taste and budget.

By following these simple tips, you can keep your attached headboard looking and functioning its best for years to come.

the-role-of-the-piece-of-wood-at-the-bottom-of-walls

Baseboard: What is it and its Purpose in Your Home

If you’re a homeowner or have ever been inside a house, you’ve probably noticed a piece of wood running along the bottom of the walls. It’s a common feature in most homes, but have you ever wondered what it’s called? This piece of wood serves both a functional and aesthetic purpose, but it’s not always referred to by the same name.

In England, this piece of wood is generally known as the skirting board, while Americans often refer to it as a kick board. However, it can also be called a baseboard, mopboard, or floor molding. Despite the different names, they all serve the same purpose of covering the gap between the wall surface and the floor, protecting the wall from damage and providing a finished look to the room.

Skirting boards come in a variety of materials, including wood, MDF, PVC, and plaster. They can be simple and plain or ornate and decorative, depending on the style of the room. In addition to its functional purpose, skirting boards can also be used to add character and style to a room, serving as a decorative feature that complements the overall design.

Understanding the Basics of House Structure

When it comes to understanding the basics of house structure, it’s important to know the different components that make up a house. One of these components is the piece of wood that runs along the bottom of the walls in a house, which is known as the baseboard or skirting board.

The baseboard is typically made from wood and is installed along the bottom of the walls to cover the joint between the wall and the floor. It serves both a functional and aesthetic purpose, as it helps to protect the wall from damage and also adds a finishing touch to the room.

In addition to the baseboard, there are other important components of house structure that you should be familiar with. These include the foundation, frame, roof, windows and doors, plumbing, electrical, and HVAC systems, as well as the finishes such as siding, drywall, paint, and flooring.

Overall, understanding the basics of house structure is essential for homeowners, builders, and anyone involved in the construction or maintenance of a house. By knowing the different components that make up a house, you can better understand how it all fits together and ensure that your home is safe, functional, and aesthetically pleasing.

The Role of the Piece of Wood at the Bottom of Walls

the-role-of-the-piece-of-wood-at-the-bottom-of-walls

If you’ve ever looked closely at the bottom of the walls in your house, you may have noticed a piece of wood running along the length of the wall. This piece of wood is known as the baseboard or skirting board and serves several important purposes.

Firstly, the baseboard provides a finished look to the bottom of the wall. Without it, the wall would appear unfinished and rough. Additionally, it covers any gaps or imperfections between the wall and the floor, creating a smooth transition between the two surfaces.

Another important function of the baseboard is to protect the wall from damage caused by furniture, vacuums, and other household items. By providing a barrier between the wall and the floor, the baseboard prevents scratches, scuffs, and other types of damage.

Finally, the baseboard can also serve as a decorative element in your home. There are many different styles and designs of baseboards available, ranging from simple and understated to ornate and elaborate. Choosing the right baseboard can add a touch of elegance and sophistication to any room in your home.

In summary, the baseboard is an essential component of any home’s interior design. It provides a finished look to the bottom of the wall, protects the wall from damage, and can even serve as a decorative element.

Different Types of Baseboards

different-types-of-baseboards

When it comes to baseboards, there are a variety of materials and styles to choose from. Here are some of the most common types of baseboards:

  • MDF: Medium-density fiberboard is a popular choice for baseboards because it is affordable, easy to install, and can be painted to match any decor. However, it is not as durable as other materials and can be easily damaged.
  • Pine: Pine is another popular choice for baseboards because it is affordable and easy to work with. It can be stained or painted to match any decor, but it is not as durable as other materials and can dent or scratch easily.
  • Oak: Oak is a more expensive option, but it is also more durable and can be stained to bring out its natural beauty. It is a good choice for high-traffic areas.
  • Maple: Maple is another hardwood that is durable and can be stained to match any decor. It is more expensive than pine but less expensive than oak.
  • Vinyl: Vinyl baseboards are a good choice for bathrooms and other areas where moisture is a concern. They are easy to clean, durable, and come in a variety of colors and styles.
  • Hardwood: Other hardwoods like mahogany, cherry, and walnut can be used for baseboards, but they are more expensive than oak or maple.
  • Shoe molding: Shoe molding is a small molding that is installed at the bottom of baseboards to cover any gaps between the baseboard and the floor. It is available in a variety of materials, including hardwood, MDF, and vinyl.

When choosing a baseboard, consider the style of your home, your budget, and the durability you need for the area where it will be installed. With so many options available, you’re sure to find a baseboard that fits your needs and your style.

Material Choices for Baseboards

material-choices-for-baseboards

When it comes to choosing the material for your baseboards, there are a few options to consider. Each material has its own advantages and disadvantages, so it’s important to choose the one that best fits your needs and budget.

Wood

Wood is a popular choice for baseboards because it is durable and can be stained or painted to match your decor. Oak, pine, and maple are common types of wood used for baseboards. Pine is a popular choice because it is affordable and easy to work with. Oak is more expensive but is known for its durability and strength. Maple is also a strong and durable option but is more expensive than pine.

Medium-Density Fiberboard (MDF)

MDF is a composite material made from wood fibers and resin. It is a popular choice for baseboards because it is affordable and easy to work with. MDF can be painted to match your decor, but it cannot be stained like natural wood. It is also not as durable as wood and can be easily damaged.

PVC

PVC is a plastic material that is becoming more popular for baseboards. It is affordable, durable, and resistant to moisture and insects. PVC can be painted to match your decor, but it cannot be stained. It is also not as strong as wood and can be easily damaged.

Other Materials

Other materials used for baseboards include extruded polyurethane and natural wood such as poplar and cherry. These materials are more expensive than MDF and PVC but are stronger and more durable. They can also be stained and painted to match your decor.

Overall, the material you choose for your baseboards will depend on your needs and budget. Wood is a classic choice that offers durability and versatility, while MDF and PVC are more affordable options that are easy to work with. Consider your options carefully and choose the material that best fits your needs and style.

Installation Process of Baseboards

installation-process-of-baseboards

Installing baseboards is a simple process that can be completed by anyone with a few basic tools and some patience. Here are the steps you need to follow to install baseboards in your home:

  1. Measure the room: Before you begin, you need to measure the length of each wall in the room where you will be installing the baseboards. This will help you determine how much baseboard material you will need.
  2. Choose your baseboard material: Baseboards can be made from a variety of materials, including wood, MDF, and PVC. Each material has its own advantages and disadvantages, so it’s important to choose the one that is right for your needs.
  3. Cut the baseboard to size: Using a miter saw, cut the baseboard to the appropriate length for each wall. Be sure to make precise cuts to ensure that the baseboards fit together properly.
  4. Install the baseboards: Using a nail gun, attach the baseboards to the wall. Be sure to nail the baseboards into the studs to ensure that they are secure.
  5. Fill in nail holes: Once the baseboards are installed, use spackle to fill in any nail holes or gaps between the baseboards and the wall.
  6. Caulk the baseboards: Using a caulk gun, apply caulk to the gaps between the baseboards and the wall. This will help create a seamless finish.
  7. Paint the baseboards: Finally, paint the baseboards to match the color of your walls. This will help create a cohesive look in the room.

Overall, installing baseboards is a relatively simple process that can be completed by anyone with some basic DIY skills. By following these steps, you can add a finishing touch to your home that will make it look more polished and complete.

Maintenance and Care of Baseboards

maintenance-and-care-of-baseboards

Baseboards are an essential part of any home’s interior design. They cover the gap between the wall and the floor and provide a finished look to the room. However, they can accumulate dirt, dust, and scuff marks over time, which can make them look unsightly. Here are some tips on how to maintain and care for your baseboards to keep them looking their best:

Regular Cleaning

One of the best ways to keep your baseboards looking good is to clean them regularly. You can use a soft cloth or a microfiber duster to remove any dust or dirt that has accumulated on them. If there are any stubborn stains, you can use a magic eraser or a gentle all-purpose cleaner to remove them.

Deep Cleaning

If your baseboards are really dirty or have not been cleaned for a long time, you may need to do a deep cleaning. Start by removing any loose dirt or dust with a soft cloth or a microfiber duster. Then, mix some warm water with a gentle all-purpose cleaner and use a sponge or a microfiber cloth to clean the baseboards thoroughly. Be sure to rinse the cloth with clean water and wipe down the baseboards to remove any cleaner residue.

Protecting Your Baseboards

To keep your baseboards looking their best, you can take some steps to protect them from damage. For example, you can use a dryer sheet to rub them down after cleaning, which can help repel dust and dirt. You can also use furniture pads to protect them from scratches and scuff marks caused by moving furniture.

Repairing Baseboards

If your baseboards are damaged or have holes in them, you may need to repair or replace them. You can use a repair patch to fix small imperfections or holes, or you can replace the entire piece of baseboard if it is beyond repair. However, if you are not comfortable with DIY repairs, it may be best to hire a professional to do the job for you.

By following these tips, you can keep your baseboards looking their best and maintain the overall appearance of your home. Regular cleaning and maintenance can go a long way toward preserving the beauty and value of your property.

Impact of Baseboards on Interior Design

impact-of-baseboards-on-interior-design

Baseboards are an essential part of interior design that can make or break the overall aesthetic appeal of a room. They are the piece of wood or vinyl that runs along the bottom of the walls in a house, hiding the joint between the floor and wall. Here are some ways baseboards can impact interior design:

1. Aesthetic Appeal

Baseboards can add a finishing touch to a room, giving it a polished and complete look. They can be simple or ornate, depending on the style of the room. For example, minimalist baseboards can complement a modern and sleek design, while more detailed and decorative baseboards can enhance a traditional or vintage look.

2. Protection

Baseboards protect the walls from damage caused by furniture, vacuums, and other objects that come into contact with the walls. They also prevent dust and debris from accumulating in the gap between the wall and floor, making cleaning easier.

3. Visual Separation

Baseboards can visually separate different materials used in a room, such as different types of flooring or wallpaper. They can also create a transition between different colors or patterns used in the room.

4. Increased Home Value

Well-designed baseboards can add value to a home by enhancing its overall appearance. Potential buyers may be more interested in a home with attractive and well-maintained baseboards.

In conclusion, baseboards are an important part of interior design that can impact the overall look and feel of a room. They can enhance the aesthetic appeal, protect the walls, create visual separation, and increase home value.

Common Problems and Solutions with Baseboards

common-problems-and-solutions-with-baseboards

Baseboards are an essential part of any home’s interior design. They serve as a protective barrier between the walls and the floor, covering the gap that is often left between the two. However, baseboards can also present some problems. In this section, we’ll discuss some common issues with baseboards and their solutions.

Problem: Damaged or Cracked Baseboards

Baseboards can become damaged or cracked over time due to wear and tear or accidents. This can make them look unsightly and can even cause safety hazards.

Solution: Repair or Replace

If your baseboards are only slightly damaged, you can repair them using a repair patch. This is a simple and cost-effective solution that can be done in a few hours. However, if the damage is severe, it may be best to replace the baseboard entirely. This can be a more time-consuming and costly solution, but it will ensure that your baseboards are safe and look great.

Problem: Crooked Baseboards

Sometimes, baseboards can become crooked due to uneven walls or floors. This can make your home look unprofessional and can even cause gaps between the baseboard and the wall.

Solution: Install Properly

To avoid crooked baseboards, it’s important to install them properly. This means using the right tools and techniques to ensure that they are level and straight. You can also use tricks such as shimming and caulking to help close any gaps and make your baseboards look seamless.

Problem: Water Damage

Baseboards are often the first place to show signs of water damage. This can be caused by leaks from pipes or appliances, or even from floods or storms.

Solution: Dry and Repair

If you notice water damage to your baseboards, it’s important to act quickly. First, dry out the affected area using fans or dehumidifiers. Then, assess the damage and repair or replace the baseboard as needed. It’s also important to address the source of the water damage to prevent future issues.

Baseboards may present some challenges, but with the right solutions, you can ensure that they look great and protect your home for years to come.

Choosing the Right Baseboards for Your House

When it comes to choosing the right baseboards for your house, there are a few things to consider such as your house style, ceiling height, preferred material, and budget plan. Baseboards come in a wide variety of styles and materials, and selecting the right one can help to enhance the overall appearance of your home.

Baseboard Styles and Profiles

Baseboards come in a range of styles, including smooth, beaded, ornate, and many more. The style you choose will depend on the look you want to achieve and the overall style of your home. For instance, if you have a traditional-style home, you may want to consider a more ornate baseboard with intricate details. On the other hand, if you have a modern-style home, you may want to go for a simple and sleek baseboard.

Baseboard Materials

Baseboards can be made from a variety of materials, including solid wood, MDF (medium-density fiberboard), vinyl, and more. Solid wood is a popular choice because it can be painted or stained, and it can be repaired, sanded, and repainted as needed. However, keep in mind that solid wood can be slightly more expensive than other trim materials and may split when nailed. MDF is another popular choice because it is less expensive than solid wood and can be easily painted or stained. Vinyl is also a great option because it is affordable, easy to install, and requires little maintenance.

Baseboard Height

The height of your baseboard can also play a significant role in enhancing the overall look of your home. Generally, the taller the baseboard, the more elegant and luxurious your home will look. However, keep in mind that taller baseboards can also be more expensive. If you have a low ceiling, you may want to consider a shorter baseboard to avoid making your room feel cramped.

In conclusion, choosing the right baseboards for your house can help to enhance the overall appearance of your home. By considering your house style, ceiling height, preferred material, and budget plan, you can find the perfect baseboard to suit your needs.

Frequently Asked Questions

What is the name of the board that runs along the bottom of the walls in a house?

The board that runs along the bottom of the walls in a house is called a baseboard, skirting board, or kick board.

What is the purpose of the board that runs along the bottom of the walls in a house?

The purpose of the board that runs along the bottom of the walls in a house is to cover the joint between the wall and the floor, protect the wall from kicks and abrasions, and provide a decorative finish to the room.

What are other names for the board that runs along the bottom of the walls in a house?

Other names for the board that runs along the bottom of the walls in a house include base molding, base shoe, mopboard, and floor molding.

How do I clean the board that runs along the bottom of the walls in a house?

To clean the board that runs along the bottom of the walls in a house, use a soft cloth or sponge dampened with warm water and mild soap. Avoid using abrasive cleaners or scrubbers that can damage the finish.

What is the difference between baseboards and wainscoting?

Baseboards are boards that run along the bottom of the walls, while wainscoting is a decorative paneling that covers the lower part of the walls. Wainscoting can be installed above or below the baseboard.

Why do houses need a board that runs along the bottom of the walls?

Houses need a board that runs along the bottom of the walls to protect the wall from damage, cover the joint between the wall and the floor, and provide a decorative finish to the room. Baseboards also help to hide electrical wiring and other unsightly elements along the bottom of the walls.