Tag Archives: avoid inhaling fumes

How to Remove Carpet Glue from Wooden Floor: A Step-by-Step Guide

Removing carpet glue from a wooden floor can be a daunting task, but it is necessary if you want to restore the natural beauty of your hardwood floors. Carpet glue can be stubborn and difficult to remove, but with the right tools and techniques, you can get the job done quickly and efficiently.

One of the most important things to keep in mind when removing carpet glue from a wooden floor is to be patient. It may take some time and effort to get all of the glue off, but rushing the process can damage your floors. It is also important to use the right tools and techniques to avoid damaging the wood. With the right approach, you can remove the glue without causing any harm to your floors.

Understanding Carpet Glue

If you have ever removed carpeting from a wood floor, you know that it can be a tedious task. One of the most challenging parts of this process is removing the residual glue that remains on the floor. Carpet glue is a stiff and strong solvent used to adhere a carpet to a floor. Because of its toughness, removing it is difficult, and as you will see, taking off carpet glue or adhesive off wood floors is not as simple as it looks.

Carpet glue is typically made of synthetic polymer resins that are mixed with solvents. The solvents help to dissolve the resins, which allows the glue to be spread evenly on the floor. Once the glue dries, it forms a strong bond with the floor, which keeps the carpet in place.

There are several types of carpet glue available on the market, and each has its unique properties. Some glue is water-based, while others are solvent-based. Some glue is designed for use on concrete floors, while others are designed for use on wood floors. It is essential to understand the type of glue you are dealing with to remove it effectively.

Carpet glue varies in color, texture, and thickness. Some glue looks more terrible than others. Some glue is easy to remove, while others require more effort and time. The type of carpet glue you are dealing with will determine the best method to remove it.

In the next section, we will look at some of the methods you can use to remove carpet glue from a wood floor.

Necessary Tools and Materials

Removing carpet glue from a wooden floor requires specific tools and materials. Here are the essential items that you will need:

Scraper

A scraper is a tool that you will use to remove the carpet glue from the wooden floor. You can use a spackling tool or a hoe as a scraper. A spackling tool is a flat metal tool that you can use to scrape off the glue from the floor. A hoe is a tool with a flat blade that you can use to scrape off the glue from the floor.

Adhesive Remover

An adhesive remover is a solvent that you can use to dissolve the carpet glue from the wooden floor. You can use a mineral-based solvent or an orange-based solvent. A mineral-based solvent is more effective in removing the glue, while an orange-based solvent is less pervasive. Make sure to read the instructions on the adhesive remover before using it.

Protective Gear

Protective gear is essential when removing carpet glue from a wooden floor. You should wear rubber gloves, rubber boots, and goggles to protect your skin and eyes from the adhesive remover. The adhesive remover can be harmful to your skin and eyes, so make sure to take the necessary precautions.

In summary, to remove carpet glue from a wooden floor, you will need a scraper, an adhesive remover, and protective gear. These tools and materials will help you remove the glue effectively and safely.

Safety Precautions

When removing carpet glue from a wooden floor, there are some safety precautions you should take to ensure your well-being and the safety of your property. Here are some tips to keep in mind:

Wear Protective Gear

Before starting the process, make sure you wear protective gear, including rubber gloves, goggles, and rubber boots. This will protect your skin from chemical burns, splinters, and other injuries that may occur during the removal process.

Ventilate the Room

When using any chemical solvents, make sure you have proper ventilation in the room. Open windows and doors to allow fresh air to circulate. If you are using a chemical solvent, wear a mask to avoid inhaling fumes.

Keep the Area Clean

Make sure the area you are working in is clean and free of clutter. This will prevent accidents and make it easier to move around. Also, keep children and pets away from the area to avoid any accidents.

Follow Instructions

Read and follow the instructions on the product label carefully. Some solvents may require specific instructions for use, and not following them may lead to accidents or damage to the floor.

Test the Solvent

Before using any solvent, test it on a small, inconspicuous area of the floor to make sure it does not damage the wood. If the solvent causes damage, do not use it on the rest of the floor.

By following these safety precautions, you can ensure a safe and successful removal of carpet glue from your wooden floor.

Step-By-Step Guide

Removing carpet glue from a wooden floor may seem like a daunting task, but with the right tools and techniques, it can be done efficiently. Here is a step-by-step guide to help you remove carpet glue from your wooden floor.

Clearing the Area

Before starting, clear the area around the wooden floor. Remove any furniture, rugs, or other items that may obstruct your work. Cover any vents, electrical outlets, or other openings to prevent dust and debris from entering.

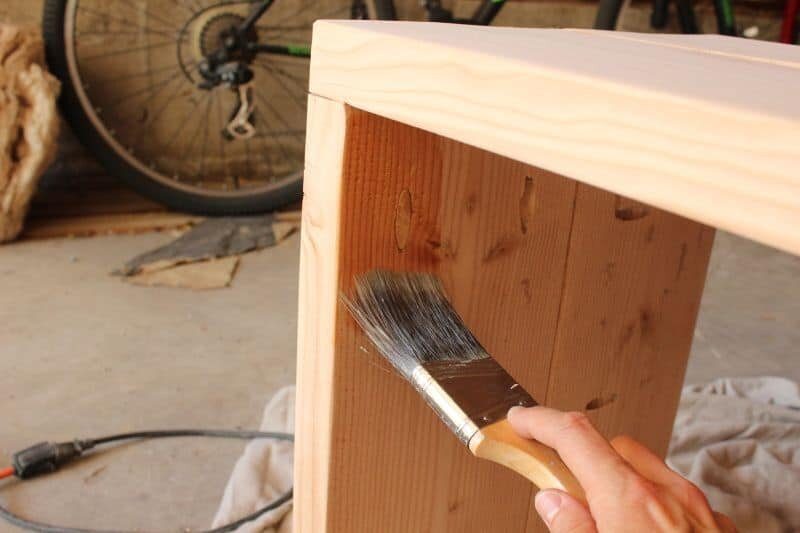
Applying the Adhesive Remover

Apply adhesive remover to a small section of the wooden floor. Allow the adhesive remover to sit for a few minutes to dissolve the glue. Use a scraper to remove the softened glue. Repeat the process until all the glue is removed.

Scraping Off the Glue

Use a scraper to remove any remaining glue from the wooden floor. Be careful not to scratch the surface of the wood. Use a plastic scraper or putty knife to avoid damage to the surface.

Sanding the Floor

After removing the glue, sand the wooden floor to remove any remaining residue. Start with a coarse grit sandpaper and work your way up to a finer grit sandpaper. Sand in the direction of the wood grain to avoid damaging the surface.

Cleaning the Wooden Floor

After sanding, clean the wooden floor with a vacuum cleaner or broom to remove any dust or debris. Then, use a damp mop to clean the surface. Allow the floor to dry completely before applying any finish.

By following these steps, you can remove carpet glue from your wooden floor and restore its natural beauty.

Troubleshooting Common Problems

Residual Glue

If you have removed the carpet from your wooden floor, you may still be left with residual glue. This can be difficult to remove, but there are a few things you can try. First, try scraping the glue with a plastic putty knife. If this doesn’t work, you can try using a solvent to dissolve the glue. Be sure to follow the manufacturer’s instructions carefully and wear protective gear such as rubber gloves and a respirator. You may need to repeat the process several times to completely remove the glue.

Damage to the Wooden Floor

Removing carpet glue from a wooden floor can be a delicate process, and it’s possible to damage the floor if you’re not careful. If you notice any damage to the floor, stop immediately and assess the situation. If the damage is minor, you may be able to sand it out. If the damage is more severe, you may need to replace the affected boards.

It’s also important to be careful when using tools such as scrapers and sanders. Make sure you’re using the right tool for the job and that you’re using it correctly. If you’re not sure, it’s always a good idea to consult a professional.

In summary, removing carpet glue from a wooden floor can be a challenging task, but with the right tools and techniques, it can be done. Be patient, take your time, and be careful not to damage the floor. If you run into any problems, don’t hesitate to seek professional help.

Maintaining Your Wooden Floor After Glue Removal

Now that you have successfully removed the carpet glue from your wooden floor, it’s time to focus on maintaining your floor’s beauty and longevity. Here are some tips to help you take care of your wooden floor after glue removal:

1. Clean Your Floor Regularly

You should clean your wooden floor regularly to keep it looking good and to prevent any damage. Use a soft-bristled broom or a vacuum cleaner to remove dirt, dust, and debris. Avoid using a wet mop as it can damage your wooden floor.

2. Use a Protective Coating

After removing the glue, you can apply a protective coating to your wooden floor. This will help protect your floor from scratches, stains, and other damage. There are different types of protective coatings available, including polyurethane and wax. Choose the one that suits your needs and preferences.

3. Avoid Water Spills

Water can damage your wooden floor, so it’s important to avoid spills. If you spill water on your wooden floor, clean it up immediately. You can use a dry cloth or a mop to absorb the water. Don’t let water sit on your wooden floor for too long as it can cause warping and other damage.

4. Use Furniture Pads

Furniture can scratch your wooden floor, so it’s important to use furniture pads. These pads can be placed under the legs of your furniture to protect your floor from scratches. You can find furniture pads in different sizes and materials, such as felt or rubber.

By following these tips, you can maintain the beauty and longevity of your wooden floor after removing the carpet glue. Remember to clean your floor regularly, use a protective coating, avoid water spills, and use furniture pads.

How to Build a Wooden Frame: A Beginner's Guide

Building a wooden frame is a great way to showcase your favorite pictures or artwork. Whether you’re a beginner or an experienced woodworker, making a wooden frame is a simple and rewarding project that can be completed in just a few hours. With a few basic tools and some affordable materials, you can create a custom frame that perfectly complements your decor.

To build a wooden frame, you’ll need to start by selecting the right type of wood. Pine, poplar, and oak are all popular choices for frames, and each has its own unique characteristics. Once you’ve chosen your wood, you’ll need to cut it to the right size using a saw. From there, you’ll assemble the pieces using wood glue and clamps, and then finish the frame with sandpaper and stain or paint. Whether you’re making a frame for a family photo or a piece of art, building a wooden frame is a fun and rewarding project that anyone can tackle.

Understanding Wood Types

When building a wooden frame, it’s important to understand the different types of wood available to you. Here are the three most common types of wood used in framing:

Natural Wood

Natural wood is the most common type of wood used in framing. It’s easy to work with and has a natural beauty that makes it a popular choice. However, natural wood is susceptible to warping and splitting, so it’s important to choose the right type of wood for your project.

Finger-Jointed Poplar

Finger-jointed poplar is a type of wood that is made by joining smaller pieces of wood together. This process creates a stronger and more stable piece of wood that is less likely to warp or split. Finger-jointed poplar is also less expensive than natural wood, making it a popular choice for budget-conscious builders.

Medium-Density Fiberboard (MDF)

Medium-density fiberboard (MDF) is a type of wood that is made by compressing wood fibers together. It’s a very strong and stable type of wood that is resistant to warping and splitting. MDF is also less expensive than natural wood, but it’s not as strong as finger-jointed poplar.

When choosing the type of wood for your frame, consider the strength, stability, and cost of each option. Natural wood is a great choice for its natural beauty, but finger-jointed poplar and MDF are more stable and less expensive, making them great alternatives.

Tools and Materials Needed

When it comes to building a wooden frame, you will need a few tools and materials to get started. In this section, we will cover the essential tools and materials you need to build a wooden frame.

Choosing the Right Tools

To build a wooden frame, you will need a few essential tools. Here are some of the tools you will need:

Tools Description
Circular Saw Used for cutting the wood to the desired size
Miter Saw Used for making precise cuts at different angles
Hammer Used for driving nails into the wood
Nail Gun Used for driving nails into the wood quickly
Measuring Tape Used for measuring the wood
Carpenter’s Square Used for making sure the corners are square
Sandpaper Used for smoothing out rough edges

When selecting your tools, you want to make sure you choose high-quality tools that will last. You also want to make sure you choose tools that are appropriate for your skill level. If you are a beginner, you may want to start with basic hand tools and work your way up to power tools.

Material Selection

The materials you choose for your wooden frame are just as important as the tools you use. Here are some of the materials you will need:

Materials Description
Wood The main material used for building the frame
Wood Glue Used for joining the pieces of wood together
Wood Stain or Paint Used for finishing the frame
Picture Frame Hardware Used for hanging the frame

When selecting your wood, you want to make sure you choose a high-quality wood that is appropriate for your project. You also want to make sure you choose a wood that is free from knots and other defects that can weaken the frame.

In conclusion, by choosing the right tools and materials, you can build a wooden frame that is both beautiful and functional. Whether you are a beginner or an experienced woodworker, building a wooden frame is a fun and rewarding project that anyone can do.

Designing the Frame

When building a wooden frame, designing the frame is a crucial step that can make or break your project. In this section, we’ll cover the two main aspects of designing a frame: measuring and marking, and design considerations.

Measuring and Marking

Before you start cutting your wood, you’ll need to measure and mark it properly. This will ensure that your frame is the right size and that all the pieces fit together perfectly.

To measure your wood, use a tape measure and measure twice to ensure accuracy. Mark your measurements with a pencil or a marker, making sure to mark on the side of the wood that won’t be visible in the final product.

Once you have your measurements marked, use a saw to cut your wood to the desired size. Remember to cut slightly larger than your measurements to allow for sanding and finishing.

Design Considerations

When designing your frame, there are a few things to consider. These include:

  • Wood type: Different types of wood have different characteristics, such as hardness, grain pattern, and color. Choose a wood that fits your project’s needs and aesthetic.

  • Frame style: There are many different styles of frames, including simple and ornate designs. Choose a style that fits your project’s needs and complements the artwork or photo you’ll be framing.

  • Joinery: There are several ways to join wood together, including butt joints, miter joints, and lap joints. Choose a joinery method that fits your project’s needs and skill level.

  • Finish: The finish you choose can greatly affect the final look of your frame. Consider staining, painting, or leaving the wood natural, depending on your project’s needs.

By taking these considerations into account when designing your frame, you’ll be able to create a beautiful, functional, and long-lasting product.

Building the Frame

Building a wooden frame can be a fun and rewarding DIY project. Whether you’re framing a piece of art, a photograph, or a canvas, building your own frame allows you to customize the size, style, and finish to your liking. Here’s how to build a wooden frame in three simple steps.

Cutting the Wood

The first step in building a wooden frame is to cut the wood to the desired size. You will need four pieces of wood: two longer pieces for the top and bottom, and two shorter pieces for the sides. Use a table saw or miter saw to cut the wood to the correct length and width.

Make sure that the pieces are cut at a 45-degree angle so that they will fit together neatly. Use a miter gauge or miter saw to ensure that the angles are accurate. Sand the edges of the wood to remove any rough spots or splinters.

Assembling the Pieces

Once you have cut the wood to the correct size and angle, it’s time to assemble the pieces. Lay the pieces out on a flat surface and fit them together to form a rectangle. Use clamps to hold the pieces in place while you drill pilot holes for the screws.

Apply some wood glue to the joints and then screw the pieces together using wood screws. Be sure to countersink the screws so that they are flush with the surface of the wood. Once the frame is assembled, use a damp cloth to wipe away any excess glue.

Securing the Frame

The final step in building a wooden frame is to secure it to the artwork or canvas. Lay the frame face-down on a flat surface and place the artwork or canvas face-down on top of it. Use a staple gun to attach the canvas to the frame, starting at the center of each side and working your way outwards.

Once the canvas is secured to the frame, flip it over and admire your handiwork. You can now hang your artwork or canvas on the wall using picture hangers or wire.

Building a wooden frame is a simple and rewarding DIY project that anyone can do with a few basic tools and some patience. With a little practice, you’ll be able to create custom frames that perfectly complement your artwork or photographs.

Finishing Touches

After building your wooden frame, it’s time to put the finishing touches on it. This will not only enhance the appearance of your frame, but it will also protect it from wear and tear. In this section, we’ll cover two important sub-sections: Sanding the Frame and Applying Finish.

Sanding the Frame

Before applying any finish, it’s important to sand your frame properly. Sanding will smooth out any rough spots or imperfections on the surface of the wood, creating a clean and uniform finish. Here are some tips to keep in mind while sanding your frame:

  • Start with a coarse sandpaper (around 80 grit) and work your way up to a finer grit (around 220 grit).
  • Sand in the direction of the wood grain to avoid creating scratches.
  • Use a sanding block to ensure even sanding across the entire surface.
  • Wipe the frame with a tack cloth to remove any sawdust before applying the finish.

Applying Finish

Once your frame is sanded, it’s time to apply the finish of your choice. There are many different types of finishes available, including oil-based, water-based, and wax-based finishes. Here are some general tips to help you apply the finish:

  • Apply the finish in a well-ventilated area to avoid inhaling fumes.
  • Stir the finish thoroughly before applying it to ensure an even consistency.
  • Apply the finish with a brush, roller, or cloth, depending on the type of finish and the desired effect.
  • Apply multiple coats of finish, allowing each coat to dry completely before applying the next one.
  • Sand lightly between coats with a fine-grit sandpaper (around 220 grit) to ensure a smooth finish.
  • Once you’ve applied the final coat of finish, let it dry completely before handling the frame.

By following these tips, you can ensure that your wooden frame looks great and is protected from damage for years to come.

How to Make Wooden Handles: A Beginner's Guide

Wooden handles are a great addition to any furniture or tool project. Not only are they functional, but they can also add a touch of warmth and character to your design. Making your own wooden handles can be a fun and rewarding experience, and it’s not as difficult as you might think.

To start, you’ll need to choose the type of wood you want to use for your handles. Hardwoods like oak, maple, and cherry are popular choices because they are strong and durable. Softwoods like pine and cedar can also work well, but they may not hold up as well over time. Once you’ve chosen your wood, you’ll need to decide on the size and shape of your handle. This will depend on the specific application and your personal preference.

There are several methods for shaping and attaching wooden handles, including drilling and carving. One popular method is to use a Forstner bit to create a recessed area for your fingers to grip. You can also use a chisel or carving knife to shape the handle to your liking. Attaching the handle can be done with screws or dowels, depending on the project. With a little bit of practice and patience, you can create beautiful and functional wooden handles for all of your woodworking projects.

Understanding Wood Types

When it comes to making wooden handles, choosing the right type of wood is essential. Different types of wood have different properties that affect their durability, strength, and appearance. Here are some of the most common wood types used for making wooden handles:

Hardwood

Hardwoods are dense and durable, making them ideal for frequently used handles that need to withstand wear and tear. Here are some popular hardwoods used for handles:

  • Oak: Oak is a strong and durable hardwood that is resistant to moisture and rot. It has a prominent grain pattern and is available in different colors.
  • Maple: Maple is a hard and dense wood that is easy to work with. It has a uniform texture and is available in different grades.
  • Walnut: Walnut is a dark and richly colored hardwood that is strong and durable. It has a straight grain pattern and is easy to work with.

Softwood

Softwoods are less dense than hardwoods, making them more suitable for handles that are not subjected to heavy use. Here are some popular softwoods used for handles:

  • Pine: Pine is a softwood that is easy to work with and has a straight grain pattern. It is available in different grades and is often used for decorative handles.
  • Cedar: Cedar is a softwood that is resistant to decay and insects. It has a pleasant aroma and is often used for outdoor handles.
  • Spruce: Spruce is a softwood that is strong and lightweight. It has a straight grain pattern and is often used for tool handles.

Remember that the type of wood you choose will affect the appearance and durability of your handle. Consider the intended use of the handle when selecting the wood type, and always choose a high-quality piece of wood to ensure the best results.

Choosing the Right Tools

When it comes to making wooden handles, choosing the right tools is essential to ensure a successful outcome. Here are some of the tools you will need:

Saw

A saw is required to cut the wooden handle to the desired length. A handsaw or a jigsaw can be used for this purpose. Ensure that the blade of the saw is sharp so that you can make a clean cut. A dull blade can cause the wood to splinter, ruining the handle.

Chisel

A chisel is used to remove any excess wood and to shape the handle. A sharp chisel will make it easier to carve the wood and create a smooth finish. Make sure to choose a chisel that is appropriate for the size of the handle you are making.

Sandpaper

Sandpaper is used to smooth out any rough edges and to create a polished finish. Start with a coarse sandpaper and gradually work your way up to a finer grit. This will ensure that the handle is smooth and free of any rough spots.

Varnish

Varnish is used to protect the wooden handle from moisture and wear and tear. It also gives the handle a glossy finish. Choose a varnish that is appropriate for the type of wood you are using and follow the manufacturer’s instructions for application.

By choosing the right tools and using them correctly, you can create a wooden handle that is both functional and aesthetically pleasing.

Designing Your Handle

When it comes to designing your wooden handle, there are a few things to consider. You want to make sure that the handle is not only functional but also visually appealing. Here are some tips to help you design your handle:

Consider the Purpose

The first thing to consider when designing your handle is the purpose of the handle. Is it going to be used for a cabinet or drawer? Is it going to be used for a door or a piece of furniture? The purpose of the handle will determine the size and shape of the handle.

Choose the Wood

The type of wood you choose will also play a role in the design of your handle. Hardwoods like oak, maple, and cherry are great choices for handles because they are durable and can withstand wear and tear. Softwoods like pine and cedar are also an option, but they may not be as durable as hardwoods.

Determine the Size and Shape

The size and shape of the handle will depend on the purpose of the handle and the size of the item it will be attached to. For example, a drawer handle will be smaller than a door handle. When determining the shape of the handle, consider the overall design of the item it will be attached to. A simple, streamlined handle may work best for a modern piece of furniture, while a more ornate handle may be better suited for a traditional piece.

Add Personal Touches

Don’t be afraid to add personal touches to your handle design. You can add decorative elements like carvings or inlays to make the handle unique. You can also experiment with different finishes to give the handle a different look. Just make sure that any decorative elements you add do not compromise the functionality of the handle.

By considering the purpose, wood type, size and shape, and personal touches, you can design a wooden handle that is not only functional but also visually appealing.

Cutting the Wood

Cutting the wood is the first step in making wooden handles. You can use a table saw, bandsaw, or handsaw to cut the wood. Make sure that the wood is straight and free of knots to prevent any issues during cutting.

When using a table saw, set the blade height to the thickness of the wood you are using. Use a push stick to guide the wood through the blade and keep your fingers away from the blade. If you are using a bandsaw, adjust the blade guide to the thickness of the wood and use a fence to guide the wood through the blade.

It is important to use a sharp saw blade to make clean cuts. Dull blades can cause the wood to splinter or chip, resulting in a rough finish. If you notice that the blade is dull, replace it before continuing.

Once you have cut the wood to the desired length and width, use a block plane or sandpaper to smooth the edges and remove any rough spots. This will make the handle more comfortable to hold and prevent any splinters.

In summary, cutting the wood is the first step in making wooden handles. Use a table saw, bandsaw, or handsaw to cut the wood and make sure that it is straight and free of knots. Use a sharp saw blade and smooth the edges with a block plane or sandpaper to create a comfortable handle.

Shaping the Handle

Now that you have your wooden block ready, it’s time to shape the handle. This is where you can get creative and really make the handle your own. Here are a few tips to get you started:

1. Sketch out your design

Before you start cutting, it’s a good idea to sketch out your design on the block of wood. This will help you visualize the final product and make any necessary adjustments before you start shaping the handle.

2. Use a rasp or file

To shape the handle, you can use a rasp or file. These tools will allow you to remove material quickly and shape the handle to your desired shape. Start by removing material from the sides of the handle and work your way towards the top.

3. Sand the handle

Once you have your desired shape, it’s time to sand the handle. Start with a coarse grit sandpaper and work your way towards a finer grit. This will help smooth out any rough edges and give the handle a polished look.

4. Apply a finish

To protect the handle and bring out the natural beauty of the wood, you can apply a finish. There are many different finishes you can use, such as oil, wax, or varnish. Apply the finish according to the manufacturer’s instructions and let it dry completely before using the handle.

With these tips, you should be able to shape a wooden handle that is both functional and beautiful. Just remember to take your time and have fun with the process!

Finishing the Handle

Finishing the handle is an important step in making a wooden tool handle. It not only protects the handle from wear and tear but also enhances its appearance. There are several ways to finish a wooden handle, but sanding and applying varnish are the most common methods.

Sanding

Sanding is the process of smoothing the surface of the handle by rubbing it with an abrasive material. It removes any rough spots, scratches, or imperfections on the surface of the handle. Here are a few tips for sanding a wooden handle:

  • Use sandpaper with a grit between 120 and 220 for initial sanding.
  • Sand in the direction of the grain to avoid damaging the wood fibers.
  • Use a sanding block to keep the sandpaper flat and even.
  • Sand the handle until it feels smooth to the touch.
  • Wipe the handle with a clean cloth to remove any dust or debris.

Applying Varnish

Applying varnish to a wooden handle not only protects it from moisture but also gives it a glossy finish. Here are a few tips for applying varnish to a wooden handle:

  • Choose a high-quality varnish that is suitable for the type of wood you are using.
  • Apply the varnish in a well-ventilated area to avoid inhaling fumes.
  • Use a clean brush to apply a thin coat of varnish to the handle.
  • Allow the varnish to dry for at least 24 hours before applying another coat.
  • Sand the handle lightly between coats to remove any bumps or bubbles.
  • Apply two to three coats of varnish for a durable finish.

In conclusion, sanding and applying varnish are essential steps in finishing a wooden handle. By following these tips, you can ensure that your wooden tool handle looks great and lasts for years to come.

Safety Measures

Woodworking can be a fun and rewarding activity, but it’s important to remember that safety should always be your top priority. Here are some safety measures to keep in mind when making wooden handles:

Wear Appropriate Safety Gear

Before you start working on your project, make sure you’re wearing the appropriate safety gear. This includes safety glasses, ear protection, and a dust mask. You should also wear a long-sleeved shirt and pants to protect your skin from sawdust and wood shavings.

Keep Your Workspace Clean and Organized

A clean and organized workspace is essential for safety. Make sure you have enough space to move around and that there are no obstacles in your way. Keep your tools and materials organized so you can easily find what you need without having to search through clutter.

Use Sharp Tools

Using dull tools can be dangerous, as they can slip and cause injury. Make sure your tools are sharp and in good condition before you start working. If you’re not sure how to sharpen your tools, there are plenty of resources available online or at your local hardware store.

Follow Tool Safety Guidelines

Each tool has its own safety guidelines that you should follow. Make sure you read the instructions carefully before using any new tool. Never use a tool for something it’s not intended for, and always use it in the way it was designed to be used.

Keep a First Aid Kit on Hand

Accidents can happen, even if you’re following all the safety guidelines. That’s why it’s important to keep a first aid kit on hand at all times. Make sure your kit includes bandages, gauze, antiseptic, and other essentials. If you’re not sure what to include in your first aid kit, ask your local pharmacist or healthcare provider for advice.

By following these safety measures, you can enjoy the process of making wooden handles while keeping yourself and those around you safe.

How to Make a Wooden Shield and Sword: A Beginner's Guide

If you’re looking for a fun and easy DIY project to do with your kids, making wooden swords and shields is a great option. Not only will it provide hours of entertainment for your little ones, but it’s also a great way to teach them basic woodworking skills. In this article, we’ll show you how to make a wooden shield and sword, step-by-step.

To make a wooden shield, you’ll need some basic supplies like wood, a saw, sandpaper, and paint. You can choose to make your shield any size or shape you want, but a rectangular shape is a good option for beginners. Once you have your supplies, you’ll need to sketch out a design for your shield and cut it out using a saw. After sanding the edges and painting your shield, it will be ready for battle!

Making a wooden sword is a bit more complicated than making a shield, but it’s still a fun and rewarding project. You’ll need to choose the right type of wood, sketch out a design, and use a saw to cut out the shape of the sword. After sanding and painting your sword, it will be ready to take on any imaginary foe. With these simple steps, you’ll be able to create a set of wooden swords and shields that your kids will love.

Understanding Wood Types

Choosing the Right Wood

Choosing the right wood for your shield and sword is crucial. You want a wood that is strong, durable, and easy to work with. Some of the best types of wood for making shields and swords include:

  • Pine: Pine is a softwood that is easy to work with and has a light color. It is a good choice for beginners.

  • Oak: Oak is a hardwood that is strong and durable. It has a beautiful grain pattern and is a popular choice for shields and swords.

  • Maple: Maple is a hardwood that is strong and durable. It has a fine grain pattern and is a good choice for swords.

  • Ash: Ash is a hardwood that is strong and flexible. It has a beautiful grain pattern and is a good choice for shields.

Properties of Different Woods

Each type of wood has its own unique properties that make it suitable for different purposes. Here are some of the properties of different woods that you should consider when choosing the right wood for your shield and sword:

  • Hardness: The hardness of the wood will determine how well it can withstand impact.

  • Density: The density of the wood will determine how heavy the shield or sword will be.

  • Grain pattern: The grain pattern of the wood will determine how it looks and how it can be carved.

  • Flexibility: The flexibility of the wood will determine how well it can withstand bending and twisting.

  • Availability: The availability of the wood will determine how easy it is to find and how much it will cost.

When choosing the right wood for your shield and sword, consider all of these factors to ensure that you choose a wood that is strong, durable, and easy to work with.

Designing Your Shield and Sword

When it comes to making your wooden shield and sword, the first step is to design them. This is an important step, as it will determine the overall look and feel of your finished products. Here are a few things to keep in mind as you sketch out your design.

Sketching the Design

Before you start cutting any wood, it’s a good idea to sketch out your design on paper. This will give you a chance to play around with different shapes, sizes, and styles until you find something you like. Don’t worry if you’re not an artist – a simple sketch will do. Just make sure to include all the elements you want in your shield and sword, such as the shape, color, and any decorative details.

Size and Proportions

When designing your shield and sword, it’s important to consider their size and proportions. Your shield should be large enough to provide adequate protection, but not so large that it’s cumbersome to carry. A good rule of thumb is to make your shield about the same size as your torso.

As for your sword, it should be proportional to your body size. A sword that’s too long or too short will be difficult to wield effectively. A good length for a wooden sword is around 3 feet.

Overall, the key to designing your shield and sword is to keep it simple. Don’t try to do too much with your design, as this can lead to a cluttered and unappealing finished product. Stick to a few basic elements, such as a simple shape and a few decorative details, and you’ll end up with a shield and sword that look great and are easy to use.

Creating a Wooden Shield

If you’re looking to make a wooden shield, you’re in the right place. With a few tools and some patience, you can create a shield that is both functional and visually appealing. Here are the steps to creating your own wooden shield.

Cutting the Shield Shape

The first step is to cut the shield shape from a piece of wood. You can use a jigsaw or a bandsaw to cut out your shield shape. If you don’t have access to these tools, you can also use a handsaw or a circular saw. Be sure to wear protective gear like gloves and goggles when cutting the wood.

When choosing the size and shape of your shield, consider the purpose of the shield. If you’re making a shield for a child, you may want to make it smaller and lighter. If you’re making a shield for cosplay or LARPing, you may want to make it larger and more detailed.

Sanding and Smoothing

Once you have cut out your shield shape, it’s time to sand and smooth the edges. Use a sanding block or sandpaper to smooth out any rough spots or jagged edges. You can also use a router to add decorative edges to your shield.

After sanding, you can apply a coat of wood stain or paint to give your shield a finished look. Be sure to let the stain or paint dry completely before moving on to the next step.

Adding a Handle

The final step is to add a handle to your shield. You can use a piece of leather or rope to create a handle. Cut the leather or rope to the desired length and attach it to the back of the shield with screws or nails.

Make sure the handle is securely attached and can support the weight of the shield. You may want to test the handle by holding the shield and shaking it to make sure it doesn’t come loose.

With these steps, you can create a wooden shield that is both functional and visually appealing. Whether you’re using it for cosplay, LARPing, or just for fun, your wooden shield will be a unique and impressive addition to your collection.

Creating a Wooden Sword

When it comes to creating a wooden sword, there are a few key steps to keep in mind. This section will cover the process of cutting the sword shape, carving the blade, and creating the hilt.

Cutting the Sword Shape

The first step in creating a wooden sword is to cut the shape of the sword. You can use a saw to cut the shape of the sword from a piece of wood. It’s important to make sure that the wood is thick enough to create a sturdy sword.

Carving the Blade

Once you have cut the shape of the sword, the next step is to carve the blade. You can use a carving knife to carefully carve the blade into shape. It’s important to take your time with this step, as the blade is the most important part of the sword.

Creating the Hilt

The final step in creating a wooden sword is to create the hilt. You can use a drill to create a hole in the handle of the sword, and then insert a piece of wood to create the hilt. You can also use a carving knife to shape the hilt to your liking.

Overall, creating a wooden sword is a fun and rewarding project that can be enjoyed by people of all ages. With a little bit of patience and some basic woodworking skills, you can create a beautiful and functional wooden sword that will be treasured for years to come.

Safety Precautions

When working with tools and wood, it is important to take safety precautions to avoid injuries. Here are some safety tips to keep in mind when making a wooden shield and sword.

Using Tools Safely

When using tools, make sure to wear appropriate safety gear such as safety goggles, gloves, and ear protection. Keep your work area clean and organized to avoid tripping hazards. Always use tools for their intended purpose and follow the manufacturer’s instructions carefully.

When cutting wood, make sure to use a sharp blade and keep your fingers away from the blade. Always cut away from your body and use a sawhorse or clamp to secure the wood. When drilling, use a drill bit that is appropriate for the size of the hole you need and hold the drill with both hands.

Treating the Wood

Before working with wood, inspect it for any defects or knots that could cause the wood to split or break. Sand any rough edges or splinters to avoid getting injured. When applying finishes or stains, make sure to work in a well-ventilated area and wear a mask to avoid inhaling fumes.

When gluing wood together, use a high-quality wood glue and clamp the pieces together tightly. Allow the glue to dry completely before removing the clamps. When assembling the shield or sword, make sure to follow the instructions carefully and use the appropriate hardware and fasteners.

By following these safety precautions, you can avoid injuries and enjoy making your own wooden shield and sword.

Finishing Touches

Painting and Decorating

Once you have completed the construction of your wooden sword and shield, it’s time to add some personality to them. Painting and decorating your wooden sword and shield can make them look more realistic and unique. Here are some tips to guide you:

  • Choose the right paint: Use acrylic paint, which is readily available and easy to work with. It dries quickly and adheres well to wood. You can use spray paint, but it’s not recommended as it can be difficult to control and may cause drips.

  • Select a color scheme: Choose a color scheme that matches your personal style or the theme of your sword and shield. You can use a single color or multiple colors to create a unique design.

  • Add some details: You can use stencils or freehand painting to add details to your sword and shield. Consider adding symbols, patterns, or designs that reflect your personality or the purpose of your sword and shield.

Sealing the Wood

Sealing the wood is an essential step to protect your wooden sword and shield from moisture and damage. Here are some tips to help you seal your wooden sword and shield:

  • Choose the right sealer: Use a sealer that is specifically designed for wood. Polyurethane is a popular choice as it creates a hard, durable finish that resists scratches and dings.

  • Apply the sealer evenly: Use a brush or a clean cloth to apply the sealer evenly to the entire surface of your sword and shield. Be sure to apply a thin coat and allow it to dry completely before applying a second coat.

  • Sand between coats: Sand the surface lightly with fine-grit sandpaper between coats to remove any imperfections or bubbles. This will help to create a smooth, even finish.

By following these tips, you can add some personality to your wooden sword and shield and protect them from damage. Now you are ready to embark on your next adventure!

the-basics-of-applying-wood-stain

Can You Apply Multiple Coats of Stains to Wood? Exploring the Best Practices

Are you wondering if you can apply more than one coat of stain to your wood project? The answer is yes, you can apply multiple coats of stain to wood, but it is important to do it correctly to achieve the desired results. Applying too many coats can result in an uneven finish, while not applying enough can leave the wood looking dull or unfinished.

When it comes to applying multiple coats of stain, it is important to properly prepare the wood surface before each application. This includes sanding the wood to ensure an even surface and removing any dust or debris. It is also important to apply each coat of stain evenly and allow sufficient drying time between coats.

Keep in mind that the number of coats needed will depend on several factors, including the type of wood, the color of the stain, and the desired finish. Lighter colored stains may only require one or two coats, while darker stains or glossy finishes may require three or more coats. By following the proper techniques and taking these factors into consideration, you can achieve a beautiful, even finish on your wood project.

Understanding Wood Stains

If you’re planning to stain your wood project, you may be wondering if you can apply more than one coat of stain. The answer is yes, you can apply multiple coats of stain to achieve the desired look. However, there are some things you should keep in mind before applying multiple coats of stain.

First, it’s important to understand that wood stains are designed to penetrate the wood fibers and enhance the natural beauty of the wood. Applying too many coats of stain can result in a buildup of the product on the surface of the wood, which can affect the final look and durability of the finish.

Second, the number of coats you apply will depend on the type of stain you’re using and the desired look you want to achieve. Some stains, such as solid color stains, may require two or more coats to achieve full coverage and hide imperfections in the wood. Other stains, such as semi-transparent or transparent stains, may only require one or two coats to achieve the desired color and protection.

When applying multiple coats of stain, it’s important to follow the manufacturer’s instructions and allow each coat to fully dry before applying the next. This will ensure that the stain fully penetrates the wood and doesn’t create a sticky or tacky surface.

In addition, you may want to consider using a wood conditioner between coats of stain. Wood conditioners can help to even out the absorption of the stain and prevent blotching or uneven coloring. However, it’s important to note that wood conditioners should only be applied before the first coat of stain.

Overall, applying multiple coats of stain can be a great way to achieve a rich, deep color and enhance the natural beauty of your wood project. Just be sure to follow the manufacturer’s instructions and take the necessary steps to ensure a smooth and even finish.

The Basics of Applying Wood Stain

the-basics-of-applying-wood-stain

When it comes to staining wood, there are a few basics you should keep in mind to ensure the best results. Here are some tips to help you get started:

1. Sand the Wood

Before applying any stain, make sure to sand the wood thoroughly. This will help to remove any rough spots or imperfections, and will also help the wood to absorb the stain more evenly. You can use a sanding block or a random orbital sander to do the lion’s share of the work. Begin by sanding the project well a few times using progressively finer grits of sandpaper as you go.

2. Apply the Stain

Once the wood is sanded, you can apply the stain. You can use a brush or a rag to apply the stain, depending on your preference. Apply the stain in the direction of the wood grain, and make sure to apply it evenly. If you’re using a brush, use a natural-bristle brush for oil stains and a synthetic-bristle brush for latex stains.

3. Wipe Off the Excess

After applying the stain, you’ll want to wipe off any excess with a clean cloth. This will help to prevent the stain from becoming too dark or blotchy. Make sure to wipe off the excess stain in the direction of the wood grain.

4. Allow the Stain to Dry

Once you’ve wiped off the excess stain, allow the wood to dry completely. This usually takes around 24 hours, but can vary depending on the type of stain and the humidity level in your area. Don’t rush the drying process, as this can cause the stain to become uneven or blotchy.

5. Apply a Second Coat (Optional)

If you want a darker or richer color, you can apply a second coat of stain. However, it’s important to note that adding a second coat of stain will usually darken the overall color. This is because adding more stain to the surface can penetrate deeper into the wood’s pores and deposit more pigment. Make sure to test your color on a scrap piece of wood before applying a second coat to your project.

Multiple Coats of Wood Stain: Pros and Cons

When staining wood, you may wonder if you can apply more than one coat of stain to achieve the desired color and finish. The answer is yes, but there are pros and cons to consider before doing so.

Pros of Applying Multiple Coats of Wood Stain

  • Achieve a darker color: Applying multiple coats of stain can help you achieve a darker and richer color than a single coat.
  • Enhance the wood grain: Each coat of stain can bring out the natural grain of the wood, adding depth and character to your project.
  • Add more protection: Multiple coats of stain can provide more protection from the elements, especially if you use a varnish or drying oil as your topcoat.

Cons of Applying Multiple Coats of Wood Stain

  • Risk of blotchiness: Applying too many coats of stain can cause blotchiness, especially on softwoods like pine and spruce. It’s important to test your stain on a scrap piece of wood before applying it to your project.
  • Longer drying time: Each consecutive coat of stain will take longer to dry, which can prolong the staining process.
  • No added durability: Multiple coats of stain do not build up a protective surface coating, so if you’re after durability, you’ll need to use a film-forming material like a varnish or drying oil.

In summary, applying multiple coats of wood stain can help you achieve a darker color and enhance the natural grain of the wood, but it can also lead to blotchiness and longer drying times. Keep in mind that multiple coats of stain do not add durability, so consider using a topcoat for added protection.

Preparation for Applying Multiple Coats

preparation-for-applying-multiple-coats

When applying stains to wood, you may need to use multiple coats to achieve the desired color and finish. However, before you start applying multiple coats, there are certain preparations you need to make to ensure the best results.

Choosing the Right Stain

Choosing the right stain is crucial when planning to apply multiple coats. While some stains are designed to be applied in a single coat, others may require multiple coats to achieve the desired color and finish. Therefore, it’s important to read the manufacturer’s instructions carefully to determine the recommended number of coats for the stain you’ve chosen.

Wood Condition Considerations

Before applying multiple coats of stain, it’s important to consider the condition of the wood you’re working with. If the wood is rough or porous, you may need to use multiple coats to get even coverage. On the other hand, if the wood has an existing finish, you may need to use multiple coats to fully obscure the old color.

To prepare the wood for staining, you may need to sand it lightly to remove any rough spots or imperfections. You should also clean the wood thoroughly to remove any dirt or debris that may interfere with the staining process.

Safety Measures

When applying multiple coats of stain, it’s important to take appropriate safety measures. This includes wearing protective gloves and eyewear to prevent direct contact with the stain. You should also work in a well-ventilated area to avoid inhaling fumes from the stain.

In addition to these safety measures, you should also follow the manufacturer’s instructions carefully when applying multiple coats of stain. This may include waiting a certain amount of time between coats to allow the stain to dry properly.

By taking these preparation steps, you can ensure that your multiple coats of stain are applied evenly and provide the desired color and finish for your wood project.

Step-by-Step Guide to Applying Multiple Coats

step-by-step-guide-to-applying-multiple-coats

If you want to achieve a darker or richer color for your wood project, applying multiple coats of stain is a great option. However, it’s important to apply each coat correctly to avoid issues like blotching or uneven coloring. Follow these steps to apply multiple coats of stain to your wood:

First Coat Application

Before applying the first coat, make sure your wood is clean and dry. If necessary, sand the surface to remove any roughness or imperfections. Then, apply the first coat of stain using a brush, cloth, or sprayer. Make sure to apply the stain evenly, following the wood grain. Let the stain dry completely before moving on to the next step.

Interim Sanding

After the first coat has dried, lightly sand the surface with fine-grit sandpaper. This will help smooth out any raised grain or rough spots and prepare the surface for the next coat. Make sure to remove any sanding dust before applying the second coat.

Second Coat Application

Apply the second coat of stain in the same manner as the first, making sure to follow the wood grain and apply the stain evenly. Let the second coat dry completely before deciding if you need to apply additional coats.

Additional Coats

Depending on the desired color and the type of wood you’re working with, you may need to apply additional coats of stain. If so, repeat the process of interim sanding and applying the stain until you achieve the desired color. However, be careful not to over-apply the stain, as this can result in a blotchy or uneven finish.

By following these steps, you can achieve a rich, even color for your wood project. Just remember to take your time and apply each coat carefully and evenly.

Maintenance Tips for Stained Wood

After staining your wood, it is important to maintain it properly to ensure it lasts for a long time. Here are some tips to help you maintain your stained wood:

  • Clean Regularly: Dirt and dust can accumulate on your stained wood, making it look dull. To prevent this, clean your wood regularly with a soft cloth or a vacuum cleaner. Avoid using harsh chemicals that can damage the wood or the stain.
  • Avoid Water Damage: Stained wood can be damaged by water, so it is important to keep it dry. Wipe up any spills immediately and avoid placing wet items on the wood surface. If you need to clean the wood with water, use a damp cloth and dry it thoroughly afterward.
  • Protect from Sunlight: Sunlight can cause the stain to fade and the wood to dry out, so it is important to protect your stained wood from direct sunlight. Use curtains or blinds to block out the sun, or move the wood to a shaded area.
  • Reapply Stain: Over time, the stain on your wood may start to fade or wear off. To keep your wood looking its best, you can reapply the stain. Follow the manufacturer’s instructions for applying the stain and make sure to clean the wood thoroughly before applying the new coat.
  • Use Protective Coating: A protective coating can help to protect your stained wood from scratches, dings, and other damage. You can use a clear coat or a tinted coat to enhance the color of the stain. Follow the manufacturer’s instructions for applying the protective coating and allow it to dry completely before using the wood.

By following these maintenance tips, you can keep your stained wood looking beautiful for years to come.

Common Mistakes to Avoid

When it comes to staining wood, there are some common mistakes that many people make. Here are a few things to keep in mind to avoid these mistakes:

Applying Too Many Coats

One of the biggest mistakes people make when staining wood is applying too many coats. While it may seem like adding more coats will make the color richer and deeper, it can actually have the opposite effect. Too many coats can lead to a buildup of stain that can obscure the wood grain and create a splotchy, uneven finish.

Not Sanding Between Coats

Another mistake people make is not sanding between coats. Sanding between coats helps to smooth out any rough spots or raised grain, which can make the final finish look much better. If you skip this step, you may end up with a rough, uneven finish that is difficult to fix.

Using the Wrong Brush

Using the wrong brush can also be a mistake. For example, if you use a natural bristle brush with a water-based stain, the bristles can swell and become misshapen, making it difficult to apply the stain evenly. Make sure you use the right brush for the type of stain you are using.

Not Testing the Stain

Finally, not testing the stain can be a big mistake. Before you apply the stain to your entire project, it’s a good idea to test it on a small, inconspicuous area first. This will help you see how the stain will look on your particular type of wood and whether you like the color. If you don’t test the stain first, you may end up with a finish that you don’t like and have to redo the entire project.

Frequently Asked Questions

How many coats of stain should be applied to wood?

The number of coats of stain that should be applied to wood depends on the type of stain and the desired outcome. In general, one to two coats of stain are sufficient for most projects. However, some stains may require more coats to achieve the desired color or level of protection.

Is one coat of stain enough for wood?

One coat of stain may be enough for some projects, but it depends on the type of stain and the desired outcome. If you want a deeper color or more protection, you may need to apply more than one coat of stain.

Can you apply multiple coats of oil-based stain?

Yes, you can apply multiple coats of oil-based stain. However, you should wait for the first coat to dry completely before applying the second coat. This will ensure that the second coat adheres properly and doesn’t create a blotchy appearance.

How soon can a second coat of stain be applied to wood?

The drying time for stain varies depending on the type of stain and environmental conditions. In general, you should wait at least 24 hours before applying a second coat of stain. However, some stains may dry faster and allow for a second coat to be applied sooner.

Will applying two coats of stain make the color darker?

Applying two coats of stain may make the color darker, but it depends on the type of stain and the desired outcome. Some stains may not darken significantly with a second coat, while others may become much darker.

Can different types of stains be layered on wood?

Different types of stains can be layered on wood, but it may not always produce the desired outcome. For example, layering a water-based stain over an oil-based stain may not work well, as the water-based stain may not adhere properly. It’s best to stick with the same type of stain or consult with a professional if you want to layer different types of stains.

What Can You Use to Sand Wood Without Sandpaper? Top Alternatives

Are you tired of using sandpaper to sand wood? Perhaps you’re looking for a more affordable or eco-friendly alternative. Luckily, there are plenty of options available that can help you achieve a smooth finish without sandpaper. In this article, we’ll explore some of the best substitutes for sandpaper and how to use them effectively.

One alternative to sandpaper is pumice, a type of volcanic rock. Pumice can be used to smooth wood by rubbing it along the grain. Another option is to use sand and a piece of leather or cloth, which can be effective for small areas. Ground walnut shells, wood shavings, and corn cobs can also be used to smooth wood surfaces. Additionally, you can use hand files or a wood file for more precise sanding. In this article, we’ll cover these alternatives in more detail, so you can find the best option for your woodworking needs.

Understanding Wood Grain

When it comes to sanding wood, understanding the direction of the wood grain is crucial. Sanding against the grain can cause splintering and damage to the wood, while sanding with the grain will result in a smooth, polished finish. Here’s what you need to know about wood grain direction.

Determining Wood Grain Direction

Before you start sanding, it’s important to determine the direction of the wood grain. There are a few ways to do this:

  • Look at the end grain: The end grain of the wood will show you the direction of the growth rings, which is the direction of the grain.
  • Look at the surface: The surface of the wood will show you the direction of the grain. Look for the lines and patterns in the wood.
  • Wet the wood: Wetting the wood will cause the grain to become more visible, making it easier to determine the direction of the grain.

Once you’ve determined the direction of the grain, make sure to sand with the grain, using long, smooth strokes. If you’re not sure which direction to sand, start with a fine-grit sandpaper and test a small area in different directions until you find the direction that results in the smoothest finish.

Remember, sanding against the grain can cause damage to the wood, so take your time and make sure you’re sanding in the right direction.

Using Scrapers

using-scrapers

When it comes to sanding wood without sandpaper, scrapers can be a great alternative. Scrapers are handheld tools that can be used to shave off thin layers of wood to create a smooth surface. They are especially useful for removing rough spots and burrs. Here are two types of scrapers that can be used for sanding wood:

Cabinet Scrapers

Cabinet scrapers are rectangular pieces of steel that are sharpened to a fine edge. They are commonly used in woodworking to smooth out rough surfaces and remove small amounts of material. To use a cabinet scraper, you need to hold it at a slight angle and push it across the surface of the wood. With each pass, the scraper will shave off a thin layer of wood, leaving behind a smooth surface.

Card Scrapers

Card scrapers are small, handheld scrapers that are similar in shape to credit cards. They are made from thin pieces of steel that are sharpened along the edges. Card scrapers are great for smoothing out small areas of wood, such as corners or edges. To use a card scraper, you need to hold it at a slight angle and pull it across the surface of the wood. With each pass, the scraper will shave off a thin layer of wood, leaving behind a smooth surface.

When using scrapers to sand wood, it’s important to keep the blade sharp. Dull blades can cause tearing and splintering, which will leave behind an uneven surface. To sharpen a scraper, you can use a sharpening stone or a honing guide. It’s also important to use the right amount of pressure when scraping. Too much pressure can cause the blade to dig into the wood, while too little pressure will result in a less effective scrape.

Overall, scrapers can be a great alternative to sandpaper when it comes to sanding wood. They are easy to use, versatile, and can create a smooth surface in no time. Whether you choose a cabinet scraper or a card scraper, make sure to keep the blade sharp and use the right amount of pressure for the best results.

Embracing Abrasive Tools

embracing-abrasive-tools

When it comes to sanding wood without sandpaper, there are several abrasive tools that you can use. These tools are effective in smoothing out rough surfaces and removing imperfections. Here are some of the most popular abrasive tools you can use:

Steel Wool

Steel wool is a popular abrasive tool that is commonly used in woodworking. It is made of fine steel fibers that are bundled together to form a pad. Steel wool comes in different grades, ranging from coarse to fine. The coarser grades are ideal for removing paint and rust, while the finer grades are perfect for smoothing out wood surfaces.

To use steel wool, simply rub it gently against the wood surface in a circular motion. Be sure to follow the grain of the wood to avoid leaving scratch marks. Steel wool is also great for removing stains and finishes from wood surfaces.

Pumice Stone

Pumice stone is another effective abrasive tool that you can use to sand wood without sandpaper. It is a volcanic rock that is porous and lightweight. Pumice stone is available in different grades, ranging from coarse to fine.

To use pumice stone, wet it with water and rub it gently against the wood surface in a circular motion. Be sure to rinse the wood surface with water after sanding to remove any debris. Pumice stone is great for smoothing out rough wood surfaces and removing imperfections.

Emery Cloth

Emery cloth is a type of sandpaper that has abrasive particles embedded in a cloth backing. It is commonly used for metalworking but can also be useful for wood sanding. Emery cloth is durable and can withstand high pressure and friction.

To use emery cloth, wrap it around a sanding block and rub it gently against the wood surface in a circular motion. Be sure to follow the grain of the wood to avoid leaving scratch marks. Emery cloth is great for smoothing out wood surfaces and removing imperfections.

In conclusion, there are several abrasive tools that you can use to sand wood without sandpaper. Steel wool, pumice stone, and emery cloth are just a few examples of effective abrasive tools. Be sure to choose the right tool for the job and follow the proper sanding techniques to achieve the best results.

Exploring Power Tools

exploring-power-tools

If you want to sand wood without sandpaper, you can also consider using power tools. Power tools can be a great option if you have a large surface area to sand or if you want to save time. Here are some power tools you can use:

Orbital Sander

An orbital sander is a handheld power tool that vibrates in small circles. It’s a great option for sanding large, flat surfaces, such as tabletops or floors. Orbital sanders come in different sizes, and you can choose between a corded or cordless version. Here are some pros and cons of using an orbital sander:

Pros

  • Faster than sanding by hand
  • Can sand large surfaces quickly and efficiently
  • Comes in different sizes and with different sandpaper grits

Cons

  • Can be expensive
  • Can be difficult to control for beginners
  • Can leave circular marks on the wood if not used properly

Belt Sander

A belt sander is another handheld power tool that uses a sanding belt to sand wood. It’s a great option for sanding large, rough surfaces, such as decks or fences. Belt sanders come in different sizes, and you can choose between a corded or cordless version. Here are some pros and cons of using a belt sander:

Pros

  • Can remove a lot of material quickly
  • Good for rough sanding
  • Comes in different sizes and with different sandpaper grits

Cons

  • Can be expensive
  • Can be difficult to control for beginners
  • Can leave deep scratches on the wood if not used properly

Overall, power tools can be a great option for sanding wood without sandpaper. Just make sure to use them properly and safely.

Opting for Chemical Strippers

opting-for-chemical-strippers

If you want to sand wood without sandpaper, you can also opt for chemical strippers. These products are designed to loosen the wood stain, making it easier to remove. Here are some things to keep in mind when using chemical strippers:

Using Paint Strippers

When selecting a chemical stripper, you can choose between solvent and caustic types. Solvent strippers are typically less harsh and are a good option for removing paint and varnish. Caustic strippers, on the other hand, are more potent and are better for removing polyurethane and other tough finishes.

To use a paint stripper, follow these steps:

  1. Apply the stripper to the wood surface using a brush or roller.
  2. Let the stripper sit for the recommended amount of time (usually 15-30 minutes).
  3. Use a scraper to remove the finish from the wood.
  4. Repeat the process until all the finish has been removed.
  5. Clean the wood with a damp cloth and let it dry completely before sanding or applying a new finish.

Safety Precautions

When using chemical strippers, it’s important to take the proper safety precautions to protect yourself and your workspace. Here are some tips to keep in mind:

  • Always wear gloves and eye protection when handling chemical strippers.
  • Work in a well-ventilated area to avoid inhaling fumes.
  • Avoid using chemical strippers on windy days or in areas with poor ventilation.
  • Dispose of chemical strippers and used rags properly, following local regulations.
  • Keep chemical strippers out of reach of children and pets.

By following these tips, you can safely and effectively use chemical strippers to sand wood without sandpaper.

Frequently Asked Questions

What are some alternatives to sandpaper for sanding wood?

There are several alternatives to sandpaper for sanding wood. Some of the popular ones include using pumice stone, steel wool, sanding sponges, sanding discs, and even old denim jeans. These alternatives are cost-effective and can be used to achieve a smooth finish on wood without the need for sandpaper.

How can I make wood smooth and shiny without sandpaper?

One of the easiest ways to make wood smooth and shiny without sandpaper is by using a polishing compound. You can apply a small amount of the compound onto a soft cloth and rub it onto the wood surface in circular motions. This will help to remove any scratches or imperfections on the surface and leave it smooth and shiny.

Is it possible to sand wood without using a sander or sandpaper?

Yes, it is possible to sand wood without using a sander or sandpaper. You can use a scraper or a plane to remove the top layer of wood and achieve a smooth finish. Another option is to use a piece of leather with some sand sprinkled on it to rub the wood surface.

What are some primitive sanding tools that can be used on wood?

Primitive sanding tools that can be used on wood include stones, shells, and even animal bones. These tools were commonly used in ancient times and can still be used today to achieve a smooth finish on wood surfaces.

Where can I buy sandpaper alternatives for sanding plastic?

Sandpaper alternatives for sanding plastic can be found at most hardware stores or online retailers. Some popular options include sanding sponges, sanding discs, and steel wool.

What is the fastest way to sand rough wood without using sandpaper or a sander?

The fastest way to sand rough wood without using sandpaper or a sander is by using a scraper or a plane. These tools can quickly remove the top layer of wood and leave a smooth finish. Alternatively, you can use a piece of leather with some sand sprinkled on it to rub the wood surface.