Tag Archives: wear eye protection

how-to-make-wooden-pallets

How to Make Wooden Pallets: A Beginner's Guide

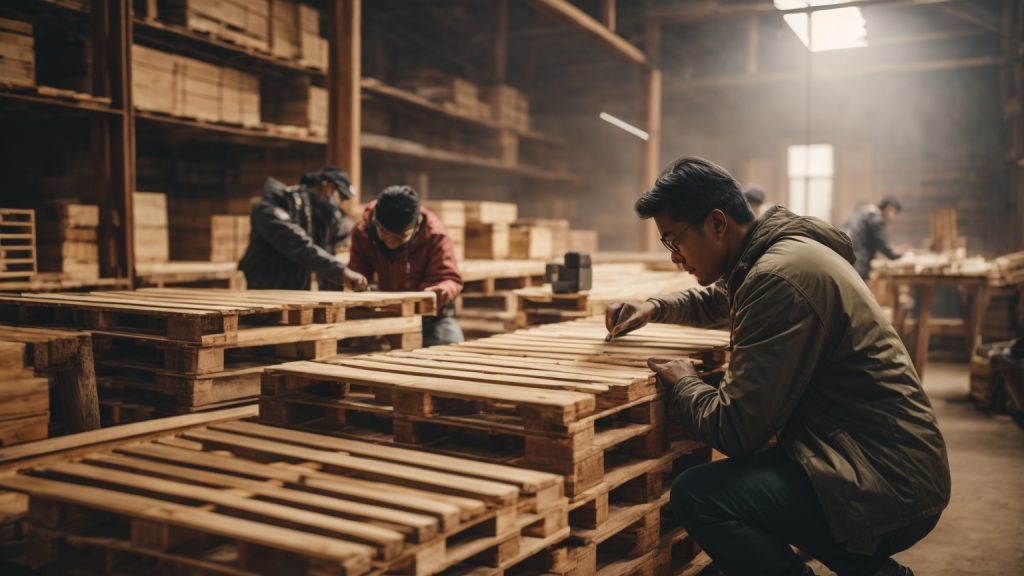
If you’re looking to build your own furniture or create a unique DIY project, wooden pallets can be a great material to work with. Not only are they affordable and easy to find, but they can also be customized to fit your specific needs and style. In this article, we’ll walk you through the process of making your own wooden pallets, so you can start creating your own one-of-a-kind pieces.

Before we get started, it’s important to note that there are two types of pallets: chemically treated and heat treated. Chemically treated pallets are often used for shipping and can contain harmful chemicals, so it’s best to avoid using them for DIY projects. Heat treated pallets, on the other hand, are treated with heat to kill any pests and are safe to use for furniture and other projects. It’s important to look for the “HT” stamp on the pallet to ensure it’s safe to use. Once you have your heat treated pallets, you’re ready to start building!

Understanding the Basics of Pallet Making

how-to-make-wooden-pallets

If you are interested in making wooden pallets, it is important to understand the basics of pallet making. Pallets are typically made from a combination of softwood and hardwood, with oak and pine being popular choices. Here are some key factors to consider when making wooden pallets:

Wood Selection

When selecting wood for your pallets, you should consider factors such as strength, availability, and cost. Most pallets are made from softwood and hardwood, with the choice of wood depending on the intended use of the pallet. Oak is a strong and widely available hardwood, while pine is a popular and relatively affordable softwood.

Size and Trim

The size of your pallet will depend on its intended use. Pallets are typically either 48×40 inches or 42×42 inches, but custom sizes can be made as well. Once you have determined the size of your pallet, you will need to trim the wood to the appropriate length.

Deck Boards and Stringers

The deck boards and stringers are the main components of a pallet. Deck boards are the top and bottom boards that support the load, while stringers are the boards that run perpendicular to the deck boards and provide support. The size and spacing of the deck boards and stringers will depend on the intended use of the pallet.

Notches and Fasteners

Notches can be cut into the stringers to allow forklifts or pallet jacks to easily lift and move the pallet. Fasteners such as nails or screws are used to hold the pallet together. It is important to use the appropriate fasteners and to ensure that they are properly secured to prevent the pallet from breaking apart during use.

By understanding the basics of pallet making, you can create strong and durable pallets that are suitable for a variety of applications.

Materials Required

If you’re planning to make wooden pallets, you will need a few essential materials. In this section, we will discuss the types of wood and other materials required to make wooden pallets.

Types of Wood

The type of wood you choose for your pallets will depend on your budget, the purpose of the pallets, and the availability of the wood. Here are a few common types of wood used in making pallets:

  • Softwood: Softwood is the most common type of wood used in making pallets. It is affordable and readily available. Pine is a popular softwood used in making pallets.
  • Hardwood: Hardwood is more durable than softwood but is also more expensive. Oak is a popular hardwood used in making pallets.
  • Mixed Wood: Most pallets are made of a mixture of softwood and hardwood. This is because pallet manufacturers cannot always specify the type of wood used in making the pallets.

Other Essential Materials

Apart from the wood, you will also need a few other essential materials to make wooden pallets. Here are a few of them:

  • Nails: You will need nails to hold the pallet together. Make sure to use nails that are long enough to go through the wood and hold it securely.
  • Saw: You will need a saw to cut the wood to the desired size and shape.
  • Hammer: You will need a hammer to drive the nails into the wood.
  • Measuring Tape: You will need a measuring tape to measure the wood accurately.
  • Pencil: You will need a pencil to mark the wood before cutting it.
  • Safety Equipment: You will need safety equipment such as gloves and safety glasses to protect yourself while working with the wood.

By having all the necessary materials on hand, you can make your own wooden pallets and save money in the process.

Choosing the Right Wood

When it comes to making wooden pallets, choosing the right type of wood is crucial. The right wood will ensure that your pallets are durable, sturdy, and able to withstand the weight of the products they are carrying. Here are some factors to consider when choosing the right wood for your pallets:

Hardwood vs. Softwood

Most pallet manufacturers prefer to use hardwood for making pallets. This is because hardwood is denser and more durable than softwood, which makes it better suited for heavy-duty applications. However, softwood can also be used for making pallets, especially if the pallets are intended for lighter loads.

Location and Availability

The type of wood you choose for your pallets will also depend on your location and the availability of different types of wood in your area. For example, if you live in an area with a lot of pine trees, it may be more cost-effective to use pine wood for your pallets instead of importing hardwood from another region.

Intended Use

The intended use of your pallets is another important factor to consider when choosing the right wood. If your pallets will be used for outdoor storage or transportation, you may want to choose a type of wood that is more resistant to moisture and rot, such as cedar or redwood. On the other hand, if your pallets will be used for indoor storage or transportation, you may not need to worry as much about moisture resistance.

Other Considerations

In addition to the factors mentioned above, there are a few other things to consider when choosing the right wood for your pallets:

  • Size: Make sure the wood you choose is the right size for your pallets.
  • Strength: Choose wood that is strong enough to support the weight of your products.
  • Sustainability: Consider using wood that is sustainably sourced to reduce your environmental impact.

By considering these factors when choosing the right wood for your pallets, you can ensure that your pallets are strong, durable, and able to meet your specific needs.

Pallet Designing

When it comes to designing pallets, there are two main options: standard sizes and custom designs.

Standard Pallet Sizes

Standard pallet sizes are widely used in the industry and can be easily sourced from manufacturers. The most common sizes are:

Size Dimensions (inches)
48×40 48 x 40 x 6
42×42 42 x 42 x 6
48×48 48 x 48 x 6

These sizes are popular because they are compatible with most pallet jacks and forklifts. They are also easy to stack and transport.

Custom Pallet Designs

Custom pallet designs are an option for those who need a specific size or shape that is not available in standard sizes. When designing a custom pallet, there are several factors to consider:

  • Load capacity: Determine the weight and size of the items that will be placed on the pallet to ensure it can handle the load.
  • Material: Choose the appropriate type of wood or other material based on the intended use of the pallet.
  • Durability: Consider the expected lifespan of the pallet and choose materials and design elements that will ensure longevity.
  • Compatibility: Ensure the pallet is compatible with the machinery that will be used to move and transport it.

Custom pallets can be designed in a variety of shapes and sizes, including circular, triangular, and hexagonal. They can also be designed with additional features such as notches, grooves, and handles for easier handling.

Overall, whether you choose a standard size or a custom design, it’s important to consider the specific needs of your business and the intended use of the pallet. With the right design, pallets can be a valuable asset for your operations.

Cutting the Wood

Now that you have chosen your wood, it’s time to cut it into the proper-sized deck boards and stringers for your pallet. Here are the steps to follow:

  1. Trim the cants: Pallet cants from local sawmills are trimmed to the proper length before being ripped into boards. The length of the cants will depend on the size of the pallet you want to make.
  2. Rip into boards: Once the cants are trimmed, they are then ripped into boards of the proper width. The width will depend on the type of pallet you want to make.
  3. Sawn into deck boards and stringers: After the boards are ripped, they are sawn into deck boards and stringers that will fit the type of pallet being used.
  4. Cut notches into stringers: The next step is to cut notches into stringers. This allows for 4-way entry using forklifts, or 2-way entry using pallet jacks.

When cutting the wood, it’s important to take safety precautions. Always wear protective gear, such as safety glasses and gloves, and ensure that the saw blade is sharp and in good condition. It’s also important to make sure the wood is securely held in place while cutting to avoid accidents.

By following these steps, you can cut the wood for your pallet with ease and precision.

Assembling the Pallet

assembling-the-pallet

Now that you have all the necessary materials, it’s time to assemble your wooden pallet. Here are the steps you need to follow:

  1. Lay out the bottom deck of the forklift by placing two 5-1/2 by 40 by 5/8 inch crosspiece boards on the ground. Mount one flush with each end of the two outside stringers. Nail the third stringer parallel to the others in the middle. Use nine nails per 5-1/2 inch crosspiece, three at each joining.
  2. Once the bottom deck is complete, lay the top deck on top of it and secure it with nails or screws. Make sure to align the boards of the top deck with those of the bottom deck.
  3. Next, attach the blocks to each corner of the pallet. These blocks will help distribute the weight of the load and prevent the pallet from collapsing.
  4. Finally, attach the optional stringers to the bottom of the pallet. These stringers will provide additional support and stability to the pallet.

Remember to use the appropriate safety gear, such as gloves and safety glasses, when assembling your pallet. Also, make sure to inspect your pallet for any defects or damage before using it. With these simple steps, you can create a sturdy and reliable wooden pallet that will serve your needs for years to come.

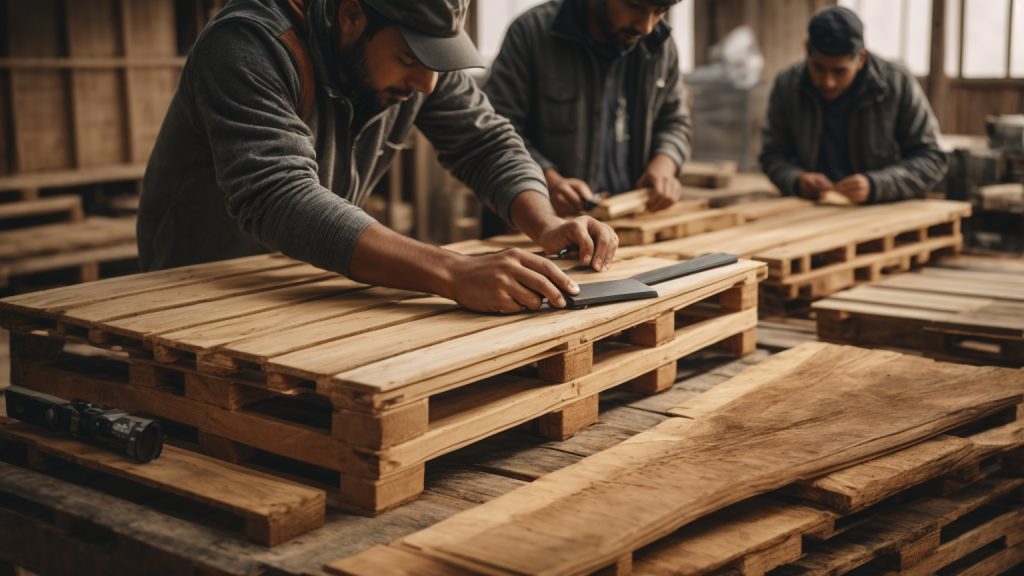
Finishing the Pallet

Once you have assembled your wooden pallet, it’s time to give it a finishing touch. Finishing a pallet is important not only for aesthetic reasons but also to protect the wood from weathering and deterioration. In this section, we will cover two important steps in finishing your pallet: sanding and sealing.

Sanding

Sanding is crucial to give your pallet a smooth and polished surface. Sanding will also help to remove any rough edges and splinters, making your pallet safe to handle. Here are some tips for sanding your pallet:

  • Use a coarse-grit sandpaper (60-80 grit) to start sanding the surface of the pallet.
  • Sand in the direction of the wood grain to avoid damaging the wood fibers.
  • Once you have sanded the surface, use a finer grit sandpaper (120-150 grit) to smooth out the surface further.
  • Sand the edges of the pallet to remove any rough edges and splinters.
  • Use a tack cloth to remove any dust or debris left from sanding.

Sealing

Sealing your pallet is important to protect the wood from moisture and weathering. There are several options for sealing your pallet, including staining, painting, or using a clear sealant. Here are some tips for sealing your pallet:

  • If you want to stain your pallet, choose a stain that is suitable for outdoor use and matches the color of your other outdoor furniture.
  • If you want to paint your pallet, choose a paint that is suitable for outdoor use and matches the color of your other outdoor furniture.
  • If you want to use a clear sealant, choose a sealant that is suitable for outdoor use and provides UV protection.
  • Apply the sealant evenly with a brush or roller, making sure to cover all surfaces of the pallet.
  • Allow the sealant to dry completely before using the pallet.

By following these tips for sanding and sealing your pallet, you can ensure that your pallet will look great and last for years to come.

Safety Precautions

When working with wooden pallets, it is important to take proper safety precautions to avoid injury. Here are some tips to keep in mind:

Wear Protective Gear

Wearing protective gear is crucial when working with wooden pallets. Safety equipment such as puncture-proof gloves, safety shoes, and clothing that covers your legs and arms will help protect you from slivers and other injuries.

Check the Condition of the Pallet

Before using a wooden pallet, make sure it is in good condition. Check for any broken or loose boards, protruding nails, or other damage that could cause injury. Do not use a damaged or underrated pallet.

Be Careful When Handling Pallets

When handling pallets, be sure to lift with your legs and not your back. Do not try to lift a pallet that is too heavy for you to handle safely. Use a pallet jack or forklift if necessary.

Avoid Hazardous Pallets

Some pallets are used to transport hazardous materials or may harbor bacteria. Avoid using these pallets for indoor projects, and be sure to take appropriate precautions when handling them.

Use Tools Safely

When cutting or sawing wooden pallets, be sure to use the appropriate tools and follow all safety guidelines. Wear eye protection and keep your hands and fingers away from the blade.

By following these safety precautions, you can work with wooden pallets safely and avoid injury.

Maintaining Your Wooden Pallets

Keeping your wooden pallets in good condition is important to ensure they last longer and can be reused. Here are some tips for maintaining your wooden pallets:

1. Store Pallets Properly

Storing your pallets correctly is essential to prevent damage and extend their lifespan. Keep them in a dry, cool place away from direct sunlight and moisture. You can stack them on top of each other, but make sure to place a layer of cardboard or other protective material between them to avoid scratches and damage.

2. Inspect Regularly

Inspect your pallets regularly to identify any damage or issues that need to be addressed. Check for cracks, splinters, loose boards, or any signs of rot or decay. If you notice any damage, remove the pallet from circulation and repair or replace it as needed.

3. Clean Pallets

Cleaning your pallets is essential to maintain their quality and hygiene. Use a soft-bristled brush or a pressure washer to remove any dirt, debris, or stains. Avoid using harsh chemicals or bleach as they can damage the wood and reduce its lifespan.

4. Treat Pallets

Treating your pallets can help protect them from moisture, insects, and other environmental factors that can cause damage. You can use a variety of treatments such as paint, stain, or sealant to protect the wood. Make sure to choose a treatment that is safe for the intended use of the pallet.

5. Handle with Care

When handling your pallets, make sure to do so with care to avoid damage. Use a forklift or pallet jack to move them around and avoid dragging them on the ground. Also, avoid overloading them beyond their weight capacity as it can cause damage and increase the risk of accidents.

By following these simple tips, you can maintain your wooden pallets and ensure they last longer and can be reused.

How to Make a Wooden Sword Without Power Tools: A Simple Guide

Are you looking for a fun and easy DIY project that will keep you or your kids entertained for hours? How about making a wooden sword without any power tools? Not only is this a great way to spend an afternoon, but it’s also a chance to practice your woodworking skills and create something unique and special.

With just a few basic tools and materials, you can create a sturdy and safe wooden sword that’s perfect for playtime or cosplay. And the best part? You don’t need any expensive or complicated power tools to get the job done. In fact, all you need is a handsaw, sandpaper, and a few other simple items that you probably already have lying around the house.

In this article, we’ll show you step-by-step how to make a wooden sword without power tools. We’ll provide you with some free templates to help you get started, and we’ll walk you through the entire process from start to finish. Whether you’re a beginner or an experienced woodworker, you’ll find this project to be both fun and rewarding. So grab your tools and let’s get started!

Understanding the Basics of Woodworking

Woodworking is a fun and rewarding hobby that allows you to create beautiful and functional objects from wood. However, it can seem intimidating if you’re new to the craft, especially if you don’t have access to power tools. But don’t worry, making a wooden sword without power tools is a great way to get started with woodworking! Here are some basic concepts to keep in mind:

Choosing the Right Wood

The first step in making a wooden sword is choosing the right type of wood. You want a wood that is strong, durable, and easy to work with. Some good options include:

  • Pine: A softwood that is easy to find and work with. It’s not as strong as some other woods, but it’s a good choice for beginners.
  • Oak: A hardwood that is strong and durable. It’s a bit harder to work with than pine, but it will make a sturdy sword.
  • Maple: Another hardwood that is strong and durable. It’s a bit more expensive than oak, but it’s also easier to work with.

Cutting and Shaping the Wood

Once you have your wood, the next step is to cut and shape it into the desired shape. You can do this with a variety of hand tools, such as:

  • Hand saw: Use a hand saw to cut the wood to the desired length.
  • Drawknife: A drawknife is a tool used to shape and smooth wood. Use it to shape the sword blade.
  • Chisel: Use a chisel to carve out the handle of the sword.

Sanding and Finishing

After you’ve shaped the wood, it’s time to sand and finish it. Sanding is important to smooth out any rough spots and prepare the wood for finishing. You can do this with sandpaper, starting with a coarse grit and working your way up to a finer grit.

Once the wood is smooth, you can apply a finish to protect it and give it a nice appearance. Some good options include:

  • Stain: Use a wood stain to add color to the wood.
  • Varnish: Use a varnish to protect the wood from moisture and wear.
  • Wax: Use a wax to give the wood a smooth, polished finish.

With these basic woodworking concepts in mind, you’re ready to start making your own wooden sword!

Choosing the Right Type of Wood

When it comes to making a wooden sword without power tools, choosing the right type of wood is crucial. Here are some things to consider when selecting wood for your project.

Hardwood vs Softwood

The first thing you need to decide is whether you want to use hardwood or softwood for your sword. Hardwood is generally more durable and resistant to wear and tear, but it can also be more difficult to work with. Softwood, on the other hand, is easier to carve and shape, but it may not hold up as well over time.

Best Wood for Sword Making

If you’re looking for a good all-around wood for your sword, oak is a great choice. It’s strong, durable, and has a beautiful grain pattern that will make your sword look great. Other good options include maple, cherry, and ash.

When selecting wood, make sure to choose pieces that are straight and free of knots or other defects. You’ll also want to choose wood that is dry and well-seasoned to prevent warping or cracking.

Overall, choosing the right type of wood is essential when making a wooden sword without power tools. By selecting the right wood and taking your time to shape and carve it carefully, you can create a beautiful and functional sword that will last for years to come.

Designing Your Wooden Sword

Before starting to make your wooden sword, it is important to design it properly. Here are some steps to follow when designing your sword.

Deciding the Sword Type

The first step in designing your wooden sword is to decide what type of sword you want to make. There are many different types of swords, such as a Katana, a Longsword, a Broadsword, and more. Each sword type has its own unique design and features.

When deciding on the sword type, consider the following factors:

  • Your personal preference
  • The purpose of the sword (e.g. decoration, cosplay, practice)
  • The level of difficulty in making the sword

Sketching the Design

Once you have decided on the sword type, it’s time to sketch the design. Sketching your design will help you visualize the final product and make any necessary adjustments before starting to make the sword.

When sketching the design, consider the following factors:

  • The length and width of the blade
  • The shape of the blade (e.g. straight, curved, pointed)
  • The type of handle (e.g. single-handed, double-handed)
  • Any additional features (e.g. engravings, decorations)

Use a pencil and paper to sketch your design. You can also use online resources for inspiration and reference.

Remember, the design should be proportionate and balanced. It is important to make sure that the blade and handle are in proportion to each other.

Once you have sketched your design, you are ready to move on to the next step in making your wooden sword.

Cutting Out the Sword Shape

To make a wooden sword without power tools, you will need to cut out the shape of the sword from a piece of wood. This can be done with a handsaw and a few other basic tools. Here are the steps to follow:

Marking the Wood

The first step is to mark the wood with the shape of the sword. You can use a template or draw the shape freehand. Here are some tips to keep in mind:

  • Use a straight edge to draw a center line down the length of the wood.
  • Mark the center point of the sword blade and the center of the handle.
  • Use a compass or protractor to draw the curves of the sword blade and handle.
  • Double-check your measurements and marks before moving on to the next step.

Using a Handsaw

Once you have marked the wood, it’s time to cut out the shape of the sword. Here’s how to do it with a handsaw:

  1. Clamp the wood securely to a workbench or other stable surface.
  2. Use a crosscut saw to cut along the lines of the sword shape. Start with the blade and work your way out to the edges.
  3. Use a coping saw to cut out the curves of the handle and blade. This will take more time and effort than the straight cuts.
  4. Sand the edges and surfaces of the sword to smooth out any rough spots or splinters.

Remember to take your time and be careful when using a handsaw. Wear eye protection and work in a well-ventilated area. With practice, you can create a wooden sword that is both functional and beautiful.

Shaping and Refining the Sword

Once you have cut out the basic shape of your wooden sword, it’s time to start shaping and refining it to give it a more realistic look. In this section, we’ll cover two important aspects of this process: sanding the edges and carving the details.

Sanding the Edges

To make your sword look more polished and professional, you’ll want to sand the edges of the blade, guard, and handle. This will also help to remove any rough or jagged edges that could cause splinters.

To sand the edges, you’ll need sandpaper with a medium grit (around 80-120) and a fine grit (around 220-320). Start with the medium grit sandpaper and sand the edges until they are smooth and even. Then, switch to the fine grit sandpaper and repeat the process until the edges are completely smooth.

Carving the Details

To give your wooden sword a more realistic look, you’ll want to carve some details into the blade, guard, and handle. This can be done using a carving knife or a set of carving tools.

Start by sketching out the details you want to add onto the sword with a pencil. Then, carefully carve away the excess wood to create the desired shape. Be sure to take your time and work slowly and carefully to avoid any mistakes.

Some common details to add to a wooden sword include:

  • A fuller (a groove down the center of the blade)
  • A crossguard (a piece of wood that sits perpendicular to the blade to protect your hand)
  • A pommel (a decorative piece at the end of the handle)

Remember, the key to carving details is to take your time and work slowly and carefully. If you rush, you could end up making mistakes that are difficult to fix.

Finishing Touches

After you have completed the steps to make your wooden sword without power tools, it’s time to give it the finishing touches. There are two main finishing touches you can add to your wooden sword: applying a wood finish and adding a handle wrap.

Applying Wood Finish

A wood finish will help protect your wooden sword from scratches and damage. It will also give your sword a more polished look. Here are the steps to apply a wood finish to your wooden sword:

  1. Sand the sword: Use a fine-grit sandpaper to sand the surface of your sword. This will help the wood finish adhere better to the wood.

  2. Apply the wood finish: You can use a variety of wood finishes such as varnish, stain, or oil. Apply the wood finish with a brush or a cloth, following the manufacturer’s instructions.

  3. Let it dry: Allow the wood finish to dry completely before handling the sword.

  4. Sand again: Once the wood finish is dry, sand the sword again with a fine-grit sandpaper. This will help smooth out any rough spots and give your sword a polished look.

Adding a Handle Wrap

Adding a handle wrap to your wooden sword will provide a better grip and make it easier to handle. Here’s how you can add a handle wrap to your wooden sword:

  1. Choose your material: You can use leather, cord, or fabric to wrap the handle of your sword. Choose a material that is comfortable to hold and provides a good grip.

  2. Measure the length: Measure the length of the handle of your sword and cut your material to fit.

  3. Wrap the handle: Start at the base of the handle and wrap the material around the handle, making sure to overlap each wrap. Use a glue gun to secure the material in place.

  4. Finish the wrap: Once you have wrapped the entire handle, secure the end of the material with glue. You can also add decorative touches such as tassels or beads.

By following these simple steps, you can give your wooden sword a professional look and make it more comfortable to handle. With a little creativity, you can customize your wooden sword to make it unique and one-of-a-kind.

How to Make Wooden Flowers: A Step-by-Step Guide

Are you looking for a unique way to add some natural beauty to your home decor? Wooden flowers are a charming and creative option that can brighten up any space. Not only are they a fun DIY project, but they also make great gifts for loved ones. In this article, we will guide you through the steps of how to make wooden flowers, so you can create your own beautiful and long-lasting blooms.

To make wooden flowers, you will need some basic materials such as wood, a saw, sandpaper, wood glue, and paint. The process involves cutting the wood into petal shapes, sanding the edges, and then gluing the petals together in the desired flower shape. You can customize your wooden flowers by adding other decorative items such as beads, ribbons, and wire. Whether you want to make a bouquet of daisies or a single rose, the possibilities are endless.

With a little bit of creativity and patience, you can make wooden flowers that look just as beautiful as the real thing. Not only do they add a touch of nature to your home, but they are also a sustainable and eco-friendly alternative to traditional flowers. So, grab your tools and let’s get started on this fun and rewarding project!

Understanding the Basics of Woodworking

Woodworking is a fun and rewarding hobby that allows you to create beautiful and functional objects out of wood. It’s important to understand the basics of woodworking before you start any project. In this section, we’ll cover some of the basics you need to know before you start making wooden flowers.

Choosing the Right Wood

Choosing the right wood is an important part of woodworking. Different types of wood have different properties and are suited for different purposes. When making wooden flowers, you want to choose a wood that is easy to work with and has a nice grain pattern.

Some good woods for making wooden flowers include:

  • Basswood: A soft wood that is easy to carve and has a fine grain pattern.
  • Pine: A soft wood that is easy to work with and has a distinctive grain pattern.
  • Cedar: A soft wood that is resistant to rot and has a pleasant aroma.

When choosing wood, make sure it is free from knots and other defects that can make it difficult to work with. You should also consider the color of the wood and how it will look when finished.

Safety Measures in Woodworking

Safety is an important consideration in woodworking. You will be using sharp tools and machines that can be dangerous if not used properly. Here are some safety measures you should take when working with wood:

  • Wear eye protection: When using power tools or hand tools, wear safety glasses or goggles to protect your eyes from flying debris.
  • Use sharp tools: Dull tools are more dangerous than sharp tools because they are more likely to slip and cause injury. Keep your tools sharp and in good condition.
  • Keep your work area clean: Cluttered workspaces can be dangerous. Keep your work area clean and free from tripping hazards.
  • Use machines safely: If you are using power tools, make sure you read the manual and follow all safety instructions. Never remove safety guards or operate a machine without proper training.

By following these safety measures, you can reduce the risk of injury and enjoy woodworking safely.

Gathering Necessary Tools

Before you start making wooden flowers, you need to gather all the necessary tools and materials. Here are the essential tools you will need:

Essential Woodworking Tools

  • Wooden dowels: These will serve as the stem of your wooden flowers. You can find these at your local craft store or online.
  • Floral wire: This will make the stems more flexible and sturdy.
  • Wooden petals: You can either purchase pre-cut wooden petals or cut them yourself using a saw and sandpaper.
  • Glue: You will need wood glue to attach the petals to the stem and to attach the petals to each other.
  • Saw: You will need a saw to cut the wooden petals into the desired shape.
  • Sandpaper: You will need sandpaper to smooth the edges of the petals.
  • Paint: You can use any type of paint, but acrylic paint is recommended for its durability and versatility.
  • Paintbrushes: You will need different sizes of paintbrushes to paint the petals and add details.

Choosing the Right Paint and Brushes

When choosing paint and brushes, consider the following:

  • Acrylic paint is the best choice for wooden flowers because it is water-resistant, dries quickly, and adheres well to wood.
  • Choose a paintbrush with soft bristles to prevent brush marks on the petals.
  • Use a smaller brush for details and a larger brush for painting the petals.
  • Consider using a sealer to protect the paint and add shine to the petals.

By gathering all the necessary tools and materials, you are ready to start making beautiful wooden flowers.

Creating the Flower Design

When it comes to making wooden flowers, the first step is to create a design for your flower. This design will serve as a guide for carving or cutting the wood into the shape of the flower. In this section, we’ll cover two important sub-sections to help you create your flower design: Sketching the Flower and Transferring the Design onto Wood.

Sketching the Flower

The first step in creating your wooden flower design is to sketch out the flower on paper. You can use a pencil and paper to create a rough sketch of the flower you want to make. Take your time and make sure to capture all the details of the flower, including the shape of the petals, the size of the flower, and any other features that make it unique.

Once you have a rough sketch of the flower, you can refine it by adding more details and making adjustments to the design. You can also use digital tools like Adobe Illustrator or Inkscape to create a more precise design for your flower.

Transferring the Design onto Wood

After creating your flower design, the next step is to transfer it onto the wood. You can do this by printing out your design on paper and then tracing it onto the wood using a pencil. Alternatively, you can use carbon paper to transfer the design onto the wood.

Once you have the design transferred onto the wood, you can begin cutting or carving the wood to create the shape of the flower. Make sure to take your time and work carefully to ensure that you create a precise and accurate representation of your flower design.

Overall, creating a flower design is an important step in the process of making wooden flowers. By following these tips and techniques, you can create a beautiful and unique wooden flower that will be a great addition to any home or garden.

Cutting and Shaping the Flower

When it comes to making wooden flowers, cutting and shaping the petals is a crucial step. Here’s how to do it:

Using a Jigsaw for Cutting

A jigsaw is a versatile tool that can be used to cut intricate shapes and curves in wood. It’s the perfect tool for cutting out the petal shapes needed for your wooden flower. Follow these steps to use a jigsaw for cutting:

  1. Choose the right blade: For cutting wood, a blade with a high tooth count is best. Look for blades labeled “wood” or “fine.”

  2. Clamp the wood: Secure the piece of wood you’ll be cutting to a workbench or table with clamps. This will keep the wood from moving while you cut.

  3. Mark the petal shape: Use a pencil to draw the shape of the petal onto the wood. You can use a template or draw freehand.

  4. Cut the shape: Turn on the jigsaw and carefully guide the blade along the pencil line. Take your time and be patient. It’s better to go slow and get a clean cut than to rush and make mistakes.

Sanding the Edges

After cutting out the petal shapes, you’ll need to sand the edges to smooth them out and remove any rough spots. Here’s how to do it:

  1. Choose the right sandpaper: For sanding wood, a medium-grit sandpaper (around 120 grit) is a good choice.

  2. Sand the edges: Hold the sandpaper at a 45-degree angle to the edge of the petal and sand in a back-and-forth motion. Be sure to sand all the way around the edge of the petal to get a smooth, even finish.

  3. Check your work: After sanding, inspect the edges of the petal for any rough spots or jagged edges. If you find any, sand them down until the edge is smooth.

By following these steps, you’ll be able to cut and shape the petals for your wooden flower with ease.

Painting and Finishing

Once you have assembled your wooden flower, it’s time to add some color and finish it off. Here are some tips to help you paint and finish your wooden flowers:

Applying the Base Coat

The first step in painting your wooden flower is to apply a base coat. This will help the paint adhere to the wood and provide a smooth surface for the topcoat. You can use any type of paint for the base coat, but acrylic paint is a good choice because it dries quickly and is easy to work with.

To apply the base coat, use a small brush or foam brush and apply the paint in thin, even strokes. Be sure to cover the entire surface of the flower, including the petals and stem. Let the paint dry completely before moving on to the next step.

Adding Details with Paint

Once the base coat is dry, you can add details to your wooden flower with paint. Use a small brush to paint the details, such as the veins on the petals or the center of the flower. You can also use different colors to create a more realistic look.

If you’re not confident in your painting skills, you can use stencils or stamps to add details to your wooden flower. Simply place the stencil or stamp on the flower and apply paint with a brush or sponge.

Sealing the Wood

After you have finished painting your wooden flower, it’s important to seal the wood to protect it from moisture and dirt. You can use a clear coat of polyurethane or a wood sealer to seal the wood.

To apply the sealer, use a brush or spray bottle and apply a thin, even coat to the entire surface of the flower. Be sure to let the sealer dry completely before handling the flower.

By following these simple steps, you can add color and detail to your wooden flowers and protect them from damage.

Displaying Your Wooden Flowers

After creating your beautiful wooden flowers, it’s time to display them! Whether you want to create a flower arrangement or attach them to a wall or surface, there are different ways to showcase your wooden flowers. Here are some tips:

Creating a Flower Arrangement

One way to display your wooden flowers is by creating a flower arrangement. This can be done in a vase, a basket, or any other container of your choice. Here are some steps to follow:

  1. Choose your container: Select a container that matches the style and size of your wooden flowers. A clear vase can show off the stem of the flowers, while a basket can give a rustic feel.

  2. Add filler: Use some filler material, such as moss or small stones, to create a base for your wooden flowers.

  3. Arrange your flowers: Start arranging your wooden flowers in the container. Place the taller flowers in the back and the shorter ones in the front. You can also mix and match different colors and shapes.

  4. Adjust: Once you have arranged your flowers, step back and take a look. Make any necessary adjustments until you are happy with the final result.

Attaching to a Wall or Surface

Another way to display your wooden flowers is by attaching them to a wall or surface. This can be done using adhesive strips, hooks, or nails. Here are some steps to follow:

  1. Choose your location: Decide on the location where you want to hang your wooden flowers. Make sure it is a flat surface and that you have enough space.

  2. Prepare your flowers: If your wooden flowers have stems, you can trim them to the desired length. If they don’t have stems, you can attach a wire or string to the back.

  3. Attach your flowers: Use adhesive strips or hooks to attach your wooden flowers to the wall. If you prefer, you can also use nails. Make sure to space them evenly and at the same height.

  4. Adjust: Once you have attached your flowers, step back and take a look. Make any necessary adjustments until you are happy with the final result.

By following these tips, you can create a beautiful display of your wooden flowers that will add a unique touch to any room.