Tag Archives: nice grain pattern

how-to-make-a-wooden-pipe-simple-steps-for-crafting-your-own-smoking-tool-2

How to Make a Wooden Pipe: Simple Steps for Crafting Your Own Smoking Tool

If you’re a fan of smoking and woodworking, then you might want to try your hand at making a wooden pipe. Not only is it a fun and creative project, but it also allows you to have a unique smoking experience. With a few basic tools and materials, you can create a beautiful and functional wooden pipe.

Before you start making your wooden pipe, it’s important to choose the right type of wood. Hardwoods like cherry, maple, and oak are great options because they are durable and have a nice grain pattern. Softwoods like pine and cedar are not recommended because they can be too porous and can affect the taste of the smoke. Once you have your wood, you can begin shaping it into the desired shape and size. There are many different styles of pipes, so choose one that suits your taste and skill level.

Understanding the Basics of a Wooden Pipe

When it comes to smoking, wooden pipes are a classic choice. They are easy to make and provide a natural, earthy flavor to your smoking experience. In this section, we will cover the basics of a wooden pipe, including the types of wood used, pipe anatomy, and tools required.

Types of Wood

The type of wood you choose for your pipe will affect the flavor of your smoking experience. Here are some common types of wood used for making pipes:

  • Briar: This is the most popular and traditional wood used for pipe making. It is a dense, hard wood with a natural resistance to fire and moisture. Briar pipes are known for their cool smoke and sweet flavor.
  • Cherry: This wood is a popular choice for beginners because it is easy to work with and has a mild, sweet flavor. Cherry pipes are also known for their beautiful grain patterns.
  • Maple: This wood is a good choice for those who prefer a milder flavor. Maple pipes are also known for their durability and resistance to cracking.
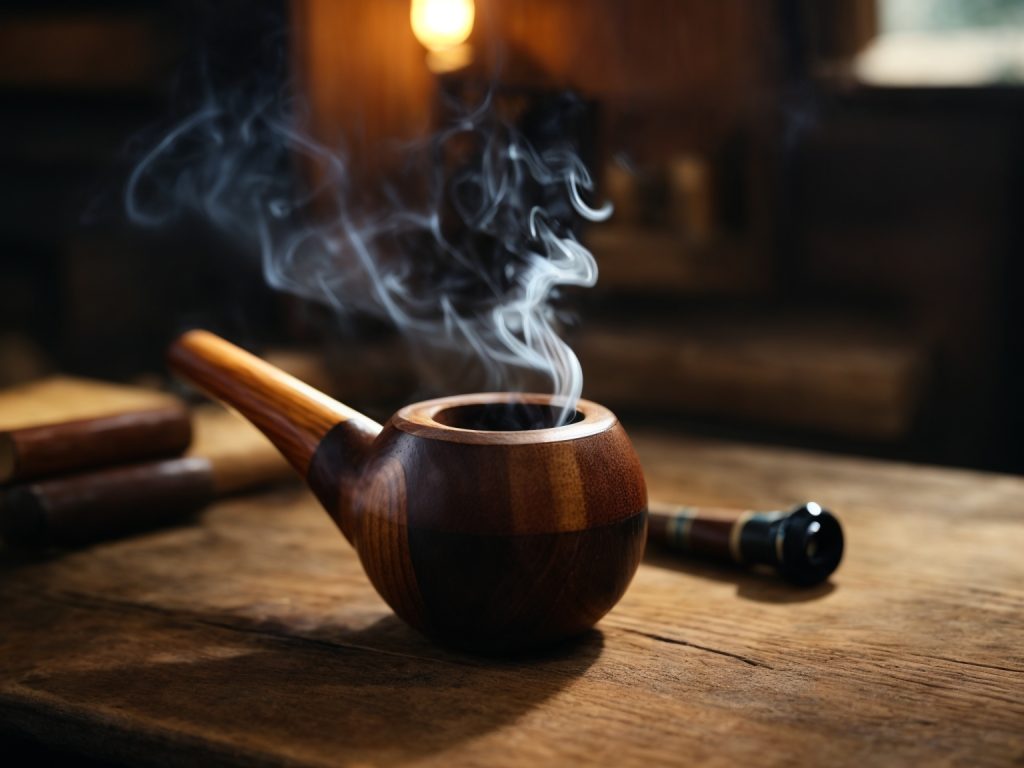
Pipe Anatomy

A wooden pipe consists of three main parts:

  • Bowl: This is the part of the pipe where you pack your smoking material.
  • Stem: This is the long, narrow part of the pipe that you put in your mouth.
  • Shank: This is the part of the pipe that connects the bowl and stem.

Tools Required

To make a wooden pipe, you will need the following tools:

  • Saw: You will need a saw to cut the wood to the desired size and shape.
  • Drill: You will need a drill to create the hole in the bowl for your smoking material.
  • Sandpaper: You will need sandpaper to smooth out the rough edges of the wood.
  • Pipe cleaner: You will need a pipe cleaner to clean out the stem and shank of your pipe after each use.

Now that you understand the basics of a wooden pipe, you are ready to start making your own. Remember to choose the right type of wood for your smoking preferences and to use the proper tools for the job. Happy smoking!

Choosing the Right Wood

When it comes to making a wooden pipe, choosing the right wood is crucial. The type of wood you select will affect the overall quality and durability of your pipe. Here are some things to consider when choosing the right wood for your pipe:

1. Hardwoods vs. Softwoods

Hardwoods are generally the best choice for pipe making because they are denser and more durable than softwoods. Some popular hardwoods for pipe making include briar, cherry, maple, and oak. Softwoods like pine and cedar can also be used, but they are more prone to cracking and burning out over time.

2. Grain Orientation

The orientation of the wood grain is also important. You want to choose a piece of wood with a straight, uniform grain that runs parallel to the length of the pipe. This will help prevent the pipe from cracking or warping over time.

3. Toxicity

Some woods, like yew and ebony, can be toxic when burned or inhaled. It’s important to research the toxicity of any wood you plan to use before making your pipe.

4. Curing Process

The curing process is important for stabilizing the wood and preventing it from cracking or warping over time. Some woods, like briar, undergo a special curing process before they are used for pipe making. Other woods can be cured by air-drying or kiln-drying.

5. Availability and Cost

Finally, consider the availability and cost of the wood you plan to use. Some woods, like briar, can be expensive and difficult to find. Other woods, like cherry and maple, are more readily available and affordable.

By considering these factors, you can choose the right wood for your pipe and ensure that it will be durable, high-quality, and enjoyable to use.

Designing Your Pipe

how-to-make-a-wooden-pipe-simple-steps-for-crafting-your-own-smoking-tool-2

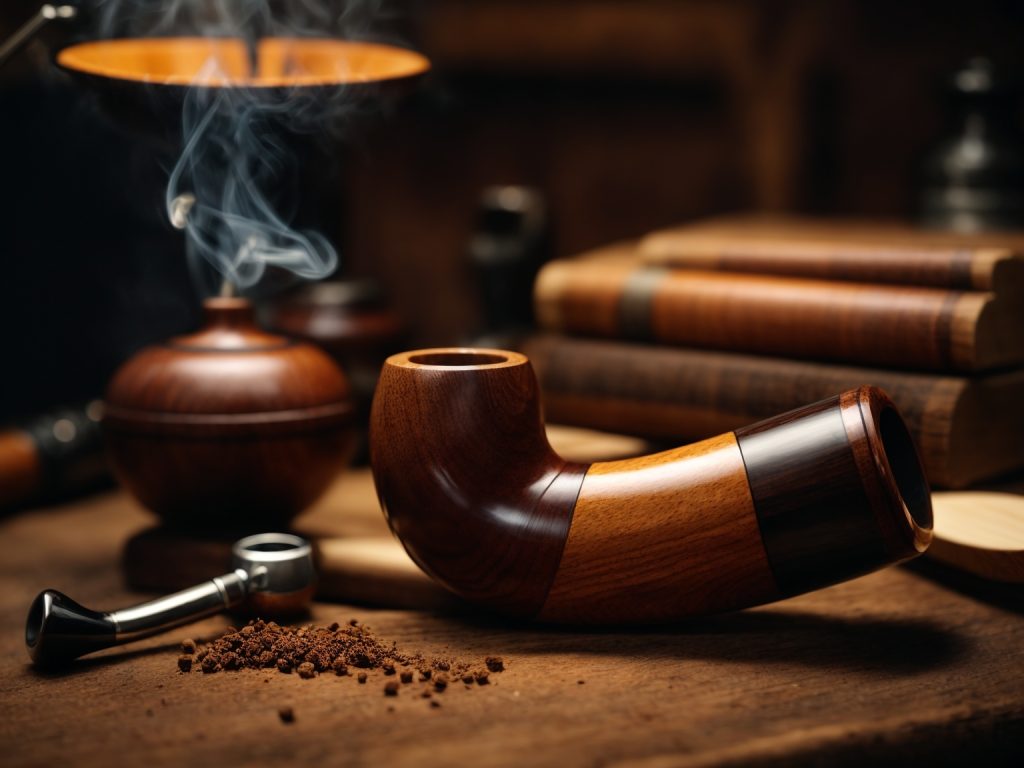
When it comes to designing your wooden pipe, there are a few things to consider. First, think about the shape and style of the pipe. Pipes come in all shapes and sizes, from straight and simple to curved and intricate. The shape you choose will depend on your personal preference and the level of difficulty you are comfortable with.

Next, consider the type of wood you want to use. Different types of wood will give your pipe a unique look and flavor. Some popular options include cherry, briar, and rosewood. Make sure the wood you choose is dry and free of knots or imperfections.

Once you have chosen your shape and wood, it’s time to start designing the details. You can add decorative elements such as carvings, inlays, or stains to give your pipe a personalized touch. Keep in mind that some designs may be more difficult to execute than others, so choose a design that fits your skill level.

Finally, consider the size and weight of your pipe. A pipe that is too heavy or too large may be uncomfortable to use, so make sure to take these factors into account when designing your pipe.

Overall, designing your wooden pipe is a fun and creative process that allows you to express your personal style. With a little planning and attention to detail, you can create a beautiful and functional pipe that you will enjoy for years to come.

Cutting and Shaping the Pipe

To start making your wooden pipe, you need to cut and shape the wood to the desired size and shape. Here are the steps to follow:

  1. Choose the right wood: You can use any type of wood to make a pipe, but some types are better suited for the job. For example, hardwoods like cherry, maple, and oak are strong and durable, and they have a nice grain pattern that looks great when finished. Softwoods like pine and cedar are easier to work with, but they may not last as long.
  2. Cut the wood to size: Use a saw to cut the wood to the desired length and width. The size of the wood will depend on the size of the pipe you want to make. A typical pipe is about 5-6 inches long and 1-2 inches wide.
  3. Shape the wood: Use a chisel or sandpaper to shape the wood to the desired shape. You can make the pipe straight or curved, and you can shape the bowl and stem to your liking. Take your time and be careful not to remove too much wood at once.
  4. Drill the bowl: Use a drill bit to make a hole in the center of the bowl. The size of the hole will depend on the size of the pipe you are making and the type of tobacco you plan to smoke. A typical hole size is about 1/2 inch in diameter.
  5. Drill the stem: Use a smaller drill bit to make a hole in the stem of the pipe. The size of the hole will depend on the size of the stem and the size of the bowl. Make sure the hole is centered and straight.
  6. Smooth the edges: Use sandpaper to smooth the edges of the pipe and remove any rough spots. You can also use a wood file or rasp to shape the edges to your liking.

By following these steps, you can cut and shape your wooden pipe to the desired size and shape. Remember to take your time and be careful not to remove too much wood at once. With a little patience and practice, you can create a beautiful and functional wooden pipe that you can enjoy for years to come.

Creating the Pipe Bowl

To create the bowl of your wooden pipe, you will need to follow a few simple steps. Here’s how to do it:

Step 1: Choose Your Wood

When it comes to choosing the wood for your pipe bowl, there are a few things to keep in mind. First, you’ll want to choose a hardwood that is suitable for smoking. Some popular choices include briar, cherry, and maple.

Second, you’ll want to make sure that the wood is dry and seasoned. This will help prevent cracks and warping as the wood dries further during the pipe-making process.

Step 2: Cut Out the Bowl

Once you’ve chosen your wood, it’s time to cut out the bowl shape. You can use a template or stencil to ensure that your bowl is the right size and shape.

Use a saw or other cutting tool to carefully cut out the bowl shape. Take your time and make sure that your cuts are clean and precise.

Step 3: Carve the Bowl

With the bowl shape cut out, it’s time to start carving the inside of the bowl. Use a carving knife or other tool to carefully hollow out the bowl. You’ll want to create a smooth, even surface that is deep enough to hold your tobacco.

Step 4: Sand and Finish

Once you’ve carved the bowl, it’s time to sand and finish it. Use sandpaper to smooth out any rough edges or uneven surfaces. Then, apply a finishing oil or wax to protect the wood and give it a nice shine.

And that’s it! With these simple steps, you can create a beautiful wooden pipe bowl that is ready to be assembled into a fully-functional smoking pipe.

Drilling the Stem

drilling-the-stem

Now that you have the basic shape of your wooden pipe, it’s time to drill the stem. This will allow smoke to travel from the bowl to the mouthpiece.

Here are the steps to follow:

  1. Secure the pipe in a vise. Make sure the pipe is held firmly in place so it doesn’t move around while you’re drilling. If you don’t have a vise, you can use clamps or another method to hold the pipe steady.
  2. Choose the right drill bit. You’ll need a drill bit that’s the same diameter as the stem you want to create. For example, if you want a stem that’s 1/4 inch in diameter, you’ll need a 1/4 inch drill bit.
  3. Mark the drill bit with tape. Measure the depth you want the stem to be and mark the drill bit with a piece of tape so you know when to stop drilling.
  4. Start drilling. Hold the drill bit perpendicular to the pipe and slowly start drilling. Be careful not to drill too fast or apply too much pressure, as this can cause the wood to split or crack.
  5. Clean up the hole. Once you’ve drilled the stem, use a small file or sandpaper to smooth out the edges of the hole. You want it to be as smooth as possible so smoke can flow through it easily.
  6. Test the draw. Place your mouth over the mouthpiece and inhale gently. You should feel air flowing through the stem and into your mouth. If the draw is too tight, use a larger drill bit to widen the hole slightly.

That’s it! With these simple steps, you can create a stem that’s perfectly sized for your wooden pipe.

Finishing the Pipe

Once you have completed the construction of your wooden pipe, it is time to give it a finishing touch to make it look polished and professional. In this section, we will discuss the three main steps involved in finishing your pipe: sanding, staining, and polishing.

Sanding

Sanding is an important step in finishing your wooden pipe. It helps to smooth out any rough edges and give your pipe a sleek finish. To sand your pipe, you will need sandpaper of varying grits, ranging from coarse to fine. Start with a coarse grit sandpaper and work your way up to a finer grit. Make sure to sand in the direction of the wood grain to avoid any scratches or damage to the surface.

Staining

Staining your wooden pipe is an optional step, but it can add a touch of color and character to your pipe. Before staining, make sure to sand the surface of your pipe to remove any dirt or debris. Apply the stain evenly using a brush or cloth, and let it dry completely before applying a second coat. Choose a stain that is safe for smoking pipes and avoid using any toxic chemicals.

Polishing

Polishing your wooden pipe is the final step in finishing your pipe. It helps to protect the surface and give it a shiny finish. To polish your pipe, you can use a wax or oil-based polish. Apply a small amount of polish to a clean cloth and rub it onto the surface of your pipe in a circular motion. Let it dry for a few minutes before buffing it with a clean cloth.

By following these simple steps, you can give your wooden pipe a professional and polished look. Remember to take your time and be patient during the finishing process to achieve the best results.

Maintaining Your Wooden Pipe

Congratulations on making your very own wooden pipe! Now that you have your new smoking accessory, it’s important to know how to properly maintain it to ensure its longevity. Here are a few tips to keep your wooden pipe in great condition:

Cleaning Your Wooden Pipe

It’s important to clean your wooden pipe regularly to prevent buildup and ensure a smooth smoking experience. Here’s how to do it:

  1. After each use, use a pipe cleaner to remove any excess debris from the bowl and stem of the pipe.
  2. Use a soft-bristled brush to gently scrub the inside of the bowl and stem with warm, soapy water.
  3. Rinse the bowl and stem thoroughly with warm water and dry with a soft cloth.
  4. Allow the pipe to air dry completely before using it again.

Oiling Your Wooden Pipe

To keep your wooden pipe looking like new, it’s important to oil it regularly. Here’s how to do it:

  1. Choose a high-quality, food-grade oil such as mineral oil or beeswax.
  2. Apply a small amount of oil to a soft cloth and rub it into the wood, being careful not to get any oil on the bowl or stem.
  3. Allow the oil to soak in for a few minutes, then wipe off any excess with a clean cloth.
  4. Repeat this process every few months to keep your wooden pipe looking and feeling great.

Storing Your Wooden Pipe

When you’re not using your wooden pipe, it’s important to store it properly to prevent damage. Here’s how to do it:

  1. Store your wooden pipe in a cool, dry place away from direct sunlight and heat sources.
  2. Use a pipe stand or holder to keep your pipe upright and prevent it from rolling around or getting knocked over.
  3. Avoid storing your pipe with tobacco in the bowl, as this can cause moisture buildup and damage the wood.

By following these simple tips, you can keep your wooden pipe in great condition and enjoy many smoking sessions to come.

How to Make Layered Wooden Crosses: A Step-by-Step Guide

If you’re looking for a unique and meaningful way to decorate your home or give a thoughtful gift, making a layered wooden cross might be just what you need. These crosses are made by layering different types of wood to create a stunning and intricate design. The possibilities for customization are endless, making it a perfect DIY project for anyone.

To get started, you’ll need to gather your materials. This can include various types of wood, saws, sandpaper, glue, and clamps. It’s important to choose wood that has contrasting colors and grains to really make the layers stand out. Once you have your materials, you can begin cutting the wood into the desired shapes and sizes. The layers can be glued together and clamped until the glue dries to create a sturdy and beautiful cross.

Understanding the Basics of Woodworking

Safety Measures

Before you start any woodworking project, it is important to take necessary safety measures to protect yourself and others around you. Here are some safety tips to keep in mind:

  • Always wear safety glasses to protect your eyes from flying debris.
  • Use earplugs or earmuffs to protect your hearing.
  • Wear a dust mask to protect your lungs from sawdust and other airborne particles.
  • Keep your work area clean and free of clutter to avoid tripping hazards.
  • Never wear loose clothing or jewelry that could get caught in machinery.
  • Keep your hands away from the cutting area of the saws and other tools.
  • Always use sharp tools to avoid slipping and causing injury.

Tools and Equipment

To make a layered wooden cross, you will need some basic woodworking tools and equipment. Here is a list of some essential tools:

Tool Description
Circular Saw Used for making straight cuts
Jigsaw Used for making curved cuts
Drill Used for making holes and driving screws
Clamps Used for holding pieces of wood together
Sandpaper Used for smoothing out rough edges

In addition to these tools, you will also need some materials such as wood glue, wood stain, and varnish to finish your project. When selecting wood for your cross, it is important to choose a type of wood that is easy to work with and has a nice grain pattern.

By following these basic safety measures and having the right tools and equipment, you can successfully create a beautiful layered wooden cross.

Choosing the Right Wood

When it comes to making layered wooden crosses, selecting the right type of wood is crucial. Not all types of wood are created equal, and some may be better suited for this type of project than others. In this section, we will discuss the different types of wood and wood grading to help you make an informed decision.

Types of Wood

There are many types of wood available, each with its own unique characteristics. Some of the most popular types of wood for making layered wooden crosses include:

  • Maple: Maple is a hard, dense wood that is easy to work with and has a fine, uniform texture. It is a popular choice for making layered crosses due to its durability and strength.

  • Cherry: Cherry is a medium-hard wood that is known for its rich, warm colors and smooth texture. It is often used for making high-end furniture and decorative items.

  • Walnut: Walnut is a hard, strong wood that is known for its dark, rich color and beautiful grain patterns. It is a popular choice for making layered crosses due to its durability and aesthetic appeal.

  • Mahogany: Mahogany is a hardwood that is known for its deep, rich color and beautiful grain patterns. It is often used for making high-end furniture and decorative items.

Wood Grading

In addition to the type of wood, it is also important to consider the wood grading. Wood grading is a system used to classify wood based on its quality and appearance. The most common wood grading systems include:

  • Select: Select grade wood is the highest quality and has the fewest defects. It is often used for high-end furniture and decorative items.

  • Common: Common grade wood is less expensive than select grade and has more defects, such as knots and blemishes. It is often used for more rustic or casual projects.

  • Rustic: Rustic grade wood is the lowest quality and has the most defects. It is often used for projects where the natural, imperfect look is desired.

When selecting wood for your layered wooden cross, consider both the type of wood and the wood grading to ensure that you choose a high-quality, durable material that will look beautiful and stand the test of time.

Designing Your Cross

When it comes to making a layered wooden cross, the design is an important aspect to consider. Here are a few sub-sections to help you with the design process:

Sketching the Design

Before you start cutting any wood, it’s important to sketch out your design. This will give you a visual representation of what you want your cross to look like. You can use a pencil and paper or a digital sketching tool to create your design.

When sketching your design, consider the size of your cross and the number of layers you want to include. You can also experiment with different shapes and patterns to create a unique look. Don’t be afraid to play around with different ideas until you find a design that you’re happy with.

Determining the Layers

Once you have your design sketched out, it’s time to determine the number of layers you’ll need. This will depend on the size of your cross and the thickness of your wood. For a 20-inch cross, you may want to aim for 5-7 layers.

When determining your layers, consider the depth you want to create. You can create depth by using different thicknesses of wood or by adding additional layers. You can also experiment with different wood stains to create a unique look.

Overall, designing your layered wooden cross is a fun and creative process. By sketching your design and determining your layers, you can create a beautiful and unique cross that you’ll be proud to display.

Cutting the Wood

Cutting the wood is a crucial step in making a layered wooden cross. It requires precision and accuracy to ensure that all the pieces fit together perfectly. In this section, we will discuss how to cut the wood for your layered cross.

Creating the First Layer

To create the first layer of your cross, you will need to cut two pieces of wood to the same size. These pieces will be the base of your cross. You can use any type of wood, but it is recommended to use a hardwood like oak or cherry for durability.

Measure the length and width of your wood pieces and mark them with a pencil. Then, using a table saw or a circular saw, cut the wood to the appropriate size. Make sure your cuts are straight and even to ensure a tight fit.

Making Subsequent Layers

After creating the first layer, you will need to cut the remaining pieces of wood for the subsequent layers. These pieces will be smaller in size and will fit on top of the first layer.

Measure the length and width of your wood pieces and mark them with a pencil. Then, using a miter saw or a circular saw, cut the wood to the appropriate size. Make sure your cuts are at a 45-degree angle to create a perfect fit.

It is important to note that the number of layers you create will depend on your personal preference. Some people prefer a simple two-layer cross, while others may want to create a more intricate design with multiple layers.

In conclusion, cutting the wood is an important step in making a layered wooden cross. Take your time and ensure that your cuts are precise and accurate to create a beautiful and lasting cross.

Assembling the Cross

Once you have all the layers of your wooden cross cut and sanded, it’s time to start assembling them. This section will guide you through the process, step-by-step.

Joining the Layers

To join the layers of your cross, you’ll need wood glue and clamps. Apply a thin layer of wood glue to the back of each layer, making sure to cover the entire surface. Then, carefully stack the layers on top of each other, making sure they are aligned properly.

Once the layers are stacked, use clamps to hold them together while the glue dries. Be sure to wipe away any excess glue that squeezes out from between the layers.

Securing the Structure

After the glue has dried, remove the clamps and inspect the cross for any gaps or imperfections. If necessary, use wood filler to fill in any gaps or holes.

Next, you’ll need to secure the structure of the cross. One way to do this is to attach a backer board to the back of the cross using wood screws. This will add stability and help prevent the cross from warping over time.

Finally, you can add any finishing touches you like, such as staining or painting the cross. Be sure to let the finish dry completely before hanging or displaying your new layered wooden cross.

By following these simple steps, you can create a beautiful and unique cross that will be a cherished addition to your home or office decor.

Finishing Touches

After assembling your layered wooden cross, it’s time to add the finishing touches. This is where you can really make your cross stand out and showcase your personal style. In this section, we’ll cover two important aspects of finishing touches: sanding and painting or staining.

Sanding

Sanding is an important step in finishing your wooden cross. It helps to smooth out any rough edges and imperfections, and prepares the wood for painting or staining. Here are a few tips to help you sand your cross:

  • Start with a coarse grit sandpaper (around 80 grit) and work your way up to a finer grit (around 220 grit).
  • Sand in the direction of the wood grain to avoid scratches.
  • Use a sanding block or sanding sponge to ensure even sanding.
  • Be sure to sand all edges and corners to avoid any sharp edges.

Painting or Staining

Painting or staining your wooden cross is a great way to add color and character. Here are some tips to help you get started:

  • Choose a paint or stain that complements the wood and matches your personal style.
  • Apply a thin coat of paint or stain using a brush or rag. Allow it to dry completely before applying a second coat.
  • Use a clear coat to protect the wood and give it a glossy finish.
  • Consider adding decorative elements such as stencils or decals to make your cross unique.

With these finishing touches, your layered wooden cross is complete and ready to be displayed. Whether you choose to paint it, stain it, or leave it natural, your cross will be a beautiful and meaningful addition to any space.

Maintenance Tips

Congratulations on making your own layered wooden cross! Now that you have completed your project, it’s important to know how to properly maintain it to ensure it lasts for years to come. Here are a few maintenance tips to keep in mind:

Cleaning

To keep your layered wooden cross looking its best, it’s important to keep it clean. Dust and dirt can accumulate on the surface, so it’s recommended to wipe it down with a soft, dry cloth on a regular basis. If you need to clean it more thoroughly, you can use a damp cloth with a mild soap solution. Be sure to dry it off completely afterwards to prevent any water damage.

Protection

To protect your layered wooden cross from scratches and other damage, it’s a good idea to place it in a safe location. Avoid placing it in direct sunlight or near any sources of heat or moisture. You can also apply a coat of wax or oil to the surface to help protect it from any potential damage.

Repair

If your layered wooden cross becomes damaged, it’s important to repair it as soon as possible to prevent any further damage. Depending on the type and severity of the damage, you may be able to repair it yourself or you may need to seek professional help. For minor scratches or dents, you can use wood filler or sandpaper to smooth out the surface. For more serious damage, it’s best to consult with a professional to ensure it’s repaired properly.

By following these maintenance tips, you can ensure that your layered wooden cross remains in excellent condition for years to come.

How to Make Wooden Flowers: A Step-by-Step Guide

Are you looking for a unique way to add some natural beauty to your home decor? Wooden flowers are a charming and creative option that can brighten up any space. Not only are they a fun DIY project, but they also make great gifts for loved ones. In this article, we will guide you through the steps of how to make wooden flowers, so you can create your own beautiful and long-lasting blooms.

To make wooden flowers, you will need some basic materials such as wood, a saw, sandpaper, wood glue, and paint. The process involves cutting the wood into petal shapes, sanding the edges, and then gluing the petals together in the desired flower shape. You can customize your wooden flowers by adding other decorative items such as beads, ribbons, and wire. Whether you want to make a bouquet of daisies or a single rose, the possibilities are endless.

With a little bit of creativity and patience, you can make wooden flowers that look just as beautiful as the real thing. Not only do they add a touch of nature to your home, but they are also a sustainable and eco-friendly alternative to traditional flowers. So, grab your tools and let’s get started on this fun and rewarding project!

Understanding the Basics of Woodworking

Woodworking is a fun and rewarding hobby that allows you to create beautiful and functional objects out of wood. It’s important to understand the basics of woodworking before you start any project. In this section, we’ll cover some of the basics you need to know before you start making wooden flowers.

Choosing the Right Wood

Choosing the right wood is an important part of woodworking. Different types of wood have different properties and are suited for different purposes. When making wooden flowers, you want to choose a wood that is easy to work with and has a nice grain pattern.

Some good woods for making wooden flowers include:

  • Basswood: A soft wood that is easy to carve and has a fine grain pattern.
  • Pine: A soft wood that is easy to work with and has a distinctive grain pattern.
  • Cedar: A soft wood that is resistant to rot and has a pleasant aroma.

When choosing wood, make sure it is free from knots and other defects that can make it difficult to work with. You should also consider the color of the wood and how it will look when finished.

Safety Measures in Woodworking

Safety is an important consideration in woodworking. You will be using sharp tools and machines that can be dangerous if not used properly. Here are some safety measures you should take when working with wood:

  • Wear eye protection: When using power tools or hand tools, wear safety glasses or goggles to protect your eyes from flying debris.
  • Use sharp tools: Dull tools are more dangerous than sharp tools because they are more likely to slip and cause injury. Keep your tools sharp and in good condition.
  • Keep your work area clean: Cluttered workspaces can be dangerous. Keep your work area clean and free from tripping hazards.
  • Use machines safely: If you are using power tools, make sure you read the manual and follow all safety instructions. Never remove safety guards or operate a machine without proper training.

By following these safety measures, you can reduce the risk of injury and enjoy woodworking safely.

Gathering Necessary Tools

Before you start making wooden flowers, you need to gather all the necessary tools and materials. Here are the essential tools you will need:

Essential Woodworking Tools

  • Wooden dowels: These will serve as the stem of your wooden flowers. You can find these at your local craft store or online.
  • Floral wire: This will make the stems more flexible and sturdy.
  • Wooden petals: You can either purchase pre-cut wooden petals or cut them yourself using a saw and sandpaper.
  • Glue: You will need wood glue to attach the petals to the stem and to attach the petals to each other.
  • Saw: You will need a saw to cut the wooden petals into the desired shape.
  • Sandpaper: You will need sandpaper to smooth the edges of the petals.
  • Paint: You can use any type of paint, but acrylic paint is recommended for its durability and versatility.
  • Paintbrushes: You will need different sizes of paintbrushes to paint the petals and add details.

Choosing the Right Paint and Brushes

When choosing paint and brushes, consider the following:

  • Acrylic paint is the best choice for wooden flowers because it is water-resistant, dries quickly, and adheres well to wood.
  • Choose a paintbrush with soft bristles to prevent brush marks on the petals.
  • Use a smaller brush for details and a larger brush for painting the petals.
  • Consider using a sealer to protect the paint and add shine to the petals.

By gathering all the necessary tools and materials, you are ready to start making beautiful wooden flowers.

Creating the Flower Design

When it comes to making wooden flowers, the first step is to create a design for your flower. This design will serve as a guide for carving or cutting the wood into the shape of the flower. In this section, we’ll cover two important sub-sections to help you create your flower design: Sketching the Flower and Transferring the Design onto Wood.

Sketching the Flower

The first step in creating your wooden flower design is to sketch out the flower on paper. You can use a pencil and paper to create a rough sketch of the flower you want to make. Take your time and make sure to capture all the details of the flower, including the shape of the petals, the size of the flower, and any other features that make it unique.

Once you have a rough sketch of the flower, you can refine it by adding more details and making adjustments to the design. You can also use digital tools like Adobe Illustrator or Inkscape to create a more precise design for your flower.

Transferring the Design onto Wood

After creating your flower design, the next step is to transfer it onto the wood. You can do this by printing out your design on paper and then tracing it onto the wood using a pencil. Alternatively, you can use carbon paper to transfer the design onto the wood.

Once you have the design transferred onto the wood, you can begin cutting or carving the wood to create the shape of the flower. Make sure to take your time and work carefully to ensure that you create a precise and accurate representation of your flower design.

Overall, creating a flower design is an important step in the process of making wooden flowers. By following these tips and techniques, you can create a beautiful and unique wooden flower that will be a great addition to any home or garden.

Cutting and Shaping the Flower

When it comes to making wooden flowers, cutting and shaping the petals is a crucial step. Here’s how to do it:

Using a Jigsaw for Cutting

A jigsaw is a versatile tool that can be used to cut intricate shapes and curves in wood. It’s the perfect tool for cutting out the petal shapes needed for your wooden flower. Follow these steps to use a jigsaw for cutting:

  1. Choose the right blade: For cutting wood, a blade with a high tooth count is best. Look for blades labeled “wood” or “fine.”

  2. Clamp the wood: Secure the piece of wood you’ll be cutting to a workbench or table with clamps. This will keep the wood from moving while you cut.

  3. Mark the petal shape: Use a pencil to draw the shape of the petal onto the wood. You can use a template or draw freehand.

  4. Cut the shape: Turn on the jigsaw and carefully guide the blade along the pencil line. Take your time and be patient. It’s better to go slow and get a clean cut than to rush and make mistakes.

Sanding the Edges

After cutting out the petal shapes, you’ll need to sand the edges to smooth them out and remove any rough spots. Here’s how to do it:

  1. Choose the right sandpaper: For sanding wood, a medium-grit sandpaper (around 120 grit) is a good choice.

  2. Sand the edges: Hold the sandpaper at a 45-degree angle to the edge of the petal and sand in a back-and-forth motion. Be sure to sand all the way around the edge of the petal to get a smooth, even finish.

  3. Check your work: After sanding, inspect the edges of the petal for any rough spots or jagged edges. If you find any, sand them down until the edge is smooth.

By following these steps, you’ll be able to cut and shape the petals for your wooden flower with ease.

Painting and Finishing

Once you have assembled your wooden flower, it’s time to add some color and finish it off. Here are some tips to help you paint and finish your wooden flowers:

Applying the Base Coat

The first step in painting your wooden flower is to apply a base coat. This will help the paint adhere to the wood and provide a smooth surface for the topcoat. You can use any type of paint for the base coat, but acrylic paint is a good choice because it dries quickly and is easy to work with.

To apply the base coat, use a small brush or foam brush and apply the paint in thin, even strokes. Be sure to cover the entire surface of the flower, including the petals and stem. Let the paint dry completely before moving on to the next step.

Adding Details with Paint

Once the base coat is dry, you can add details to your wooden flower with paint. Use a small brush to paint the details, such as the veins on the petals or the center of the flower. You can also use different colors to create a more realistic look.

If you’re not confident in your painting skills, you can use stencils or stamps to add details to your wooden flower. Simply place the stencil or stamp on the flower and apply paint with a brush or sponge.

Sealing the Wood

After you have finished painting your wooden flower, it’s important to seal the wood to protect it from moisture and dirt. You can use a clear coat of polyurethane or a wood sealer to seal the wood.

To apply the sealer, use a brush or spray bottle and apply a thin, even coat to the entire surface of the flower. Be sure to let the sealer dry completely before handling the flower.

By following these simple steps, you can add color and detail to your wooden flowers and protect them from damage.

Displaying Your Wooden Flowers

After creating your beautiful wooden flowers, it’s time to display them! Whether you want to create a flower arrangement or attach them to a wall or surface, there are different ways to showcase your wooden flowers. Here are some tips:

Creating a Flower Arrangement

One way to display your wooden flowers is by creating a flower arrangement. This can be done in a vase, a basket, or any other container of your choice. Here are some steps to follow:

  1. Choose your container: Select a container that matches the style and size of your wooden flowers. A clear vase can show off the stem of the flowers, while a basket can give a rustic feel.

  2. Add filler: Use some filler material, such as moss or small stones, to create a base for your wooden flowers.

  3. Arrange your flowers: Start arranging your wooden flowers in the container. Place the taller flowers in the back and the shorter ones in the front. You can also mix and match different colors and shapes.

  4. Adjust: Once you have arranged your flowers, step back and take a look. Make any necessary adjustments until you are happy with the final result.

Attaching to a Wall or Surface

Another way to display your wooden flowers is by attaching them to a wall or surface. This can be done using adhesive strips, hooks, or nails. Here are some steps to follow:

  1. Choose your location: Decide on the location where you want to hang your wooden flowers. Make sure it is a flat surface and that you have enough space.

  2. Prepare your flowers: If your wooden flowers have stems, you can trim them to the desired length. If they don’t have stems, you can attach a wire or string to the back.

  3. Attach your flowers: Use adhesive strips or hooks to attach your wooden flowers to the wall. If you prefer, you can also use nails. Make sure to space them evenly and at the same height.

  4. Adjust: Once you have attached your flowers, step back and take a look. Make any necessary adjustments until you are happy with the final result.

By following these tips, you can create a beautiful display of your wooden flowers that will add a unique touch to any room.