Tag Archives: proper safety measures

designing-your-wooden-desk

How to Make a Wooden Desk: A Beginner's Guide to Crafting Your Own Workspace

Looking to build your own wooden desk? Whether you’re a seasoned woodworker or a beginner, building your own desk can be a fun and rewarding project. Not only will you end up with a custom piece of furniture that perfectly fits your needs and style, but you’ll also have the satisfaction of knowing that you built it yourself.

Before you get started, you’ll need to decide on the type of desk you want to build. Do you want a simple, minimalist desk that can be built in a weekend, or are you looking for a more elaborate design that will require more time and skill? You’ll also need to consider the size and shape of your desk, as well as the type of wood you want to use. Once you’ve made these decisions, you’ll be ready to start gathering your materials and tools and getting to work on your new desk.

Understanding the Basics of Woodworking

make-a-wooden-desk

Woodworking is a rewarding and fulfilling hobby that allows you to create beautiful and functional pieces of furniture. However, before you start building your own wooden desk, there are a few basics you need to understand.

Types of Wood

There are many different types of wood available, each with its own unique characteristics. Some popular types of wood used in woodworking include:

  • Pine: A softwood that is easy to work with and relatively inexpensive.
  • Oak: A hardwood that is strong and durable, but can be difficult to work with due to its density.
  • Cherry: A hardwood that is known for its beautiful grain patterns and rich color.
  • Maple: A hardwood that is strong and durable, but can be difficult to work with due to its hardness.

When choosing wood for your desk, consider factors such as strength, durability, and appearance.

Safety Measures

Woodworking can be dangerous if proper safety measures are not taken. Always wear protective gear, such as safety glasses and earplugs, when working with power tools. Additionally, make sure to follow all safety instructions for each tool you use. Never rush or take shortcuts when working with wood.

Essential Tools

To build a wooden desk, you will need a few essential tools, including:

  • Saw: A saw is used to cut the wood to the desired size and shape.
  • Drill: A drill is used to make holes in the wood for screws and other fasteners.
  • Hammer: A hammer is used to drive nails and other fasteners into the wood.
  • Sandpaper: Sandpaper is used to smooth the wood and remove any rough edges.

Other useful tools include a measuring tape, square, and clamps.

By understanding the basics of woodworking, you will be well on your way to building your own beautiful and functional wooden desk. Remember to always prioritize safety and take your time to ensure a high-quality finished product.

Designing Your Wooden Desk

designing-your-wooden-desk

When it comes to designing your own wooden desk, there are a few key things to consider. By taking the time to think through these factors, you can create a desk that is both functional and visually appealing. Here are some sub-sections to help guide you through the design process:

Deciding the Size

The first step in designing your wooden desk is to decide on the size. Consider the space where the desk will be placed and how much room you need to work. You’ll want to make sure that your desk is large enough to accommodate all of your tools and equipment, but not so large that it takes up too much space in the room.

To help you determine the right size for your desk, take measurements of the area where it will be placed. Consider the height of the desk as well, and make sure that it is comfortable for you to work at for extended periods of time.

Choosing the Style

The style of your wooden desk is another important factor to consider. Do you want a modern, minimalist desk, or something more traditional? Think about the overall aesthetic of the room where the desk will be placed, and try to choose a style that complements it.

You’ll also want to consider the type of wood you’ll use for your desk. Different woods have different grains and colors, so choose one that matches your personal style and the look you’re going for.

Creating the Blueprint

Once you have an idea of the size and style of your desk, it’s time to create a blueprint. This will help you visualize the final product and ensure that everything fits together properly.

You can create a blueprint using software like SketchUp, or you can draw it by hand. Make sure to include all of the necessary measurements and details, including the size of the desk, the placement of drawers and shelves, and any other features you want to include.

By taking the time to design your wooden desk properly, you can create a beautiful and functional piece of furniture that will last for years to come.
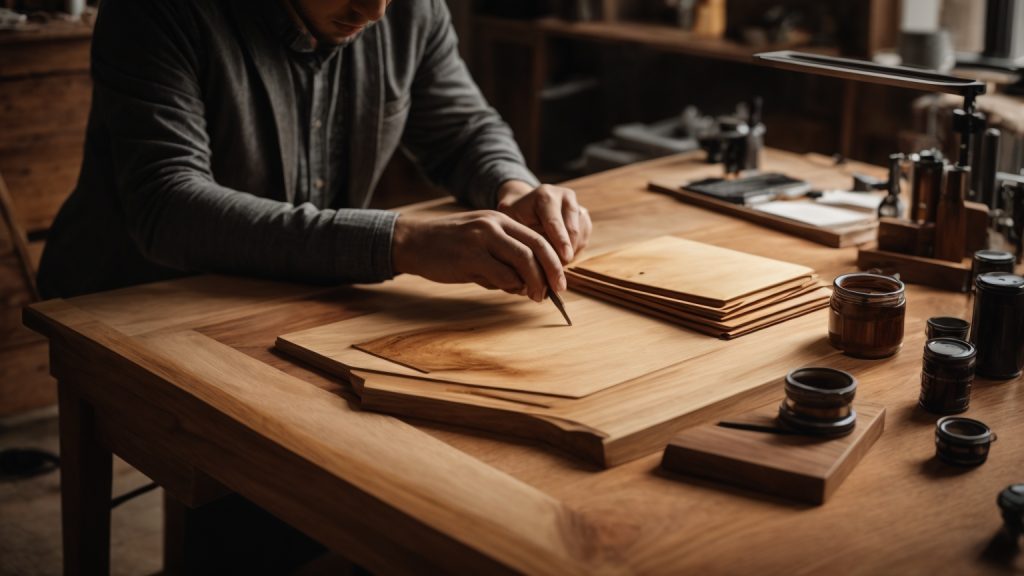
Preparing the Wood

Before you start building your wooden desk, you need to prepare the wood. This involves selecting the right type of wood, cutting it to size, and sanding it to create a smooth surface.

Selecting the Wood

When selecting wood for your desk, you want to choose a type of wood that is sturdy and durable. Some popular options include oak, maple, and pine. You should also consider the color and grain pattern of the wood to ensure it matches your desired aesthetic.

Once you have selected the wood, you need to measure and cut it to the appropriate size.

Cutting the Wood

To cut the wood, you will need a saw. A miter saw or handsaw will work for this task. Make sure to measure the wood carefully before cutting to ensure accuracy.

If you are not comfortable using a saw, you can have the wood cut to size at a hardware store or lumber yard.

Sanding the Wood

Once the wood is cut to size, you need to sand it to create a smooth surface. Start with a coarse-grit sandpaper, such as 120-grit, and work your way up to a finer grit, such as 180-grit.

Make sure to sand with the grain of the wood to avoid creating scratches or marks. You can use a sanding block or an orbital sander to make the process easier.

After sanding, wipe the wood with a clean cloth to remove any dust or debris. Your wood is now ready to be assembled into a desk.
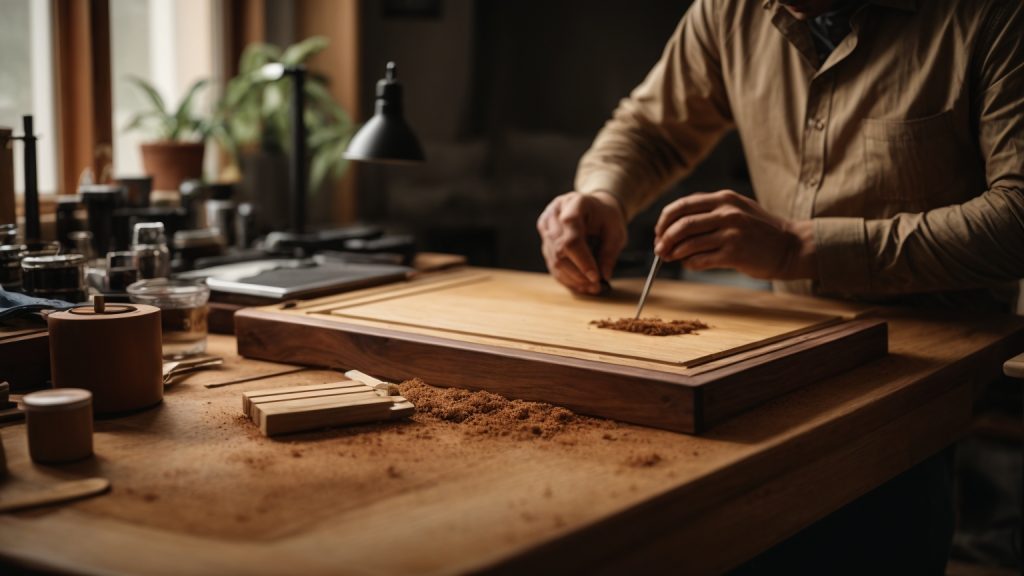
Assembling the Desk

Once you have all the pieces of your wooden desk cut and sanded, it’s time to put them together. This section will guide you through the process of assembling your desk. We will cover two sub-sections: Joining the Pieces and Securing the Structure.

Joining the Pieces

The first step in assembling your desk is to join the pieces together. You will need to use wood glue and clamps to ensure a strong bond between the pieces. Follow these steps to join the pieces:

  1. Apply wood glue to the edges of the pieces that will be joined together.
  2. Press the pieces together and use clamps to hold them in place.
  3. Wipe away any excess glue with a damp cloth.
  4. Allow the glue to dry completely before removing the clamps.

Securing the Structure

Once the pieces are joined together, you will need to secure the structure of the desk. This will ensure that your desk is sturdy and can hold the weight of your computer, books, and other items. Follow these steps to secure the structure:

  1. Attach the legs to the underside of the desk using wood screws.
  2. Install the cross supports between the legs to add stability to the desk.
  3. Attach the top of the desk to the frame using wood screws.
  4. Sand any rough edges or surfaces to ensure a smooth finish.

Congratulations! You have successfully assembled your wooden desk.

Finishing Touches

Applying the Finish

Now that you have assembled your wooden desk, it’s time to apply the finish. This will not only protect the wood but also enhance its beauty. There are various finishes you can choose from, such as stains, oils, and varnishes. Here are some tips to help you apply the finish:

  • Sand the surface of the desk with fine-grit sandpaper to remove any imperfections and ensure a smooth finish.
  • Apply the finish in thin coats using a brush or a cloth. It’s important to follow the manufacturer’s instructions and allow each coat to dry completely before applying the next one.
  • If you’re using a stain, make sure to wipe off any excess with a clean cloth after a few minutes. This will prevent the stain from becoming too dark or blotchy.
  • For a glossy finish, you can use a varnish or a polyurethane. Apply several coats, sanding lightly between each coat to remove any bumps or bubbles.

Adding Accessories

To make your wooden desk more functional and comfortable, you can add some accessories. Here are some ideas:

  • Desk lamp: A desk lamp will provide you with the right amount of light and reduce eye strain.
  • Desk organizer: Keep your desk clutter-free with a desk organizer. You can store pens, papers, and other office supplies in it.
  • Chair: Choose a comfortable chair that provides good support for your back. You’ll be spending a lot of time sitting at your desk, so it’s important to have a chair that is both comfortable and ergonomic.
  • Monitor stand: If you use a computer, a monitor stand will elevate your screen to eye level, reducing neck and eye strain.
  • Keyboard tray: A keyboard tray will help you maintain a good posture and prevent wrist strain.

With these finishing touches, your wooden desk will be ready for you to use and enjoy.

How to Make a Wooden Chest: A Beginner's Guide

To make a wooden chest, you will need some basic woodworking skills and tools. Whether you want to create a storage chest for blankets, toys, or other items, building your own wooden chest can be a fun and rewarding project. In this article, we will provide you with step-by-step instructions on how to make a wooden chest DIY style.

First, you will need to gather all the necessary materials and tools. This includes wood, screws, hinges, a saw, a drill, sandpaper, and wood glue. You can choose the type of wood you want to use based on your personal preference and budget. Once you have all the materials, you can start measuring and cutting the wood according to the dimensions of your desired chest.

Next, you will need to assemble the chest by attaching the sides, bottom, and lid together. You can use wood glue and screws to secure the pieces in place. After the chest is assembled, you can sand it down to make it smooth and apply a finish or paint if desired. With a little bit of patience and effort, you can create a beautiful and functional wooden chest that will last for years to come.

Understanding the Basics of Woodworking

Woodworking is a fun and rewarding hobby that allows you to create beautiful and functional objects out of wood. However, it is important to understand the basics of woodworking before you start any project. In this section, we will cover two important aspects of woodworking: choosing the right wood and safety measures.

Choosing the Right Wood

Choosing the right wood is crucial for any woodworking project. Here are some factors to consider when selecting wood:

  • Type of Wood: There are many types of wood available, each with its own unique characteristics. Some common types of wood used in woodworking include oak, maple, cherry, and pine. Consider the color, grain pattern, and hardness of the wood when making your selection.

  • Moisture Content: The moisture content of the wood is important because it affects how the wood will behave during the woodworking process. Wood that is too wet or too dry can be difficult to work with. It is best to use wood with a moisture content between 6% and 8%.

  • Grade: Wood is graded based on its quality and appearance. Select the grade that is appropriate for your project. For example, if you are making a rustic piece of furniture, you may want to use lower-grade wood with knots and other imperfections.

Safety Measures in Woodworking

Woodworking can be dangerous if proper safety measures are not taken. Here are some important safety tips to keep in mind:

  • Wear Safety Gear: Always wear safety goggles, ear protection, and a dust mask when working with wood. Wear gloves to protect your hands and avoid loose clothing that can get caught in machinery.

  • Use Sharp Tools: Dull tools are more dangerous than sharp tools because they require more force to use. Keep your tools sharp and in good condition.

  • Use Machinery Safely: Follow the manufacturer’s instructions when using machinery. Keep your hands and fingers away from moving parts, and never reach over or under a machine while it is running.

By following these basic guidelines, you can ensure that your woodworking projects are safe and successful.

Required Tools for Making a Wooden Chest

When making a wooden chest, you will need several tools to help you complete the project. Here are the basic tools you will need to make a wooden chest.

Measuring Tools

Before you begin making a wooden chest, you need to make sure that you have the right measurements. Here are some measuring tools you will need:

  • Tape measure
  • Combination square
  • Carpenter’s square
  • Marking gauge
  • Pencil

Cutting Tools

Once you have the right measurements, you will need to cut the wood to size. Here are some cutting tools you will need:

  • Circular saw
  • Table saw
  • Hand saw
  • Jigsaw
  • Miter saw

Joinery Tools

Joinery tools help you to join the pieces of wood together. Here are some joinery tools you will need:

  • Hammer
  • Chisels
  • Screwdrivers
  • Nails
  • Screws

Having the right tools is essential to making a wooden chest. Make sure that you have all the necessary tools before starting your project.

Designing Your Wooden Chest

When it comes to designing your wooden chest, there are a few key things to consider. In this section, we will go over how to determine the size of your chest and how to sketch out your design.

Determining the Size

The size of your wooden chest will largely depend on what you plan to use it for. If you are using it as a toy box or for storing blankets, you may want to make it larger. If you are using it for smaller items like jewelry or keepsakes, you may want to make it smaller.

One way to determine the size of your chest is to measure the items you plan to store in it. This will give you a good idea of how much space you will need. You can also consider the space where you plan to keep the chest and make sure it fits comfortably in that area.

Sketching the Design

Once you have determined the size of your chest, it’s time to sketch out your design. You can use graph paper to help you create a to-scale drawing of your chest. This will help you visualize what the finished product will look like and make it easier to make any necessary adjustments.

When sketching your design, consider the following:

  • The overall shape of the chest
  • The placement of any handles or hinges
  • The type of wood you plan to use
  • Any decorative elements you want to include

Keep in mind that the design of your chest should be both functional and aesthetically pleasing. You want to create a piece that is not only useful but also looks great in your home.

By taking the time to carefully consider the size and design of your wooden chest, you can create a beautiful and functional piece that will last for years to come.

Preparing the Wood

Before you start building your wooden chest, it’s important to prepare the wood properly. This will ensure that your final product looks great and is sturdy enough to last for years to come. In this section, we’ll go over the two main steps in preparing the wood: cutting and sanding.

Cutting the Wood

The first step in preparing the wood is cutting it to the right size. You’ll need to measure and mark the wood according to your plans, and then use a saw to make the cuts. Here are a few tips to keep in mind:

  • Use a sharp saw: A dull saw will make rough cuts and may damage the wood. Make sure your saw is sharp before you start cutting.
  • Measure twice, cut once: Double-check your measurements before you start cutting to avoid mistakes.
  • Cut slowly and carefully: Take your time when cutting to ensure that your cuts are straight and accurate.

Sanding the Wood

Once you’ve cut the wood to size, it’s time to sand it. Sanding will smooth out any rough edges and prepare the wood for staining or painting. Here’s what you need to know:

  • Start with coarse sandpaper: Use a coarse sandpaper (around 80-100 grit) to remove any rough spots or splinters.
  • Move to finer sandpaper: Once the rough spots are gone, switch to a finer sandpaper (around 150-200 grit) to smooth out the wood.
  • Sand with the grain: Always sand with the grain of the wood to avoid scratches and to ensure a smooth finish.
  • Use a sanding block: A sanding block will help you apply even pressure and ensure that your sanding is consistent.

By following these steps, you’ll be able to prepare your wood for building a beautiful and sturdy wooden chest.

Assembling the Wooden Chest

Now that you have all the pieces cut, sanded, and stained, it’s time to put the wooden chest together. This section will guide you through the process of assembling the chest.

Joining the Pieces

First, you need to join the sides of the chest to the front and back panels. Apply wood glue to the edges of the front and back panels and attach them to the sides. Use clamps to hold the pieces together while the glue dries.

Next, you can attach the base of the chest. Apply glue to the bottom edges of the chest sides and attach the base. You can also use screws to secure the base to the sides.

Installing the Lid

Now it’s time to install the lid of the chest. Attach the hinges to the back of the lid and the back of the chest. Make sure the hinges are evenly spaced and level. Once the hinges are attached, you can attach the lid to the chest.

If you want to add a handle to the lid, now is the time to do so. You can use a metal handle or make your own out of wood. To attach the handle, drill holes in the lid and attach the handle with screws.

Congratulations! Your wooden chest is now assembled and ready to use.

Finishing Touches

Once you have completed building your wooden chest, it’s time to apply the finishing touches. This will not only enhance the appearance of your chest but also protect it from wear and tear. In this section, we will discuss the two essential finishing touches: Applying the Finish and Adding Hardware.

Applying the Finish

Before applying the finish, make sure that the surface of your chest is smooth and free of any dust or debris. You can use a sandpaper to sand the surface of your chest until it’s smooth. Once you have done that, you can apply the finish of your choice. There are several types of finishes available, including paint, stain, and varnish.

If you want to paint your chest, make sure that you use a paint that is suitable for wood. You can also use a primer to ensure that the paint adheres to the surface of your chest. If you want to stain your chest, choose a stain that is suitable for the type of wood you have used. Apply the stain with a brush and wipe off any excess stain with a cloth. If you want to use varnish, apply it in thin coats with a brush and let it dry completely before applying another coat.

Adding Hardware

Adding hardware to your wooden chest can enhance its appearance and make it more functional. You can use handles, hinges, locks, and other hardware to add character and functionality to your chest. When choosing hardware, make sure that it is suitable for the size and weight of your chest.

To attach handles, mark the position where you want to attach them and drill holes in the marked position. Insert the screws through the holes and attach the handles. For hinges, mark the position where you want to attach them and drill pilot holes. Attach the hinges with screws and make sure that they are aligned properly. For locks, mark the position where you want to attach them and drill holes for the lock mechanism. Attach the lock mechanism and the keyhole plate with screws.

In conclusion, applying the finish and adding hardware are essential finishing touches that can enhance the appearance and functionality of your wooden chest. By following these simple steps, you can create a beautiful and functional wooden chest that will last for years to come.

How to Make a Wooden Mantel Shelf: A Simple Guide

Looking to add some character to your living space? A wooden mantel shelf is a great way to do just that. Whether you’re looking to create a rustic or modern look, a wooden mantel shelf is a versatile addition to any home.

Creating your own wooden mantel shelf may seem like a daunting task, but with the right tools and materials, it can be a fun and rewarding DIY project. In this article, we’ll take you through the steps to create a wooden mantel shelf from scratch. From choosing the right wood to finishing touches, we’ll cover everything you need to know to create a beautiful and functional mantel shelf.

Before we get started, it’s important to note that safety should always come first when working with power tools and wood. Be sure to wear protective gear, such as goggles and gloves, and follow all safety guidelines for your tools. Now, let’s get started on creating your own wooden mantel shelf!

Understanding the Basics of Woodworking

Woodworking is a fun and rewarding hobby that can also be practical. With the right tools and techniques, you can create beautiful and functional pieces of furniture and decor for your home. If you’re new to woodworking, it’s important to start with the basics. Here are a few things to keep in mind as you begin:

Choosing the Right Wood

The type of wood you choose for your project will depend on a few factors, including your budget, the look you’re going for, and the project itself. Here are a few popular types of wood and their characteristics:

Wood Type Characteristics
Pine Softwood, affordable, easy to work with
Oak Hardwood, durable, attractive grain pattern
Cherry Hardwood, reddish-brown color, smooth texture
Maple Hardwood, light color, fine grain

When selecting wood for your project, be sure to choose pieces that are straight and free of knots or other defects. This will make it easier to work with and will result in a more polished finished product.

Safety Measures

Woodworking can be dangerous if proper safety measures are not taken. Here are a few things to keep in mind:

  • Always wear eye and ear protection when working with power tools.
  • Keep your work area clean and free of clutter.
  • Use sharp tools to avoid slips and accidents.
  • Never work with power tools while under the influence of drugs or alcohol.

By following these basic safety guidelines, you can enjoy woodworking without putting yourself or others at risk.

Gathering Necessary Tools

To build a wooden mantel shelf, you will need some basic tools. Here is a list of tools you’ll need:

Measuring Tools

You’ll need a measuring tape to measure the length and width of the mantel shelf. A level will help you ensure that the shelf is straight and even.

Cutting Tools

A saw is essential for cutting the wood to the desired length and shape. A circular saw or a miter saw is ideal for this job.

Joining Tools

To join the pieces of wood together, you can use wood glue and clamps. A brad nailer and brad nails can also be used to secure the pieces of wood together.

Sanding Tools

After cutting and joining the pieces of wood, you’ll need to sand the surface to make it smooth. A palm sander is ideal for this job.

Finishing Tools

To finish the mantel shelf, you’ll need a stain or paint of your choice. A rag and wood conditioner can be used to prepare the wood for staining. A paste finishing wax can also be used to give the shelf a polished look.

Other Tools

Other tools that may come in handy include a stud finder, drill, and wood screws. These tools will help you secure the mantel shelf to the wall.

Once you have all the necessary tools, you can start building your wooden mantel shelf. With a little patience and effort, you can create a beautiful mantel shelf that will add character and warmth to your home.

Designing Your Wooden Mantel Shelf

When designing your wooden mantel shelf, there are a few things to consider. You want to create a piece that not only adds beauty to your fireplace but also functionality. Here are some tips to help you design the perfect wooden mantel shelf for your home.

1. Choose the Right Wood

The type of wood you choose for your mantel shelf will affect both its appearance and durability. Some popular wood options include oak, maple, cherry, and walnut. Each type of wood has its unique characteristics, such as color, grain pattern, and hardness. Consider the style of your home and the look you want to achieve when selecting the wood for your mantel shelf.

2. Determine the Size

The size of your mantel shelf will depend on the size of your fireplace and the room it’s in. You want to make sure the mantel shelf is proportional to the fireplace and doesn’t overwhelm the room. Measure the width and height of your fireplace and use those measurements to determine the appropriate size for your mantel shelf.

3. Add Decorative Elements

A wooden mantel shelf can be more than just a functional piece. You can add decorative elements to make it a focal point in the room. Consider adding corbels, brackets, or trim to enhance the look of your mantel shelf. You can also add a stain or paint to match your home’s decor.

4. Consider the Functionality

Your mantel shelf should not only look great but also serve a purpose. Consider adding shelves or cubbies to store books, pictures, or other decorative items. You can also add hooks to hang stockings or other items during the holiday season.

Designing a wooden mantel shelf can be a fun and rewarding project. Keep these tips in mind when creating your design to ensure you end up with a beautiful and functional piece that adds value to your home.

Cutting and Shaping the Wood

Now that you have gathered all the necessary materials, it’s time to start cutting and shaping the wood for your mantel shelf. Here are some steps to follow:

  1. Measure and mark the wood: Measure the wood according to the dimensions you want for your mantel shelf. Use a pencil to mark the wood where you will be making cuts.

  2. Cut the wood: Use a saw to cut the wood along the marked lines. Be sure to cut carefully and accurately to avoid any mistakes.

  3. Sand the wood: Use sandpaper to smooth out any rough edges or surfaces on the wood. This will help make the wood look more polished and professional.

  4. Shape the wood: If you want to add any decorative elements to your mantel shelf, now is the time to do so. Use a router or other shaping tool to create the desired design on the wood.

  5. Finish the wood: Apply a wood stain or paint to the wood to give it the desired finish. Be sure to let the finish dry completely before installing the mantel shelf.

Remember to take your time when cutting and shaping the wood. It’s better to work slowly and carefully to avoid any mistakes or accidents. With these steps, you’ll be well on your way to creating a beautiful and functional mantel shelf for your fireplace.

Assembling the Wooden Mantel Shelf

Now that you have all the necessary materials and have made all the required cuts, it’s time to assemble your wooden mantel shelf. Follow these steps to ensure a smooth and successful assembly process:

  1. Start by attaching the mounting bracket to the back of your mantel shelf. If you’re using a French cleat, attach one half of the cleat to the back of the shelf, making sure it’s level and centered.

  2. Next, mark the location where you want the mantel shelf to be installed on the wall. Use a level to ensure that the markings are straight and level. It’s important to take your time with this step to ensure that the mantel shelf is properly aligned and looks great once installed.

  3. Now it’s time to attach the other half of the French cleat or the mounting bracket to the wall. Use a drill to attach the bracket securely to the wall, making sure that it’s level and centered.

  4. Once the mounting bracket is securely attached to the wall, it’s time to hang the mantel shelf. If you’re using a French cleat, simply slide the shelf onto the other half of the cleat that’s attached to the wall. If you’re using a mounting bracket, carefully lift the shelf and slide it onto the bracket.

  5. Finally, use a level to ensure that the mantel shelf is straight and level. Make any necessary adjustments to ensure that it’s properly aligned.

Congratulations! You’ve successfully assembled your wooden mantel shelf. It’s now ready to be decorated and used to enhance the look of your fireplace.

Sanding and Finishing the Shelf

Once you have assembled your wooden mantel shelf, it is time to sand and finish it. Sanding the shelf is important to ensure that it is smooth and free of rough patches or splinters. Finishing the shelf is important to protect the wood from moisture and wear and tear. Here are the steps to sand and finish your wooden mantel shelf:

Sanding the Shelf

  1. Start by sanding the shelf with medium-grit sandpaper to remove any rough patches or splinters. Then, sand the shelf with fine-grit sandpaper to make it smooth.

  2. Use a sanding block or a power sander to make the job easier and more efficient.

  3. Pay special attention to the places where you applied putty. Sand those areas until you can feel little difference between the wood and the putty.

  4. After sanding, wipe the shelf with a damp cloth to remove any dust or debris.

Finishing the Shelf

  1. Apply a wood conditioner to the shelf to help it absorb the stain evenly.

  2. Apply the stain with a brush or a cloth. Be sure to follow the manufacturer’s instructions and apply the stain evenly.

  3. After applying the stain, wipe the shelf with a lint-free cloth to remove any excess stain.

  4. Allow the stain to dry completely before applying a topcoat.

  5. Apply a topcoat to protect the wood from moisture and wear and tear. You can choose a clear coat or a colored coat depending on your preference.

  6. Allow the topcoat to dry completely before installing the shelf.

By following these steps, you can sand and finish your wooden mantel shelf to make it smooth and protected from wear and tear.

Installing the Wooden Mantel Shelf

Now that you have built your wooden mantel shelf, it’s time to install it. Follow these steps to ensure a secure and level installation.

Step 1: Choose the Location

Choose the location where you want to install your mantel shelf. Make sure the location is free from any obstructions and is centered above the fireplace. Use a level to ensure that the location is straight.

Step 2: Mark the Wall

Mark the wall where you want to install the mantel shelf. Use a pencil to mark the location where the shelf will be installed. Make sure the marks are level and straight.

Step 3: Install the Mounting Bracket

Install the mounting bracket on the wall. Use a drill to make holes in the wall where you marked the location. Insert the screws through the mounting bracket and into the wall. Make sure the mounting bracket is level and secure.

Step 4: Attach the Mantel Shelf

Attach the mantel shelf to the mounting bracket. Slide the mantel shelf onto the mounting bracket and secure it with screws. Make sure the mantel shelf is level and secure.

Step 5: Finishing Touches

Now that your mantel shelf is installed, it’s time to add the finishing touches. Sand any rough edges and apply a coat of paint or stain to match your decor. Add any decorative items or pictures to your mantel shelf to complete the look.

Following these steps will ensure a secure and level installation for your wooden mantel shelf. Enjoy your new mantel shelf and the warmth it brings to your home.