Tag Archives: regular maintenance regular maintenance

how-to-fix-a-hole-in-a-wooden-door-simple-solutions-for-a-common-problem-2

How to Fix a Hole in a Wooden Door: Simple Solutions for a Common Problem

Fixing a hole in a wooden door may seem like a daunting task, but it is actually a simple DIY project that you can easily do yourself. Whether you have a hollow-core or solid wood door, there are a variety of methods you can use to repair the hole and make your door look as good as new.

If you have a hollow-core door, the most common method involves using a quick expansion filler to fill the space in the door and then sanding it down and painting it to match the existing color. For solid wood doors, you can use string, glue, and putty to fill the hole and make a seamless repair. With a little bit of time and effort, you can easily fix the hole and avoid the cost of replacing the entire door.

In this article, we will provide you with step-by-step instructions on how to fix a hole in a wooden door, including the tools and materials you will need. Whether you are a seasoned DIYer or a beginner, our guide will help you make the repair quickly and easily. So, roll up your sleeves and let’s get started!

Recognizing the Type of Hole
how-to-fix-a-hole-in-a-wooden-door-simple-solutions-for-a-common-problem-2

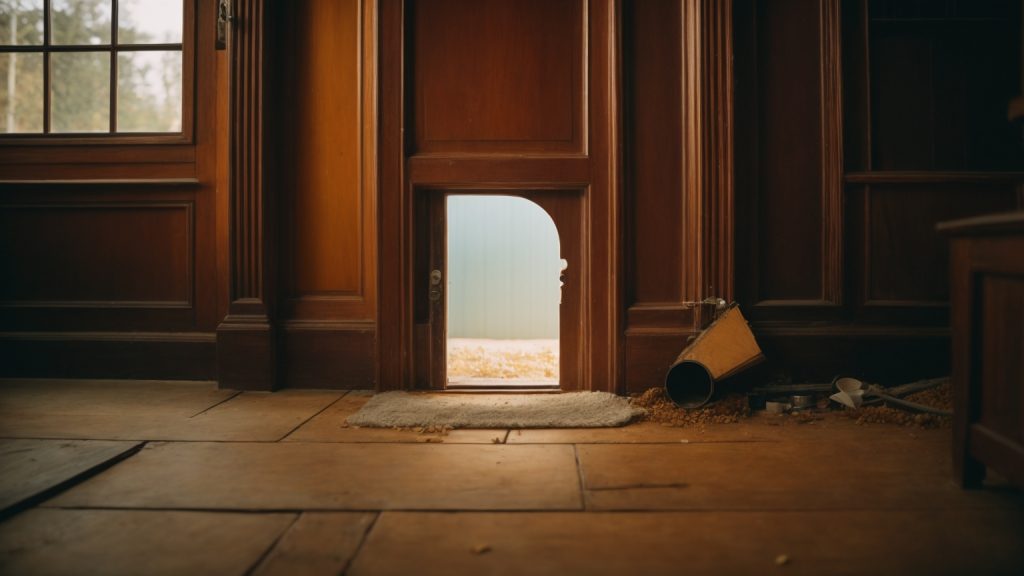
When it comes to fixing a hole in a wooden door, the first step is to recognize the type of hole you’re dealing with. Different types of holes require different approaches to repair. Here are some common types of holes you may encounter:

Small Holes

Small holes in wooden doors are typically caused by screws or nails. These holes are usually less than 1/4 inch in diameter. To fix a small hole, you can use wood filler or putty. Here’s how:

  1. Clean the hole with a damp cloth to remove any debris.
  2. Apply wood filler or putty to the hole, using a putty knife.
  3. Smooth out the surface of the filler or putty with the putty knife.
  4. Let the filler or putty dry completely, according to the manufacturer’s instructions.
  5. Sand the surface of the filler or putty until it’s smooth.
  6. Prime and paint the repaired area to match the rest of the door.

Large Holes

Large holes in wooden doors are usually caused by accidental impact or damage. These holes are typically more than 1/4 inch in diameter. To fix a large hole, you’ll need to use a patch or a new piece of wood. Here’s how:

  1. Cut a piece of wood that’s slightly larger than the hole.
  2. Place the wood over the hole and trace around it with a pencil.
  3. Cut out the traced area with a jigsaw or handsaw.
  4. Apply wood glue to the back of the patch or new piece of wood.
  5. Insert the patch or new piece of wood into the hole and press it firmly in place.
  6. Let the glue dry completely, according to the manufacturer’s instructions.
  7. Sand the surface of the patch or new piece of wood until it’s flush with the rest of the door.
  8. Prime and paint the repaired area to match the rest of the door.

Cracks or Splits

Cracks or splits in wooden doors are usually caused by changes in temperature or humidity. These types of holes can be more difficult to repair. Here’s how:

  1. Use a putty knife to clean out any debris from the crack or split.
  2. Apply wood glue to the crack or split, using a small brush.
  3. Use a clamp to hold the crack or split closed while the glue dries.
  4. Let the glue dry completely, according to the manufacturer’s instructions.
  5. Sand the surface of the repaired area until it’s smooth.
  6. Prime and paint the repaired area to match the rest of the door.

By recognizing the type of hole you’re dealing with, you can choose the appropriate method to fix it. With a little bit of effort, you can have your wooden door looking as good as new again.

Gathering Necessary Tools and Materials

Before you begin fixing a hole in your wooden door, you need to gather the necessary tools and materials. Here is a list of things you will need to fix a hole in a wooden door:

For Small Holes

If you have a small hole in your wooden door, you will need the following tools and materials:

Tools Materials
Hammer Wood filler
Sandpaper Paint or stain
Paintbrush

For Large Holes

If you have a large hole in your wooden door, you will need the following tools and materials:

Tools Materials
Jigsaw or handsaw Plywood or wooden patch
Sandpaper Wood glue
C-clamps Paint or stain
Paintbrush

For Cracks or Splits

If your wooden door has cracks or splits, you will need the following tools and materials:

Tools Materials
Chisel Wood glue
Hammer Clamps
Sandpaper Wood filler
Paint or stain Paintbrush

Make sure to gather all the necessary tools and materials before starting the repair process. This will make the process smoother and faster.

Fixing Small Holes
fixing-small-holes

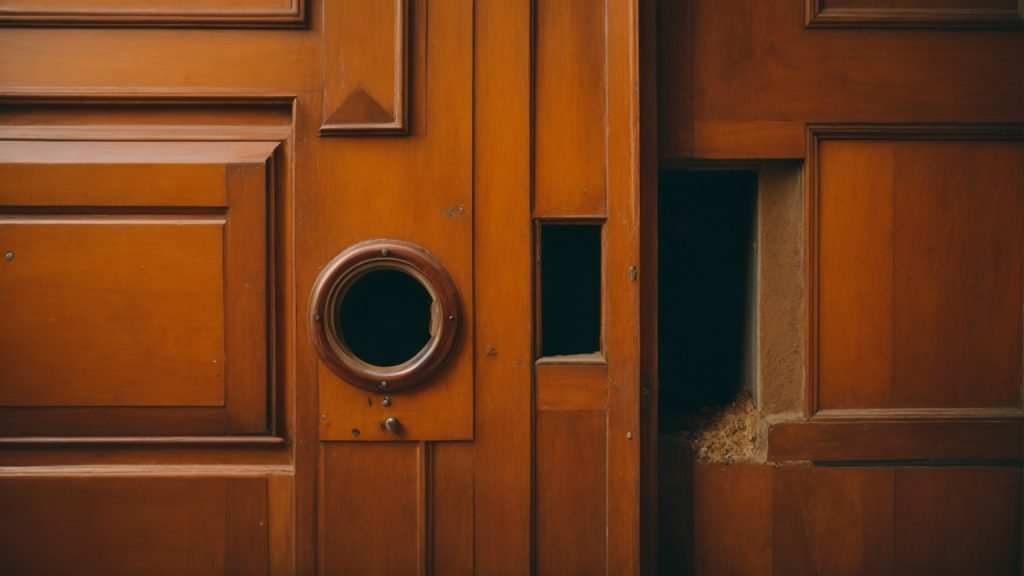
Fixing small holes in a wooden door is a simple job that you can do yourself. Here are the steps to follow:

Preparation

Before you start, you need to gather the necessary materials. You will need wood filler, sandpaper, a putty knife, a damp cloth, and paint or stain that matches the door. Once you have everything you need, follow these steps:

  1. Clean the area around the hole with a damp cloth to remove any dirt or debris.
  2. Use a putty knife to apply wood filler to the hole. Make sure to fill the hole completely and smooth out the surface of the filler.
  3. Let the wood filler dry completely. This may take several hours depending on the product you are using.

Application of Wood Filler

Once the wood filler is dry, you can start sanding and finishing the door. Follow these steps:

  1. Use sandpaper to sand the surface of the wood filler until it is smooth and level with the surrounding wood.
  2. Use a damp cloth to remove any dust or debris from the surface of the door.
  3. Apply paint or stain to the door to match the existing color. You may need to apply more than one coat to achieve the desired color.

Sanding and Finishing

Once the paint or stain is dry, you can finish the job by sanding the surface of the door. Follow these steps:

  1. Use a fine-grit sandpaper to sand the surface of the door until it is smooth and even.
  2. Wipe the door with a damp cloth to remove any dust or debris.
  3. Apply a coat of finish to the door to protect it from future damage.

By following these simple steps, you can fix small holes in a wooden door and restore its appearance.

Repairing Large Holes

If you have a large hole in your wooden door, don’t worry, it can be fixed. Here is a step-by-step guide to repairing large holes in wooden doors.

Preparation

Before you begin the repair process, you need to prepare the door. First, remove any loose or splintered wood around the hole. Use sandpaper to smooth the edges of the hole and surrounding area. Clean the hole and the surrounding area with a cloth to remove any dust or debris.

Application of Wood Patch

Next, you need to apply a wood patch to fill the hole. There are different types of wood patches available, such as epoxy, wood filler, or wood putty. Choose the one that matches the color of your door.

To apply the wood patch, follow these steps:

  1. Mix the wood patch according to the instructions on the package.
  2. Apply the wood patch to the hole with a putty knife, filling it completely.
  3. Smooth the surface of the patch with the putty knife, making it level with the surface of the door.
  4. Let the patch dry completely, according to the instructions on the package.

Sanding and Finishing

Once the patch has dried, you need to sand and finish the door. Follow these steps:

  1. Sand the surface of the patch with sandpaper until it is smooth and level with the surface of the door.
  2. Clean the surface of the door with a cloth to remove any dust or debris.
  3. Apply a coat of primer to the patch and let it dry completely.
  4. Apply a coat of paint or stain to the patch, matching the color of the door. Let it dry completely.
  5. Apply a clear coat of varnish or polyurethane to the entire door to protect it from moisture and scratches.

By following these steps, you can repair a large hole in your wooden door and make it look like new again.

Mending Cracks or Splits

If your wooden door has cracks or splits, don’t worry. You can easily fix them with some wood glue and clamps. Here’s how:

Preparation

Before you start, gather the necessary materials. You’ll need wood glue, clamps, sandpaper, a putty knife, and a paintbrush. If the crack is dirty, clean it out with sandpaper. Then, apply wood glue to the crack using a putty knife. Make sure to spread the glue evenly over the entire crack.

Application of Wood Glue

Apply a generous amount of wood glue to the crack. Spread it evenly with a putty knife, making sure to fill the entire crack. If the crack is deep, you may need to apply the glue in layers, allowing each layer to dry before applying the next one.

Clamping and Finishing

Once you’ve applied the wood glue, clamp the crack shut. Use as many clamps as necessary to ensure a tight fit. Wipe off any excess glue with a damp cloth. Let the glue dry completely, which can take several hours or overnight. Once the glue is dry, sand the area smooth and paint or stain the door to match the rest of the surface.

By following these simple steps, you can mend cracks or splits in your wooden door and restore it to its original beauty.

Painting or Staining the Door

When it comes to fixing a hole in a wooden door, painting or staining the door is an essential step to make it look like new. Here are some tips to help you get the best results.

Choosing the Right Paint or Stain

Choosing the right paint or stain is crucial to ensure that the door looks good and lasts a long time. When selecting the paint or stain, consider the following:

  • Type of wood: Different types of wood require different types of paint or stain. Make sure to choose a product that is suitable for the type of wood that your door is made of.
  • Color: Choose a color that matches the existing color of the door or complements the overall color scheme of the room.
  • Finish: The finish you choose will affect the final look of the door. Choose a finish that suits the style of the door and the room.

Application Process

Once you have chosen the right paint or stain, it’s time to apply it to the door. Here are some steps to follow:

  1. Sand the door: Sand the door to remove any rough spots or imperfections. This will help the paint or stain adhere better to the surface.
  2. Clean the door: Clean the door thoroughly to remove any dust or debris. Use a damp cloth or sponge to wipe down the surface.
  3. Apply the paint or stain: Apply the paint or stain using a brush or roller. Make sure to apply it evenly and follow the manufacturer’s instructions.
  4. Allow to dry: Allow the paint or stain to dry completely before applying a second coat or reattaching the door to its hinges.
  5. Apply a second coat (optional): If necessary, apply a second coat of paint or stain to achieve the desired look.

Remember to take your time and follow the instructions carefully to get the best results. With a little patience and effort, you can make your door look as good as new.

Preventive Measures for Future Damage

To avoid having to repair holes in your wooden door, there are some preventive measures you can take. Proper door handling and regular maintenance are key to preventing future damage.

Proper Door Handling

One of the most common causes of damage to wooden doors is improper handling. Here are some tips to help you handle your door properly:

  • Avoid slamming the door shut, as this can cause the wood to crack or split.
  • Don’t lean or hang heavy objects on the door, as this can cause the hinges to bend or the wood to warp.
  • Use doorstops to prevent the door from swinging open too far and hitting the wall.

By following these simple tips, you can help prevent damage to your wooden door.

Regular Maintenance

Regular maintenance is also important to prevent damage to your wooden door. Here are some maintenance tips:

  • Keep the door clean and free of dirt and debris. This can help prevent scratches and other damage to the wood.
  • Apply a coat of wax or polish to the door every few months to help protect the wood and keep it looking new.
  • Check the hinges and other hardware regularly to make sure they are tight and functioning properly.

By following these maintenance tips, you can help keep your wooden door in good condition and prevent future damage.

Remember, prevention is key when it comes to maintaining your wooden door. By handling your door properly and performing regular maintenance, you can help prevent damage and keep your door looking great for years to come.

why-is-my-wooden-table-sticky-tips-to-get-rid-of-stickiness-2

Why Is My Wooden Table Sticky? Tips to Get Rid of Stickiness

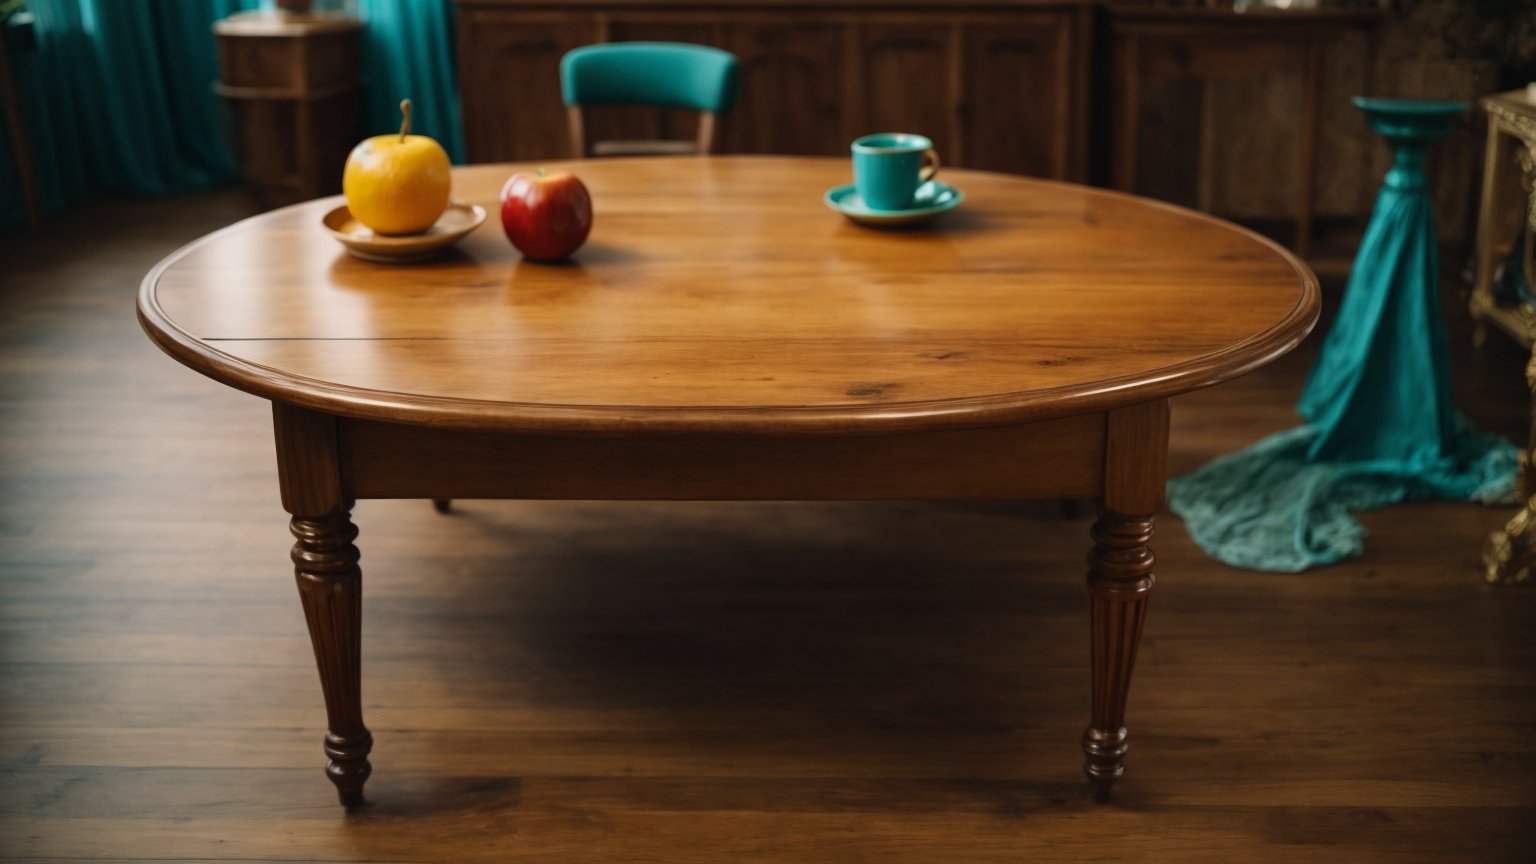
Is your wooden table feeling sticky and gross to the touch? It can be frustrating to try to enjoy a meal or work on a project with a table that won’t stop sticking to your hands. If you’re wondering why your wooden table is sticky, there are a few common causes that you should be aware of.

One of the most common reasons for a sticky wooden table is a buildup of dirt, oil, and wax on the surface. Over time, these substances can accumulate and create a sticky residue that is difficult to remove. Another common cause is a poor quality finish that has started to break down, leaving a sticky surface behind. Children and harsh cleaning agents can also contribute to a sticky table.

In this article, we’ll explore the different reasons why your wooden table might be sticky and provide some tips on how to fix the problem. Whether you have a varnished, stained, or painted table, we’ll cover the most common causes of stickiness and offer solutions that you can try at home. By the end of this article, you’ll have a better understanding of why your table is sticky and how to get it back to its original condition.

Understanding Your Wooden Table

why-is-my-wooden-table-sticky-tips-to-get-rid-of-stickiness-2

When your wooden table feels sticky, it can be frustrating and uncomfortable. But before you can fix the problem, you need to understand what might be causing it. Here are some factors that can affect the stickiness of your wooden table:

Material Composition

The type of wood your table is made from can affect its stickiness. Some types of wood are naturally more porous than others, which means they can absorb more moisture and become sticky. For example, pine and oak are more porous than maple or cherry. Additionally, if your table has a veneer or laminate top, the adhesive used to attach it to the underlying wood can also contribute to stickiness.

Age and Usage

Over time, your wooden table may become sticky due to wear and tear. This can happen if the finish on the table wears away, leaving the wood exposed to moisture and dirt. Additionally, if you use your table frequently, food and drink spills can accumulate and contribute to stickiness. Children may also contribute to stickiness by leaving sticky fingerprints or spills on the table.

To prevent stickiness, it’s important to clean your table regularly and use coasters and placemats to protect the surface. Avoid using harsh cleaning agents or excess wax, which can contribute to stickiness. If your table is already sticky, you can try cleaning it with a mild soap and water solution or a vinegar and water solution. Be sure to dry the table thoroughly after cleaning to prevent moisture from accumulating.

By understanding the material composition and age and usage of your wooden table, you can take steps to prevent or fix stickiness and keep your table looking and feeling great.

Causes of Stickiness

If you have a wooden table that feels sticky to the touch, there are several possible causes. In this section, we will explore some of the most common reasons why wooden tables become sticky.

Spills and Stains

One of the most common causes of a sticky wooden table is spills and stains. Food, drinks, and other substances can leave residue on the surface of the table that can make it feel sticky. If spills and stains are not cleaned up promptly, they can become more difficult to remove and may even damage the finish of the table.

To prevent spills and stains from causing stickiness on your wooden table, it is important to clean up any spills as soon as possible. Use a damp cloth to wipe up the spill, and then dry the area thoroughly with a clean towel. If the spill has already dried, you may need to use a mild cleaning solution to remove the residue.

Humidity and Temperature

Humidity and temperature can also contribute to stickiness on wooden tables. When the air is humid, moisture can be absorbed into the wood, causing it to swell and become sticky. Similarly, high temperatures can cause the wood to expand and contract, which can also lead to stickiness.

To prevent humidity and temperature from causing stickiness on your wooden table, try to keep the room at a consistent temperature and humidity level. Use a dehumidifier or air conditioner if necessary to control the humidity levels in the room.

Improper Cleaning Methods

improper-cleaning-methods

Using improper cleaning methods can also cause wooden tables to become sticky. Harsh chemicals, abrasive cleaners, and excessive amounts of water can all damage the finish of the table and leave it feeling sticky.

To clean your wooden table properly and avoid stickiness, use a soft cloth and a mild cleaning solution. Avoid using abrasive scrubbers or harsh chemicals, and be sure to dry the table thoroughly after cleaning to prevent moisture from being absorbed into the wood.

By understanding the causes of stickiness on wooden tables, you can take steps to prevent it from happening and keep your table looking and feeling great for years to come.

Preventing Stickiness

If you want to keep your wooden table from becoming sticky, there are a few measures you can take to prevent it from happening in the first place. Here are some tips:

Proper Cleaning Techniques

One of the best ways to prevent stickiness on your wooden table is to use proper cleaning techniques. Avoid using harsh chemicals or abrasive cleaners that can damage the finish of your table. Instead, use a mild soap and warm water to clean your table. Be sure to wipe up any spills or stains immediately to prevent them from setting in and causing stickiness.

Use of Coasters and Mats

Another way to prevent stickiness on your wooden table is to use coasters and mats. These can help protect the surface of your table from spills and stains, which can lead to stickiness. Use coasters for drinks and mats for hot dishes to prevent heat damage to your table.

Regular Maintenance

Regular maintenance is also important for preventing stickiness on your wooden table. This includes dusting your table regularly to remove any dirt or debris that can scratch the surface. You should also apply a protective wax or oil to your table periodically to help maintain its finish and prevent stickiness.

By following these tips, you can help prevent stickiness on your wooden table and keep it looking great for years to come.

Solving the Stickiness Problem

If your wooden table is sticky, don’t worry, there are ways to solve the problem. Here are some solutions that you can try:

DIY Cleaning Solutions

If the stickiness is caused by food residues or harsh cleaning agents, you can try cleaning your table with natural ingredients that you probably already have in your kitchen. Here are some DIY cleaning solutions that you can try:

  • Vinegar and Water: Mix equal parts of white vinegar and water in a spray bottle. Spray the solution on the table and wipe it with a clean cloth. Vinegar is a natural disinfectant and can help remove sticky residues.
  • Baking Soda and Water: Mix baking soda and water to make a paste. Apply the paste on the table and scrub it with a soft brush. Baking soda is a natural abrasive and can help remove sticky residues.
  • Tea: Steep black tea bags in boiling water for 10 minutes. Let the tea cool down and then use it to clean the table. The tannic acid in the tea can help remove stickiness.

Professional Help

If the stickiness is caused by a poor quality finish or excess wax, you may need to seek professional help. Here are some options:

  • Refinishing: A professional can strip the old finish off your table and apply a new finish. This can be expensive, but it will give your table a new lease of life.
  • Wax Removal: A professional can remove excess wax from your table. This is a less expensive option than refinishing, but it may not be as effective.

Remember, prevention is better than cure. To prevent stickiness in the future, avoid using harsh cleaning agents, wipe spills immediately, and use coasters and placemats to protect your table.

cleaning-process

How to Clean Wooden Blocks: Tips and Tricks for Keeping Your Child's Toys Safe and Sanitized

Cleaning wooden blocks may seem like a daunting task, but it’s actually quite simple. Whether you’re a parent wanting to clean your child’s toys or a collector looking to restore old blocks, there are a few easy steps to follow. By properly cleaning your wooden blocks, you can ensure that they last for years to come.

First, it’s important to gather the necessary supplies. You will need a soft cloth, mild soap, and water. For tougher stains, vinegar and baking soda can be used. It’s important to note that only unpainted blocks should be sanded, as painted blocks can be damaged. Once you have your supplies, you’re ready to start cleaning your wooden blocks.

To clean your wooden blocks, simply dampen the cloth with water and mild soap and wipe down each block. For tougher stains, mix equal parts vinegar and water and use the solution to scrub the blocks with a sponge. If the stain still won’t come out, try lightly sanding the block with fine sandpaper. Once you’re done cleaning, be sure to let the blocks air dry completely before storing them away.

Understanding the Importance of Cleaning Wooden Blocks

how-to-clean-wooden-blocks-tips-and-tricks-for-keeping-your-childs-toys-safe-and-sanitized-2

Cleaning your child’s wooden blocks is essential for their health and safety. Wooden blocks are a classic toy that has been around for centuries. They are durable and can last for years, but they can also harbor harmful bacteria if not cleaned regularly. Here are some reasons why cleaning wooden blocks is important:

Preventing the Spread of Germs

Children are notorious for putting things in their mouths, and wooden blocks are no exception. If the blocks are not cleaned regularly, they can harbor harmful bacteria that can make your child sick. By cleaning the blocks regularly, you can prevent the spread of germs and keep your child healthy.

Maintaining the Quality of the Blocks

Wooden blocks can become dirty and stained over time, which can affect their quality. By cleaning the blocks regularly, you can maintain their quality and ensure that they last for years to come. Regular cleaning can also prevent the wood from drying out and cracking.

Promoting a Safe Play Environment

Cleaning your child’s toys is an important part of creating a safe play environment. By keeping the blocks clean, you can reduce the risk of accidents and injuries. Dirty blocks can become slippery and difficult to handle, which can increase the risk of falls and other accidents.

In summary, cleaning your child’s wooden blocks is essential for their health and safety. By preventing the spread of germs, maintaining the quality of the blocks, and promoting a safe play environment, you can ensure that your child’s wooden blocks are a fun and safe toy to play with.

Materials Required for Cleaning

Cleaning wooden blocks is a simple process that requires only a few materials. Here is a list of the materials you will need:

  • Warm water
  • Eco-friendly dish soap
  • White vinegar
  • Spray bottle
  • Soft-bristled brush
  • Microfiber cloth

Warm water mixed with eco-friendly dish soap is an effective and safe cleaning solution for wooden blocks. You can mix one part soap with four parts water and place it in a spray bottle for easy application. Alternatively, you can use a natural disinfectant solution made from white vinegar and water in a ratio of one part vinegar to two parts water.

A soft-bristled brush is useful for removing dirt and grime from the blocks’ crevices and corners. A microfiber cloth can be used to wipe the blocks clean after washing. It is essential to avoid using abrasive materials like steel wool or harsh chemicals that can damage the wood’s surface.

In addition to the above materials, you will need a designated cleaning area covered with a drop cloth or old towel to catch any drips or spills. It is also essential to have a drying rack or a clean towel to dry the blocks after washing them.

By using these simple materials, you can effectively clean your wooden blocks and keep them looking their best for years to come.

Pre-Cleaning Steps

Before you start cleaning your wooden blocks, there are a few pre-cleaning steps you should take to ensure the best results.

Inspecting the Blocks

The first step is to inspect your wooden blocks. Check for any visible signs of damage or wear and tear. Look for cracks, splits, or splinters in the wood. If you find any damaged blocks, set them aside for repair or replacement.

Sorting the Blocks

Once you’ve inspected your blocks, the next step is to sort them. Group the blocks by size, shape, and color. This will make it easier to clean them efficiently and thoroughly.

Here are some tips for sorting your blocks:

  • Sort the blocks into piles based on their size.
  • Group the blocks by shape (cubes, rectangles, triangles, etc.).
  • Separate the blocks by color (natural wood, painted, stained, etc.).

By sorting your blocks, you’ll be able to clean them more effectively and efficiently. It will also make it easier to put them back together once they’re clean.

Taking these pre-cleaning steps will ensure that your wooden blocks are ready for cleaning. By inspecting and sorting your blocks, you’ll be able to clean them more effectively and efficiently.

Cleaning Process

cleaning-process

Cleaning your wooden blocks is an important step to keep them in good condition and ensure they last for years to come. Here is a step-by-step guide on how to clean your wooden blocks:

Preparing the Cleaning Solution

First, you need to prepare the cleaning solution. Mix one part white vinegar with one part water in a bowl. If the blocks are heavily soiled, add a small amount of mild dish soap to the solution.

Applying the Solution

Dip a sponge or soft cloth into the cleaning solution and wring it out. Then, gently wipe down each block with the damp sponge or cloth. Make sure to cover all sides of the block, including any crevices or corners.

Scrubbing the Blocks

For stubborn stains or marks on the blocks, use a soft-bristled brush to scrub the affected area. You can also lightly sand the blocks with fine sandpaper to remove any stains or discoloration, but only do this for unpainted blocks.

Rinsing and Drying

Once you have finished cleaning the blocks, rinse them thoroughly with clean water to remove any remaining cleaning solution. Then, dry the blocks with a clean towel, and let them air dry completely before storing them away.

By following these simple steps, you can keep your wooden blocks clean and in good shape for years to come.

Post-Cleaning Care

After cleaning your wooden blocks, it’s important to take proper care of them to ensure they last a long time. Here are some tips for post-cleaning care:

Proper Storage

Storing your wooden blocks properly is crucial to maintaining their quality. Here are some things to keep in mind:

  • Keep your blocks in a dry, cool place. Moisture can cause the wood to warp or crack.
  • Store your blocks in a container or on a shelf. This will help protect them from dust and dirt.
  • Don’t stack your blocks too high. This can cause them to become misshapen or damaged.

Regular Maintenance

Regular maintenance can help keep your wooden blocks looking and feeling great. Here are some things you can do:

  • Oil your blocks with mineral oil or beeswax every few months. This will help keep the wood from drying out and cracking.
  • Inspect your blocks regularly for any signs of damage or wear. If you notice any issues, address them as soon as possible to prevent further damage.
  • Keep your blocks clean by wiping them down with a damp cloth after each use. This will help prevent dirt and grime from building up on the surface.

By following these tips, you can help ensure that your wooden blocks stay in great condition for years to come.

Tips and Tricks for Effective Cleaning

Cleaning wooden blocks can be a simple and enjoyable task, but it’s important to do it right to ensure the longevity and safety of your toys. Here are some tips and tricks for effective cleaning:

  • Use warm water and a mild dish soap or a natural disinfectant solution of white vinegar and water. Avoid using harsh chemicals or abrasive cleaners that can damage the wood or paint.
  • Dip a clean cloth into the soapy water and wring it out well before wiping the blocks. You can also use a soft-bristled brush or a toothbrush to clean hard-to-reach areas.
  • Avoid immersing, soaking, or putting your wooden blocks in the dishwasher, as this can cause warping, cracking, or discoloration.
  • Dry the blocks thoroughly with a clean towel or let them air dry before storing them. Avoid using a hair dryer or placing them in direct sunlight, as this can cause the wood to dry out and crack.
  • If your wooden blocks have stains or marks that won’t come off with soap and water, you can try rubbing them gently with a cloth dipped in olive oil or mineral oil. This can help restore the natural shine and color of the wood.
  • To prevent mold or mildew from forming on your wooden blocks, store them in a dry and well-ventilated area. Avoid storing them in damp or humid places like basements or bathrooms.
  • If you have vintage or antique wooden blocks, be extra careful when cleaning them, as they may be more fragile or delicate than newer blocks. You may want to consult a professional restoration expert or do some research on the best cleaning methods for your specific type of blocks.

By following these tips and tricks, you can keep your wooden blocks clean, safe, and beautiful for years to come.

Safety Measures While Cleaning

Cleaning wooden blocks is a great way to keep them looking their best, but it’s important to take some safety measures to ensure that you don’t damage the blocks or injure yourself in the process. Here are some tips to help you clean your wooden blocks safely:

  • Wear gloves: Wooden blocks can be rough and splintery, so it’s a good idea to wear gloves while cleaning them to protect your hands.
  • Use a soft brush: A soft-bristled brush, such as a toothbrush or a paintbrush, is ideal for cleaning wooden blocks. Avoid using stiff brushes or abrasive materials that could scratch or damage the blocks.
  • Avoid water damage: Wooden blocks can warp or crack if they get too wet, so it’s important to avoid using too much water while cleaning them. Use a damp cloth or a spray bottle to lightly mist the blocks, rather than soaking them in water.
  • Test cleaning products: Before using any cleaning products on your wooden blocks, test them on a small, inconspicuous area first to make sure that they don’t cause any damage or discoloration.
  • Keep blocks away from heat sources: Wooden blocks are flammable, so it’s important to keep them away from heat sources while cleaning them. Avoid using hot water or heat guns to dry the blocks, and don’t leave them near heaters or open flames.

By following these safety measures, you can ensure that your wooden blocks stay in great condition for years to come, while also protecting yourself from injury and damage.

open-jammed-wooden-drawers

How to Easily Open Jammed Wooden Drawers

Are you struggling with a jammed wooden drawer? It can be frustrating to have a drawer that won’t open or close properly, especially if it’s a drawer you use frequently. Fortunately, there are several simple solutions you can try to get your drawer unstuck and working smoothly again.

One common cause of a jammed wooden drawer is a lack of lubrication. Over time, the wood can dry out and cause the drawer to stick. Applying a lubricant such as paraffin wax or dry spray lubricant can help loosen the drawer and make it easier to open and close. Another cause of a stuck drawer may be misaligned tracks or damaged hardware. In this case, you may need to adjust or replace the tracks or hardware to get the drawer functioning properly again.

By following a few simple steps, you can get your jammed wooden drawer back on track. In this article, we’ll explore some of the most effective methods for fixing a stuck drawer, so you can get back to using your furniture without any frustration. Whether you’re dealing with a minor issue or a more serious problem, we’ve got you covered with practical tips and tricks to help you get the job done.

Understanding the Problem

open-jammed-wooden-drawers

When you have a jammed wooden drawer, it can be frustrating and time-consuming to try to open it. However, understanding the problem and its causes can help you fix it quickly and easily. In this section, we’ll discuss how to identify the type of jam and determine the cause of the jam.

Identifying the Type of Jam

The first step in fixing a jammed wooden drawer is to identify the type of jam. There are two main types of jams: side-to-side jams and front-to-back jams.

Side-to-side jams occur when the drawer is stuck and won’t move from side to side. This type of jam is often caused by a misaligned drawer slide or a buildup of debris on the slide.

Front-to-back jams occur when the drawer is stuck and won’t move in and out of the cabinet. This type of jam is often caused by a misaligned drawer guide or a buildup of debris on the guide.

Determining the Cause of the Jam

Once you’ve identified the type of jam, the next step is to determine the cause of the jam. There are several possible causes for a jammed wooden drawer, including:

  • Humidity: Wooden drawers can expand and contract with changes in humidity, which can cause them to become stuck.
  • Loose or worn parts: Loose or worn drawer slides, guides, or rollers can cause the drawer to become misaligned and stuck.
  • Debris: Buildup of debris on the drawer slides, guides, or rollers can prevent the drawer from moving smoothly.
  • Warped wood: Warped wood can cause the drawer to become misaligned and stuck.

By identifying the cause of the jam, you can take the necessary steps to fix it and prevent it from happening in the future. In the next section, we’ll discuss how to fix each type of jam and its causes.

Basic Techniques to Open Jammed Drawers

If you’re dealing with a jammed wooden drawer, don’t panic. There are a few basic techniques you can try to open it up without causing any damage. Here are three methods to try:

The ‘Tap and Pull’ Method

This is a simple, yet effective way to coax a jammed drawer open. First, try tapping the drawer on the sides with your hand to loosen it up. Then, pull the drawer out slowly and steadily. If the drawer is still stuck, try wiggling it gently from side to side as you pull.

The ‘Wiggle’ Method

If tapping and pulling doesn’t work, try wiggling the drawer from side to side to loosen it up. Hold onto the drawer with both hands and gently wiggle it back and forth. As you wiggle, try pulling the drawer out slowly and steadily. If the drawer still won’t budge, try pushing it back in slightly and then pulling it out again.

Using Lubrication

Another way to free up a jammed wooden drawer is to use a lubricant. Rub paraffin wax on the parts of the drawer where the wood meets. You can find paraffin wax at most hobby and craft stores, or in the canning supplies section of your local grocery store. In a pinch, you can also use candles, bar soap, or even dry spray lubricant.

If the drawer is still stuck after trying these methods, it may be time to call in a professional. Don’t force the drawer open, as this can cause damage to the wood and the tracks. With a little patience and persistence, you should be able to open up that stubborn drawer and get back to using your furniture as normal.

Advanced Techniques to Open Jammed Drawers

advanced-techniques-to-open-jammed-drawers

If you’ve tried the basic techniques to open a jammed wooden drawer and they didn’t work, don’t worry. There are still a few advanced techniques you can try to get that drawer open. In this section, we’ll cover two advanced techniques: using tools and dismantling the drawer.

Using Tools

Sometimes, all you need is a little extra force to get a stubborn drawer open. Here are some tools you can use:

  • Pry bar: A pry bar can help you gently pry the drawer open without damaging the wood or the drawer slides.
  • Rubber mallet: A rubber mallet can help you gently tap the sides of the drawer to loosen it from the frame.
  • Screwdriver: A screwdriver can help you remove any screws that may be holding the drawer in place.

When using tools, be careful not to damage the wood or the drawer slides. Use gentle force and stop if you feel resistance.

Dismantling the Drawer

If all else fails, you may need to dismantle the drawer to get it open. Here’s how:

  1. Remove the drawer from the frame: If the drawer is stuck closed, you may need to remove it from the frame to work on it. Check for any screws or nails holding the drawer in place and remove them.
  2. Remove the drawer face: If the drawer is still stuck closed, you may need to remove the drawer face to access the inside of the drawer. Check for any screws or nails holding the face in place and remove them.
  3. Inspect the drawer slides: Once you have access to the inside of the drawer, inspect the drawer slides for any damage or debris. Clean the slides with a soft cloth and lubricate them with wax or a dry spray lubricant.
  4. Reassemble the drawer: Once you have cleaned and lubricated the drawer slides, reassemble the drawer and try opening it again.

Remember, dismantling the drawer should be a last resort. If you’re not confident in your ability to reassemble the drawer, consider hiring a professional.

Preventive Measures for Future

To avoid the frustration of dealing with jammed wooden drawers in the future, there are some preventive measures that you can take. Here are a few tips:

Regular Maintenance

Regular maintenance is key to keeping your wooden drawers in good working condition. Here are some maintenance tasks you should perform on a regular basis:

  • Clean the drawers: Dust and debris can accumulate inside the drawers and cause them to stick. Regularly clean the drawers with a damp cloth to remove any dirt or debris.
  • Lubricate the drawers: Use a silicone-based lubricant or wax to keep the drawer gliding smoothly. Apply the lubricant to the tracks and slides of the drawer.
  • Check for loose screws: Loose screws can cause the drawer to become misaligned and stick. Check the screws on a regular basis and tighten them if necessary.

Proper Usage

Proper usage is also important to prevent wooden drawers from becoming jammed. Here are some tips for proper usage:

  • Don’t overload the drawers: Overloading the drawers can cause them to become misaligned and stick. Be sure to distribute the weight evenly and don’t put too much weight in one drawer.
  • Use the drawers properly: Don’t slam the drawers shut or force them open. Use a gentle touch when opening and closing the drawers.
  • Keep the drawers dry: Moisture can cause the wood to swell and the drawers to stick. Keep the drawers dry and avoid placing damp items inside them.

By following these preventive measures, you can keep your wooden drawers in good working condition and avoid the frustration of dealing with jammed drawers in the future.

How to Clean Wooden Flooring: Tips and Tricks for a Shiny Finish

Cleaning wooden flooring is an essential task that should be done regularly to maintain its shine and durability. Wooden floors add warmth and a unique look to all home decor styles, but they can be easily damaged if not appropriately cleaned. In this article, we will provide you with some tips on how to clean wooden flooring effectively and efficiently.

To start, it’s essential to know the type of wood flooring you have and what cleaning products are safe to use. Some cleaning solutions can damage or discolor certain types of wood, so it’s crucial to read the manufacturer’s instructions before using any cleaning products. Additionally, it’s essential to sweep or vacuum the floor regularly to prevent dirt and dust from scratching the surface. In the next section, we will discuss some cleaning methods that you can use to keep your wooden flooring looking its best.

Understanding the Nature of Wooden Flooring

Wooden flooring is a popular choice for many homeowners due to its natural beauty and durability. However, it requires proper care and maintenance to keep it looking its best. Before you start cleaning your wooden flooring, it’s important to understand its nature.

Types of Wooden Flooring

There are three main types of wooden flooring: solid hardwood, engineered hardwood, and laminate wood-look flooring. Solid hardwood is made from a single piece of wood and is the most expensive option. Engineered hardwood is made from multiple layers of wood and is more affordable than solid hardwood. Laminate wood-look flooring is made from synthetic materials and is the most affordable option.

Characteristics of Wooden Flooring

Wooden flooring is susceptible to scratches, dents, and water damage. It can also fade or change color over time due to exposure to sunlight. Additionally, wooden flooring can expand or contract due to changes in temperature and humidity.

Maintenance of Wooden Flooring

To keep your wooden flooring looking its best, it’s important to follow a regular cleaning and maintenance routine. Sweep or vacuum your flooring regularly to remove dirt and debris. Avoid using harsh chemicals or abrasive cleaners, as they can damage the finish of your flooring. Instead, use a gentle cleaner specifically designed for wooden flooring.

In conclusion, understanding the nature of your wooden flooring is essential for proper care and maintenance. By following a regular cleaning routine and using the right products, you can keep your wooden flooring looking beautiful for years to come.

Essential Cleaning Tools

To properly clean your wooden floors, you’ll need a few essential cleaning tools. Here are some of the must-have items that will help you keep your wooden floors looking their best:

Soft-bristled Broom or Dust Mop

A soft-bristled broom or a dust mop is an essential tool for cleaning wooden floors. These tools are gentle enough to avoid scratching the surface of your floor but effective enough to remove dirt and dust. When choosing a broom or dust mop, look for one with soft, fine bristles that won’t damage your floor.

Vacuum Cleaner

A vacuum cleaner is another essential tool for cleaning wooden floors. It’s especially useful for removing pet hair and other debris that a broom or dust mop might miss. When using a vacuum cleaner, make sure to use the bare-floor setting to avoid damaging the surface of your floor. Also, ensure that the brush roller is turned off to prevent scratches.

Microfiber Mop

A microfiber mop is a great alternative to a broom or dust mop. It’s gentle on your wooden floors and can be used dry or damp for effective cleaning. When using a microfiber mop, avoid using too much water as it can damage your floor.

Cleaning Solution

A cleaning solution specifically designed for wooden floors is necessary for deep cleaning. Avoid using harsh chemicals that can damage the surface of your floor. Instead, opt for a cleaner that’s specifically designed for wooden floors. You can also make your own cleaning solution using natural ingredients like vinegar and water.

Soft Towels or Cloths

Soft towels or cloths are necessary for wiping up spills and stains. Avoid using rough or abrasive materials that can scratch the surface of your floor. Instead, use soft, absorbent towels or cloths to gently clean up spills and stains.

By having these essential cleaning tools on hand, you’ll be able to keep your wooden floors looking their best for years to come.

Pre-Cleaning Routine

Before diving into the actual cleaning process, it is essential to follow a pre-cleaning routine. This routine will help you prepare the floor for cleaning and ensure that you don’t damage the wooden surface.

Dusting the Floor

The first step in the pre-cleaning routine is to dust the floor. Use a soft-bristled broom or a vacuum cleaner to remove any dust, dirt, or debris from the surface. Make sure to sweep in the direction of the wood grain to avoid scratching the surface.

Removing Stains

If you notice any stains on the wooden floor, it is best to remove them before cleaning. Use a damp cloth or a cleaning solution specifically designed for wooden floors to remove the stains. Avoid using harsh chemicals or abrasive materials that can damage the surface.

Checking for Damage

Before starting the cleaning process, it is crucial to check the wooden floor for any damage. Look for cracks, scratches, or warped boards that may require repairs. If you notice any damage, it is best to address it before cleaning to prevent further damage.

In summary, following a pre-cleaning routine is crucial to ensure that your wooden floor stays clean and damage-free. Dusting the floor, removing stains, and checking for damage are essential steps that should not be skipped. By following these steps, you can prepare your wooden floor for cleaning and keep it looking great for years to come.

Proper Cleaning Techniques

Cleaning your wooden floors regularly will help maintain their quality and appearance. Here are some techniques you can use to keep your floors clean:

Dry Mopping

Sweep or dust your wooden floors daily with a soft-bristled broom, or use a microfiber dust mop to avoid scratches. You can also use a vacuum cleaner with a hardwood floor attachment to remove dust and dirt. Make sure to turn off the brush roller to avoid scratches.

Wet Mopping

You can use a damp mop to clean your wooden floors, but avoid using too much water as it can damage the wood. Use a cleaning solution that is specifically designed for wooden floors, and follow the manufacturer’s instructions. Avoid using vinegar or acidic cleaners as they can damage the finish of your floors.

Polishing

Polishing your wooden floors can help restore their shine and protect them from scratches and wear. You can use a commercial floor polish or wax, or make your own using a mixture of olive oil and vinegar. Apply the polish or wax with a soft cloth, and buff the floors to a shine.

Remember to clean up spills as soon as they happen to prevent stains and damage to your floors. Avoid using abrasive cleaners or tools that can scratch or damage the finish of your wooden floors. With proper cleaning and maintenance, your wooden floors will look beautiful for years to come.

Choosing the Right Cleaning Solutions

When it comes to cleaning your wooden flooring, selecting the right cleaning solution is crucial. Using the wrong type of cleaning solution can cause damage to your floors. Here are some tips to help you choose the right cleaning solution for your wooden flooring:

1. Check the Manufacturer’s Recommendations

Before selecting a cleaning solution, check the manufacturer’s recommendations for your specific type of wooden flooring. Some manufacturers may recommend specific cleaning solutions or may advise against using certain types of cleaning products.

2. Avoid Harsh Chemicals

Avoid using harsh chemicals such as bleach, ammonia, or vinegar on your wooden flooring. These chemicals can strip the finish and cause damage to the wood.

3. Use pH-Neutral Cleaners

Choose pH-neutral cleaners that are specifically designed for wooden flooring. These cleaners are gentle on the wood and won’t damage the finish. Look for cleaners that are labeled as “wood floor cleaners” or “hardwood floor cleaners.”

4. Test the Cleaner First

Before using any cleaning solution on your wooden flooring, test it in a small, inconspicuous area first. This will help you determine if the cleaner is safe to use on your floors and won’t cause any damage.

5. Follow the Instructions

Always follow the instructions on the cleaning solution label. Using too much cleaner or not diluting it properly can cause damage to your floors. Be sure to use the recommended amount of cleaner and dilute it according to the instructions.

By following these tips, you can choose the right cleaning solution for your wooden flooring and keep it looking its best for years to come.

Preventing Damage to Wooden Floors

Wooden floors are a beautiful addition to any home, but they can be easily damaged if not taken care of properly. In this section, we will provide you with some tips on how to prevent damage to your wooden floors.

Using Protective Pads

One of the easiest ways to prevent damage to your wooden floors is by using protective pads under furniture legs. These pads help to distribute the weight of the furniture evenly and prevent scratches and dents. You can find protective pads in most hardware stores and they are available in various sizes and shapes to fit different types of furniture.

Avoiding Water Damage

Water is one of the biggest enemies of wooden floors. It can cause warping, swelling, and discoloration. To prevent water damage, make sure to clean up spills immediately. You can use a dry or slightly damp cloth to clean up spills, but avoid using a wet mop or leaving standing water on the floor. Also, be careful when watering plants near wooden floors and make sure to use a saucer or tray to catch any excess water.

Regular Maintenance

Regular maintenance is key to keeping your wooden floors looking their best. Sweep or vacuum your floors regularly to remove dirt and debris that can cause scratches. You can also use a soft-bristled broom or dust mop to remove dust and pet hair. Avoid using abrasive cleaners or tools that can scratch the surface of the floor. Instead, use a cleaner specifically designed for wooden floors and follow the manufacturer’s instructions.

In conclusion, taking care of your wooden floors is essential to maintaining their beauty and durability. By using protective pads, avoiding water damage, and performing regular maintenance, you can keep your wooden floors looking their best for years to come.

Professional Cleaning Services

While it is possible to clean your wooden floors yourself, sometimes it’s best to leave it to the professionals. Professional cleaning services can provide a deep clean that removes dirt and grime that may be difficult to remove with DIY methods. Here are some reasons why you might want to consider hiring a professional:

  • Expertise: Professional cleaners have experience and training in cleaning wooden floors. They know how to identify the type of wood, the finish, and the level of dirt and damage. This allows them to use the right cleaning products and techniques to achieve the best results without damaging the wood.

  • Equipment: Professional cleaners have access to specialized equipment that can make cleaning wooden floors more efficient and effective. For example, they may use auto scrubbers or steam cleaners to remove dirt and stains. They also have access to commercial-grade cleaning products that are stronger and more effective than those available to consumers.

  • Time-saving: Cleaning wooden floors can be time-consuming, especially if you have a large area to clean. Hiring a professional can save you time and energy, allowing you to focus on other tasks or activities.

  • Improved appearance: Professional cleaning services can improve the appearance of your wooden floors, making them look like new again. This can be especially important if you are preparing to sell your home or if you want to impress guests.

When hiring a professional cleaning service, be sure to do your research and choose a reputable company with good reviews. Ask about their experience and training, as well as their equipment and cleaning products. You should also ask for a quote and make sure that the price is within your budget. With the right professional cleaning service, you can enjoy clean and beautiful wooden floors without the hassle of DIY cleaning.

How to Fix a Broken Wooden Chair Leg: Easy DIY Guide

If you have a broken wooden chair leg, don’t worry! Repairing it is easier than you might think. With a few simple tools and some basic woodworking skills, you can have your chair back in working order in no time.

Before you begin, it’s important to assess the damage. Is the leg completely broken off, or is it just cracked? If it’s completely broken, you’ll need to remove any old glue and reattach the leg. If it’s just cracked, you may be able to fix it with wood glue and clamps.

Once you’ve determined the extent of the damage, it’s time to gather your materials. You’ll need wood glue, clamps, a saw, sandpaper, and possibly some wood filler. With these tools in hand, you’re ready to get started on fixing your broken chair leg.

Identifying the Problem

When you have a broken wooden chair leg, the first step is to identify the problem. This involves assessing the damage and determining the type of wood used to make the chair leg.

Assessing the Damage

The first step in identifying the problem is to assess the damage to the chair leg. This can be done by looking at the broken area and checking for any cracks or splinters. You should also check to see if the break is a clean break or if there are any jagged edges.

If the break is a clean break, it may be easier to repair. However, if there are jagged edges or splinters, it may be more difficult to fix. In some cases, it may be necessary to replace the entire leg.

Determining the Type of Wood

Once you have assessed the damage, the next step is to determine the type of wood used to make the chair leg. This is important because different types of wood require different repair methods.

One way to determine the type of wood is to look for any markings or labels on the chair. If there are no markings or labels, you can try to identify the wood by its color and grain pattern. Some common types of wood used to make chair legs include oak, maple, cherry, and walnut.

Once you have identified the type of wood, you can research the best repair method for that specific type of wood. This will help ensure that the repair is effective and long-lasting.

In summary, identifying the problem with a broken wooden chair leg involves assessing the damage and determining the type of wood used to make the leg. By doing this, you can choose the best repair method for the specific situation and ensure a successful repair.

Gathering Necessary Tools

Before you start repairing the broken wooden chair leg, you need to gather some essential repair tools and safety equipment. Here are the tools you will need:

Essential Repair Tools

Tool Name Description
Wood Glue A strong adhesive that will hold the broken pieces of the chair leg together.
Clamps Used to hold the glued pieces together while they dry.
Saw Used to cut the dowels that will be used to reinforce the repair.
Drill Used to make holes for the dowels.
Dowels Wooden pegs that will be inserted into the holes to reinforce the repair.
Sandpaper Used to smooth out any rough edges and ensure a seamless finish.

Safety Equipment

It’s important to ensure your safety while repairing the broken chair leg. Here are the safety equipment you will need:

  • Safety Glasses: Wear safety glasses to protect your eyes from any flying debris while sawing or drilling.
  • Gloves: Wear gloves to protect your hands from any sharp edges or splinters.
  • Dust Mask: Wear a dust mask to protect your lungs from any sawdust or sanding particles.

Make sure you have all the necessary tools and safety equipment before you start repairing the broken wooden chair leg. This will ensure that you can complete the repair safely and effectively.

Preparation Steps

Before you begin to fix your broken wooden chair leg, make sure you have the necessary tools and materials. Here are the things you will need:

  • Wood glue
  • Clamps
  • Drill
  • 1/2 inch paddle bit (wood-boring bit)
  • 1/2 inch dowel wood
  • Hacksaw or backsaw
  • Pocket knife
  • Painters tape

Once you have gathered all the necessary tools and materials, follow these preparation steps to get started:

Removing the Broken Leg

The first step in fixing a broken chair leg is to remove the broken leg. To do this, follow these steps:

  1. Turn the chair upside down so that the broken leg is facing up.
  2. Use a hacksaw or backsaw to cut through any remaining wood fibers that are holding the broken leg to the chair.
  3. Gently wiggle the broken leg until it comes loose from the chair.

Cleaning the Area

After you have removed the broken leg, it’s important to clean the area where the leg will be reattached. Here’s how:

  1. Use a pocket knife to remove any remaining wood fibers or glue from the area where the leg was attached.
  2. Sand the area lightly to remove any rough spots or splinters.
  3. Use painters tape to cover any nearby areas that you don’t want to get glue on.

By following these preparation steps, you’ll be ready to move on to the next steps of fixing your broken wooden chair leg.

Repairing the Chair Leg

Fixing a broken chair leg may seem like a daunting task, but with the right tools and techniques, it can be easily repaired. Here is a step-by-step guide on how to repair a broken wooden chair leg.

Applying Wood Glue

The first step in repairing a broken chair leg is to apply wood glue to the broken pieces. Make sure to apply enough glue to cover the entire surface area of the broken pieces. Use a brush or a toothpick to spread the glue evenly.

Securing with Clamps

After applying the glue, carefully align the broken pieces and secure them with clamps. Make sure to tighten the clamps enough to hold the pieces together, but not so tight that the glue is squeezed out.

Allowing Time to Dry

Allow the glue to dry completely before removing the clamps. This may take several hours or even overnight. Once the glue has dried, remove the clamps and use sandpaper to smooth out any rough edges.

Remember to always use caution when working with tools and equipment. If you are unsure about any part of the repair process, seek assistance from a professional. With these simple steps, your broken chair leg will be as good as new in no time!

Final Touches

Once the glue has dried and the clamps have been removed, it’s time to finish up the repair on your broken wooden chair leg. Here are a few final touches you can add to make the repair look seamless.

Sanding the Repaired Area

To make the repaired area smooth and even, you’ll need to do some sanding. Start with a coarse grit sandpaper and work your way up to a finer grit. Use a sanding block or folded sandpaper to ensure that you sand evenly across the surface.

Be careful not to sand too much in one area, as this can create an uneven surface. Once you’re happy with the smoothness of the repaired area, wipe it clean with a damp cloth.

Matching the Finish

To make the repaired area blend in with the rest of the chair, you’ll need to match the finish. If the chair has a clear finish, you can use a clear coat of varnish or polyurethane to protect the wood and give it a glossy finish.

If the chair has a stained finish, you’ll need to match the color of the stain. Start by sanding the surrounding area to remove any old finish or dirt. Then, apply a small amount of stain to the repaired area and let it dry. If the color is not a perfect match, you can mix different colors of stain to get the right shade.

Once the stain has dried, apply a clear coat of varnish or polyurethane to protect the wood and give it a glossy finish. Be sure to let the finish dry completely before using the chair.

With these final touches, your broken wooden chair leg should be as good as new.

Preventive Measures

To avoid having to fix a broken chair leg, there are some preventive measures you can take to ensure that your wooden chairs remain sturdy and in good condition for a long time. Here are some tips:

Regular Maintenance

Regular maintenance is essential to keep your wooden chairs in good condition. You should inspect your chairs regularly for signs of wear and tear, such as loose joints, cracks, or splits. If you notice any damage, it is important to repair it as soon as possible to prevent further damage.

To maintain your wooden chairs, you should:

  • Dust them regularly with a soft cloth to remove any dirt or debris.
  • Clean them with a mild soap and water solution, and dry them immediately to prevent water damage.
  • Apply furniture polish or wax to protect the wood and keep it looking shiny.

Proper Use of Wooden Chairs

Proper use of wooden chairs is also important to prevent damage. Here are some tips to keep in mind:

  • Do not stand on your chairs or use them as a ladder.
  • Do not lean back too far in your chair, as this can cause the legs to break.
  • Do not drag your chairs across the floor, as this can scratch the wood and damage the legs.
  • Do not expose your chairs to direct sunlight or extreme temperatures, as this can cause the wood to warp or crack.

By following these preventive measures, you can keep your wooden chairs in good condition and avoid having to repair or replace them in the future.

How to Unstick Wooden Drawers: Simple Solutions for Smooth Sliding

If you have a wooden dresser or cabinet, you may have experienced the frustration of a drawer that sticks and won’t open or close smoothly. This can be caused by a variety of factors, including humidity, loose screws, or splinters. Fortunately, there are several simple solutions you can try to unstick your wooden drawers and get them sliding smoothly again.

One common cause of sticking wooden drawers is humidity. If the wood has absorbed moisture from the air, it can swell and cause the drawer to stick. In this case, removing the excess moisture from the wood can help the drawer shrink enough to open and close smoothly. You can try using a dehumidifier or pointing a hair dryer on low heat at the drawer for several minutes to remove moisture.

Another solution is to lubricate the drawer slides with a silicone, graphite, or Teflon-based lubricant. These lubricants can help reduce friction and make the drawer slide more easily. You can find silicone lubricant in spray cans at most hardware stores. Additionally, rubbing paraffin wax on the parts of the drawer where the wood meets can also help reduce friction and make the drawer slide more smoothly.

Understanding the Problem

Identifying Stuck Drawers

Stuck wooden drawers can be a frustrating problem to deal with. You may find yourself pulling and pushing the drawer with all your might, only to have it barely budge. It’s important to identify a stuck drawer before attempting to fix it.

A stuck drawer is one that is difficult to open and close. It may feel like it’s catching on something, or it may not slide smoothly like it used to. If you have to use excessive force to open or close a drawer, it’s likely stuck.

Recognizing Common Causes

There are several reasons why a wooden drawer may become stuck. Here are some of the most common causes:

  • Humidity: Wood is a porous material that can absorb moisture from the air. When the humidity is high, the wood can swell, causing the drawer to stick.
  • Dirt and debris: Over time, dirt and debris can build up on the tracks and rollers of the drawer, causing it to stick.
  • Worn-out tracks: The tracks that the drawer slides on can become worn out over time, causing the drawer to stick or become misaligned.
  • Loose screws or hardware: If the screws or hardware that hold the drawer in place become loose, the drawer can become misaligned and stick.

By understanding the common causes of stuck wooden drawers, you can better diagnose the problem and find the right solution. In the next section, we’ll explore some tips for fixing stuck drawers.

Gathering Necessary Tools

Before you begin to unstick your wooden drawer, make sure you have all the necessary tools. Here are some tools that you might need:

Dehumidifier

If the drawer is sticking due to humidity, you might need a dehumidifier to remove moisture from the wood. Set up the dehumidifier next to the drawer and let it run for a few hours.

Hair Dryer

Another way to remove moisture from the wood is by pointing a hair dryer on low heat at the drawer for several minutes.

Paraffin Wax

Rub paraffin wax on the parts of drawers where the wood meets. You can find paraffin wax almost anywhere, from hobby and craft stores to the canning supplies section in your local grocery store. In a pinch, you can also use candles, bar soap, or even dry spray lubricant.

Nylon Tape

If the wooden drawer slides are causing the problem, you might need nylon tape to fix it. Apply the tape to the wooden slide to create a smooth surface for the drawer to slide on.

Screwdriver

If the drawer is sticking due to a loose screw, you might need a screwdriver to tighten the screw.

Sandpaper

If the drawer is sticking due to rough edges, you might need sandpaper to smooth out the edges.

By having these tools on hand, you will be prepared to unstick your wooden drawer and get it working smoothly again.

Preparation Steps

Before attempting to unstick your wooden drawer, there are a few preparation steps you should take to ensure the process goes smoothly. These steps include emptying the drawer and removing it from the cabinet.

Emptying the Drawer

The first step in preparing to unstick your wooden drawer is to empty it completely. Remove all items from the drawer, taking care to set them aside in a safe and organized manner. This will make it easier to access the back of the drawer and work on it without any obstructions.

Removing the Drawer

After emptying the drawer, the next step is to remove it from the cabinet. Depending on the type of cabinet and drawer, this may involve lifting the drawer up and out of the cabinet or removing screws or other fasteners that hold the drawer in place.

If you’re unsure how to remove the drawer from your specific cabinet, consult the manufacturer’s instructions or seek guidance from a professional. It’s important to remove the drawer carefully to avoid damaging it or the cabinet.

Once you’ve emptied the drawer and removed it from the cabinet, you’re ready to begin the process of un-sticking it.

Methods to Unstick Drawers

If you have a wooden drawer that’s stuck, don’t worry, there are a few methods you can try to fix it. In this section, we’ll discuss three methods that can help you unstick your wooden drawers.

Sanding Technique

One way to unstick a wooden drawer is by using sandpaper. First, remove the drawer from the cabinet. Then, use sandpaper to sand the sides of the drawer that are rubbing against the cabinet. Be sure to sand evenly and lightly, as too much sanding can damage the wood. Once you’ve finished sanding, wipe away any dust or debris with a clean cloth, and then try sliding the drawer back into the cabinet.

Waxing Method

Another way to unstick a wooden drawer is by using wax. First, remove the drawer from the cabinet. Then, apply a small amount of wax to the sides of the drawer that are rubbing against the cabinet. You can use a candle, paraffin wax, or even dry spray lubricant. Rub the wax into the wood, and then try sliding the drawer back into the cabinet. If the drawer still sticks, repeat the process until it slides smoothly.

Shrinking Wood Process

If the wooden drawer is swollen due to humidity, you can try to shrink the wood to unstick it. First, remove the drawer from the cabinet. Then, place the drawer in a dry and warm area for a few days, allowing the wood to dry out and shrink. Once the wood has shrunk, try sliding the drawer back into the cabinet. If it still sticks, you can use sandpaper or wax as described above.

By using one of these methods, you can unstick your wooden drawer and have it sliding smoothly in no time.

Preventive Measures

To avoid having to unstick wooden drawers, you can take some preventive measures. Here are some tips to help you keep your drawers sliding smoothly.

Regular Maintenance

Regular maintenance of your wooden drawers can help prevent them from sticking. Here are some things you can do:

  • Keep your drawers clean and free of debris. Dirt and dust can cause the drawers to stick.
  • Lubricate the drawer slides with a silicone, graphite, or Teflon-based lubricant. This will help the drawers slide more easily.
  • Tighten any loose screws or bolts. Loose hardware can cause the drawers to stick.
  • Check the alignment of the drawers. If the drawers are not aligned properly, they can stick.

Appropriate Use

Using your wooden drawers appropriately can also help prevent them from sticking. Here are some things to keep in mind:

  • Do not overload your drawers. Overloading can cause the drawers to stick.
  • Do not slam your drawers shut. This can cause the drawers to become misaligned and stick.
  • Do not use your drawers as a step stool. This can cause the drawers to become misaligned and stick.
  • Do not expose your drawers to extreme temperatures or humidity. This can cause the wood to expand or contract and cause the drawers to stick.

By following these preventive measures, you can help keep your wooden drawers sliding smoothly and avoid having to unstick them in the future.

When to Seek Professional Help

Sometimes, despite your best efforts, wooden drawers can become so stuck that you need to call in a professional to fix them. Here are some situations where seeking professional help might be necessary:

  • The drawer is an antique or valuable. If the drawer is an antique or has significant monetary or sentimental value, it’s best to leave the job to a professional. They will have the necessary expertise to repair the drawer without causing any further damage.

  • The drawer is part of a larger piece of furniture. If the stuck drawer is part of a larger piece of furniture, it’s important to consider how attempting to fix it yourself could affect the rest of the piece. A professional can assess the situation and make any necessary repairs without causing damage to the surrounding area.

  • You’ve tried everything and the drawer still won’t budge. If you’ve exhausted all the DIY methods and the drawer still won’t open, it’s time to call in a professional. They will have access to specialized tools and techniques that can safely and effectively free the drawer.

Remember, attempting to force a stuck drawer open can cause more damage and make the problem worse. If you’re unsure whether you need professional help, it’s always better to err on the side of caution and seek advice from an expert.

How to Make a Wooden Picnic Table: Step-by-Step Guide with Pictures

Are you looking for a fun and functional addition to your backyard? A wooden picnic table is a classic choice that can provide years of enjoyment for family and friends. Whether you’re planning a backyard BBQ or a simple outdoor meal, a picnic table can provide the perfect setting for your gathering.

Building your own wooden picnic table may seem like a daunting task, but with the right tools and materials, it can be a fun and rewarding project. In this article, we’ll provide you with step-by-step instructions and tips for building your very own picnic table. From selecting the right lumber to assembling the final product, we’ll guide you through the process to ensure your picnic table is sturdy, attractive, and long-lasting. So grab your tools and let’s get started!

Understanding Wood Types

When it comes to building a wooden picnic table, choosing the right type of wood is crucial. There are many different types of wood available, each with its own unique properties and characteristics. In this section, we will discuss three popular types of wood for building picnic tables: Pine, Oak, and Cedar.

Pine

Pine is a softwood that is widely available and relatively inexpensive. It is easy to work with and can be stained or painted to match your desired color scheme. However, pine is not the most durable wood and is susceptible to rot and insect damage, especially when exposed to the elements. If you choose to use pine for your picnic table, be sure to treat it with a weather-resistant finish to help prolong its lifespan.

Oak

Oak is a hardwood that is known for its strength and durability. It is more expensive than pine but is also more resistant to rot and insect damage. Oak has a distinctive grain pattern and can be stained to a variety of colors. However, oak can be difficult to work with due to its hardness, so it may not be the best choice for novice woodworkers.

Cedar

Cedar is a softwood that is naturally resistant to rot and insect damage. It has a pleasant aroma and a beautiful reddish-brown color. Cedar is easy to work with and can be stained or painted to match your desired color scheme. However, cedar is more expensive than pine and may not be as strong as oak. If you choose to use cedar for your picnic table, be sure to select a grade that is suitable for outdoor use.

In conclusion, choosing the right type of wood is an important decision when building a picnic table. Pine, oak, and cedar are all popular choices, each with its own unique properties and characteristics. Consider your budget, woodworking experience, and desired level of durability when selecting the type of wood for your picnic table.

Tools Required

Before starting to build your wooden picnic table, you need to ensure you have the necessary tools. Here are the tools you will need to complete the project:

Saw

A saw is an essential tool for cutting the lumber to the required length. You can use either a hand saw or a power saw, depending on your preference. A circular saw is a popular choice for cutting large pieces of wood, while a jigsaw is ideal for making curved cuts. Make sure the blade is sharp, and keep the saw blade clean to ensure smooth cuts.

Hammer

A hammer is necessary for attaching the pieces of wood together. A claw hammer is a common choice, but a framing hammer is a good option if you need to drive nails into thicker lumber. Make sure the hammer is comfortable to hold and has a good grip to avoid any accidents.

Screwdriver

A screwdriver is essential for attaching the screws to the wood. You can use either a manual screwdriver or a power screwdriver, depending on your preference. A power screwdriver can save time and effort, but a manual screwdriver allows for more control. Make sure you have different sizes of screwdrivers to fit the various screws you will be using.

Other tools that you may need include a tape measure, a level, a square, clamps, a drill, and a wrench set. Make sure you have all the necessary tools before starting the project to avoid any delays.

Safety Measures

When building a wooden picnic table, safety should always be your top priority. Here are some essential safety measures to keep in mind:

1. Wear Protective Gear

Before you begin, make sure you have the right protective gear. Wear safety glasses to protect your eyes from flying wood chips, and earplugs to protect your ears from the noise of power tools. If you’re using power tools, wear gloves to protect your hands from getting hurt.

2. Use the Right Tools

Using the right tools is essential to ensure that your picnic table is sturdy and safe. Make sure you have the right saws, drills, and other tools for the job. Use sharp blades and bits to make clean cuts, and avoid using dull or damaged tools.

3. Follow the Instructions Carefully

Make sure you read the instructions carefully before you start building your picnic table. Follow the steps in the order they are given, and don’t skip any steps. If you’re not sure about something, ask for help or do some research before you proceed.

4. Work in a Safe Environment

Make sure you work in a safe environment. Keep your work area clean and free of clutter, and make sure you have enough space to move around. Avoid working near children or pets, and keep them away from your work area.

5. Use Proper Lifting Techniques

When lifting heavy pieces of wood, use proper lifting techniques to avoid injuring yourself. Bend at the knees and lift with your legs, not your back. If a piece of wood is too heavy for you to lift, ask for help.

By following these safety measures, you can ensure that your wooden picnic table is not only beautiful but also safe for you and your loved ones to use.

Choosing the Right Design

When it comes to building a wooden picnic table, choosing the right design is an important step. There are many different styles of picnic tables to choose from, each with their own unique features and benefits. Here are some things to consider when selecting the right design for your needs:

Size

The first thing to consider when choosing a picnic table design is the size. How many people do you want to be able to seat at the table? Will the table be used for small family gatherings or larger parties? Make sure to choose a design that is the right size for your needs.

Style

There are many different styles of picnic tables to choose from, including traditional, modern, and rustic designs. Consider the overall aesthetic of your outdoor space and choose a style that complements it.

Material

Another important factor to consider when choosing a picnic table design is the material. Wooden picnic tables are a popular choice due to their durability and natural beauty. However, there are also picnic tables made from metal, plastic, and other materials.

Features

Finally, consider any additional features you may want in your picnic table design. Some picnic tables come with built-in benches, while others may have an umbrella hole for shade. Think about what features are important to you and choose a design that meets those needs.

Overall, choosing the right picnic table design is an important step in building a table that will meet your needs and enhance your outdoor space. Take the time to consider your options and choose a design that is the perfect fit for you.

Measuring and Cutting the Wood

Before you start building your picnic table, you will need to measure and cut the wood to the appropriate size. Here is a step-by-step guide to help you through the process.

Step 1: Gather the Required Tools

You will need a few tools to measure and cut the wood for your picnic table. These tools include:

  • Tape measure
  • Circular saw or handsaw
  • Speed square
  • Pencil
  • Clamps

Step 2: Measure and Mark the Wood

Using a tape measure, measure the length and width of the tabletop, seats, and legs. Once you have the measurements, mark the wood with a pencil. Make sure to double-check your measurements before making any cuts.

Step 3: Cut the Wood

Using a circular saw or handsaw, carefully cut the wood along the marked lines. Make sure to follow safety precautions when using power tools. If you are using a circular saw, use a speed square to guide your cuts and ensure they are straight.

Step 4: Sand the Edges

After cutting the wood, use sandpaper to smooth out any rough edges. This will prevent splinters and make the wood easier to work with.

Step 5: Repeat for Each Piece

Repeat these steps for each piece of wood needed for the picnic table. Make sure to label each piece to avoid confusion during assembly.

By following these steps, you can measure and cut the wood for your picnic table with ease.

Assembling the Table

Now that you have all the pieces cut, it’s time to assemble your picnic table. Follow these steps to put everything together:

  1. Lay out the tabletop boards on a flat surface, making sure they’re evenly spaced and aligned. Then, place the two end pieces on top of the tabletop boards, making sure they’re flush with the ends.

  2. Drill pilot holes through the end pieces and into the tabletop boards. Then, screw the pieces together using 3-inch screws.

  3. Next, attach the seat supports to the legs. Place the legs on a flat surface, and then attach the seat supports to the inside of the legs using 2 1/2-inch screws.

  4. Attach the cross braces to the legs. Place the legs on a flat surface, and then attach the cross braces to the inside of the legs using 2 1/2-inch screws.

  5. Now it’s time to attach the tabletop to the legs. Turn the tabletop assembly upside down, and then place the legs on top of the tabletop, making sure they’re evenly spaced and aligned. Then, drill pilot holes through the tabletop and into the legs. Finally, screw the legs to the tabletop using 3-inch screws.

  6. Attach the seats to the seat supports. Place the seats on top of the seat supports, making sure they’re evenly spaced and aligned. Then, drill pilot holes through the seats and into the seat supports. Finally, screw the seats to the seat supports using 2 1/2-inch screws.

  7. Sand the table and chairs to remove any rough edges or splinters. Apply a coat of wood sealer or stain to protect your new picnic table from the elements.

Congratulations! You have successfully assembled your wooden picnic table. Invite your friends and family over for a fun picnic and enjoy your new outdoor furniture.

Sanding and Finishing

Sanding Process

Before applying any finish to your wooden picnic table, you need to sand it properly. Sanding is an essential step to ensure the surface of the wood is smooth and ready to receive the finish. Here are the steps to follow to sand your wooden picnic table:

  1. Start with coarse-grit sandpaper: Begin by sanding the table with coarse-grit sandpaper, such as 60 grit. Sand the entire surface of the table, including the top, sides, and legs. This will help remove any rough spots, splinters, or bumps.

  2. Move to finer-grit sandpaper: Once you have sanded the table with coarse-grit sandpaper, switch to finer-grit sandpaper, such as 120 grit. Sand the entire surface of the table again, making sure to remove any scratches or marks left by the coarse-grit sandpaper.

  3. Sand with the grain: Always sand with the grain of the wood to avoid damaging the surface. Sanding against the grain can cause scratches and marks that will be difficult to remove.

  4. Use a sanding block: To ensure an even sanding job, use a sanding block to hold the sandpaper. This will help you apply even pressure across the surface of the table.

Applying Finish

Once you have sanded your wooden picnic table, it is time to apply the finish. The finish will protect the wood from moisture, UV rays, and other environmental factors. Here are the steps to follow to apply the finish:

  1. Choose the right finish: There are different types of finishes available, such as varnish, polyurethane, and oil-based finishes. Choose the finish that suits your needs and preferences.

  2. Apply the finish: Apply the finish using a brush or a rag. Make sure to apply an even coat across the surface of the table, including the top, sides, and legs.

  3. Wait for the finish to dry: Allow the finish to dry completely before applying another coat. Follow the manufacturer’s instructions to determine how long you need to wait for the finish to dry.

  4. Sand between coats: Sand the surface of the table lightly between coats of finish using fine-grit sandpaper, such as 220 grit. This will help remove any bumps or imperfections and ensure a smooth finish.

  5. Apply multiple coats: Apply multiple coats of finish to ensure maximum protection. Follow the manufacturer’s instructions to determine how many coats you need to apply.

By following these steps, you can sand and finish your wooden picnic table like a pro. With a little patience and effort, you can create a beautiful and durable picnic table that will last for years to come.

Maintaining Your Picnic Table

Maintaining your wooden picnic table is essential to ensure its longevity and keep it looking great. Here are a few tips to help you maintain your picnic table.

Cleaning Your Picnic Table

To start, you will need to clean your picnic table. Use a soft-bristled brush and a mild detergent to scrub the surface of the table. Rinse it off with a hose and let it dry completely before moving on to the next step.

Applying a Protective Coating

Once your picnic table is clean and dry, you can apply a protective coating to help prevent damage from the elements. There are several options to choose from, including:

  • Linseed oil
  • Teak oil
  • Tung oil
  • Water-resistant, UV-protected sealer

Apply the protective coating according to the manufacturer’s instructions. Be sure to apply it evenly and let it dry completely before using the table.

Regular Maintenance

Regular maintenance is key to keeping your picnic table in good condition. Here are a few things you can do to keep it looking great:

  • Remove debris and dirt regularly
  • Keep it covered when not in use
  • Sand and refinish as needed

By following these tips, you can keep your wooden picnic table looking great for years to come.

How to Build a Wooden Sailboat: A Beginner's Guide

Are you interested in building your own sailboat? If so, building a wooden sailboat can be a rewarding and fulfilling experience. Not only will you have a unique vessel to call your own, but you’ll also learn valuable woodworking skills along the way.

To get started, you’ll need to gather the necessary materials and tools. This may include oak plywood, epoxy resin and hardener, thickener, brad nails, masking tape, a pull-saw, and a table saw. Once you have everything you need, you can begin the process of building your sailboat. From creating a jig and frame assembly to making the mast, there are many steps involved in building a wooden sailboat. But with patience and attention to detail, you can create a beautiful and functional vessel that will bring you joy for years to come.

Understanding the Basics of a Wooden Sailboat

If you are interested in building a wooden sailboat, it’s important to understand the basics of how a sailboat is constructed. In this section, we’ll cover the parts of a wooden sailboat and the different types of wooden sailboats.

Parts of a Wooden Sailboat

A wooden sailboat is made up of several parts, each with its own unique function. Here are some of the most important parts:

  • Hull: The hull is the main body of the boat. It is the part of the boat that sits in the water and provides buoyancy.
  • Keel: The keel is a long, narrow fin that extends down from the bottom of the hull. It helps to keep the boat from capsizing by providing stability.
  • Rudder: The rudder is a flat piece of wood or metal that is attached to the back of the boat. It helps to steer the boat.
  • Mast: The mast is a tall, vertical pole that supports the sails.
  • Sails: The sails are large pieces of fabric that are attached to the mast and other parts of the boat. They catch the wind and propel the boat forward.
  • Boom: The boom is a horizontal pole that is attached to the bottom of the mast. It helps to control the shape of the sail.

Types of Wooden Sailboats

There are many different types of wooden sailboats, each with its own unique characteristics. Here are some of the most common types:

  • Dinghy: A dinghy is a small sailboat that is typically used for recreational sailing or racing.
  • Sloop: A sloop is a sailboat with a single mast and a fore-and-aft rig.
  • Ketch: A ketch is a sailboat with two masts, with the main mast taller than the mizzen mast.
  • Yawl: A yawl is a sailboat with two masts, with the mizzen mast located aft of the rudder post.

When choosing a type of wooden sailboat to build, it’s important to consider your needs and experience level. A dinghy is a good choice for beginners, while a ketch or yawl may be more suitable for experienced sailors.

By understanding the basics of a wooden sailboat and the different types available, you can make an informed decision about which type of boat to build.

Choosing the Right Materials

When building a wooden sailboat, choosing the right materials is crucial to ensure the boat’s durability and performance. In this section, we will discuss the two most important materials you’ll need to choose: wood and sails/rigging materials.

Selecting the Right Wood

Choosing the right type of wood for your sailboat is critical. You want a wood that is strong, lightweight, and resistant to rot and decay. Some of the most popular types of wood used in sailboat building include:

  • Cedar: Lightweight and easy to work with, cedar is an excellent choice for planking and decking.
  • Mahogany: Strong and durable, mahogany is often used for building frames and keels.
  • Oak: A dense and hard wood, oak is commonly used for building frames and planking.

When selecting your wood, make sure it is free of knots, cracks, and other defects that could weaken the boat’s structure. You should also consider the wood’s grain pattern, as this can affect the boat’s strength and appearance.

Choosing Sails and Rigging Materials

The type of sails and rigging materials you choose will depend on the type of sailboat you’re building and your sailing needs. Some of the most common materials used in sail and rigging construction include:

  • Dacron: A strong and durable synthetic material, dacron is commonly used for sailcloth.
  • Nylon: Lightweight and flexible, nylon is often used for spinnaker sails.
  • Stainless Steel: Strong and corrosion-resistant, stainless steel is commonly used for rigging hardware.

When selecting your sails and rigging materials, consider the conditions you’ll be sailing in and the type of sailing you’ll be doing. For example, if you’ll be racing, you may want to choose lightweight sails and rigging materials that will help you achieve maximum speed. On the other hand, if you’ll be cruising, you may want to choose more durable materials that can withstand rougher conditions.

By choosing the right materials for your wooden sailboat, you can ensure that your boat is strong, durable, and performs well on the water.

Designing Your Sailboat

Before you start building your wooden sailboat, you need to design it. This will involve creating a blueprint and determining the size and shape of your boat.

Creating a Blueprint

Creating a blueprint is an essential step in designing your sailboat. It will help you visualize your boat and ensure that you have all the necessary components in place. You can create a blueprint using software such as AutoCAD or SketchUp, or you can draw it by hand.

When creating your blueprint, consider the following:

  • The length, width, and height of your boat
  • The position of the mast and sails
  • The location of the rudder and keel
  • The number of cabins and their layout
  • The placement of any storage compartments or equipment

Determining the Size and Shape

The size and shape of your sailboat will depend on several factors, including your budget, the type of sailing you plan to do, and the number of people who will be on board.

Consider the following when determining the size and shape of your sailboat:

  • The type of sailing you plan to do (coastal cruising, racing, etc.)
  • The number of people who will be on board
  • The amount of storage space you will need
  • The amount of deck space you will need
  • Your budget

Once you have determined the size and shape of your sailboat, you can start gathering materials and building your boat.

Building the Hull

When building a wooden sailboat, the hull is the most important part of the boat. It is the main structure that holds everything together and keeps the boat afloat. Building the hull requires cutting and assembling the wooden frame.

Cutting the Wood

To begin building the hull, you will need to cut the wood into the appropriate sizes and shapes. The wood should be cut according to the plans or blueprints that you have created. You can use a saw or a jigsaw to make the cuts.

It is important to use high-quality wood that is free of knots or other defects. The wood should be strong enough to withstand the pressure and weight of the water. Common types of wood used for building a wooden sailboat include cedar, oak, and mahogany.

Assembling the Frame

Once you have cut the wood, you can begin assembling the frame of the hull. The frame is made up of vertical pieces of wood called frames, which hold the shape of the boat. The frames are attached to the keel, which is the main structure that runs down the center of the boat.

To assemble the frame, you will need to use a sawhorse or other support to hold the lumber in place. You can then use screws or bolts to attach the frames to the keel. It is important to ensure that the frames are level and straight.

After the frames are attached to the keel, you can add the planks to the hull. The planks are attached to the frames and keel using screws or nails. It is important to ensure that the planks are properly aligned and spaced.

Once the planks are attached, you can sand and finish the hull to give it a smooth and polished look. This will also help to protect the wood from the elements.

Building the hull of a wooden sailboat requires patience and attention to detail. With the right tools and materials, you can create a strong and beautiful hull that will last for years to come.

Installing the Deck and Cabin

Installing the deck and cabin of your wooden sailboat is a crucial step in the construction process. It not only adds to the aesthetics of your boat but also provides structural support. Here are some tips to help you through the process.

Deck Installation

The deck of your wooden sailboat should be installed after the hull has been completed and before the cabin is built. It is important to ensure that the deck is watertight to prevent any leaks. Here are the steps to follow when installing the deck:

  1. Cut the deck to fit the hull and sand the edges to ensure a tight fit.
  2. Apply a layer of epoxy to the hull and deck joint to seal it.
  3. Secure the deck to the hull using screws or bolts.
  4. Apply a layer of fiberglass cloth and epoxy to the deck to make it watertight.
  5. Sand the surface of the deck to prepare it for painting or varnishing.

Cabin Installation

The cabin of your wooden sailboat provides shelter and storage space. It is important to ensure that it is properly installed to prevent any leaks. Here are the steps to follow when installing the cabin:

  1. Build the cabin on a flat surface using marine-grade plywood.
  2. Cut the cabin to fit the deck and hull and sand the edges to ensure a tight fit.
  3. Apply a layer of epoxy to the cabin and deck joint to seal it.
  4. Secure the cabin to the deck using screws or bolts.
  5. Apply a layer of fiberglass cloth and epoxy to the cabin to make it watertight.
  6. Install any windows, hatches, or doors in the cabin.
  7. Sand the surface of the cabin to prepare it for painting or varnishing.

By following these steps, you can ensure that your wooden sailboat’s deck and cabin are properly installed and watertight. This will not only make your boat look great but also ensure that you have a safe and enjoyable sailing experience.

Setting Up the Mast and Sails

Now that you have built your wooden sailboat, it is time to set up the mast and sails. This process may seem daunting, but with a little patience and attention to detail, you can have your boat ready to sail in no time.

Step 1: Install the Mast

The first step is to install the mast. Depending on the design of your boat, the mast may be a single piece or assembled from multiple sections. Make sure the mast is secured properly and is straight. Use a level to ensure the mast is vertical in both directions.

Step 2: Prepare the Sails

Next, prepare the sails. Make sure the sails are clean and free of any debris or damage. Attach the sail to the mast using the halyard, which is a rope used to raise and lower the sail. Make sure the sail is hoisted all the way to the top of the mast.

Step 3: Attach the Boom

Attach the boom to the mast and secure it with a boom vang, which is a rope used to control the angle of the boom. The boom is the horizontal spar that holds the bottom edge of the sail.

Step 4: Set the Sail

Once the boom is attached, set the sail. Adjust the angle of the boom and the sail to catch the wind and start moving. You can use the main sheet to control the angle of the sail and the boat’s speed.

Step 5: Trim the Sail

Finally, trim the sail to optimize its performance. This involves adjusting the sail’s shape and position to maximize its power and minimize drag. Use the sail controls, such as the cunningham and outhaul, to adjust the sail’s shape. Use the main sheet to control the sail’s position relative to the wind.

Congratulations! You have successfully set up the mast and sails of your wooden sailboat. Now it’s time to hit the water and enjoy the thrill of sailing.

Applying Finishing Touches

When it comes to building a wooden sailboat, applying the finishing touches is a crucial step that can make all the difference in the final product. Here are some tips and tricks to help you get the perfect finish.

Sanding and Finishing

Before you can apply any finish, you need to make sure the surface is smooth and free of imperfections. This means sanding the wood with progressively finer grits of sandpaper until you achieve the desired smoothness. Once you’ve finished sanding, you can apply a wood conditioner to help the wood absorb the finish more evenly.

When it comes to choosing a finish, you have several options. Some popular choices include varnish, paint, and oil. Varnish is a popular choice for wooden boats because it provides a durable, glossy finish that can withstand the harsh marine environment. Paint is another option, but it requires more maintenance than varnish and may not provide as much protection against the elements. Oil is a good choice if you want a more natural look, but it may not provide as much protection as varnish or paint.

Painting and Varnishing

If you decide to go with paint or varnish, there are a few things to keep in mind. First, make sure you apply the finish in a well-ventilated area to avoid inhaling fumes. Second, make sure you apply thin, even coats and allow each coat to dry completely before applying the next. This will help prevent drips and ensure a smooth finish.

When it comes to varnishing, it’s important to use a high-quality brush and work quickly to avoid brush marks. You may also want to consider using a foam brush for hard-to-reach areas. Once you’ve applied the final coat of varnish, you can buff the surface with a soft cloth to achieve a high-gloss finish.

Painting requires a different approach. You’ll need to choose the right type of paint for your boat and make sure you apply it evenly. If you’re painting a large area, you may want to consider using a paint sprayer to achieve a smooth, even finish. Once the paint has dried, you can apply a clear coat to protect the paint and give it a glossy finish.

In conclusion, applying the finishing touches to your wooden sailboat is an important step that requires careful attention to detail. By following these tips and using the right tools and materials, you can achieve a beautiful, long-lasting finish that will protect your boat and make it stand out on the water.

Safety Measures

When building a wooden sailboat, safety should always be your top priority. Here are some safety measures you should take to ensure a safe and successful build.

Installing Safety Equipment

Before you start building, make sure you have all the necessary safety equipment installed in your workshop. This includes fire extinguishers, smoke detectors, and first aid kits. You should also have a clear and unobstructed path to the exit in case of an emergency.

When working with power tools, always wear eye and ear protection, as well as a dust mask to protect your lungs. If you are using chemicals, make sure you are working in a well-ventilated area and wear gloves and a respirator if necessary.

Conducting a Safety Check

Before you start working on your sailboat, conduct a safety check to make sure everything is in order. Check that all tools and equipment are in good working order and that there are no loose or damaged parts. Make sure your work area is clean and free of clutter, and that all cords and cables are properly secured.

When working with wood, be aware of any knots or cracks in the wood that could weaken the structure of your sailboat. Use only high-quality marine-grade wood and be sure to follow the plans carefully to ensure a strong and safe boat.

By following these safety measures, you can ensure that your wooden sailboat build is a safe and enjoyable experience.

Maintaining Your Wooden Sailboat

Congratulations on building your own wooden sailboat! Now that you have a beautiful vessel, it’s important to keep it well-maintained to ensure its longevity and safety on the water.

Regular Maintenance

Regular maintenance is essential to keep your wooden sailboat in top condition. Here are some tips to keep in mind:

  • Clean your boat regularly with a mild soap and water to prevent dirt and grime buildup.
  • Check for any signs of damage, such as cracks, rot, or loose fittings, and address them promptly.
  • Apply a fresh coat of varnish or paint every few years to protect the wood from the elements.
  • Keep your boat covered when not in use to protect it from the sun and rain.

Seasonal Maintenance

In addition to regular maintenance, there are also some seasonal tasks that you should perform to keep your wooden sailboat in top condition:

  • At the beginning of the season, inspect the hull for any damage or wear and make any necessary repairs.
  • Check the rigging and sails to make sure they are in good condition and make any necessary repairs or replacements.
  • Before storing your boat for the winter, make sure to properly winterize it to protect it from the cold and moisture.

Additional Tips

Here are some additional tips to keep in mind when maintaining your wooden sailboat:

  • Use high-quality marine-grade products when cleaning and maintaining your boat.
  • Avoid using harsh chemicals or abrasive materials that can damage the wood.
  • Regularly check the bilge for any water buildup and pump it out as needed.
  • Keep your boat well-ventilated to prevent moisture buildup and mold growth.

By following these tips, you can keep your wooden sailboat in top condition and enjoy many years of safe and fun sailing.

How to Build a Wooden Handrail for Outdoor Steps: A Step-by-Step Guide

If you have outdoor steps that need a handrail, you may be wondering how to go about making one yourself. Building a wooden handrail for your outdoor steps is a great DIY project that can provide safety and style to your home. With a few basic tools and some lumber, you can create a handrail that will last for years to come.

Before you begin building your handrail, it’s important to check with your local building codes to ensure that you are meeting any requirements for handrail height, spacing, and materials. Once you have determined the specifications for your handrail, you can begin gathering your materials. The most common materials for outdoor handrails are pressure-treated lumber and metal balusters, but you can also use other materials like cedar or wrought iron to create a unique look.

Once you have your materials, you can begin building your handrail. The process will involve cutting and assembling the pieces of lumber, attaching the balusters, and securing the handrail to the steps. With some patience and attention to detail, you can create a handrail that will not only provide safety but also enhance the look of your outdoor space.

Understanding the Basics of Handrails

If you have outdoor steps, it’s important to have a handrail for safety purposes. A handrail is a simple wooden structure that runs along the length of the stairs. It provides support and stability to people as they climb up or down the stairs. In this section, we will discuss the basics of handrails and how to make one for your outdoor steps.

Handrail Height and Length

Before you begin building your handrail, it’s important to know the height and length of the handrail. The height of the handrail should be between 34 and 38 inches from the top of the stair tread to the top of the handrail. The length of the handrail should extend the full length of the stairs and extend at least 12 inches beyond the top and bottom steps.

Handrail Materials

The most common material used for handrails is wood. Cedar, redwood, and pressure-treated pine are popular choices for outdoor use because they are resistant to rot and decay. Other materials such as metal or vinyl can also be used for handrails, but they may require more maintenance.

Handrail Design

There are many different designs for handrails, but the most common design is a simple straight railing. The railing should be at least 1.5 inches in diameter to provide a comfortable grip. It’s important to make sure that the handrail is securely attached to the stairs to prevent any accidents.

Building Codes

Before building your handrail, it’s important to check your local building codes to ensure that your handrail meets the required standards. Building codes may vary depending on your location, so it’s important to do your research before beginning any construction.

In summary, a handrail is an important safety feature for outdoor steps. It should be between 34 and 38 inches in height, extend the full length of the stairs, and be securely attached to the stairs. Wood is the most common material used for handrails, and there are many different designs to choose from. Always check your local building codes before beginning any construction.

Choosing the Right Wood

When it comes to choosing the right wood for your outdoor handrail, there are several factors to consider. You want a wood that is durable, weather-resistant, and able to withstand the elements. Here are some popular options:

Cedar

Cedar is a popular choice for outdoor handrails because it is naturally resistant to rot and insects. It has a warm, reddish-brown color and a pleasant aroma. Cedar is also lightweight and easy to work with, making it a great choice for DIY projects.

Redwood

Redwood is another popular choice for outdoor handrails. It has a beautiful, rich color and is naturally resistant to decay and insects. Redwood is also easy to work with and holds up well in wet conditions.

Pressure-Treated Pine

Pressure-treated pine is a budget-friendly option that is treated with chemicals to resist rot and insects. It can be stained or painted to match your outdoor decor. However, it is important to note that the chemicals used in pressure treatment can be harmful to humans and pets, so it is important to wear gloves and a mask when working with it.

Ipe

Ipe is a hardwood that is known for its durability and resistance to rot, insects, and weather. It has a rich, dark color and a beautiful grain pattern. However, it is also one of the most expensive options.

No matter which type of wood you choose, make sure it is properly sealed and maintained to ensure its longevity. Consider the climate and weather conditions in your area when making your decision.

Materials and Tools Needed

When it comes to building a wooden handrail for your outdoor steps, you will need to gather a few materials and tools to get the job done. In this section, we will go over the different materials and tools needed to build a sturdy and reliable handrail for your outdoor steps.

Wood Selection

The first thing you will need to do is select the right type of wood for your handrail. You want to choose a wood that is strong, durable, and able to withstand the elements. Some of the best wood options for outdoor handrails include cedar, redwood, and pressure-treated pine. These woods are all resistant to rot and decay, making them ideal for outdoor use.

Handrail Hardware

In addition to the wood, you will also need to gather some handrail hardware. This includes brackets, screws, and bolts to secure the handrail to the posts. You will also need to purchase a post cap to protect the top of the posts from water damage.

Woodworking Tools

To build your handrail, you will need a few basic woodworking tools. These include a circular saw, a jigsaw, a drill, and a level. You will also need a measuring tape, a pencil, and a square to ensure that your cuts are accurate and your handrail is level.

In summary, to build a wooden handrail for your outdoor steps, you will need to select the right type of wood, gather the necessary hardware, and have the right woodworking tools on hand. With these materials and tools, you will be able to build a sturdy and reliable handrail that will provide safety and support for years to come.

Measuring and Planning

Before you start building your wooden handrail for outdoor steps, you need to measure and plan accordingly. This will ensure that your handrail fits properly and provides the necessary support when climbing or descending stairs.

Step Measurement

The first step is to measure the height and width of your steps. Measure the height from the bottom of the step to the top, and the width from side to side. Make sure to measure each step individually, as they may vary in size.

Once you have your measurements, you can determine the number of posts and rails you will need. As a general rule, you should have a post for every four to six feet of railing, and a rail for every two to three feet of railing.

Handrail Design

The next step is to design your handrail. You can choose from a variety of designs, including straight, curved, or angled. You can also choose from a variety of materials, including wood, metal, or vinyl.

When designing your handrail, it’s important to consider the style of your home and the surrounding landscape. You want your handrail to blend in with the overall aesthetic of your property.

Once you have your design in mind, you can start selecting your materials. Make sure to choose high-quality materials that are durable and weather-resistant. Pressure-treated lumber is a popular choice for outdoor handrails.

In summary, measuring and planning is an essential step in building a wooden handrail for outdoor steps. Make sure to measure your steps carefully and design your handrail to fit your specific needs. With the right materials and design, you can create a beautiful and functional handrail that provides the necessary support and adds value to your home.

Cutting the Wood

Now that you have measured and marked the spots for your handrail, it’s time to start cutting the wood. Here’s how you can do it:

  1. Use a chop saw or a miter saw to cut the pressure-treated lumber into the desired lengths for the rails and posts. Remember to wear protective gear while using the saw.

  2. Use a spade drill bit to drill holes into the posts where the rails will be attached. Make sure to align the holes on both sides of the post.

  3. Use a masonry bit to drill holes into the concrete or brick where the post holders will be installed.

  4. If you need to cut the railings at an angle to fit the slope of the stairs, use a miter saw to make the cuts.

  5. Sand the edges of the wood to smooth out any rough spots or splinters.

  6. Apply a wood stain or sealant to protect the wood from weather damage.

Remember to double-check your measurements and make sure all the pieces fit together before securing them in place. With these steps, you’ll be well on your way to creating a sturdy and attractive handrail for your outdoor steps.

Assembling the Handrail

Now that you have installed the posts for your outdoor handrail, it’s time to assemble the handrail itself. Here’s how you can do it:

Step 1: Measure and Cut Rails and Posts

Measure the distance between the posts to determine the length of the rails. Cut the rails to the appropriate length using a saw. Make sure the rails are level and straight.

Step 2: Place the Post Holders

Place the post holders on the rails. The holders should be placed at regular intervals, depending on the length of the rails. Use a measuring tape to ensure that the holders are evenly spaced.

Step 3: Install the Posts

Insert the posts into the post holders. Make sure that the posts are securely in place. Use a level to ensure that the posts are straight and level.

Step 4: Attach the Handrail

Attach the handrail to the posts using screws. Make sure that the screws are long enough to go through the handrail and into the posts. Use a drill to make pilot holes for the screws.

Step 5: Seal the Handrail

Seal the handrail with a weather-resistant sealant. This will protect the wood from the elements and prevent it from rotting or warping. Apply the sealant with a brush or roller, following the manufacturer’s instructions.

And that’s it! Your outdoor handrail is now complete and ready to use. Remember to check the handrail regularly for any signs of wear or damage, and make repairs as necessary.

Installing the Handrail

Now that you have built your wooden handrail, it’s time to install it on your outdoor steps. Follow these steps to ensure a safe and secure installation:

  1. Measure and mark the placement of the handrail on your steps. Use a level to ensure that the handrail is straight and even.

  2. Pre-drill holes into the handrail and the steps. This will prevent the wood from splitting when you attach the handrail to the steps.

  3. Attach the handrail to the steps using screws and brackets. Make sure the screws are long enough to go through the handrail and into the steps securely.

  4. Test the handrail to make sure it is sturdy and can support weight. If it wobbles or feels loose, reinforce the installation with additional screws or brackets.

  5. Finish the handrail with a weather-resistant sealant or paint to protect it from the elements.

Remember, installing a handrail is an important safety feature for your outdoor steps. It provides stability and support, especially for those with mobility issues or disabilities. Take the time to install it properly to ensure the safety of yourself and your guests.

Finishing Touches

Once you have constructed your wooden handrail for your outdoor steps, it’s time to add the finishing touches to make it look great and protect it from the elements.

Sanding the Handrail

Before applying any finish, it’s important to sand the handrail to ensure a smooth surface. Start with a coarse grit sandpaper and work your way up to a finer grit. Be sure to sand with the grain of the wood to avoid scratches. After sanding, wipe the handrail with a damp cloth to remove any dust.

Applying Wood Stain

Applying wood stain to your handrail will not only give it a beautiful color but also protect it from UV rays and water damage. Choose a stain that is specifically designed for outdoor use and matches the color of your deck or steps. Apply the stain with a brush or rag, following the manufacturer’s instructions. Be sure to apply the stain evenly and wipe off any excess.

Sealing the Wood

After the stain has dried, it’s important to seal the wood to protect it from moisture. Choose a clear, waterproof sealer that is designed for outdoor use. Apply the sealer with a brush or roller, following the manufacturer’s instructions. Be sure to apply an even coat and let it dry completely before using the handrail.

By following these simple steps, you can add the finishing touches to your wooden handrail and ensure that it looks great and lasts for years to come.

Maintenance Tips

Once you have installed your wooden handrail for outdoor steps, it is important to maintain it properly to ensure it lasts for years to come. Here are a few tips to help you keep your handrail in good condition:

Regular Cleaning

Dirt, dust, and other debris can accumulate on your handrail over time, making it look dirty and unappealing. To keep it looking its best, you should clean it regularly. You can use a mixture of water and vinegar or a cleaning solution to wipe down the handrail. Be sure to dry it thoroughly afterward to prevent water damage.

Preventing Stains

Stains can be a common problem with wooden handrails, especially if they are not sealed properly. To prevent stains, you can apply a sealant to the handrail. This will help to protect it from moisture and other elements that can cause damage.

Preventing Drying Out

Wooden handrails can dry out over time, which can cause them to crack and split. To prevent this from happening, you should apply a coat of oil or wax to the handrail every few months. This will help to keep it moisturized and prevent it from drying out.

Regular Maintenance

Regular maintenance is key to keeping your wooden handrail in good condition. This includes checking for any signs of damage, such as cracks or splits, and repairing them as necessary. You should also inspect the handrail for any loose screws or other hardware and tighten them as needed.

By following these simple maintenance tips, you can keep your wooden handrail for outdoor steps looking its best and ensure that it lasts for years to come.