Tag Archives: beautiful reddish-brown color

build-a-wooden-pond-frame

How to Build a Wooden Pond Frame: Step-by-Step Guide for Beginners

Are you interested in adding a beautiful pond to your backyard? Building a wooden pond frame is a great way to create a stunning water feature that will enhance the look of your outdoor space. With a little bit of planning and effort, you can create a pond that is both functional and aesthetically pleasing.

One of the first things you’ll need to consider when building a wooden pond frame is the size and shape of your pond. Think about the space you have available, as well as the type of fish or plants you want to include in your pond. You’ll also need to decide on the depth of your pond, as this will impact the type of liner and pump you’ll need to use. Once you have a clear idea of what you want your pond to look like, you can begin gathering the materials you’ll need to build your wooden frame.

Understanding the Basics of a Wooden Pond Frame

build-a-wooden-pond-frame

If you’re planning to build a pond in your backyard, a wooden frame is a great option to consider. A wooden pond frame offers a natural look that blends well with the surroundings, and it’s also relatively easy to build. Here are some basics you need to understand before building a wooden pond frame:

Choosing the Right Wood

The first step in building a wooden pond frame is choosing the right wood. You need to choose a wood that is resistant to rot and decay, as it will be exposed to water and moisture. Cedar and redwood are popular choices for wooden pond frames, as they are naturally resistant to rot and decay.

Determining the Size and Shape

The size and shape of your pond frame will depend on the size and shape of your pond. You need to determine the size and shape of your pond before building the frame. You can use a garden hose or spray paint to mark the outline of your pond. Once you have determined the size and shape, you can start building the frame.

Building the Frame

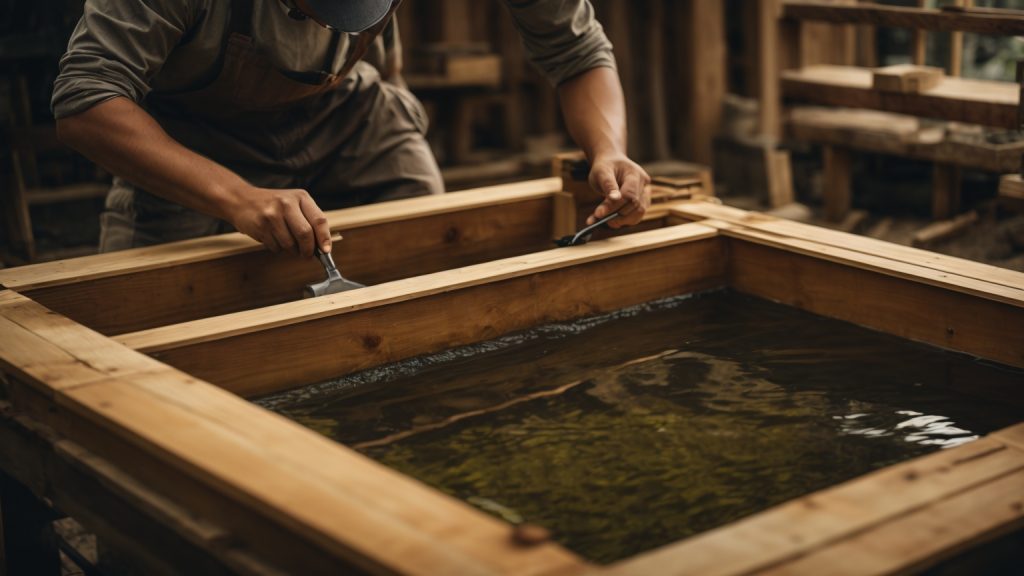
Building a wooden pond frame is relatively easy. You need to start by building the base of the frame, which will support the weight of the pond. You can use pressure-treated lumber for the base, as it is resistant to rot and decay. Once you have built the base, you can start building the walls of the frame. You can use regular lumber for the walls, but make sure to seal it properly to prevent rot and decay.

Installing the Liner

After building the frame, you need to install the liner. A pond liner is a flexible material that is used to hold water in the pond. You can use a rubber liner or a PVC liner for your pond. Make sure to install the liner properly to prevent leaks.

Adding the Finishing Touches

Once you have installed the liner, you can add the finishing touches to your pond. You can add rocks, plants, and other decorations to make your pond look more natural. You can also install a pump and filter to keep the water clean and clear.

Building a wooden pond frame is a fun and rewarding project that can add beauty and serenity to your backyard. With the right tools and materials, you can build a pond that will provide years of enjoyment.

Choosing the Right Wood

When building a wooden frame for your pond, choosing the right type of wood is crucial. You want to choose a wood that is durable, resistant to rot, and can withstand exposure to water. Here are some options to consider:

Cedar

Cedar is a popular choice for building pond frames because it is naturally resistant to decay and rot. It also has a pleasant aroma and is known for its beautiful reddish-brown color. Cedar is a bit more expensive than other types of wood, but it is worth the investment for its durability and aesthetic appeal.

Pressure-Treated Pine

Pressure-treated pine is another popular choice for building pond frames. It is treated with chemicals that make it resistant to decay, insects, and rot. Pressure-treated pine is less expensive than cedar, but it is important to note that the chemicals used in the treatment process can be harmful to fish and other aquatic life. Be sure to use a pond liner to protect your fish from any potential harm.

Redwood

Redwood is a durable and attractive wood that is naturally resistant to decay and insects. It has a rich, reddish color and is often used for outdoor furniture and decks. Redwood is more expensive than pine, but it is a good choice if you want a wood that is both durable and visually appealing.

Other Options

Other woods that can be used for building pond frames include cypress, oak, and teak. These woods are all durable and resistant to decay, but they can be more expensive than other options.

When choosing the right wood for your pond frame, consider your budget, the durability of the wood, and any potential harm to aquatic life. With the right wood and proper construction, your pond frame will provide a beautiful and functional addition to your backyard oasis.

Designing Your Pond Frame

Before you start building your wooden pond frame, you need to design it. This is an essential step that will ensure that your pond is safe, functional, and aesthetically pleasing. Here are some things to consider when designing your pond frame:

Size and Shape

The first thing to consider when designing your pond frame is the size and shape of your pond. You need to decide how big you want your pond to be and what shape you want it to take. The size and shape of your pond will depend on the space available in your yard, the number of fish you want to keep, and your personal preferences.

Materials

The next thing to consider is the materials you will use to build your pond frame. Wood is a popular choice for building pond frames because it is durable, easy to work with, and looks great. However, you need to make sure that the wood you choose is suitable for outdoor use and can withstand exposure to water and other elements.

Depth

Another important factor to consider when designing your pond frame is the depth of your pond. The depth of your pond will depend on the type of fish you want to keep and the climate in your area. Generally, a depth of at least 2 feet is recommended for most fish species.

Filtration and Aeration

Finally, you need to consider how you will filter and aerate your pond. Filtration is important to keep the water clean and clear, while aeration is necessary to provide oxygen to your fish. You can use a variety of filtration and aeration systems, including pumps, filters, and air stones.

By considering these factors when designing your pond frame, you can ensure that your pond is safe, functional, and beautiful. Take your time and plan carefully to create a pond that you will enjoy for years to come.

Materials and Tools Needed

Essential Materials

Building a wooden pond frame requires certain materials to ensure its durability and safety for your aquatic life. Here are the essential materials you will need:

Materials Quantity
Pressure-treated lumber Depends on the size of the pond
Pond liner Depends on the size of the pond
Rebar stakes 8-10 pieces
Gravel Enough to cover the bottom of the pond
Screws Enough to secure the lumber

Pressure-treated lumber is recommended for building the frame as it is resistant to rot and insect damage. The pond liner will serve as a barrier between the wood and water, preventing the wood from rotting. Rebar stakes will be used to secure the frame to the ground, and gravel will provide a stable base for the pond liner. Screws will be used to join the lumber together.

Required Tools

To build a wooden pond frame, you will need the following tools:

  • Circular saw
  • Power drill
  • Level
  • Tape measure
  • Shovel
  • Wheelbarrow
  • Hammer
  • Rubber mallet
  • Utility knife
  • Safety glasses
  • Gloves

A circular saw will be used to cut the lumber to the appropriate size. A power drill will be used to make holes for the screws and to attach the rebar stakes. A level will ensure that the frame is even and balanced. A tape measure will be used to measure the dimensions of the frame and the pond liner. A shovel and wheelbarrow will be needed to move the gravel and soil. A hammer and rubber mallet will be used to secure the rebar stakes and adjust the frame. A utility knife will be used to trim the pond liner. Finally, safety glasses and gloves are recommended to protect yourself while working with the tools and materials.

Preparation Steps

Before you start building your wooden pond frame, there are a few preparation steps that you need to take. These steps will help ensure that your pond is safe for your fish and will last for years to come.

Site Preparation

The first step in preparing for your wooden pond frame is to choose the right location. You want to choose a location that is level and has good drainage. Avoid areas that are prone to flooding or have poor drainage.

Once you have chosen your location, you need to prepare the site. This involves removing any grass or vegetation from the area where your pond will be. You can use a shovel or a sod cutter to remove the grass.

After you have removed the grass, you need to level the area. You can use a rake or a shovel to level the area. Make sure that the area is level and smooth.

Wood Treatment

The next step in preparing for your wooden pond frame is to treat the wood. You want to use wood that is resistant to rot and decay. Cedar and redwood are good choices for building a wooden pond frame.

Before you start building your pond frame, you need to treat the wood with a wood preservative. This will help protect the wood from rot and decay. You can use a brush or a sprayer to apply the wood preservative.

Make sure that you apply the wood preservative to all sides of the wood, including the ends. You should also let the wood dry for at least 24 hours before you start building your pond frame.

By following these preparation steps, you can ensure that your wooden pond frame is safe and will last for years to come.

Building the Frame

building-the-frame

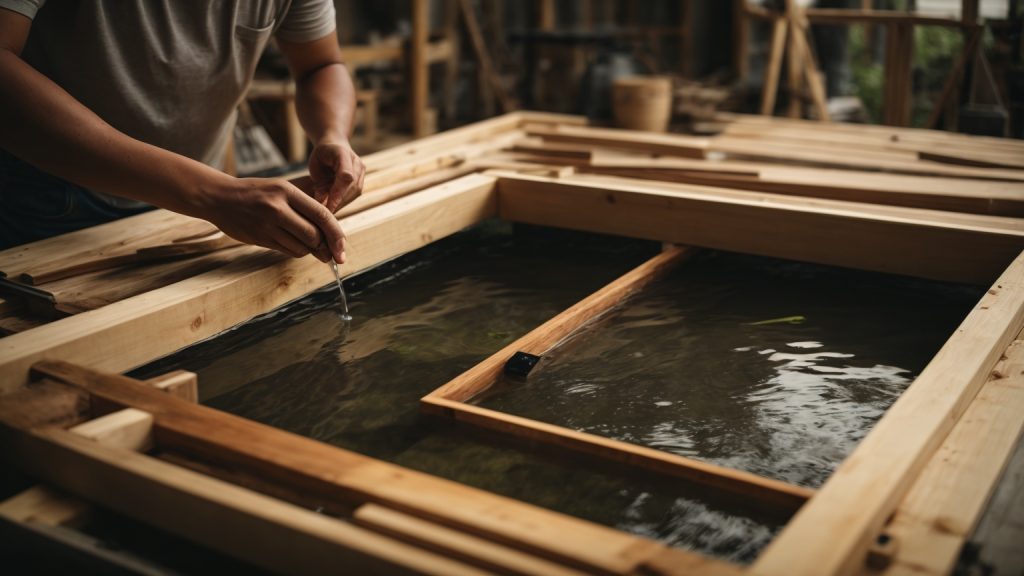
Building a wooden frame for your pond is a great way to create a sturdy and long-lasting structure that will keep your pond safe and secure. In this section, we will go over the steps involved in building a wooden pond frame, including the base construction, side construction, and top construction.

Base Construction

The first step in building a wooden pond frame is constructing the base. This is the foundation of your frame and should be built to last. Here are the steps involved in building the base:

  1. Measure the dimensions of your pond and add a few inches to each side to ensure that the frame will be large enough to support it.
  2. Cut four pieces of pressure-treated lumber to the length of your pond plus the additional inches you added in step 1.
  3. Lay the four pieces of lumber on a flat surface and attach them together at the corners using wood screws or nails.
  4. Use a level to ensure that the base is even and adjust as necessary.

Side Construction

Once the base is complete, you can move on to constructing the sides of the frame. This will provide support for the pond liner and prevent it from collapsing. Here are the steps involved in building the sides:

  1. Cut four pieces of pressure-treated lumber to the height of your desired frame.
  2. Attach the four pieces of lumber to the corners of the base using wood screws or nails.
  3. Use a level to ensure that the sides are even and adjust as necessary.

Top Construction

The final step in building the wooden pond frame is constructing the top. This will provide a sturdy surface for the pond liner to rest on. Here are the steps involved in building the top:

  1. Cut four pieces of pressure-treated lumber to the length of your pond plus the additional inches you added in step 1 of the base construction section.
  2. Attach the four pieces of lumber to the top of the side pieces using wood screws or nails.
  3. Use a level to ensure that the top is even and adjust as necessary.

Congratulations! You have now completed the construction of your wooden pond frame. With proper maintenance and care, your frame should last for many years to come.

Adding the Pond Liner

Now that you have built the wooden frame for your pond, it’s time to add the pond liner. Here are the steps to follow:

  1. Lay the Underlayment: Before adding the pond liner, it’s important to lay the underlayment first. This will help protect the liner from any sharp objects that may damage it. You can use sand, old carpet, or even newspapers as underlayment.
  2. Position the Pond Liner: Once the underlayment is in place, it’s time to position the pond liner. Carefully lay it over the underlayment and make sure it’s centered over the pond.
  3. Stretch the Pond Liner: Once the pond liner is in place, it’s important to stretch it evenly. This will help prevent any wrinkles or folds that may trap debris or cause leaks. You can use rocks or other heavy objects to hold the liner in place as you stretch it.
  4. Secure the Pond Liner: When the pond liner is stretched evenly, it’s time to secure it to the wooden frame. You can use adhesive to attach the liner to the wood. However, it’s important to note that pond liner materials like RPE and RPP are hard to adhere securely to wood with adhesive alone. To attach your pond liner to wood, you can also use screws or nails.
  5. Trim the Excess Liner: Once the pond liner is secured in place, it’s time to trim the excess liner. Use a sharp pair of scissors or a utility knife to carefully trim the excess liner around the edges of the pond.

By following these steps, you can successfully add the pond liner to your wooden pond frame. With the liner in place, you can now add water to your pond and start enjoying your new backyard oasis!

Maintaining Your Wooden Pond Frame

Building a wooden pond frame can be a great addition to your backyard, but it’s important to keep it well-maintained to ensure its longevity. Here are some tips on how to maintain your wooden pond frame:

Regular Cleaning

One of the most important things you can do to maintain your wooden pond frame is to keep it clean. Regularly remove any debris or leaves that fall into the pond, as they can cause blockages and damage to your pump. Use a skimmer net to remove debris from the surface of the water, and a pond vacuum to clean the bottom of the pond.

Check for Leaks

It’s important to check your pond for leaks regularly. Look for any signs of water loss, such as a drop in water level, wet areas around the pond, or visible cracks. If you find a leak, it’s important to repair it as soon as possible to prevent further damage. You can use a pond sealant to fix small leaks, but larger leaks may require professional help.

Maintain Water Quality

Maintaining good water quality is essential for the health of your fish and plants. Test the water regularly to ensure that the pH balance is correct and that the water is not too acidic or alkaline. You should also add beneficial bacteria to the pond to help break down organic matter and keep the water clean.

Protect Your Pond from Wildlife

Wildlife such as raccoons and herons can cause damage to your pond and harm your fish. To protect your pond, install a net over the top to prevent wildlife from accessing it. You can also add floating plants to provide cover for your fish and discourage predators.

By following these tips, you can keep your wooden pond frame in great condition and enjoy it for years to come.

How to Make a Wooden Hammock Chair Stand: A Step-by-Step Guide

Looking for a cozy spot to relax and unwind? A hammock chair might be just what you need. But what if you don’t have a suitable place to hang it? That’s where a wooden hammock chair stand comes in. With a few basic tools and materials, you can easily build your own stand and enjoy your hammock chair wherever you like.

To make a wooden hammock chair stand, you’ll need to gather some supplies, including wood, screws, and brackets. You’ll also need some basic tools like a saw, drill, and measuring tape. Once you have everything you need, it’s time to get started. With a little patience and some elbow grease, you’ll have a sturdy and attractive stand that will support your hammock chair and provide a comfortable place to relax.

Building a wooden hammock chair stand is a great DIY project for anyone who enjoys working with wood. Not only is it a practical addition to your outdoor space, but it’s also a fun and rewarding project that you can complete in a weekend. So why not give it a try? With our step-by-step instructions and helpful tips, you’ll be lounging in your hammock chair in no time.

Understanding Hammock Chair Stands

If you want to relax in a hammock chair but don’t have any trees or posts to hang it from, you can use a freestanding hammock chair stand. These stands are designed to hold the weight of a hammock chair and provide a stable base for it to hang from. In this section, we will discuss the different types of hammock chair stands and their features.

Types of Hammock Chair Stands

There are several types of hammock chair stands available on the market. Some of the most common ones are:

  • C-style chair stand: This type of stand has a C-shaped frame and is designed to hold the weight of a hammock chair from the top. It is easy to assemble and disassemble, making it a good option for people who want to move their hammock chair from one location to another.

  • Tripod stand: This type of stand has three legs and is designed to hold the weight of a hammock chair from the top. It is stable and sturdy, but it takes up more space than other types of stands.

  • Egg-crate style stand: This type of stand has a rectangular frame with a crossbar at the top. The hammock chair hangs from the crossbar, which is adjustable to accommodate different heights. It is a good option for people who want to use their hammock chair indoors or in a covered outdoor area.

Features to Consider

When choosing a hammock chair stand, there are several features to consider. These include:

  • Weight capacity: Make sure the stand can support the weight of your hammock chair and your body weight.

  • Material: Stands can be made from wood, metal, or plastic. Choose a material that is durable and weather-resistant.

  • Size: Make sure the stand is the right size for your hammock chair. Some stands are adjustable, while others are designed to fit a specific type of chair.

  • Portability: If you plan to move your hammock chair from one location to another, choose a stand that is easy to assemble and disassemble.

By understanding the different types of hammock chair stands and their features, you can choose the right one for your needs and enjoy relaxing in your hammock chair wherever you want.

Types of Wood Suitable for Hammock Chair Stands

When building a wooden hammock chair stand, choosing the right type of wood is crucial to ensure that the stand is sturdy and durable. Here are some types of wood suitable for hammock chair stands:

Hardwoods

Hardwoods are known for their strength and durability, making them a popular choice for hammock chair stands. Some popular hardwoods include:

  • Oak: Oak is a strong and durable hardwood that is resistant to decay and insect damage. It is a popular choice for outdoor furniture, including hammock chair stands.
  • Teak: Teak is a dense and durable hardwood that is resistant to water, decay, and insects. It is a popular choice for outdoor furniture due to its natural oils that help it resist moisture and weathering.
  • Mahogany: Mahogany is a strong and durable hardwood that is resistant to decay and insect damage. It has a beautiful reddish-brown color and is often used for high-end furniture.

Softwoods

Softwoods are less dense than hardwoods and are often more affordable. While they may not be as durable as hardwoods, they can still be a good choice for hammock chair stands. Some popular softwoods include:

  • Pine: Pine is a softwood that is affordable and easy to work with. It is often used for indoor furniture and can be treated to make it more resistant to decay and insects.
  • Cedar: Cedar is a softwood that is naturally resistant to decay and insects. It has a beautiful reddish-brown color and is often used for outdoor furniture, including hammock chair stands.
  • Redwood: Redwood is a softwood that is naturally resistant to decay and insects. It has a beautiful reddish color and is often used for outdoor furniture.

When choosing the type of wood for your hammock chair stand, consider the climate and weather conditions in your area, as well as the level of maintenance you are willing to commit to. Hardwoods are generally more durable and require less maintenance, but they can be more expensive. Softwoods are more affordable but may require more maintenance to keep them looking their best.

Tools Needed for Building a Hammock Chair Stand

When building a wooden hammock chair stand, you will need a variety of tools to ensure that the project is completed correctly. In this section, we will discuss the hand tools and power tools that you will need to build a sturdy and durable hammock chair stand.

Hand Tools

Hand tools are essential for any woodworking project, and building a hammock chair stand is no exception. Here are some of the hand tools that you will need:

  • Measuring tape: You will need a measuring tape to ensure that your cuts are accurate and your pieces are the correct size.
  • Carpenter’s square: A carpenter’s square will help you ensure that your cuts are straight and your angles are correct.
  • Chisels: You will need chisels to make precise cuts and to remove any excess wood.
  • Hand saw: A hand saw is necessary for cutting smaller pieces of wood and making precise cuts.
  • Sandpaper: Sandpaper is essential for smoothing out any rough edges and ensuring that your wood is smooth and even.

Power Tools

Power tools can make woodworking projects much easier and more efficient. Here are some of the power tools that you will need:

  • Circular saw: A circular saw is necessary for cutting larger pieces of wood quickly and accurately.
  • Drill: A drill is necessary for drilling holes and attaching pieces of wood together.
  • Jigsaw: A jigsaw is necessary for making curved cuts and intricate designs.
  • Router: A router is necessary for cutting grooves and creating decorative edges.

By using the right tools, you can ensure that your wooden hammock chair stand is sturdy, durable, and built to last. With a little bit of time and effort, you can create a beautiful and functional piece of furniture that you can enjoy for years to come.

Preparation of Materials

Before starting the construction of your wooden hammock chair stand, it’s important to gather all the necessary materials and tools. This will ensure that the project runs smoothly and without any interruptions. In this section, we will cover the preparation of materials, including wood cutting, sanding, and smoothing.

Wood Cutting

To build a wooden hammock chair stand, you will need to cut several pieces of wood to size. The exact measurements will depend on the design you choose and the size of your hammock chair. Here are the materials you will need for a basic wooden hammock chair stand:

Materials Quantity
2x4s or similar wood 4-6 pieces
Screws 16-24 pieces
Brackets 4 pieces

Once you have all the necessary materials, you can start cutting the wood. Use a saw to cut the wood to the desired length and shape. Make sure to measure twice and cut once to avoid any mistakes. You can use a table saw, circular saw, or handsaw depending on your preference and skill level.

Sanding and Smoothing

After cutting the wood to size, you will need to sand and smooth the surfaces. This will ensure that the wood is free of any splinters or rough edges that could cause discomfort or injury. Here are the steps to follow:

  1. Use a coarse sandpaper to remove any rough spots or splinters on the wood.
  2. Follow up with a finer sandpaper to smooth the surfaces and remove any remaining roughness.
  3. Use a wood filler to fill any gaps or holes in the wood. This will ensure that the wood is smooth and even.
  4. Sand the wood again to remove any excess wood filler and ensure a smooth finish.

By following these steps, you can prepare the wood for the construction of your wooden hammock chair stand. With the materials and tools ready, you can move on to the next step of the project.

Building the Base of the Hammock Chair Stand

To build the base of your wooden hammock chair stand, you will need to gather the necessary materials and tools. Here is a list of what you will need:

Materials

  • 4 pieces of 4×4 lumber
  • 2 pieces of 2×6 lumber
  • Wood screws
  • Wood glue

Tools

  • Circular saw
  • Drill
  • Measuring tape
  • Pencil
  • Safety glasses

Once you have gathered all the materials and tools, you can start building the base of your hammock chair stand.

Step 1: Cut the Wood

Using your circular saw, cut the 4×4 lumber to the desired length for your hammock chair stand. You will need 2 pieces for the front and back legs, and 2 pieces for the side rails. Cut the 2×6 lumber to the same length as the side rails.

Step 2: Lay Out the Wood

Lay out the 4×4 pieces on a flat surface, positioning the front and back legs parallel to each other and the side rails perpendicular to them. Make sure everything is square and even.

Step 3: Add Cross Supports

Measure and mark the center point on each side rail. Cut 2 pieces of 2×6 lumber to the length between the front and back legs. Place one piece of 2×6 lumber between the two side rails at the center point and attach it with wood screws and wood glue. Repeat for the other side.

Step 4: Secure the Cross Supports

To reinforce the cross supports, add a diagonal brace to each side. Cut a piece of 2×6 lumber to the length between the front leg and the center point on the opposite side rail. Attach it to the side rail and cross support with wood screws and wood glue. Repeat for the other side.

Congratulations! You have now built the base of your wooden hammock chair stand. The next step is to add the top bar and hanging hardware.

Constructing the Upright Section

To begin constructing the upright section of your wooden hammock chair stand, you will need to gather the necessary materials, including:

  • Two 8-foot 4×4 lumber pieces
  • Measuring tape
  • Pencil
  • Circular saw or miter saw
  • Drill
  • 1/2 inch drill bit
  • 3/8 inch drill bit
  • 2 1/2 inch wood screws
  • Wood glue

First, you will need to cut the two 4×4 lumber pieces to the desired length for your hammock chair stand. A good height is typically around 6 feet, but you can adjust the length to fit your specific needs.

Next, measure and mark the center of each 4×4 lumber piece. Then, use your circular saw or miter saw to make a 1 inch deep cut at the center mark of each piece. This will create a slot for the crossbeam to fit into.

After making the cuts, apply wood glue to the ends of the crossbeam and insert it into the slots on the upright sections. Use your drill and 1/2 inch drill bit to drill a hole through the crossbeam and the upright section at each end. Then, use your 3/8 inch drill bit to drill a hole through the center of each hole you just drilled.

Finally, use your 2 1/2 inch wood screws to secure the crossbeam to the upright sections. Repeat this process on the other side to complete the construction of the upright section of your wooden hammock chair stand.

With the upright section complete, you can move on to constructing the base of your hammock chair stand.

Assembling the Hammock Chair Stand

Now that you have all the necessary materials and tools ready, it’s time to assemble your wooden hammock chair stand. Follow these steps to put it all together:

  1. Lay out all the pieces of the stand on a flat surface and double-check that you have all the necessary parts.
  2. Start by attaching the four legs to the base using wood screws. Make sure to pre-drill the holes to prevent the wood from splitting.
  3. Once the legs are securely attached, attach the top beam to the legs using wood screws. Again, pre-drill the holes to prevent splitting.
  4. Next, attach the side braces to the legs and top beam. Make sure to use wood glue in addition to the screws for extra stability.
  5. Finally, attach the S-hooks to the top beam using eye screws. These will be used to hang your hammock chair.

Once you have assembled your hammock chair stand, it’s important to test its stability before using it. Sit in your hammock chair and gently rock back and forth to make sure the stand can support your weight.

Congratulations! You have successfully assembled your very own wooden hammock chair stand. Now all that’s left to do is hang your hammock chair and enjoy a relaxing afternoon in the great outdoors.

Safety Considerations

When building a wooden hammock chair stand, safety should be your top priority. Here are a few things to keep in mind to ensure that your stand is safe and secure:

Weight Capacity

Before you start building, make sure you know the weight capacity of your stand. Different stands can hold different weights, so it’s important to choose one that can support your weight and the weight of anyone who will be using the hammock chair. Make sure to check the manufacturer’s specifications and follow them closely.

Stability

A hammock chair stand needs to be stable to ensure that it doesn’t tip over while you’re sitting in it. Make sure that the base of your stand is wide enough to provide stability. If you’re building a stand for a larger hammock chair, you may need to use thicker or stronger wood to ensure that it can support the weight.

Durability

Your hammock chair stand will be exposed to the elements, so it’s important to use materials that can withstand the weather. Make sure to use exterior-grade wood and seal it properly to protect it from moisture and UV rays. You may also want to consider adding a coat of paint or stain to further protect the wood.

Assembly

When assembling your hammock chair stand, make sure to follow the instructions carefully. Use the right tools and hardware, and make sure that all bolts and screws are tightened securely. If you’re not comfortable with assembling the stand yourself, consider hiring a professional to do it for you.

By keeping these safety considerations in mind, you can ensure that your wooden hammock chair stand is safe, secure, and built to last.

Maintenance and Care Tips

To ensure that your wooden hammock chair stand lasts for years to come, it is important to properly maintain and care for it. Here are some tips to keep your stand in top condition:

Regular Cleaning

Cleaning your wooden hammock chair stand regularly is essential to prevent the buildup of dirt and debris that can cause damage over time. Use a soft brush or cloth to remove any dust or dirt from the surface of the stand, and then wipe it down with a damp cloth. Avoid using harsh chemicals or abrasive cleaners that can damage the wood.

Protection from the Elements

Exposure to sunlight, rain, and humidity can cause the wood to warp, crack, or rot over time. To protect your stand from the elements, it is important to keep it covered when not in use. You can use a tarp or a specially designed cover to protect your stand from rain and snow.

Oil or Stain

To maintain the natural beauty of the wood and protect it from the elements, you can apply a coat of oil or stain to your stand. This will help to prevent the wood from drying out and cracking, and will also protect it from moisture and UV rays. Be sure to choose a product that is specifically designed for use on outdoor wood furniture.

Store Indoors During Winter Months

If you live in an area with harsh winters, it is best to store your wooden hammock chair stand indoors during the colder months. This will help to prevent damage from snow, ice, and freezing temperatures. Be sure to clean and dry your stand thoroughly before storing it to prevent mold and mildew.

What Is the Best Wood for Wooden Spoons? A Guide to Choosing the Perfect Material.

Are you looking for the perfect wooden spoon to stir your soups and sauces? Choosing the right wood is essential to ensure that your utensil is durable, safe, and easy to use. With so many options available, it can be challenging to determine which wood is best for your needs. In this article, we’ll explore the different types of wood commonly used for wooden spoons and help you make an informed decision.

When it comes to wooden spoons, not all woods are created equal. Some woods are too soft and prone to splintering, while others are too porous and can harbor bacteria. Hardwood is the preferred choice for wooden spoons, as it is sturdy, non-toxic, and resistant to staining and odor absorption. But within the category of hardwood, there are still many options to consider. In the next section, we’ll delve into some of the most popular types of hardwood used for making wooden spoons and highlight their unique properties.

Understanding Wood Types

When it comes to choosing the best wood for your wooden spoons, it’s important to understand the different types of wood available. In general, wood can be categorized into two main types: hardwoods and softwoods.

Hardwoods

Hardwoods are typically denser and more durable than softwoods, making them a great choice for cooking utensils that will withstand frequent use. Some popular hardwoods for wooden spoons include:

  • Olive wood: known for its unique grain pattern and durability
  • Hard Maple: a dense, hard wood that resists wear and tear
  • Cherry: a beautiful, reddish-brown wood that is also durable
  • Walnut: a dark, rich wood that is both strong and attractive

Softwoods

While softwoods are not as durable as hardwoods, they can still be a good choice for wooden spoons if properly cared for. Some popular softwoods for wooden spoons include:

  • Pine: a light-colored wood with a straight grain
  • Cedar: a fragrant wood that resists insects and decay
  • Spruce: a soft, lightweight wood that is easy to work with

When choosing a wood for your wooden spoons, it’s important to consider factors such as durability, grain pattern, and porosity. Hardwoods tend to be more durable and less porous than softwoods, but softwoods can still be a good choice if properly cared for. Ultimately, the best wood for your wooden spoons will depend on your personal preferences and needs.

Qualities of Good Wooden Spoon Wood

When it comes to choosing the best wood for making wooden spoons, there are several qualities to consider. Here are some of the most important qualities to keep in mind:

Durability

One of the most important qualities of good wooden spoon wood is durability. You want a wood that is strong enough to withstand the rigors of regular use without cracking or splintering. Hardwoods like maple, cherry, and walnut are good choices because they are denser and stronger than softwoods.

Heat Resistance

Another important quality to consider when choosing wooden spoon wood is heat resistance. You want a wood that can withstand high temperatures without warping or cracking. Hardwoods like maple and cherry are again good choices because they are less porous and can withstand heat better than softer woods.

Non-Toxicity

Since wooden spoons come into contact with food, it is important to choose a wood that is non-toxic. Hardwoods like maple, cherry, and walnut are safe to use for cooking utensils because they do not release harmful chemicals or toxins when exposed to heat or moisture.

Grain Structure

The grain structure of the wood is also an important consideration. You want a wood with a tight, even grain that won’t splinter or crack easily. Hardwoods like maple and cherry have a fine, even grain that makes them ideal for spoon making.

Overall, the best wood for making wooden spoons is a hardwood that is durable, heat-resistant, non-toxic, and has a tight, even grain. Maple, cherry, and walnut are all good choices that meet these criteria.

Top Woods for Wooden Spoons

When it comes to choosing the best wood for wooden spoons, you want to look for a wood that is durable, non-toxic, and won’t absorb too much moisture. Here are some of the top woods for wooden spoons:

Maple

Maple is a popular choice for wooden spoons because it is hard, durable, and non-toxic. It has a tight grain that resists staining and is easy to clean. Maple spoons are also less likely to warp or crack over time.

Cherry

Cherry wood is another great option for wooden spoons. It is a hardwood that is strong and durable, with a beautiful reddish-brown color. Cherry wood is also non-toxic and has a tight grain that resists staining.

Walnut

Walnut is a darker wood that is known for its strength and durability. It has a tight grain that resists staining and is easy to clean. Walnut spoons are also less likely to crack or warp over time.

Bamboo

Bamboo is a sustainable and eco-friendly option for wooden spoons. It is a fast-growing grass that is easy to harvest and regenerates quickly. Bamboo spoons are lightweight, strong, and non-toxic. They also have a smooth surface that is easy to clean.

When choosing the best wood for your wooden spoons, it’s important to consider your personal preferences and needs. Each type of wood has its own unique characteristics and benefits. Whether you choose maple, cherry, walnut, or bamboo, you can be sure that you are getting a high-quality and durable wooden spoon that will last for years to come.

Factors to Consider When Choosing Wood

When choosing the best wood for wooden spoons, there are several factors to consider. Here are some key factors to keep in mind:

Availability

The availability of the wood is an important factor to consider when choosing the best wood for your wooden spoons. Some types of wood may be more readily available than others, depending on your location. It’s important to choose a wood that is easy to find and purchase, so you can easily replace your wooden spoons if needed.

Cost

The cost of the wood is another important factor to consider. Some types of wood may be more expensive than others, depending on their availability and quality. It’s important to choose a wood that is within your budget, so you can get the best value for your money.

Sustainability

Sustainability is an important factor to consider when choosing the best wood for your wooden spoons. You want to choose a wood that is sustainable and eco-friendly, so you can reduce your impact on the environment. Look for woods that are harvested responsibly and come from sustainable sources.

In conclusion, when choosing the best wood for your wooden spoons, consider the availability, cost, and sustainability of the wood. By keeping these factors in mind, you can choose a wood that is both practical and eco-friendly.

Wood Treatment and Maintenance

When it comes to wooden spoons, proper maintenance is essential to keep them in good condition for a long time. Here are some tips on how to treat and maintain your wooden spoons:

Oiling

Wooden spoons should be oiled regularly to prevent them from drying out and cracking. You can use any food-safe oil such as mineral oil, coconut oil, or beeswax. Apply a small amount of oil to a cloth and rub it into the wood until it is absorbed. Wipe away any excess oil and let the spoon dry completely before using it again.

Cleaning

Cleaning wooden spoons is easy and straightforward. Always hand wash them with warm water and mild soap, making sure to scrub any food particles off the surface. Avoid soaking them in water for long periods as this can cause them to warp or split. Never put wooden spoons in the dishwasher as the high temperature and harsh detergents can damage the wood.

Storage

Proper storage is crucial to keep your wooden spoons in good condition. Store them in a dry and well-ventilated place to prevent moisture from building up. Avoid storing them in direct sunlight or near a heat source as this can cause them to dry out and crack. You can also use a utensil holder or a drawer organizer to keep them organized and easily accessible.

By following these simple tips, you can ensure that your wooden spoons remain in excellent condition for years to come.

How to Make a Wooden Airplane Propeller: A Beginner's Guide

If you’re a fan of aviation and woodworking, making your own wooden airplane propeller can be a fun and rewarding project. While the process may seem daunting at first, with the right tools and techniques, you can create a propeller that looks and performs great. In this article, we’ll guide you through the steps of making a wooden airplane propeller using basic tools and materials.

Before you begin, it’s important to note that making a propeller requires precision and attention to detail. You’ll need to carefully measure and shape each piece to ensure that the propeller is balanced and efficient. However, with patience and practice, you can create a propeller that is not only functional but also a work of art. So, roll up your sleeves and let’s get started on this exciting project!

Understanding Propeller Basics

If you are planning to make a wooden airplane propeller, it is essential to understand the basics of how a propeller works. A propeller is essentially a rotating airfoil that converts the engine’s power into thrust to propel the aircraft forward. The propeller’s blades are designed to create a difference in air pressure on either side of the blade, which results in a forward force.

Blade Pitch

The pitch of a propeller blade refers to the angle between the blade’s chord line and the plane of rotation. The pitch angle determines the amount of air that the propeller can move per revolution. A higher pitch angle means that the propeller can move more air per revolution, resulting in more thrust. However, a higher pitch angle also requires more power from the engine to rotate the propeller.

Blade Shape

The shape of a propeller blade is also critical to its performance. The blade’s airfoil shape and thickness determine how much lift and drag the blade generates. The blade’s shape is designed to generate the most lift with the least amount of drag, resulting in maximum efficiency.

Number of Blades

The number of blades on a propeller also affects its performance. A propeller with fewer blades generally produces less drag and is more efficient. However, a propeller with more blades provides more surface area for generating thrust, resulting in more power.

Diameter

The diameter of a propeller refers to the distance across the circle that the blades create when rotating. A larger diameter propeller can move more air per revolution, resulting in more thrust. However, a larger diameter propeller also requires more power to rotate.

By understanding these basic principles of propeller design, you can create a wooden airplane propeller that is efficient and effective.

Choosing the Right Wood

When it comes to making a wooden airplane propeller, choosing the right wood is crucial. The right wood will ensure that the propeller is strong, durable, and able to withstand the stresses of flight. In this section, we’ll discuss the different types of wood that can be used for propeller making and what to look for in terms of wood quality.

Types of Wood

Traditionally, wooden propellers have been made from hardwoods such as ash, hickory, and mahogany. These woods are known for their strength, durability, and resistance to moisture. However, other types of wood can also be used, including:

  • Sitka Spruce: This is a lightweight, strong, and flexible wood that is commonly used in aircraft construction. It is an excellent choice for propeller making because it is easy to work with and has good dimensional stability.
  • Douglas Fir: This wood is strong, durable, and has good resistance to moisture. It is a popular choice for propeller making because it is readily available and affordable.
  • Cherry: This wood is strong, durable, and has good resistance to moisture. It is also lightweight and has a beautiful reddish-brown color.

Wood Quality

When choosing wood for propeller making, it is important to look for wood that is straight-grained and free from defects such as knots, checks, and splits. These defects can weaken the wood and make it more prone to failure. It is also important to choose wood that has been properly dried and seasoned to prevent warping and cracking.

To ensure that the wood you choose is of high quality, look for wood that has been graded by a reputable organization such as the National Hardwood Lumber Association (NHLA) or the Forest Stewardship Council (FSC). These organizations have established standards for wood quality and grading that can help you choose the best wood for your propeller.

In summary, choosing the right wood for your propeller is essential to ensuring its strength and durability. Consider the type of wood that will work best for your needs, and look for high-quality wood that is free from defects and properly seasoned.

Designing Your Propeller

When making a wooden airplane propeller, designing it is a crucial step that will determine its performance. Here are some factors to consider when designing your propeller.

Propeller Dimensions

The dimensions of your propeller will depend on various factors such as the engine power, prop diameter, and RPM. You can search for design patterns online or at your local library that will suit your needs. Once you have a design pattern, you can customize it to fit your specifications.

Here are some important dimensions to consider:

  • Diameter: The diameter of your propeller will determine the amount of thrust your airplane will generate. Generally, a larger diameter will produce more thrust.

  • Pitch: The pitch is the distance a propeller would move forward in one revolution if it were moving through a solid medium. A higher pitch will result in a faster airplane.

  • Blade Area: The blade area is the total area of the propeller blades. A larger blade area will produce more thrust.

Propeller Shape

The shape of your propeller will also affect its performance. The shape will determine the amount of air it can move and how efficiently it can convert engine power into thrust.

Here are some important factors to consider when designing the shape of your propeller:

  • Blade Shape: The shape of your propeller blades will determine how much air they can move and how efficiently they can do so. Different blade shapes will work better for different airplane types and engine powers.

  • Blade Twist: The blade twist is the angle at which the blade changes pitch from the root to the tip. A blade with a twist will produce more thrust than a straight blade.

  • Blade Camber: The blade camber is the curvature of the blade from the leading edge to the trailing edge. A blade with a higher camber will produce more thrust.

By considering these factors, you can design a wooden airplane propeller that will perform optimally for your airplane and engine specifications.

Preparing Your Wood

Before you start making your wooden airplane propeller, it is important to prepare your wood properly. The quality of your propeller will depend on the quality of the wood you use and how well you prepare it. Here are some tips to help you prepare your wood for making a wooden airplane propeller.

Choose the Right Wood

The first step in preparing your wood is to choose the right type of wood. You want to use a strong, durable wood that is also lightweight. Some good options for making a wooden airplane propeller include:

  • Sitka spruce
  • Douglas fir
  • Yellow cedar
  • Mahogany

Make sure the wood you choose is straight-grained and free of knots or defects. You should also avoid using wood that is too dry or too wet. Ideally, your wood should have a moisture content of around 12%.

Cut Your Wood to Size

Once you have chosen your wood, the next step is to cut it to size. You will need to cut your wood into several pieces, including the hub, the blades, and the tips. Use a saw to cut your wood to the correct dimensions, and make sure each piece is exactly the same size and shape.

Plane Your Wood

After cutting your wood to size, you will need to plane it to remove any rough edges or imperfections. Use a hand plane or a power planer to smooth out the surface of your wood. Make sure you plane your wood evenly, and remove only a small amount of material at a time to avoid damaging the wood.

Sand Your Wood

Finally, you will need to sand your wood to get it ready for finishing. Use a fine-grit sandpaper to sand your wood, starting with a coarse grit and working your way up to a finer grit. Sand your wood evenly and thoroughly, making sure to remove any scratches or imperfections.

By following these tips, you can prepare your wood properly and ensure that your wooden airplane propeller turns out strong, durable, and beautiful.

Carving the Propeller

Carving the wooden airplane propeller can be a challenging but rewarding process. With the right tools and techniques, you can create a propeller that is both functional and beautiful. In this section, we will go over the basic steps for carving a wooden airplane propeller.

Initial Carving

The first step in carving a wooden airplane propeller is to rough out the shape of the propeller. This can be done using a variety of tools, including a band saw, jigsaw, or hand saw. Once you have the basic shape of the propeller, you can begin to refine the shape using carving tools.

Before you begin carving, it is important to have a good understanding of the design of the propeller. You will need to know the engine power, prop diameter, and RPMs to ensure that your propeller is designed to work with your specific airplane. You can find design patterns online or in books at your local library.

Once you have a good understanding of the design of the propeller, you can begin carving. Start by removing large chunks of wood with a roughing gouge or a carving knife. Be sure to work slowly and carefully, making small cuts to avoid removing too much wood at once.

Refining the Shape

Once you have the basic shape of the propeller, you can begin to refine the shape using smaller carving tools. This is where the real artistry of propeller carving comes in. You will need to pay close attention to the shape of the blades, ensuring that they are symmetrical and balanced.

One technique for refining the shape of the propeller is to use a spokeshave. A spokeshave is a tool that allows you to shape wood by shaving off thin layers. Start by using a coarse spokeshave to remove any remaining rough spots on the propeller. Then, switch to a finer spokeshave to smooth out the surface of the propeller.

Another technique for refining the shape of the propeller is to use a carving knife. A carving knife allows you to make precise cuts, allowing you to create intricate details on the propeller. Use the carving knife to shape the edges of the blades and to create any accents or details on the propeller.

In conclusion, carving a wooden airplane propeller can be a challenging but rewarding process. With the right tools and techniques, you can create a propeller that is both functional and beautiful. Be sure to take your time and pay close attention to the design of the propeller, and you will end up with a propeller that is perfect for your airplane.

Sanding and Smoothing

Sanding and smoothing your wooden airplane propeller is an essential step in the fabrication process. It not only gives your propeller a polished look but also helps to improve its aerodynamic performance. Here are a few tips to help you sand and smooth your propeller effectively:

1. Sandpaper Grits

When it comes to sanding your propeller, you will need to use different grits of sandpaper. Start with a coarse grit, such as 80 or 100 grit, to remove any rough spots or bumps. Then move on to a finer grit, such as 220 or 320 grit, to smooth out the surface and remove any scratches left by the coarse grit.

2. Sanding Direction

Always sand in the direction of the wood grain. Sanding against the grain can cause tear-out, which will ruin the appearance and performance of your propeller. Use a light touch when sanding to avoid removing too much material and altering the shape of your propeller.

3. Contour Sanding

To achieve a smooth, contoured surface on your propeller, use a sanding block or a piece of foam wrapped in sandpaper. This will help you to maintain a consistent angle and contour while sanding. Be sure to check your progress frequently and adjust your sanding technique as needed.

4. Finishing

Once you have finished sanding, wipe down your propeller with a clean, dry cloth to remove any dust or debris. You can then apply a finish to protect the wood and enhance its appearance. A clear varnish or polyurethane will provide a durable, glossy finish, while a wax or oil finish will give your propeller a more natural, matte look.

By following these tips, you can achieve a smooth, polished finish on your wooden airplane propeller. Remember to take your time and be patient, as sanding and smoothing can be a time-consuming process. With a little effort and attention to detail, you can create a propeller that not only looks great but also performs well in the air.

Applying Finish

Once you have completed shaping and sanding your wooden airplane propeller, it’s time to apply the finish. Applying a finish will not only enhance the look of your propeller but also protect it from moisture and other environmental factors.

There are several options for finishes, but the most common ones are varnish and epoxy. Varnish is a traditional finish that provides a glossy and durable coating. Epoxy, on the other hand, is a more modern finish that provides a clear and hard coating.

Before applying any finish, make sure that the propeller is clean and free of dust and debris. You can use a tack cloth or a soft-bristled brush to remove any particles that may have accumulated during the sanding process.

Applying Varnish

If you choose to use varnish, you will need to apply several coats to achieve the desired finish. Here are the steps to follow:

  1. Apply the first coat of varnish with a clean brush, following the direction of the wood grain. Make sure to cover the entire surface of the propeller evenly.
  2. Let the first coat dry completely before applying the second coat. This can take anywhere from 12 to 24 hours, depending on the temperature and humidity.
  3. Sand the surface lightly with fine-grit sandpaper (220 grit) before applying the second coat. This will help the varnish adhere better and create a smoother finish.
  4. Apply the second coat of varnish, following the same process as the first coat. Let it dry completely before sanding and applying subsequent coats.
  5. Repeat the process until you have applied at least three coats of varnish. You can apply more coats if you want a thicker and more durable finish.

Applying Epoxy

If you choose to use epoxy, you will need to mix the resin and hardener according to the manufacturer’s instructions before applying it to the propeller. Here are the steps to follow:

  1. Apply a thin coat of epoxy to the entire surface of the propeller with a clean brush or roller. Make sure to cover the entire surface evenly.
  2. Let the first coat dry for at least 24 hours before applying the second coat. You can sand the surface lightly with fine-grit sandpaper (220 grit) before applying the second coat if you want a smoother finish.
  3. Apply subsequent coats of epoxy, following the same process as the first coat. You can apply as many coats as you want, depending on the desired thickness and durability of the finish.

Remember to follow the manufacturer’s instructions for the specific product you are using and use proper safety equipment, such as gloves and a respirator, when working with finishes. With a little patience and attention to detail, you can achieve a beautiful and long-lasting finish for your wooden airplane propeller.

Testing Your Propeller

Once you have finished making your wooden airplane propeller, it’s time to test it to ensure it’s safe and effective. Here are a few steps to follow when testing your propeller:

  1. Visually inspect the propeller: Before you attach the propeller to your airplane, inspect it visually to ensure there are no visible cracks, splits, or other damage. If you see any damage, do not use the propeller and repair or replace it before testing.

  2. Balance the propeller: A balanced propeller is essential for smooth and safe operation. Use a propeller balancer to check the balance of your propeller. If it’s not balanced, adjust it until it is.

  3. Attach the propeller to your airplane: Attach the propeller to your airplane according to the manufacturer’s instructions. Make sure all bolts and nuts are tightened securely.

  4. Run the engine at low RPM: Start your engine and run it at low RPM to test the propeller’s balance and vibration. If you notice any excessive vibration, stop the engine and adjust the balance.

  5. Gradually increase the RPM: Increase the RPM gradually while monitoring the propeller’s performance. If you notice any unusual noises or vibrations, stop the engine immediately and inspect the propeller.

  6. Test the propeller in the air: Once you’ve tested the propeller on the ground, it’s time to test it in the air. Take your airplane for a test flight, and monitor the propeller’s performance. If you notice any issues, land the airplane immediately and inspect the propeller.

Remember, safety should always be your top priority when testing your wooden airplane propeller. Follow these steps carefully, and if you have any doubts or concerns, consult an expert before using the propeller.

How to Make a Wooden Picnic Table: Step-by-Step Guide with Pictures

Are you looking for a fun and functional addition to your backyard? A wooden picnic table is a classic choice that can provide years of enjoyment for family and friends. Whether you’re planning a backyard BBQ or a simple outdoor meal, a picnic table can provide the perfect setting for your gathering.

Building your own wooden picnic table may seem like a daunting task, but with the right tools and materials, it can be a fun and rewarding project. In this article, we’ll provide you with step-by-step instructions and tips for building your very own picnic table. From selecting the right lumber to assembling the final product, we’ll guide you through the process to ensure your picnic table is sturdy, attractive, and long-lasting. So grab your tools and let’s get started!

Understanding Wood Types

When it comes to building a wooden picnic table, choosing the right type of wood is crucial. There are many different types of wood available, each with its own unique properties and characteristics. In this section, we will discuss three popular types of wood for building picnic tables: Pine, Oak, and Cedar.

Pine

Pine is a softwood that is widely available and relatively inexpensive. It is easy to work with and can be stained or painted to match your desired color scheme. However, pine is not the most durable wood and is susceptible to rot and insect damage, especially when exposed to the elements. If you choose to use pine for your picnic table, be sure to treat it with a weather-resistant finish to help prolong its lifespan.

Oak

Oak is a hardwood that is known for its strength and durability. It is more expensive than pine but is also more resistant to rot and insect damage. Oak has a distinctive grain pattern and can be stained to a variety of colors. However, oak can be difficult to work with due to its hardness, so it may not be the best choice for novice woodworkers.

Cedar

Cedar is a softwood that is naturally resistant to rot and insect damage. It has a pleasant aroma and a beautiful reddish-brown color. Cedar is easy to work with and can be stained or painted to match your desired color scheme. However, cedar is more expensive than pine and may not be as strong as oak. If you choose to use cedar for your picnic table, be sure to select a grade that is suitable for outdoor use.

In conclusion, choosing the right type of wood is an important decision when building a picnic table. Pine, oak, and cedar are all popular choices, each with its own unique properties and characteristics. Consider your budget, woodworking experience, and desired level of durability when selecting the type of wood for your picnic table.

Tools Required

Before starting to build your wooden picnic table, you need to ensure you have the necessary tools. Here are the tools you will need to complete the project:

Saw

A saw is an essential tool for cutting the lumber to the required length. You can use either a hand saw or a power saw, depending on your preference. A circular saw is a popular choice for cutting large pieces of wood, while a jigsaw is ideal for making curved cuts. Make sure the blade is sharp, and keep the saw blade clean to ensure smooth cuts.

Hammer

A hammer is necessary for attaching the pieces of wood together. A claw hammer is a common choice, but a framing hammer is a good option if you need to drive nails into thicker lumber. Make sure the hammer is comfortable to hold and has a good grip to avoid any accidents.

Screwdriver

A screwdriver is essential for attaching the screws to the wood. You can use either a manual screwdriver or a power screwdriver, depending on your preference. A power screwdriver can save time and effort, but a manual screwdriver allows for more control. Make sure you have different sizes of screwdrivers to fit the various screws you will be using.

Other tools that you may need include a tape measure, a level, a square, clamps, a drill, and a wrench set. Make sure you have all the necessary tools before starting the project to avoid any delays.

Safety Measures

When building a wooden picnic table, safety should always be your top priority. Here are some essential safety measures to keep in mind:

1. Wear Protective Gear

Before you begin, make sure you have the right protective gear. Wear safety glasses to protect your eyes from flying wood chips, and earplugs to protect your ears from the noise of power tools. If you’re using power tools, wear gloves to protect your hands from getting hurt.

2. Use the Right Tools

Using the right tools is essential to ensure that your picnic table is sturdy and safe. Make sure you have the right saws, drills, and other tools for the job. Use sharp blades and bits to make clean cuts, and avoid using dull or damaged tools.

3. Follow the Instructions Carefully

Make sure you read the instructions carefully before you start building your picnic table. Follow the steps in the order they are given, and don’t skip any steps. If you’re not sure about something, ask for help or do some research before you proceed.

4. Work in a Safe Environment

Make sure you work in a safe environment. Keep your work area clean and free of clutter, and make sure you have enough space to move around. Avoid working near children or pets, and keep them away from your work area.

5. Use Proper Lifting Techniques

When lifting heavy pieces of wood, use proper lifting techniques to avoid injuring yourself. Bend at the knees and lift with your legs, not your back. If a piece of wood is too heavy for you to lift, ask for help.

By following these safety measures, you can ensure that your wooden picnic table is not only beautiful but also safe for you and your loved ones to use.

Choosing the Right Design

When it comes to building a wooden picnic table, choosing the right design is an important step. There are many different styles of picnic tables to choose from, each with their own unique features and benefits. Here are some things to consider when selecting the right design for your needs:

Size

The first thing to consider when choosing a picnic table design is the size. How many people do you want to be able to seat at the table? Will the table be used for small family gatherings or larger parties? Make sure to choose a design that is the right size for your needs.

Style

There are many different styles of picnic tables to choose from, including traditional, modern, and rustic designs. Consider the overall aesthetic of your outdoor space and choose a style that complements it.

Material

Another important factor to consider when choosing a picnic table design is the material. Wooden picnic tables are a popular choice due to their durability and natural beauty. However, there are also picnic tables made from metal, plastic, and other materials.

Features

Finally, consider any additional features you may want in your picnic table design. Some picnic tables come with built-in benches, while others may have an umbrella hole for shade. Think about what features are important to you and choose a design that meets those needs.

Overall, choosing the right picnic table design is an important step in building a table that will meet your needs and enhance your outdoor space. Take the time to consider your options and choose a design that is the perfect fit for you.

Measuring and Cutting the Wood

Before you start building your picnic table, you will need to measure and cut the wood to the appropriate size. Here is a step-by-step guide to help you through the process.

Step 1: Gather the Required Tools

You will need a few tools to measure and cut the wood for your picnic table. These tools include:

  • Tape measure
  • Circular saw or handsaw
  • Speed square
  • Pencil
  • Clamps

Step 2: Measure and Mark the Wood

Using a tape measure, measure the length and width of the tabletop, seats, and legs. Once you have the measurements, mark the wood with a pencil. Make sure to double-check your measurements before making any cuts.

Step 3: Cut the Wood

Using a circular saw or handsaw, carefully cut the wood along the marked lines. Make sure to follow safety precautions when using power tools. If you are using a circular saw, use a speed square to guide your cuts and ensure they are straight.

Step 4: Sand the Edges

After cutting the wood, use sandpaper to smooth out any rough edges. This will prevent splinters and make the wood easier to work with.

Step 5: Repeat for Each Piece

Repeat these steps for each piece of wood needed for the picnic table. Make sure to label each piece to avoid confusion during assembly.

By following these steps, you can measure and cut the wood for your picnic table with ease.

Assembling the Table

Now that you have all the pieces cut, it’s time to assemble your picnic table. Follow these steps to put everything together:

  1. Lay out the tabletop boards on a flat surface, making sure they’re evenly spaced and aligned. Then, place the two end pieces on top of the tabletop boards, making sure they’re flush with the ends.

  2. Drill pilot holes through the end pieces and into the tabletop boards. Then, screw the pieces together using 3-inch screws.

  3. Next, attach the seat supports to the legs. Place the legs on a flat surface, and then attach the seat supports to the inside of the legs using 2 1/2-inch screws.

  4. Attach the cross braces to the legs. Place the legs on a flat surface, and then attach the cross braces to the inside of the legs using 2 1/2-inch screws.

  5. Now it’s time to attach the tabletop to the legs. Turn the tabletop assembly upside down, and then place the legs on top of the tabletop, making sure they’re evenly spaced and aligned. Then, drill pilot holes through the tabletop and into the legs. Finally, screw the legs to the tabletop using 3-inch screws.

  6. Attach the seats to the seat supports. Place the seats on top of the seat supports, making sure they’re evenly spaced and aligned. Then, drill pilot holes through the seats and into the seat supports. Finally, screw the seats to the seat supports using 2 1/2-inch screws.

  7. Sand the table and chairs to remove any rough edges or splinters. Apply a coat of wood sealer or stain to protect your new picnic table from the elements.

Congratulations! You have successfully assembled your wooden picnic table. Invite your friends and family over for a fun picnic and enjoy your new outdoor furniture.

Sanding and Finishing

Sanding Process

Before applying any finish to your wooden picnic table, you need to sand it properly. Sanding is an essential step to ensure the surface of the wood is smooth and ready to receive the finish. Here are the steps to follow to sand your wooden picnic table:

  1. Start with coarse-grit sandpaper: Begin by sanding the table with coarse-grit sandpaper, such as 60 grit. Sand the entire surface of the table, including the top, sides, and legs. This will help remove any rough spots, splinters, or bumps.

  2. Move to finer-grit sandpaper: Once you have sanded the table with coarse-grit sandpaper, switch to finer-grit sandpaper, such as 120 grit. Sand the entire surface of the table again, making sure to remove any scratches or marks left by the coarse-grit sandpaper.

  3. Sand with the grain: Always sand with the grain of the wood to avoid damaging the surface. Sanding against the grain can cause scratches and marks that will be difficult to remove.

  4. Use a sanding block: To ensure an even sanding job, use a sanding block to hold the sandpaper. This will help you apply even pressure across the surface of the table.

Applying Finish

Once you have sanded your wooden picnic table, it is time to apply the finish. The finish will protect the wood from moisture, UV rays, and other environmental factors. Here are the steps to follow to apply the finish:

  1. Choose the right finish: There are different types of finishes available, such as varnish, polyurethane, and oil-based finishes. Choose the finish that suits your needs and preferences.

  2. Apply the finish: Apply the finish using a brush or a rag. Make sure to apply an even coat across the surface of the table, including the top, sides, and legs.

  3. Wait for the finish to dry: Allow the finish to dry completely before applying another coat. Follow the manufacturer’s instructions to determine how long you need to wait for the finish to dry.

  4. Sand between coats: Sand the surface of the table lightly between coats of finish using fine-grit sandpaper, such as 220 grit. This will help remove any bumps or imperfections and ensure a smooth finish.

  5. Apply multiple coats: Apply multiple coats of finish to ensure maximum protection. Follow the manufacturer’s instructions to determine how many coats you need to apply.

By following these steps, you can sand and finish your wooden picnic table like a pro. With a little patience and effort, you can create a beautiful and durable picnic table that will last for years to come.

Maintaining Your Picnic Table

Maintaining your wooden picnic table is essential to ensure its longevity and keep it looking great. Here are a few tips to help you maintain your picnic table.

Cleaning Your Picnic Table

To start, you will need to clean your picnic table. Use a soft-bristled brush and a mild detergent to scrub the surface of the table. Rinse it off with a hose and let it dry completely before moving on to the next step.

Applying a Protective Coating

Once your picnic table is clean and dry, you can apply a protective coating to help prevent damage from the elements. There are several options to choose from, including:

  • Linseed oil
  • Teak oil
  • Tung oil
  • Water-resistant, UV-protected sealer

Apply the protective coating according to the manufacturer’s instructions. Be sure to apply it evenly and let it dry completely before using the table.

Regular Maintenance

Regular maintenance is key to keeping your picnic table in good condition. Here are a few things you can do to keep it looking great:

  • Remove debris and dirt regularly
  • Keep it covered when not in use
  • Sand and refinish as needed

By following these tips, you can keep your wooden picnic table looking great for years to come.

How to Make a Wooden Sliding Door: A Beginner's Guide

If you’re looking to add some rustic charm to your home, a wooden sliding door is a great way to do it. Not only are they functional, but they also add a touch of warmth and character to any room. Plus, making your own sliding door can be a fun and rewarding DIY project.

To make a wooden sliding door, you’ll need some basic woodworking tools and materials. The first step is to decide on the size and style of your door. You can choose from a variety of wood types, including pine, cedar, and oak, depending on your preference and budget. Once you have your wood, you’ll need to cut it to size and shape it using a saw and sandpaper.

Next, you’ll need to assemble the door frame and attach the sliding hardware. This can be a bit tricky, but there are plenty of tutorials and videos available online to guide you through the process. Once your door is assembled and installed, you can add any finishing touches you like, such as a coat of stain or paint. With a little bit of time and effort, you’ll have a beautiful wooden sliding door that adds both style and function to your home.

Understanding the Basics of a Sliding Door

If you’re looking for a stylish and functional way to divide your space, a sliding door can be a great option. Sliding doors are easy to install and can save you a lot of space compared to traditional hinged doors. In this section, we’ll cover the basics of a sliding door, including its components and the different types available.

Components of a Sliding Door

A sliding door consists of several parts that work together to create a smooth and functional door. Here are the main components of a sliding door:

  • Track: The track is the part that the door slides on. It is usually made of metal or plastic and is attached to the wall or ceiling.
  • Rollers: The rollers are attached to the door and glide along the track. They are usually made of metal or nylon and can be adjusted to ensure the door slides smoothly.
  • Handles: The handles are used to open and close the door. They can be attached to the door or mounted on the wall.
  • Locks: Locks are used to secure the door in place. They can be simple latches or more complex locking mechanisms.

Types of Sliding Doors

There are several types of sliding doors available, each with its own unique features and benefits. Here are some of the most common types:

  • Pocket doors: Pocket doors slide into a wall cavity, making them a great space-saving option. They are ideal for small rooms or areas where you want to create a seamless transition between spaces.
  • Barn doors: Barn doors slide along a track mounted above the doorway. They are a popular choice for rustic or farmhouse-style homes and can add a unique touch to any space.
  • Bypass doors: Bypass doors slide past each other, allowing you to access both sides of the doorway. They are a great option for closets or areas where you want to maximize accessibility.
  • Bi-fold doors: Bi-fold doors fold in half and slide along a track. They are a great option for areas where you want to create a larger opening, such as a closet or pantry.

Now that you have a better understanding of the basics of a sliding door, you can choose the right type for your space. Whether you’re looking for a space-saving option or a unique design element, a sliding door can be a great addition to any home.

Choosing the Right Wood

When it comes to making a wooden sliding door, choosing the right wood is crucial. You want to select a wood that is both durable and aesthetically pleasing. In this section, we will discuss the different types of wood that are suitable for sliding doors, as well as wood quality and durability.

Types of Wood

There are several types of wood that are commonly used for sliding doors. Each type of wood has its own unique characteristics that make it suitable for different applications.

  • Pine – Pine is a softwood that is easy to work with and is relatively inexpensive. It is a popular choice for sliding doors, but it is not as durable as some other types of wood.

  • Cedar – Cedar is a softwood that is naturally resistant to rot and insect damage. It has a beautiful grain pattern and is often used for outdoor applications.

  • Redwood – Redwood is a hardwood that is known for its durability and resistance to decay. It has a beautiful reddish-brown color and is often used for outdoor applications.

  • Mahogany – Mahogany is a hardwood that is known for its durability and beauty. It has a rich reddish-brown color and is often used for high-end applications.

Wood Quality and Durability

When selecting wood for your sliding door, it is important to consider the quality and durability of the wood. Look for wood that is free of knots and other imperfections, as these can weaken the wood and make it more prone to damage.

It is also important to consider the moisture content of the wood. Wood that is too dry can be brittle and prone to cracking, while wood that is too wet can be prone to warping and twisting.

Finally, consider the finish that you will be applying to the wood. A high-quality finish can help to protect the wood from moisture and other environmental factors, which can help to extend its lifespan.

In summary, when choosing the right wood for your sliding door, consider the type of wood that is best suited for your application, as well as the quality and durability of the wood. Look for wood that is free of imperfections and has the appropriate moisture content, and be sure to apply a high-quality finish to protect the wood from the elements.

Designing Your Wooden Sliding Door

When making a wooden sliding door, the design process is crucial to ensure that the door fits your needs. Here are some factors to consider when designing your wooden sliding door.

Determining the Size

The first step in designing your wooden sliding door is determining the size. Measure the opening where you want to install the door, and make sure to include the door frame in your measurements. The door should be slightly larger than the opening to ensure a snug fit.

Consider the width of the door, as well. The wider the door, the heavier it will be, which may affect the hardware you choose. A typical sliding door is around 44 inches wide, but you can adjust the size to fit your needs.

Choosing the Style

The style of your wooden sliding door is another important factor to consider. There are many different styles to choose from, including traditional, modern, and rustic.

Consider the overall style of your home, as well as the purpose of the door. If you want a door that provides privacy, a solid wood door may be the best choice. If you want a door that allows light to pass through, a door with glass panels may be a better option.

You can also add decorative elements to your door, such as carving or painting. This can add a unique touch to your door and make it a focal point in your home.

In conclusion, when designing your wooden sliding door, consider the size and style to ensure that the door fits your needs and complements your home’s decor.

Gathering the Necessary Tools and Materials

Before you start building your wooden sliding door, you will need to gather the necessary tools and materials. Here are the essential tools and additional materials you will need to complete this project.

Essential Tools

  1. Saw: You will need a saw to cut the wood to the appropriate size. A miter saw or circular saw will work best for this project.

  2. Drill: You will need a drill to make holes in the wood for screws and other hardware.

  3. Screwdriver: You will need a screwdriver to attach the hardware to the wood.

  4. Measuring Tape: You will need a measuring tape to measure the dimensions of the door and the space where it will be installed.

  5. Level: You will need a level to ensure that the door is installed straight and level.

  6. Pencil: You will need a pencil to mark the wood where you need to make cuts or drill holes.

  7. Safety Glasses and Ear Protection: You should always wear safety glasses and ear protection when using power tools.

Additional Materials

  1. Wood: You will need wood to build the door frame and panels. The type of wood you choose will depend on your personal preference and budget. Common types of wood used for sliding doors include pine, cedar, and oak.

  2. Sliding Door Hardware: You will need sliding door hardware to hang the door. This includes a track, rollers, and stops. You can purchase a sliding door hardware kit at most hardware stores.

  3. Screws: You will need screws to attach the hardware to the wood. Make sure you choose screws that are the appropriate length for the thickness of your wood.

  4. Wood Glue: You may want to use wood glue to reinforce the joints in the door frame.

  5. Sandpaper: You will need sandpaper to smooth any rough edges or surfaces on the wood.

  6. Stain or Paint: You may want to stain or paint the door to match your decor. Choose a stain or paint that is appropriate for the type of wood you are using.

Building the Door Frame

Building the door frame is the first step in creating your own wooden sliding door. Follow these steps to build the frame of your door.

Cutting the Wood

The first step in building the door frame is to cut the wood. You will need 2×2 lumber for this project. Cut the lumber to the dimensions of your doorway. Make sure to measure carefully to ensure that your sliding door will fit properly.

Assembling the Frame

Once you have cut your lumber, it’s time to assemble the frame. Follow these steps to assemble your door frame:

  1. Lay out the pieces of lumber on a flat surface.
  2. Use wood glue to attach the pieces of lumber together. Apply a generous amount of wood glue to the end of each piece of lumber and press them together to form a corner.
  3. Use a clamp to hold the pieces of lumber together while the glue dries. Leave the clamp in place for at least an hour to ensure that the glue has dried completely.
  4. Once the glue has dried, use wood screws to secure the pieces of lumber together. Pre-drill holes for the screws to prevent the wood from splitting.
  5. Repeat these steps to assemble the entire frame of your sliding door.

By following these steps, you can build the frame of your own wooden sliding door. With a little bit of time and effort, you can create a beautiful and functional sliding door that will add style and convenience to your home.

Installing the Sliding Mechanism

Now that you have built your wooden sliding door, it’s time to install the sliding mechanism. This is a crucial step in ensuring that your door will slide smoothly and securely. Here are the steps to follow:

  1. Measure and mark the placement of the sliding mechanism on the top of the door. The mechanism should be centered and level.

  2. Pre-drill holes for the screws that will attach the sliding mechanism to the door.

  3. Attach the sliding mechanism to the top of the door using the screws provided. Be sure to tighten them securely.

  4. Measure and mark the placement of the sliding track on the wall above the doorway. The track should be centered and level.

  5. Pre-drill holes for the screws that will attach the sliding track to the wall.

  6. Attach the sliding track to the wall using the screws provided. Be sure to tighten them securely.

  7. Hang the door on the sliding mechanism by lifting it up and fitting the wheels into the track. Make sure the door is level and slides smoothly.

  8. Adjust the height of the door by turning the adjustment screws on the sliding mechanism. This will ensure that the door is level and slides smoothly.

  9. Test the sliding door to make sure it slides smoothly and securely. If necessary, make any adjustments to the sliding mechanism or track.

By following these steps, you can install the sliding mechanism for your wooden sliding door with ease. Now you can enjoy the beauty and functionality of your new sliding door!

Finishing Touches

Once you have built your wooden sliding door, it’s time to give it a finishing touch. This will not only enhance the look of the door but also protect it from wear and tear. Here are two essential sub-sections that will help you give your door a polished look.

Sanding and Smoothing

Before applying any finish, you need to sand the door to remove any rough spots, splinters, or uneven surfaces. This will also help to open up the pores of the wood, allowing the finish to penetrate deeply. Use a fine-grit sandpaper to sand the door’s surface in the direction of the grain.

After sanding, use a damp cloth to wipe off any dust or debris. Then, use a fine steel wool to smooth the surface further. This will give the wood a silky smooth feel and ensure that the finish adheres correctly.

Applying a Finish

The finish you choose will depend on the look you want to achieve and the type of wood you used. You can use a clear finish to showcase the natural beauty of the wood or a stain to darken or lighten the color.

Before applying any finish, make sure the surface is clean and dry. Then, use a brush or cloth to apply the finish in the direction of the grain. Be sure to apply the finish evenly and avoid drips or bubbles.

After the first coat has dried, lightly sand the surface with a fine-grit sandpaper, then apply a second coat. Repeat this process until you achieve the desired look.

In conclusion, sanding and smoothing, as well as applying a finish, are essential steps to give your wooden sliding door a professional and polished look. With these tips, you can create a beautiful and functional door that will last for years to come.

Mounting the Door

After you have built your sliding door, the next step is to mount it. This involves attaching the door to the doorway and making sure it slides smoothly. Here are the steps you need to follow:

Preparing the Doorway

Before you can mount the door, you need to prepare the doorway. This involves installing a track on which the door will slide. Here’s how to do it:

  1. Measure the width of the doorway and cut the track to size.
  2. Use a level to make sure the track is straight and mark the screw holes.
  3. Drill pilot holes for the screws and attach the track to the top of the doorway using screws.

Attaching the Door

Now that the track is installed, it’s time to attach the door. Here’s how to do it:

  1. Lift the door and place it on the track.
  2. Use a level to make sure the door is straight and adjust the track if necessary.
  3. Attach the rollers to the top of the door using screws.
  4. Adjust the rollers so that the door slides smoothly.
  5. Install door guides at the bottom of the doorway to keep the door from swinging.

Congratulations! You have successfully mounted your sliding door. Now you can enjoy the benefits of having a space-saving door that adds a touch of elegance to your home.

is-cedar-a-hardwood-or-a-softwood-1024x515

Is Red Cedar Hard or Soft Wood? Explained

Are you wondering whether red cedar is a hard or soft wood? The answer is not as straightforward as you might think. Cedar is a type of softwood, but it is known for its durability and strength. In fact, some species of cedar are even harder than certain types of hardwoods.

When it comes to determining the hardness of wood, the Janka scale is often used. This scale measures the force required to embed a steel ball into the wood, and the higher the rating, the harder the wood. While Western red cedar has a Janka rating of only 320, it is still a strong and durable wood. Other species of cedar, such as Alaskan yellow cedar and Eastern red cedar, have higher Janka ratings and are even stronger.

So, while cedar is technically a softwood, it should not be underestimated in terms of its strength and durability. In this article, we will explore the properties of cedar and the factors that determine its hardness. Whether you are a woodworker or simply curious about the different types of wood, this article will provide you with valuable information about red cedar and its characteristics.

Understanding Wood Types

understanding-wood-types-1

When it comes to woodworking, understanding the characteristics of different types of wood is essential. One of the most fundamental distinctions is between hardwood and softwood.

Hardwood

Hardwood comes from deciduous trees, which are trees that lose their leaves in the fall. These trees tend to be slower-growing and have a more complex structure than softwoods. As a result, hardwoods are generally denser and stronger than softwoods. They also tend to have a more attractive grain pattern, making them popular for use in furniture and decorative woodworking.

Some common examples of hardwoods include oak, maple, cherry, and walnut. These woods are prized for their durability, strength, and beauty. However, they can also be more difficult to work with than softwoods, as they are denser and may require more effort to cut and shape.

Softwood

Softwood comes from evergreen trees, which are trees that keep their leaves year-round. These trees tend to be faster-growing and have a simpler structure than hardwoods. As a result, softwoods are generally less dense and less strong than hardwoods. However, they are also more lightweight and easier to work with.

Some common examples of softwoods include pine, cedar, and spruce. These woods are often used in construction and outdoor woodworking because of their affordability and ease of use. However, they may not be as durable or attractive as hardwoods.

It’s important to note that the terms “hardwood” and “softwood” can be somewhat misleading. For example, some softwoods like yew and Douglas fir are actually harder than some hardwoods like American cherry. Additionally, some woods like cedar can be both soft and hard depending on the species.

In conclusion, understanding the differences between hardwood and softwood is crucial for any woodworker. By choosing the right type of wood for your project, you can ensure that your finished product is both beautiful and functional.

Properties of Red Cedar

is-cedar-a-hardwood-or-a-softwood-1024x515

Red Cedar is a softwood that is obtained from gymnosperm trees which are conifers. The common term for gymnosperms is softwoods. Other popular softwoods are pine and fir trees. Below are some of the properties of Red Cedar:

Durability

Red Cedar has excellent resistance to decay and insect attacks, making it a popular choice for outdoor applications like fence posts. It is also rated as durable to very durable in regard to decay resistance, though it has a mixed resistance to insect attack.

Workability

Red Cedar is easy to work with, and it is a popular choice among woodworkers. It has a straight grain and a uniform texture, which makes it easy to carve and turn. However, it can have knots and irregularities that can make it difficult to work with.

Appearance

Red Cedar has a reddish-brown color that can vary from light to dark. It has a distinct and pleasant aroma that is often used in closet linings and furniture. The wood has a straight grain and a uniform texture, which gives it a smooth and consistent finish.

Strength

Red Cedar is a strong wood, but it is not as strong as hardwoods like oak or maple. It has a bending strength of 8,800 lbf per square inch (60.7 MPa), which is lower than some other softwoods like Alaskan yellow cedar. However, it is still strong enough for most applications.

Uses

Red Cedar is a versatile wood that is used in a variety of applications. It is commonly used for outdoor applications like fence posts, decking, and siding. It is also used for indoor applications like closet linings, furniture, and carvings. Red Cedar is a popular choice among woodworkers because of its easy workability and pleasant aroma.

Red Cedar as Hardwood or Softwood

red-cedar-as-hardwood-or-softwood

If you are wondering whether red cedar is a hardwood or a softwood, the answer is simple: red cedar is a softwood. While hardwoods come from trees that produce seeds encased in a fruit or nut, softwoods come from trees that produce seeds in cones. Cedar trees belong to the latter category, which means that red cedar is a softwood.

However, just because red cedar is a softwood does not mean that it is not strong. In fact, red cedar is known for its strength and durability, which makes it a popular choice for outdoor furniture, decks, and siding. Red cedar is also resistant to rot and decay, making it an excellent choice for outdoor applications.

When it comes to compressive strength, red cedar is not as strong as some other woods, but it is still quite strong for a softwood. According to the North American Wood Products Association, the average compressive strength of red cedar is around 6,020 lbf per square inch (41.5 MPa).

In addition to its strength and durability, red cedar is also known for its pleasant aroma and beautiful color. The wood has a reddish-brown hue that can vary in intensity depending on the age and location of the tree. The wood also has a straight grain and a fine texture, which makes it easy to work with using both hand and power tools.

Overall, while red cedar may be a softwood, it is still a strong and durable choice for a variety of outdoor applications. Its natural resistance to rot and decay, pleasant aroma, and beautiful color make it a popular choice among homeowners and builders alike.

Applications of Red Cedar

Red cedar is a versatile wood that can be used for various applications. Its unique properties make it an excellent choice for both indoor and outdoor use. Here are some common applications of red cedar:

Outdoor Use

Red cedar is a popular choice for outdoor applications due to its natural resistance to decay and insects. It is commonly used for:

  • Siding: Red cedar is a popular choice for siding as it is durable and has a natural resistance to rot and decay.
  • Decking: Red cedar decking is a popular choice due to its natural beauty and durability.
  • Fencing: Red cedar is an excellent choice for fencing as it is strong and has a natural resistance to rot and insects.
  • Shingles: Red cedar shingles are a popular choice for roofing as they are durable and have a natural resistance to decay.

Indoor Use

Red cedar is also a popular choice for indoor applications. Its unique properties make it an excellent choice for:

  • Closets and chests: Red cedar has a distinct and tell-tale scent that repels moths and other insects, making it an excellent choice for closets and chests.
  • Furniture: Red cedar furniture is durable and has a unique aesthetic that can add character to any room.
  • Venetian blinds: Red cedar is a popular choice for Venetian blinds due to its natural resistance to decay and insects.

Other Applications

Red cedar can also be used for a variety of other applications, such as:

  • Pencils: Red cedar is a popular choice for making pencils due to its straight grain and durability.
  • Carvings: Red cedar is a popular choice for carvings as it is easy to work with and has a unique aesthetic.
  • Musical instruments: Red cedar is a popular choice for making musical instruments such as guitars and violins due to its unique tonal qualities.

Overall, red cedar is a versatile wood that can be used for a variety of applications. Its unique properties make it an excellent choice for both indoor and outdoor use.

Comparing Red Cedar to Other Woods

comparing-red-cedar-to-other-woods

When it comes to determining whether red cedar is a hardwood or a softwood, the answer is clear – it is a softwood. But how does it compare to other woods in terms of hardness and durability? Let’s take a look.

Hardwood vs. Softwood

First, it’s important to understand the difference between hardwood and softwood. Hardwood comes from deciduous trees, which are trees that lose their leaves annually, while softwood comes from coniferous trees, which are evergreen trees that typically have needles or scale-like leaves. Hardwood tends to be denser and harder than softwood, but this isn’t always the case.

Red Cedar vs. Douglas Fir

Douglas fir is a softwood that is often used in construction for its strength and durability. However, when it comes to hardness, red cedar is actually slightly harder than Douglas fir. Red cedar has a Janka hardness rating of 900 lbf (pounds-force) while Douglas fir has a rating of 660 lbf. This means that red cedar is slightly more resistant to wear and tear than Douglas fir.

Red Cedar vs. Redwood

Redwood is another softwood that is often used in construction for its durability and resistance to decay. When it comes to hardness, redwood is actually harder than red cedar. Redwood has a Janka hardness rating of 450 lbf, making it about half as hard as red cedar. This means that red cedar is more resistant to wear and tear than redwood.

Red Cedar vs. Cherry Wood

Cherry wood is a hardwood that is often used in furniture making for its beauty and durability. In terms of hardness, cherry wood is slightly harder than red cedar. Cherry wood has a Janka hardness rating of 950 lbf, making it about 50% harder than red cedar. However, cherry wood is still not as resistant to wear and tear as red cedar.

Conclusion

While red cedar is technically a softwood, it is still relatively hard compared to other softwoods like Douglas fir and redwood. When compared to hardwoods like cherry wood, red cedar is not as hard, but it still offers a good balance of durability and workability. If you’re looking for a wood that is resistant to wear and tear and easy to work with, red cedar is a great choice.

Frequently Asked Questions

What are the properties of red cedar wood?

Red cedar wood is known for its distinctive aroma and beautiful reddish-brown color. It has a straight grain and a fine, even texture. Red cedar is also lightweight and has natural resistance to decay, rot, and insect damage.

What are some common uses for red cedar wood?

Red cedar wood is a popular choice for outdoor furniture, decking, siding, and fencing. It is also commonly used for indoor furniture, closets, and chests due to its natural resistance to moths and other insects.

Is red cedar considered a hardwood or softwood?

Red cedar is a softwood, not a hardwood. Softwoods come from conifer trees, while hardwoods come from deciduous trees.

How does the hardness of red cedar compare to pine?

Red cedar is generally considered to be harder than pine, but not as hard as some other hardwoods. The Janka hardness scale rates red cedar at around 900, while pine is rated at around 690.

What are some disadvantages of using red cedar wood?

One potential disadvantage of using red cedar wood is that it can be relatively expensive compared to other softwoods. Additionally, while it is naturally resistant to decay and insect damage, it is not completely immune and may still require regular maintenance to maintain its appearance and structural integrity.

Is red cedar a strong and durable wood?

Red cedar is relatively strong and durable for a softwood, but it is not as strong as many hardwoods. It has a moderate bending strength and stiffness, but may be prone to splitting or cracking if not properly cared for.