Tag Archives: release harmful chemicals

how-to-easily-get-rid-of-wooden-pallets

How to Easily Get Rid of Wooden Pallets: Tips and Tricks

Do you have a pile of wooden pallets taking up space in your yard or warehouse? Getting rid of them can seem like a daunting task, but it doesn’t have to be. With a little effort and creativity, you can dispose of your pallets in an eco-friendly and cost-effective way.

One option is to recycle them. Many local recycling centers accept wood pallets, so you can drop them off and give them a second life. This not only keeps them out of the landfill but also reduces the demand for new trees to be cut down for pallet production.

Another option is to sell them. Even if your pallets are in less-than-perfect condition, they can still fetch a competitive price. Some companies even offer pick-up services, making it easy to clear out your space quickly. Before pricing your pallets, consider factors such as their condition and the current market demand.

Understanding Wooden Pallets

how-to-easily-get-rid-of-wooden-pallets

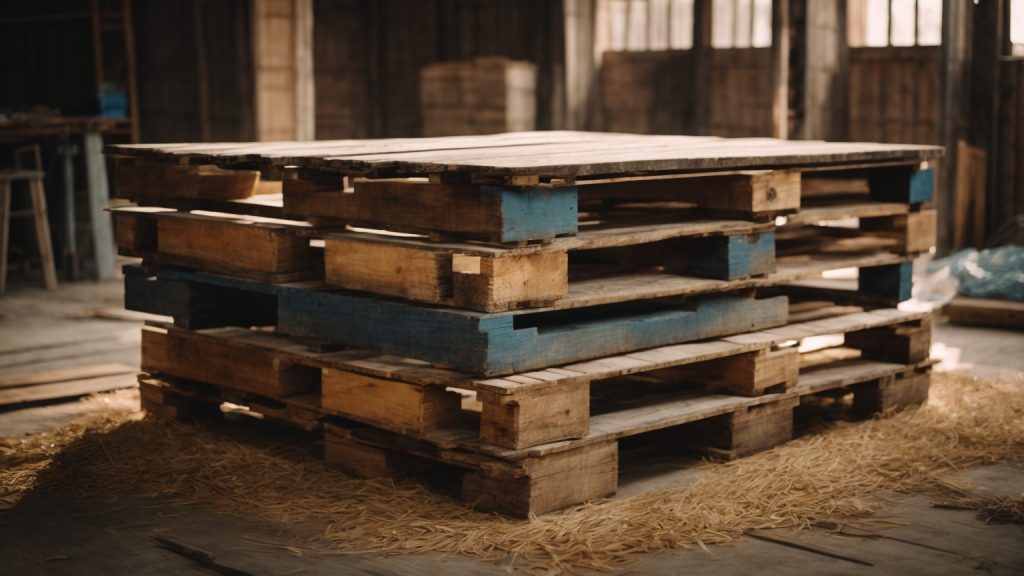
If you work in a warehouse, construction site, or any industry that involves shipping and receiving goods, you are likely familiar with wooden pallets. Wooden pallets are a popular choice for transporting goods due to their durability and affordability. In this section, we will discuss the basics of wooden pallets, including their construction, size, and weight capacity.

Construction

Wooden pallets are typically made from hardwood or softwood and consist of a top deck, bottom deck, and stringers. The top and bottom decks are the flat surfaces of the pallet, and the stringers are the long, narrow boards that run perpendicular to the deck boards. The stringers are what support the weight of the goods on the pallet and allow forklifts and pallet jacks to lift and move the pallet.

Size

The most common size for wooden pallets in the United States is 48 inches by 40 inches. However, there are many other sizes available, ranging from small pallets used for retail displays to large pallets used for industrial machinery. When disposing of wooden pallets, it is important to know the size of the pallets you have to ensure that you choose the appropriate disposal method.

Weight Capacity

The weight capacity of a wooden pallet depends on several factors, including the type of wood used, the construction of the pallet, and the size of the pallet. As a general rule, a standard 48-inch by 40-inch wooden pallet can hold up to 4,600 pounds. However, it is important to note that this weight capacity can vary depending on the specific pallet and the goods being transported.

In summary, wooden pallets are a common and essential part of many industries. Understanding the construction, size, and weight capacity of wooden pallets can help you choose the appropriate disposal method and ensure that your goods are transported safely and efficiently.

Why Get Rid of Wooden Pallets

If you have old wooden pallets lying around, you may wonder why you should bother getting rid of them. After all, they’re just pieces of wood, right? Well, there are actually several good reasons why you should dispose of your wooden pallets properly.

Safety Concerns

One of the most important reasons to get rid of wooden pallets is safety. Pallets that are damaged or in disrepair can be a hazard to anyone who comes into contact with them. Workers who pass unserviceable pallets stacked on their feet can trip and bump into them, causing injury. Untidy spaces can also be dangerous! If you leave pallets around, they can quickly turn into a danger.

Clutter Reduction

Another reason to get rid of wooden pallets is to reduce clutter. Pallets can take up a lot of space, and if you have too many of them, they can make your home or business look messy and disorganized. By getting rid of your old pallets, you can free up space and create a more organized and efficient environment.

Environmental Impact

Wooden pallets can also have a negative impact on the environment if they are not disposed of properly. If you throw your pallets in the trash, they will end up in a landfill where they will take up space and contribute to pollution. However, there are many ways you can choose to get rid of unwanted pallets. You can recycle them by yourself into several different products, including mulch (a layer of material applied to the surface of the soil), animal bedding, and biofuel.

Overall, there are several good reasons why you should get rid of your wooden pallets. By doing so, you can create a safer, more organized environment while also doing your part to protect the planet.

Preparation for Disposal

Before disposing of your wooden pallets, it’s important to take some time to prepare them properly. This will not only make the disposal process easier, but it can also help you identify any pallets that may be reusable or recyclable. Here are some steps you can take to prepare your wooden pallets for disposal.

Inspecting the Pallets

The first step in preparing your wooden pallets for disposal is to inspect them for damage or signs of wear and tear. Look for broken or missing boards, loose nails or screws, and any other damage that may make the pallets unsafe to use. If you find any damaged pallets, set them aside for disposal.

Next, check the condition of the wood itself. If the wood is rotting or infested with insects, it may not be suitable for reuse or recycling. In this case, it’s best to dispose of the pallets.

Sorting the Pallets

Once you’ve inspected your pallets, sort them into three categories: reusable, recyclable, and disposable. Reusable pallets are those that are in good condition and can be used again. Recyclable pallets are those that can be broken down and the wood reused. Disposable pallets are those that are damaged or otherwise unsuitable for reuse or recycling.

If you have reusable pallets, consider donating them to a local school or nonprofit organization. These organizations often use pallets for various projects and can put them to good use without having to purchase new lumber.

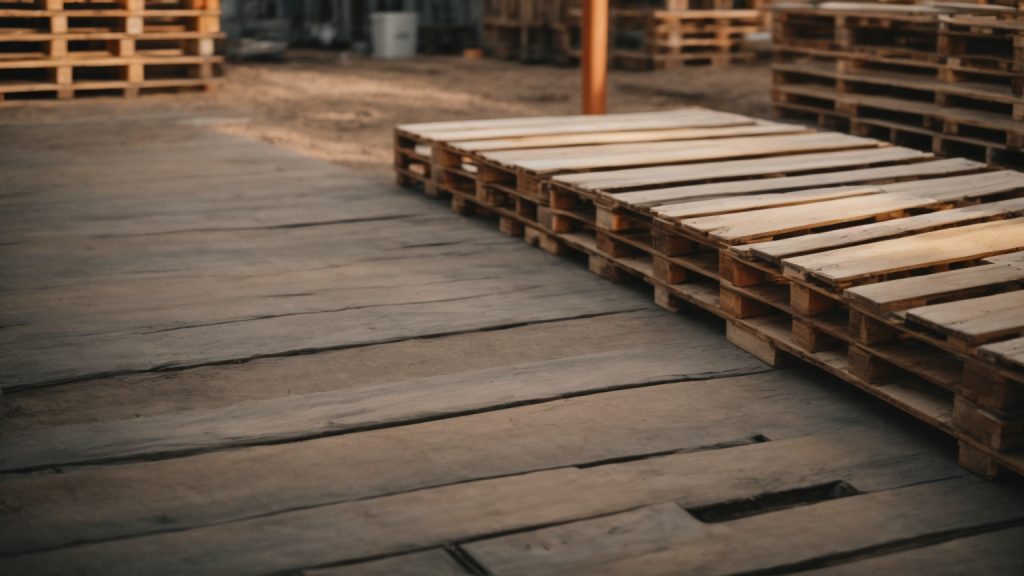
Recyclable pallets can be taken to a local recycling center or sold to wood recyclers. Some companies may even offer pick-up services for pallets, which can help clear jobsites, warehouses, and driveways quickly.

Finally, dispose of any damaged or unsuitable pallets according to your local regulations. This may involve taking them to a landfill or arranging for a special pickup service. Be sure to follow all safety guidelines when handling and disposing of wooden pallets.

Methods of Disposal

methods-of-disposal

When it comes to getting rid of wooden pallets, there are several methods of disposal you can choose from. Here are a few options to consider:

Recycling

Recycling is one of the most popular methods of disposing of wooden pallets. If you have a local recycling center that accepts wood, you can take your wood pallets there. This is a great way to give them a second life and keep them out of the landfill. You can also check with local businesses and see if they have a recycling program in place.

Selling

Regardless of condition, pallets can be sold for competitive prices. The average price for wood pallets in like-new or good condition is $0.50 – $4 per pallet. Some companies may offer pick-up services — which can help clear jobsites, warehouses, and driveways quickly. Consider these factors when pricing your pallets:

  • Condition: Like-new pallets will fetch a higher price than damaged ones.
  • Size: Larger pallets will generally command a higher price than smaller ones.
  • Quantity: The more pallets you have to sell, the better the price you can negotiate.

Donating

If you have wooden pallets that are still in good condition, consider donating them to a local charity or non-profit organization. Many organizations use pallets to build structures or create furniture, so your donation could be put to good use.

Repurposing

Another option for getting rid of wooden pallets is to repurpose them. Pallets can be used to create a wide variety of items, including:

  • Furniture: Pallets can be disassembled and used to create chairs, tables, and other pieces of furniture.
  • Garden beds: Pallets can be used to create raised garden beds for growing vegetables and herbs.
  • Art projects: Pallets can be used to create unique and interesting art projects, such as wall hangings or picture frames.

In conclusion, there are several methods of disposing of wooden pallets, including recycling, selling, donating, and repurposing. Choose the method that works best for you and helps keep these useful items out of the landfill.

Safety Precautions

When it comes to disposing of wooden pallets, it’s important to take some safety precautions to avoid any accidents or injuries. Here are some tips to keep in mind:

1. Wear Protective Gear

Before you start breaking down or moving wooden pallets, make sure to wear the appropriate protective gear. This includes gloves, safety glasses, and sturdy shoes to protect your hands, eyes, and feet from any potential hazards.

2. Use Proper Tools

Using the right tools can make the process of breaking down wooden pallets much easier and safer. A pallet buster or pry bar can help you remove the boards without causing damage to the wood. Avoid using tools that are dull, rusty, or damaged, as they can be dangerous to use.

3. Watch Your Surroundings

When working with wooden pallets, it’s important to be aware of your surroundings. Make sure you have enough space to move around and avoid working in areas with high foot traffic. Keep an eye out for any potential hazards, such as uneven surfaces or sharp objects.

4. Lift with Proper Technique

Moving wooden pallets can be heavy and awkward, so it’s important to use proper lifting technique to avoid strain or injury. Bend your knees and lift with your legs, rather than your back. If possible, use a dolly or hand truck to help you move the pallets.

5. Dispose of Pallets Properly

Finally, make sure to dispose of wooden pallets properly. Avoid leaving them lying around where they can cause a tripping hazard, and don’t burn them, as this can release harmful chemicals into the air. Instead, consider recycling or repurposing the pallets, or contact a waste management company to properly dispose of them.

By following these safety precautions, you can safely and effectively dispose of wooden pallets without putting yourself or others at risk.

Local Laws and Regulations

When it comes to getting rid of wooden pallets, it’s important to be aware of local laws and regulations. Depending on where you live, there may be specific rules and guidelines that dictate how you can dispose of your pallets. Failing to follow these regulations can result in fines or other penalties, so it’s important to do your research before getting rid of your pallets.

One common regulation that you may encounter is a ban on burning wooden pallets. Burning pallets can release harmful chemicals into the air, which can be harmful to both the environment and human health. If burning is not allowed in your area, you will need to find an alternative method for disposing of your pallets.

Another regulation to be aware of is the requirement to properly label and package pallets for disposal. This may involve using specific types of containers or marking pallets with identifying information. Failure to properly label and package your pallets can result in fines or other penalties.

In addition to these regulations, you may also need to obtain permits or licenses to dispose of your pallets. This is especially true if you are disposing of large quantities of pallets or if you are using a commercial disposal service. Be sure to check with your local government or waste management authority to determine what permits or licenses you may need.

Overall, it’s important to be aware of local laws and regulations when getting rid of wooden pallets. By doing your research and following the rules, you can ensure that you dispose of your pallets safely and responsibly.

What Is the Best Wood for Wooden Spoons? A Guide to Choosing the Perfect Material.

Are you looking for the perfect wooden spoon to stir your soups and sauces? Choosing the right wood is essential to ensure that your utensil is durable, safe, and easy to use. With so many options available, it can be challenging to determine which wood is best for your needs. In this article, we’ll explore the different types of wood commonly used for wooden spoons and help you make an informed decision.

When it comes to wooden spoons, not all woods are created equal. Some woods are too soft and prone to splintering, while others are too porous and can harbor bacteria. Hardwood is the preferred choice for wooden spoons, as it is sturdy, non-toxic, and resistant to staining and odor absorption. But within the category of hardwood, there are still many options to consider. In the next section, we’ll delve into some of the most popular types of hardwood used for making wooden spoons and highlight their unique properties.

Understanding Wood Types

When it comes to choosing the best wood for your wooden spoons, it’s important to understand the different types of wood available. In general, wood can be categorized into two main types: hardwoods and softwoods.

Hardwoods

Hardwoods are typically denser and more durable than softwoods, making them a great choice for cooking utensils that will withstand frequent use. Some popular hardwoods for wooden spoons include:

  • Olive wood: known for its unique grain pattern and durability
  • Hard Maple: a dense, hard wood that resists wear and tear
  • Cherry: a beautiful, reddish-brown wood that is also durable
  • Walnut: a dark, rich wood that is both strong and attractive

Softwoods

While softwoods are not as durable as hardwoods, they can still be a good choice for wooden spoons if properly cared for. Some popular softwoods for wooden spoons include:

  • Pine: a light-colored wood with a straight grain
  • Cedar: a fragrant wood that resists insects and decay
  • Spruce: a soft, lightweight wood that is easy to work with

When choosing a wood for your wooden spoons, it’s important to consider factors such as durability, grain pattern, and porosity. Hardwoods tend to be more durable and less porous than softwoods, but softwoods can still be a good choice if properly cared for. Ultimately, the best wood for your wooden spoons will depend on your personal preferences and needs.

Qualities of Good Wooden Spoon Wood

When it comes to choosing the best wood for making wooden spoons, there are several qualities to consider. Here are some of the most important qualities to keep in mind:

Durability

One of the most important qualities of good wooden spoon wood is durability. You want a wood that is strong enough to withstand the rigors of regular use without cracking or splintering. Hardwoods like maple, cherry, and walnut are good choices because they are denser and stronger than softwoods.

Heat Resistance

Another important quality to consider when choosing wooden spoon wood is heat resistance. You want a wood that can withstand high temperatures without warping or cracking. Hardwoods like maple and cherry are again good choices because they are less porous and can withstand heat better than softer woods.

Non-Toxicity

Since wooden spoons come into contact with food, it is important to choose a wood that is non-toxic. Hardwoods like maple, cherry, and walnut are safe to use for cooking utensils because they do not release harmful chemicals or toxins when exposed to heat or moisture.

Grain Structure

The grain structure of the wood is also an important consideration. You want a wood with a tight, even grain that won’t splinter or crack easily. Hardwoods like maple and cherry have a fine, even grain that makes them ideal for spoon making.

Overall, the best wood for making wooden spoons is a hardwood that is durable, heat-resistant, non-toxic, and has a tight, even grain. Maple, cherry, and walnut are all good choices that meet these criteria.

Top Woods for Wooden Spoons

When it comes to choosing the best wood for wooden spoons, you want to look for a wood that is durable, non-toxic, and won’t absorb too much moisture. Here are some of the top woods for wooden spoons:

Maple

Maple is a popular choice for wooden spoons because it is hard, durable, and non-toxic. It has a tight grain that resists staining and is easy to clean. Maple spoons are also less likely to warp or crack over time.

Cherry

Cherry wood is another great option for wooden spoons. It is a hardwood that is strong and durable, with a beautiful reddish-brown color. Cherry wood is also non-toxic and has a tight grain that resists staining.

Walnut

Walnut is a darker wood that is known for its strength and durability. It has a tight grain that resists staining and is easy to clean. Walnut spoons are also less likely to crack or warp over time.

Bamboo

Bamboo is a sustainable and eco-friendly option for wooden spoons. It is a fast-growing grass that is easy to harvest and regenerates quickly. Bamboo spoons are lightweight, strong, and non-toxic. They also have a smooth surface that is easy to clean.

When choosing the best wood for your wooden spoons, it’s important to consider your personal preferences and needs. Each type of wood has its own unique characteristics and benefits. Whether you choose maple, cherry, walnut, or bamboo, you can be sure that you are getting a high-quality and durable wooden spoon that will last for years to come.

Factors to Consider When Choosing Wood

When choosing the best wood for wooden spoons, there are several factors to consider. Here are some key factors to keep in mind:

Availability

The availability of the wood is an important factor to consider when choosing the best wood for your wooden spoons. Some types of wood may be more readily available than others, depending on your location. It’s important to choose a wood that is easy to find and purchase, so you can easily replace your wooden spoons if needed.

Cost

The cost of the wood is another important factor to consider. Some types of wood may be more expensive than others, depending on their availability and quality. It’s important to choose a wood that is within your budget, so you can get the best value for your money.

Sustainability

Sustainability is an important factor to consider when choosing the best wood for your wooden spoons. You want to choose a wood that is sustainable and eco-friendly, so you can reduce your impact on the environment. Look for woods that are harvested responsibly and come from sustainable sources.

In conclusion, when choosing the best wood for your wooden spoons, consider the availability, cost, and sustainability of the wood. By keeping these factors in mind, you can choose a wood that is both practical and eco-friendly.

Wood Treatment and Maintenance

When it comes to wooden spoons, proper maintenance is essential to keep them in good condition for a long time. Here are some tips on how to treat and maintain your wooden spoons:

Oiling

Wooden spoons should be oiled regularly to prevent them from drying out and cracking. You can use any food-safe oil such as mineral oil, coconut oil, or beeswax. Apply a small amount of oil to a cloth and rub it into the wood until it is absorbed. Wipe away any excess oil and let the spoon dry completely before using it again.

Cleaning

Cleaning wooden spoons is easy and straightforward. Always hand wash them with warm water and mild soap, making sure to scrub any food particles off the surface. Avoid soaking them in water for long periods as this can cause them to warp or split. Never put wooden spoons in the dishwasher as the high temperature and harsh detergents can damage the wood.

Storage

Proper storage is crucial to keep your wooden spoons in good condition. Store them in a dry and well-ventilated place to prevent moisture from building up. Avoid storing them in direct sunlight or near a heat source as this can cause them to dry out and crack. You can also use a utensil holder or a drawer organizer to keep them organized and easily accessible.

By following these simple tips, you can ensure that your wooden spoons remain in excellent condition for years to come.

How to Remove Wooden Flooring: A Beginner's Guide

Removing wooden flooring can be a daunting task, but it doesn’t have to be. Whether you’re looking to replace your flooring or install something new, removing the old wooden flooring is the first step. With the right tools and techniques, you can remove your wooden flooring with ease and without damaging your subfloor.

Before you begin, it’s important to assess the type of wooden flooring you have and the condition it’s in. If your flooring is in good condition, you may be able to salvage it for reuse or resale. However, if your flooring is damaged or worn, it may be best to remove it entirely. Additionally, you’ll want to consider the type of subfloor you have and whether or not it’s suitable for the new flooring you plan to install. Once you’ve assessed your situation, you can begin the removal process.

Understanding Wooden Flooring

If you’re planning to remove wooden flooring, it’s important to understand the type of flooring you’re dealing with. There are two main types: solid hardwood and engineered hardwood.

Solid hardwood flooring is made of a single piece of wood and is typically thicker than engineered hardwood. It can be sanded and refinished multiple times, making it a more durable option. However, it can also be more expensive and susceptible to warping and shrinking due to changes in humidity.

Engineered hardwood flooring is made of multiple layers of wood, with a top layer of hardwood veneer. It’s more stable than solid hardwood and less prone to shrinking and warping. It’s also typically less expensive than solid hardwood. However, it can only be sanded and refinished a few times before needing to be replaced.

Before removing your wooden flooring, it’s important to determine which type you have. This can affect the tools and techniques you’ll need to use for removal. You can usually tell the difference by looking at the edges of the flooring – solid hardwood will have a solid edge, while engineered hardwood will have a layered edge.

It’s also important to consider the age of your flooring. Older flooring may have been installed with nails or staples, while newer flooring may be glued down. This can also affect the removal process and the tools you’ll need to use.

By understanding the type and age of your wooden flooring, you can better prepare for the removal process and ensure that you’re using the proper tools and techniques.

Tools And Materials Needed

When it comes to removing wooden flooring, having the right tools and materials is essential. Here are the basic tools, safety equipment, and materials you will need to get the job done.

Basic Tools

  • Circular saw: This tool is used to cut through the wooden planks, making it easier to remove them.
  • Reciprocating saw: This tool is optional but really handy. It can be used to cut through nails and other tough materials.
  • Prybar: This tool is used to pry up the wooden planks. It is important to have a prybar with a wide, flat end to avoid damaging the subfloor.
  • Mallet: This tool is used to hit the prybar, helping to loosen the wooden planks.
  • Hammer: This tool is used to remove any nails left in the subfloor.
  • Nail claws: This tool is a type of claw that is used to remove nails.

Safety Equipment

  • Safety goggles: These protect your eyes from flying debris.
  • Dust mask: This protects your lungs from dust and debris.
  • Gloves: These protect your hands from splinters and other injuries.
  • Ear protection: This protects your ears from loud noises.

Materials

  • Plastic sheeting: This is used to cover furniture and other items in the room, protecting them from dust and debris.
  • Contractor bags: These are heavy-duty bags used to dispose of the wooden planks and other debris.
  • Adhesive remover: This is used to remove any adhesive left on the subfloor after the wooden planks have been removed.
  • Broom and dustpan: These are used to clean up the room after the wooden planks have been removed.

By having these tools, safety equipment, and materials on hand, you will be well-equipped to remove your wooden flooring safely and efficiently.

Preparation Stage

Before you start removing your wooden flooring, you need to prepare the room and inspect the floor to ensure you’re ready to begin. Here are some steps you should follow during the preparation stage:

Clearing The Room

The first step in preparing to remove your wooden flooring is to clear the room of all furniture, rugs, and other items. This will give you plenty of room to work and ensure that nothing gets damaged during the removal process.

If you have any large pieces of furniture that you can’t move on your own, consider hiring a professional moving company to help you. You don’t want to risk injuring yourself or damaging your furniture by trying to move it on your own.

Inspecting The Floor

Once the room is clear, you should inspect the floor to identify any potential problems. Look for any loose boards, damaged areas, or signs of water damage. If you find any of these issues, you’ll need to address them before you start removing the flooring.

You should also check for any nails, staples, or other fasteners that are holding the flooring in place. Make note of where they are so you can avoid them during the removal process.

Before you start removing the flooring, you should also put on protective clothing, including gloves, eye protection, and a dust mask. The removal process can be messy and potentially dangerous, so it’s important to take the necessary precautions to protect yourself.

By following these steps during the preparation stage, you’ll be well on your way to successfully removing your wooden flooring.

Removing The Wooden Flooring

Removing wooden flooring may seem like a daunting task, but with the right tools and techniques, it can be done with relative ease. Here are some steps to help you remove your wooden flooring without damaging the subfloor or the surrounding areas.

Starting The Removal

Before you start removing the wooden flooring, it is important to prepare the area. Remove all furniture, rugs, and other items from the room. Turn off any heating or cooling systems to prevent dust from spreading throughout the house.

Next, locate the starting point of the wooden flooring. This is usually the area closest to the door or the edge of the room. Use a pry bar and a hammer to remove the baseboards along the walls. This will give you more room to work and prevent damage to the walls.

Once the baseboards are removed, use a circular saw to cut the wooden flooring into manageable sections. Start at the edge of the room and work your way towards the middle. Make sure to wear safety goggles and a dust mask to protect yourself from sawdust and debris.

Handling Stubborn Areas

Some areas of the wooden flooring may be more difficult to remove than others. If you encounter a stubborn area, use a reciprocating saw with a metal-cutting blade to cut through the nails or staples holding the wooden flooring in place.

If the wooden flooring is glued down, use a floor scraper to remove the adhesive. Be careful not to damage the subfloor or the surrounding areas.

Once the wooden flooring is removed, use a vacuum or a broom to clean up any debris. Inspect the subfloor for damage and make any necessary repairs before installing new flooring.

By following these steps, you can remove your wooden flooring without damaging the subfloor or the surrounding areas. With a little patience and the right tools, you can successfully complete this DIY project and give your room a fresh new look.

Dealing With Leftover Adhesive

Removing wooden flooring can be a tedious task, but dealing with leftover adhesive can be even more challenging. Here are some tips on how to get rid of adhesive residue effectively:

1. Use Hot Water and Towels

One of the easiest ways to remove adhesive residue is by using hot water and towels. Soak some old towels in hot water and place them on the adhesive residue. Leave them there for a few minutes, then start scrubbing the residue off with a putty knife. Repeat the process until all the adhesive is gone.

2. Try a Commercial Adhesive Remover

If hot water and towels don’t work, you can try using a commercial adhesive remover. These products are specifically designed to dissolve adhesive residue. Be sure to follow the instructions on the label carefully and wear protective gloves and goggles.

3. Use Acetone

Acetone is another effective adhesive remover. Apply a small amount of acetone to a cloth or sponge and rub it onto the adhesive residue. Allow it to sit for a few minutes, then wipe it off with a clean cloth.

4. Sand the Residue Away

If all else fails, you can sand the adhesive residue away. Use a fine-grit sandpaper and be careful not to damage the surrounding area. This method should only be used as a last resort.

Remember to always test any adhesive remover or solvent on a small, inconspicuous area first to ensure it doesn’t damage the flooring. With a little patience and some elbow grease, you can successfully remove leftover adhesive and have a clean, smooth surface for your new flooring.

Repairing The Subfloor

If your wooden flooring has been damaged due to water or other reasons, it’s important to repair the subfloor before installing new flooring. Here are the steps to repair the subfloor:

  1. Remove the damaged section of the subfloor: Use a circular saw to cut out the damaged section of the subfloor. Make sure to cut along the joists so that you have a clean edge to work with.

  2. Assess the damage: Check the joists to make sure they are not damaged. If they are, you will need to repair or replace them before installing new subfloor.

  3. Cut a new piece of subfloor: Measure the size of the hole and cut a new piece of subfloor to fit. Make sure the new piece is the same thickness as the existing subfloor.

  4. Install the new subfloor: Apply construction adhesive to the joists and place the new subfloor in the hole. Use screws to secure the subfloor to the joists.

  5. Sand the edges: Sand the edges of the new subfloor so that they are level with the existing subfloor.

  6. Install the new flooring: Once the subfloor is repaired, you can install the new flooring. Make sure to follow the manufacturer’s instructions for installation.

By following these steps, you can repair the subfloor and install new flooring that will look great and last for years to come.

Disposing Of Old Wooden Flooring

Once you have removed your old wooden flooring, it’s important to dispose of it properly. Here are some options for disposing of your old wooden flooring:

Recycling

Wooden flooring can be recycled and repurposed for other projects. Check with your local recycling center or waste management facility to see if they accept wooden flooring for recycling. Some facilities may require the wood to be separated from other construction debris, so be sure to follow their guidelines.

Landfill

If recycling is not an option, you can dispose of your old wooden flooring in a landfill. However, be aware that this is not the most eco-friendly option. Wooden flooring takes a long time to decompose in a landfill and can release harmful chemicals into the environment as it breaks down.

Repurposing

If your old wooden flooring is still in good condition, consider repurposing it for other projects. You can use the wood to create furniture, accent walls, or even artwork. Get creative and see what you can come up with!

Donation

Another option for disposing of your old wooden flooring is to donate it to a local charity or non-profit organization. Many organizations accept building materials for use in their projects, and your old flooring could be just what they need.

No matter which option you choose, be sure to dispose of your old wooden flooring responsibly. By doing so, you can help reduce waste and protect the environment.