Tag Archives: tape measure

how-to-install-wooden-flooring-on-concrete-a-step-by-step-guide-2

How to Install Wooden Flooring on Concrete: A Step-by-Step Guide

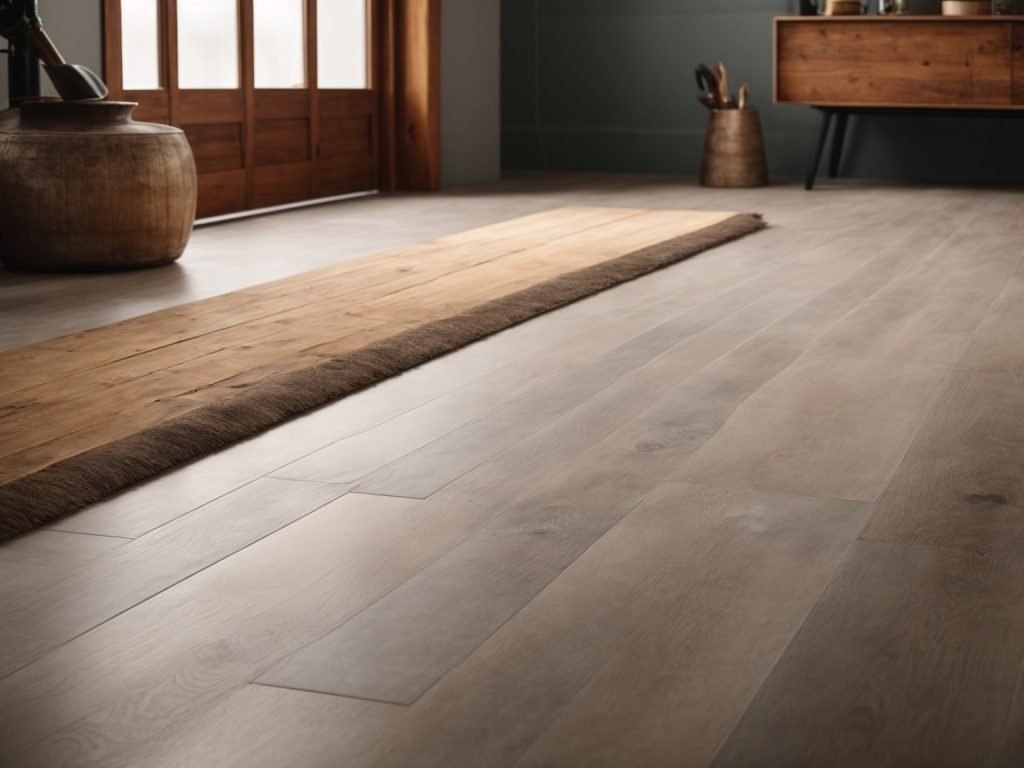
If you’re looking to install wooden flooring on a concrete surface, you may be wondering where to start. While it can be a bit more challenging than installing on a wood subfloor, it’s definitely possible. With the right tools, materials, and some patience, you can have beautiful wooden floors in your home in no time.

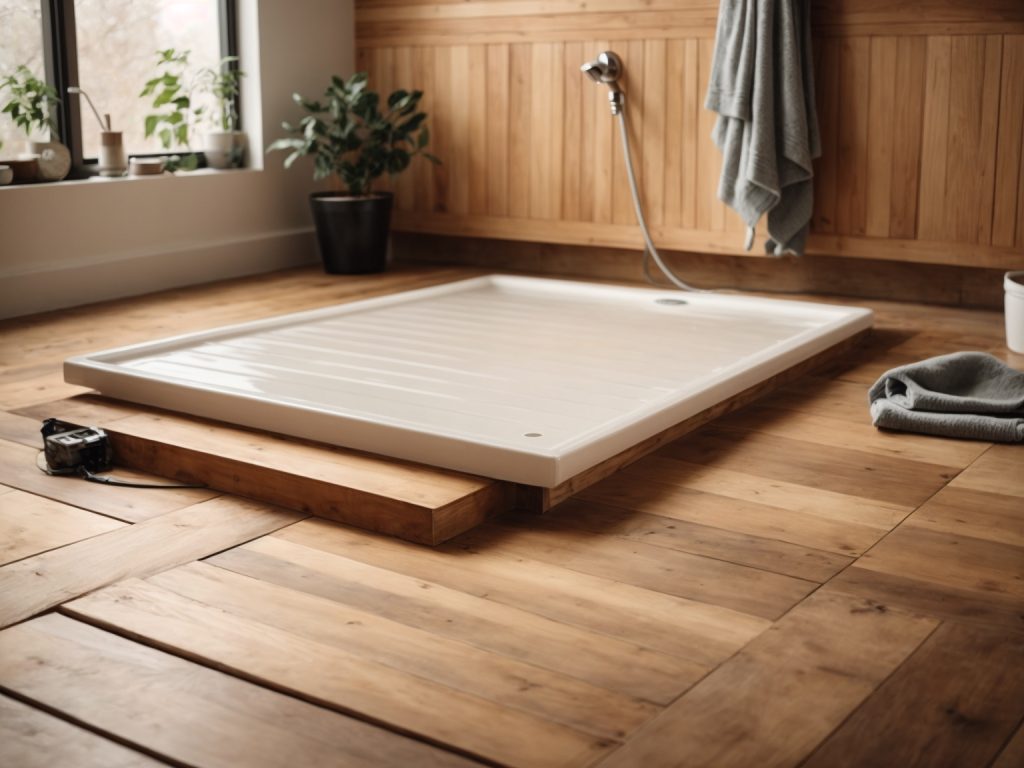
One of the first things you’ll need to do is prepare the concrete surface. This involves checking for moisture, ensuring the surface is level, and filling any cracks or holes. Once the surface is ready, you’ll need to install a moisture barrier to protect your wooden flooring from any moisture that may seep through the concrete. From there, you can lay down underlayment and start installing your wooden planks. It’s important to plan out your layout beforehand to ensure a seamless and professional-looking finish.

Overall, installing wooden flooring on concrete may require a bit more work than other surfaces, but it’s definitely worth it in the end. With the right preparation and installation techniques, you can transform your space and add value to your home.

Understanding the Basics of Wooden Flooring

how-to-install-wooden-flooring-on-concrete-a-step-by-step-guide-2

Wooden flooring is an excellent way to add warmth, beauty, and value to your home. If you’re looking to install wooden flooring on concrete, there are a few things you need to know. In this section, we’ll cover the basics of wooden flooring, including the types of wooden flooring and the benefits of installing wooden flooring on concrete.

Types of Wooden Flooring

There are three basic types of wooden flooring: solid hardwood, engineered hardwood, and laminate. Each type has its own unique characteristics and advantages.

  • Solid hardwood flooring is made from a single piece of wood and is the most traditional type of wooden flooring. It is durable, long-lasting, and can be sanded and refinished multiple times. However, it is susceptible to moisture damage and can be expensive.
  • Engineered hardwood flooring is made from multiple layers of wood and is more stable than solid hardwood flooring. It is also less expensive and can be installed over concrete. However, it cannot be sanded and refinished as many times as solid hardwood flooring.
  • Laminate flooring is made from a high-density fiberboard core with a photographic layer that mimics the look of wood. It is less expensive than both solid and engineered hardwood flooring and is easy to install. However, it cannot be sanded or refinished and is not as durable as hardwood flooring.

Benefits of Wooden Flooring on Concrete

benefits-of-wooden-flooring-on-concrete

Installing wooden flooring on concrete has several benefits, including:

  • Improved aesthetics: Wooden flooring adds warmth and beauty to any space.
  • Increased home value: Wooden flooring is a desirable feature that can increase the value of your home.
  • Durability: Wooden flooring is durable and long-lasting, especially if you choose solid hardwood flooring.
  • Easy maintenance: Wooden flooring is easy to clean and maintain, making it a practical choice for busy households.
  • Improved indoor air quality: Wooden flooring does not trap dust and allergens like carpet, improving indoor air quality.

In summary, wooden flooring is an excellent choice for adding beauty, value, and durability to your home. When installed on concrete, it can provide a stable and long-lasting flooring solution.

Preparation Before Installation

Before you start installing wooden flooring on concrete, you need to prepare the surface properly. This will ensure that the flooring is installed correctly and will last for a long time. In this section, we will discuss the tools and materials you need and how to prepare the concrete surface.

Tools and Materials Needed

To prepare the concrete surface, you will need the following tools and materials:

  • Vacuum cleaner
  • Broom
  • Dustpan
  • Damp mop
  • Moisture barrier
  • Underlayment
  • Tape measure
  • Chalk line
  • Circular saw
  • Jigsaw
  • Hammer
  • Pry bar
  • Long level
  • Carpenter’s square
  • Trowel
  • Wood flooring adhesive
  • Wood flooring nails
  • Wood flooring screws
  • Wood flooring planks

Make sure you have all these tools and materials before you start the installation.

Preparing the Concrete Surface

The first step in preparing the concrete surface is to clean it thoroughly. Use a vacuum cleaner, broom, and dustpan to remove any dirt, debris, and dust. Then, damp mop the surface to remove any remaining dirt and dust.

Next, you need to check the moisture level of the concrete. If the moisture level is high, you need to install a moisture barrier. This will prevent moisture from seeping into the wood and causing damage.

After installing the moisture barrier, you need to install the underlayment. This will provide a smooth surface for the wood flooring to be installed on. Use a tape measure and chalk line to mark the layout of the underlayment.

Once the underlayment is installed, you need to check the level of the concrete surface. Use a long level and carpenter’s square to ensure that the surface is level. If it is not, you need to use a self-leveling compound to even it out.

Finally, you need to let the surface dry completely before installing the wood flooring. Follow the manufacturer’s instructions for drying time. Once the surface is dry, you can start installing the wood flooring.

By properly preparing the concrete surface, you can ensure that your wooden flooring will be installed correctly and will last for a long time.

Installing the Wooden Flooring

Installing wooden flooring over concrete can be challenging, but with the right tools and techniques, you can achieve a beautiful and durable result. In this section, we will guide you through the process step-by-step, from laying the moisture barrier to laying the wooden planks.

Laying the Moisture Barrier

Before you start laying the wooden planks, it is essential to lay a moisture barrier to prevent moisture from penetrating the wood. Here are the steps to follow:

  1. Clean the concrete surface thoroughly to remove any dirt or debris.
  2. Roll out the moisture barrier over the entire surface of the concrete, making sure to overlap the seams by at least 6 inches.
  3. Cut the moisture barrier to fit the room’s dimensions, leaving a 2-inch gap around the perimeter of the room.
  4. Tape the seams of the moisture barrier with waterproof tape to ensure a tight seal.

Spreading the Adhesive

Once the moisture barrier is in place, it’s time to spread the adhesive. Here’s how to do it:

  1. Apply a layer of adhesive to a small section of the concrete surface using a trowel.
  2. Use a notched trowel to spread the adhesive evenly over the surface, making sure to cover the entire area.
  3. Lay the wooden planks onto the adhesive, making sure to leave a 1/2 inch gap around the perimeter of the room.
  4. Repeat the process, working in small sections until the entire floor is covered.

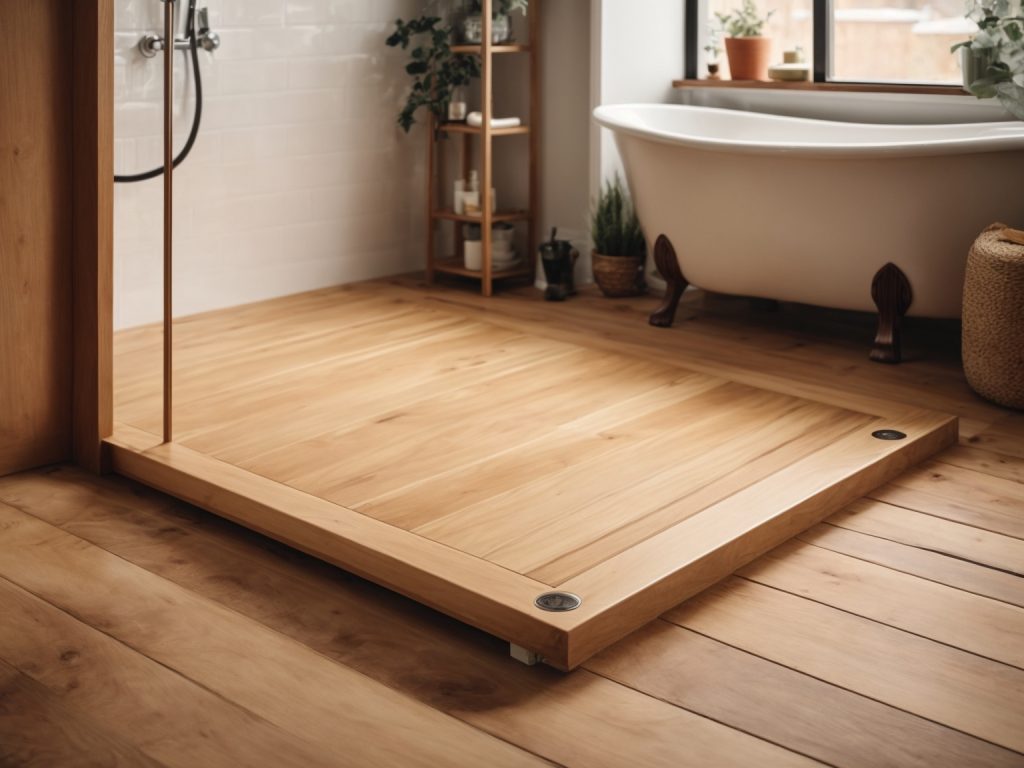
Laying the Wooden Planks

Now that the adhesive is in place, it’s time to lay the wooden planks. Here’s how to do it:

  1. Start laying the wooden planks along the longest wall, making sure to leave a 1/2 inch gap around the perimeter of the room.
  2. Use a rubber mallet to tap the wooden planks into place, making sure they are snug against each other.
  3. Continue laying the wooden planks row by row, making sure to stagger the joints to create a random pattern.
  4. Use a saw to cut the wooden planks to fit the edges of the room.

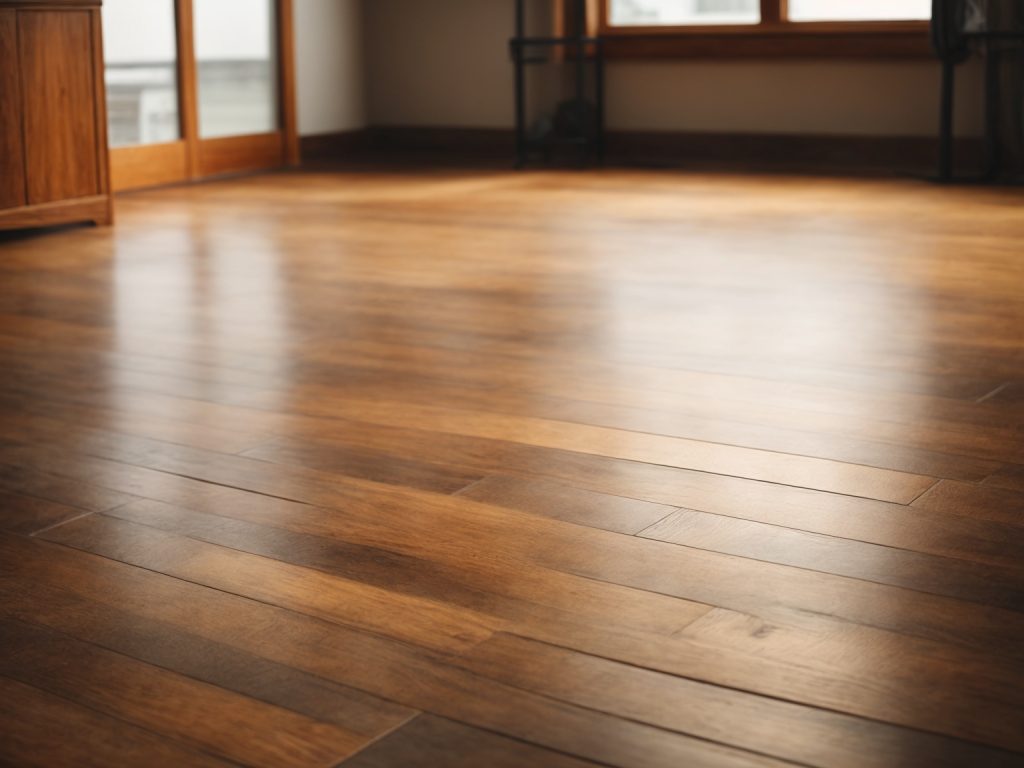
By following these steps, you can install wooden flooring over concrete and enjoy a beautiful and durable result.

Post-Installation Care

Congratulations! You have successfully installed your wooden flooring on concrete. Now, it’s time to take care of your new investment to ensure it lasts for years to come. Here are some tips for post-installation care:

Cleaning and Maintenance

Regular cleaning and maintenance will keep your wooden flooring looking its best. Here are some tips:

  • Sweep or vacuum your floors regularly to remove dirt and debris.
  • Use a damp mop and a mild cleaner to clean your floors. Avoid using harsh chemicals or abrasive cleaners that can damage the finish.
  • Wipe up spills immediately to prevent staining.
  • Use furniture pads to prevent scratches and dents from furniture.

Preventing Damage

Preventing damage is key to maintaining the durability and longevity of your wooden flooring. Here are some tips:

  • Place doormats at entryways to prevent dirt and debris from being tracked onto your floors.
  • Avoid wearing high heels or shoes with cleats on your wooden flooring, as they can cause scratches and dents.
  • Keep your floors dry and avoid exposing them to excessive moisture, as this can cause warping and damage.
  • Use area rugs in high traffic areas to protect your floors from wear and tear.

By following these simple tips, you can keep your wooden flooring looking beautiful for years to come.

how-to-install-a-shower-base-on-a-wooden-floor-a-step-by-step-guide-2

How to Install a Shower Base on a Wooden Floor: A Step-by-Step Guide

Installing a shower base on a wooden floor can be a challenging task, but with the right tools and guidance, it can be done with ease. The first step is to ensure that the wooden floor is strong enough to support the weight of the shower base and the person using it. If the floor is not strong enough, it may need to be reinforced before proceeding with the installation.

Once you have confirmed that the floor is sturdy enough, the next step is to prepare the floor for the shower base. This involves tracing and cutting the floorboards precisely where the shower base will be placed. It’s important to be careful not to cut into the floor joists below. After cutting the floorboards, you may need to make additional adjustments to ensure that the shower base fits snugly and securely on the floor.

Installing a shower base on a wooden floor can be a DIY project, but it’s important to follow the correct steps to ensure a safe and successful installation. In this article, we will provide a step-by-step guide on how to install a shower base on a wooden floor. We will cover everything from preparing the floor to installing the shower base and plumbing. With our guidance, you’ll be able to install a shower base on a wooden floor with confidence.

Understanding Shower Bases

When it comes to installing a shower on a wooden floor, one of the most critical components is the shower base. A shower base is a waterproof barrier that sits on the floor and provides a solid foundation for the shower.

There are several types of shower bases available on the market, including fiberglass, acrylic, and cast iron. Each material has its own pros and cons, so it’s essential to choose the right one for your needs.

Here are some things to consider when selecting a shower base:

  • Size: The size of the shower base should be appropriate for the size of your shower. A larger shower base will require more support, which can be challenging to achieve on a wooden floor.
  • Shape: Shower bases come in various shapes, including rectangular, square, and round. Choose a shape that fits your bathroom layout and personal preference.
  • Material: As mentioned earlier, there are different materials to choose from, each with its own advantages and disadvantages. Fiberglass is lightweight and easy to install, while cast iron is durable but heavy.
  • Drain Location: The location of the drain is critical when installing a shower base. Make sure the shower base you select has a drain location that matches your plumbing setup.

Once you have selected the right shower base, it’s time to prepare the wooden floor for installation. The next section will discuss the necessary steps to take to ensure a sturdy and waterproof foundation for your shower base.

Choosing the Right Shower Base for Wooden Floor

how-to-install-a-shower-base-on-a-wooden-floor-a-step-by-step-guide-2

When it comes to installing a shower base on a wooden floor, it is important to choose the right type of shower base to ensure that it is compatible with the wooden floor. There are several types of shower bases available in the market, and each one has its own advantages and disadvantages. Here are some factors to consider when choosing the right shower base for a wooden floor:

Material

The first factor to consider when choosing a shower base is the material it is made of. The most common materials used for shower bases are acrylic, fiberglass, and tile. Acrylic and fiberglass shower bases are lightweight and easy to install, making them a popular choice for wooden floors. Tile shower bases, on the other hand, are more durable and can be customized to match the bathroom decor.

Size

The size of the shower base is another important factor to consider. The size of the shower base should be based on the size of the bathroom and the number of people who will be using it. A larger shower base may be necessary for a family bathroom, while a smaller base may be suitable for a guest bathroom.

Drain Location

The drain location is another important factor to consider when choosing a shower base. The drain should be located in a position that is easy to access and does not interfere with the wooden floor. It is important to choose a shower base that has a drain location that is compatible with the wooden floor.

Installation Method

The installation method is another important factor to consider when choosing a shower base. Some shower bases are designed to be installed directly onto the wooden floor, while others require a mortar base. It is important to choose a shower base that is compatible with the installation method that is being used.

In conclusion, choosing the right shower base for a wooden floor is important to ensure that it is compatible with the wooden floor and provides a comfortable and safe showering experience. Consider the material, size, drain location, and installation method when choosing a shower base for a wooden floor.

Tools and Materials Needed

Before you start installing a shower base on a wooden floor, you need to make sure you have all the necessary tools and materials. Here is a list of the items you will need:

Tools

  • Circular saw
  • Corded drill
  • Framing square
  • Hammer
  • Hole saw kit
  • Jigsaw
  • Knee pads
  • Level
  • Miter saw
  • Nut driver
  • Pipe wrench
  • Reciprocating saw
  • Safety glasses
  • Slip joint pliers
  • Soldering torch
  • Tape measure
  • Trowel
  • Tube cutter
  • Utility knife
  • 4-in-1 screwdriver
  • Adjustable wrench

Materials

  • Shower base
  • Wooden floor
  • Drainage pipes
  • Screws
  • Adhesive
  • Glue or sealant
  • Silicone

Make sure you have all the necessary tools and materials before starting the installation process. It is important to have the right tools to ensure a smooth and efficient installation process. A circular saw and corded drill will be needed to cut and drill holes in the wooden floor. A framing square will help ensure that the shower base is installed at the correct angle. A level will be used to ensure that the shower base is level and stable.

You will also need various other tools such as a hammer, hole saw kit, jigsaw, knee pads, miter saw, nut driver, pipe wrench, reciprocating saw, safety glasses, slip joint pliers, soldering torch, tape measure, trowel, tube cutter, utility knife, 4-in-1 screwdriver, and adjustable wrench.

In addition to the tools, you will need several materials such as a shower base, wooden floor, drainage pipes, screws, adhesive, glue or sealant, and silicone. The shower base is the foundation of the shower and should be chosen based on your specific needs and preferences. The wooden floor should be sturdy, level, and free from any damage. Drainage pipes are required to connect the shower base to the plumbing system. Screws, adhesive, glue or sealant, and silicone are used to secure the shower base to the wooden floor and prevent any leaks.

Preparing the Wooden Floor

preparing-the-wooden-floor

Before installing a shower base on a wooden floor, it is important to properly prepare the surface. This will ensure that the shower base is level and securely installed, preventing any potential leaks or damage to the floor.

Here are the steps to prepare the wooden floor for the shower base installation:

  1. Clear the area: Remove any furniture or fixtures from the bathroom to create a clear workspace. This will make it easier to move around and work on the floor.
  2. Check the floor: Inspect the wooden floor for any damage or rot. If you find any issues, repair or replace the damaged areas before proceeding with the installation.
  3. Level the floor: Use a level to check if the floor is even. If there are any high or low spots, use a sander or chisel to level the floor. This will ensure that the shower base sits evenly on the floor.
  4. Clean the floor: Thoroughly clean the floor to remove any dirt, debris, or dust. This will ensure that the shower base adheres properly to the floor.
  5. Install a vapor barrier: Install a vapor barrier over the wooden floor to prevent moisture from seeping into the wood. This will help protect the wood from damage and prevent mold growth.

By properly preparing the wooden floor before installing the shower base, you can ensure a secure and leak-free installation. Taking the time to properly prepare the surface will save you time and money in the long run by preventing any potential damage or repairs.

Installing the Shower Base

Before you start installing the shower base, make sure that the wooden floor is level and sturdy. Here are the steps to follow when installing a shower base on a wooden floor:

Positioning the Base

  1. Place the shower base on the wooden floor where you want it to be installed.
  2. Use a level to ensure that the base is level in all directions.
  3. Mark the location of the drain hole on the floor.
  4. Remove the shower base from the floor.

Securing the Base

  1. Apply a generous amount of adhesive to the bottom of the shower base.
  2. Place the shower base back onto the wooden floor in the same position as before.
  3. Press down on the base to ensure that it is firmly attached to the floor.
  4. Use screws to secure the base to the wooden floor. Make sure to screw in the corners and around the perimeter of the base.
  5. Check again with a level to ensure that the base is still level.

Sealing the Base

  1. Apply a layer of silicone caulk around the perimeter of the shower base where it meets the floor.
  2. Smooth out the caulk with a caulk smoothing tool or your finger.
  3. Apply a second layer of caulk around the drain hole.
  4. Install the drain assembly according to the manufacturer’s instructions.
  5. Allow the caulk to dry completely before using the shower.

By following these steps, you can install a shower base on a wooden floor with ease. Remember to always follow the manufacturer’s instructions and use the appropriate tools and materials for the job.

Final Checks

Before you start using your newly installed shower base, there are a few final checks that you should perform to ensure that everything is in good working order. Here are some things to keep in mind:

Check for Leaks

The first thing you should do is check for leaks. Turn on the water and let it run for a few minutes. Check around the base of the shower to see if there are any signs of water leaking out. If you do notice any leaks, you will need to take the necessary steps to fix them before you can start using your shower.

Check the Drain

Next, you should check the drain to make sure it is working properly. Pour some water down the drain and watch to see how quickly it drains away. If the water is slow to drain, you may need to clear out any debris that is blocking the drain.

Check the Level

Finally, you should check to make sure that the shower base is level. Use a spirit level to check the base in both directions. If it is not level, you may need to adjust the base to ensure that it is properly aligned.

By performing these final checks, you can ensure that your shower base is installed correctly and is ready for use. If you do notice any issues, be sure to address them promptly to avoid any further problems down the line.

Maintenance Tips

Congratulations! You have successfully installed a shower base on a wooden floor. Now, you need to take good care of it to ensure it lasts for a long time. Here are some maintenance tips to keep in mind:

  • Clean the shower base regularly: You should clean your shower base regularly to prevent the buildup of soap scum, mold, and mildew. Use a non-abrasive cleaner and a soft cloth or sponge to clean the base.
  • Keep the shower base dry: After taking a shower, make sure to wipe down the shower base with a towel. This will prevent water from pooling and causing damage to the wood underneath.
  • Check for leaks: Check the shower base regularly for leaks. If you notice any water dripping or pooling around the base, you may have a leak. Fix it as soon as possible to prevent further damage.
  • Avoid using abrasive cleaners: Avoid using abrasive cleaners, such as bleach or ammonia, on your shower base. These cleaners can damage the finish and cause discoloration.
  • Use a shower mat: To prevent slips and falls, use a non-slip shower mat in your shower. This will also help protect your shower base from scratches and damage.

By following these maintenance tips, you can keep your shower base in great condition for years to come.

planning-your-wooden-trellis

How to Build a Wooden Trellis: A Step-by-Step Guide

Looking to add some height and interest to your garden? A wooden trellis is a great way to support climbing plants and create a beautiful focal point in your outdoor space. With a few basic tools and materials, building a wooden trellis can be a fun and rewarding DIY project.

When it comes to building a wooden trellis, there are a variety of designs and styles to choose from. Some trellises are designed to stand alone, while others can be attached to a wall or fence. You can also choose from a range of materials, including cedar, pine, and redwood, depending on your budget and desired aesthetic. Whether you’re a seasoned woodworker or a beginner, building a wooden trellis is a project that can be customized to fit your skill level and design preferences.

In this article, we’ll walk you through the steps to build a basic wooden trellis, as well as provide some inspiration for more advanced designs. From choosing the right materials to adding decorative touches, we’ll cover everything you need to know to create a beautiful and functional trellis for your garden. So grab your tools and let’s get started!

Understanding the Basic Design of a Wooden Trellis

how-to-build-a-wooden-trellis-a-step-by-step-guide-2

If you’re looking to add a touch of elegance to your garden or outdoor space, a wooden trellis is a perfect addition. Not only do they provide a beautiful aesthetic, but they also serve a functional purpose as support for climbing plants. In this section, we’ll go over the basic design of a wooden trellis, including the types of wooden trellis and key components.

Types of Wooden Trellis

There are several types of wooden trellises that you can choose from depending on your preference and the plants you are looking to support. Here are a few common types:

  • Lattice trellis: This type of trellis features a crisscross pattern and is perfect for climbing plants like ivy or roses.
  • Fan trellis: This trellis has a fan-like shape and is ideal for training climbing plants against a wall or fence.
  • Obelisk trellis: This trellis is a tall, pyramid-shaped structure that is perfect for supporting climbing plants like clematis or morning glory.

Key Components of a Wooden Trellis

Regardless of the type of wooden trellis you choose, there are some key components that all trellises should have. Here are the basic components of a wooden trellis:

  • Frame: The frame is the backbone of the trellis and provides the structure that supports the climbing plants. The frame can be made from a variety of materials, but wood is the most common.
  • Lattice: The lattice is the crisscross pattern that provides the climbing plants with support. The lattice can be made from wood or other materials like wire or plastic.
  • Posts: The posts are the vertical supports that hold the trellis in place. The number of posts you need will depend on the size of your trellis and the weight of the climbing plants you plan to support.
  • Crosspieces: Crosspieces are horizontal pieces of wood that connect the posts and provide additional support for the lattice.

By understanding the basic design of a wooden trellis, you can create a beautiful and functional addition to your outdoor space. Whether you choose a lattice, fan, or obelisk trellis, make sure to include all of the key components for a sturdy and reliable structure.

Choosing the Right Materials

When building a wooden trellis, choosing the right materials is crucial to ensure the longevity of your structure. In this section, we’ll discuss the types of wood you can use and the essential tools and equipment you’ll need.

Types of Wood

When selecting wood for your trellis, it’s important to choose a type of wood that is resistant to rot and decay. Cedar and redwood are excellent options due to their natural resistance to water and insects. Pine and spruce are also good choices, but they will need to be treated with a wood preservative to prevent rotting.

Here’s a breakdown of the different types of wood you can use for your trellis:

Wood Type Pros Cons
Cedar Naturally resistant to water and insects, lightweight, easy to work with Expensive
Redwood Naturally resistant to water and insects, durable, attractive Expensive
Pine Affordable, widely available, easy to work with Prone to rotting and decay
Spruce Affordable, widely available, easy to work with Prone to rotting and decay

Essential Tools and Equipment

To build a wooden trellis, you’ll need a few essential tools and equipment. Here’s a list of what you’ll need:

  • Circular saw or handsaw
  • Drill
  • Screwdriver
  • Wood screws
  • Wood glue
  • Clamps
  • Tape measure
  • Pencil
  • Safety goggles
  • Work gloves

It’s important to wear safety goggles and work gloves when working with wood to protect your eyes and hands. Clamps are also helpful to hold pieces of wood in place while you drill and screw them together.

In summary, when building a wooden trellis, it’s important to choose a type of wood that is resistant to rot and decay, such as cedar or redwood. You’ll also need essential tools and equipment, including a circular saw or handsaw, drill, screwdriver, wood screws, wood glue, clamps, tape measure, pencil, safety goggles, and work gloves.

Planning Your Wooden Trellis

planning-your-wooden-trellis

Before you start building your wooden trellis, it’s important to plan out the size and shape of the trellis. By doing so, you’ll be able to determine the amount of materials you’ll need and ensure that the finished product will fit your specific needs.

Deciding the Size and Shape

The first step in planning your wooden trellis is to decide the size and shape of the trellis. Consider the following factors:

  • The height and width of the plants you’ll be growing on the trellis
  • The amount of space you have available for the trellis
  • The desired aesthetic of the trellis

Once you have these factors in mind, you can begin to sketch out a rough design of the trellis. You can use graph paper or a computer program to create a blueprint of the trellis.

Creating a Blueprint

Creating a blueprint of your wooden trellis will help you visualize the finished product and ensure that you have all the materials you need before you start building. Here are some tips for creating a blueprint:

  • Start by drawing the outline of the trellis, including the height and width.
  • Determine the spacing of the slats or lattice work. This will depend on the size of the plants you’ll be growing on the trellis.
  • Decide on the type of wood you’ll be using for the trellis and calculate the amount of wood needed for the project.
  • Consider adding decorative elements to the trellis, such as finials or decorative cutouts.

Once you have a blueprint of your wooden trellis, you’re ready to start building. By taking the time to plan out your trellis, you’ll be able to create a beautiful and functional addition to your garden.

Building the Wooden Trellis

If you want to build a wooden trellis, you’ll need to prepare the wood, assemble the structure, and secure it in place. Here’s how to do it:

Preparing the Wood

Before you start building your trellis, you’ll need to prepare the wood. You can use any type of wood, but cedar and redwood are popular choices because they’re naturally resistant to rot and insects. Here’s what you’ll need to do:

  1. Measure and cut your wood to the desired length and width using a saw. Make sure your cuts are straight and accurate.
  2. Sand the edges of your wood to smooth out any rough spots or splinters.
  3. Apply a wood preservative or sealant to protect your wood from moisture and decay.

Assembling the Trellis

Once your wood is prepared, you can start assembling your trellis. Here’s how to do it:

  1. Lay out your pieces of wood on a flat surface. Arrange them in the shape of your trellis, making sure everything lines up evenly.
  2. Use wood screws or nails to attach your pieces of wood together. Make sure your screws or nails are long enough to penetrate both pieces of wood and hold them securely in place.
  3. Add any decorative elements, such as lattice or trim, to your trellis.

Securing the Structure

Now that your trellis is assembled, you’ll need to secure it in place. Here’s how to do it:

  1. Choose a location for your trellis. Make sure it’s in a spot that gets plenty of sunlight and is easily accessible.
  2. Dig two holes for your trellis posts. The holes should be deep enough to support the height of your trellis and wide enough to accommodate your post holders.
  3. Place your post holders in the holes and fill them with concrete. Make sure your post holders are level and secure.
  4. Slide your trellis posts into the post holders and secure them with screws or bolts.

And that’s it! Your wooden trellis is now ready to support your climbing plants and add a beautiful touch to your garden.

Maintaining Your Wooden Trellis

To ensure that your wooden trellis lasts for years to come, it’s important to perform regular maintenance. This includes inspecting your trellis for damage and cleaning it as needed. Here are some tips for maintaining your wooden trellis:

Regular Inspection

It’s important to inspect your wooden trellis regularly to catch any damage early on. This will help prevent further damage and prolong the life of your trellis. Here’s what to look for during your inspection:

  • Check for any signs of rot or decay in the wood.
  • Look for any loose or missing screws, bolts, or nails.
  • Check for any cracks or splits in the wood.
  • Look for any signs of insect damage, such as holes or sawdust.

If you notice any damage during your inspection, it’s important to address it as soon as possible to prevent further damage.

Cleaning and Repairs

Cleaning your wooden trellis will help remove dirt, grime, and other debris that can accumulate over time. Here’s how to clean your trellis:

  1. Use a soft-bristled brush to remove any loose dirt or debris.
  2. Mix a solution of mild soap and water.
  3. Dip a clean cloth or sponge into the solution and use it to gently scrub the trellis.
  4. Rinse the trellis thoroughly with clean water.
  5. Allow the trellis to dry completely before applying any treatments or making repairs.

If you notice any damage during your inspection, such as rot or cracks, it’s important to make repairs as soon as possible. Here’s how to make repairs to your wooden trellis:

  1. Use a wood filler to fill any cracks or splits in the wood.
  2. Sand the repaired area until it’s smooth and level with the surrounding wood.
  3. Apply a wood sealer or preservative to the repaired area to help protect it from further damage.

By performing regular maintenance on your wooden trellis, you can help ensure that it lasts for years to come.

Customizing Your Wooden Trellis

Once you’ve built your wooden trellis, you can customize it to fit your personal style and garden needs. Here are some ideas to get you started:

Painting and Finishing

One way to customize your trellis is by painting or staining it. This not only adds color and personality to your garden, but also helps protect the wood from weather and insects. Here are some tips for painting and finishing your trellis:

  • Choose an exterior-grade paint or stain that is safe for plants and animals.
  • Apply a primer before painting to help the paint adhere better and last longer.
  • Consider using a clear sealant to protect the wood and add shine.
  • Don’t forget to paint or stain the back of the trellis as well to ensure complete protection.

Adding Decorative Elements

Another way to customize your trellis is by adding decorative elements. This can be as simple as hanging a potted plant or as elaborate as attaching metal sculptures. Here are some ideas for adding decorative elements to your trellis:

  • Hang string lights or lanterns to create a cozy atmosphere in your garden.
  • Attach small shelves or hooks to hold plants, tools, or other decorations.
  • Use decorative brackets or corbels to add a touch of elegance to your trellis.
  • Install a mirror or stained glass panel to reflect light and add interest.

Remember, the possibilities are endless when it comes to customizing your wooden trellis. Get creative and have fun!

build-a-wooden-pond-frame

How to Build a Wooden Pond Frame: Step-by-Step Guide for Beginners

Are you interested in adding a beautiful pond to your backyard? Building a wooden pond frame is a great way to create a stunning water feature that will enhance the look of your outdoor space. With a little bit of planning and effort, you can create a pond that is both functional and aesthetically pleasing.

One of the first things you’ll need to consider when building a wooden pond frame is the size and shape of your pond. Think about the space you have available, as well as the type of fish or plants you want to include in your pond. You’ll also need to decide on the depth of your pond, as this will impact the type of liner and pump you’ll need to use. Once you have a clear idea of what you want your pond to look like, you can begin gathering the materials you’ll need to build your wooden frame.

Understanding the Basics of a Wooden Pond Frame

build-a-wooden-pond-frame

If you’re planning to build a pond in your backyard, a wooden frame is a great option to consider. A wooden pond frame offers a natural look that blends well with the surroundings, and it’s also relatively easy to build. Here are some basics you need to understand before building a wooden pond frame:

Choosing the Right Wood

The first step in building a wooden pond frame is choosing the right wood. You need to choose a wood that is resistant to rot and decay, as it will be exposed to water and moisture. Cedar and redwood are popular choices for wooden pond frames, as they are naturally resistant to rot and decay.

Determining the Size and Shape

The size and shape of your pond frame will depend on the size and shape of your pond. You need to determine the size and shape of your pond before building the frame. You can use a garden hose or spray paint to mark the outline of your pond. Once you have determined the size and shape, you can start building the frame.

Building the Frame

Building a wooden pond frame is relatively easy. You need to start by building the base of the frame, which will support the weight of the pond. You can use pressure-treated lumber for the base, as it is resistant to rot and decay. Once you have built the base, you can start building the walls of the frame. You can use regular lumber for the walls, but make sure to seal it properly to prevent rot and decay.

Installing the Liner

After building the frame, you need to install the liner. A pond liner is a flexible material that is used to hold water in the pond. You can use a rubber liner or a PVC liner for your pond. Make sure to install the liner properly to prevent leaks.

Adding the Finishing Touches

Once you have installed the liner, you can add the finishing touches to your pond. You can add rocks, plants, and other decorations to make your pond look more natural. You can also install a pump and filter to keep the water clean and clear.

Building a wooden pond frame is a fun and rewarding project that can add beauty and serenity to your backyard. With the right tools and materials, you can build a pond that will provide years of enjoyment.

Choosing the Right Wood

When building a wooden frame for your pond, choosing the right type of wood is crucial. You want to choose a wood that is durable, resistant to rot, and can withstand exposure to water. Here are some options to consider:

Cedar

Cedar is a popular choice for building pond frames because it is naturally resistant to decay and rot. It also has a pleasant aroma and is known for its beautiful reddish-brown color. Cedar is a bit more expensive than other types of wood, but it is worth the investment for its durability and aesthetic appeal.

Pressure-Treated Pine

Pressure-treated pine is another popular choice for building pond frames. It is treated with chemicals that make it resistant to decay, insects, and rot. Pressure-treated pine is less expensive than cedar, but it is important to note that the chemicals used in the treatment process can be harmful to fish and other aquatic life. Be sure to use a pond liner to protect your fish from any potential harm.

Redwood

Redwood is a durable and attractive wood that is naturally resistant to decay and insects. It has a rich, reddish color and is often used for outdoor furniture and decks. Redwood is more expensive than pine, but it is a good choice if you want a wood that is both durable and visually appealing.

Other Options

Other woods that can be used for building pond frames include cypress, oak, and teak. These woods are all durable and resistant to decay, but they can be more expensive than other options.

When choosing the right wood for your pond frame, consider your budget, the durability of the wood, and any potential harm to aquatic life. With the right wood and proper construction, your pond frame will provide a beautiful and functional addition to your backyard oasis.

Designing Your Pond Frame

Before you start building your wooden pond frame, you need to design it. This is an essential step that will ensure that your pond is safe, functional, and aesthetically pleasing. Here are some things to consider when designing your pond frame:

Size and Shape

The first thing to consider when designing your pond frame is the size and shape of your pond. You need to decide how big you want your pond to be and what shape you want it to take. The size and shape of your pond will depend on the space available in your yard, the number of fish you want to keep, and your personal preferences.

Materials

The next thing to consider is the materials you will use to build your pond frame. Wood is a popular choice for building pond frames because it is durable, easy to work with, and looks great. However, you need to make sure that the wood you choose is suitable for outdoor use and can withstand exposure to water and other elements.

Depth

Another important factor to consider when designing your pond frame is the depth of your pond. The depth of your pond will depend on the type of fish you want to keep and the climate in your area. Generally, a depth of at least 2 feet is recommended for most fish species.

Filtration and Aeration

Finally, you need to consider how you will filter and aerate your pond. Filtration is important to keep the water clean and clear, while aeration is necessary to provide oxygen to your fish. You can use a variety of filtration and aeration systems, including pumps, filters, and air stones.

By considering these factors when designing your pond frame, you can ensure that your pond is safe, functional, and beautiful. Take your time and plan carefully to create a pond that you will enjoy for years to come.

Materials and Tools Needed

Essential Materials

Building a wooden pond frame requires certain materials to ensure its durability and safety for your aquatic life. Here are the essential materials you will need:

Materials Quantity
Pressure-treated lumber Depends on the size of the pond
Pond liner Depends on the size of the pond
Rebar stakes 8-10 pieces
Gravel Enough to cover the bottom of the pond
Screws Enough to secure the lumber

Pressure-treated lumber is recommended for building the frame as it is resistant to rot and insect damage. The pond liner will serve as a barrier between the wood and water, preventing the wood from rotting. Rebar stakes will be used to secure the frame to the ground, and gravel will provide a stable base for the pond liner. Screws will be used to join the lumber together.

Required Tools

To build a wooden pond frame, you will need the following tools:

  • Circular saw
  • Power drill
  • Level
  • Tape measure
  • Shovel
  • Wheelbarrow
  • Hammer
  • Rubber mallet
  • Utility knife
  • Safety glasses
  • Gloves

A circular saw will be used to cut the lumber to the appropriate size. A power drill will be used to make holes for the screws and to attach the rebar stakes. A level will ensure that the frame is even and balanced. A tape measure will be used to measure the dimensions of the frame and the pond liner. A shovel and wheelbarrow will be needed to move the gravel and soil. A hammer and rubber mallet will be used to secure the rebar stakes and adjust the frame. A utility knife will be used to trim the pond liner. Finally, safety glasses and gloves are recommended to protect yourself while working with the tools and materials.

Preparation Steps

Before you start building your wooden pond frame, there are a few preparation steps that you need to take. These steps will help ensure that your pond is safe for your fish and will last for years to come.

Site Preparation

The first step in preparing for your wooden pond frame is to choose the right location. You want to choose a location that is level and has good drainage. Avoid areas that are prone to flooding or have poor drainage.

Once you have chosen your location, you need to prepare the site. This involves removing any grass or vegetation from the area where your pond will be. You can use a shovel or a sod cutter to remove the grass.

After you have removed the grass, you need to level the area. You can use a rake or a shovel to level the area. Make sure that the area is level and smooth.

Wood Treatment

The next step in preparing for your wooden pond frame is to treat the wood. You want to use wood that is resistant to rot and decay. Cedar and redwood are good choices for building a wooden pond frame.

Before you start building your pond frame, you need to treat the wood with a wood preservative. This will help protect the wood from rot and decay. You can use a brush or a sprayer to apply the wood preservative.

Make sure that you apply the wood preservative to all sides of the wood, including the ends. You should also let the wood dry for at least 24 hours before you start building your pond frame.

By following these preparation steps, you can ensure that your wooden pond frame is safe and will last for years to come.

Building the Frame

building-the-frame

Building a wooden frame for your pond is a great way to create a sturdy and long-lasting structure that will keep your pond safe and secure. In this section, we will go over the steps involved in building a wooden pond frame, including the base construction, side construction, and top construction.

Base Construction

The first step in building a wooden pond frame is constructing the base. This is the foundation of your frame and should be built to last. Here are the steps involved in building the base:

  1. Measure the dimensions of your pond and add a few inches to each side to ensure that the frame will be large enough to support it.
  2. Cut four pieces of pressure-treated lumber to the length of your pond plus the additional inches you added in step 1.
  3. Lay the four pieces of lumber on a flat surface and attach them together at the corners using wood screws or nails.
  4. Use a level to ensure that the base is even and adjust as necessary.

Side Construction

Once the base is complete, you can move on to constructing the sides of the frame. This will provide support for the pond liner and prevent it from collapsing. Here are the steps involved in building the sides:

  1. Cut four pieces of pressure-treated lumber to the height of your desired frame.
  2. Attach the four pieces of lumber to the corners of the base using wood screws or nails.
  3. Use a level to ensure that the sides are even and adjust as necessary.

Top Construction

The final step in building the wooden pond frame is constructing the top. This will provide a sturdy surface for the pond liner to rest on. Here are the steps involved in building the top:

  1. Cut four pieces of pressure-treated lumber to the length of your pond plus the additional inches you added in step 1 of the base construction section.
  2. Attach the four pieces of lumber to the top of the side pieces using wood screws or nails.
  3. Use a level to ensure that the top is even and adjust as necessary.

Congratulations! You have now completed the construction of your wooden pond frame. With proper maintenance and care, your frame should last for many years to come.

Adding the Pond Liner

Now that you have built the wooden frame for your pond, it’s time to add the pond liner. Here are the steps to follow:

  1. Lay the Underlayment: Before adding the pond liner, it’s important to lay the underlayment first. This will help protect the liner from any sharp objects that may damage it. You can use sand, old carpet, or even newspapers as underlayment.
  2. Position the Pond Liner: Once the underlayment is in place, it’s time to position the pond liner. Carefully lay it over the underlayment and make sure it’s centered over the pond.
  3. Stretch the Pond Liner: Once the pond liner is in place, it’s important to stretch it evenly. This will help prevent any wrinkles or folds that may trap debris or cause leaks. You can use rocks or other heavy objects to hold the liner in place as you stretch it.
  4. Secure the Pond Liner: When the pond liner is stretched evenly, it’s time to secure it to the wooden frame. You can use adhesive to attach the liner to the wood. However, it’s important to note that pond liner materials like RPE and RPP are hard to adhere securely to wood with adhesive alone. To attach your pond liner to wood, you can also use screws or nails.
  5. Trim the Excess Liner: Once the pond liner is secured in place, it’s time to trim the excess liner. Use a sharp pair of scissors or a utility knife to carefully trim the excess liner around the edges of the pond.

By following these steps, you can successfully add the pond liner to your wooden pond frame. With the liner in place, you can now add water to your pond and start enjoying your new backyard oasis!

Maintaining Your Wooden Pond Frame

Building a wooden pond frame can be a great addition to your backyard, but it’s important to keep it well-maintained to ensure its longevity. Here are some tips on how to maintain your wooden pond frame:

Regular Cleaning

One of the most important things you can do to maintain your wooden pond frame is to keep it clean. Regularly remove any debris or leaves that fall into the pond, as they can cause blockages and damage to your pump. Use a skimmer net to remove debris from the surface of the water, and a pond vacuum to clean the bottom of the pond.

Check for Leaks

It’s important to check your pond for leaks regularly. Look for any signs of water loss, such as a drop in water level, wet areas around the pond, or visible cracks. If you find a leak, it’s important to repair it as soon as possible to prevent further damage. You can use a pond sealant to fix small leaks, but larger leaks may require professional help.

Maintain Water Quality

Maintaining good water quality is essential for the health of your fish and plants. Test the water regularly to ensure that the pH balance is correct and that the water is not too acidic or alkaline. You should also add beneficial bacteria to the pond to help break down organic matter and keep the water clean.

Protect Your Pond from Wildlife

Wildlife such as raccoons and herons can cause damage to your pond and harm your fish. To protect your pond, install a net over the top to prevent wildlife from accessing it. You can also add floating plants to provide cover for your fish and discourage predators.

By following these tips, you can keep your wooden pond frame in great condition and enjoy it for years to come.