Tag Archives: safety goggles

planning-your-wooden-trellis

How to Build a Wooden Trellis: A Step-by-Step Guide

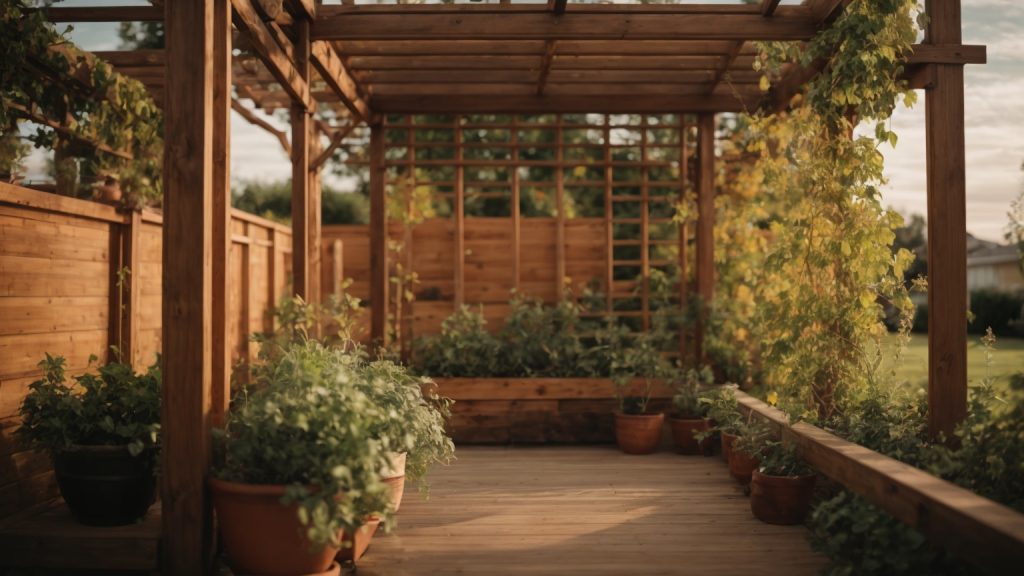
Looking to add some height and interest to your garden? A wooden trellis is a great way to support climbing plants and create a beautiful focal point in your outdoor space. With a few basic tools and materials, building a wooden trellis can be a fun and rewarding DIY project.

When it comes to building a wooden trellis, there are a variety of designs and styles to choose from. Some trellises are designed to stand alone, while others can be attached to a wall or fence. You can also choose from a range of materials, including cedar, pine, and redwood, depending on your budget and desired aesthetic. Whether you’re a seasoned woodworker or a beginner, building a wooden trellis is a project that can be customized to fit your skill level and design preferences.

In this article, we’ll walk you through the steps to build a basic wooden trellis, as well as provide some inspiration for more advanced designs. From choosing the right materials to adding decorative touches, we’ll cover everything you need to know to create a beautiful and functional trellis for your garden. So grab your tools and let’s get started!

Understanding the Basic Design of a Wooden Trellis

how-to-build-a-wooden-trellis-a-step-by-step-guide-2

If you’re looking to add a touch of elegance to your garden or outdoor space, a wooden trellis is a perfect addition. Not only do they provide a beautiful aesthetic, but they also serve a functional purpose as support for climbing plants. In this section, we’ll go over the basic design of a wooden trellis, including the types of wooden trellis and key components.

Types of Wooden Trellis

There are several types of wooden trellises that you can choose from depending on your preference and the plants you are looking to support. Here are a few common types:

  • Lattice trellis: This type of trellis features a crisscross pattern and is perfect for climbing plants like ivy or roses.
  • Fan trellis: This trellis has a fan-like shape and is ideal for training climbing plants against a wall or fence.
  • Obelisk trellis: This trellis is a tall, pyramid-shaped structure that is perfect for supporting climbing plants like clematis or morning glory.

Key Components of a Wooden Trellis

Regardless of the type of wooden trellis you choose, there are some key components that all trellises should have. Here are the basic components of a wooden trellis:

  • Frame: The frame is the backbone of the trellis and provides the structure that supports the climbing plants. The frame can be made from a variety of materials, but wood is the most common.
  • Lattice: The lattice is the crisscross pattern that provides the climbing plants with support. The lattice can be made from wood or other materials like wire or plastic.
  • Posts: The posts are the vertical supports that hold the trellis in place. The number of posts you need will depend on the size of your trellis and the weight of the climbing plants you plan to support.
  • Crosspieces: Crosspieces are horizontal pieces of wood that connect the posts and provide additional support for the lattice.

By understanding the basic design of a wooden trellis, you can create a beautiful and functional addition to your outdoor space. Whether you choose a lattice, fan, or obelisk trellis, make sure to include all of the key components for a sturdy and reliable structure.

Choosing the Right Materials

When building a wooden trellis, choosing the right materials is crucial to ensure the longevity of your structure. In this section, we’ll discuss the types of wood you can use and the essential tools and equipment you’ll need.

Types of Wood

When selecting wood for your trellis, it’s important to choose a type of wood that is resistant to rot and decay. Cedar and redwood are excellent options due to their natural resistance to water and insects. Pine and spruce are also good choices, but they will need to be treated with a wood preservative to prevent rotting.

Here’s a breakdown of the different types of wood you can use for your trellis:

Wood Type Pros Cons
Cedar Naturally resistant to water and insects, lightweight, easy to work with Expensive
Redwood Naturally resistant to water and insects, durable, attractive Expensive
Pine Affordable, widely available, easy to work with Prone to rotting and decay
Spruce Affordable, widely available, easy to work with Prone to rotting and decay

Essential Tools and Equipment

To build a wooden trellis, you’ll need a few essential tools and equipment. Here’s a list of what you’ll need:

  • Circular saw or handsaw
  • Drill
  • Screwdriver
  • Wood screws
  • Wood glue
  • Clamps
  • Tape measure
  • Pencil
  • Safety goggles
  • Work gloves

It’s important to wear safety goggles and work gloves when working with wood to protect your eyes and hands. Clamps are also helpful to hold pieces of wood in place while you drill and screw them together.

In summary, when building a wooden trellis, it’s important to choose a type of wood that is resistant to rot and decay, such as cedar or redwood. You’ll also need essential tools and equipment, including a circular saw or handsaw, drill, screwdriver, wood screws, wood glue, clamps, tape measure, pencil, safety goggles, and work gloves.

Planning Your Wooden Trellis

planning-your-wooden-trellis

Before you start building your wooden trellis, it’s important to plan out the size and shape of the trellis. By doing so, you’ll be able to determine the amount of materials you’ll need and ensure that the finished product will fit your specific needs.

Deciding the Size and Shape

The first step in planning your wooden trellis is to decide the size and shape of the trellis. Consider the following factors:

  • The height and width of the plants you’ll be growing on the trellis
  • The amount of space you have available for the trellis
  • The desired aesthetic of the trellis

Once you have these factors in mind, you can begin to sketch out a rough design of the trellis. You can use graph paper or a computer program to create a blueprint of the trellis.

Creating a Blueprint

Creating a blueprint of your wooden trellis will help you visualize the finished product and ensure that you have all the materials you need before you start building. Here are some tips for creating a blueprint:

  • Start by drawing the outline of the trellis, including the height and width.
  • Determine the spacing of the slats or lattice work. This will depend on the size of the plants you’ll be growing on the trellis.
  • Decide on the type of wood you’ll be using for the trellis and calculate the amount of wood needed for the project.
  • Consider adding decorative elements to the trellis, such as finials or decorative cutouts.

Once you have a blueprint of your wooden trellis, you’re ready to start building. By taking the time to plan out your trellis, you’ll be able to create a beautiful and functional addition to your garden.

Building the Wooden Trellis

If you want to build a wooden trellis, you’ll need to prepare the wood, assemble the structure, and secure it in place. Here’s how to do it:

Preparing the Wood

Before you start building your trellis, you’ll need to prepare the wood. You can use any type of wood, but cedar and redwood are popular choices because they’re naturally resistant to rot and insects. Here’s what you’ll need to do:

  1. Measure and cut your wood to the desired length and width using a saw. Make sure your cuts are straight and accurate.
  2. Sand the edges of your wood to smooth out any rough spots or splinters.
  3. Apply a wood preservative or sealant to protect your wood from moisture and decay.

Assembling the Trellis

Once your wood is prepared, you can start assembling your trellis. Here’s how to do it:

  1. Lay out your pieces of wood on a flat surface. Arrange them in the shape of your trellis, making sure everything lines up evenly.
  2. Use wood screws or nails to attach your pieces of wood together. Make sure your screws or nails are long enough to penetrate both pieces of wood and hold them securely in place.
  3. Add any decorative elements, such as lattice or trim, to your trellis.

Securing the Structure

Now that your trellis is assembled, you’ll need to secure it in place. Here’s how to do it:

  1. Choose a location for your trellis. Make sure it’s in a spot that gets plenty of sunlight and is easily accessible.
  2. Dig two holes for your trellis posts. The holes should be deep enough to support the height of your trellis and wide enough to accommodate your post holders.
  3. Place your post holders in the holes and fill them with concrete. Make sure your post holders are level and secure.
  4. Slide your trellis posts into the post holders and secure them with screws or bolts.

And that’s it! Your wooden trellis is now ready to support your climbing plants and add a beautiful touch to your garden.

Maintaining Your Wooden Trellis

To ensure that your wooden trellis lasts for years to come, it’s important to perform regular maintenance. This includes inspecting your trellis for damage and cleaning it as needed. Here are some tips for maintaining your wooden trellis:

Regular Inspection

It’s important to inspect your wooden trellis regularly to catch any damage early on. This will help prevent further damage and prolong the life of your trellis. Here’s what to look for during your inspection:

  • Check for any signs of rot or decay in the wood.
  • Look for any loose or missing screws, bolts, or nails.
  • Check for any cracks or splits in the wood.
  • Look for any signs of insect damage, such as holes or sawdust.

If you notice any damage during your inspection, it’s important to address it as soon as possible to prevent further damage.

Cleaning and Repairs

Cleaning your wooden trellis will help remove dirt, grime, and other debris that can accumulate over time. Here’s how to clean your trellis:

  1. Use a soft-bristled brush to remove any loose dirt or debris.
  2. Mix a solution of mild soap and water.
  3. Dip a clean cloth or sponge into the solution and use it to gently scrub the trellis.
  4. Rinse the trellis thoroughly with clean water.
  5. Allow the trellis to dry completely before applying any treatments or making repairs.

If you notice any damage during your inspection, such as rot or cracks, it’s important to make repairs as soon as possible. Here’s how to make repairs to your wooden trellis:

  1. Use a wood filler to fill any cracks or splits in the wood.
  2. Sand the repaired area until it’s smooth and level with the surrounding wood.
  3. Apply a wood sealer or preservative to the repaired area to help protect it from further damage.

By performing regular maintenance on your wooden trellis, you can help ensure that it lasts for years to come.

Customizing Your Wooden Trellis

Once you’ve built your wooden trellis, you can customize it to fit your personal style and garden needs. Here are some ideas to get you started:

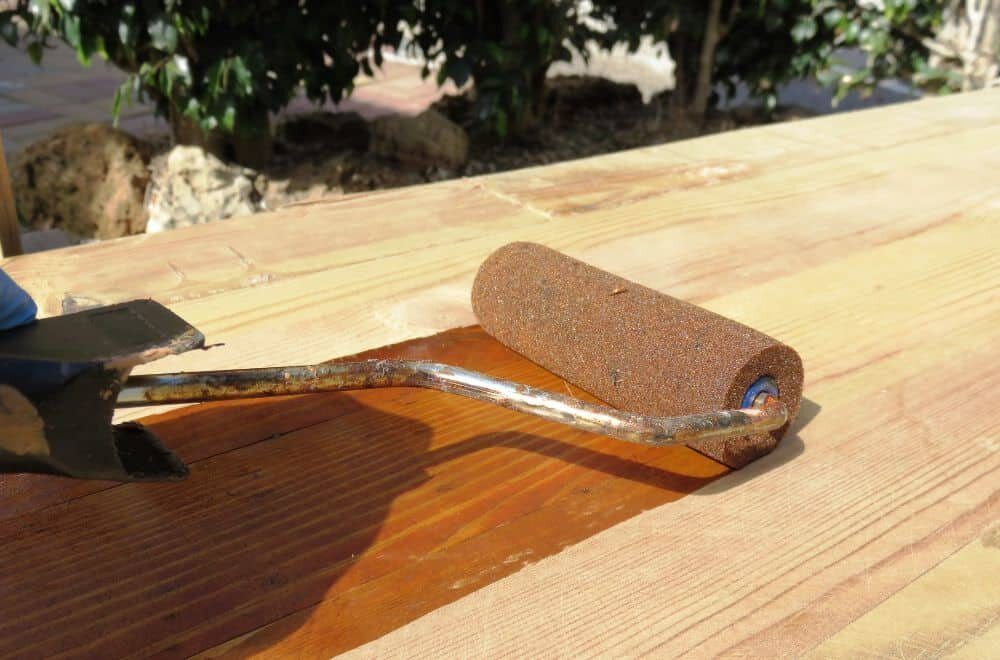
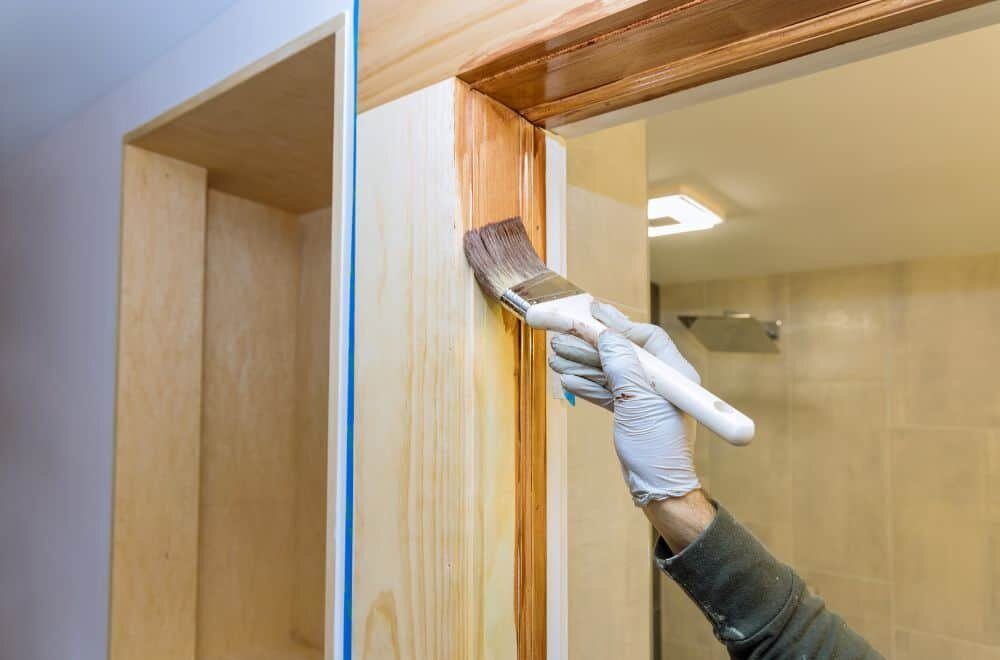
Painting and Finishing

One way to customize your trellis is by painting or staining it. This not only adds color and personality to your garden, but also helps protect the wood from weather and insects. Here are some tips for painting and finishing your trellis:

  • Choose an exterior-grade paint or stain that is safe for plants and animals.
  • Apply a primer before painting to help the paint adhere better and last longer.
  • Consider using a clear sealant to protect the wood and add shine.
  • Don’t forget to paint or stain the back of the trellis as well to ensure complete protection.

Adding Decorative Elements

Another way to customize your trellis is by adding decorative elements. This can be as simple as hanging a potted plant or as elaborate as attaching metal sculptures. Here are some ideas for adding decorative elements to your trellis:

  • Hang string lights or lanterns to create a cozy atmosphere in your garden.
  • Attach small shelves or hooks to hold plants, tools, or other decorations.
  • Use decorative brackets or corbels to add a touch of elegance to your trellis.
  • Install a mirror or stained glass panel to reflect light and add interest.

Remember, the possibilities are endless when it comes to customizing your wooden trellis. Get creative and have fun!

How to Make a Wooden Ice Chest Box: A Simple Guide

Are you looking for a fun and practical woodworking project? Making a wooden ice chest box might be just what you need! This project can be completed in a weekend and will provide you with a stylish and functional addition to your outdoor gatherings. With a few basic tools and some cedar fence pickets, you can create a custom ice chest that is perfect for keeping your drinks cold on a hot day.

To get started, gather your materials and tools. You will need cedar fence pickets, a saw, a drill, screws, a cooler, and some basic woodworking tools. Once you have everything you need, you can begin building your ice chest box. Start by making the frame for the box bottom, then attach the sides and lid. Be sure to add a drain spigot and bottle opener for added convenience.

When finished, your wooden ice chest box will be a great addition to any outdoor space. Not only will it keep your drinks cold, but it will also add a touch of rustic charm to your backyard gatherings. So why not give it a try and see what you can create?

Understanding the Basics of a Wooden Ice Chest Box

If you’re looking for a fun and practical DIY project, building a wooden ice chest box is a great option. Not only does it provide a stylish way to keep your drinks cold, but it can also be customized to fit your specific needs. However, before you get started, it’s important to understand the basics of what goes into building a wooden ice chest box.

Materials

First and foremost, you’ll need to gather the necessary materials. This will typically include:

  • Wood for the frame and lid
  • Insulation material
  • Screws or nails
  • Hinges and a latch for the lid
  • Handles for easy carrying

Construction

Once you have your materials, it’s time to start building. The basic construction of a wooden ice chest box involves creating a frame, adding insulation, and attaching a lid. Here’s a basic overview of the steps involved:

  1. Cut your wood to the appropriate sizes for the frame and lid.
  2. Assemble the frame using screws or nails.
  3. Attach the insulation material to the inside of the frame.
  4. Cut the lid to size and attach it using hinges.
  5. Add a latch to keep the lid securely closed.
  6. Attach handles to make it easy to carry.

Customization

One of the great things about building a wooden ice chest box is that you can customize it to fit your specific needs. For example, you could add a drain to make it easy to empty melted ice, or you could add a bottle opener to the side for added convenience. You could also choose to paint or stain the wood to match your personal style.

Overall, building a wooden ice chest box is a fun and rewarding project that can provide you with a practical and stylish addition to your outdoor entertaining space. With a little bit of time and effort, you can create a one-of-a-kind piece that’s sure to impress your friends and family.

Choosing the Right Wood

When building a wooden ice chest box, choosing the right type of wood is essential to ensure durability, functionality, and aesthetics. In this section, we will discuss the different types of wood you can use for your ice chest box and the considerations you need to make when selecting the right wood.

Types of Wood

There are several types of wood that you can choose from when building an ice chest box. Here are some of the most popular ones:

  • Cedar: Cedar is a popular choice for ice chest boxes because it is naturally resistant to rot, decay, and insects. It also has a pleasant aroma that can repel insects and keep your ice chest smelling fresh.

  • Pine: Pine is another popular choice for ice chest boxes because it is affordable, easy to work with, and readily available. However, pine is not as durable as cedar and may require more maintenance over time.

  • Redwood: Redwood is a durable and attractive wood that is resistant to decay, rot, and insects. It is also naturally weather-resistant, making it a great choice for outdoor ice chest boxes.

  • Teak: Teak is a high-end wood that is prized for its durability, resistance to moisture, and beautiful grain patterns. However, it is also expensive and may not be suitable for all budgets.

Considerations for Choosing Wood

When selecting the right wood for your ice chest box, there are several factors you need to consider, including:

  • Durability: You want a wood that is durable and can withstand the wear and tear of regular use. Cedar, redwood, and teak are all great choices for durability.

  • Moisture resistance: Your ice chest box will be exposed to moisture, so you need a wood that can resist rot and decay. Cedar and redwood are both naturally resistant to moisture.

  • Aesthetics: You want your ice chest box to look good, so choose a wood that has an attractive grain pattern and color. Teak and redwood are both known for their beautiful aesthetics.

  • Budget: Different woods come at different price points, so consider your budget when selecting the right wood for your ice chest box. Pine is an affordable option, while teak is more expensive.

By considering these factors and choosing the right type of wood, you can ensure that your ice chest box will be durable, functional, and aesthetically pleasing.

Materials and Tools Needed

List of Materials

Before you start building your wooden ice chest cooler box, you’ll need to gather the necessary materials. Here’s a list of what you’ll need:

Materials Quantity
Cedar boards 8-10 1x6x8 boards
Deck screws 1-1/2 inch
Hinges 2-3
Latch 1
Drain spigot 1
Bottle opener 1
Cooler insert 1

Required Tools

Now that you have your materials, you’ll also need the right tools to build your wooden ice chest cooler box. Here’s a list of the required tools:

  • Miter saw
  • Drill
  • ⅛-inch combination countersink bit
  • Clamps
  • Jigsaw
  • Screwdriver
  • Tape measure
  • Pencil
  • Safety goggles
  • Sandpaper

Make sure all your tools are in good condition before you start building. You don’t want to be in the middle of a project and realize that your drill bit is dull or your saw blade is bent. Safety goggles are also important to protect your eyes from sawdust and debris.

With all the necessary materials and tools gathered, you’re ready to start building your own wooden ice chest cooler box.

Designing Your Ice Chest Box

When it comes to designing your wooden ice chest box, there are a few key factors to consider. In this section, we’ll cover the dimensions and features you should take into account before starting your DIY project.

Dimensions

The first thing to consider is the size of your ice chest box. The dimensions will depend on how much space you have available and how much you plan to store inside. Here are some general guidelines to help you get started:

  • Width: 24-36 inches
  • Depth: 18-24 inches
  • Height: 22-28 inches

Of course, these are just rough estimates, and you can adjust the dimensions to suit your needs. Keep in mind that you’ll need enough space to store ice as well as your drinks and food.

Features

Once you have an idea of the size you want, you can start thinking about the features you’d like to include in your ice chest box. Here are some popular options:

  • Wheels: Adding wheels to your ice chest box makes it easy to move around, especially if it’s heavy when fully loaded.
  • Drainage: You’ll want to include a drainage system to remove melted ice and prevent your drinks and food from getting waterlogged.
  • Insulation: Insulation will help keep your drinks and food cold for longer periods of time.
  • Lid: A sturdy lid will help keep the cold air inside and prevent any unwanted critters from getting in.
  • Bottle opener: Adding a bottle opener to the side of your ice chest box makes it easy to open drinks without having to search for a separate tool.

By including these features, you’ll be able to create an ice chest box that’s both functional and convenient. Remember to take your time and plan out your design before you start cutting any wood.

Building the Box

Cutting the Wood

To start building your wooden ice chest box, you will need to gather all the necessary materials, including cedar wood boards, deck screws, and a combination countersink bit. Once you have your materials, you can begin cutting the wood to size.

Using a miter saw, make all the straight cuts per the cut list. The cut list will depend on the size of the box you want to build. Make sure to measure twice and cut once to avoid any mistakes.

Assembling the Box

With all the wood cut to size, you can now begin assembling the box. Use long bar clamps to hold the box’s four frame boards together, with the short ones between the long ones.

Using a ⅛-inch combination countersink bit, drill two pilot holes at each joint, and secure the frame with 1½-inch deck screws. Make sure to pre-drill the holes to avoid any splitting of the wood.

Once the frame is secure, you can add the bottom boards. Use the same process as before, drilling pilot holes and securing the boards with deck screws.

With the bottom boards in place, you can now add the side boards. Again, use the same process as before, drilling pilot holes and securing the boards with deck screws.

Finally, add the lid to the box. This can be done by attaching hinges to the back of the box and the lid. Make sure the lid fits snugly on the box to prevent any air from escaping.

Congratulations, you have now built your own wooden ice chest box!

Adding Insulation

To keep your drinks cold for longer periods, it’s important to add insulation to your ice chest. Insulation helps to reduce the transfer of heat from the outside environment to the inside of the chest. Here are some steps to follow when adding insulation to your wooden ice chest.

  1. Choose the right insulation material: There are various insulation materials you can use for your ice chest. Some of the commonly used insulation materials include Styrofoam, foam insulation, and fiberglass insulation. Styrofoam is a popular choice because it’s lightweight and easy to work with. Foam insulation provides better insulation than Styrofoam, but it’s more expensive. Fiberglass insulation is the most effective insulation material, but it’s also the most expensive.

  2. Cut the insulation to size: Measure the inside dimensions of your ice chest and cut the insulation material to size. You can use a utility knife or a saw to cut the insulation material. Make sure the insulation fits snugly inside the chest.

  3. Glue the insulation to the chest: Apply a generous amount of adhesive to the back of the insulation and press it firmly against the inside walls of the chest. Make sure the insulation is evenly distributed and there are no gaps.

  4. Cover the insulation: To protect the insulation from moisture and damage, cover it with a layer of plastic. You can use a plastic sheet or a plastic bag to cover the insulation. Make sure the plastic covers the insulation completely and is tightly sealed.

  5. Finish the chest: Once the insulation is in place, you can finish the chest by adding a lid, hinges, and a latch. You can also add a drain plug to the bottom of the chest to drain any melted ice.

Adding insulation to your wooden ice chest is a simple and effective way to keep your drinks cold for longer periods. By following these steps, you can create a well-insulated ice chest that will keep your drinks cold for hours.

Finishing Touches

Sanding and Finishing

Before you start sanding, make sure the wood is clean and free of any debris. Sand the entire ice chest box with 120-grit sandpaper, followed by 220-grit sandpaper. Be sure to sand in the direction of the grain to avoid scratches. Once you’ve sanded the box, wipe it down with a tack cloth to remove any dust.

Now it’s time to apply the finish. You can use a clear coat or a stain to protect the wood and give it a polished look. If you choose to use a clear coat, apply it with a brush or a spray can. Be sure to follow the manufacturer’s instructions and apply multiple coats for added protection.

If you prefer a stained look, apply the stain with a brush or a rag. Allow the stain to soak into the wood for a few minutes, then wipe away any excess with a clean cloth. Repeat this process until you achieve the desired color.

Installing Hardware

To complete your ice chest box, you’ll need to install the hardware. You’ll need hinges, a latch, and handles. You can purchase these items at your local hardware store.

First, install the hinges. Place the lid on the box and mark where the hinges will go. Screw the hinges into place, making sure they are level and secure.

Next, install the latch. Place the latch on the front of the box and mark where the screws will go. Screw the latch into place, making sure it is centered and secure.

Finally, install the handles. Place the handles on the sides of the box and mark where the screws will go. Screw the handles into place, making sure they are level and secure.

Congratulations! You’ve successfully built a wooden ice chest box. Now it’s time to fill it with ice and your favorite beverages.

Maintenance Tips

Proper maintenance of your wooden ice chest box will ensure its longevity and keep it looking great. Here are some tips to help you maintain your ice chest box:

Cleaning

To keep your ice chest box clean, wipe it down with a damp cloth after each use. For tougher stains, you can use a mild soap and water solution. Avoid using harsh chemicals or abrasive cleaners, as they can damage the wood.

It’s also important to keep the inside of the box clean. To prevent mold and bacteria growth, wipe down the inside with a solution of one part vinegar and three parts water. Rinse thoroughly with water and let it air dry before using it again.

Repairing

If your ice chest box gets damaged, it’s important to repair it as soon as possible to prevent further damage. Here are some common issues and how to fix them:

  • Loose or broken boards: If a board is loose or broken, use wood glue to reattach it. Clamp the board in place and let it dry for at least 24 hours before using the ice chest box again.

  • Cracks or splits: If the wood has cracked or split, use wood filler to fill in the gaps. Sand the area smooth once the filler has dried.

  • Warping: If the wood has warped, you may need to replace the affected boards. Sand down the warped area and replace the boards with new ones.

Regular maintenance and repairs will help keep your wooden ice chest box in great condition for years to come.

understanding-polyurethane

Can You Polyurethane Over Painted Wood? A Guide to Coating Painted Wood with Polyurethane

Are you wondering if you can apply polyurethane over painted wood? The answer is yes, you can. However, there are a few things to keep in mind to ensure a successful outcome. In this article, we’ll explore the process of polyurethaning over painted wood and provide some tips to help you achieve the best results.

Before applying polyurethane over painted wood, it’s important to make sure the paint is fully cured and clean. This will help ensure a smooth and even finish. Additionally, it’s important to choose the right type of polyurethane. Both oil-based and water-based polyurethane can be used over painted wood, but oil-based polyurethane may cause discoloration over time, so be cautious when using it. With these considerations in mind, let’s take a closer look at the process of applying polyurethane over painted wood.

Understanding Polyurethane

understanding-polyurethane

Polyurethane is a synthetic product that is commonly used as a protective coating for wood surfaces. It is a durable and flexible material that can help to extend the lifespan of your painted wood surfaces. In this section, we will discuss the benefits of polyurethane and the different types available.

Benefits of Polyurethane

Polyurethane offers several benefits when used as a protective coating for painted wood surfaces. These benefits include:

  • Protection against weathering and UV damage
  • Enhanced and deepened colors
  • Increased resistance to scratching, impact, and general wear
  • Easy cleanup

Types of Polyurethane

There are two main types of polyurethane: oil-based and water-based. Each type has its own advantages and disadvantages.

Oil-Based Polyurethane

Oil-based polyurethane is known for its durability and resistance to water and chemicals. It also tends to give a warm, amber tone to the wood surface. However, it has a longer drying time and can emit strong fumes during application. It is also more difficult to clean up.

Water-Based Polyurethane

Water-based polyurethane dries faster and emits fewer fumes during application. It also has a clear finish that does not alter the color of the wood surface. However, it is less durable than oil-based polyurethane and may require more coats for adequate protection.

In conclusion, polyurethane is a valuable protective coating for painted wood surfaces. Understanding the benefits and types available can help you choose the best product for your specific needs.

Painted Wood and Polyurethane

If you have a painted wood surface that needs additional protection, applying polyurethane over the paint can be a great option. However, there are some important considerations to keep in mind to ensure the best results.

Preparation of Painted Wood

Before applying polyurethane over painted wood, it is crucial to ensure that the paint is fully cured and clean. Any grease stains, dirt, or other filth needs to be washed off before you can apply the first coat of polyurethane. Use a soft sponge or rag and a powerful detergent to clean up the painted surface. You can take a ½ cup of trisodium phosphate and mix it with warm water.

After cleaning, it is important to scuff the surface with 220-grit sandpaper. This helps the polyurethane adhere to the painted surface. Make sure to wipe away any sanding dust with a damp rag or tack cloth.

Compatibility of Polyurethane and Paint

When it comes to applying polyurethane over paint, you can use both oil-based and water-based polyurethane. However, it is important to be cautious of discoloration, especially when using oil-based polyurethane. Some oil-based polyurethane can yellow over time, which can be especially noticeable over light-colored paint.

To avoid discoloration, it is recommended to use a water-based polyurethane over light-colored paint. Additionally, it is important to test the polyurethane on a small, inconspicuous area before applying it to the entire surface.

Overall, applying polyurethane over painted wood can provide additional protection and durability to your surface. Just make sure to properly prepare the surface and choose the right type of polyurethane to avoid any discoloration or other issues.

Application Process

application-process-1

Materials Needed

Before you begin the application process, you will need to gather a few materials. Here is a list of what you will need:

  • Sandpaper (120 grit)
  • Tack cloth
  • Paintbrush or paint sprayer
  • Polyurethane
  • Gloves
  • Safety goggles
  • Face mask

Step-by-Step Guide

  1. Sand the painted surface with 120 grit sandpaper. This will help the polyurethane adhere to the surface. Be sure to sand in the direction of the grain.
  2. Wipe the surface with a tack cloth to remove any dust or debris.
  3. Put on gloves, safety goggles, and a face mask to protect yourself from the fumes.
  4. Apply the polyurethane with a paintbrush or paint sprayer. Be sure to follow the manufacturer’s instructions for application.
  5. Allow the first coat to dry completely before applying a second coat.
  6. Sand the surface lightly with 220 grit sandpaper before applying the second coat. This will help the second coat adhere to the first coat.
  7. Apply the second coat of polyurethane and allow it to dry completely.
  8. Sand the surface lightly with 220 grit sandpaper before applying the third coat.
  9. Apply the third coat of polyurethane and allow it to dry completely.
  10. After the final coat has dried, you can sand the surface lightly with 220 grit sandpaper to remove any imperfections.
  11. Wipe the surface with a tack cloth to remove any dust or debris.

Congratulations! You have successfully applied polyurethane over painted wood.

Maintenance Tips

Keeping your polyurethane finished painted wood looking its best requires some basic maintenance. Here are some tips to help you keep your surfaces looking their best.

Cleaning and Care

To keep your polyurethane finished painted wood looking clean and shiny, you should clean it regularly. Here are some tips to help you with regular cleaning:

  • Use a soft cloth or sponge to wipe down the surface.
  • Use a mild soap and water solution to clean the surface.
  • Avoid using harsh chemicals or abrasive cleaners that can damage the finish.
  • Dry the surface thoroughly after cleaning to prevent water damage.

If your polyurethane finished painted wood becomes dull or scratched, you can restore its shine by applying a new coat of polyurethane. Before applying a new coat, clean the surface thoroughly and lightly sand it to remove any scratches or imperfections.

Touch-Ups and Repairs

Even with regular care, your polyurethane finished painted wood may become damaged over time. Here are some tips to help you with touch-ups and repairs:

  • Use a fine-grit sandpaper to lightly sand the damaged area.
  • Clean the surface thoroughly to remove any dust or debris.
  • Apply a small amount of touch-up paint to the damaged area.
  • Allow the touch-up paint to dry completely.
  • Apply a new coat of polyurethane to the entire surface to blend the touch-up with the rest of the finish.

By following these simple maintenance tips, you can keep your polyurethane finished painted wood looking its best for years to come.

Common Mistakes to Avoid

common-mistakes-to-avoid

When it comes to polyurethane over painted wood, there are a few common mistakes that you should avoid to ensure a successful project. Here are some of the most important things to keep in mind:

Skipping Surface Preparation

One of the biggest mistakes people make when applying polyurethane over painted wood is skipping surface preparation. Before you apply any polyurethane, you need to make sure the surface is clean, dry, and free of any dirt, grease, or other contaminants. If you skip this step, the polyurethane may not adhere properly, and you could end up with a finish that peels or flakes off.

Using the Wrong Type of Polyurethane

Another common mistake is using the wrong type of polyurethane. There are two main types of polyurethane: oil-based and water-based. Oil-based polyurethane is more durable and provides a richer, deeper finish, but it takes longer to dry and can yellow over time. Water-based polyurethane dries faster and is less likely to yellow, but it is not as durable as oil-based polyurethane. Make sure you choose the right type of polyurethane for your project.

Applying Too Thick of a Coat

When applying polyurethane over painted wood, it’s important to apply thin, even coats. If you apply too thick of a coat, the polyurethane may not dry properly, and you could end up with a finish that is uneven or has drips and runs. It’s better to apply multiple thin coats than one thick coat.

Not Allowing Enough Drying Time

Finally, one of the biggest mistakes people make when applying polyurethane over painted wood is not allowing enough drying time between coats. Polyurethane takes time to dry and cure, and if you apply a new coat before the previous coat is fully dry, you could end up with a finish that is tacky or doesn’t adhere properly. Make sure you follow the manufacturer’s instructions for drying time between coats.

Frequently Asked Questions

Can polyurethane be applied over latex paint?

Yes, you can apply polyurethane over latex paint. However, it is important to wait until the paint has fully cured before applying the polyurethane. This usually takes about 30 days. Additionally, it is recommended that you lightly sand the surface of the paint before applying the polyurethane to ensure proper adhesion.

What is the best type of polyurethane to use over paint?

The best type of polyurethane to use over paint is a water-based polyurethane. This type of polyurethane is easy to apply, dries quickly, and is less likely to yellow over time compared to oil-based polyurethane.

Can you put polyurethane over water-based paint?

Yes, you can put polyurethane over water-based paint. However, it is important to wait until the paint has fully cured before applying the polyurethane. This usually takes about 30 days. Additionally, it is recommended that you lightly sand the surface of the paint before applying the polyurethane to ensure proper adhesion.

How do you apply polyurethane to painted wood?

To apply polyurethane to painted wood, first, ensure that the paint has fully cured and the surface is clean and dry. Then, lightly sand the surface of the paint to ensure proper adhesion. Apply the polyurethane using a brush or roller, following the manufacturer’s instructions for application and drying times. Sand lightly between coats, and apply multiple coats as needed for the desired level of protection.

Is polyurethane a good option for protecting painted wood?

Yes, polyurethane is a good option for protecting painted wood. It provides a durable and long-lasting protective finish that can help prevent scratches, scuffs, and other types of damage to the painted surface.

Should I apply polyurethane over painted cabinets for extra protection?

Yes, applying polyurethane over painted cabinets can provide extra protection and help extend the life of the paint job. It is important to ensure that the paint has fully cured before applying the polyurethane and to follow the manufacturer’s instructions for application and drying times.