Tag Archives: oil-based finishes

How to Cut Wooden Dowels: A Beginner's Guide

How to Cut Wooden Dowels: A Beginner's Guide

Cutting wooden dowels is a common task for those involved in woodworking. Dowels are used as a means of joining two pieces of wood together, or to reinforce a weak or damaged area. If you’re new to woodworking, the process of cutting dowels may seem daunting at first. However, with a few simple steps, you can easily cut wooden dowels to your desired length.

There are several tools and techniques you can use to cut wooden dowels. You can use a table saw, band saw, miter saw, or circular saw to make precise cuts. Alternatively, you can use a cutting jig, serrated knife, or garden shears if you don’t have access to power tools. In this article, we’ll explore the different methods you can use to cut wooden dowels and provide step-by-step instructions to help you get started.

Understanding Wooden Dowels
how-to-cut-wooden-dowels-a-beginners-guide-2

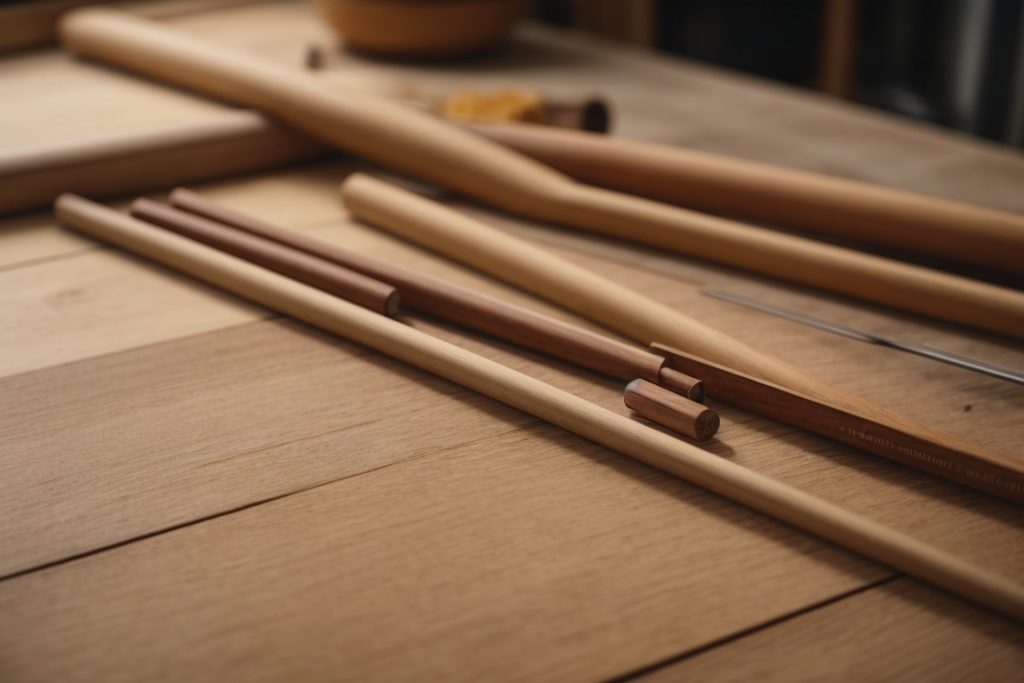
When it comes to woodworking, wooden dowels are a popular choice for joining two pieces of wood together. They are cylindrical rods made of wood that come in different sizes and lengths. Wooden dowels are versatile and can be used in various woodworking projects, such as furniture, cabinets, and shelves.

Types of Wooden Dowels

There are two main types of wooden dowels: hardwood and softwood. Hardwood dowels are made from deciduous trees, such as oak, maple, and walnut. They are denser and stronger than softwood dowels, making them ideal for heavy-duty projects. Softwood dowels, on the other hand, are made from coniferous trees, such as pine and cedar. They are lightweight and easy to work with, making them suitable for smaller projects.

Choosing the Right Size

Choosing the right size of wooden dowel is crucial for the success of your woodworking project. The size of the dowel you need depends on the thickness of the wood you are joining. A good rule of thumb is to choose a dowel that is one-third the thickness of the wood. For example, if you are joining two pieces of wood that are 1 inch thick, you should choose a dowel that is ⅜ inch in diameter.

Cutting Wooden Dowels

Cutting wooden dowels is a simple process that can be done with a saw or a sharp knife. It is essential to make clean, straight cuts to ensure a tight fit. Before cutting the dowel, mark the length you need with a pencil or marker. Then, use a saw or knife to cut the dowel to size. It is important to be careful and avoid splintering or splitting the dowel when cutting it.

Conclusion

Understanding wooden dowels is essential for any woodworking project. Choosing the right size and type of dowel, as well as cutting it properly, will ensure that your project is successful. Wooden dowels are a versatile and reliable way to join two pieces of wood together, and with a little practice, you can use them to create beautiful and functional pieces of furniture and decor.

Necessary Tools and Materials

When it comes to cutting wooden dowels, having the right tools and materials is essential. Here are the things you will need to get started:

Choosing the Right Saw

The type of saw you use to cut your wooden dowels will depend on the size and shape of the dowel, as well as the type of cut you want to make. Here are some common saws used for cutting dowels:

  • Table saw: This is the most common saw used for cutting wooden dowels. It is best for making straight cuts and is ideal for larger dowels.
  • Miter saw: This saw is great for making angled cuts and is perfect for smaller dowels.
  • Band saw: This saw is ideal for making curved cuts in larger dowels.
  • Circular saw: This saw is best for making long, straight cuts on larger dowels.

Selecting Your Dowel

The type of dowel you choose will depend on the project you are working on. Here are some things to consider when selecting your dowel:

  • Size: Make sure the dowel is the right size for your project.
  • Material: Dowels can be made from a variety of materials, including wood, metal, and plastic. Choose the material that is best suited for your project.
  • Shape: Dowels come in a variety of shapes, including round, square, and hexagonal. Choose the shape that is best suited for your project.

Safety Equipment

Whenever you are working with power tools, it is important to take safety precautions. Here are some safety equipment items you should have on hand:

  • Safety goggles: Protect your eyes from flying debris.
  • Dust mask: Protect your lungs from sawdust.
  • Earplugs: Protect your ears from loud noises.
  • Work gloves: Protect your hands from sharp edges and splinters.

By having the right tools and materials on hand, you can ensure that your wooden dowel cutting project goes smoothly and safely.

Preparation Steps

Before you start cutting your wooden dowels, it’s important to take some preparation steps to ensure that your cuts are accurate and clean. Here are some tips to help you get started:

Measuring the Dowel

The first step in cutting a wooden dowel is to measure it accurately. Use a ruler or tape measure to determine the length of the dowel you need. Make sure to measure from end to end, and take into account any extra length you may need for your project.

Marking the Cut

Once you have measured your dowel, it’s time to mark the cut. Use a pencil or marker to make a small mark on the dowel where you want to make the cut. Make sure to mark both sides of the dowel to ensure that your cut is straight and even.

If you are cutting multiple dowels to the same length, it can be helpful to use a stop block or jig to ensure that your cuts are consistent. You can also use a clamp or vise to hold the dowel in place while you make your cut.

Remember to take your time and be careful when making your cuts. A clean, accurate cut will ensure that your dowel fits properly in your project and looks professional.

Cutting Techniques
cutting-techniques

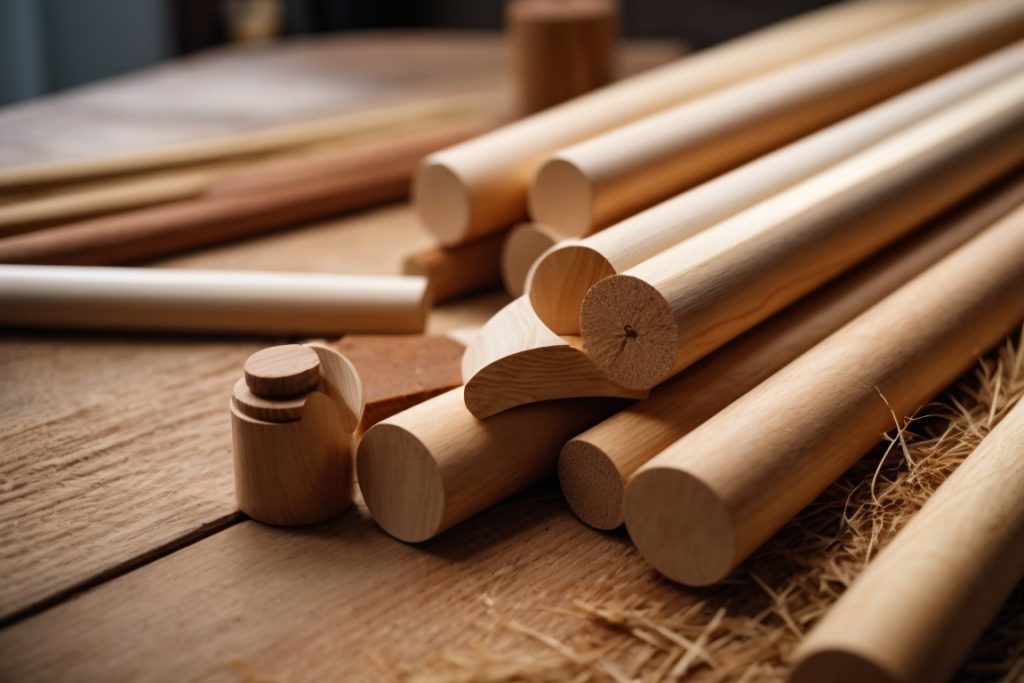
Cutting wooden dowels can be done using various techniques, depending on the tools available and the desired level of precision. In this section, we will discuss three common cutting techniques: using a hand saw, using a miter box, and using a power saw.

Using a Hand Saw

Using a hand saw is a simple and inexpensive way to cut wooden dowels. Here are the steps to follow:

  1. Mark the dowel at the desired length using a pencil or marker.
  2. Secure the dowel in a vise or clamp it to a workbench to prevent it from moving.
  3. Hold the saw at a 45-degree angle and start cutting along the marked line.
  4. Use a back-and-forth motion to cut through the dowel.
  5. Sand the cut end of the dowel to remove any rough edges.

Using a Miter Box

A miter box is a tool that helps you make precise cuts at specific angles. Here’s how to use a miter box to cut wooden dowels:

  1. Place the dowel in the miter box and align it with the desired angle.
  2. Hold the dowel firmly in place with one hand while using a saw to cut through it with the other hand.
  3. Repeat the process for each cut needed.
  4. Sand the cut ends of the dowel to remove any rough edges.

Using a Power Saw

Power saws are efficient and accurate tools for cutting wooden dowels. Here are the steps to follow when using a power saw:

  1. Choose a power saw that is appropriate for the size and thickness of the dowel.
  2. Mark the dowel at the desired length using a pencil or marker.
  3. Secure the dowel in a vise or clamp it to a workbench to prevent it from moving.
  4. Turn on the power saw and align the blade with the marked line.
  5. Slowly lower the blade and cut through the dowel.
  6. Sand the cut end of the dowel to remove any rough edges.

Remember to wear proper safety gear, such as goggles and gloves, when using power saws. Also, be sure to read and follow the manufacturer’s instructions for your specific power saw.

Sanding and Finishing

Once you have cut your wooden dowels to the desired size, it’s important to sand and finish them properly. This will not only improve their appearance but also protect them from damage and wear over time.

Smoothing the Edges

Before you start sanding, use a fine-toothed saw or sandpaper to smooth any rough edges left from cutting the dowels. This will prevent splintering and make the sanding process easier.

Start with a coarse-grit sandpaper, such as 80-grit, and work your way up to a finer grit, such as 220-grit. Sand in the direction of the grain, using a circular motion. Be careful not to sand too aggressively or you may create uneven surfaces or remove too much material.

Once you have sanded the dowels with the finer grit sandpaper, wipe them down with a tack cloth to remove any dust or debris.

Applying Finish

Applying a finish to your wooden dowels will protect them from moisture, stains, and scratches. There are several types of finishes you can use, including varnish, lacquer, shellac, and oil-based finishes.

Before applying any finish, make sure the dowels are clean and free of dust. Apply the finish in thin, even coats, using a brush or cloth. Be sure to follow the manufacturer’s instructions for drying time and number of coats.

After the final coat has dried, use a fine-grit sandpaper, such as 320-grit, to lightly sand the surface of the dowels. This will remove any bumps or imperfections and create a smooth, even finish.

In conclusion, sanding and finishing your wooden dowels is an important step in ensuring their longevity and appearance. By following these simple steps, you can achieve a professional-looking finish that will protect your dowels for years to come.

Troubleshooting Common Issues

Avoiding Splintering

When cutting wooden dowels, splintering can be a common issue. To avoid this, it is important to use the right cutting tool and technique. A handsaw or a sharp knife is recommended for cutting dowels. Make sure to mark the dowel’s length on one end and score the dowel at the mark with a sharp knife. Turn the dowel so the scored end is facing the saw blade and make 1-3 cuts straight down the dowel. Repeat on the other side. This will help prevent splintering.

Another way to avoid splintering is to use a cutting jig. A cutting jig is a tool that helps guide the saw blade and keeps the dowel in place while cutting. This will help prevent the dowel from moving around and causing splintering.

Correcting Uneven Cuts

If you accidentally make an uneven cut while cutting a wooden dowel, don’t worry. There are ways to correct it. One way is to use sandpaper to smooth out the uneven edges. Start with a coarse grit sandpaper and gradually work your way up to a finer grit until the edges are smooth and even.

Another way to correct uneven cuts is to use a dowel plate. A dowel plate is a tool that helps shape and smooth out wooden dowels. Simply insert the dowel into the appropriate size hole and tap it with a hammer until the dowel is shaped and smoothed out.

In conclusion, avoiding splintering and correcting uneven cuts are important steps when cutting wooden dowels. By using the right cutting tool and technique, and utilizing tools like a cutting jig or dowel plate, you can achieve clean and precise cuts without any issues.
How to Make a Wooden Picnic Table: Step-by-Step Guide with Pictures

Are you looking for a fun and functional addition to your backyard? A wooden picnic table is a classic choice that can provide years of enjoyment for family and friends. Whether you’re planning a backyard BBQ or a simple outdoor meal, a picnic table can provide the perfect setting for your gathering.

Building your own wooden picnic table may seem like a daunting task, but with the right tools and materials, it can be a fun and rewarding project. In this article, we’ll provide you with step-by-step instructions and tips for building your very own picnic table. From selecting the right lumber to assembling the final product, we’ll guide you through the process to ensure your picnic table is sturdy, attractive, and long-lasting. So grab your tools and let’s get started!

Understanding Wood Types

When it comes to building a wooden picnic table, choosing the right type of wood is crucial. There are many different types of wood available, each with its own unique properties and characteristics. In this section, we will discuss three popular types of wood for building picnic tables: Pine, Oak, and Cedar.

Pine

Pine is a softwood that is widely available and relatively inexpensive. It is easy to work with and can be stained or painted to match your desired color scheme. However, pine is not the most durable wood and is susceptible to rot and insect damage, especially when exposed to the elements. If you choose to use pine for your picnic table, be sure to treat it with a weather-resistant finish to help prolong its lifespan.

Oak

Oak is a hardwood that is known for its strength and durability. It is more expensive than pine but is also more resistant to rot and insect damage. Oak has a distinctive grain pattern and can be stained to a variety of colors. However, oak can be difficult to work with due to its hardness, so it may not be the best choice for novice woodworkers.

Cedar

Cedar is a softwood that is naturally resistant to rot and insect damage. It has a pleasant aroma and a beautiful reddish-brown color. Cedar is easy to work with and can be stained or painted to match your desired color scheme. However, cedar is more expensive than pine and may not be as strong as oak. If you choose to use cedar for your picnic table, be sure to select a grade that is suitable for outdoor use.

In conclusion, choosing the right type of wood is an important decision when building a picnic table. Pine, oak, and cedar are all popular choices, each with its own unique properties and characteristics. Consider your budget, woodworking experience, and desired level of durability when selecting the type of wood for your picnic table.

Tools Required

Before starting to build your wooden picnic table, you need to ensure you have the necessary tools. Here are the tools you will need to complete the project:

Saw

A saw is an essential tool for cutting the lumber to the required length. You can use either a hand saw or a power saw, depending on your preference. A circular saw is a popular choice for cutting large pieces of wood, while a jigsaw is ideal for making curved cuts. Make sure the blade is sharp, and keep the saw blade clean to ensure smooth cuts.

Hammer

A hammer is necessary for attaching the pieces of wood together. A claw hammer is a common choice, but a framing hammer is a good option if you need to drive nails into thicker lumber. Make sure the hammer is comfortable to hold and has a good grip to avoid any accidents.

Screwdriver

A screwdriver is essential for attaching the screws to the wood. You can use either a manual screwdriver or a power screwdriver, depending on your preference. A power screwdriver can save time and effort, but a manual screwdriver allows for more control. Make sure you have different sizes of screwdrivers to fit the various screws you will be using.

Other tools that you may need include a tape measure, a level, a square, clamps, a drill, and a wrench set. Make sure you have all the necessary tools before starting the project to avoid any delays.

Safety Measures

When building a wooden picnic table, safety should always be your top priority. Here are some essential safety measures to keep in mind:

1. Wear Protective Gear

Before you begin, make sure you have the right protective gear. Wear safety glasses to protect your eyes from flying wood chips, and earplugs to protect your ears from the noise of power tools. If you’re using power tools, wear gloves to protect your hands from getting hurt.

2. Use the Right Tools

Using the right tools is essential to ensure that your picnic table is sturdy and safe. Make sure you have the right saws, drills, and other tools for the job. Use sharp blades and bits to make clean cuts, and avoid using dull or damaged tools.

3. Follow the Instructions Carefully

Make sure you read the instructions carefully before you start building your picnic table. Follow the steps in the order they are given, and don’t skip any steps. If you’re not sure about something, ask for help or do some research before you proceed.

4. Work in a Safe Environment

Make sure you work in a safe environment. Keep your work area clean and free of clutter, and make sure you have enough space to move around. Avoid working near children or pets, and keep them away from your work area.

5. Use Proper Lifting Techniques

When lifting heavy pieces of wood, use proper lifting techniques to avoid injuring yourself. Bend at the knees and lift with your legs, not your back. If a piece of wood is too heavy for you to lift, ask for help.

By following these safety measures, you can ensure that your wooden picnic table is not only beautiful but also safe for you and your loved ones to use.

Choosing the Right Design

When it comes to building a wooden picnic table, choosing the right design is an important step. There are many different styles of picnic tables to choose from, each with their own unique features and benefits. Here are some things to consider when selecting the right design for your needs:

Size

The first thing to consider when choosing a picnic table design is the size. How many people do you want to be able to seat at the table? Will the table be used for small family gatherings or larger parties? Make sure to choose a design that is the right size for your needs.

Style

There are many different styles of picnic tables to choose from, including traditional, modern, and rustic designs. Consider the overall aesthetic of your outdoor space and choose a style that complements it.

Material

Another important factor to consider when choosing a picnic table design is the material. Wooden picnic tables are a popular choice due to their durability and natural beauty. However, there are also picnic tables made from metal, plastic, and other materials.

Features

Finally, consider any additional features you may want in your picnic table design. Some picnic tables come with built-in benches, while others may have an umbrella hole for shade. Think about what features are important to you and choose a design that meets those needs.

Overall, choosing the right picnic table design is an important step in building a table that will meet your needs and enhance your outdoor space. Take the time to consider your options and choose a design that is the perfect fit for you.

Measuring and Cutting the Wood

Before you start building your picnic table, you will need to measure and cut the wood to the appropriate size. Here is a step-by-step guide to help you through the process.

Step 1: Gather the Required Tools

You will need a few tools to measure and cut the wood for your picnic table. These tools include:

  • Tape measure
  • Circular saw or handsaw
  • Speed square
  • Pencil
  • Clamps

Step 2: Measure and Mark the Wood

Using a tape measure, measure the length and width of the tabletop, seats, and legs. Once you have the measurements, mark the wood with a pencil. Make sure to double-check your measurements before making any cuts.

Step 3: Cut the Wood

Using a circular saw or handsaw, carefully cut the wood along the marked lines. Make sure to follow safety precautions when using power tools. If you are using a circular saw, use a speed square to guide your cuts and ensure they are straight.

Step 4: Sand the Edges

After cutting the wood, use sandpaper to smooth out any rough edges. This will prevent splinters and make the wood easier to work with.

Step 5: Repeat for Each Piece

Repeat these steps for each piece of wood needed for the picnic table. Make sure to label each piece to avoid confusion during assembly.

By following these steps, you can measure and cut the wood for your picnic table with ease.

Assembling the Table

Now that you have all the pieces cut, it’s time to assemble your picnic table. Follow these steps to put everything together:

  1. Lay out the tabletop boards on a flat surface, making sure they’re evenly spaced and aligned. Then, place the two end pieces on top of the tabletop boards, making sure they’re flush with the ends.

  2. Drill pilot holes through the end pieces and into the tabletop boards. Then, screw the pieces together using 3-inch screws.

  3. Next, attach the seat supports to the legs. Place the legs on a flat surface, and then attach the seat supports to the inside of the legs using 2 1/2-inch screws.

  4. Attach the cross braces to the legs. Place the legs on a flat surface, and then attach the cross braces to the inside of the legs using 2 1/2-inch screws.

  5. Now it’s time to attach the tabletop to the legs. Turn the tabletop assembly upside down, and then place the legs on top of the tabletop, making sure they’re evenly spaced and aligned. Then, drill pilot holes through the tabletop and into the legs. Finally, screw the legs to the tabletop using 3-inch screws.

  6. Attach the seats to the seat supports. Place the seats on top of the seat supports, making sure they’re evenly spaced and aligned. Then, drill pilot holes through the seats and into the seat supports. Finally, screw the seats to the seat supports using 2 1/2-inch screws.

  7. Sand the table and chairs to remove any rough edges or splinters. Apply a coat of wood sealer or stain to protect your new picnic table from the elements.

Congratulations! You have successfully assembled your wooden picnic table. Invite your friends and family over for a fun picnic and enjoy your new outdoor furniture.

Sanding and Finishing

Sanding Process

Before applying any finish to your wooden picnic table, you need to sand it properly. Sanding is an essential step to ensure the surface of the wood is smooth and ready to receive the finish. Here are the steps to follow to sand your wooden picnic table:

  1. Start with coarse-grit sandpaper: Begin by sanding the table with coarse-grit sandpaper, such as 60 grit. Sand the entire surface of the table, including the top, sides, and legs. This will help remove any rough spots, splinters, or bumps.

  2. Move to finer-grit sandpaper: Once you have sanded the table with coarse-grit sandpaper, switch to finer-grit sandpaper, such as 120 grit. Sand the entire surface of the table again, making sure to remove any scratches or marks left by the coarse-grit sandpaper.

  3. Sand with the grain: Always sand with the grain of the wood to avoid damaging the surface. Sanding against the grain can cause scratches and marks that will be difficult to remove.

  4. Use a sanding block: To ensure an even sanding job, use a sanding block to hold the sandpaper. This will help you apply even pressure across the surface of the table.

Applying Finish

Once you have sanded your wooden picnic table, it is time to apply the finish. The finish will protect the wood from moisture, UV rays, and other environmental factors. Here are the steps to follow to apply the finish:

  1. Choose the right finish: There are different types of finishes available, such as varnish, polyurethane, and oil-based finishes. Choose the finish that suits your needs and preferences.

  2. Apply the finish: Apply the finish using a brush or a rag. Make sure to apply an even coat across the surface of the table, including the top, sides, and legs.

  3. Wait for the finish to dry: Allow the finish to dry completely before applying another coat. Follow the manufacturer’s instructions to determine how long you need to wait for the finish to dry.

  4. Sand between coats: Sand the surface of the table lightly between coats of finish using fine-grit sandpaper, such as 220 grit. This will help remove any bumps or imperfections and ensure a smooth finish.

  5. Apply multiple coats: Apply multiple coats of finish to ensure maximum protection. Follow the manufacturer’s instructions to determine how many coats you need to apply.

By following these steps, you can sand and finish your wooden picnic table like a pro. With a little patience and effort, you can create a beautiful and durable picnic table that will last for years to come.

Maintaining Your Picnic Table

Maintaining your wooden picnic table is essential to ensure its longevity and keep it looking great. Here are a few tips to help you maintain your picnic table.

Cleaning Your Picnic Table

To start, you will need to clean your picnic table. Use a soft-bristled brush and a mild detergent to scrub the surface of the table. Rinse it off with a hose and let it dry completely before moving on to the next step.

Applying a Protective Coating

Once your picnic table is clean and dry, you can apply a protective coating to help prevent damage from the elements. There are several options to choose from, including:

  • Linseed oil
  • Teak oil
  • Tung oil
  • Water-resistant, UV-protected sealer

Apply the protective coating according to the manufacturer’s instructions. Be sure to apply it evenly and let it dry completely before using the table.

Regular Maintenance

Regular maintenance is key to keeping your picnic table in good condition. Here are a few things you can do to keep it looking great:

  • Remove debris and dirt regularly
  • Keep it covered when not in use
  • Sand and refinish as needed

By following these tips, you can keep your wooden picnic table looking great for years to come.

How to Make a Wooden Rocking Chair: A Beginner's Guide

Making a wooden rocking chair can be a fun and rewarding project for any woodworking enthusiast. Not only does it provide a comfortable and relaxing place to sit, but it also adds a touch of classic charm to any room or outdoor space. Whether you’re a beginner or an experienced woodworker, building a rocking chair is a great way to improve your skills and create something beautiful.

Before you begin, it’s important to have a plan and gather all the necessary materials and tools. There are many different designs and styles of rocking chairs to choose from, so take some time to research and find one that suits your preferences and skill level. Some basic tools you’ll need include a saw, drill, chisels, sandpaper, and clamps. You’ll also need wood, such as oak or maple, and hardware like screws and bolts. Once you have everything you need, it’s time to get started on your rocking chair project.

Understanding Wood Types

When it comes to making a wooden rocking chair, choosing the right type of wood is crucial. In this section, we’ll explore the differences between hardwood and softwood and discuss the best wood options for rocking chairs.

Hardwood vs Softwood

Hardwood and softwood are two distinct categories of wood. The terms “hardwood” and “softwood” do not refer to the actual hardness or softness of the wood. Instead, they refer to the type of tree the wood comes from.

Hardwood comes from trees that have broad leaves, such as oak, maple, and cherry. Hardwood is generally denser and more durable than softwood, making it an excellent choice for furniture-making.

Softwood comes from trees that have needles or scales, such as pine, spruce, and cedar. Despite the name, softwood is not necessarily softer than hardwood. Softwood is generally less dense and less durable than hardwood, but it can still be used for furniture-making.

Best Wood for Rocking Chairs

When it comes to making a rocking chair, you want a wood that is both durable and attractive. Here are some of the best wood options for rocking chairs:

  • Cherry: Cherry is a popular choice for rocking chairs due to its rich color and durability.
  • Oak: Oak is a strong and durable wood that can withstand heavy use.
  • Maple: Maple is a hard and dense wood that is resistant to wear and tear.
  • Walnut: Walnut is a beautiful wood with a rich, dark color. It is also strong and durable.
  • Birch: Birch is an affordable and stable wood that is often used in furniture-making.

When selecting wood for your rocking chair, it’s important to consider the grain pattern and color of the wood. You want a wood that is visually appealing and complements the design of your chair.

In conclusion, choosing the right type of wood is essential for making a beautiful and long-lasting rocking chair. Whether you opt for a hardwood or softwood, be sure to choose a wood that is both durable and visually appealing.

Basic Tools and Materials Needed

If you want to build a wooden rocking chair, you’ll need a few basic tools and materials. Here’s a list of what you’ll need to get started:

Woodworking Tools

To build a wooden rocking chair, you’ll need some basic woodworking tools. Here are some of the tools you’ll need:

  • Saw: You’ll need a saw to cut the wood to size. A handsaw or a circular saw will work.

  • Drill: You’ll need a drill to make holes for screws and dowels.

  • Chisels: You’ll need chisels to shape the wood and remove any excess material.

  • Rasp: You’ll need a rasp to smooth out any rough edges or surfaces.

  • Clamps: You’ll need clamps to hold the wood in place while you work on it.

  • Screwdriver: You’ll need a screwdriver to tighten screws and attach the parts together.

Safety Equipment

When working with woodworking tools, it’s important to take safety precautions. Here are some safety equipment you’ll need:

  • Safety glasses: You’ll need safety glasses to protect your eyes from sawdust and wood chips.

  • Dust mask: You’ll need a dust mask to protect your lungs from sawdust.

  • Ear protection: You’ll need ear protection to protect your ears from the noise of power tools.

  • Work gloves: You’ll need work gloves to protect your hands from sharp edges and splinters.

  • Respirator: You’ll need a respirator to protect yourself from sawdust and other airborne particles.

Make sure you have all the necessary tools and safety equipment before you start building your rocking chair. With the right tools and materials, you’ll be able to build a beautiful and functional wooden rocking chair that you can enjoy for years to come.

Designing Your Rocking Chair

When it comes to making a wooden rocking chair, the design is an essential factor to consider. A well-designed rocking chair should be both stylish and comfortable. In this section, we will discuss the two crucial steps in designing your rocking chair: choosing a design and creating a blueprint.

Choosing a Design

Before you start building your rocking chair, you need to decide on the design you want to create. There are many different styles of rocking chairs, ranging from traditional to modern. You can find inspiration from various sources, such as furniture stores, online catalogs, and woodworking books.

When choosing a design, consider the following factors:

  • Your skill level: Choose a design that matches your skill level. If you are a beginner, start with a simple design that is easy to build.
  • Your budget: Some designs require more materials than others, so consider your budget when choosing a design.
  • Your personal taste: Choose a design that fits your personal style and taste.

Creating a Blueprint

Once you have chosen a design, it’s time to create a blueprint. A blueprint is a detailed plan that shows the dimensions and layout of your rocking chair. It should include all the necessary measurements, angles, and materials needed to build your chair.

Creating a blueprint will help you visualize the final product and ensure that you have all the necessary materials before you start building. You can create a blueprint using software or by hand. If you are not familiar with woodworking software, you can use graph paper to sketch out your design.

When creating your blueprint, consider the following factors:

  • The dimensions of your chair: Make sure your blueprint includes accurate measurements of your chair’s height, width, and depth.
  • The materials you will use: Include a list of all the materials you will need, such as wood, screws, and glue.
  • The tools you will need: Make a list of all the tools you will need to build your chair, such as saws, drills, and sanders.

By following these steps, you can design a rocking chair that is both comfortable and stylish. Remember to take your time and pay attention to the details to create a chair that you will be proud to show off.

Cutting and Shaping the Wood

When it comes to making a wooden rocking chair, cutting and shaping the wood is a crucial step. This section will guide you through the process of cutting and shaping the wood for your rocking chair.

Cutting Techniques

Before you start cutting the wood, it’s important to have a clear idea of the measurements you need. You can use a measuring tape and a square to ensure that your cuts are accurate. Once you have your measurements, you can use a saw to cut the wood.

There are different types of saws you can use for cutting wood, including a circular saw, jigsaw, or handsaw. A circular saw is ideal for making long straight cuts, while a jigsaw is great for cutting curves and intricate shapes. A handsaw is a good option if you don’t have access to power tools.

When using a saw, it’s important to follow safety precautions. Wear eye and ear protection, and keep your hands away from the blade. Make sure the wood is securely clamped or held in place before you start cutting.

Shaping the Rockers

The rockers are the curved pieces of wood that give the rocking chair its signature motion. To shape the rockers, you can use a technique called steam bending. This involves heating the wood with steam to make it pliable, and then bending it into shape.

To steam bend the wood, you’ll need a steam box and a bending form. The steam box is a long, narrow box that you fill with steam. The bending form is a template that you use to shape the wood.

First, place the wood in the steam box and heat it for the recommended amount of time. Then, remove the wood from the steam box and place it on the bending form. Use clamps to hold the wood in place while it cools and sets into the desired shape.

Once the rockers are shaped, you can sand them smooth and attach them to the rest of the chair. With these cutting and shaping techniques, you’ll be well on your way to creating a beautiful and functional wooden rocking chair.

Assembling the Chair

Now that you have all the pieces of your rocking chair, it’s time to put them together. This section will cover the two main steps of assembling the chair: joining the pieces and securing the rockers.

Joining the Pieces

To join the pieces of your rocking chair, you will need to use wood glue and clamps. Follow these steps:

  1. Apply a small amount of wood glue to the joints where the pieces will be joined.
  2. Align the pieces and clamp them together.
  3. Wipe off any excess glue that squeezes out of the joints.
  4. Allow the glue to dry according to the manufacturer’s instructions.

Securing the Rockers

Once the chair is assembled, it’s time to secure the rockers. This is an important step, as it will ensure that the chair is stable and safe to use.

To secure the rockers, you will need to use screws or dowels. Follow these steps:

  1. Drill pilot holes into the bottom of the chair legs where the rockers will be attached.
  2. Align the rockers with the pilot holes and attach them using screws or dowels.
  3. Check that the rockers are level and adjust as necessary.
  4. Repeat for the other side of the chair.

Congratulations! Your wooden rocking chair is now assembled and ready to use.

Finishing Touches

Once you have completed your wooden rocking chair, you’ll want to add some finishing touches to give it a unique and polished look. This section will cover two important steps to finish your chair: sanding and applying a finish.

Sanding the Chair

Before applying any finish, you should sand your chair to ensure a smooth surface. Start with a coarse sandpaper (around 80 grit) and work your way up to a finer grit (around 220 grit). Sand in the direction of the grain, and be sure to sand all surfaces, including the legs, arms, and seat.

Once you have finished sanding with the finer grit, wipe the chair down with a tack cloth to remove any dust or debris.

Applying a Finish

Applying a finish to your rocking chair will protect the wood and enhance its natural beauty. There are many types of finishes available, including varnish, lacquer, and oil-based finishes.

Before applying any finish, be sure to read the manufacturer’s instructions carefully. Some finishes require multiple coats, while others may require specific drying times or application methods.

Here are some tips for applying a finish to your rocking chair:

  • Use a brush or cloth to apply the finish in thin, even coats.
  • Allow each coat to dry completely before applying the next coat.
  • Sand lightly between coats with a fine-grit sandpaper.
  • Be sure to apply the finish to all surfaces, including the underside of the chair.
  • Consider using a protective sealant to prevent scratches or damage to the finish.

By following these steps, you can give your wooden rocking chair a beautiful and long-lasting finish.

How to Make a Wooden Stool Seat: A Beginner's Guide

If you’re looking to add a new piece of furniture to your home, why not try making a wooden stool seat? Not only is it a practical addition that can be used in various rooms, but it’s also a fun and rewarding DIY project. With a few basic tools and materials, you can create a custom stool seat that fits your style and needs.

Before getting started, it’s important to consider the type of wood you’ll be using. Hardwoods like oak, maple, and cherry are durable and long-lasting, but can be more expensive. Softwoods like pine and cedar are more affordable, but may not hold up as well over time. Once you’ve chosen your wood, you’ll need to measure and cut it to the desired size and shape. From there, you can add decorative touches like carving or staining to give your stool seat a unique look.

Understanding Wood Types

When it comes to making a wooden stool seat, choosing the right type of wood is crucial. Different types of wood have different properties, including hardness, durability, and grain patterns, which can affect the overall look and feel of your stool. In this section, we’ll explore the two main categories of wood: hardwood and softwood.

Hardwood

Hardwood is a popular choice for furniture making due to its durability and strength. It is derived from deciduous trees, such as oak, maple, and cherry. Hardwood is generally more expensive than softwood, but it is also more resistant to wear and tear.

Here are some common types of hardwood and their properties:

Type of Hardwood Properties
Oak Strong, durable, and resistant to moisture
Maple Hard, dense, and resistant to scratches
Cherry Warm, rich color, and easy to work with

When choosing hardwood for your stool, consider the overall aesthetic you want to achieve. Oak, for example, has a distinctive grain pattern that can add character to your stool, while cherry has a warm, inviting color that can give your stool a cozy feel.

Softwood

Softwood is derived from coniferous trees, such as pine, spruce, and cedar. It is generally less expensive than hardwood, but it is also less durable and more prone to wear and tear.

Here are some common types of softwood and their properties:

Type of Softwood Properties
Pine Lightweight, easy to work with, and affordable
Spruce Straight grain pattern, and lightweight
Cedar Resistant to rot and insects, and has a pleasant aroma

Softwood is a good choice if you’re on a budget or if you want a more rustic look for your stool. Pine, for example, has a light color and a distinctive grain pattern that can give your stool a natural, outdoorsy feel. Cedar, on the other hand, has a pleasant aroma and is resistant to rot and insects, making it a good choice for outdoor stools.

When choosing between hardwood and softwood, consider your budget, the overall aesthetic you want to achieve, and the durability you need for your stool. With the right type of wood, you can create a beautiful and functional stool that will last for years to come.

Tools Needed

When making a wooden stool seat, you will need a few tools to get the job done. Below are some of the essential tools you will need to make a wooden stool seat.

Saw

A saw is an essential tool when making a wooden stool seat. You will need a saw to cut the wood to the right size. There are different types of saws you can use, such as a hand saw, circular saw, or jigsaw. Choose the saw that you are most comfortable using.

Hammer

A hammer is another essential tool you will need when making a wooden stool seat. You will use a hammer to drive nails or screws into the wood. A claw hammer is a good choice because it has a claw on one end that you can use to remove nails.

Sandpaper

After cutting the wood to the right size, you will need to sand it to make it smooth. Sandpaper comes in different grits, so you will need to choose the right one for the job. Coarse grit sandpaper is good for rough sanding, while fine grit sandpaper is good for finishing.

Screws and Nails

You will need screws and nails to hold the wooden stool seat together. There are different types of screws and nails you can use, such as wood screws, finishing nails, or brads. Choose the type of screw or nail that is appropriate for the job.

With these tools, you can make a wooden stool seat that is sturdy and functional. Make sure to use the right tools for the job and take your time to ensure that the stool seat is well-made.

Choosing the Right Wood

When it comes to making a wooden stool seat, choosing the right wood is crucial. You want a wood that is both sturdy and attractive. Here are some factors to consider when choosing the right wood for your stool seat:

Durability

The durability of the wood is an important consideration, especially if the stool seat will be subjected to daily use. Hardwoods such as oak, maple, and cherry are great options for their strength and durability. Softwoods such as pine and cedar are less durable but can still be used if properly treated.

Appearance

The appearance of the wood is also important. You want a wood that is visually appealing and matches the overall aesthetic of the stool. Woods such as walnut and mahogany have rich, dark tones that can add a touch of elegance to your stool. Lighter woods such as birch and ash have a more natural, rustic look.

Grain Pattern

The grain pattern of the wood can also affect the appearance of the stool. Woods with straight, uniform grain patterns such as maple and cherry are great for a classic, timeless look. Woods with more pronounced grain patterns such as oak and ash can add a unique, rustic touch to your stool.

Sustainability

It’s important to consider the sustainability of the wood you choose. Look for wood that is responsibly sourced and certified by organizations such as the Forest Stewardship Council (FSC). Using sustainable wood not only helps protect the environment but also ensures a reliable supply of wood for future projects.

Overall, choosing the right wood for your stool seat requires careful consideration of factors such as durability, appearance, grain pattern, and sustainability. By taking these factors into account, you can ensure that your stool is both functional and visually appealing.

Designing Your Stool Seat

When it comes to designing your wooden stool seat, there are a few important factors to consider. In this section, we’ll go over the size and shape of your seat, as well as some comfort considerations to keep in mind.

Size and Shape

The size and shape of your stool seat will depend on a few different factors. First and foremost, consider the intended use of your stool. Will it be used as a dining chair or a barstool? Will it be used as a decorative piece or as a functional seat?

Once you’ve determined the intended use of your stool, think about the space it will occupy. Measure the height of your table or bar and make sure your stool seat is at a comfortable height for the user. Additionally, consider the width and depth of your seat to ensure it fits comfortably within the space.

Comfort Considerations

When designing your stool seat, comfort should be a top priority. Think about the ergonomics of your seat and how it will support the user’s body. A few things to keep in mind include:

  • Seat height: Make sure the height of your seat allows the user’s feet to rest comfortably on the ground.
  • Seat depth: A deeper seat will provide more support for the user’s back and legs.
  • Seat width: Consider the size of the user and make sure the seat is wide enough to accommodate their body comfortably.
  • Backrest: If you plan on including a backrest, make sure it provides adequate support for the user’s back.

By keeping these factors in mind, you can design a stool seat that is both functional and comfortable for the user.

Cutting the Wood

First, you will need to gather the materials needed to make your wooden stool seat. This includes the wood you will be using, a saw, a measuring tape, and a pencil. You can use any type of wood you prefer, but make sure it is sturdy enough to support the weight of a person.

Measure the length and width of your stool seat and mark these measurements on your wood with a pencil. Make sure your measurements are accurate to ensure a proper fit.

Next, use your saw to cut the wood according to your measurements. If you are using a circular saw, make sure to use a guide to ensure straight cuts. If you are using a hand saw, take your time and use long, smooth strokes to avoid splintering the wood.

After cutting the wood, use sandpaper to smooth out any rough edges or surfaces. This will give your stool seat a professional and polished look.

If you plan on staining or painting your stool seat, now is the time to do so. Make sure to follow the manufacturer’s instructions and allow sufficient drying time before moving on to the next step.

In summary, cutting the wood for your wooden stool seat is a simple process that requires attention to detail and accuracy. By following these steps, you can create a sturdy and attractive stool seat that will last for years to come.

Assembling the Stool

Now that you have all the pieces cut and sanded, it’s time to assemble your wooden stool. Follow these steps to put it all together:

  1. Start by attaching the legs to the seat. Apply wood glue to the top of each leg and then position them on the underside of the seat. Use clamps to hold everything in place while the glue dries.

  2. Once the legs are attached, you can add the cross braces. Apply glue to the ends of each brace and then position them between the legs. Use clamps to hold everything in place while the glue dries.

  3. After the cross braces are attached, you can add the footrest. Apply glue to the ends of the footrest and then position it between the legs. Use clamps to hold everything in place while the glue dries.

  4. Finally, you can add any finishing touches to your stool. Sand down any rough edges and apply a coat of finish to protect the wood.

  5. Your wooden stool is now complete! Congratulations on your new piece of furniture.

Sanding and Finishing

Sanding Process

When it comes to sanding your wooden stool seat, there are a few important things to keep in mind. First, you’ll want to start with a relatively coarse grit sandpaper, such as 80 or 100 grit. This will help you to remove any rough spots or imperfections in the wood. As you progress through the sanding process, you should gradually move to finer grit sandpaper, such as 220 or 320 grit. This will help you to achieve a smooth, even finish.

When sanding, be sure to always sand with the grain of the wood. Sanding against the grain can cause scratches and other damage to the surface of the wood. Additionally, be sure to keep the sandpaper moving in a circular or back-and-forth motion. This will help to prevent uneven wear on the sandpaper and ensure that you achieve an even finish.

Applying Finish

Once you’ve finished sanding your wooden stool seat, it’s time to apply a finish. There are a variety of different finishes you can use, including oil-based finishes, water-based finishes, and polyurethane finishes.

Oil-based finishes are a popular choice because they provide a warm, natural look to the wood. Water-based finishes are a good choice if you’re looking for a clear, non-yellowing finish. Polyurethane finishes are durable and long-lasting, making them a good choice for high-traffic areas.

Regardless of the type of finish you choose, be sure to follow the manufacturer’s instructions carefully. Apply the finish in thin, even coats, and allow each coat to dry completely before applying the next. Depending on the type of finish you’re using, you may need to apply several coats to achieve the desired level of protection and shine.

Overall, sanding and finishing your wooden stool seat is a relatively simple process that can help you to achieve a beautiful, long-lasting finish. With a little bit of patience and attention to detail, you can create a stool seat that will be both functional and stylish.

How to Make Wooden Sunglass Frames: A Beginner's Guide

Are you tired of the same old plastic sunglasses? Want to stand out in a crowd with a unique accessory? Why not try making your own wooden sunglasses frames? Not only will you have a one-of-a-kind pair of shades, but you’ll also get the satisfaction of creating something with your own two hands.

Making wooden sunglass frames may seem like a daunting task, but with the right tools and materials, it can be a fun and rewarding project. There are many different techniques and styles to choose from, whether you prefer a classic wayfarer shape or a more modern, geometric design. And the best part is, you can customize your frames to fit your personal style and taste. Plus, wooden frames are lightweight and comfortable to wear, making them a great alternative to traditional plastic frames.

In this article, we’ll guide you through the process of making your own wooden sunglass frames. We’ll cover everything from selecting the right wood and tools to cutting and shaping the frames. With a little patience and creativity, you’ll have a stylish and eco-friendly accessory in no time. So, grab your tools and let’s get started!

Understanding the Basics of Wooden Sunglasses

When it comes to making wooden sunglasses, understanding the basics is crucial to achieving a successful outcome. In this section, we will discuss two important aspects of wooden sunglasses: the types of wood used and the importance of grain direction.

Types of Wood Used

Selecting the right type of wood is essential for creating high-quality wooden sunglasses. The wood must be both durable and lightweight, while also being suitable for the design you have in mind. Some popular types of wood used for making wooden sunglasses include:

  • Bamboo
  • Ebony
  • Walnut
  • Maple
  • Zebrawood
  • Rosewood

Each type of wood has its own unique characteristics, such as color and grain pattern. It’s important to choose a wood that not only looks good but is also strong enough to withstand the stress of everyday use.

Importance of Grain Direction

The direction of the grain in the wood is another important factor to consider when making wooden sunglasses. The grain direction affects the strength and durability of the frames, as well as their appearance.

When cutting the wood for the frames, it’s important to pay attention to the direction of the grain. The grain should run parallel to the long axis of the frame, as this provides the greatest strength. If the grain runs perpendicular to the frame, it can weaken the wood and make it more susceptible to cracking or breaking.

In addition to affecting the strength of the frames, the grain direction can also affect the appearance of the sunglasses. The grain pattern can add an interesting and unique texture to the frames, giving them a natural and organic feel.

By understanding the types of wood used and the importance of grain direction, you can create beautiful and functional wooden sunglasses that will stand the test of time.

Tools and Materials Needed

To make wooden sunglasses frames, you will need a variety of tools and materials. Here are the essential items you will need to get started:

Tools

  • Saw (hand or power)
  • Sandpaper (80, 120, and 220 grit)
  • Wood glue
  • Clamps
  • Dremel tool with sanding disks
  • Small screwdriver
  • Brush

Materials

  • Wooden veneer (straight grain and flexible)
  • Lenses and hinges from store-bought sunglasses
  • Super glue
  • Walnut oil and beeswax for wood finish
  • Clothespins

When selecting your wooden veneer, choose a type that is flexible and has a straight grain. This will make it easier to shape and mold into the desired frame shape. You will also need to purchase lenses and hinges from a store-bought pair of sunglasses to use in your wooden frame.

In terms of tools, a saw (either hand or power) will be necessary to cut the wooden veneer to the correct shape and size. Sandpaper of varying grits will be needed to smooth out any rough edges and ensure a polished finish. Wood glue and clamps will be necessary to hold the frame together while it dries.

A Dremel tool with sanding disks will be useful for shaping and sanding the frame, while a small screwdriver will be necessary for attaching the hinges. A brush will be necessary for applying the wood finish, and clothespins can be used to hold the frame together while the glue dries.

With these tools and materials, you will be well on your way to creating your very own pair of stylish and unique wooden sunglasses frames.

Designing Your Sunglass Frames

When it comes to designing your wooden sunglass frames, there are a few important things to consider. In this section, we’ll cover the basics of choosing the right shape and creating a template for your frames.

Choosing the Right Shape

The shape of your frames will play a big role in the overall look and feel of your wooden sunglasses. There are a few things to consider when choosing a shape:

  • Face Shape: Consider the shape of your face when choosing a frame shape. Round faces often look best with angular frames, while angular faces can benefit from rounder frames.
  • Style: Think about the overall style you want to achieve with your sunglasses. Do you want something classic and timeless, or something more modern and trendy?
  • Functionality: Consider how you will be using your sunglasses. If you plan on using them for outdoor activities, you may want a more wrap-around style to provide better protection from the sun.

Once you have a general idea of the shape you want, you can start creating a template.

Creating the Template

Creating a template for your wooden sunglass frames is an important step in the design process. This will help ensure that your frames are the right size and shape, and will make it easier to create multiple pairs of sunglasses with consistent sizing.

To create a template, you can start with a basic outline of the shape you want. You can then use this outline to create a more detailed template, including measurements for the width of the frame, the height of the lenses, and the angle of the arms.

There are a few different ways to create a template, depending on your preferences and available tools. Some people prefer to draw their templates by hand, while others use computer software to create a more precise design.

Once you have a template, you can use it as a guide for cutting and shaping your wooden frames. With a little bit of practice, you’ll be able to create beautiful and unique wooden sunglass frames that are perfect for your style and needs.

Cutting and Shaping the Frames

Cutting the Wood

When making wooden sunglass frames, the first step is to cut the wood to the desired size and shape. You can use a table saw or a band saw to cut the wood into the rough shape of the frames. It’s important to use a high-quality, durable wood that can withstand wear and tear. Some popular choices include cherry, maple, and walnut.

Before cutting the wood, it’s essential to measure the size of the lenses and take into account the width of the nose bridge and the length of the temples. You should also consider the thickness of the wood and the desired thickness of the frames. Once you have these measurements, you can cut the wood to the right size and shape.

Sanding and Shaping

After cutting the wood, the next step is to sand and shape the frames. Start by sanding the rough edges and corners of the frames using a coarse-grit sandpaper. Then, switch to a finer-grit sandpaper to smooth out the surface of the wood.

Once the frames are sanded, you can start shaping them. You can use a router or a Dremel tool to create the desired shape of the frames. Be sure to take your time and work carefully to avoid making any mistakes.

When shaping the frames, it’s important to pay attention to the details. You can use a template or a guide to ensure that the frames are symmetrical and well-proportioned. You can also add decorative elements such as patterns or engravings to make the frames more unique.

Overall, cutting and shaping the frames is an important step in making wooden sunglass frames. With the right tools and techniques, you can create frames that are both functional and stylish.

Assembling the Sunglasses

Congratulations on making it this far! You’re almost done with your wooden sunglasses. In this section, we’ll cover how to assemble the sunglasses with the lenses and arms.

Installing the Lenses

The first step is to install the lenses. If you’re using lenses from store-bought sunglasses, you can simply pop them into the frames. If you’re using custom lenses, you may need to have them cut to size. Here are the steps to install the lenses:

  1. Clean the lenses with a microfiber cloth to remove any dust or debris.
  2. Insert the lenses into the frame grooves, making sure they are centered and level.
  3. Gently press down on the lenses to secure them in place.

Attaching the Arms

Now it’s time to attach the arms to the frame. You can use hinges from store-bought sunglasses or make your own hinges out of wood. Here are the steps to attach the arms:

  1. Mark the location of the hinges on the frame and arms.
  2. Drill pilot holes for the hinge screws.
  3. Attach the hinges to the frame and arms using screws.
  4. Test the hinges to make sure they open and close smoothly.

Once you’ve installed the lenses and attached the arms, your wooden sunglasses are ready to wear! Make sure to store them in a protective case when not in use to keep them safe from scratches and damage.

Finishing Touches

Applying a Finish

Once you have shaped and sanded your wooden sunglass frames, it’s time to apply a finish. A finish will protect the wood from moisture, sunlight, and wear and tear. There are many different finishes you can use, such as oil-based finishes, water-based finishes, and wax finishes.

Before applying the finish, make sure the frames are completely clean and dust-free. You can use a tack cloth or a soft-bristled brush to remove any dust or debris. Then, apply the finish according to the manufacturer’s instructions. You may need to apply multiple coats, depending on the type of finish you choose.

Adding the Hinges

Once the finish has dried, it’s time to add the hinges. You can purchase hinges specifically designed for wooden sunglass frames, or you can make your own hinges out of wire or metal strips.

To install the hinges, use a small drill bit to make a pilot hole in the frame where the hinge will be attached. Then, screw the hinge into place using a small screwdriver. Make sure the hinge is secure and the arms of the frame move smoothly.

Congratulations! You have now completed your own unique pair of wooden sunglass frames. Enjoy wearing them and showing off your craftsmanship.

“How Much Does It Cost to Refinish a 2,000 Square Foot Hardwood Floor?” – A Guide to Budgeting for Your Flooring Project

“How Much Does It Cost to Refinish a 2,000 Square Foot Hardwood Floor?” – A Guide to Budgeting for Your Flooring Project

Refinishing a hardwood floor can give your home a fresh new look and increase its value. However, one of the biggest concerns homeowners have when considering this type of renovation is the cost. If you’re wondering how much it will cost to refinish a 2,000 square foot hardwood floor, you’ve come to the right place.

According to industry experts, the cost to refinish a 2,000 square foot hardwood floor can range from $3,000 to $7,000. The final cost will depend on a variety of factors, such as the condition of the floor, the type of wood, the extent of the damage, and the type of finish you choose. It’s important to note that these prices are just estimates, and the actual cost may be higher or lower depending on your specific situation.

Factors that can affect the cost of refinishing a hardwood floor include the level of sanding required, the type of finish you choose, and the amount of prep work needed. Some homeowners opt for a DIY approach to save money, but it’s important to note that refinishing a hardwood floor can be a time-consuming and labor-intensive process. Hiring a professional can ensure that the job is done properly and efficiently, but it will also add to the overall cost.

Understanding Hardwood Floor Refinishing

cost-to-refinish-hardwood-floors-types-of-hardwood-floors-650x434understanding-hardwood-floor-refinishing

What is Hardwood Floor Refinishing?

Hardwood floor refinishing is the process of sanding, staining, and sealing a hardwood floor to restore its original beauty. Over time, hardwood floors can become dull, scratched, and worn out due to foot traffic, pets, and furniture. Refinishing your hardwood floor can bring it back to life and make it look brand new again.

The process of hardwood floor refinishing involves several steps. First, the floor is sanded down to remove the old finish and any scratches or imperfections on the surface. Then, the floor is stained to achieve the desired color and tone. Finally, a protective sealant is applied to protect the floor from future damage.

Why Refinish Your Hardwood Floor?

Refinishing your hardwood floor has several benefits. First and foremost, it can improve the appearance of your home. A freshly refinished hardwood floor can make a room look brighter, cleaner, and more inviting. It can also increase the value of your home if you plan to sell it in the future.

In addition to aesthetic benefits, refinishing your hardwood floor can also help prolong its lifespan. The protective sealant applied during the refinishing process can help prevent scratches, dents, and other damage from occurring. This can save you money in the long run by reducing the need for costly repairs or replacements.

Overall, hardwood floor refinishing is a great investment for any homeowner looking to improve the appearance and durability of their hardwood floors. With the right tools and techniques, it is possible to refinish a 2,000 square foot hardwood floor at a reasonable cost.

Cost Factors

When it comes to refinishing a hardwood floor, several factors can influence the overall cost of the project. Here are some essential cost factors you should consider before starting the refinishing process.

Type of Hardwood

The type of hardwood you have can significantly affect the cost of refinishing. Some hardwoods are more difficult to work with than others, and therefore, require more time and effort to refinish. For instance, exotic hardwoods like Brazilian Cherry or Teak can be more challenging to sand and finish, which can increase the cost of refinishing.

Condition of the Flooring

The condition of your hardwood flooring is another significant cost factor. If the flooring has deep scratches, dents, or stains, it may require more extensive sanding and repair work, which can increase the overall cost of refinishing. On the other hand, if the flooring is in good condition, it may only require light sanding and a new coat of finish, which can be less expensive.

Geographical Location

Geographical location can also affect the cost of refinishing a hardwood floor. In some areas, the cost of living is higher, which can increase the labor costs associated with the refinishing process. Additionally, some regions have more experienced and skilled hardwood flooring professionals, which can also impact the overall cost.

Level of Finishing Required

The level of finishing required is another critical cost factor. If you want a high-gloss finish, it may require more coats of finish and additional buffing, which can increase the cost. However, if you prefer a more natural look, it may only require a single coat of finish, which can be less expensive.

In summary, the cost of refinishing a 2,000 square foot hardwood floor can vary depending on several factors. By considering the type of hardwood, the condition of the flooring, your geographical location, and the level of finishing required, you can get a better idea of the overall cost of the project.

Average Cost Breakdown

average-cost-breakdown

When it comes to refinishing a 2,000 square foot hardwood floor, the cost can vary depending on several factors. In this section, we’ll break down the average cost of refinishing a 2,000 square foot hardwood floor, including labor costs, material costs, and additional costs.

Labor Costs

The cost of labor is typically the most significant expense when it comes to refinishing a hardwood floor. The labor cost for refinishing a 2,000 square foot hardwood floor can range from $2,500 to $5,000. The cost of labor will vary depending on the experience and expertise of the contractor, the location of the project, and the complexity of the job.

Material Costs

The material cost for refinishing a 2,000 square foot hardwood floor can range from $1,500 to $3,000. The cost of materials will depend on the type of finish you choose, the quality of the materials, and the size of the project. The most common materials used for refinishing hardwood floors include sandpaper, stain, polyurethane, and paint brushes.

Additional Costs

In addition to labor and material costs, there may be additional costs associated with refinishing a 2,000 square foot hardwood floor. These costs may include:

  • Furniture removal and replacement: If you have furniture in the room, you’ll need to remove it before the project begins. This may require hiring a moving company or renting a storage unit.
  • Floor repairs: If your hardwood floor has extensive damage, such as deep scratches or gouges, you may need to repair the floor before refinishing it.
  • Stair refinishing: If you have stairs that need to be refinished, this will add to the overall cost of the project.

It’s important to keep in mind that the cost of refinishing a 2,000 square foot hardwood floor can vary depending on your location, the contractor you hire, and the materials you choose. Be sure to get multiple quotes from different contractors and compare them to find the best deal for your project.

Cost Comparison

When it comes to refinishing a 2,000 square foot hardwood floor, there are a few cost comparison factors to consider. In this section, we’ll compare the cost of DIY vs professional refinishing and new installation vs refinishing.

DIY vs Professional Refinishing

One way to save money on refinishing a hardwood floor is to do it yourself. DIY refinishing costs around $600 to $1,100, according to HomeGuide. However, this option is only recommended for those with experience in woodworking and refinishing.

Professional refinishing, on the other hand, costs between $2 and $8 per square foot, depending on the location, type of finish, and condition of the floor. According to This Old House, a 2,000 square foot floor could cost between $4,800 and $16,000 for professional refinishing.

While DIY refinishing may seem like a cost-effective option, it’s important to consider the time and effort required to complete the project. Professional refinishing may be more expensive, but it ensures a high-quality finish and saves you the hassle of doing the work yourself.

New Installation vs Refinishing

Another cost comparison to consider is new installation vs refinishing. Installing a new hardwood floor can cost between $8 and $14 per square foot, according to HomeAdvisor. This means that a 2,000 square foot floor could cost between $16,000 and $28,000 to install.

Refinishing, on the other hand, costs between $2 and $8 per square foot, as mentioned earlier. Refinishing a 2,000 square foot floor could cost between $4,000 and $16,000.

While new installation may seem like a better option, refinishing can save you money and preserve the character and history of your existing hardwood floor. Refinishing also has a shorter timeline than new installation, as it can be completed in a few days compared to the weeks required for new installation.

In conclusion, both DIY and professional refinishing and new installation and refinishing have their pros and cons. It’s important to consider your budget, timeline, and desired outcome before making a decision.

How to Save on Refinishing Costs

how-to-save-on-refinishing-costs

Refinishing a 2,000 square foot hardwood floor can be a significant investment. However, there are ways to save on refinishing costs without compromising the quality of the work. Here are some tips to help you save money on your hardwood floor refinishing project.

Choosing the Right Contractor

The first step in saving on refinishing costs is to choose the right contractor. Look for a contractor who has experience in hardwood floor refinishing and has good reviews from previous customers. Ask for references and check them to ensure that the contractor is reliable and provides quality work.

Get multiple quotes from different contractors and compare their prices and services. Don’t simply choose the lowest bidder, as the quality of their work may not be up to par. Instead, choose a contractor who offers a fair price and provides a detailed breakdown of the costs involved in the project.

Opt for Simpler Finishes

Hardwood floor finishes come in a variety of options, ranging from simple to complex. While complex finishes may look more attractive, they can also be more expensive. Opting for a simpler finish can save you money without compromising the quality of the work.

Consider using a water-based finish instead of an oil-based finish. Water-based finishes are cheaper and dry faster, which means that the project can be completed more quickly. They are also more environmentally friendly and have fewer fumes than oil-based finishes.

Maintain Your Floors Properly

One of the best ways to save on refinishing costs is to maintain your floors properly. Regular cleaning and maintenance can extend the life of your hardwood floors and reduce the need for refinishing.

Sweep or vacuum your floors regularly to remove dirt and debris. Use a damp mop to clean spills and stains immediately. Avoid using harsh chemicals or abrasive cleaners, as they can damage the finish of your floors.

Place rugs or mats in high-traffic areas to protect your floors from wear and tear. Trim your pet’s nails regularly to prevent scratches on the floor. By maintaining your floors properly, you can save money on refinishing costs and keep your floors looking beautiful for years to come.

In conclusion, refinishing a 2,000 square foot hardwood floor can be expensive, but there are ways to save on costs without compromising the quality of the work. Choose the right contractor, opt for simpler finishes, and maintain your floors properly to save money on your hardwood floor refinishing project.

Frequently Asked Questions

What factors affect the cost of refinishing hardwood floors?

The cost of refinishing hardwood floors depends on several factors, including the size of the area to be refinished, the condition of the floors, the type of finish you want, and the cost of labor in your area. If your floors require extensive repairs, such as replacing damaged boards or fixing squeaks, this will also add to the cost.

Is it worth it to hire a professional to refinish hardwood floors?

While it is possible to refinish hardwood floors yourself, it can be a time-consuming and challenging process. Hiring a professional can ensure that the job is done correctly and efficiently. Additionally, professionals have access to specialized equipment and materials that can produce better results than DIY methods.

How much does it cost to rent a hardwood floor sander?

The cost to rent a hardwood floor sander varies depending on your location and the type of sander you need. On average, you can expect to pay between $50 and $100 per day to rent a sander. Keep in mind that you will also need to purchase sandpaper and other supplies, which can add to the overall cost.

Can you refinish hardwood floors yourself? What are the risks?

Yes, it is possible to refinish hardwood floors yourself. However, there are several risks involved. If you are not experienced with sanding and finishing floors, you may damage the wood or produce uneven results. Additionally, refinishing floors can produce a significant amount of dust, which can be hazardous to your health if you do not take proper precautions.

What is the average cost to refinish 2,000 square feet of hardwood floors?

The cost to refinish 2,000 square feet of hardwood floors can vary widely depending on several factors. On average, you can expect to pay between $3,000 and $6,000 for professional refinishing services. However, this cost can be higher or lower depending on the condition of your floors, the type of finish you choose, and the cost of labor in your area.

Is it cheaper to refinish or replace hardwood floors?

In general, it is cheaper to refinish hardwood floors than to replace them. Refinishing can cost between $3 and $8 per square foot, while replacing can cost between $8 and $15 per square foot. However, if your floors are severely damaged or you want to change the layout of your space, replacement may be a better option.

Cleaning Hardwood Floors: Can White Vinegar Diluted in Water Do the Trick?

Cleaning Hardwood Floors: Can White Vinegar Diluted in Water Do the Trick?

Are you wondering if white vinegar diluted in water can be used to clean your hardwood floors? The answer is yes, but with some important considerations. While vinegar is a natural and inexpensive cleaning solution, it can damage your hardwood floors if used improperly. In this article, we will explore the do’s and don’ts of cleaning hardwood floors with vinegar to help you keep your floors looking their best.

Before you start cleaning your hardwood floors with vinegar, it’s important to understand the potential risks. Vinegar is acidic and can strip the finish off your floors if used in high concentrations or too frequently. However, when diluted properly, vinegar can be an effective and safe cleaning solution. We will discuss the right ratio of vinegar to water, as well as other tips to help you avoid damaging your hardwood floors. By following our guidelines, you can use vinegar to clean your floors without worrying about causing harm.

Understanding White Vinegar

If you’re looking for a natural and affordable cleaning solution, white vinegar is a popular option. But what exactly is white vinegar, and how can it be used to clean hardwood floors?

White vinegar is a clear, acidic liquid made from fermented grain alcohol. It typically has a pH of around 2.5 – 3.5, which makes it effective at breaking down dirt, grime, and mineral deposits. When diluted with water, white vinegar can be used to clean a variety of surfaces, including hardwood floors.

It’s important to note that not all types of vinegar are created equal. While white vinegar is a great all-purpose cleaner, other types of vinegar, such as apple cider vinegar or balsamic vinegar, may contain sugars or other additives that can leave behind a sticky residue. Stick with white vinegar for cleaning purposes.

When using white vinegar to clean hardwood floors, it’s important to dilute it properly. A solution of 1/4 cup of white vinegar to 1 gallon of warm water is a good starting point. Avoid using undiluted vinegar, as it can be too acidic and may damage your floors.

In addition to its cleaning properties, white vinegar also has some other benefits. It’s non-toxic, biodegradable, and safe to use around children and pets. Plus, it’s much cheaper than many commercial cleaning products.

Overall, white vinegar is a versatile and effective cleaning solution for hardwood floors and many other surfaces in your home. Just be sure to dilute it properly and avoid using it on surfaces that may be sensitive to acidity.

The Science Behind Vinegar and Hardwood Floors

the-science-behind-vinegar-and-hardwood-floors

Acidity of Vinegar

Vinegar is a natural cleaning agent that is commonly used in households. It is a diluted solution of acetic acid, which makes it acidic. The acidity of vinegar can range from 2.4 to 3.4 pH, depending on the type of vinegar.

When vinegar is mixed with water, it becomes less acidic. A solution of 50% water and 50% vinegar has a pH of around 2.5 to 3.0. This level of acidity is safe for most hardwood floors.

However, it is important to note that vinegar should not be used on floors that have been treated with wax or oil-based finishes. The acidity of the vinegar can break down the wax or oil, causing damage to the floor.

Effect on Hardwood

When used in moderation, vinegar can be an effective cleaner for hardwood floors. It can help remove dirt, grime, and stains without leaving behind a residue. Additionally, vinegar is a natural disinfectant, which makes it a great choice for households with pets or young children.

However, it is important to use vinegar in moderation. Overuse of vinegar can damage hardwood floors, especially those with a polyurethane finish. The acidity of the vinegar can strip away the protective coating, leaving the wood vulnerable to damage.

To avoid damage, it is recommended to dilute vinegar with water and use it sparingly. A good ratio to follow is 1/4 cup of vinegar to 1 gallon of water. Additionally, it is important to avoid using abrasive materials, such as steel wool, when cleaning hardwood floors with vinegar.

In summary, vinegar can be an effective cleaner for hardwood floors when used in moderation. The acidity of the vinegar can help remove dirt and grime without leaving behind a residue. However, it is important to dilute vinegar with water and avoid using it on floors with wax or oil-based finishes.

Dilution Process

Cleaning hardwood floors with vinegar and water is a great way to remove dirt and grime without using harsh chemicals. However, it’s important to dilute the vinegar properly to avoid damaging your floors. In this section, we’ll walk you through the ideal vinegar to water ratio and the preparation steps for cleaning your hardwood floors with vinegar.

Ideal Vinegar to Water Ratio

The ideal vinegar to water ratio for cleaning hardwood floors is 1 cup of vinegar to 1 gallon of warm water. This ratio is safe for most hardwood floors, but if you’re unsure, it’s always a good idea to test the solution on a small, inconspicuous area first.

If you have particularly dirty floors, you can increase the vinegar concentration slightly, but be careful not to use too much vinegar as it can damage the finish on your floors. A good rule of thumb is to never use more than 1 cup of vinegar per 1 gallon of water.

Preparation Steps

Now that you know the ideal vinegar to water ratio, let’s go over the preparation steps for cleaning your hardwood floors with vinegar.

  1. Start by sweeping or vacuuming your floors to remove any loose dirt and debris.
  2. Mix 1 cup of vinegar with 1 gallon of warm water in a bucket.
  3. Dip a mop or cloth into the solution and wring it out well. You want the mop or cloth to be damp, but not soaking wet.
  4. Begin mopping your floors, working in small sections at a time. Be sure to rinse your mop or cloth frequently to avoid spreading dirt and grime around.
  5. Once you’ve mopped the entire floor, go over it again with a clean, damp mop or cloth to remove any excess vinegar solution.
  6. Allow your floors to air dry completely before walking on them.

That’s it! Cleaning your hardwood floors with vinegar and water is a simple and effective way to keep them looking their best. Just be sure to follow the ideal vinegar to water ratio and preparation steps to avoid damaging your floors.

Cleaning Procedure

cleaning-procedure

Frequency of Cleaning

The frequency of cleaning your hardwood floors depends on the amount of foot traffic and the level of dirt and debris. Generally, it is recommended to clean your hardwood floors once a week. However, if you have pets or children, or if your living area is prone to dust and dirt, you may need to clean your floors more frequently.

Step-by-Step Guide

Cleaning your hardwood floors with white vinegar diluted in water is a safe and effective way to keep them clean and shiny. Here is a step-by-step guide to help you get started:

  1. Clear the floor of any furniture or obstacles that may get in the way of cleaning.
  2. Sweep or vacuum the floor to remove any loose dirt, dust, or debris. This will prevent scratching the floor while mopping.
  3. Mix a solution of white vinegar and warm water in a bucket. The recommended ratio is 1/4 cup of white vinegar to 1 gallon of warm water.
  4. Dip a mop or cloth into the solution and wring it out well. You should avoid using too much water as it can damage the wood.
  5. Mop the floor in sections, starting from one corner of the room and working your way towards the other end. Be sure to wring out the mop or cloth frequently to avoid leaving excess water on the floor.
  6. After mopping, use a clean, damp cloth to wipe the floor again. This will remove any remaining dirt and vinegar residue.
  7. Allow the floor to air dry completely before walking on it again.

It’s important to note that you should never use a steam mop or wet mop on hardwood floors, as it can cause damage to the wood. Additionally, you should avoid using abrasive cleaners or tools that can scratch the surface of the wood. By following these simple steps, you can keep your hardwood floors clean and looking their best.

Benefits of Using Vinegar Solution

When it comes to cleaning hardwood floors, using a vinegar solution has several benefits. Here are a few reasons why you should consider using vinegar solution for your hardwood floors:

Natural and Non-Toxic

Vinegar is a natural and non-toxic cleaning agent that is safe to use on hardwood floors. Unlike harsh chemicals, vinegar solution won’t damage the finish of your hardwood floors or leave behind any harmful residue.

Effective Cleaning

Vinegar solution is an effective cleaner that can remove dirt, grime, and stains from your hardwood floors. It can also help to eliminate odors and leave your floors looking clean and shiny.

Inexpensive

Using vinegar solution to clean your hardwood floors is a cost-effective option. Vinegar is a common household item that is readily available and affordable. You can save money on expensive cleaning products by using vinegar solution instead.

Easy to Make

Making vinegar solution is easy and requires only a few ingredients. All you need is white vinegar, water, and a spray bottle. Simply mix the vinegar and water in the spray bottle, and you’re ready to clean your hardwood floors.

Environmentally Friendly

Using vinegar solution to clean your hardwood floors is an environmentally friendly option. Vinegar is a natural and biodegradable substance that won’t harm the environment. By using vinegar solution, you can reduce your impact on the environment and help to keep your home clean and healthy.

Potential Risks and Precautions

potential-risks-and-precautions

Possible Damages

While white vinegar diluted in water can be an effective cleaning solution for hardwood floors, there are potential risks to keep in mind. Using undiluted vinegar or vinegar with a higher acidity level can damage the finish of the hardwood and cause discoloration. Additionally, using too much vinegar or leaving it on the floor for too long can cause the wood to swell or warp.

Another potential risk is using vinegar on floors that have already been waxed or polished. The acidic properties of vinegar can strip away the wax or polish, leaving the floor dull and unprotected.

Preventive Measures

To prevent any potential damages, it is important to dilute the vinegar properly. A good ratio to follow is one part vinegar to four parts water. This will ensure that the acidity level is not too high and will not damage the finish of the hardwood.

It is also important to avoid leaving the vinegar solution on the floor for too long. After applying the solution, be sure to wipe it up with a clean, damp cloth. This will prevent any excess vinegar from soaking into the wood and causing damage.

If your hardwood floors have already been waxed or polished, it is best to avoid using vinegar altogether. Instead, use a cleaning solution that is specifically designed for waxed or polished floors.

By following these preventive measures, you can safely use white vinegar diluted in water to clean your hardwood floors without causing any damage.

Frequently Asked Questions

Can I use diluted white vinegar to clean my hardwood floors?

Yes, you can use diluted white vinegar to clean your hardwood floors. However, it is important to note that vinegar is acidic and can damage the finish of your hardwood floors over time. It is recommended to only use vinegar as a cleaning solution occasionally and to follow proper dilution ratios.

Is it safe to use vinegar and water on hardwood floors?

Yes, vinegar and water can be safe to use on hardwood floors as long as it is properly diluted and used sparingly. However, it is important to note that excessive use of vinegar can damage the finish of your hardwood floors.

What is the recommended ratio of vinegar to water for cleaning hardwood floors?

The recommended ratio of vinegar to water for cleaning hardwood floors is 1/2 cup of white vinegar to one gallon of warm water. This ratio is safe for most hardwood floors and will effectively clean and remove dirt and grime.

What are some alternatives to using vinegar to clean hardwood floors?

Some alternatives to using vinegar to clean hardwood floors include using a pH-neutral cleaner specifically designed for hardwood floors, using a microfiber mop with warm water, or using a hardwood floor cleaner recommended by the manufacturer.

What should I avoid using when cleaning my hardwood floors?

Avoid using abrasive cleaners, wax-based cleaners, oil-based cleaners, or steam cleaners when cleaning your hardwood floors. These cleaners can damage the finish of your hardwood floors and cause long-term damage.

How can I prevent streaks when cleaning my hardwood floors?

To prevent streaks when cleaning your hardwood floors, use a microfiber mop and make sure to wring out excess water before cleaning. Additionally, make sure to follow the recommended dilution ratios for cleaning solutions and avoid using too much cleaning solution on your floors.