Tag Archives: mix equal parts water

clean-wooden-floors

What Can I Use to Clean Wooden Floors? Tips and Tricks for a Spotless Finish

Are you tired of seeing your wooden floors looking dull and dirty? Do you want to know what you can use to clean them effectively and efficiently? Look no further! In this article, we will provide you with some tips and tricks on how to clean your wooden floors and keep them looking their best.

Cleaning wooden floors may seem like a daunting task, but it doesn’t have to be. The key is to use the right products and techniques that won’t damage the wood. There are several options available, from commercial wood-cleaning products to DIY solutions. We will explore the pros and cons of each so that you can make an informed decision on what to use for your specific needs.

It’s important to note that not all wooden floors are the same, and what works for one may not work for another. Factors such as the type of wood, finish, and age of the floor can all play a role in determining the best cleaning method. So, let’s dive in and discover what you can use to clean your wooden floors and achieve that beautiful, shiny finish you desire.

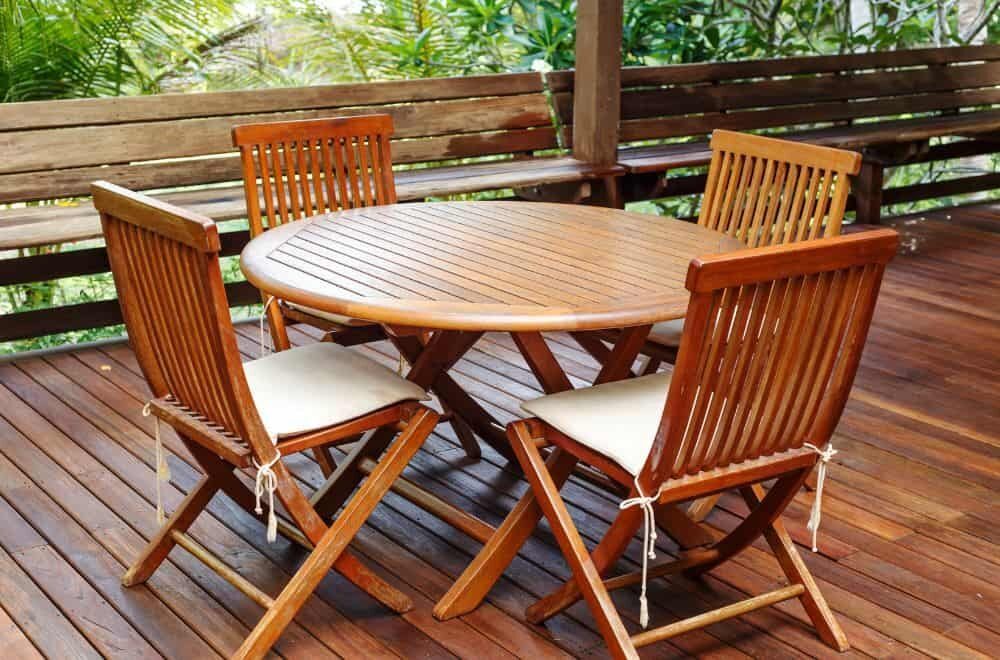
Understanding Your Wooden Floors

clean-wooden-floors

Wooden floors are a beautiful addition to any home, but they also require proper maintenance to keep them looking their best. Before you start cleaning your wooden floors, it’s important to understand the type of wood and finish used. Here are some things to keep in mind:

Types of Wood

Different types of wood have different properties that affect their durability and how they should be cleaned. Here are some common types of wood used for flooring:

  • Oak: durable and resistant to wear and tear
  • Maple: hard and dense, with a uniform texture
  • Pine: soft and prone to scratches and dents
  • Cherry: soft and prone to scratches, but develops a rich patina over time

Types of Finish

The finish on your wooden floors affects how you should clean them. Here are some common types of finishes:

  • Polyurethane: a clear, protective layer that is easy to clean
  • Wax: a traditional finish that requires regular maintenance
  • Oil: penetrates the wood to protect it from within, but requires regular maintenance
  • Varnish: a hard, durable finish that is resistant to scratches and stains

Cleaning Tips

Once you understand the type of wood and finish on your floors, you can start cleaning them properly. Here are some tips to keep in mind:

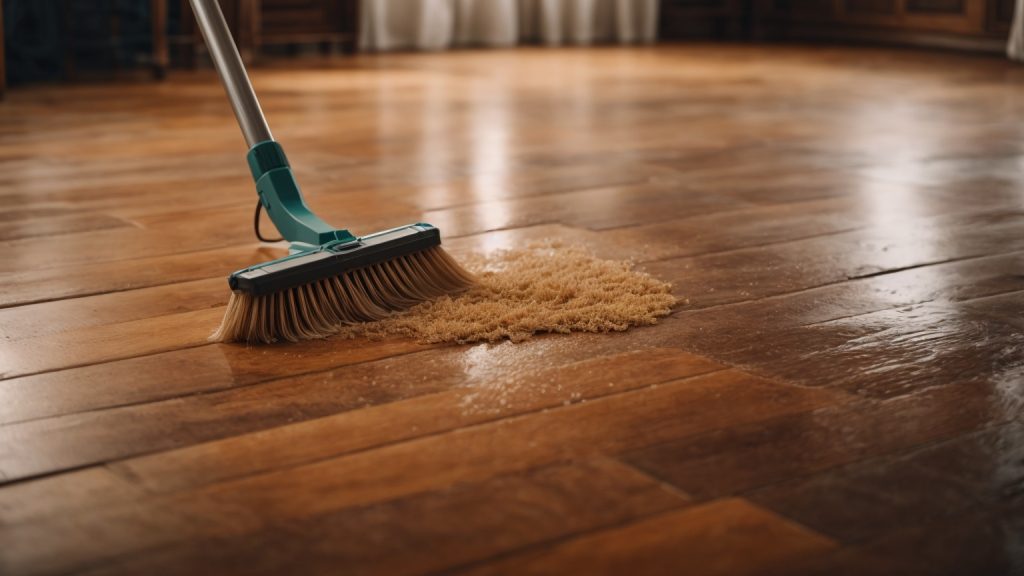
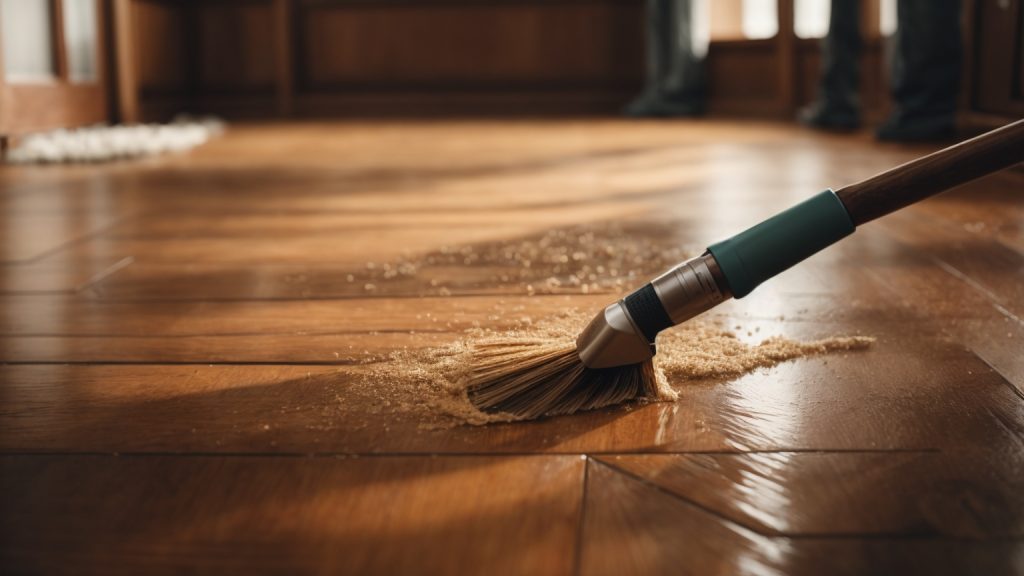
  • Sweep or vacuum your floors regularly to prevent dirt and dust from scratching the surface.
  • Use a damp mop to clean your floors, but avoid using too much water, as it can damage the wood.
  • Avoid using harsh chemicals or vinegar, as they can strip the finish and damage the wood.
  • Use a cleaner specifically designed for your type of finish, and follow the instructions carefully.
  • Wipe up spills immediately to prevent them from seeping into the wood and causing damage.

By understanding your wooden floors and taking proper care of them, you can enjoy their beauty for years to come.

Choosing the Right Cleaning Products

When it comes to cleaning wooden floors, it’s important to choose the right products to avoid damaging the wood. There are two main categories of cleaning products: natural products and commercial cleaners.

Natural Products

If you prefer to use natural products to clean your wooden floors, there are several options available:

  • Vinegar and water: Mix equal parts of white vinegar and water in a spray bottle and use it to clean your floors. Vinegar is a natural disinfectant and can help remove dirt and grime from your floors.
  • Olive oil and vinegar: Mix 1/4 cup of olive oil with 1/4 cup of white vinegar in a spray bottle and use it to clean your floors. The olive oil will help moisturize the wood and restore its shine.
  • Lemon juice and water: Mix equal parts of lemon juice and water in a spray bottle and use it to clean your floors. Lemon juice is a natural cleaner and can help remove stains and odors from your floors.

Commercial Cleaners

If you prefer to use commercial cleaners to clean your wooden floors, there are several options available:

  • Bona Hardwood Floor Cleaner: This is a popular commercial cleaner that is safe for use on hardwood floors. It is non-toxic and does not leave any residue on your floors.
  • Murphy Oil Soap: This is another popular commercial cleaner that is safe for use on hardwood floors. It is made from natural ingredients and can help remove dirt and grime from your floors.
  • Method Wood Floor Cleaner: This is a natural cleaner that is safe for use on hardwood floors. It is made from plant-based ingredients and does not contain any harsh chemicals.

When choosing a commercial cleaner, make sure to read the label carefully to ensure that it is safe for use on hardwood floors. Avoid using cleaners that contain harsh chemicals or abrasives, as these can damage the wood.

Cleaning Techniques

cleaning-techniques

When it comes to cleaning your wooden floors, there are two main techniques you can use: dry cleaning and wet cleaning. Each method has its advantages and disadvantages, so it’s important to choose the right one for your specific needs.

Dry Cleaning

Dry cleaning is a great technique for removing loose dirt, dust, and debris from your wooden floors. Here are a few methods you can use:

  • Sweeping: Use a soft-bristled broom to sweep your floors regularly. This will help prevent dirt and debris from accumulating and scratching the surface of your floors.
  • Vacuuming: Use a vacuum cleaner with a soft-brush attachment to remove dirt and debris from your floors. Be sure to avoid using a vacuum with a beater bar, as this can scratch the surface of your floors.
  • Dry Mopping: Use a microfiber mop or a dry mop to pick up dirt and debris from your floors. Be sure to avoid using a wet mop, as this can damage your floors.

Wet Cleaning

Wet cleaning is a great technique for removing stains and spills from your wooden floors. Here are a few methods you can use:

  • Damp Mopping: Use a damp mop with a mild cleaning solution to clean your floors. Be sure to wring out the mop thoroughly before using it, as excess water can damage your floors.
  • Vinegar Solution: Mix equal parts water and vinegar to create a natural cleaning solution for your floors. Apply the solution to your floors with a damp mop, and then rinse with clean water.
  • Commercial Cleaners: There are many commercial cleaners available that are specifically designed for cleaning wooden floors. Be sure to follow the manufacturer’s instructions carefully when using these products.

Remember to always test any cleaning solution on a small, inconspicuous area of your floor before using it on the entire surface. This will help prevent any damage or discoloration to your floors.

Preventive Measures

Taking preventive measures is the best way to ensure that your wooden floors remain clean and shiny. Here are some tips for maintaining your floors:

Regular Dusting

Dust and dirt can easily scratch and dull the surface of your wooden floors, so it’s important to dust them regularly. You can use a soft-bristled broom or a microfiber dust mop to remove dirt and debris. Make sure to avoid using a vacuum with a beater bar, as it can cause scratches. If you prefer to use a vacuum, make sure to use a bare-floor setting.

Avoiding Water Damage

Water can cause serious damage to wooden floors, so it’s important to avoid any spills or excess moisture. Make sure to wipe up spills immediately using a dry cloth. Avoid using wet mops or steam cleaners, as they can cause warping and damage to the wood. If you need to clean your floors with water, make sure to use a damp mop and dry the floors thoroughly afterwards.

Using Floor Mats

Floor mats can help prevent dirt and debris from being tracked onto your wooden floors. Place mats at all entryways and high-traffic areas to help trap dirt and moisture. Make sure to clean the mats regularly to prevent any buildup of dirt and debris.

By following these preventive measures, you can help keep your wooden floors looking clean and shiny for years to come.

Restoring and Maintaining Shine

If your wooden floors have lost their shine, don’t worry! There are several ways to restore and maintain their shine.

Polishing

Polishing is a quick and easy way to restore the shine of your wooden floors. You can use a floor polish or wax to bring back the shine. Here are the steps to polish your wooden floors:

  1. Clean the floor thoroughly with a hardwood floor cleaner and let it dry completely.
  2. Apply the polish or wax on a small section of the floor with a clean cloth or mop.
  3. Rub the polish or wax into the floor in a circular motion.
  4. Repeat the process on the rest of the floor.

Note that you should avoid using too much polish or wax as it can leave a residue on the floor.

Recoating

Recoating is another way to restore the shine of your wooden floors. It involves applying a new coat of finish to the floor. Here are the steps to recoat your wooden floors:

  1. Clean the floor thoroughly with a hardwood floor cleaner and let it dry completely.
  2. Lightly sand the floor with a fine-grit sandpaper to remove any scratches or imperfections.
  3. Apply a new coat of finish with a clean mop or applicator.
  4. Let the finish dry completely before walking on the floor.

Note that you should choose a finish that is compatible with the existing finish on your floor. Also, make sure to follow the manufacturer’s instructions when applying the finish.

By following these tips, you can restore and maintain the shine of your wooden floors.

How to Clean Grease from Wooden Cabinets: A Quick and Easy Guide

Are your wooden cabinets looking greasy and dirty? Grease buildup is a common problem in kitchens, especially on wooden cabinets. Fortunately, cleaning grease from wooden cabinets is not as difficult as it may seem. With a few simple steps, you can have your cabinets looking clean and new again.

One of the easiest ways to clean grease from wooden cabinets is to use warm, soapy water. Dish soap is designed to cut through grease, making it an effective cleaning agent. You can mix a few drops of dish soap with warm water and use a sponge or scrub brush to clean your cabinets. Another option is to use a grease-cutting dish soap and a nylon scouring pad to attack cabinet grease. Keep the water hot and use light pressure on the nylon pad to avoid scratching the surface. Rinse and dry the cabinets when done.

In addition to dish soap, there are other household items that can help you clean grease from wooden cabinets. For example, you can use vinegar and baking soda to create a natural cleaning solution. Simply mix equal parts of vinegar and water, and add a tablespoon of baking soda. Apply the mixture to your cabinets with a sponge or cloth and let it sit for a few minutes. Then, rinse with warm water and dry with a clean cloth.

Understanding Grease Stains on Wooden Cabinets

If you have wooden cabinets in your kitchen, you know that they are prone to grease stains. Grease stains can be unsightly and difficult to remove, but with the right techniques, you can get your cabinets looking like new again.

Grease stains occur when oils from cooking and food splatters accumulate on the surface of your wooden cabinets. Over time, these stains can become more difficult to remove as they penetrate deeper into the wood. If left untreated, the stains can discolor the wood and cause it to warp or crack.

To prevent grease stains from forming on your wooden cabinets, it’s important to keep them clean and dry. Wipe down your cabinets regularly with a damp cloth to remove any food splatters or spills. Avoid using harsh chemicals or abrasive cleaners, as these can damage the finish on your cabinets.

If you do have grease stains on your wooden cabinets, don’t panic. There are several methods you can use to remove them. One of the most effective methods is to use a mixture of warm water and dish soap. Simply mix a few drops of dish soap into a bowl of warm water, dip a sponge or cloth into the mixture, and gently scrub the stained area.

Another effective method for removing grease stains from wooden cabinets is to use a paste made from baking soda and water. Mix equal parts baking soda and water to create a thick paste, and apply it to the stained area. Let the paste sit for a few minutes, then wipe it away with a damp cloth.

In some cases, you may need to use a stronger cleaner to remove stubborn grease stains from your wooden cabinets. Look for cleaners that are specifically designed for use on wood surfaces, and follow the manufacturer’s instructions carefully.

By understanding how grease stains form on wooden cabinets and using the right cleaning techniques, you can keep your cabinets looking beautiful for years to come.

Essential Cleaning Supplies

When it comes to cleaning grease from wooden cabinets, having the right cleaning supplies is essential. Here are the top five supplies you’ll need to get the job done:

Microfiber Cloth

A microfiber cloth is a must-have for cleaning grease from wooden cabinets. These cloths are designed to trap and hold dirt and grime, making them perfect for wiping down cabinets. Plus, they’re reusable, so you can wash them and use them again and again.

Dish Soap

Dish soap is an effective and affordable way to clean grease from wooden cabinets. Simply mix a few drops of dish soap with warm water and use a sponge or microfiber cloth to wipe down your cabinets. Be sure to rinse the cabinets with clean water and dry them thoroughly when you’re done.

Baking Soda

Baking soda is a natural cleaning agent that can help remove stubborn grease stains from wooden cabinets. Mix baking soda with a small amount of water to create a paste, then apply the paste to the stains and let it sit for a few minutes. Use a sponge or microfiber cloth to wipe away the paste, then rinse the cabinets with clean water and dry them thoroughly.

Vinegar

Vinegar is another natural cleaning agent that can be used to clean grease from wooden cabinets. Mix equal parts vinegar and water in a spray bottle, then spray the solution onto your cabinets and wipe them down with a microfiber cloth. Be sure to rinse the cabinets with clean water and dry them thoroughly when you’re done.

Commercial Degreaser

If you’re dealing with tough grease stains that won’t come off with natural cleaning agents, a commercial degreaser may be your best bet. Look for a degreaser that’s specifically designed for use on wooden cabinets, and be sure to follow the manufacturer’s instructions carefully.

Step-by-Step Cleaning Guide

Cleaning grease from wooden cabinets can be a daunting task, but with the right tools and techniques, you can get the job done quickly and effectively. Follow this step-by-step cleaning guide to make your cabinets look like new again.

Initial Wipe Down

Before you start cleaning your cabinets, it’s important to remove any loose dirt or debris from the surface. Use a dry cloth or a soft-bristled brush to gently wipe down the cabinets and remove any loose dust or dirt.

Soapy Solution Cleaning

Next, mix up a solution of warm water and dish soap in a bucket or bowl. Dip a soft cloth or sponge into the solution and wring out the excess water. Then, use the cloth or sponge to gently scrub the cabinets, paying special attention to any areas with heavy grease buildup.

Baking Soda Scrub

For stubborn grease stains, try making a paste of baking soda and water. Apply the paste to the affected area and let it sit for a few minutes. Then, use a soft-bristled brush or a sponge to scrub the area, working in a circular motion. Rinse the area with warm water and dry it with a clean cloth.

Vinegar Rinse

To help remove any remaining grease residue, mix equal parts water and white vinegar in a spray bottle. Spray the solution onto the cabinets and let it sit for a few minutes. Then, use a clean cloth or sponge to wipe down the cabinets, rinsing the cloth or sponge frequently with warm water.

Commercial Degreaser Use

If the above methods don’t work, you may need to use a commercial degreaser. Be sure to read the label carefully and follow the manufacturer’s instructions. Apply the degreaser to the affected area and let it sit for the recommended amount of time. Then, use a soft-bristled brush or sponge to scrub the area, working in a circular motion. Rinse the area with warm water and dry it with a clean cloth.

By following these simple steps, you can easily remove grease from your wooden cabinets and restore their natural beauty. Remember to always test any cleaning solution on a small, inconspicuous area first, and to avoid using abrasive materials or harsh chemicals that could damage the wood.

Preventive Measures

To keep your wooden cabinets free of grease and grime, it’s important to take preventive measures. Here are some tips to help you keep your cabinets clean and grease-free:

Regular Cleaning

The best way to prevent grease buildup on your cabinets is to clean them regularly. Wipe down the cabinet surfaces with a soft cloth or sponge and warm, soapy water. Rinse with clean water and dry with a clean cloth. Avoid using abrasive cleaners or steel wool, as these can scratch the surface of the wood.

Use of Protective Coating

Another way to prevent grease buildup on your cabinets is to use a protective coating. There are a variety of products available that can help protect your cabinets from grease and other types of stains. These include wax, oil, and polyurethane coatings. Follow the manufacturer’s instructions for application and maintenance.

Proper Ventilation

Proper ventilation can also help prevent grease buildup on your cabinets. Make sure your kitchen is well-ventilated, with a range hood or exhaust fan that vents to the outside. This will help remove grease and other cooking fumes from the air, reducing the amount of grease that settles on your cabinets.

By following these preventive measures, you can keep your wooden cabinets looking clean and new for years to come.

Professional Help

If you’ve tried all the methods mentioned above and still can’t get rid of the grease from your wooden cabinets, it might be time to call in a professional. Here are some things to consider when deciding whether to seek professional help.

When to Call a Professional

If you’ve tried all the DIY methods and still can’t get rid of the grease, it might be time to call in a professional. Here are some signs that it’s time to call in the experts:

  • The grease has been there for a long time and has become very stubborn.
  • You’ve tried all the DIY methods and still can’t get rid of the grease.
  • You’re not comfortable working with chemicals or don’t have the necessary equipment.

Choosing a Professional

When choosing a professional to clean your wooden cabinets, here are some things to keep in mind:

  • Look for a company that specializes in cleaning wooden cabinets.
  • Check reviews and ratings online to make sure the company has a good reputation.
  • Ask for a quote before hiring a company to make sure you’re getting a fair price.
  • Make sure the company is licensed, insured, and bonded.

Remember that hiring a professional to clean your wooden cabinets can be expensive, but it’s worth it if you can’t get rid of the grease on your own. A professional will have the experience and equipment necessary to get your cabinets looking like new again.

How to Easily Remove Smells from Your Wooden Cutting Board

If you’re an avid cook, you know how important it is to have a reliable cutting board. Wooden cutting boards are a popular choice because of their durability, but they also require some extra care to keep them clean and odor-free. Over time, wooden cutting boards can absorb smells from the food you prepare on them, leaving behind a lingering odor that can be difficult to remove. Fortunately, there are several easy and effective ways to get rid of those unpleasant smells and keep your wooden cutting board looking and smelling fresh.

One of the most common ways to remove odors from a wooden cutting board is by using baking soda. Baking soda is a natural deodorizer that can absorb and neutralize odors. Simply mix water and baking soda to create a paste, then scrub the cutting board with the paste and rinse it thoroughly. Another effective method is to use lemon and salt. The acid in lemon juice can help break down odor-causing bacteria, while the salt acts as a gentle abrasive to scrub away any residue.

Understanding the Problem

Why Wooden Cutting Boards Absorb Smells

Wooden cutting boards are a popular choice for many cooks due to their durability, natural appearance, and ability to prevent knives from dulling. However, one common issue with wooden cutting boards is that they can easily absorb smells from the foods that are cut on them. This is because wood is a porous material that can trap bacteria and odors deep inside its surface.

When you cut foods like onions, garlic, or fish on a wooden cutting board, the juices from these foods can seep into the wood and create an environment where bacteria can thrive. As the bacteria grow, they release unpleasant odors that can linger on the cutting board even after it has been washed.

Common Culprits of Bad Odors

There are several common culprits of bad odors in wooden cutting boards. Some of the most common include:

  • Garlic and onions: These foods contain sulfur compounds that can create strong odors that are difficult to remove.
  • Fish: The oils in fish can penetrate deep into the wood and create a strong, fishy smell.
  • Meat: Raw meat can leave behind bacteria and odors that can linger on the cutting board.
  • Spices: Strong spices like cumin, curry, or chili powder can leave behind a lingering odor.

If you use your wooden cutting board frequently, it’s important to take steps to prevent odors from developing. In the next section, we’ll explore some effective methods for removing smells from wooden cutting boards.

Preventive Measures

To prevent your wooden cutting board from developing unpleasant odors, you should take some preventive measures. Here are a few tips to help keep your cutting board smelling fresh and clean.

Proper Cleaning Techniques

One of the best ways to prevent your wooden cutting board from smelling bad is to clean it properly after each use. Here are some tips for cleaning your board:

  • Wash your cutting board with hot, soapy water and rinse it thoroughly.
  • Use a scrub brush or sponge to remove any food particles or stains.
  • Dry your cutting board with a clean towel or let it air dry.
  • Avoid soaking your cutting board in water, as this can cause it to warp or crack.
  • Don’t put your cutting board in the dishwasher, as the high temperatures and harsh detergents can damage the wood.

Regular Maintenance and Care

In addition to proper cleaning techniques, you should also take care of your wooden cutting board on a regular basis. Here are some tips for maintaining your board:

  • Apply food-grade mineral oil to your cutting board once a month to help protect the wood and prevent it from absorbing moisture and odors.
  • Use a separate cutting board for meats and another for fruits and vegetables to prevent cross-contamination.
  • Don’t use your cutting board as a serving platter, as this can transfer bacteria and odors to the wood.
  • Store your cutting board in a dry, cool place away from direct sunlight and heat sources.
  • Sand your cutting board occasionally to remove any deep scratches or stains, but be careful not to sand too much or you may damage the board.

By following these preventive measures, you can help keep your wooden cutting board smelling fresh and clean for years to come.

Natural Remedies for Odor Removal

If you’re looking for a natural and effective way to remove odors from your wooden cutting board, there are a few methods you can try. Here are three popular options:

Using Vinegar

Vinegar is a natural deodorizer and can help remove unwanted smells from your wooden cutting board. To use vinegar for odor removal, mix equal parts water and white vinegar in a spray bottle. Spray the mixture onto the cutting board and let it sit for a few minutes. Then, rinse the board with hot water and dry it thoroughly.

Lemon and Salt Method

Lemon and salt are also great natural odor removers. Cut a lemon in half and sprinkle salt onto the cut side. Rub the lemon and salt mixture onto the cutting board, focusing on any areas with strong odors. Let the mixture sit for a few minutes, then rinse the board with hot water and dry it thoroughly.

Baking Soda Solution

Baking soda is another natural deodorizer that can help remove unwanted smells from your wooden cutting board. Mix a tablespoon of baking soda with a cup of water to create a paste. Spread the paste onto the cutting board and let it sit for a few minutes. Then, rinse the board with hot water and dry it thoroughly.

Remember to always wash your cutting board with hot, soapy water after each use to prevent the buildup of bacteria and odors. With these natural remedies, you can keep your wooden cutting board smelling fresh and clean.

Commercial Cleaning Products

If you prefer using commercial cleaning products to clean your wooden cutting board, there are a few options available. In this section, we will discuss enzyme-based cleaners and wood-safe disinfectants.

Enzyme-Based Cleaners

Enzyme-based cleaners are a great option for removing tough stains and odors from your wooden cutting board. These cleaners contain enzymes that break down organic matter, such as food particles and bacteria, making them easier to clean.

When using enzyme-based cleaners, it’s important to follow the manufacturer’s instructions carefully. Some cleaners may require dilution with water, while others can be used directly on the cutting board.

Here are a few popular enzyme-based cleaners to consider:

  • Method All-Purpose Cleaner: This cleaner is made with plant-based ingredients and is safe for use on wood surfaces.
  • Seventh Generation All-Purpose Cleaner: This cleaner is also made with plant-based ingredients and is free from harsh chemicals.

Wood-Safe Disinfectants

If you want to disinfect your wooden cutting board, it’s important to use a product that is safe for use on wood. Some disinfectants can be too harsh and may damage the surface of your cutting board.

Here are a few wood-safe disinfectants to consider:

  • Clorox Anywhere Hard Surface Daily Sanitizing Spray: This spray is safe for use on wood surfaces and can kill 99.9% of bacteria and viruses.
  • Lysol Disinfectant Spray: This spray is also safe for use on wood surfaces and can kill 99.9% of bacteria and viruses.

Remember to always rinse your cutting board thoroughly after using any cleaning product, and allow it to dry completely before using it again.

Restoring Your Cutting Board

If your wooden cutting board has been used for a while and has developed deep grooves and scratches, it might be time to restore it. Here are a couple of options to consider:

Sanding and Refinishing

If your cutting board is still in good shape, but has some scratches and stains, you can sand it down and refinish it. Here are the steps:

  1. Start by sanding the board with a fine-grit sandpaper. Sand in the direction of the grain until all the scratches and stains are gone.
  2. Wipe the board with a damp cloth to remove any dust.
  3. Apply a food-safe mineral oil to the board. Use a clean cloth to rub the oil into the wood, making sure to cover the entire surface.
  4. Let the board sit for a few hours or overnight to allow the oil to soak in.
  5. Wipe off any excess oil with a clean cloth.

Replacing Your Board

If your cutting board is beyond repair, it might be time to replace it. Here are some things to consider when choosing a new cutting board:

  • Material: Wooden cutting boards are popular, but there are also plastic and bamboo options available.
  • Size: Consider the size of your kitchen and the amount of counter space you have available.
  • Maintenance: Some cutting boards require more maintenance than others. Wooden cutting boards need to be oiled regularly, while plastic cutting boards can be put in the dishwasher.
  • Budget: Cutting boards can range in price from a few dollars to several hundred dollars. Determine how much you’re willing to spend before making a purchase.

By following these tips, you can restore your old cutting board or choose a new one that will serve you well for years to come.

How to Easily Remove Stains from Your Wooden Cutting Board

Are you tired of seeing stubborn stains on your wooden cutting board? It can be frustrating to have to replace a perfectly good cutting board just because of a few unsightly marks. Fortunately, there are several simple and effective methods for removing stains and keeping your board looking like new.

One of the easiest ways to remove stains from your wooden cutting board is by using natural ingredients you likely already have in your kitchen. For example, lemon and salt can be used to lift stubborn stains and odors. Another effective method involves white vinegar and baking soda. By following a few simple steps, you can easily remove stains and disinfect your board at the same time.

Understanding the Nature of Wood

Why Wood Absorbs Stains

Wood is a natural material that is porous and absorbent, which means it can easily absorb liquids and stains. When you cut food on a wooden cutting board, the juices from the food can seep into the wood and cause stains. Over time, these stains can become stubborn and difficult to remove.

The porous nature of wood also makes it a breeding ground for bacteria. If not properly cleaned and maintained, wooden cutting boards can harbor harmful bacteria that can cause foodborne illnesses.

Types of Wood and Their Stain Resistance

Not all types of wood are created equal when it comes to stain resistance. Some types of wood are naturally more resistant to stains than others. Here are some common types of wood used for cutting boards and their stain resistance:

Type of Wood Stain Resistance
Maple High
Walnut Medium
Cherry Low
Bamboo High

Maple is a popular choice for cutting boards because it is hard, durable, and highly resistant to stains. Walnut is also a good choice, but it is slightly less resistant to stains than maple. Cherry, on the other hand, is a softer wood that is more prone to staining. Bamboo is a highly renewable resource that is also very resistant to stains.

When choosing a wooden cutting board, it is important to consider the type of wood and its stain resistance. It is also important to properly clean and maintain your cutting board to prevent stains and bacteria buildup.

Identifying the Type of Stain

When it comes to cleaning a wooden cutting board, the first step is to identify the type of stain you are dealing with. Different types of stains require different cleaning methods. Here are some common types of stains and how to identify them:

Food Stains

Food stains are the most common type of stain on a cutting board. They can come from a variety of foods such as fruits, vegetables, meats, and spices. Food stains are usually brown or red in color and can be easily identified by their smell.

Ink Stains

Ink stains can come from markers or pens used for labeling or writing on the cutting board. They are usually black or blue in color and can be difficult to remove.

Water Stains

Water stains are caused by moisture that has been left on the cutting board for an extended period of time. They are usually white or light in color and can be identified by their texture.

Heat Stains

Heat stains are caused by placing hot pots or pans on the cutting board. They are usually brown or black in color and can be identified by their circular shape.

By identifying the type of stain on your wooden cutting board, you can choose the appropriate cleaning method to remove it.

Preventing Stains on Wooden Cutting Boards

Wooden cutting boards are a great tool to have in your kitchen, but they can easily become stained and discolored over time. Stains on a cutting board not only look unsightly, but they can also harbor bacteria and germs. Here are some tips to help prevent stains on your wooden cutting board:

1. Use a Separate Cutting Board for Different Foods

Using a separate cutting board for different types of food can help prevent stains and cross-contamination. For example, use one cutting board for fruits and vegetables, and another for raw meat and poultry. This will not only help prevent stains, but it will also help prevent the spread of harmful bacteria.

2. Clean Your Cutting Board After Each Use

Cleaning your cutting board after each use is essential to prevent stains and bacteria buildup. Use hot, soapy water to clean your cutting board, and make sure to dry it thoroughly after washing. You can also use a mixture of white vinegar and water to disinfect your cutting board.

3. Oil Your Cutting Board Regularly

Oiling your cutting board regularly can help prevent stains and keep it looking new. Use food-grade mineral oil or beeswax to oil your cutting board, and apply it every few weeks or as needed. This will help protect the wood and prevent stains from penetrating the surface.

4. Use a Non-Slip Mat

Using a non-slip mat under your cutting board can help prevent it from sliding around on your countertop, which can cause scratches and stains. Non-slip mats are also easy to clean and can be used with any type of cutting board.

By following these simple tips, you can help prevent stains on your wooden cutting board and keep it looking great for years to come.

General Stain Removal Methods

When it comes to removing stains from your wooden cutting board, there are a few methods you can try. Here are some general stain removal methods that may work for you:

Using Salt and Lemon

If you have stubborn stains or odors on your cutting board, cleaning with lemon and salt will help to lift them out. First, sprinkle a generous amount of coarse salt — such as sea salt or kosher salt — over the board. Then, cut a lemon in half and rub it over the salt, squeezing as you go. Let the mixture sit for a few minutes, then use a scrub brush or sponge to clean the board. Rinse with hot water and dry thoroughly.

Using Baking Soda

Another effective method for removing stains from your wooden cutting board is to use baking soda. First, sprinkle baking soda over the board and add a small amount of water to create a paste. Use a scrub brush or sponge to work the paste into the board, focusing on the stained areas. Let the mixture sit for a few minutes, then rinse with hot water and dry thoroughly.

Using Vinegar

Vinegar is another great option for removing stains from your wooden cutting board. Mix equal parts of white vinegar and water in a spray bottle. Spray the solution on the board and let it sit for a few minutes. Use a scrub brush or sponge to clean the board, then rinse with hot water and dry thoroughly.

Remember to always dry your wooden cutting board thoroughly after cleaning to prevent it from warping or cracking. And if your cutting board is particularly stained or damaged, it may be time to consider replacing it.

Specific Stain Removal Techniques

When it comes to removing stains from your wooden cutting board, different types of stains require different treatments. Here are some specific stain removal techniques to help you get rid of those stubborn stains:

Removing Food Stains

Food stains are common on cutting boards, but they can be easily removed with a few simple steps. Start by washing the board with warm soapy water and a sponge. If the stain persists, try using a paste made of baking soda and water. Apply the paste to the stain and let it sit for a few minutes before scrubbing it off with a sponge. Rinse the board with water and dry it with a clean towel.

Removing Ink Stains

Ink stains can be tough to remove, but with the right treatment, you can get your cutting board looking like new again. First, mix equal parts of baking soda and water to create a paste. Apply the paste to the stain and let it sit for a few minutes. Then, use a soft-bristled brush to scrub the stain gently. Rinse the board with water and dry it with a clean towel.

Removing Water Stains

Water stains are caused by moisture that has been absorbed into the wood. To remove these stains, start by sanding the affected area with fine-grit sandpaper. Be sure to sand with the grain of the wood. Then, wipe the board with a damp cloth and let it dry completely. If the stain persists, you can try applying a mixture of equal parts vinegar and olive oil to the affected area. Let it sit for a few minutes before wiping it off with a clean cloth.

Removing Heat Stains

Heat stains are caused by placing hot pots or pans on the cutting board. To remove these stains, start by mixing equal parts of baking soda and water to create a paste. Apply the paste to the stain and let it sit for a few minutes. Then, use a soft-bristled brush to scrub the stain gently. Rinse the board with water and dry it with a clean towel. If the stain persists, you can try using a mixture of equal parts vinegar and olive oil. Apply the mixture to the affected area and let it sit for a few minutes before wiping it off with a clean cloth.

By following these specific stain removal techniques, you can keep your wooden cutting board looking clean and new for years to come.

Aftercare for Your Wooden Cutting Board

Taking care of your wooden cutting board is essential to ensure its longevity and prevent any contamination of your food. Here are some tips for aftercare that will keep your cutting board looking great and functioning well.

Clean it properly

Cleaning your wooden cutting board properly is the first step in aftercare. Use a mild detergent and warm water to wash the board after every use. Make sure to rinse it thoroughly and dry it with a clean towel. Avoid soaking it in water or putting it in the dishwasher, as this can cause the wood to warp or crack.

Disinfect it regularly

Disinfecting your wooden cutting board is important to prevent the growth of harmful bacteria. You can use a mixture of white vinegar and water to disinfect your board. Simply mix equal parts of vinegar and water, apply it to the board, and let it sit for a few minutes before rinsing it off.

Oil it regularly

Oiling your wooden cutting board is essential to keep it from drying out and cracking. Use food-grade mineral oil or beeswax to oil your board. Apply a generous amount of oil to the board and let it sit for a few hours or overnight. Wipe off any excess oil with a clean towel.

Remove stains

If your wooden cutting board has stains, you can remove them using a mixture of salt and lemon juice. Sprinkle some salt on the board and rub it with a lemon half. Let the mixture sit on the board for a few minutes before rinsing it off.

Store it properly

Storing your wooden cutting board properly is important to prevent it from warping or cracking. Store it in a cool, dry place away from direct sunlight. You can also use a cutting board oil or wax to protect it from moisture and humidity.

By following these aftercare tips, you can keep your wooden cutting board in great condition for years to come.

Professional Help for Stubborn Stains

Sometimes, despite your best efforts, a stubborn stain just won’t come out. In these cases, it may be time to seek professional help. Here are a few options to consider:

Sanding

If your cutting board has a deep stain that won’t budge, sanding may be your best bet. This method involves removing a thin layer of wood from the surface of the board, effectively removing the stain along with it. While sanding can be effective, it should only be used as a last resort, as it can damage the board and shorten its lifespan.

Bleaching

Bleaching is another option for removing stubborn stains from a wooden cutting board. To bleach your board, mix equal parts water and hydrogen peroxide in a spray bottle and spray the affected area. Let the solution sit for a few hours, then rinse the board thoroughly with water and dry it completely. While bleach can be effective at removing stains, it can also weaken the wood fibers, so use this method with caution.

Refinishing

If your cutting board has multiple stains or is showing signs of wear and tear, refinishing may be the best option. This involves sanding down the entire surface of the board and then applying a new finish, such as mineral oil or beeswax. Refinishing can give your cutting board a fresh start, but it is a time-consuming process that should only be attempted if you are comfortable working with wood.

Remember, prevention is always the best cure when it comes to stains on wooden cutting boards. By properly cleaning and maintaining your board, you can help prevent stains from forming in the first place. However, if a stain does occur, don’t panic. With a little effort and patience, you can usually get your cutting board looking as good as new.

How to Clean Wooden Furniture: Tips and Tricks for a Shiny Finish

Cleaning wooden furniture can be a daunting task, especially if you’re not sure where to start. But with the right tools and techniques, you can keep your wooden furniture looking beautiful for years to come. In this article, we’ll provide you with some helpful tips and tricks for cleaning and maintaining your wooden furniture.

First and foremost, it’s important to avoid using harsh chemicals or abrasive materials when cleaning your wooden furniture. These can scratch or damage the surface of the wood, leaving it looking dull and worn. Instead, opt for gentle cleaning solutions like a mixture of mild dish soap and warm water, or a vinegar and water solution. These will help to remove dirt and grime without harming the wood.

Another key tip for cleaning wooden furniture is to be gentle and patient. Don’t scrub too hard or use too much pressure when cleaning, as this can damage the wood. Instead, use a soft cloth or sponge and work in small, circular motions. And remember to always dry your furniture thoroughly after cleaning to prevent water damage. With these tips in mind, you’ll be well on your way to keeping your wooden furniture looking its best.

Understanding Wood Types

When it comes to cleaning wood furniture, it’s important to understand the type of wood you’re dealing with. Different types of wood require different cleaning methods and products. Here are the three main types of wood:

Hardwood

Hardwood is a type of wood that comes from deciduous trees, such as oak, maple, and cherry. Hardwood is known for its durability and strength, making it a popular choice for furniture. However, hardwood can be more expensive than other types of wood.

When cleaning hardwood furniture, it’s important to use a gentle cleaner and avoid using too much water. Hardwood furniture can be sensitive to moisture, which can cause warping and damage. Use a soft cloth and a mild cleaner to gently wipe down the surface of the furniture.

Softwood

Softwood comes from coniferous trees, such as pine and cedar. Softwood is less expensive than hardwood and is often used for furniture that is painted or stained. Softwood is also more prone to scratches and dents than hardwood.

When cleaning softwood furniture, it’s important to avoid using harsh chemicals or abrasive cleaners. Use a soft cloth and a mild cleaner to gently wipe down the surface of the furniture. Be sure to dry the furniture thoroughly to prevent water damage.

Veneer

Veneer is a thin layer of wood that is applied to a less expensive material, such as particle board or MDF. Veneer is often used to create the look of hardwood furniture at a lower cost. However, veneer furniture can be more delicate than solid wood furniture.

When cleaning veneer furniture, it’s important to use a gentle cleaner and avoid using too much water. Veneer is sensitive to moisture, which can cause the veneer to peel or warp. Use a soft cloth and a mild cleaner to gently wipe down the surface of the furniture. Avoid using abrasive cleaners or scrubbing too hard, as this can damage the veneer.

Materials Needed for Cleaning

When it comes to cleaning wooden furniture, it’s important to have the right materials on hand. Here are some of the items you’ll need to get started:

Dish Soap

Dish soap is a great all-purpose cleaner that can be used on wooden furniture. It’s gentle enough not to damage the surface, but strong enough to remove dirt and grime. To use dish soap, mix a few drops with warm water and apply it to a clean, damp cloth. Wipe the furniture down, making sure to get into all the nooks and crannies. Rinse the cloth and repeat as needed.

Vinegar

Vinegar is a natural cleaning agent that can be used on wooden furniture. It’s especially useful for removing water stains and other tough stains. To use vinegar, mix equal parts water and vinegar in a spray bottle. Spray the solution onto the furniture and wipe it down with a clean cloth. Be sure to rinse the cloth frequently to avoid spreading the vinegar around.

Mineral Spirits

Mineral spirits are a solvent that can be used to clean wooden furniture. They’re especially useful for removing wax buildup and other stubborn stains. To use mineral spirits, apply a small amount to a clean, dry cloth and rub it onto the furniture in a circular motion. Be sure to wear gloves and work in a well-ventilated area.

Wood Polish

Wood polish is a great way to protect and restore the shine of wooden furniture. There are many different types of wood polish available, so be sure to choose one that’s appropriate for your furniture. To use wood polish, apply a small amount to a clean, dry cloth and rub it onto the furniture in a circular motion. Be sure to follow the manufacturer’s instructions for best results.

By having these materials on hand, you’ll be able to keep your wooden furniture looking clean and beautiful for years to come.

Basic Cleaning Process

Cleaning your wooden furniture regularly can help maintain its beauty and extend its lifespan. Here are the basic steps to follow when cleaning your wooden furniture:

Dusting the Furniture

Before you start cleaning your furniture, you need to remove any dust and debris that may have accumulated on it. Dusting is an important step because it helps prevent scratches and other damage to the wood. Here’s how to do it:

  • Use a soft, dry cloth or a feather duster to remove any loose dust and debris from the surface of the furniture.
  • Make sure to dust all the nooks and crannies, including the corners and crevices.
  • Avoid using a rough or abrasive cloth, as this can scratch the surface of the wood.

Applying the Cleaning Solution

Once you have removed the dust and debris, it’s time to apply the cleaning solution. There are many different types of cleaning solutions available, but a simple mixture of water and mild dish soap is often the most effective. Here’s how to apply the cleaning solution:

  • Mix a small amount of mild dish soap with warm water in a bucket.
  • Dip a soft cloth into the cleaning solution and wring it out until it’s just damp.
  • Test the cleaning solution on a small, inconspicuous area of the furniture to make sure it doesn’t damage the wood.
  • If the test area looks good, use the damp cloth to clean the rest of the furniture.

Wiping Down the Furniture

After you have applied the cleaning solution, it’s time to wipe down the furniture with a clean, dry cloth. Here’s how to do it:

  • Use a clean, dry cloth to wipe down the furniture, removing any excess cleaning solution.
  • Make sure to wipe in the direction of the grain to avoid damaging the wood.
  • If the furniture feels damp, let it air dry for a few minutes before using it.

By following these simple steps, you can keep your wooden furniture looking beautiful for years to come.

Dealing with Stains and Spots

Wooden furniture is beautiful and timeless, but it is also susceptible to stains and spots. In this section, we will discuss how to deal with different types of stains and spots that can affect your wooden furniture.

Water Stains

Water stains are a common problem with wooden furniture. They occur when water is left on the surface of the wood for too long. To remove water stains, follow these steps:

  1. Mix equal parts of baking soda and water to make a paste.
  2. Apply the paste to the water stain and rub gently with a soft cloth.
  3. Wipe the area clean with a damp cloth and dry it with a dry cloth.

Ink Stains

Ink stains can be tough to remove from wooden furniture. To remove ink stains, follow these steps:

  1. Mix equal parts of vinegar and water.
  2. Dip a cotton ball into the mixture and apply it to the ink stain.
  3. Rub gently until the stain disappears.
  4. Wipe the area clean with a damp cloth and dry it with a dry cloth.

Food Stains

Food stains are another common problem with wooden furniture. To remove food stains, follow these steps:

  1. Mix equal parts of vinegar and olive oil.
  2. Dip a soft cloth into the mixture and apply it to the food stain.
  3. Rub gently until the stain disappears.
  4. Wipe the area clean with a damp cloth and dry it with a dry cloth.

Remember to always test any cleaning solution on an inconspicuous area of the furniture before using it on a larger area. Also, avoid using harsh chemicals or abrasive materials on wooden furniture as they can damage the surface. With a little care and attention, your wooden furniture can stay beautiful for years to come.

Polishing Your Furniture

Keeping your wooden furniture clean is important, but polishing it will help to maintain its natural beauty and extend its lifespan. Here are some tips on how to polish your wooden furniture:

Choosing the Right Polish

Before you start polishing your furniture, it’s important to choose the right polish for your specific type of wood. There are many different types of wood polishes available on the market, so it’s important to choose one that is appropriate for your furniture.

One popular type of polish is beeswax, which is a natural and eco-friendly option. Beeswax is great for protecting and nourishing your wooden furniture, as it helps to prevent the wood from drying out and cracking. Another popular option is a silicone-based polish, which creates a protective layer over your furniture and gives it a shiny finish.

Applying the Polish

Once you’ve chosen the right polish for your furniture, it’s time to apply it. Here’s how:

  1. Start by dusting your furniture with a dry, soft cloth to remove any dirt or debris.

  2. Apply a small amount of polish to a clean, soft cloth. Be sure to follow the manufacturer’s instructions for how much to use.

  3. Rub the cloth onto the furniture in a circular motion, working in small sections at a time.

  4. Once you’ve applied the polish, let it sit for a few minutes to allow it to penetrate the wood.

  5. Use a clean, dry cloth to buff the furniture, removing any excess polish and creating a shiny finish.

Remember to always test the polish on a small, inconspicuous area of your furniture before applying it to the entire piece. This will help you to ensure that the polish is compatible with your furniture and that it won’t cause any damage.

By following these simple tips, you can keep your wooden furniture looking beautiful for years to come.

Maintaining Your Wooden Furniture

To keep your wooden furniture looking great for years to come, it’s important to maintain it properly. Here are a few tips to keep your wooden furniture in top condition.

Regular Dusting

Dusting your wooden furniture regularly is the most important thing you can do to keep it looking great. Dust can scratch the surface of your furniture, so it’s important to remove it regularly. You can use a soft cloth or a feather duster to remove dust from your furniture. Avoid using a dry cloth, as this can scratch the surface of your furniture.

Avoiding Sunlight and Heat

Sunlight and heat can cause your wooden furniture to fade and dry out. It’s important to keep your furniture away from direct sunlight and heat sources like radiators and fireplaces. If you must place your furniture in a sunny spot, consider using curtains or blinds to block out the sun.

Using Coasters

Using coasters is important to prevent water rings and other damage to your wooden furniture. Always use coasters under glasses, mugs, and other items that can leave moisture on your furniture. If you do spill something on your furniture, clean it up immediately with a soft cloth.

By following these simple tips, you can keep your wooden furniture looking great for years to come. Regular dusting, avoiding sunlight and heat, and using coasters will help protect your furniture and keep it looking its best.

How to Clean Wooden Dresser Drawers: A Simple Guide

Are you tired of opening your dresser drawers only to be met with a musty smell and dusty surfaces? It’s time to give those wooden dresser drawers a good cleaning! Not only will it improve the overall appearance of your dresser, but it will also help to prolong the life of your wooden furniture.

Before you begin, gather all the necessary cleaning supplies such as a damp cloth, wood cleaner, wax, and a soft bristle brush. You may also want to wear gloves to protect your hands from harsh chemicals or cleaning solutions. Once you have your supplies, start by removing all items from the drawers and vacuuming out any debris or dust. From there, you can use a cleaning solution to wipe down the surfaces and remove any stains or odors.

Cleaning wooden dresser drawers may seem like a daunting task, but with the right supplies and a little elbow grease, you can have them looking and smelling like new in no time! In this article, we will guide you through the steps to effectively clean your wooden dresser drawers and provide tips for maintaining them in the future. So, let’s get started!

Understanding the Importance of Cleaning Wooden Dresser Drawers

When it comes to keeping your home clean and tidy, it’s easy to overlook the importance of cleaning your wooden dresser drawers. However, keeping your dresser drawers clean is essential not only for maintaining the appearance of your furniture but also for your health and hygiene. In this section, we’ll discuss the importance of cleaning your wooden dresser drawers and why it should be a regular part of your cleaning routine.

Preventing Dust Buildup

Dresser drawers are notorious for collecting dust, dirt, and debris. Over time, this buildup can become a breeding ground for bacteria, mold, and other harmful microorganisms. Cleaning your wooden dresser drawers regularly can help prevent dust buildup and keep your clothes and other items clean and fresh.

Protecting Your Clothing

Dust and debris in your dresser drawers can also damage your clothing. Over time, the fibers in your clothes can become weakened and even discolored from exposure to dust and other particles. By keeping your dresser drawers clean, you can help protect your clothing and extend its lifespan.

Maintaining the Appearance of Your Furniture

Wooden dresser drawers can be a beautiful addition to any home, but they require regular maintenance to keep them looking their best. Dust and debris can leave unsightly marks on your furniture, and over time, this can lead to permanent damage. By cleaning your wooden dresser drawers regularly, you can help maintain the appearance of your furniture and keep it looking like new.

Improving Your Health and Hygiene

Finally, keeping your wooden dresser drawers clean is essential for your health and hygiene. Dust and debris can trigger allergies and other respiratory problems, and bacteria and mold can cause a range of health issues. By cleaning your dresser drawers regularly, you can help improve the air quality in your home and keep yourself and your family healthy and safe.

Overall, cleaning your wooden dresser drawers is an essential part of maintaining a clean and healthy home. By taking the time to clean your dresser drawers regularly, you can protect your clothing, maintain the appearance of your furniture, and improve your health and hygiene.

Materials Needed for Cleaning Wooden Dresser Drawers

When it comes to cleaning wooden dresser drawers, you’ll need a few materials to get the job done right. Here are the essential items you’ll need:

Cleaning Agents

  1. Wood Cleaner: Use a wood cleaner that is specifically designed for cleaning wooden surfaces. Avoid using any harsh chemicals or abrasive cleaners that can damage the wood.

  2. Dish Soap: Dish soap is an excellent cleaning agent that can help remove dirt, grime, and stains from wooden surfaces. Mix a few drops of dish soap with warm water to create a cleaning solution.

  3. Vinegar: Vinegar is a natural cleaning agent that can help remove stubborn stains and odors from wooden surfaces. Mix equal parts of vinegar and water to create a cleaning solution.

Cleaning Tools

  1. Soft-bristled Brush: A soft-bristled brush is excellent for scrubbing away dirt and grime from wooden surfaces. Avoid using a stiff-bristled brush that can scratch the wood.

  2. Microfiber Cloth: A microfiber cloth is perfect for wiping away dirt and dust from wooden surfaces. It’s gentle on the wood and won’t leave any scratches or marks.

  3. Toothbrush: A toothbrush is an excellent tool for cleaning hard-to-reach areas such as corners and crevices. Use a soft-bristled toothbrush to avoid scratching the wood.

  4. Vacuum Cleaner: A vacuum cleaner with a soft-bristled brush attachment can help remove dirt and dust from wooden surfaces. It’s an excellent tool for cleaning the inside of dresser drawers.

In summary, to clean wooden dresser drawers, you’ll need a wood cleaner, dish soap, vinegar, a soft-bristled brush, microfiber cloth, toothbrush, and a vacuum cleaner. With these materials, you can effectively clean and maintain your wooden dresser drawers.

Preparation Before Cleaning

Before you start cleaning your wooden dresser drawers, it is important to prepare them properly. This will help you achieve the best results possible and avoid damaging the wood. Here are two important steps to follow:

Emptying the Drawers

The first step is to empty the drawers completely. This will make it easier for you to clean them thoroughly. Take out all the items from the drawers and place them on a clean surface, such as a table or a bed. If there are any items that are fragile or delicate, handle them with care and place them aside.

Dusting Off the Drawers

The next step is to dust off the drawers. Use a soft-bristled brush or a clean cloth to remove any dust or debris from the surface of the drawers. Make sure to get into all the corners and crevices of the drawers. You can also use a vacuum cleaner with a soft brush attachment to remove any dust or debris that may be stuck in the corners or edges of the drawers.

Once you have emptied and dusted off the drawers, you are ready to start cleaning them. Follow the steps provided in the next section to clean your wooden dresser drawers thoroughly.

Step-by-Step Cleaning Procedure

Cleaning wooden dresser drawers may seem like a daunting task, but with the right tools and techniques, it can be a breeze. Follow these simple steps to get your wooden dresser drawers looking like new again.

Applying the Cleaning Agent

The first step in cleaning your wooden dresser drawers is to apply a cleaning solution. You can use a commercial wood cleaner or make your own solution by mixing equal parts of vinegar and water. Apply the solution to a clean cloth and wipe down the drawers, making sure to get into all the nooks and crannies.

Scrubbing the Drawers

After applying the cleaning solution, it’s time to scrub the drawers. Use a soft-bristled brush or a non-abrasive sponge to gently scrub the surfaces of the drawers. Be careful not to scrub too hard, as this can damage the wood. Pay special attention to any areas that are particularly dirty or stained.

Rinsing and Drying

Once you have scrubbed the drawers, it’s time to rinse and dry them. Use a clean, damp cloth to rinse away any remaining cleaning solution. Then, use a dry cloth to wipe down the drawers and remove any excess moisture. Finally, let the drawers air dry completely before reinserting them into the dresser.

By following these simple steps, you can keep your wooden dresser drawers looking clean and beautiful for years to come. Remember to clean your drawers regularly to prevent dirt and grime buildup, and always use gentle cleaning solutions and tools to avoid damaging the wood.

Maintaining Cleanliness

Keeping your wooden dresser drawers clean is an essential task that you should perform regularly. It not only helps to maintain the beauty of your dresser drawers but also ensures that they last for a long time. Here are some tips on how to maintain the cleanliness of your wooden dresser drawers.

Regular Dusting

Dusting your wooden dresser drawers regularly is the easiest and most effective way to maintain their cleanliness. Dust and dirt can accumulate on the surface of your dresser drawers, making them look dull and dirty. To avoid this, use a soft cloth or feather duster to wipe away any dust or dirt that has accumulated on the surface of your dresser drawers. Dusting should be done at least once a week, or more often if you live in a dusty environment.

Using Drawer Liners

Drawer liners can help to keep your dresser drawers clean and fresh. They are available in a variety of materials, including paper, fabric, and vinyl. Drawer liners protect the surface of your dresser drawers from scratches, spills, and stains. They also help to absorb any odors that may be present in your dresser drawers.

When using drawer liners, make sure that they fit the size of your dresser drawers properly. If they are too big, they may bunch up and cause your items to slide around. If they are too small, they may not provide adequate protection. You should also choose a liner that is easy to clean and maintain. Vinyl liners are a great choice because they can be wiped clean with a damp cloth.

By regularly dusting and using drawer liners, you can maintain the cleanliness of your wooden dresser drawers and keep them looking beautiful for years to come.

Dealing with Common Issues

Dealing with common issues when cleaning wooden dresser drawers is an important part of the process. Here are some tips to help you deal with common issues that may arise while cleaning your wooden dresser drawers.

Removing Stains

Stains on wooden dresser drawers can be tough to remove, but with the right tools and techniques, you can get rid of them easily. Here are the steps you can follow to remove stains from your wooden dresser drawers:

  1. Identify the type of stain: Different types of stains require different cleaning methods. For example, ink stains can be removed with a mixture of baking soda and water, while oil stains can be removed with dish soap and warm water.

  2. Use the right cleaning solution: Once you have identified the type of stain, use the appropriate cleaning solution. You can use a commercial wood cleaner or make your own solution using natural ingredients.

  3. Apply the cleaning solution: Apply the cleaning solution to the stain and let it sit for a few minutes. Then, use a soft-bristled brush to scrub the stain gently.

  4. Wipe away the cleaning solution: Use a damp cloth to wipe away the cleaning solution and dry the area with a clean cloth.

Dealing with Odors

If your wooden dresser drawers have a musty or unpleasant odor, it’s important to deal with it before it becomes a bigger problem. Here are some tips to help you deal with odors in your wooden dresser drawers:

  1. Remove everything from the drawer: Take everything out of the drawer and inspect each item for signs of mold or mildew. If you find any, clean them separately before putting them back in the drawer.

  2. Use a cleaning solution: Mix equal parts water and white vinegar in a spray bottle and spray the solution inside the drawer. Let it sit for a few minutes, then wipe it away with a damp cloth.

  3. Place odor absorbers in the drawer: You can use natural odor absorbers like baking soda, activated charcoal, or coffee grounds to absorb any remaining odors in the drawer. Simply place the odor absorber in a small container or sachet and place it in the drawer.

By following these tips, you can deal with common issues when cleaning your wooden dresser drawers and keep them looking and smelling great.

alternative-methods-for-cleaning-wood-furniture

Can You Use Lysol Spray on Wood Furniture? Tips and Precautions

Are you wondering if it’s safe to use Lysol spray on your wooden furniture? The answer is not straightforward. Lysol is a popular disinfectant used for cleaning and sanitizing surfaces. However, when it comes to wood furniture, you need to be cautious as it can cause damage if not used correctly.

The type of wood and the finish on the furniture determine whether it’s safe to use Lysol spray. If the wood is unfinished or porous, Lysol can soak deep into the pores and cause damage. On the other hand, if the wood is finished or sealed, Lysol is safe to use. In this article, we’ll explore whether you can use Lysol spray on wood furniture and the proper usage of Lysol spray on finished wood.

Understanding Lysol Spray

If you are looking for a quick and effective way to disinfect your wooden furniture, Lysol spray might seem like a good option. However, before you start spraying, it’s important to understand what Lysol spray is and how it works.

Lysol spray is a disinfectant that is designed to kill germs and bacteria on surfaces. It contains active ingredients like alkyl dimethyl benzyl ammonium chloride and ethanol that help to break down and destroy the cell walls of germs and bacteria, rendering them harmless.

When you spray Lysol on a surface, it creates a fine mist that settles on the surface and begins to work immediately. The active ingredients in Lysol spray can kill up to 99.9% of germs and bacteria, making it a powerful tool in the fight against illness and disease.

However, it’s important to note that Lysol spray is not a miracle cure-all. While it can be effective at killing germs and bacteria on surfaces, it is not a substitute for proper cleaning and hygiene practices. Regular cleaning with soap and water is still the best way to keep your wooden furniture clean and free from germs.

In addition, it’s important to use Lysol spray correctly to avoid damaging your wooden furniture. Always follow the instructions on the label and never use undiluted Lysol spray on wooden surfaces. Diluting Lysol spray with water can increase its cleaning power, but it can also be dangerous for your wooden furniture if used too frequently.

Wood Furniture Basics

wood-furniture-basics

When it comes to cleaning wood furniture, it’s important to understand the basics. Wood is a porous material that can absorb moisture and chemicals, which can cause damage to the furniture. Here are a few things to keep in mind when cleaning wood furniture:

  • Use a soft cloth: When cleaning wood furniture, always use a soft cloth to avoid scratching the surface. Avoid using abrasive materials like steel wool or rough sponges.
  • Avoid water: Water can cause damage to wood furniture, so it’s important to avoid using too much water when cleaning. If you need to use water, use a damp cloth and immediately dry the surface with a dry cloth.
  • Use a gentle cleaner: When cleaning wood furniture, it’s important to use a gentle cleaner that won’t damage the surface. Avoid using harsh chemicals or cleaners that contain bleach or ammonia.
  • Test in a small area: Before using any cleaner on wood furniture, it’s important to test it in a small, inconspicuous area first. This will help you avoid any damage to the furniture.

By following these basic guidelines, you can keep your wood furniture looking great for years to come.

Potential Effects of Lysol on Wood

Using Lysol on wood furniture can have potential effects on the surface, depending on the type of wood and the frequency of use. Here are some things to keep in mind:

  • Discoloration: Lysol contains chemicals that can cause discoloration on certain types of wood, particularly if used frequently or in high concentrations. This can result in an unsightly appearance and may require refinishing or replacement of the affected piece.
  • Drying and cracking: Over time, Lysol can dry out the natural oils in wood, causing it to become brittle and prone to cracking. This is especially true for older or more delicate pieces of furniture.
  • Damage to finishes: If your wood furniture has a protective finish, such as varnish or lacquer, using Lysol can cause the finish to break down over time. This can leave the wood vulnerable to further damage from moisture, heat, and other environmental factors.

To avoid these potential effects, it’s important to use Lysol on wood furniture sparingly and with caution. If you do need to disinfect a piece of wood furniture, consider using a diluted solution of Lysol and water, and be sure to wipe the surface clean with a damp cloth afterward to remove any residue.

In general, it’s a good idea to consult with a professional before using any cleaning or disinfecting product on wood furniture, especially if you’re unsure about the type of wood or finish. With proper care and maintenance, your wood furniture can remain beautiful and functional for many years to come.

Alternative Methods for Cleaning Wood Furniture

alternative-methods-for-cleaning-wood-furniture

If you’re hesitant to use Lysol spray on your wooden furniture, there are alternative methods for cleaning it. Here are a few options to consider:

1. Damp Dusting

Damp dusting is a great way to clean your wooden furniture without damaging it. To do this, you’ll need a microfiber cloth and some clean water. Simply dampen the cloth with water and wipe down the furniture. This will help remove any dust or dirt that has accumulated on the surface.

2. Dish Soap and Water

Another option is to use a mixture of dish soap and water. Mix a few drops of dish soap with some warm water and use a cloth to wipe down the furniture. This will help remove any dirt or grime that has built up on the surface.

3. Vinegar and Water

Vinegar is a natural cleaning agent that can be used to clean wooden furniture. Mix equal parts water and vinegar and use a cloth to wipe down the furniture. This will help remove any dirt or grime that has built up on the surface.

4. Furniture Polish

Using furniture polish is a great way to clean and protect your wooden furniture. Simply spray the polish onto a cloth and wipe down the furniture. This will help remove any dust or dirt that has accumulated on the surface and will also help protect the wood from future damage.

Remember to always test any cleaning solution on a small, inconspicuous area of the furniture before using it on the entire piece. This will help ensure that the solution doesn’t damage the wood.

Precautions When Using Lysol on Wood Furniture

precautions-when-using-lysol-on-wood-furniture

If you’re considering using Lysol spray on your wood furniture, there are a few precautions you should take to ensure that you don’t damage your furniture or harm yourself. Here are some things to keep in mind:

1. Test on a Small Area First

Before you use Lysol on your wood furniture, test it on a small, inconspicuous area first. This will help you determine if the spray is safe to use on your furniture without causing any damage or discoloration.

2. Protect Yourself

When using Lysol on your wood furniture, it’s important to protect yourself. Wear hand gloves, a dust mask, and eye protection to avoid any adverse effects that may come with the use of the spray.

3. Avoid Overuse

Lysol spray should only be used as a spot treatment and not as a general cleaning product. Overuse can damage the wood or cause discoloration. It’s recommended to only use Lysol spray on your wood furniture when necessary.

4. Wipe Off the Liquid

After spraying Lysol on your wood furniture, it’s important to wipe off the liquid with a damp cloth or paper towel. This will help prevent any damage or discoloration to the wood.

5. Use a Fan to Remove Smell

Lysol spray has a strong smell that may linger for some time. To remove the smell, turn on a fan or open a window to allow for proper ventilation.

By following these precautions, you can safely use Lysol spray on your wood furniture without causing any damage or harm to yourself.

Professional Tips for Wood Furniture Care

professional-tips-for-wood-furniture-care

If you want to keep your wood furniture looking great, you need to take care of it properly. Here are some professional tips to help you do just that:

1. Dust Regularly

Dust can scratch and damage the finish on your wood furniture, so it’s important to dust it regularly. Use a soft cloth or a microfiber duster to remove dust, and be sure to get into all the nooks and crannies.

2. Use a Gentle Cleaner

When you need to clean your wood furniture, use a gentle cleaner that is specifically designed for wood. Avoid using harsh chemicals or abrasive cleaners that can damage the finish.

3. Wipe Up Spills Immediately

If you spill something on your wood furniture, be sure to wipe it up immediately. Liquids can seep into the wood and cause damage, so it’s important to act quickly.

4. Avoid Direct Sunlight

Direct sunlight can fade and damage the finish on your wood furniture. If possible, keep your furniture out of direct sunlight or use window coverings to block the sun.

5. Use Coasters and Placemats

To prevent scratches and water damage, use coasters and placemats on your wood furniture. This will help protect the finish and keep your furniture looking great.

By following these professional tips for wood furniture care, you can help ensure that your furniture looks great for years to come.

Frequently Asked Questions

Is it safe to use Lysol spray on wood furniture?

No, it is not advisable to use Lysol on wooden furniture. The reason is that if it is natural wood and not just laminate wood, Lysol can soak deep into the pores of the wood and cause damage to it. Manufacturers ask to dilute Lysol with water to increase its cleaning power which can also be dangerous for your wooden surfaces.

Will Lysol spray leave stains or discoloration on wood?

Yes, Lysol spray can leave stains or discoloration on wood if it is not used properly. It is not recommended to use Lysol on wooden furniture as it can penetrate deep into the pores of the wood and cause damage to it. If you must use Lysol on wood, dilute it with water and test it on a small and inconspicuous area first.

What disinfectant is safe to use on wood furniture?

There are several disinfectants that are safe to use on wood furniture, such as vinegar, hydrogen peroxide, and rubbing alcohol. These disinfectants are effective in killing germs and bacteria without damaging the wood. It is important to dilute these disinfectants with water and test them on a small and inconspicuous area first.

Can Lysol residue be removed from wood surfaces?

Yes, Lysol residue can be removed from wood surfaces with the help of a mild detergent and warm water. It is important to avoid using harsh chemicals or abrasive materials that can damage the wood. After cleaning, rinse the area thoroughly with water and dry it with a soft cloth.

Can Fabuloso be used on wood floors?

No, Fabuloso should not be used on wood floors. Fabuloso is a multi-purpose cleaner that contains harsh chemicals that can damage the wood. It is important to use a cleaner that is specifically designed for use on wood floors.

How to remove Lysol stains from unfinished wood?

To remove Lysol stains from unfinished wood, mix equal parts of vinegar and water and apply the solution to the stained area. Let it sit for a few minutes, then wipe it away with a clean cloth. Repeat the process until the stain is completely removed.