Tag Archives: coconut oil coconut oil

how-to-oil-a-wooden-cutting-board

How to Oil a Wooden Cutting Board: A Step-by-Step Guide

Maintaining a wooden cutting board is crucial to ensure its longevity and prevent bacteria buildup. One of the most important steps in maintaining a wooden cutting board is oiling it regularly. Oiling a wooden cutting board helps to protect it from moisture, prevent warping, and keep it looking new.

To oil a wooden cutting board, you need to clean it thoroughly first. Use hot water and soap to wash both sides of the board, then let it air dry completely. Once the board is dry, apply a generous amount of food-grade mineral oil to the surface of the board. You can use a clean cloth or paper towel to spread the oil evenly on the board. Let the oil soak in for a few hours, or overnight if possible. Finally, wipe off any excess oil with a clean cloth before using the board again.

Regularly oiling your wooden cutting board will not only help to keep it looking new, but it will also protect it from bacteria buildup and prevent it from warping. It’s recommended to oil your wooden cutting board at least once a month, or more often if you use it frequently. With just a little bit of maintenance, your wooden cutting board can last for years to come.

Understanding the Importance of Oiling a Wooden Cutting Board
how-to-oil-a-wooden-cutting-board

If you own a wooden cutting board, it is essential to take proper care of it. One of the most important things you can do to extend the life of your wooden cutting board is to oil it regularly. Here are some reasons why oiling your wooden cutting board is so important:

Prevents Drying Out and Cracking

Wooden cutting boards are prone to drying out and cracking over time. When you oil your cutting board, it helps to keep the wood moisturized and prevents it from drying out. This can help to prevent cracks from forming and can extend the life of your cutting board.

Protects Against Bacteria

Wooden cutting boards can harbor bacteria if they are not properly cleaned and maintained. When you oil your cutting board, it helps to create a barrier that can protect against bacteria and other harmful substances. This can help to keep your food safe and prevent contamination.

Enhances Appearance

Oiling your wooden cutting board can also enhance its appearance. The oil can help to bring out the natural beauty of the wood and give it a rich, warm glow. This can make your cutting board look more attractive and can add to the overall aesthetic of your kitchen.

Improves Durability

When you oil your cutting board, it can also help to improve its durability. The oil can help to strengthen the wood and make it more resistant to wear and tear. This can help to extend the life of your cutting board and ensure that it remains in good condition for years to come.

Overall, oiling your wooden cutting board is an essential step in its maintenance. By doing so, you can help to prevent cracking, protect against bacteria, enhance appearance, and improve durability. So, make sure to oil your cutting board regularly to keep it in good condition and ensure that it lasts for years to come.

Choosing the Right Oil

When it comes to oiling your wooden cutting board, there are several options to choose from. Here are a few popular choices:

Food-Grade Mineral Oil

Food-grade mineral oil is a popular choice for many people because it is odorless, tasteless, and doesn’t go rancid. It is also affordable and readily available. Mineral oil is a petroleum byproduct, so some people prefer to use a natural oil instead.

Beeswax

Beeswax is not technically an oil, but it is an excellent option for seasoning cutting boards. It repels water and forms a tight, protective seal. Beeswax can also add a nice luster to the wood and help extend the lifespan of your cutting board.

Coconut Oil

Coconut oil is a popular choice for those who prefer natural oils. It has natural antimicrobial properties and is a great moisturizer for the wood. However, some people find that it can go rancid over time and leave a coconut scent on the board.

Walnut Oil

Walnut oil is another natural option that is popular for its rich color and nutty aroma. It is also high in antioxidants and has natural antimicrobial properties. However, it can be expensive and may not be as readily available as other oils.

When choosing an oil for your cutting board, it is important to consider the pros and cons of each option and choose the one that best suits your needs and preferences. Remember to always use a food-grade oil and follow the manufacturer’s instructions for application and maintenance.

Preparation Before Oiling
preparation-before-oiling

Before you start oiling your wooden cutting board, it’s important to prepare it properly. This will ensure that the oil is absorbed evenly and that the board is protected from damage. Here are some steps to follow:

Cleaning the Board

The first step is to clean the cutting board thoroughly. Use warm water and dish soap to wash both sides of the board. Make sure to scrub any food particles or stains off the surface. Avoid using harsh chemicals or abrasive sponges, as they can damage the wood.

After washing the board, rinse it with clean water and dry it with a clean towel. Don’t forget to clean the edges and corners of the board as well.

Drying the Board

Once the board is clean, it’s time to dry it. Make sure the board is completely dry before you start oiling it. You can use a clean towel to dry it, or let it air dry for a few hours.

It’s important to dry both sides of the board evenly. If one side is wetter than the other, it can cause the board to warp or crack when you apply the oil.

You can also use a hair dryer or a fan to speed up the drying process. Just make sure not to overheat the board, as this can also cause damage.

By following these steps, you’ll ensure that your wooden cutting board is clean and dry before you start oiling it. This will help the oil absorb evenly and protect the board from damage.

Step-by-Step Guide to Oiling

If you want to keep your wooden cutting board in good shape, you need to oil it regularly. Here’s a step-by-step guide to oiling your cutting board:

Applying the Oil

  1. Choose the right oil: mineral oil, beeswax, or a combination of both are good options.
  2. Pour a generous amount of oil onto the board surface, starting with one side at a time.
  3. Use a clean cloth or paper towel to spread the oil evenly over the surface of the board. Make sure you cover the entire board, including the sides.
  4. Be careful not to use too much oil. You don’t want to see oil pooling up on the board, but you also don’t want to be too stingy.

Letting the Board Absorb the Oil

  1. Once you’ve applied the oil, let the board sit for at least 20 minutes to allow the oil to soak in.
  2. During this time, you can flip the board over and apply oil to the other side.
  3. If the board is very dry, you may need to apply a second coat of oil.

Wiping Off Excess Oil

  1. After the oil has had time to soak in, use a clean cloth or paper towel to wipe off any excess oil.
  2. Be sure to wipe the board thoroughly to prevent any excess oil from going rancid.
  3. Let the board sit for a few hours or overnight to allow the oil to fully absorb into the wood before using it again.

By following these simple steps, you can keep your wooden cutting board in great condition for years to come.

Frequency of Oiling

To keep your wooden cutting board in top condition, it is important to oil it regularly. But how often should you oil your cutting board? The answer depends on how frequently you use it and how much care you want to take.

As a general rule, you should oil your cutting board once a month. This will help to keep the wood moisturized and prevent it from drying out or cracking. However, if you use your cutting board frequently or if it is exposed to a lot of moisture, you may need to oil it more often.

You can tell if your cutting board needs oiling by looking at its surface. If the wood looks dry or dull, it is time to oil it. You can also try the water test: sprinkle a few drops of water on the board. If the water beads up and doesn’t soak in, the board is well-oiled. If the water soaks in quickly or leaves a dark spot, it’s time to oil the board.

In addition to regular oiling, you should also clean your cutting board after each use. Use a mild dish soap and warm water to clean the board, then rinse it thoroughly and dry it with a clean towel. Avoid soaking the board in water or putting it in the dishwasher, as this can cause the wood to warp or crack.

By oiling your cutting board regularly and taking good care of it, you can extend its lifespan and keep it looking and functioning like new for years to come.

Maintaining Your Oiled Cutting Board

Once you have oiled your wooden cutting board, it is important to maintain it properly to ensure its longevity. Here are some tips for maintaining your oiled cutting board:

Regular Cleaning

To keep your cutting board clean, wash it with warm, soapy water after each use and dry it thoroughly with a clean towel. Avoid soaking the board in water or putting it in the dishwasher, as this can cause the wood to warp or crack. Additionally, avoid using abrasive cleaners or scrubbers, as they can damage the board’s surface.

Avoiding Excessive Heat and Humidity

Wooden cutting boards are sensitive to changes in temperature and humidity. Avoid exposing your board to excessive heat or moisture, as this can cause the wood to warp or crack. For example, do not place your board near a stove or in direct sunlight, and avoid storing it in a damp or humid environment.

Preventing Cross Contamination

To prevent cross-contamination, it is important to use separate cutting boards for different types of food. For example, use one board for raw meat and another for vegetables. Additionally, be sure to clean your board thoroughly after each use to remove any bacteria or food particles.

By following these simple tips, you can ensure that your oiled cutting board remains in good condition for years to come.

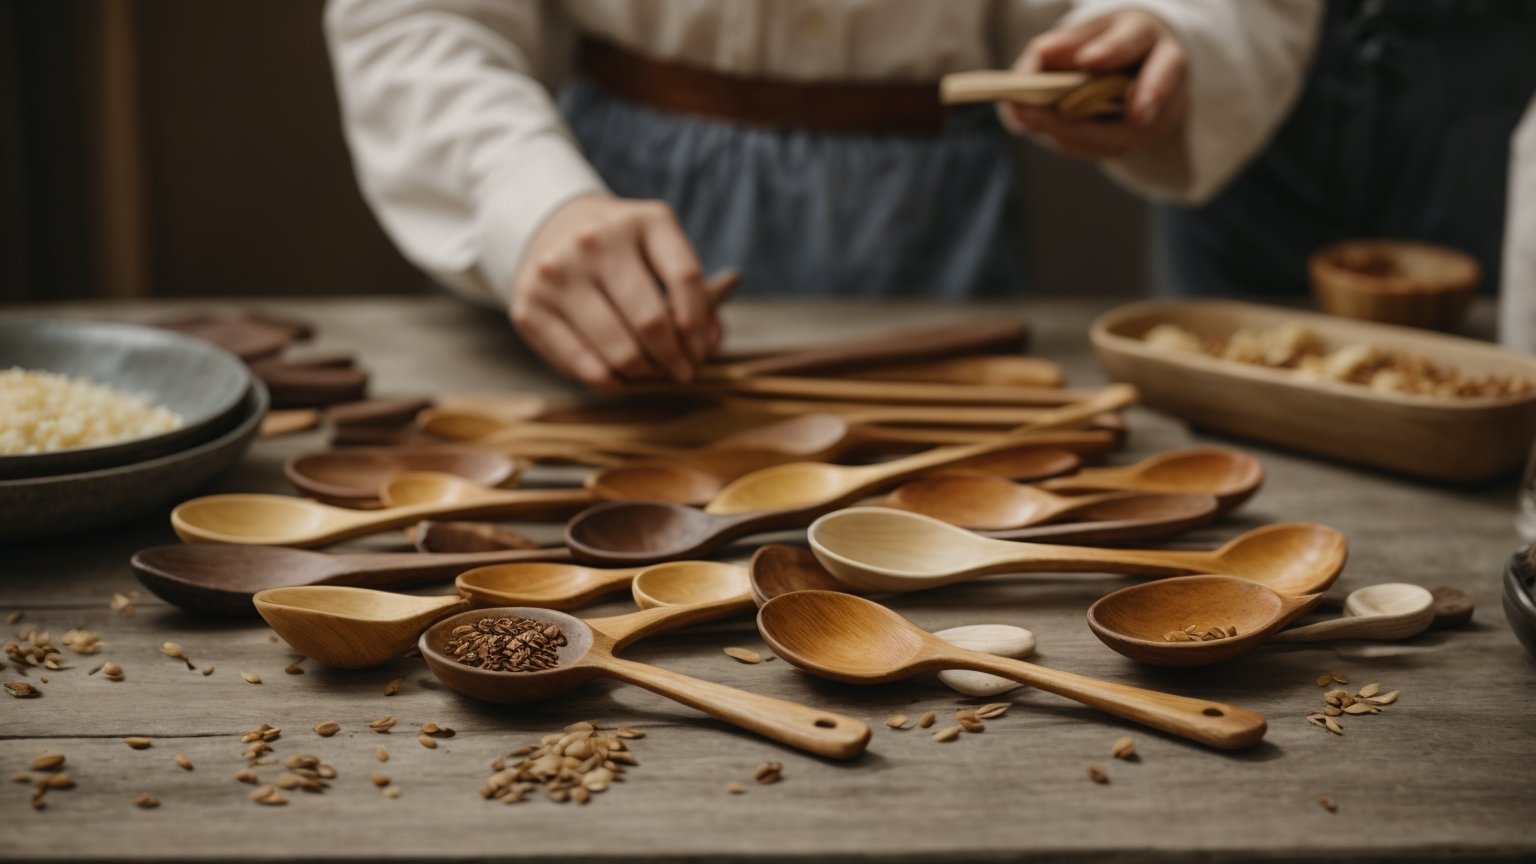
how-to-season-wooden-spoons

How to Season Wooden Spoons: A Quick and Easy Guide

Are you tired of your wooden spoons cracking or warping after just a few uses? If so, it may be time to start seasoning them. Seasoning wooden spoons is a simple process that can help prolong their lifespan and keep them looking and functioning their best.

To start, you’ll want to clean and dry your wooden spoons thoroughly. Then, you can apply a coat of mineral oil or a mixture of beeswax and oil to the spoons. This will help to protect the wood from moisture and prevent it from drying out and cracking. Repeat the process at least once a month to keep your spoons in top condition.

Understanding Wooden Spoons

how-to-season-wooden-spoons

Wooden spoons have been a staple in kitchens for centuries. They are versatile, durable, and can be used for a variety of tasks. Understanding the basics of wooden spoons can help you choose the right one for your needs and keep it in good condition for years to come.
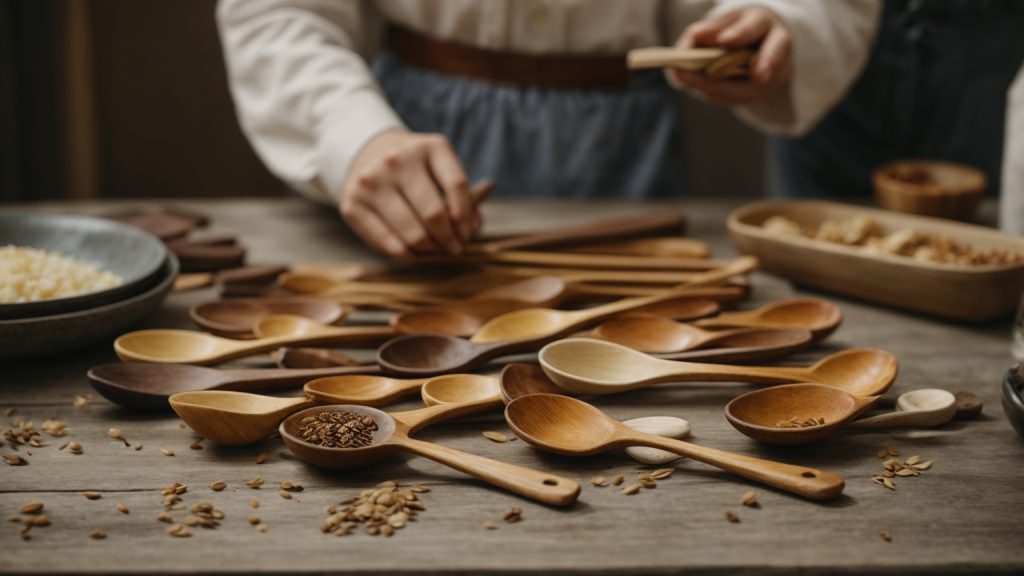
Types of Wood

Not all wooden spoons are created equal. Different types of wood have different properties that affect their durability, resistance to heat and moisture, and overall performance. Here are some common types of wood used for making wooden spoons:

  • Maple: Hard and durable, maple is a popular choice for wooden spoons. It is resistant to scratches and stains, and can withstand high temperatures without warping or cracking.
  • Cherry: Cherry wood is known for its beautiful color and grain patterns. It is also durable and resistant to moisture, making it a good choice for spoons that will be used for cooking and serving.
  • Beech: Beech wood is strong and dense, making it ideal for heavy-duty tasks like stirring thick sauces and batters. It is also resistant to moisture and won’t absorb flavors or odors.
  • Walnut: Walnut wood is prized for its rich color and grain patterns. It is also strong and durable, but can be more expensive than other types of wood.

Care and Maintenance

Proper care and maintenance can help extend the life of your wooden spoons. Here are some tips to keep in mind:

  • Seasoning: Seasoning your wooden spoons with oil or wax can help protect them from moisture and prevent them from drying out and cracking. See the previous search results for specific instructions on how to season your wooden spoons.
  • Cleaning: Wooden spoons should be washed by hand with warm, soapy water. Avoid soaking them in water or putting them in the dishwasher, as this can cause the wood to warp or crack. If your spoon has a stubborn stain or odor, try rubbing it with a mixture of baking soda and water.
  • Storage: Store your wooden spoons in a dry, well-ventilated area away from heat sources. Avoid stacking them on top of each other, as this can cause them to warp or crack.

By understanding the basics of wooden spoons and taking good care of them, you can enjoy their usefulness and beauty for years to come.

Why Season Wooden Spoons?

Wooden spoons are a staple in most kitchens. They are versatile, durable, and easy to use. However, if not properly cared for, they can quickly become damaged, stained, and even start to smell. This is where seasoning comes in.

Seasoning your wooden spoons involves treating them with oil or wax to help protect the wood from drying out, cracking, and absorbing unwanted odors and flavors. It also helps to maintain their natural beauty and extend their lifespan.

Here are a few reasons why you should consider seasoning your wooden spoons:

1. Prevents cracking and splitting

Wooden spoons are susceptible to cracking and splitting, especially if they are exposed to water or extreme temperatures. Seasoning your spoons with oil or wax helps to keep the wood moisturized and prevent it from drying out, which can lead to cracks and splits.

2. Repels odors and flavors

Wooden spoons can absorb odors and flavors from the food they come into contact with. This can be a problem if you’re using the same spoon to stir different dishes. Seasoning your spoons helps to create a protective barrier that repels unwanted odors and flavors.

3. Improves performance

Seasoning your spoons can also improve their performance. A well-seasoned spoon will glide smoothly through food, making it easier to stir and mix ingredients. It also helps to prevent the wood from sticking to food, which can be frustrating and messy.

In summary, seasoning your wooden spoons is an easy and effective way to protect and prolong their lifespan. It prevents cracking and splitting, repels odors and flavors, and improves their overall performance. With just a little bit of care, your wooden spoons can last for years to come.

Selecting the Right Oil

When it comes to seasoning your wooden spoons, selecting the right oil is crucial. You want to choose an oil that is food-safe, won’t turn rancid over time, and has a high smoke point. Here are three options to consider:

Food Grade Mineral Oil

Food-grade mineral oil is a popular choice for seasoning wooden spoons because it is odorless, tasteless, and won’t go rancid. It is also inexpensive and widely available. Mineral oil is a petroleum by-product, so it is not a natural product, but it is considered safe for use with food.

To use mineral oil to season your wooden spoons, apply a generous amount to the wood and let it soak in for several hours or overnight. Wipe off any excess oil with a clean cloth.

Beeswax

Beeswax is another option for seasoning wooden spoons. It is a natural product and has antimicrobial properties. Beeswax also creates a protective barrier on the wood, which can help prevent staining and moisture damage.

To use beeswax to season your wooden spoons, melt the wax in a double boiler and apply it to the wood with a clean cloth. Let it cool and then buff the wood with a clean cloth.

Coconut Oil

Coconut oil is a natural and food-safe oil that has a high smoke point. It is also relatively inexpensive and widely available. Coconut oil can penetrate the wood and help prevent cracking and warping.

To use coconut oil to season your wooden spoons, warm the oil in a double boiler and apply it to the wood with a clean cloth. Let it soak in for several hours or overnight, then wipe off any excess oil.

When selecting the oil to use for seasoning your wooden spoons, consider your personal preferences and the type of wood you are working with. Remember to always choose a food-safe oil and follow the manufacturer’s instructions for use.

Preparation Before Seasoning

preparation-before-seasoning

Before you start seasoning your wooden spoons, you need to prepare them properly. This will ensure that your spoons are clean and ready to absorb the oil or wax that you will use to season them. Here are the steps you need to follow:

Cleaning the Spoon

The first step is to clean your wooden spoon thoroughly. Use warm water and mild dish soap to remove any dirt, residue, or food particles. If your spoon has any stubborn stains, you can use a mixture of baking soda and water to scrub them away. Be sure to rinse the spoon well with warm water to remove all soap residue.

If your spoon has any buildup, you can soak it overnight in a 1:1 ratio of white vinegar and water. Note: you typically don’t want to submerge wooden spoons in water, but a once-off is fine. This will help remove any bacteria and odors that may have accumulated on the spoon.

Drying the Spoon

After cleaning your wooden spoon, you need to dry it thoroughly. Use a clean towel to pat the spoon dry. Be sure to remove all moisture from the spoon, as excess water can cause the wood to warp or crack.

Once you have dried the spoon, you should leave it to air dry completely. This will ensure that all moisture has evaporated from the wood. Avoid using a hairdryer or any other heat source to dry the spoon, as this can damage the wood.

By following these simple steps, you can prepare your wooden spoons for seasoning. Once your spoon is clean and dry, you can move on to the next step of seasoning.

Step-by-Step Guide to Seasoning

If you’ve just purchased a new wooden spoon or cutting board, it’s important to season it before use. Here’s a step-by-step guide to seasoning your wooden spoons:

Applying the Oil

  1. Clean the wooden spoon thoroughly with warm water and mild dish soap to remove any dirt, residue, or food particles. Rinse the spoon well and pat it dry with a clean towel.
  2. Use a rag to apply a thick coat of mineral oil to your spoons. Be sure to work with the grain.
  3. Rub the oil into the wood, making sure to cover the entire surface of the spoon.
  4. Repeat the process until the spoon is completely coated in oil.

Letting the Oil Penetrate

  1. Give the oil several hours to soak into the wood. This will allow the oil to penetrate the pores of the wood, helping to prevent it from drying out and cracking.
  2. For best results, let the oil penetrate for at least 24 hours before using the spoon.

Wiping Off Excess Oil

  1. After the oil has had time to penetrate the wood, come back and wipe off any excess oil with a clean rag.
  2. Repeat the process at least once a month to keep your wooden spoons in good condition.

Remember, seasoning your wooden spoons is an important step in maintaining their longevity and preventing them from cracking or warping over time. By following these simple steps, you can ensure that your wooden spoons will last for years to come.

Maintaining Your Seasoned Spoons

Once you have seasoned your wooden spoons, it’s important to maintain them properly to ensure that they last a long time. Here are some tips on how to keep your seasoned spoons in top condition:

Regular Re-seasoning

Even though you have already seasoned your wooden spoons, they will still need to be re-seasoned periodically. This is especially true if you use your spoons frequently or if you wash them with soap and water.

To re-season your spoons, simply apply a thin layer of mineral oil or beeswax to the surface of the spoon and let it soak in for a few hours. Then, wipe off any excess oil or wax with a clean cloth. Repeat this process once a month to keep your spoons in good condition.

Safe Cleaning Methods

When it comes to cleaning your wooden spoons, it’s important to avoid using harsh chemicals or soaking them in water for extended periods of time. Here are some safe cleaning methods to use:

  • Use a mild soap and warm water to clean your spoons. Be sure to rinse them thoroughly and dry them completely before storing them.
  • If your spoons have any stubborn stains, you can use a paste made from baking soda and water to gently scrub them clean.
  • To sanitize your spoons, you can wipe them down with a solution of white vinegar and water. Just be sure to dry them thoroughly afterwards.
  • Avoid putting your spoons in the dishwasher or soaking them in water for extended periods of time, as this can cause the wood to warp or crack.

By following these simple tips, you can keep your wooden spoons in great condition for years to come.

Common Mistakes to Avoid

When it comes to seasoning wooden spoons, there are a few common mistakes that people make that can cause damage to the wood or prevent the seasoning from being effective. Here are some things to keep in mind to avoid these mistakes.

Using the Wrong Oil

One of the biggest mistakes people make when seasoning wooden spoons is using the wrong type of oil. Some oils, such as vegetable oil or olive oil, can go rancid over time and cause the wood to smell bad. Other oils, such as linseed oil or tung oil, can take a long time to dry and may leave a tacky residue on the wood.

Instead, use a food-safe mineral oil or beeswax to season your wooden spoons. These oils are odorless, won’t go rancid, and will absorb into the wood quickly.

Not Allowing Enough Time for Oil to Absorb

Another mistake people make is not allowing enough time for the oil to absorb into the wood. It’s important to give the oil several hours to soak in before wiping off any excess. If you don’t allow enough time for the oil to absorb, it won’t be as effective at protecting the wood.

Neglecting Regular Maintenance

Finally, one of the biggest mistakes people make is neglecting regular maintenance of their wooden spoons. Even if you’ve seasoned your spoons properly, they still need to be maintained to keep them in good condition.

This means wiping them down after each use, washing them by hand with warm, soapy water, and allowing them to air dry completely before putting them away. It also means reapplying a thin coat of mineral oil or beeswax at least once a month to keep the wood hydrated and protected.

By avoiding these common mistakes, you can ensure that your wooden spoons will last for years to come and continue to be a valuable tool in your kitchen.

how-to-oil-wooden-spoons-for-long-lasting-use-2

How to Oil Wooden Spoons for Long-lasting Use

If you’re someone who loves to cook, you probably have a collection of wooden spoons and cutting boards in your kitchen. Wooden spoons are a versatile tool that can be used for stirring, mixing, and even serving. However, over time, wooden spoons can become dry and brittle, making them more susceptible to cracking and splintering. That’s where oiling comes in – it’s a simple process that can help keep your wooden spoons in great condition for years to come.

To oil your wooden spoons, you’ll need to choose an oil that’s safe for food use. Mineral oil is a popular choice, as it’s odorless, tasteless, and won’t go rancid. You can also use walnut oil, tung oil, or linseed oil – just be sure to read the label to make sure it’s safe for food use. Once you’ve chosen your oil, you’ll want to apply it generously to your wooden spoons, making sure to cover all surfaces. Let the oil soak in for at least 30 minutes, or overnight if possible, before wiping off any excess with a clean cloth.

By oiling your wooden spoons regularly, you’ll help keep them from drying out and cracking, which can extend their lifespan and make them a joy to use for years to come. With just a little bit of effort and the right oil, you can keep your wooden spoons in great condition and enjoy using them in your kitchen for many meals to come.

Understanding Wooden Spoons

how-to-oil-wooden-spoons-for-long-lasting-use-2

Wooden spoons are a staple in any kitchen. They are versatile, durable, and gentle on cookware. However, they require proper care and maintenance to ensure their longevity. In this section, we will discuss the benefits of using wooden spoons, the different types of wood used to make them, and how to properly care for them.

Benefits of Using Wooden Spoons

There are several benefits to using wooden spoons. They are:

  • Gentle on cookware: Unlike metal utensils, wooden spoons do not scratch or damage non-stick cookware.
  • Versatile: Wooden spoons can be used for stirring, mixing, scraping, and even serving.
  • Durable: Wooden spoons can last for years with proper care and maintenance.
  • Natural and eco-friendly: Wooden spoons are made from renewable resources and are biodegradable.

Types of Wood Used to Make Wooden Spoons

Different types of wood are used to make wooden spoons. The most common types are:

  • Maple: Maple wood is hard and durable, making it ideal for kitchen utensils. It has a light color and a tight grain pattern.
  • Cherry: Cherry wood is also hard and durable. It has a reddish-brown color and a distinctive grain pattern.
  • Olive: Olive wood is dense and heavy, making it perfect for cooking utensils. It has a unique grain pattern and a warm color.

Caring for Wooden Spoons

Proper care and maintenance are essential to keep your wooden spoons in good condition. Here are some tips:

  • Wash your wooden spoons by hand with warm, soapy water. Avoid soaking them in water as it can cause the wood to warp or crack.
  • Dry them thoroughly after washing. You can air dry them or use a towel to dry them off.
  • Oil your wooden spoons regularly to prevent them from drying out and cracking. Use food-grade mineral oil or walnut oil to oil your spoons.
  • Store your wooden spoons in a dry place away from heat and moisture. A utensil holder or a drawer organizer is ideal for storing them.

By following these tips, you can keep your wooden spoons in good condition for years to come.

Why Oiling is Important

If you use wooden spoons regularly, it’s important to keep them in good condition. Oiling your wooden spoons can help extend their lifespan and keep them looking beautiful. Here are a few reasons why oiling is important:

Prevents Drying and Cracking

Wooden spoons can dry out over time, especially if they’re exposed to heat or moisture. When wood dries out, it can become brittle and prone to cracking. Oiling your spoons helps to keep them hydrated, preventing them from drying out and cracking.

Protects Against Stains and Odors

Wooden spoons can absorb stains and odors from the foods you’re cooking. Oiling your spoons can help to create a barrier that protects against these stains and odors. This can help to keep your spoons looking and smelling great for longer.

Enhances the Wood’s Natural Beauty

Oiling your wooden spoons can bring out the natural beauty of the wood. It can help to highlight the grain and color of the wood, giving your spoons a unique and attractive appearance.

Improves Grip and Comfort

Oiling your wooden spoons can also improve their grip and comfort. The oil can help to smooth out any rough spots on the spoon, making it more comfortable to use. Additionally, the oil can help to create a non-slip surface, making it easier to grip the spoon while you’re cooking.

Overall, oiling your wooden spoons is an easy and effective way to keep them in great condition. By preventing drying and cracking, protecting against stains and odors, enhancing the wood’s natural beauty, and improving grip and comfort, oiling can help to extend the lifespan of your spoons and keep them looking and feeling great for years to come.

Choosing the Right Oil

choosing-the-right-oil

When it comes to oiling wooden spoons, there are a few options to consider. Here are three popular choices:

Food Grade Mineral Oil

Food grade mineral oil is a popular choice for oiling wooden spoons and cutting boards. It is a colorless, odorless, and tasteless oil that is safe for food contact. Mineral oil is also affordable and easy to find in most stores.

To use mineral oil, simply apply a small amount to the wood surface and rub it in with a clean cloth. Let it sit for a few hours or overnight, then wipe away any excess oil with a dry cloth. Repeat this process every few months to keep your wooden spoons in good condition.

Beeswax

Beeswax is a natural wax that can be used to protect and seal wooden spoons. It creates a barrier that prevents moisture from penetrating the wood and helps to prevent cracking. Beeswax also gives wooden spoons a warm, natural finish.

To use beeswax, melt a small amount in a double boiler or microwave. Apply the melted wax to the wood surface using a clean cloth or brush. Let it sit for a few minutes, then buff the surface with a dry cloth to remove any excess wax. Repeat this process every few months to maintain the protective barrier.

Coconut Oil

Coconut oil is a popular alternative to mineral oil for those who prefer a natural option. It is a solid oil at room temperature, but melts easily when warmed up. Coconut oil is also known for its antibacterial properties, which can help to keep wooden spoons clean and hygienic.

To use coconut oil, warm up a small amount until it becomes liquid. Apply the oil to the wood surface using a clean cloth, and rub it in well. Let it sit for a few hours or overnight, then wipe away any excess oil with a dry cloth. Repeat this process every few months to keep your wooden spoons in good condition.

Remember, whichever oil you choose, be sure to use a food-grade option that is safe for food contact. And always follow the manufacturer’s instructions for best results.

Oiling Process

Wooden spoons are a great addition to any kitchen, but they require proper care to maintain their quality and longevity. One of the most important steps in caring for your wooden spoons is oiling them regularly. Here is a step-by-step guide on how to oil your wooden spoons properly.

Cleaning the Spoons

Before you start oiling your wooden spoons, you need to make sure they are clean. Wash them with warm soapy water and rinse thoroughly. You can also use a mild abrasive like baking soda to remove any stains or discoloration. Once the spoons are clean, dry them with a towel and allow them to air dry completely.

Applying the Oil

Now it’s time to apply the oil. There are many different types of oils you can use, but we recommend using food-grade mineral oil or walnut oil. These oils are safe for use with food and will not turn rancid over time. Pour a small amount of oil onto a clean cloth and rub it into the wood, making sure to cover all surfaces. You can also use a brush to apply the oil if you prefer. Be sure to apply the oil generously, but not so much that it pools on the surface.

Drying and Curing

After you have applied the oil, let the spoons sit for at least 30 minutes to allow the oil to penetrate the wood. You can also let the spoons sit overnight for best results. Once the oil has had time to soak in, wipe off any excess with a clean cloth. Then, place the spoons in a well-ventilated area to dry and cure for at least 24 hours. This will help the oil to fully cure and harden, creating a protective barrier on the surface of the wood.

By following these simple steps, you can keep your wooden spoons in great condition for years to come. Remember to oil them regularly to prevent drying and cracking, and to keep them looking their best.

Maintaining Oiled Spoons

After oiling your wooden spoons, it is important to maintain them properly to ensure their longevity. Here are some tips on how to maintain your oiled spoons:

Regular Oiling

To keep your wooden spoons in good condition, it is recommended to oil them regularly. This will help prevent the wood from drying out, which can cause cracking and splintering. You can use food-grade mineral oil or coconut oil to oil your spoons.

To oil your spoons, simply apply a small amount of oil to a soft cloth or paper towel and rub it onto the surface of the spoon. Make sure to cover all crevices and the handle. Leave the oil on the spoon for a few hours or overnight to allow it to soak into the wood.

Avoiding Dishwasher

It is important to avoid washing your wooden spoons in the dishwasher. The high heat and harsh detergents can damage the wood and cause it to dry out. Instead, wash your spoons by hand using warm water and mild dish soap.

After washing, dry your spoons thoroughly with a clean towel and let them air dry completely before storing them. Do not store your spoons in a damp or humid environment, as this can cause the wood to warp or crack.

By following these simple tips, you can maintain the beauty and functionality of your oiled wooden spoons for years to come.

How to Season a Wooden Cutting Board: A Beginner's Guide

If you’re someone who loves to cook and spends a lot of time in the kitchen, then you know how important it is to have a good quality cutting board. A wooden cutting board is a great investment, but it’s important to know how to properly season and maintain it to ensure it lasts for years to come.

Seasoning a wooden cutting board involves applying oil to the surface to protect it from moisture and prevent it from drying out. This process not only helps to extend the life of your cutting board, but it also helps to prevent bacteria from growing on the surface. In this article, we will cover the steps involved in seasoning a wooden cutting board, as well as tips for maintaining it to keep it in top condition.

Understanding the Importance of Seasoning

When it comes to maintaining a wooden cutting board, seasoning is an essential step that you should never overlook. Proper seasoning of a cutting board helps to preserve its quality and prevent bacterial growth. In this section, we will discuss the importance of seasoning and how it can benefit you.

Preserving the Quality

Wooden cutting boards are a popular choice in many kitchens because they are durable and long-lasting. However, without proper care, they can become dry, cracked, and warped, making them difficult to use. Seasoning your cutting board regularly helps to keep it moisturized, preventing it from drying out and cracking. This will not only extend the life of your cutting board but also make it easier to use and maintain.

Preventing Bacterial Growth

One of the biggest concerns when it comes to using a cutting board is the potential for bacterial growth. Bacteria can easily thrive in the grooves and scratches on a cutting board, making it difficult to clean and increasing the risk of foodborne illness. Seasoning your cutting board creates a protective barrier that helps to prevent bacteria from seeping into the wood. This will not only make your cutting board safer to use but also make it easier to clean and maintain.

In summary, seasoning your wooden cutting board is an essential step in maintaining its quality and preventing bacterial growth. With proper seasoning and care, your cutting board can last for years to come, making it a valuable investment for any kitchen.

Choosing the Right Oil

When it comes to seasoning a wooden cutting board, choosing the right oil is essential. Here are a few options to consider:

Food-Grade Mineral Oil

Food-grade mineral oil is a popular choice for seasoning cutting boards. It is a clear, odorless oil that is safe for food contact and will not go rancid. Mineral oil is also affordable and widely available. To apply, simply pour a small amount onto the board and use a clean cloth to spread it evenly over the surface. Let the oil soak in for a few hours, or overnight if possible, before wiping away any excess.

Beeswax

Beeswax is another option for seasoning cutting boards. It is a natural wax that can help protect the wood and give it a nice shine. To use, melt the beeswax in a double boiler or microwave, then apply a thin layer to the board using a clean cloth. Let the wax cool and harden before buffing the board with a clean cloth.

Coconut Oil

Coconut oil is a popular choice for many kitchen tasks, including seasoning cutting boards. It is a natural oil that is solid at room temperature, making it easy to apply to the board. Simply scoop a small amount of coconut oil onto the board and use a clean cloth to spread it evenly over the surface. Let the oil soak in for a few hours, or overnight if possible, before wiping away any excess.

No matter which oil you choose, be sure to use a food-safe product and avoid any oils that can go rancid or leave a sticky residue on the board. With the right oil and proper care, your wooden cutting board can last for years to come.

Steps to Season a Wooden Cutting Board

If you want to keep your wooden cutting board in good condition and make it last longer, seasoning it is a must. Here are the steps you need to follow to season your wooden cutting board:

Cleaning the Board

Before seasoning your wooden cutting board, you need to make sure it is clean. Start by washing it with warm water and dish soap. Scrub the entire surface, edges, and handle of the board until it is ultra clean. Pay special attention to any crevices in the wood. Rinse the board with warm water and dry it with a clean towel.

Applying the Oil

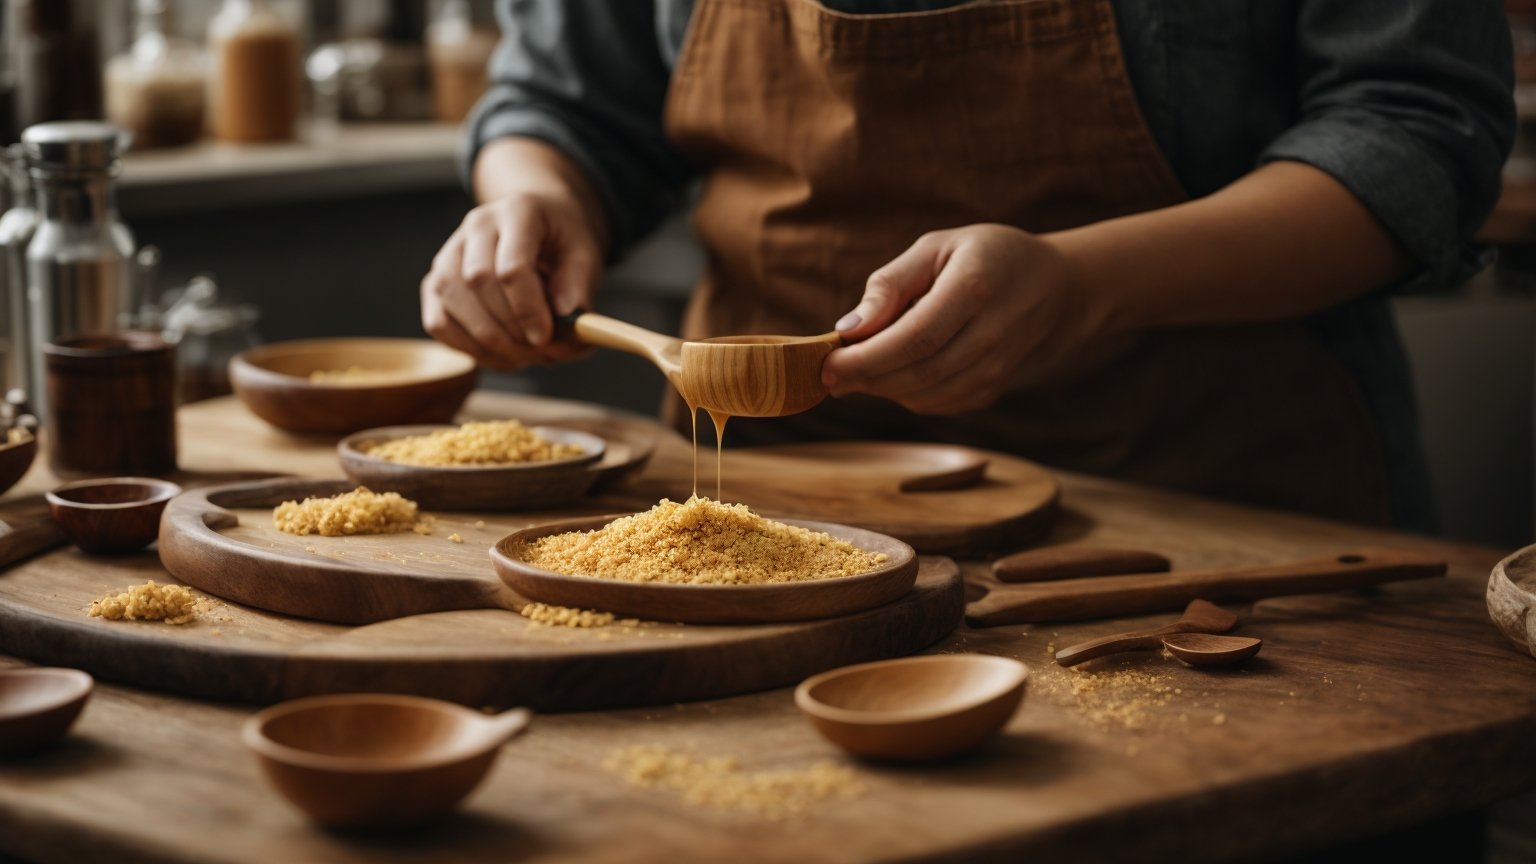
Once your wooden cutting board is clean and dry, it’s time to apply the oil. You can use a food-grade mineral oil or a mixture of mineral oil and beeswax. Apply a generous amount of oil to the board using a clean cloth or a paper towel. Make sure you cover the entire surface of the board, including the edges and the handle.

Letting it Soak

After applying the oil, let the board soak for at least 30 minutes. This will allow the oil to penetrate the wood and protect it from moisture and bacteria. You can leave the board on a flat surface or prop it up against a wall to allow the excess oil to drip off.

Wiping Off Excess Oil

Once the board has soaked for at least 30 minutes, it’s time to wipe off the excess oil. Use a clean cloth or paper towel to wipe the board, removing any excess oil. You can repeat this step a few times until the board no longer feels oily to the touch.

By following these simple steps, you can season your wooden cutting board and keep it in good condition for years to come. Remember to reapply the oil every few months or as needed to keep your board protected and looking great.
Maintaining Your Seasoned Board

Once you’ve seasoned your wooden cutting board, it’s important to maintain it properly to ensure its longevity. Here are a few tips for keeping your board in top condition.

Regular Cleaning

To keep your board clean, you should wash it after each use with warm water and mild soap. Avoid using harsh detergents or abrasive sponges, as these can damage the wood. After washing, rinse the board thoroughly and dry it with a clean towel.

To sanitize your board, you can use a solution of one part vinegar to four parts water. Simply apply the solution to the board with a clean cloth, let it sit for a few minutes, and then rinse the board with water and dry it off.

Reapplying Oil When Needed

Over time, your board may start to look dry or faded. This is a sign that it’s time to reapply oil. To do this, start by cleaning the board thoroughly and allowing it to dry completely. Then, apply a small amount of food-grade mineral oil or a combination of beeswax and mineral oil to the board, using a clean cloth or paper towel to spread it evenly.

Let the oil soak into the wood for a few hours or overnight, and then wipe off any excess with a dry cloth. Repeat this process once a month or as needed to keep your board looking and functioning its best.

By following these simple maintenance tips, you can enjoy your seasoned cutting board for years to come.