Tag Archives: withstand high temperatures

how-to-make-wooden-coasters-a-simple-diy-guide-2

How to Make Wooden Coasters: A Simple DIY Guide

Looking for a fun and easy DIY project that can add a personal touch to your home decor? Look no further than wooden coasters! Not only are they functional, but they can also add a rustic and charming feel to any room. Plus, they make great handmade gifts for friends and family.

If you’re new to woodworking, don’t worry – making your own wooden coasters is a beginner-friendly project that requires minimal tools and materials. With just a few hours of work and some basic woodworking skills, you can create a set of beautiful and practical coasters that you’ll be proud to display in your home. Whether you’re looking to spruce up your own living space or create thoughtful gifts for loved ones, making wooden coasters is a fun and rewarding project that anyone can tackle.

Understanding Wood Types
how-to-make-wooden-coasters-a-simple-diy-guide-2

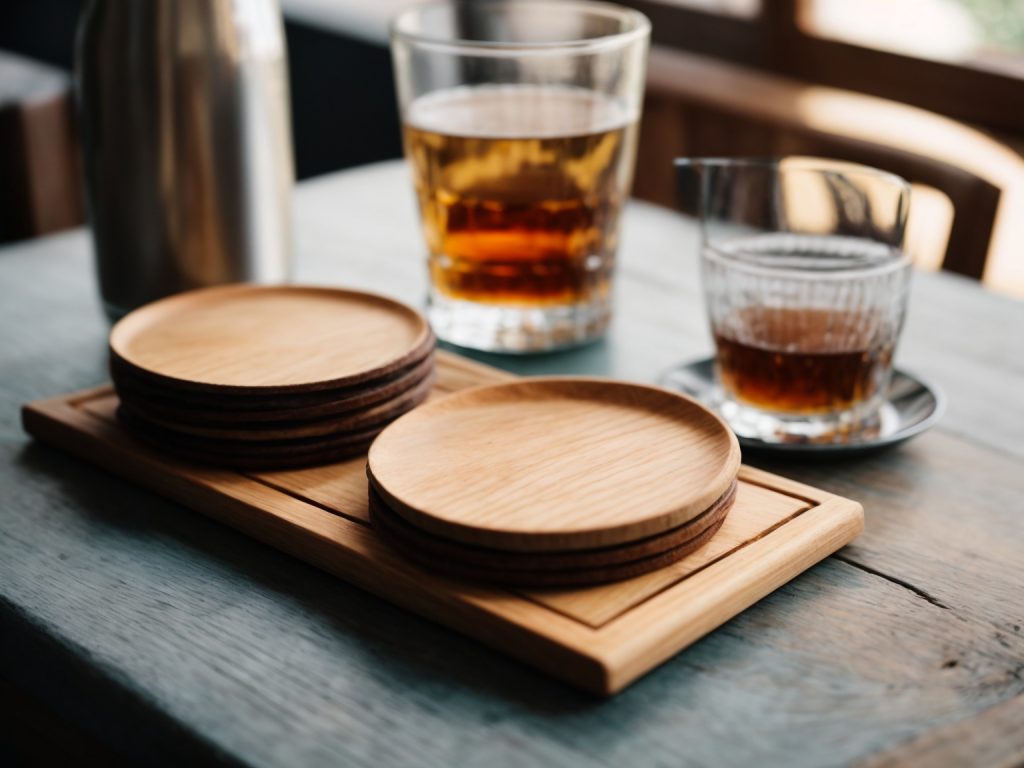
When it comes to making wooden coasters, choosing the right type of wood is crucial for the durability and longevity of your project. In this section, we will discuss the differences between softwood and hardwood, and provide some guidance on how to choose the right wood for your coaster-making project.

Softwood Vs Hardwood

Softwood and hardwood are the two main categories of wood. Softwood comes from coniferous trees, such as pine, cedar, and spruce, while hardwood comes from deciduous trees, such as oak, maple, and cherry.

Softwood is generally less dense and less expensive than hardwood. It is also easier to work with, making it a popular choice for beginners. However, softwood is more prone to dents, scratches, and other types of damage.

Hardwood, on the other hand, is denser and more durable than softwood. It is also more expensive and harder to work with. However, hardwood is less prone to damage and can last for decades with proper care.

Choosing the Right Wood

When choosing the right wood for your coaster-making project, consider the following factors:

  • Moisture resistance: Coasters are often used to protect furniture from water rings, so it’s important to choose a wood that can withstand moisture. Some woods, such as cedar and redwood, are naturally resistant to moisture, while others, such as pine and spruce, are more prone to warping and cracking when exposed to water.
  • Heat resistance: Coasters are also used to protect furniture from heat damage, so it’s important to choose a wood that can withstand high temperatures. Hardwoods such as oak and maple are more heat-resistant than softwoods such as pine and cedar.
  • Aesthetics: Wood comes in a variety of colors and grain patterns, so choose a wood that matches your personal style and complements your home decor.

Overall, hardwood is the best choice for making coasters that are both durable and attractive. However, if you are a beginner or on a tight budget, softwood can be a good option as well. Just be sure to choose a wood that is appropriate for your needs and take proper care of your coasters to ensure their longevity.

Gathering Tools and Materials

When it comes to making wooden coasters, having the right tools and materials is key to achieving a professional-looking finished product. Here are the essential tools and materials you will need:

Essential Woodworking Tools

To create wooden coasters, you will need the following woodworking tools:

Tool Description
Saw A saw is necessary to cut the wood to size. A jigsaw or circular saw is recommended for beginners.
Sandpaper Sandpaper is used to smooth out rough edges and create a smooth surface. Start with a coarse grit (80-100) and work up to a finer grit (220-240).
Drill A drill is needed to make holes for decorative elements or to attach felt pads to the bottom of the coaster.
Clamps Clamps are useful to hold the wood in place while cutting or sanding.

Safety Equipment

Safety should always be a top priority when working with power tools. Be sure to wear the following safety equipment:

  • Safety glasses or goggles to protect your eyes from flying debris
  • Earplugs or earmuffs to protect your ears from loud noise
  • Dust mask or respirator to protect your lungs from sawdust

Wood and Finishing Materials

Choosing the right type of wood is important for creating durable and long-lasting coasters. Some common types of wood used for coasters include oak, maple, and pine. You will also need a protective finish to prevent damage from condensation and hot drinks. Consider using polyurethane or shellac to finish your coasters.

In summary, to make wooden coasters, you will need a saw, sandpaper, drill, clamps, safety equipment, wood, and finishing materials. Always prioritize safety and choose high-quality materials for the best results.

Designing Your Coasters
designing-your-coasters

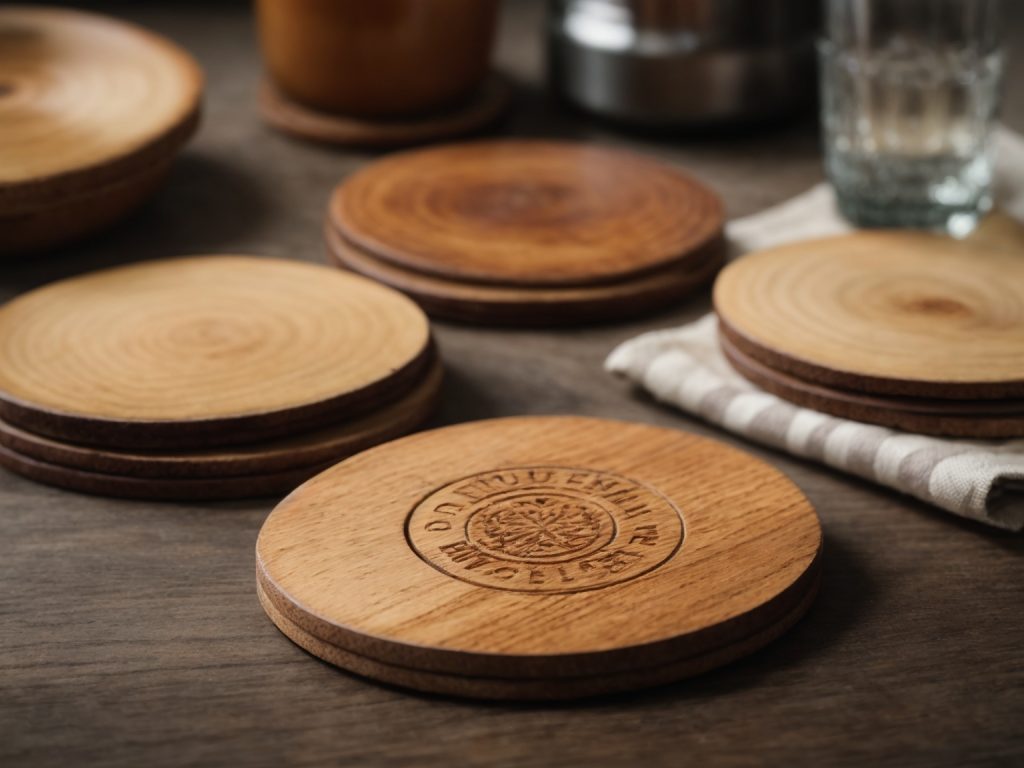
When it comes to designing your wooden coasters, the possibilities are endless. Whether you want to create a set of coasters that match your home decor or make a unique gift for a loved one, designing your own coasters is a fun and creative process. Here are some tips to help you get started:

Determining Size and Shape

Before you begin designing your coasters, you’ll need to determine the size and shape you want them to be. The size of your coasters will depend on the size of your glasses or mugs, but a typical coaster is around 4 inches in diameter. You can also make square or rectangular coasters if you prefer.

Once you’ve determined the size and shape of your coasters, you’ll need to choose the type of wood you want to use. Hardwoods like oak, maple, and cherry are durable and make great coasters, but you can also use softer woods like pine or cedar if you prefer.

Adding Personal Touches

One of the best things about making your own wooden coasters is that you can add personal touches to make them unique. Here are some ideas to get you started:

  • Wood burning: Use a wood burning tool to create designs or patterns on your coasters. You can also add names or initials to make them personalized.
  • Stenciling: Use stencils to create designs or patterns on your coasters. You can use paint or wood stain to fill in the stencil.
  • Etching: Use a rotary tool to etch designs or patterns into the wood. This method works best on hardwoods.
  • Inlay: Use a router to create a groove in the coaster and fill it with a contrasting wood or resin.

Once you’ve added your personal touches, you’ll need to seal your coasters to protect them from moisture. You can use a clear polyurethane finish or a food-safe wax to seal your coasters.

Designing your own wooden coasters is a fun and easy DIY project that anyone can do. With a little creativity and some basic woodworking skills, you can create a set of coasters that are both functional and beautiful.

Cutting the Wood

When it comes to making wooden coasters, cutting the wood is a crucial step. This section will cover two important sub-sections: Preparing the Wood and Cutting Techniques.

Preparing the Wood

Before you start cutting the wood, you need to make sure it is properly prepared. Here are a few steps to follow:

  • Choose the right type of wood: For coaster-making, it’s best to use hardwoods like maple, oak, or cherry. Softwoods like pine or cedar are not recommended.
  • Measure and mark: Use a ruler or tape measure to measure the wood and mark where you want to make the cuts.
  • Sand the wood: Sand the surface of the wood to remove any rough spots or imperfections.

Cutting Techniques

There are several cutting techniques you can use to make wooden coasters. Here are a few options:

  • Hand saw: A hand saw is a simple and affordable tool that can be used to make straight cuts. It’s a good option if you don’t have access to power tools.
  • Miter saw: A miter saw is a power tool that can make precise cuts at different angles. This is a good option if you want to make angled cuts for your coasters.
  • Table saw: A table saw is a versatile power tool that can make both straight and angled cuts. It’s a good option if you plan on making a large number of coasters.

No matter which cutting technique you choose, it’s important to follow these safety tips:

  • Wear protective eyewear and gloves.
  • Keep your fingers away from the blade.
  • Follow the manufacturer’s instructions for your specific tool.

By following these tips and techniques, you’ll be able to cut your wood with confidence and create beautiful wooden coasters.

Sanding and Finishing

Sanding Basics

Sanding is an essential step in making wooden coasters. It helps to smooth out any roughness on the surface of the wood and ensures that the coasters are even and flat. Here are some basic steps to follow when sanding your wooden coasters:

  1. Start with a coarse grit sandpaper, such as 120, and sand the surface of each coaster. Be sure to sand in the direction of the wood grain to avoid scratches.
  2. Gradually move to finer grit sandpapers, such as 220 and 320, to achieve a smooth surface. Sand each coaster until you are satisfied with the texture.
  3. Use a tack cloth or a soft-bristled brush to remove any dust or debris from the surface of the coasters.

Choosing a Finish

Once you have sanded your wooden coasters, it’s time to choose a finish. A finish not only protects the wood but also enhances its natural beauty. Here are some popular finishes to consider:

  1. Polyurethane: This finish is durable and water-resistant, making it perfect for coasters. It comes in a variety of sheens, from matte to glossy.
  2. Tung oil: This natural finish provides a warm, amber tone to the wood and is easy to apply. It is also water-resistant but may require reapplication over time.
  3. Wax: This finish provides a soft, matte look to the wood and is easy to apply. It is not as water-resistant as other finishes, but it is ideal for indoor use.

When applying a finish, be sure to follow the manufacturer’s instructions and apply it in a well-ventilated area. Use a brush, cloth, or foam applicator to evenly apply the finish to each coaster. Allow the finish to dry completely before using your wooden coasters.

Remember, sanding and finishing your wooden coasters can take time, but the end result is worth it. Your coasters will not only protect your furniture but also add a touch of natural beauty to your home.

Final Touches

Once you have completed making your wooden coasters, it’s time to add some final touches to make them look professional. In this section, we will discuss two important final touches: adding protective pads and packaging and storing.

Adding Protective Pads

Adding protective pads to your wooden coasters will prevent them from scratching surfaces and keep them in good condition for a longer time. You can use self-adhesive felt pads or cork pads, which are available at most hardware stores. Simply cut the pads to the size of the coaster and stick them on the bottom.

Packaging and Storing

Packaging and storing your wooden coasters properly will ensure that they remain in good condition until you are ready to use them or give them as gifts. Here are some tips on how to package and store your coasters:

  • Wrap each coaster in tissue paper or bubble wrap to prevent scratches and damage during transport.
  • Store the coasters in a dry and cool place, away from direct sunlight and moisture.
  • If you are giving the coasters as a gift, consider putting them in a small box or fabric bag for a more professional look.

By following these simple final touches, you can make your wooden coasters look great and last longer.
what-is-a-wooden-spoon-used-for

What Is a Wooden Spoon Used For? A Guide to This Kitchen Essential

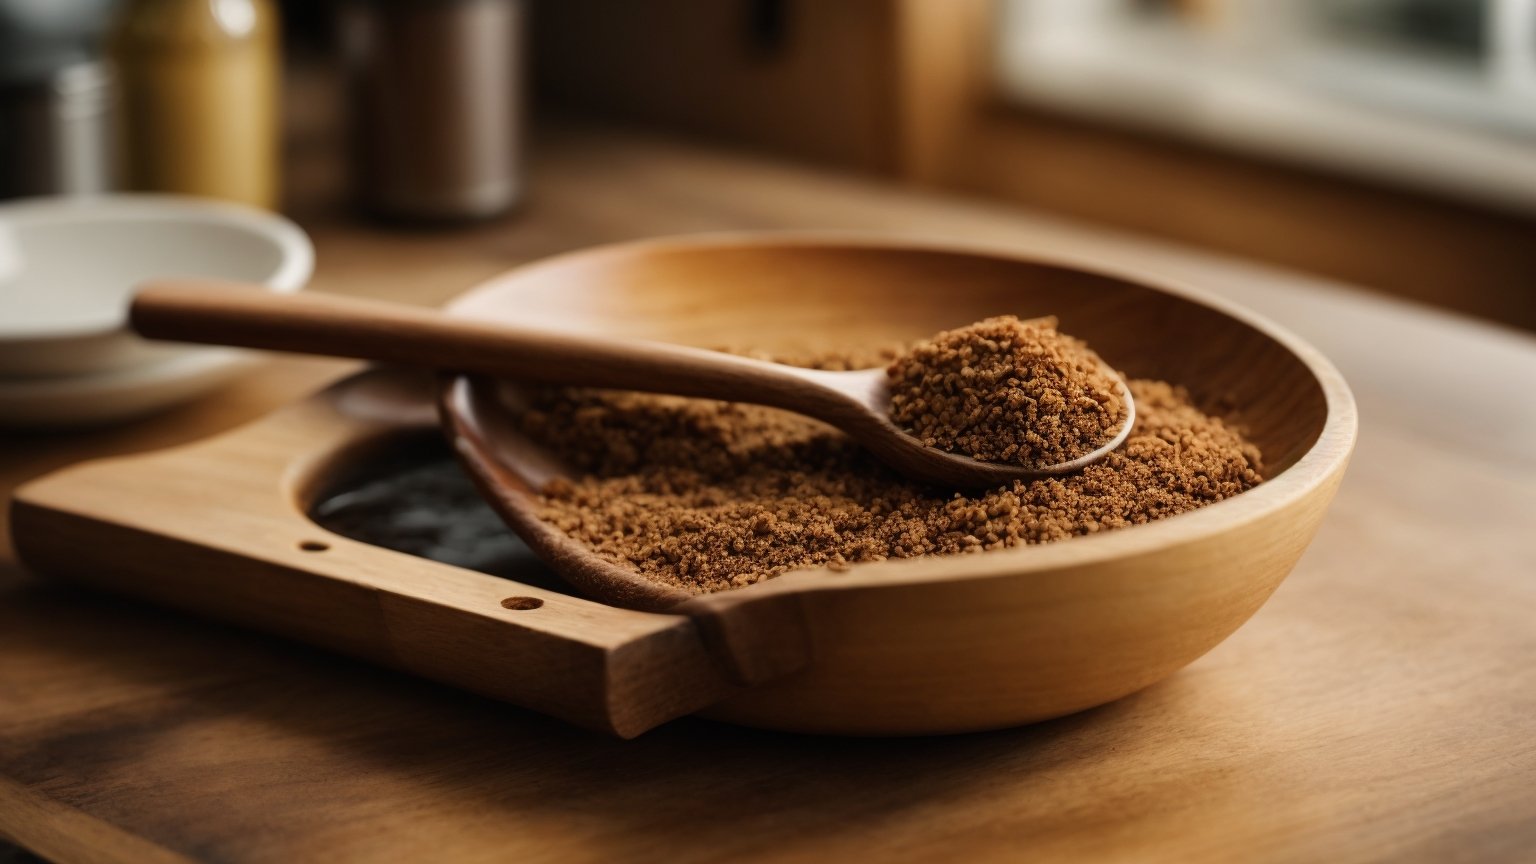
Have you ever wondered what a wooden spoon is used for in the kitchen? Wooden spoons are a versatile kitchen tool that has been used for centuries. They come in different shapes and sizes and can be used for a variety of cooking tasks.

One of the most common uses for a wooden spoon is stirring and mixing ingredients while cooking. The long handle and round bowl-shaped head make it easy to reach the bottom of pots and pans and mix ingredients thoroughly. Wooden spoons are especially useful when cooking with non-stick cookware since they won’t scratch or damage the surface.

Another use for a wooden spoon is scooping out food from pots and pans. The rounded bowl of the spoon can easily scoop up soups, stews, and sauces. Wooden spoons are also great for serving since they have a classic and rustic look that adds charm to any table setting. So whether you’re cooking a hearty soup or serving up a delicious dessert, a wooden spoon is a must-have tool in any kitchen.

The Basic Uses of a Wooden Spoon

what-is-a-wooden-spoon-used-for

A wooden spoon is a versatile kitchen tool that can be used for various purposes. Here are some basic uses of a wooden spoon:

Stirring

One of the most common uses of a wooden spoon is stirring. You can use it to stir soups, stews, sauces, and other dishes while they are cooking. The long handle of a wooden spoon allows you to reach the bottom of the pot or pan without burning your hand.

Mixing

A wooden spoon is also great for mixing ingredients. You can use it to mix batters, doughs, and other mixtures. The flat surface of a wooden spoon is perfect for scraping the sides of the bowl and ensuring that all the ingredients are well mixed.

Tasting

When you are cooking, you may need to taste your dish to check if it needs more seasoning or not. A wooden spoon is ideal for this purpose as it does not react with acidic or alkaline ingredients. You can use it to taste soups, stews, sauces, and other dishes without altering their taste.

Serving

A wooden spoon can also be used for serving food. You can use it to scoop out rice, pasta, and other dishes from a pot or pan. It is also great for serving salads and other cold dishes.

Preventing Scratches

Wooden spoons are gentle on cookware, and they won’t scratch the surface of your pots and pans. You can use them with non-stick cookware without worrying about damaging the coating.

In summary, a wooden spoon is a must-have kitchen tool that can be used for stirring, mixing, tasting, serving, and preventing scratches on your cookware.

Wooden Spoon in Baking

When it comes to baking, wooden spoons are a must-have tool in your kitchen. They are versatile and can be used for a variety of tasks, from mixing ingredients to creaming butter and sugar. Here are some ways you can use a wooden spoon in baking:

Mixing Ingredients

Wooden spoons are perfect for mixing dry and wet ingredients together. Unlike metal spoons, wooden spoons won’t scratch or damage your mixing bowls, and they won’t react with acidic ingredients like lemon juice or vinegar. When mixing ingredients, use a gentle folding motion to combine them evenly. Be sure to scrape the sides and bottom of the bowl to make sure everything is fully incorporated.

Creaming Butter and Sugar

Creaming butter and sugar is an important step in many baking recipes, and a wooden spoon is the perfect tool for the job. Start by softening your butter to room temperature, then add sugar and use your wooden spoon to mix them together until light and fluffy. This process incorporates air into the mixture, which helps the final product rise and become light and tender.

When using a wooden spoon for creaming butter and sugar, be sure to use a circular motion to fully incorporate the ingredients. You can also use the back of the spoon to press the mixture against the side of the bowl to help break up any lumps.

Overall, a wooden spoon is an essential tool in any baker’s kitchen. Whether you’re mixing ingredients or creaming butter and sugar, a wooden spoon is the perfect tool for the job. So next time you’re in the kitchen, reach for your trusty wooden spoon and start baking!

Wooden Spoon in Cooking

wooden-spoon-in-cooking

When it comes to cooking, a wooden spoon is an essential tool that every home cook should have in their kitchen. It is a versatile utensil that can be used for a variety of tasks, from stirring soups and sauces to sautéing vegetables. In this section, we will explore the different ways you can use a wooden spoon in cooking.

Stirring Soups and Sauces

One of the most common uses of a wooden spoon is for stirring soups and sauces. Unlike metal spoons, wooden spoons do not conduct heat, which makes them ideal for stirring hot liquids. They are also gentle on non-stick surfaces, which means you can use them in your non-stick pots and pans without worrying about scratching the surface.

When stirring soups and sauces, it’s important to use a wooden spoon that is long enough to reach the bottom of the pot. This will ensure that you can stir the contents of the pot evenly and prevent any burning or sticking.

Sautéing Vegetables

Another great use for a wooden spoon is for sautéing vegetables. When cooking vegetables on the stovetop, you want to make sure that they cook evenly and don’t stick to the pan. A wooden spoon can help you achieve this by gently stirring the vegetables as they cook.

To sauté vegetables with a wooden spoon, start by heating up your pan over medium-high heat. Add your vegetables and stir them around with your wooden spoon. As they cook, continue stirring them every few minutes to prevent sticking and ensure even cooking.

Overall, a wooden spoon is a must-have tool for any home cook. Whether you’re stirring soups and sauces or sautéing vegetables, a wooden spoon is gentle on your cookware and can help you achieve delicious results.

Non-Culinary Uses of Wooden Spoon

Wooden spoons are not only useful in the kitchen, but they can also be used in various other ways. Here are a few examples of non-culinary uses of wooden spoons.

Crafting and Art

Wooden spoons can be used for crafting and art projects. They can be painted, carved, or decorated to create unique designs. You can use them to make puppets, ornaments, or even a birdhouse. Wooden spoons are also great for children’s crafts, as they are easy to handle and can be painted with non-toxic paint.

If you are into woodworking, you can use wooden spoons as a starting point for carving more complex designs. They are an excellent way to practice your carving skills before moving on to more challenging projects.

Musical Instrument

Believe it or not, wooden spoons can also be used as a musical instrument. They are a traditional percussion instrument in many cultures, including Irish, Scottish, and Appalachian music. To play the wooden spoons, you hold one spoon in each hand and tap them together rhythmically. You can also use them to tap on a wooden box or table to create a beat.

If you want to take your wooden spoon playing to the next level, you can try making a set of spoons specifically designed for music. These spoons are typically longer and thinner than regular wooden spoons, with a more pronounced curve in the handle for better grip.

In conclusion, wooden spoons are not just for cooking. They can be used in a variety of ways, from crafting to music. So next time you’re in the kitchen, take a moment to appreciate the versatility of your wooden spoons.

Why Use a Wooden Spoon

When it comes to cooking, choosing the right utensils is important. Wooden spoons are a popular choice for many cooks, and for good reason. Here are a few reasons why you should consider using a wooden spoon in your kitchen.

Heat Resistance

One of the biggest advantages of wooden spoons is their ability to withstand high temperatures. Unlike plastic utensils, wooden spoons won’t melt or warp when exposed to heat. This makes them perfect for stirring hot soups, sauces, and stews. Plus, wooden spoons won’t conduct heat like metal utensils, so you won’t burn your hands when you’re cooking.

Non-Reactive Nature

Another benefit of wooden spoons is their non-reactive nature. Unlike metal spoons, wooden spoons won’t react with acidic ingredients like tomatoes or citrus fruits. This means that your food won’t take on a metallic taste or discoloration. Wooden spoons are also a great choice for cooking with non-stick cookware, as they won’t scratch the surface.

Gentle on Cookware

Wooden spoons are also gentle on your cookware. Unlike metal utensils, wooden spoons won’t scratch or damage the surface of your pots and pans. This means that your cookware will last longer and won’t need to be replaced as often. Plus, wooden spoons won’t leave behind any metal residue, which can be difficult to remove and may affect the taste of your food.

In summary, wooden spoons are a versatile and practical choice for any home cook. They’re heat-resistant, non-reactive, and gentle on your cookware. So next time you’re in the market for new cooking utensils, consider adding a wooden spoon to your collection.

how-to-season-wooden-spoons

How to Season Wooden Spoons: A Quick and Easy Guide

Are you tired of your wooden spoons cracking or warping after just a few uses? If so, it may be time to start seasoning them. Seasoning wooden spoons is a simple process that can help prolong their lifespan and keep them looking and functioning their best.

To start, you’ll want to clean and dry your wooden spoons thoroughly. Then, you can apply a coat of mineral oil or a mixture of beeswax and oil to the spoons. This will help to protect the wood from moisture and prevent it from drying out and cracking. Repeat the process at least once a month to keep your spoons in top condition.

Understanding Wooden Spoons

how-to-season-wooden-spoons

Wooden spoons have been a staple in kitchens for centuries. They are versatile, durable, and can be used for a variety of tasks. Understanding the basics of wooden spoons can help you choose the right one for your needs and keep it in good condition for years to come.

Types of Wood

Not all wooden spoons are created equal. Different types of wood have different properties that affect their durability, resistance to heat and moisture, and overall performance. Here are some common types of wood used for making wooden spoons:

  • Maple: Hard and durable, maple is a popular choice for wooden spoons. It is resistant to scratches and stains, and can withstand high temperatures without warping or cracking.
  • Cherry: Cherry wood is known for its beautiful color and grain patterns. It is also durable and resistant to moisture, making it a good choice for spoons that will be used for cooking and serving.
  • Beech: Beech wood is strong and dense, making it ideal for heavy-duty tasks like stirring thick sauces and batters. It is also resistant to moisture and won’t absorb flavors or odors.
  • Walnut: Walnut wood is prized for its rich color and grain patterns. It is also strong and durable, but can be more expensive than other types of wood.

Care and Maintenance

Proper care and maintenance can help extend the life of your wooden spoons. Here are some tips to keep in mind:

  • Seasoning: Seasoning your wooden spoons with oil or wax can help protect them from moisture and prevent them from drying out and cracking. See the previous search results for specific instructions on how to season your wooden spoons.
  • Cleaning: Wooden spoons should be washed by hand with warm, soapy water. Avoid soaking them in water or putting them in the dishwasher, as this can cause the wood to warp or crack. If your spoon has a stubborn stain or odor, try rubbing it with a mixture of baking soda and water.
  • Storage: Store your wooden spoons in a dry, well-ventilated area away from heat sources. Avoid stacking them on top of each other, as this can cause them to warp or crack.

By understanding the basics of wooden spoons and taking good care of them, you can enjoy their usefulness and beauty for years to come.

Why Season Wooden Spoons?

Wooden spoons are a staple in most kitchens. They are versatile, durable, and easy to use. However, if not properly cared for, they can quickly become damaged, stained, and even start to smell. This is where seasoning comes in.

Seasoning your wooden spoons involves treating them with oil or wax to help protect the wood from drying out, cracking, and absorbing unwanted odors and flavors. It also helps to maintain their natural beauty and extend their lifespan.

Here are a few reasons why you should consider seasoning your wooden spoons:

1. Prevents cracking and splitting

Wooden spoons are susceptible to cracking and splitting, especially if they are exposed to water or extreme temperatures. Seasoning your spoons with oil or wax helps to keep the wood moisturized and prevent it from drying out, which can lead to cracks and splits.

2. Repels odors and flavors

Wooden spoons can absorb odors and flavors from the food they come into contact with. This can be a problem if you’re using the same spoon to stir different dishes. Seasoning your spoons helps to create a protective barrier that repels unwanted odors and flavors.

3. Improves performance

Seasoning your spoons can also improve their performance. A well-seasoned spoon will glide smoothly through food, making it easier to stir and mix ingredients. It also helps to prevent the wood from sticking to food, which can be frustrating and messy.

In summary, seasoning your wooden spoons is an easy and effective way to protect and prolong their lifespan. It prevents cracking and splitting, repels odors and flavors, and improves their overall performance. With just a little bit of care, your wooden spoons can last for years to come.

Selecting the Right Oil

When it comes to seasoning your wooden spoons, selecting the right oil is crucial. You want to choose an oil that is food-safe, won’t turn rancid over time, and has a high smoke point. Here are three options to consider:

Food Grade Mineral Oil

Food-grade mineral oil is a popular choice for seasoning wooden spoons because it is odorless, tasteless, and won’t go rancid. It is also inexpensive and widely available. Mineral oil is a petroleum by-product, so it is not a natural product, but it is considered safe for use with food.

To use mineral oil to season your wooden spoons, apply a generous amount to the wood and let it soak in for several hours or overnight. Wipe off any excess oil with a clean cloth.

Beeswax

Beeswax is another option for seasoning wooden spoons. It is a natural product and has antimicrobial properties. Beeswax also creates a protective barrier on the wood, which can help prevent staining and moisture damage.

To use beeswax to season your wooden spoons, melt the wax in a double boiler and apply it to the wood with a clean cloth. Let it cool and then buff the wood with a clean cloth.

Coconut Oil

Coconut oil is a natural and food-safe oil that has a high smoke point. It is also relatively inexpensive and widely available. Coconut oil can penetrate the wood and help prevent cracking and warping.

To use coconut oil to season your wooden spoons, warm the oil in a double boiler and apply it to the wood with a clean cloth. Let it soak in for several hours or overnight, then wipe off any excess oil.

When selecting the oil to use for seasoning your wooden spoons, consider your personal preferences and the type of wood you are working with. Remember to always choose a food-safe oil and follow the manufacturer’s instructions for use.

Preparation Before Seasoning

preparation-before-seasoning

Before you start seasoning your wooden spoons, you need to prepare them properly. This will ensure that your spoons are clean and ready to absorb the oil or wax that you will use to season them. Here are the steps you need to follow:

Cleaning the Spoon

The first step is to clean your wooden spoon thoroughly. Use warm water and mild dish soap to remove any dirt, residue, or food particles. If your spoon has any stubborn stains, you can use a mixture of baking soda and water to scrub them away. Be sure to rinse the spoon well with warm water to remove all soap residue.

If your spoon has any buildup, you can soak it overnight in a 1:1 ratio of white vinegar and water. Note: you typically don’t want to submerge wooden spoons in water, but a once-off is fine. This will help remove any bacteria and odors that may have accumulated on the spoon.

Drying the Spoon

After cleaning your wooden spoon, you need to dry it thoroughly. Use a clean towel to pat the spoon dry. Be sure to remove all moisture from the spoon, as excess water can cause the wood to warp or crack.

Once you have dried the spoon, you should leave it to air dry completely. This will ensure that all moisture has evaporated from the wood. Avoid using a hairdryer or any other heat source to dry the spoon, as this can damage the wood.

By following these simple steps, you can prepare your wooden spoons for seasoning. Once your spoon is clean and dry, you can move on to the next step of seasoning.

Step-by-Step Guide to Seasoning

If you’ve just purchased a new wooden spoon or cutting board, it’s important to season it before use. Here’s a step-by-step guide to seasoning your wooden spoons:

Applying the Oil

  1. Clean the wooden spoon thoroughly with warm water and mild dish soap to remove any dirt, residue, or food particles. Rinse the spoon well and pat it dry with a clean towel.
  2. Use a rag to apply a thick coat of mineral oil to your spoons. Be sure to work with the grain.
  3. Rub the oil into the wood, making sure to cover the entire surface of the spoon.
  4. Repeat the process until the spoon is completely coated in oil.

Letting the Oil Penetrate

  1. Give the oil several hours to soak into the wood. This will allow the oil to penetrate the pores of the wood, helping to prevent it from drying out and cracking.
  2. For best results, let the oil penetrate for at least 24 hours before using the spoon.

Wiping Off Excess Oil

  1. After the oil has had time to penetrate the wood, come back and wipe off any excess oil with a clean rag.
  2. Repeat the process at least once a month to keep your wooden spoons in good condition.

Remember, seasoning your wooden spoons is an important step in maintaining their longevity and preventing them from cracking or warping over time. By following these simple steps, you can ensure that your wooden spoons will last for years to come.

Maintaining Your Seasoned Spoons

Once you have seasoned your wooden spoons, it’s important to maintain them properly to ensure that they last a long time. Here are some tips on how to keep your seasoned spoons in top condition:

Regular Re-seasoning

Even though you have already seasoned your wooden spoons, they will still need to be re-seasoned periodically. This is especially true if you use your spoons frequently or if you wash them with soap and water.

To re-season your spoons, simply apply a thin layer of mineral oil or beeswax to the surface of the spoon and let it soak in for a few hours. Then, wipe off any excess oil or wax with a clean cloth. Repeat this process once a month to keep your spoons in good condition.

Safe Cleaning Methods

When it comes to cleaning your wooden spoons, it’s important to avoid using harsh chemicals or soaking them in water for extended periods of time. Here are some safe cleaning methods to use:

  • Use a mild soap and warm water to clean your spoons. Be sure to rinse them thoroughly and dry them completely before storing them.
  • If your spoons have any stubborn stains, you can use a paste made from baking soda and water to gently scrub them clean.
  • To sanitize your spoons, you can wipe them down with a solution of white vinegar and water. Just be sure to dry them thoroughly afterwards.
  • Avoid putting your spoons in the dishwasher or soaking them in water for extended periods of time, as this can cause the wood to warp or crack.

By following these simple tips, you can keep your wooden spoons in great condition for years to come.

Common Mistakes to Avoid

When it comes to seasoning wooden spoons, there are a few common mistakes that people make that can cause damage to the wood or prevent the seasoning from being effective. Here are some things to keep in mind to avoid these mistakes.

Using the Wrong Oil

One of the biggest mistakes people make when seasoning wooden spoons is using the wrong type of oil. Some oils, such as vegetable oil or olive oil, can go rancid over time and cause the wood to smell bad. Other oils, such as linseed oil or tung oil, can take a long time to dry and may leave a tacky residue on the wood.

Instead, use a food-safe mineral oil or beeswax to season your wooden spoons. These oils are odorless, won’t go rancid, and will absorb into the wood quickly.

Not Allowing Enough Time for Oil to Absorb

Another mistake people make is not allowing enough time for the oil to absorb into the wood. It’s important to give the oil several hours to soak in before wiping off any excess. If you don’t allow enough time for the oil to absorb, it won’t be as effective at protecting the wood.

Neglecting Regular Maintenance

Finally, one of the biggest mistakes people make is neglecting regular maintenance of their wooden spoons. Even if you’ve seasoned your spoons properly, they still need to be maintained to keep them in good condition.

This means wiping them down after each use, washing them by hand with warm, soapy water, and allowing them to air dry completely before putting them away. It also means reapplying a thin coat of mineral oil or beeswax at least once a month to keep the wood hydrated and protected.

By avoiding these common mistakes, you can ensure that your wooden spoons will last for years to come and continue to be a valuable tool in your kitchen.