Tag Archives: adding personal touches

how-to-make-wooden-coasters-a-simple-diy-guide-2

How to Make Wooden Coasters: A Simple DIY Guide

Looking for a fun and easy DIY project that can add a personal touch to your home decor? Look no further than wooden coasters! Not only are they functional, but they can also add a rustic and charming feel to any room. Plus, they make great handmade gifts for friends and family.

If you’re new to woodworking, don’t worry – making your own wooden coasters is a beginner-friendly project that requires minimal tools and materials. With just a few hours of work and some basic woodworking skills, you can create a set of beautiful and practical coasters that you’ll be proud to display in your home. Whether you’re looking to spruce up your own living space or create thoughtful gifts for loved ones, making wooden coasters is a fun and rewarding project that anyone can tackle.

Understanding Wood Types
how-to-make-wooden-coasters-a-simple-diy-guide-2

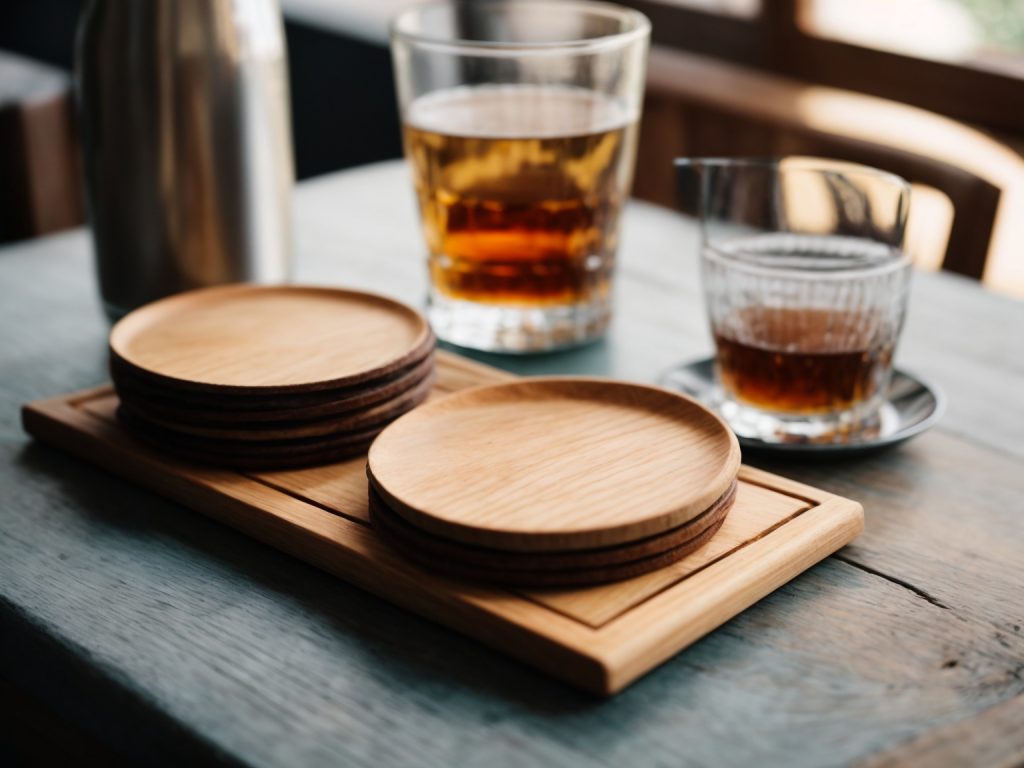
When it comes to making wooden coasters, choosing the right type of wood is crucial for the durability and longevity of your project. In this section, we will discuss the differences between softwood and hardwood, and provide some guidance on how to choose the right wood for your coaster-making project.

Softwood Vs Hardwood

Softwood and hardwood are the two main categories of wood. Softwood comes from coniferous trees, such as pine, cedar, and spruce, while hardwood comes from deciduous trees, such as oak, maple, and cherry.

Softwood is generally less dense and less expensive than hardwood. It is also easier to work with, making it a popular choice for beginners. However, softwood is more prone to dents, scratches, and other types of damage.

Hardwood, on the other hand, is denser and more durable than softwood. It is also more expensive and harder to work with. However, hardwood is less prone to damage and can last for decades with proper care.

Choosing the Right Wood

When choosing the right wood for your coaster-making project, consider the following factors:

  • Moisture resistance: Coasters are often used to protect furniture from water rings, so it’s important to choose a wood that can withstand moisture. Some woods, such as cedar and redwood, are naturally resistant to moisture, while others, such as pine and spruce, are more prone to warping and cracking when exposed to water.
  • Heat resistance: Coasters are also used to protect furniture from heat damage, so it’s important to choose a wood that can withstand high temperatures. Hardwoods such as oak and maple are more heat-resistant than softwoods such as pine and cedar.
  • Aesthetics: Wood comes in a variety of colors and grain patterns, so choose a wood that matches your personal style and complements your home decor.

Overall, hardwood is the best choice for making coasters that are both durable and attractive. However, if you are a beginner or on a tight budget, softwood can be a good option as well. Just be sure to choose a wood that is appropriate for your needs and take proper care of your coasters to ensure their longevity.

Gathering Tools and Materials

When it comes to making wooden coasters, having the right tools and materials is key to achieving a professional-looking finished product. Here are the essential tools and materials you will need:

Essential Woodworking Tools

To create wooden coasters, you will need the following woodworking tools:

Tool Description
Saw A saw is necessary to cut the wood to size. A jigsaw or circular saw is recommended for beginners.
Sandpaper Sandpaper is used to smooth out rough edges and create a smooth surface. Start with a coarse grit (80-100) and work up to a finer grit (220-240).
Drill A drill is needed to make holes for decorative elements or to attach felt pads to the bottom of the coaster.
Clamps Clamps are useful to hold the wood in place while cutting or sanding.

Safety Equipment

Safety should always be a top priority when working with power tools. Be sure to wear the following safety equipment:

  • Safety glasses or goggles to protect your eyes from flying debris
  • Earplugs or earmuffs to protect your ears from loud noise
  • Dust mask or respirator to protect your lungs from sawdust

Wood and Finishing Materials

Choosing the right type of wood is important for creating durable and long-lasting coasters. Some common types of wood used for coasters include oak, maple, and pine. You will also need a protective finish to prevent damage from condensation and hot drinks. Consider using polyurethane or shellac to finish your coasters.

In summary, to make wooden coasters, you will need a saw, sandpaper, drill, clamps, safety equipment, wood, and finishing materials. Always prioritize safety and choose high-quality materials for the best results.

Designing Your Coasters
designing-your-coasters

When it comes to designing your wooden coasters, the possibilities are endless. Whether you want to create a set of coasters that match your home decor or make a unique gift for a loved one, designing your own coasters is a fun and creative process. Here are some tips to help you get started:

Determining Size and Shape

Before you begin designing your coasters, you’ll need to determine the size and shape you want them to be. The size of your coasters will depend on the size of your glasses or mugs, but a typical coaster is around 4 inches in diameter. You can also make square or rectangular coasters if you prefer.

Once you’ve determined the size and shape of your coasters, you’ll need to choose the type of wood you want to use. Hardwoods like oak, maple, and cherry are durable and make great coasters, but you can also use softer woods like pine or cedar if you prefer.

Adding Personal Touches

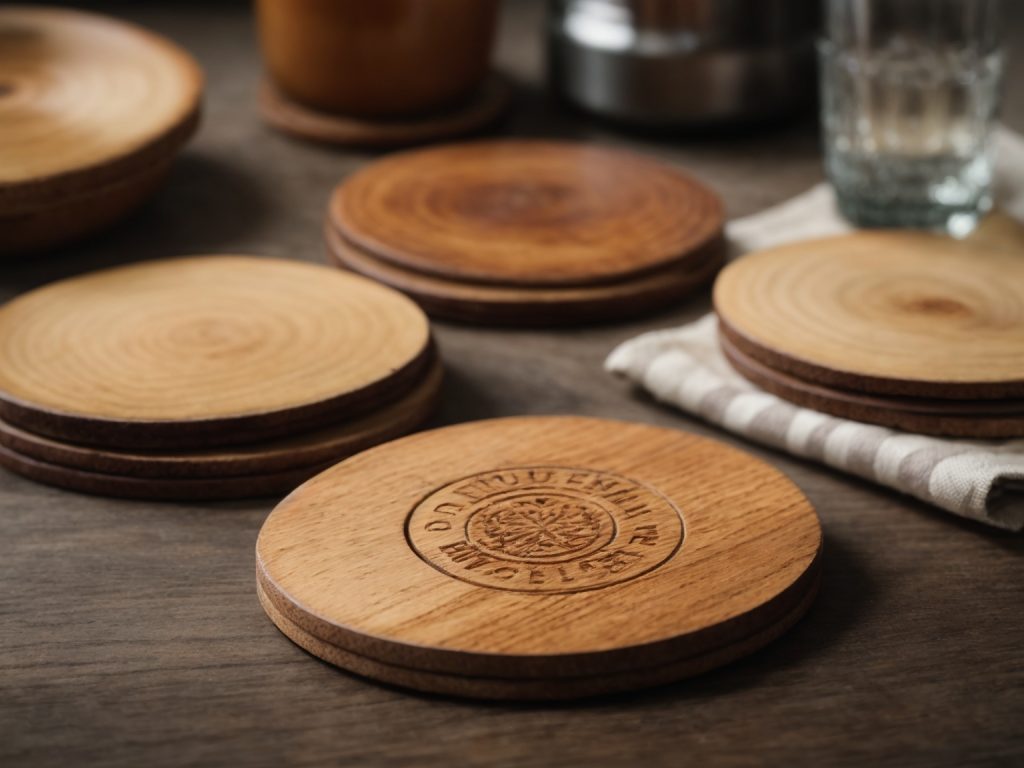
One of the best things about making your own wooden coasters is that you can add personal touches to make them unique. Here are some ideas to get you started:

  • Wood burning: Use a wood burning tool to create designs or patterns on your coasters. You can also add names or initials to make them personalized.
  • Stenciling: Use stencils to create designs or patterns on your coasters. You can use paint or wood stain to fill in the stencil.
  • Etching: Use a rotary tool to etch designs or patterns into the wood. This method works best on hardwoods.
  • Inlay: Use a router to create a groove in the coaster and fill it with a contrasting wood or resin.

Once you’ve added your personal touches, you’ll need to seal your coasters to protect them from moisture. You can use a clear polyurethane finish or a food-safe wax to seal your coasters.

Designing your own wooden coasters is a fun and easy DIY project that anyone can do. With a little creativity and some basic woodworking skills, you can create a set of coasters that are both functional and beautiful.

Cutting the Wood

When it comes to making wooden coasters, cutting the wood is a crucial step. This section will cover two important sub-sections: Preparing the Wood and Cutting Techniques.

Preparing the Wood

Before you start cutting the wood, you need to make sure it is properly prepared. Here are a few steps to follow:

  • Choose the right type of wood: For coaster-making, it’s best to use hardwoods like maple, oak, or cherry. Softwoods like pine or cedar are not recommended.
  • Measure and mark: Use a ruler or tape measure to measure the wood and mark where you want to make the cuts.
  • Sand the wood: Sand the surface of the wood to remove any rough spots or imperfections.

Cutting Techniques

There are several cutting techniques you can use to make wooden coasters. Here are a few options:

  • Hand saw: A hand saw is a simple and affordable tool that can be used to make straight cuts. It’s a good option if you don’t have access to power tools.
  • Miter saw: A miter saw is a power tool that can make precise cuts at different angles. This is a good option if you want to make angled cuts for your coasters.
  • Table saw: A table saw is a versatile power tool that can make both straight and angled cuts. It’s a good option if you plan on making a large number of coasters.

No matter which cutting technique you choose, it’s important to follow these safety tips:

  • Wear protective eyewear and gloves.
  • Keep your fingers away from the blade.
  • Follow the manufacturer’s instructions for your specific tool.

By following these tips and techniques, you’ll be able to cut your wood with confidence and create beautiful wooden coasters.

Sanding and Finishing

Sanding Basics

Sanding is an essential step in making wooden coasters. It helps to smooth out any roughness on the surface of the wood and ensures that the coasters are even and flat. Here are some basic steps to follow when sanding your wooden coasters:

  1. Start with a coarse grit sandpaper, such as 120, and sand the surface of each coaster. Be sure to sand in the direction of the wood grain to avoid scratches.
  2. Gradually move to finer grit sandpapers, such as 220 and 320, to achieve a smooth surface. Sand each coaster until you are satisfied with the texture.
  3. Use a tack cloth or a soft-bristled brush to remove any dust or debris from the surface of the coasters.

Choosing a Finish

Once you have sanded your wooden coasters, it’s time to choose a finish. A finish not only protects the wood but also enhances its natural beauty. Here are some popular finishes to consider:

  1. Polyurethane: This finish is durable and water-resistant, making it perfect for coasters. It comes in a variety of sheens, from matte to glossy.
  2. Tung oil: This natural finish provides a warm, amber tone to the wood and is easy to apply. It is also water-resistant but may require reapplication over time.
  3. Wax: This finish provides a soft, matte look to the wood and is easy to apply. It is not as water-resistant as other finishes, but it is ideal for indoor use.

When applying a finish, be sure to follow the manufacturer’s instructions and apply it in a well-ventilated area. Use a brush, cloth, or foam applicator to evenly apply the finish to each coaster. Allow the finish to dry completely before using your wooden coasters.

Remember, sanding and finishing your wooden coasters can take time, but the end result is worth it. Your coasters will not only protect your furniture but also add a touch of natural beauty to your home.

Final Touches

Once you have completed making your wooden coasters, it’s time to add some final touches to make them look professional. In this section, we will discuss two important final touches: adding protective pads and packaging and storing.

Adding Protective Pads

Adding protective pads to your wooden coasters will prevent them from scratching surfaces and keep them in good condition for a longer time. You can use self-adhesive felt pads or cork pads, which are available at most hardware stores. Simply cut the pads to the size of the coaster and stick them on the bottom.

Packaging and Storing

Packaging and storing your wooden coasters properly will ensure that they remain in good condition until you are ready to use them or give them as gifts. Here are some tips on how to package and store your coasters:

  • Wrap each coaster in tissue paper or bubble wrap to prevent scratches and damage during transport.
  • Store the coasters in a dry and cool place, away from direct sunlight and moisture.
  • If you are giving the coasters as a gift, consider putting them in a small box or fabric bag for a more professional look.

By following these simple final touches, you can make your wooden coasters look great and last longer.
How to Make a Wooden Charcuterie Board: A Step-by-Step Guide

Are you a fan of hosting parties and gatherings at your home? If so, you know that presentation is key when it comes to impressing your guests. One way to elevate your hosting game is by serving your appetizers on a beautiful charcuterie board. While you can easily purchase one at a store, making your own wooden charcuterie board is a fun and rewarding DIY project.

To get started, you’ll need to select a close-grain hardwood board with a minimum thickness of 3/4-inches and a minimum width of eight inches. Popular wood choices include walnut, maple, and cherry. Once you have your board, you can draw the shape of your charcuterie board and any additional designs you want to add. From there, you can cut and sand your board to your desired size and shape.

Not only is making your own wooden charcuterie board a great way to show off your DIY skills, but it also allows you to customize the board to your personal style and preferences. Plus, it’s a practical item that you can use time and time again for all of your future hosting needs. So why not give it a try and impress your guests with your handmade charcuterie board at your next gathering?

Understanding Charcuterie Boards

If you’re new to the world of charcuterie, you may be wondering what exactly a charcuterie board is. Simply put, a charcuterie board is a serving board or cutting board used to display and serve a variety of meats, cheeses, fruits, nuts, and other snacks. Charcuterie boards have become increasingly popular in recent years, as they offer a beautiful and delicious way to entertain guests or enjoy a snack at home.

When it comes to making a charcuterie board, there are a few key components to consider. Here are some of the most important things to keep in mind:

The Board

The board is the foundation of any good charcuterie board. You’ll want to choose a board that is large enough to hold all of your snacks, but not so large that it overwhelms your table or countertop. Wood is the most popular choice for charcuterie boards, as it is durable, attractive, and easy to clean. Some popular wood choices include walnut, maple, and cherry.

The Snacks

The snacks you choose for your charcuterie board will depend on your personal preferences and the occasion. Some popular choices include:

  • Meats: Salami, prosciutto, and pepperoni are all popular choices.
  • Cheeses: A variety of cheeses, such as cheddar, brie, and goat cheese, can add a lot of flavor and texture to your board.
  • Fruits: Fresh fruit, such as grapes, berries, and figs, can add a pop of color and sweetness to your board.
  • Nuts: Almonds, cashews, and pistachios are all great options.
  • Crackers and bread: These can serve as a vehicle for your meats and cheeses, and can add some crunch to your board.

The Presentation

The way you arrange your snacks on your charcuterie board can make a big difference in how appealing it looks. Here are some tips for presentation:

  • Start with your larger items, such as cheeses and meats, and arrange them in a way that balances the board.
  • Fill in the empty spaces with smaller items, such as nuts and fruit.
  • Use small bowls or ramekins to hold dips or spreads.
  • Add some fresh herbs or flowers for a pop of color.

With these tips in mind, you’ll be well on your way to creating a beautiful and delicious charcuterie board.

Choosing the Right Wood

When it comes to making a charcuterie board, choosing the right wood is crucial. The wood you use will not only affect the look of your board, but it will also impact its durability and safety. In this section, we will discuss the different types of wood that are suitable for charcuterie boards, as well as wood safety and maintenance.

Types of Wood

Non-porous hardwoods are the best choice for charcuterie boards. These hardwoods are less likely to absorb moisture and bacteria, making them more hygienic and durable. Some examples of non-porous hardwoods that are ideal for charcuterie boards include:

  • Teak
  • Hard maple
  • American cherry
  • Olive
  • Acacia

Other materials that can be used for charcuterie boards include kitchen slate, marble, and bamboo. However, bamboo is a hard grass, and there is debate about its environmental friendliness.

When choosing a wood for your charcuterie board, it’s important to consider the color and grain pattern of the wood. Walnut, maple, and cherry are popular choices that offer a range of colors and patterns.

Wood Safety and Maintenance

When working with wood for a charcuterie board, it’s crucial to prioritize safety and hygiene. Here are a few tips to keep in mind:

  • Use food-grade mineral oil to finish and seal your board. This will help protect it from moisture and bacteria.
  • Avoid using woods that are known to be toxic, such as cedar or pine.
  • Clean your board thoroughly after each use with warm, soapy water. Avoid soaking the board in water or putting it in the dishwasher.
  • Regularly oil and reseal your board to keep it in good condition.

By choosing the right wood and taking proper care of your charcuterie board, you can ensure that it will last for years to come and provide a beautiful and functional surface for serving your favorite foods.

Designing Your Charcuterie Board

When it comes to designing your charcuterie board, there are a few things to consider. The size and shape of your board will determine how much food you can fit on it and what types of foods you can include. Additionally, adding personal touches to your board can make it unique and special.

Board Size and Shape

When choosing the size and shape of your board, consider how many people you will be serving and what types of foods you want to include. A larger board will allow you to include more items, while a smaller board may be more appropriate for a smaller gathering.

The shape of your board can also add visual interest to your presentation. Consider a round board for a more organic feel, or a rectangular board for a more traditional look. Keep in mind that the board should be at least 3/4-inch thick to provide a sturdy surface for cutting and serving.

Adding Personal Touches

Adding personal touches to your charcuterie board can make it stand out and show off your personality. Here are a few ideas to consider:

  • Use unique serving dishes or bowls to hold dips, spreads, or small items like olives or nuts.
  • Add fresh herbs or edible flowers for a pop of color and flavor.
  • Use a wood burning tool to add a custom design or message to your board.
  • Include a handwritten menu card to showcase the different items on the board.

Remember, the goal of your charcuterie board is to create a beautiful and delicious spread that your guests will enjoy. By considering the size and shape of your board and adding personal touches, you can create a one-of-a-kind presentation that is sure to impress.

Tools and Materials Needed

Making a wooden charcuterie board is a fun and rewarding project that doesn’t require a lot of tools or materials. Here’s what you’ll need to get started:

Tools

  • Clamps: You’ll need at least two clamps to hold your board in place while you work on it.
  • Electric sander with 80-grit and 220-grit (or higher) sandpaper: This will help you smooth out any rough edges and give your board a polished finish.
  • Jigsaw: You’ll use this tool to cut your board to size and shape.
  • Drill: You’ll need a drill to make holes for the handle (if you choose to add one).
  • Router (optional): If you want to add a decorative edge to your board, a router can help you achieve that.
  • Safety gear: Make sure to wear eye and ear protection, as well as a dust mask, while working with power tools.

Materials

  • Close-grain hardwood board: Choose a hardwood like maple, cherry, or walnut for your board. Avoid softwoods like pine, as they can be too porous and prone to warping.
  • Butcher block oil: This food-safe oil will help protect your board from moisture and stains.
  • Handle (optional): If you want to add a handle to your board, you can use a piece of leather or a cabinet pull.

Overall, making a wooden charcuterie board is a fun and accessible project that can be completed with just a few tools and materials. With a little bit of time and effort, you can create a beautiful and functional board that will be the centerpiece of your next party or gathering.

Step-by-Step Guide to Making a Wooden Charcuterie Board

If you’re looking to add a personal touch to your next charcuterie board, why not make your own wooden board? With a few basic tools and some quality wood, you can create a beautiful and functional board that will last for years. Here’s a step-by-step guide to making your own wooden charcuterie board.

Cutting the Wood

The first step in making your board is to choose a type of wood and cut it to size. Hardwoods like walnut, maple, and cherry are great choices for their durability and attractive grain patterns. You’ll want a board that’s at least ¾ inch thick and 8 inches wide, but you can make it any size you like.

Once you have your wood, use a saw to cut it to the desired length and width. A miter saw or circular saw will work well for this task. Be sure to wear safety goggles and a dust mask to protect yourself from sawdust and wood chips.

Sanding and Smoothing

After cutting your wood, it’s time to sand and smooth the surface. Start with a coarse grit sandpaper, such as 80 or 100 grit, and work your way up to a finer grit, such as 220 or 320. Sand the surface of the board until it’s smooth to the touch, and be sure to sand the edges and corners as well.

Once you’re finished sanding, wipe down the board with a damp cloth to remove any dust or debris. If there are any rough spots or imperfections, you can use a wood filler to smooth them out before sanding again.

Adding Details

To add some visual interest to your board, you can add details such as beveled edges or a routed groove around the perimeter. A router or table saw with a dado blade can be used to create these details. If you’re not comfortable using these tools, you can skip this step and still have a beautiful board.

Finishing and Sealing

The final step in making your wooden charcuterie board is to finish and seal the wood. A food-safe finish, such as mineral oil or beeswax, will protect the wood and bring out its natural beauty. Apply the finish with a clean cloth, following the manufacturer’s instructions. Allow the finish to dry completely before using your board.

With these simple steps, you can create a beautiful and functional wooden charcuterie board that’s perfect for entertaining or gift-giving. Enjoy the satisfaction of creating something with your own hands and impress your guests with your craftsmanship.

Caring for Your Wooden Charcuterie Board

When you invest in a wooden charcuterie board, it’s important to take care of it properly. With the right care, your board can last for years and provide endless opportunities for delicious food presentations. Here are some tips on how to clean and maintain your wooden charcuterie board.

Cleaning

Cleaning your wooden charcuterie board is an essential part of its care. Follow these steps to keep your board looking great:

  1. Use a damp cloth or sponge to wipe down the board after each use. Be sure to remove any food particles and debris.

  2. Avoid using harsh detergents or abrasive cleaners, as these can damage the wood.

  3. If you need to deep clean your board, mix a solution of equal parts water and white vinegar. Use a soft cloth to apply the solution to the board, then rinse with clean water and dry thoroughly.

Maintenance

Maintaining your wooden charcuterie board is key to its longevity. Here are some tips to keep your board in top shape:

  1. Oil your board regularly to prevent it from drying out and cracking. Use a food-grade oil like butcher block oil or mineral oil. Apply the oil with a soft cloth, and let it soak in for a few hours or overnight.

  2. If your board becomes scratched or stained, sand it lightly with fine-grit sandpaper. Then, reapply oil to the board to restore its finish.

  3. Avoid exposing your board to extreme temperatures or moisture, as this can cause warping or splitting.

By following these simple tips, you can ensure that your wooden charcuterie board stays beautiful and functional for years to come.

Serving Suggestions

Arranging the Charcuterie

When it comes to arranging your charcuterie board, there are a few things to keep in mind. First, you want to make sure that the board is visually appealing and easy to navigate. This means arranging the meats, cheeses, and other accompaniments in a way that makes sense and is visually pleasing.

One popular method is to arrange the meats in a circular or semi-circular pattern around the edge of the board, with the cheeses and other accompaniments in the center. You can also use small bowls or ramekins to hold dips, spreads, or other items that might be messy or difficult to serve.

Another important consideration is the texture and flavor of the items you choose to include. You want to have a variety of textures and flavors to keep things interesting and to accommodate different tastes and preferences. For example, you might include some salty, savory meats like prosciutto or salami, along with some milder cheeses like brie or goat cheese, and some sweeter items like dried fruit or honey.

Pairing Suggestions

When it comes to pairing your charcuterie board with beverages, there are a few general guidelines to keep in mind. First, you want to choose a beverage that will complement the flavors of the items on the board. For example, a crisp white wine or a light beer might pair well with salty, savory meats, while a fruity red wine or a sweet cocktail might pair well with sweeter items like dried fruit or chocolate.

Another important consideration is the time of day and the occasion. For a casual afternoon get-together, you might opt for a lighter, more refreshing beverage like a sparkling water or a light beer. For a more formal evening event, you might choose a more complex or sophisticated beverage like a full-bodied red wine or a craft cocktail.

Ultimately, the key is to experiment and find pairings that work well for your own tastes and preferences. Don’t be afraid to try new things and to mix and match different flavors and textures to create a truly unique and memorable charcuterie board experience.