Tag Archives: cracking wooden cutting boards

how-to-oil-a-wooden-cutting-board

How to Oil a Wooden Cutting Board: A Step-by-Step Guide

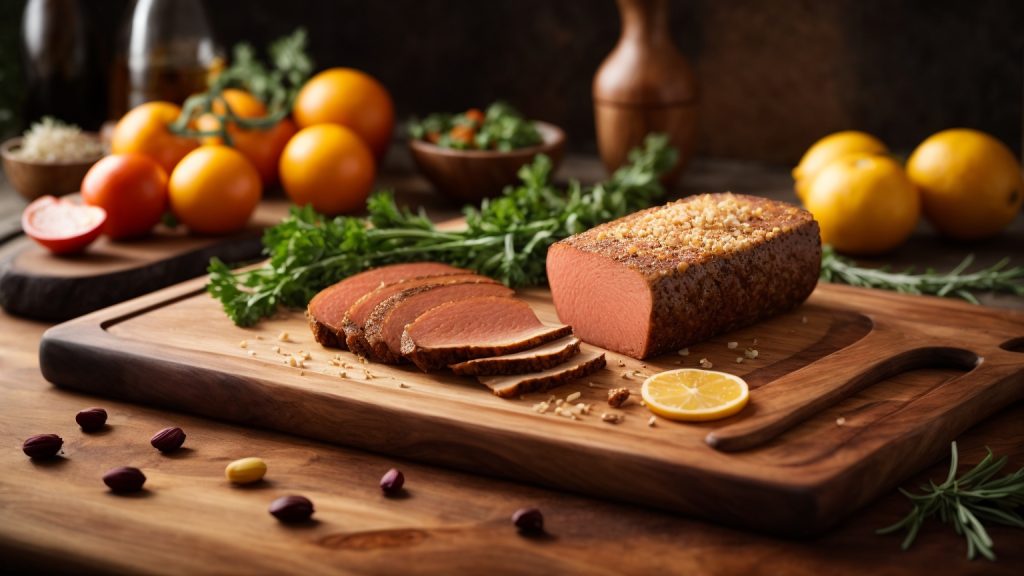
Maintaining a wooden cutting board is crucial to ensure its longevity and prevent bacteria buildup. One of the most important steps in maintaining a wooden cutting board is oiling it regularly. Oiling a wooden cutting board helps to protect it from moisture, prevent warping, and keep it looking new.

To oil a wooden cutting board, you need to clean it thoroughly first. Use hot water and soap to wash both sides of the board, then let it air dry completely. Once the board is dry, apply a generous amount of food-grade mineral oil to the surface of the board. You can use a clean cloth or paper towel to spread the oil evenly on the board. Let the oil soak in for a few hours, or overnight if possible. Finally, wipe off any excess oil with a clean cloth before using the board again.

Regularly oiling your wooden cutting board will not only help to keep it looking new, but it will also protect it from bacteria buildup and prevent it from warping. It’s recommended to oil your wooden cutting board at least once a month, or more often if you use it frequently. With just a little bit of maintenance, your wooden cutting board can last for years to come.

Understanding the Importance of Oiling a Wooden Cutting Board

how-to-oil-a-wooden-cutting-board

If you own a wooden cutting board, it is essential to take proper care of it. One of the most important things you can do to extend the life of your wooden cutting board is to oil it regularly. Here are some reasons why oiling your wooden cutting board is so important:

Prevents Drying Out and Cracking

Wooden cutting boards are prone to drying out and cracking over time. When you oil your cutting board, it helps to keep the wood moisturized and prevents it from drying out. This can help to prevent cracks from forming and can extend the life of your cutting board.

Protects Against Bacteria

Wooden cutting boards can harbor bacteria if they are not properly cleaned and maintained. When you oil your cutting board, it helps to create a barrier that can protect against bacteria and other harmful substances. This can help to keep your food safe and prevent contamination.

Enhances Appearance

Oiling your wooden cutting board can also enhance its appearance. The oil can help to bring out the natural beauty of the wood and give it a rich, warm glow. This can make your cutting board look more attractive and can add to the overall aesthetic of your kitchen.

Improves Durability

When you oil your cutting board, it can also help to improve its durability. The oil can help to strengthen the wood and make it more resistant to wear and tear. This can help to extend the life of your cutting board and ensure that it remains in good condition for years to come.

Overall, oiling your wooden cutting board is an essential step in its maintenance. By doing so, you can help to prevent cracking, protect against bacteria, enhance appearance, and improve durability. So, make sure to oil your cutting board regularly to keep it in good condition and ensure that it lasts for years to come.

Choosing the Right Oil

When it comes to oiling your wooden cutting board, there are several options to choose from. Here are a few popular choices:

Food-Grade Mineral Oil

Food-grade mineral oil is a popular choice for many people because it is odorless, tasteless, and doesn’t go rancid. It is also affordable and readily available. Mineral oil is a petroleum byproduct, so some people prefer to use a natural oil instead.

Beeswax

Beeswax is not technically an oil, but it is an excellent option for seasoning cutting boards. It repels water and forms a tight, protective seal. Beeswax can also add a nice luster to the wood and help extend the lifespan of your cutting board.

Coconut Oil

Coconut oil is a popular choice for those who prefer natural oils. It has natural antimicrobial properties and is a great moisturizer for the wood. However, some people find that it can go rancid over time and leave a coconut scent on the board.

Walnut Oil

Walnut oil is another natural option that is popular for its rich color and nutty aroma. It is also high in antioxidants and has natural antimicrobial properties. However, it can be expensive and may not be as readily available as other oils.

When choosing an oil for your cutting board, it is important to consider the pros and cons of each option and choose the one that best suits your needs and preferences. Remember to always use a food-grade oil and follow the manufacturer’s instructions for application and maintenance.

Preparation Before Oiling

preparation-before-oiling

Before you start oiling your wooden cutting board, it’s important to prepare it properly. This will ensure that the oil is absorbed evenly and that the board is protected from damage. Here are some steps to follow:

Cleaning the Board

The first step is to clean the cutting board thoroughly. Use warm water and dish soap to wash both sides of the board. Make sure to scrub any food particles or stains off the surface. Avoid using harsh chemicals or abrasive sponges, as they can damage the wood.

After washing the board, rinse it with clean water and dry it with a clean towel. Don’t forget to clean the edges and corners of the board as well.

Drying the Board

Once the board is clean, it’s time to dry it. Make sure the board is completely dry before you start oiling it. You can use a clean towel to dry it, or let it air dry for a few hours.

It’s important to dry both sides of the board evenly. If one side is wetter than the other, it can cause the board to warp or crack when you apply the oil.

You can also use a hair dryer or a fan to speed up the drying process. Just make sure not to overheat the board, as this can also cause damage.

By following these steps, you’ll ensure that your wooden cutting board is clean and dry before you start oiling it. This will help the oil absorb evenly and protect the board from damage.

Step-by-Step Guide to Oiling

If you want to keep your wooden cutting board in good shape, you need to oil it regularly. Here’s a step-by-step guide to oiling your cutting board:

Applying the Oil

  1. Choose the right oil: mineral oil, beeswax, or a combination of both are good options.
  2. Pour a generous amount of oil onto the board surface, starting with one side at a time.
  3. Use a clean cloth or paper towel to spread the oil evenly over the surface of the board. Make sure you cover the entire board, including the sides.
  4. Be careful not to use too much oil. You don’t want to see oil pooling up on the board, but you also don’t want to be too stingy.

Letting the Board Absorb the Oil

  1. Once you’ve applied the oil, let the board sit for at least 20 minutes to allow the oil to soak in.
  2. During this time, you can flip the board over and apply oil to the other side.
  3. If the board is very dry, you may need to apply a second coat of oil.

Wiping Off Excess Oil

  1. After the oil has had time to soak in, use a clean cloth or paper towel to wipe off any excess oil.
  2. Be sure to wipe the board thoroughly to prevent any excess oil from going rancid.
  3. Let the board sit for a few hours or overnight to allow the oil to fully absorb into the wood before using it again.

By following these simple steps, you can keep your wooden cutting board in great condition for years to come.

Frequency of Oiling

To keep your wooden cutting board in top condition, it is important to oil it regularly. But how often should you oil your cutting board? The answer depends on how frequently you use it and how much care you want to take.

As a general rule, you should oil your cutting board once a month. This will help to keep the wood moisturized and prevent it from drying out or cracking. However, if you use your cutting board frequently or if it is exposed to a lot of moisture, you may need to oil it more often.

You can tell if your cutting board needs oiling by looking at its surface. If the wood looks dry or dull, it is time to oil it. You can also try the water test: sprinkle a few drops of water on the board. If the water beads up and doesn’t soak in, the board is well-oiled. If the water soaks in quickly or leaves a dark spot, it’s time to oil the board.

In addition to regular oiling, you should also clean your cutting board after each use. Use a mild dish soap and warm water to clean the board, then rinse it thoroughly and dry it with a clean towel. Avoid soaking the board in water or putting it in the dishwasher, as this can cause the wood to warp or crack.

By oiling your cutting board regularly and taking good care of it, you can extend its lifespan and keep it looking and functioning like new for years to come.

Maintaining Your Oiled Cutting Board

Once you have oiled your wooden cutting board, it is important to maintain it properly to ensure its longevity. Here are some tips for maintaining your oiled cutting board:

Regular Cleaning

To keep your cutting board clean, wash it with warm, soapy water after each use and dry it thoroughly with a clean towel. Avoid soaking the board in water or putting it in the dishwasher, as this can cause the wood to warp or crack. Additionally, avoid using abrasive cleaners or scrubbers, as they can damage the board’s surface.

Avoiding Excessive Heat and Humidity

Wooden cutting boards are sensitive to changes in temperature and humidity. Avoid exposing your board to excessive heat or moisture, as this can cause the wood to warp or crack. For example, do not place your board near a stove or in direct sunlight, and avoid storing it in a damp or humid environment.

Preventing Cross Contamination

To prevent cross-contamination, it is important to use separate cutting boards for different types of food. For example, use one board for raw meat and another for vegetables. Additionally, be sure to clean your board thoroughly after each use to remove any bacteria or food particles.

By following these simple tips, you can ensure that your oiled cutting board remains in good condition for years to come.

How to Resurface a Wooden Cutting Board: Easy Steps to Bring Your Board Back to Life

If you’re an avid cook, you know the importance of having a good cutting board. Over time, wooden cutting boards can become scratched, stained, and even warped. But before you toss it out and buy a new one, consider resurfacing it instead. Not only is it a more sustainable option, but it can also save you money in the long run.

Resurfacing a wooden cutting board involves sanding down the surface to remove any scratches or stains, and then applying a food-safe finish to protect the wood. It’s a simple process that can be done at home with just a few tools and materials. In this article, we’ll walk you through the steps to resurface your wooden cutting board and make it look like new again.

Understanding the Importance of Resurfacing

If you have a wooden cutting board, you need to resurface it from time to time to keep it in good condition. Here are a few reasons why resurfacing is important:

Hygiene

When you use a cutting board, tiny grooves and scratches can develop on the surface. These grooves can trap food particles and bacteria, making it difficult to clean the board properly. By resurfacing the board, you can remove these grooves and create a smooth surface that is easier to clean.

Longevity

Resurfacing your cutting board can help extend its lifespan. Over time, the surface of a cutting board can become rough and damaged, making it more difficult to use. By resurfacing the board, you can remove any damage and create a smooth surface that will be easier on your knives.

Performance

A smooth cutting surface can make a big difference in how your knives perform. If your cutting board is rough or damaged, it can cause your knives to dull more quickly. By resurfacing the board, you can create a smooth surface that will help your knives stay sharp for longer.

In summary, resurfacing your wooden cutting board is important for hygiene, longevity, and performance. By taking the time to resurface your board, you can keep it in good condition and make it easier to use.

Identifying When Resurfacing is Needed

Wooden cutting boards are a staple in many kitchens, but over time they can become worn, scratched, and stained. While some minor scratches and stains can be sanded out and cleaned, there comes a point when resurfacing is needed to restore the board’s smooth surface. Here are some signs that it’s time to resurface your wooden cutting board:

Deep Scratches

If your cutting board has deep scratches that cannot be sanded out with fine-grit sandpaper, it’s time to resurface. Deep scratches can harbor bacteria and make it difficult to clean the board thoroughly. Plus, they can make it harder to cut food evenly and safely.

Stains that Won’t Come Out

Wooden cutting boards can develop stains over time, especially if they are not cleaned properly. While some stains can be removed with a mixture of salt and lemon juice or baking soda and water, there are some stains that won’t come out no matter what you try. If your cutting board has stubborn stains that won’t budge, it’s time to resurface.

Warping or Cracking

Wooden cutting boards can warp or crack over time, especially if they are not properly cared for. If your cutting board is warped or has cracks that cannot be repaired, it’s time to resurface or replace it. A warped or cracked cutting board can be dangerous to use and can also harbor bacteria.

In summary, if your wooden cutting board has deep scratches, stubborn stains, or is warped or cracked, it’s time to consider resurfacing it. Resurfacing can help restore the board’s smooth surface and make it safe to use again.

Materials Needed for Resurfacing

Resurfacing a wooden cutting board is a simple process that requires a few basic materials. Here are the items you will need:

Sandpaper

Sandpaper is an essential tool for resurfacing a wooden cutting board. You will need sandpaper with different grits to achieve the desired smoothness. Start with a coarse grit, such as 80 or 120, and work your way up to a finer grit, such as 220.

Cutting Board Oil

Cutting board oil is a food-safe oil that is used to protect and seal the cutting board after resurfacing. Mineral oil is a popular choice for cutting board oil. It is affordable, readily available, and easy to apply.

Beeswax

Beeswax is a natural wax that is used to condition and protect the cutting board. It helps to create a barrier against moisture and bacteria. Beeswax is usually melted with other oils to create a wood butter that is used to seal and shine the cutting board.

Orbital Sander

An orbital sander is an optional tool that can be used to speed up the sanding process. It is a handheld tool that uses sandpaper to sand the surface of the cutting board.

Lint-Free Cloth

A lint-free cloth is used to apply the cutting board oil and wood butter to the cutting board. It is important to use a lint-free cloth to avoid leaving fibers on the cutting board.

Face Mask

A face mask is recommended when sanding the cutting board to avoid inhaling dust particles. Dust particles can cause respiratory problems and should be avoided.

Tack Cloth

A tack cloth is a sticky cloth that is used to remove dust and debris from the cutting board after sanding. It is important to remove all dust particles before applying the cutting board oil and wood butter.

With these materials, you can easily resurface your wooden cutting board and keep it in top condition for years to come.

Step-by-Step Guide to Resurfacing

If you’ve got an old wooden cutting board that’s seen better days, don’t throw it away just yet. With a little elbow grease, you can resurface it and give it a new lease on life. Here’s how to do it:

Cleaning the Board

The first step in resurfacing your wooden cutting board is to clean it thoroughly. Use a mixture of warm water and dish soap to scrub the surface of the board, making sure to get into all the nooks and crannies. Rinse the board with clean water and dry it with a clean towel.

Sanding Process

Once your board is clean and dry, it’s time to start sanding. Start with a coarse-grit sandpaper (around 80 grit) and sand the surface of the board in the direction of the grain. Be sure to sand evenly across the entire surface of the board, paying special attention to any areas that are particularly rough or scratched.

After you’ve sanded the board with the coarse-grit sandpaper, switch to a finer-grit sandpaper (around 120 grit) and repeat the process. Continue sanding with progressively finer-grit sandpapers until the board is smooth and free of scratches.

Oiling the Board

Once you’ve finished sanding, it’s time to oil the board. Apply a generous amount of food-grade mineral oil to the surface of the board, using a clean cloth to spread it evenly across the entire surface. Allow the oil to soak in for several hours, or overnight if possible.

After the oil has had a chance to soak in, wipe off any excess with a clean cloth. Your board is now ready to use!

Resurfacing a wooden cutting board is a great way to extend its life and keep it looking great for years to come. With a little bit of effort, you can restore your old cutting board to its former glory and enjoy using it for many more meals to come.

Post-Resurfacing Care Tips

After resurfacing your wooden cutting board, it’s important to take proper care of it to ensure its longevity. Here are some post-resurfacing care tips to keep your cutting board in top condition.

Cleaning Post-Resurfacing

Cleaning your cutting board after resurfacing is crucial to prevent bacteria from growing on it. Here are some tips to clean your cutting board:

  • Wash your cutting board with warm soapy water after each use.
  • Use a scrub brush to remove any food particles.
  • Rinse thoroughly with hot water and dry it with a clean towel.
  • Sanitize your cutting board by rubbing it with a mixture of 1 tablespoon of bleach and 1 gallon of water. Let it sit for a few minutes before rinsing with hot water and drying.

Storage Tips

Proper storage of your cutting board can prevent it from warping or cracking. Here are some tips to store your cutting board:

  • Store your cutting board in a dry place away from direct sunlight.
  • Do not stack heavy items on top of it.
  • Use a cutting board oil or wax to condition it regularly.
  • If you have multiple cutting boards, label them to avoid confusion and use them for specific purposes.

By following these post-resurfacing care tips, you can extend the life of your wooden cutting board and ensure it stays in great condition for years to come.

What Oil to Use for Wooden Cutting Board: A Guide to Keeping Your Kitchen Essential in Top Shape

When it comes to maintaining a wooden cutting board, oiling it regularly is a must. Oiling the board helps to seal the wood and protect it from moisture, which can cause the board to warp and crack over time. But with so many oils to choose from, it can be tough to know which one is best for your board. In this article, we’ll explore the different types of oils you can use to oil your wooden cutting board and help you choose the one that’s right for you.

First up, it’s important to note that not all oils are created equal. While some oils may seem like a good choice, they can actually do more harm than good. For example, vegetable oils and olive oil can go rancid and leave a bad smell on your board. Instead, you should stick to food-grade mineral oil, natural wood oil, cutting board cream, liquid paraffin, or beeswax. These oils will help to protect your board without leaving any unpleasant odors.

So, which oil should you choose? It really depends on your personal preferences and the type of wood your cutting board is made from. Mineral oil is a popular choice as it is affordable and easy to find. Natural wood oils, like walnut oil or coconut oil, can also work well. Beeswax is another great option, as it forms a protective seal on the wood and can add a nice luster to your board. Ultimately, the best oil for your cutting board is one that you feel comfortable using and that works well with your board.

Understanding Wood and Oil

When it comes to choosing the right oil for your wooden cutting board, it’s important to understand the properties of both the wood and the oil. Here are a few things to keep in mind:

Wood

Different types of wood have different characteristics that can affect how they react to oil and how well they hold up over time. Here are a few things to consider:

  • Hardwoods like maple, walnut, and cherry are popular choices for cutting boards because they are dense and durable.
  • Softwoods like pine and cedar are less common for cutting boards because they are more porous and prone to damage.
  • End grain cutting boards are made by gluing together small pieces of wood so that the end grain is facing up. These boards are more durable and better at resisting knife marks than edge grain or face grain boards.

Oil

There are several types of oil that can be used to treat wooden cutting boards. Here are a few of the most common:

  • Mineral oil is a food-safe oil that is inexpensive and easy to find. It doesn’t go rancid and won’t affect the taste of your food.
  • Beeswax is a natural wax that can be used to protect and seal wooden cutting boards. It’s a good choice if you want to avoid petroleum-based products.
  • Walnut oil is a popular choice for cutting boards because it’s a natural oil that won’t go rancid and has a pleasant nutty smell.

When choosing an oil for your cutting board, it’s important to choose one that is food-safe and won’t go rancid. You should also consider the type of wood your cutting board is made from and what kind of protection it needs.

Types of Oils for Wooden Cutting Boards

When it comes to oils for wooden cutting boards, there are several options to choose from. Here are some of the most popular types of oils and their benefits:

Mineral Oil

Mineral oil is a food-grade oil that is commonly used for cutting boards. It is a clear, odorless oil that is easy to apply and does not go rancid. Mineral oil is also affordable and readily available in most stores. It is a popular choice because it is a non-drying oil, which means it will not harden or become sticky over time. Mineral oil is also a great option for those who want an oil that is easy to clean off their cutting board.

Tung Oil

Tung oil is a natural oil that is made from the seeds of the tung tree. It is a popular choice for cutting boards because it is a non-toxic oil that dries to a hard, waterproof finish. Tung oil is also resistant to heat, water, and most chemicals, making it a great option for those who want a durable finish for their cutting board. However, tung oil can be more expensive than other oils and requires more time and effort to apply.

Linseed Oil

Linseed oil is a natural oil that is made from the seeds of the flax plant. It is a popular choice for cutting boards because it is a non-toxic oil that dries to a hard, waterproof finish. Linseed oil is also affordable and readily available in most stores. However, linseed oil can take a long time to dry and can go rancid if not stored properly. It is also important to note that some people may have an allergic reaction to linseed oil.

Walnut Oil

Walnut oil is a natural oil that is made from the nuts of the walnut tree. It is a popular choice for cutting boards because it is a non-toxic oil that dries to a hard, waterproof finish. Walnut oil is also rich in antioxidants, which can help prevent the growth of bacteria on your cutting board. However, walnut oil can be more expensive than other oils and may not be as readily available in stores.

Beeswax

Beeswax is not technically an oil, but it is a popular choice for seasoning cutting boards. Beeswax can help repel water and form a protective seal on your cutting board. It can also add a nice luster to your cutting board’s wood and help extend its lifespan. Beeswax is also non-toxic and easy to apply. However, it may need to be reapplied more frequently than other oils.

In summary, there are several types of oils to choose from when it comes to maintaining your wooden cutting board. Each oil has its own benefits and drawbacks, so it is important to choose the one that best fits your needs and preferences.

Benefits of Using Oil on Wooden Cutting Boards

Using oil on your wooden cutting board is an important step in maintaining its longevity and keeping it in good condition. Here are some of the benefits of using oil on your wooden cutting board:

1. Prevents Drying and Cracking

Wooden cutting boards are prone to drying out and cracking over time, especially when exposed to water and moisture. Using oil on your cutting board helps to prevent this by keeping the wood moisturized and supple.

2. Protects Against Bacteria

Wooden cutting boards can harbor bacteria and germs if not properly cleaned and maintained. Using oil on your cutting board helps to create a protective barrier that repels water and prevents bacteria and germs from settling into the grooves on your board.

3. Enhances the Look and Feel

Using oil on your cutting board can enhance the natural beauty of the wood and give it a rich, warm glow. It also helps to keep the surface smooth and well-sealed, making it easier to clean and maintain.

4. Extends the Life of Your Cutting Board

By preventing drying and cracking, protecting against bacteria, and enhancing the look and feel of your cutting board, using oil can help to extend the life of your board and keep it in good condition for years to come.

Overall, using oil on your wooden cutting board is a simple and effective way to maintain its quality and ensure that it lasts for many years.

How to Apply Oil to Wooden Cutting Boards

Wooden cutting boards require regular oiling to maintain their durability and longevity. In this section, we will guide you through the process of oiling your wooden cutting board with three simple sub-sections: Cleaning the Board, Applying the Oil, and Drying Process.

Cleaning the Board

Before applying oil to your wooden cutting board, it is important to clean it thoroughly. Follow these steps to ensure your board is clean and ready for oiling:

  1. Wash the cutting board with hot water and dish soap.
  2. Scrub both sides of the board with a sponge or brush to remove any food particles or stains.
  3. Rinse the board with hot water and dry it with a clean towel.

Applying the Oil

Once your cutting board is clean and dry, it is time to apply the oil. Here are the steps to follow:

  1. Choose a food-grade oil that is safe for use on cutting boards. Mineral oil, beeswax, and coconut oil are popular choices.
  2. Pour a generous amount of oil onto the board’s surface and use a clean cloth to spread it evenly.
  3. Apply oil to one side of the board at a time, making sure to cover the edges and corners.
  4. Allow the oil to soak into the board for at least 20 minutes. Add more oil if necessary.
  5. After 20 minutes, wipe off any excess oil with a clean cloth.

Drying Process

After applying the oil, it is important to let the cutting board dry completely before using it again. Follow these steps to ensure proper drying:

  1. Place the board on a flat surface and let it dry for at least 24 hours.
  2. Flip the board over and let the other side dry for an additional 24 hours.
  3. Once the board is completely dry, you can use it again.

Remember to oil your wooden cutting board regularly to maintain its durability and longevity. By following these simple steps, you can ensure that your cutting board will last for years to come.

Maintaining Your Oiled Wooden Cutting Board

Wooden cutting boards are a great addition to any kitchen, but they require regular maintenance to keep them in good condition. Properly oiled cutting boards will last longer and resist bacteria growth. Here are some tips to help you maintain your oiled wooden cutting board.

Regular Reapplication

One of the most important things you can do to maintain your wooden cutting board is to regularly apply oil. This will help keep the wood from drying out and cracking. The frequency of oil application will depend on how often you use your cutting board. As a general rule, you should oil your board once a month.

To oil your cutting board, follow these steps:

  1. Clean the board with warm, soapy water and dry it thoroughly.
  2. Apply a generous amount of oil to the board. Use a clean cloth or paper towel to spread the oil evenly over the entire surface of the board.
  3. Let the oil soak in for at least 30 minutes, or overnight if possible.
  4. Wipe off any excess oil with a clean cloth.

There are many oils you can use to maintain your cutting board, including mineral oil, coconut oil, and beeswax. Make sure to use food-grade oil that won’t go rancid.

Avoiding Water and Heat

Wooden cutting boards can warp or crack if they are exposed to water or heat for extended periods of time. To avoid this, follow these tips:

  • Don’t put your cutting board in the dishwasher.
  • Don’t soak your cutting board in water.
  • Don’t leave your cutting board in direct sunlight or near a heat source.
  • Use a separate cutting board for raw meat to avoid cross-contamination.

By following these tips, you can keep your wooden cutting board in great condition for years to come. Remember to regularly reapply oil and avoid exposing your board to water and heat.

Frequently Asked Questions

Can I Use Vegetable Oil?

While vegetable oil may seem like a good option for oiling your cutting board, it is not recommended. Vegetable oil can go rancid quickly, leaving a bad taste and smell on your board. Additionally, it can also promote the growth of bacteria. It’s best to stick with oils that are specifically designed for cutting board maintenance, such as mineral oil or butcher block conditioner.

How Often Should I Oil My Board?

The frequency with which you should oil your cutting board depends on how often you use it. As a general rule, you should oil your board once a month, or whenever it starts to look dry. If you use your board frequently, you may need to oil it more often. On the other hand, if you only use it occasionally, you may only need to oil it every few months.

Is It Safe to Cut Food on Oiled Boards?

Yes, it is safe to cut food on oiled cutting boards. In fact, oiling your board can help prevent the growth of bacteria and other harmful microorganisms. However, it’s important to note that you should never use cooking oils, such as vegetable or olive oil, to oil your cutting board. Stick with food-grade mineral oil or butcher block conditioner to ensure that your board stays safe and sanitary.