Tag Archives: lint-free cloth

How to Clean a Wooden Charcuterie Board: Tips and Tricks

Keeping your wooden charcuterie board clean is essential for maintaining its longevity and ensuring your food stays safe to eat. While wooden boards are beautiful and functional, they require a bit more care than other materials. In this article, we’ll go over the best practices for cleaning your wooden charcuterie board to keep it in top condition.

First things first, it’s important to avoid soaking your wooden board in water or putting it in the dishwasher. This can cause the wood to warp or crack, which can ruin the board. Instead, use a sponge or cloth with warm water and soap to clean the board thoroughly. Scrubbing the board well and being generous with the amount of water is more important than using soap in flushing any food and bacteria off the board. After washing, air dry the board immediately on a raised rack or standing on a towel to allow airflow on both sides.

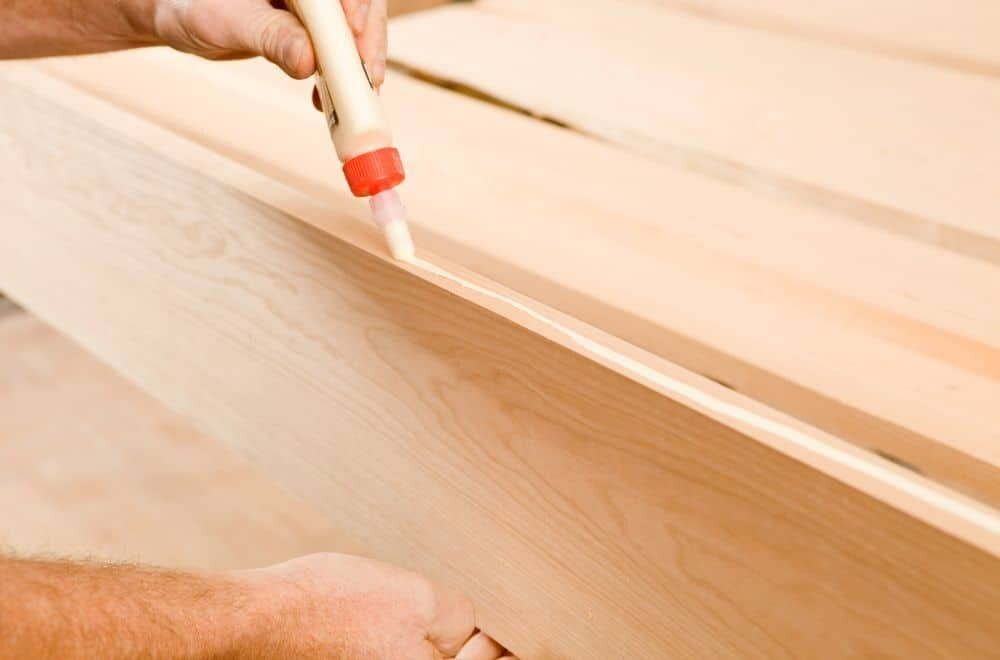
Next, it’s important to oil your wooden board regularly to prevent it from drying out and cracking. Using a soft, lint-free cloth, apply a small amount of food-grade mineral oil to the surface of the board and buff it in until the wood is no longer absorbing the product. Wipe off any excess oil and let the board sit for a few hours before using it again. By following these simple steps, you can keep your wooden charcuterie board in great condition for years to come.

Understanding the Nature of Your Wooden Charcuterie Board

If you’re the proud owner of a wooden charcuterie board, you know how important it is to keep it clean and well-maintained. But before you start cleaning your board, it’s important to understand the nature of the wood and how it reacts to different cleaning methods.

Types of Wood

Charcuterie boards are often made from hardwoods like maple, oak, and walnut. These woods are durable and can withstand the repeated use and cleaning that charcuterie boards require. However, not all woods are created equal, and some may be more prone to warping or cracking than others.

Porosity

Wood is a porous material, which means it can absorb moisture and bacteria. This is why it’s important to properly clean and sanitize your charcuterie board after each use. However, some woods are more porous than others, which can make them more susceptible to absorbing moisture and bacteria.

Cutting vs. Serving

It’s important to note that there is a difference between a cutting board and a serving board. Cutting boards are designed to withstand the repeated use of knives, while serving boards are meant to showcase food and be used for serving only. If you plan to use your charcuterie board for cutting, make sure it’s thick enough to withstand the pressure of a knife.

Cleaning and Maintenance

When it comes to cleaning and maintaining your wooden charcuterie board, there are a few things to keep in mind. First, never soak your board in water or put it in the dishwasher. This can cause the wood to warp or crack. Instead, use a damp sponge or cloth to clean the surface of the board.

It’s also important to regularly sanitize your board to prevent the growth of bacteria. You can do this by using a mixture of coarse salt and lemon juice, or by using a food-safe disinfectant spray.

By understanding the nature of your wooden charcuterie board, you can ensure that it stays in good condition for years to come.

Pre-Cleaning Preparations

Before you start cleaning your wooden charcuterie board, it’s important to gather all the essential cleaning materials and prepare your cleaning area. This will ensure that you have everything you need and that the cleaning process goes smoothly.

Gathering Essential Cleaning Materials

To properly clean your wooden charcuterie board, you will need the following materials:

  • Warm water
  • Mild dish soap
  • Sponge or cloth
  • Distilled white vinegar or 3% hydrogen peroxide
  • Food-grade mineral oil
  • Lint-free cloth
  • Optional: Food-grade wax finish, such as butcher block wax or Clapham’s Salad Bowl Finish

Make sure to use food-grade materials that are safe for use with your charcuterie board. Avoid using harsh chemicals or abrasive materials that can damage the wood.

Preparing Your Cleaning Area

Before you start cleaning your wooden charcuterie board, you should prepare your cleaning area. Here are a few steps you can take to prepare:

  1. Clear the area: Remove any items from the area around your charcuterie board to prevent them from getting in the way or getting dirty.

  2. Lay down a towel: Place a clean towel or cloth on your work surface to protect it from water and cleaning solutions.

  3. Set up your materials: Arrange your cleaning materials within easy reach. This will make the cleaning process more efficient and prevent you from having to search for materials mid-way through.

By taking these steps to prepare your cleaning area, you can ensure that you have a clean and organized space to work in. This will make the cleaning process easier and more effective.

The Cleaning Process

When it comes to cleaning your wooden charcuterie board, it’s important to take the right steps to ensure that it stays in good condition and free from bacteria. Here’s a step-by-step guide on how to clean your board properly.

Wiping Down the Board

The first step in cleaning your wooden charcuterie board is to wipe it down with a damp cloth or sponge. This will remove any loose debris and crumbs from the surface of the board. It’s important to use a damp cloth rather than a wet one, as excess water can cause the wood to warp and crack.

Applying the Cleaning Solution

Once you have wiped down the board, it’s time to apply the cleaning solution. There are a few different options for cleaning solutions, but one of the most effective is a mixture of warm water and mild dish soap. You can also use a solution of equal parts white vinegar and water, or a mixture of baking soda and water.

To apply the cleaning solution, dip a clean sponge or cloth into the solution and wring it out so that it’s damp but not dripping. Then, use the sponge or cloth to gently scrub the surface of the board, working in the direction of the grain. Be sure to get into all the corners and crevices of the board.

Scrubbing the Board

After you have applied the cleaning solution, it’s time to scrub the board. Using a soft-bristled brush or a scrubbing pad, gently scrub the surface of the board in circular motions. Be careful not to scrub too hard, as this can damage the wood.

Once you have scrubbed the entire surface of the board, rinse it thoroughly with warm water to remove any remaining cleaning solution. Then, use a clean towel to dry the board completely. It’s important to let the board air dry completely before using it again, as excess moisture can cause the wood to warp and crack.

By following these simple steps, you can keep your wooden charcuterie board clean and free from bacteria, ensuring that it lasts for years to come.

Drying the Board Properly

After washing your wooden charcuterie board, it’s important to dry it properly to prevent any warping or cracking. Here are some tips for drying your board:

  1. Air dry: The best way to dry your board is to let it air dry completely. Place it on a raised rack or stand it on a towel to allow airflow on both sides. This will ensure that both sides of the board dry evenly.

  2. Towel dry: If you’re in a hurry, you can towel dry your board. Use a clean, dry towel to wipe away any excess water. Make sure to dry both sides of the board thoroughly.

  3. Avoid heat: Do not place your board near a heat source or in direct sunlight to dry. This can cause the board to warp or crack.

  4. Don’t stack: Do not stack your boards while they are still wet. This can trap moisture between the boards and cause them to warp or stick together.

  5. Oil the board: Once your board is completely dry, you can apply a thin layer of food-grade mineral oil to protect and condition the wood. Use a soft cloth to apply the oil in the direction of the grain, and let it soak in for a few hours before wiping away any excess oil.

By following these simple steps, you can ensure that your wooden charcuterie board stays in good condition for years to come.

Maintenance Tips for Your Wooden Charcuterie Board

If you want your wooden charcuterie board to last for years, it’s essential to take good care of it. Here are some maintenance tips to help you keep your board in excellent condition.

Regular Cleaning

To prevent bacteria growth, you should clean your wooden charcuterie board after each use. Here’s how to do it:

  1. Rinse the board with hot water and use a sponge or cloth to remove any food debris.
  2. Use a mild dish soap and warm water to clean the board thoroughly.
  3. Rinse the board with hot water and dry it with a clean towel.
  4. Let the board air dry completely before storing it.

Proper Storage

Proper storage is crucial to keep your wooden charcuterie board in good condition. Here are some tips:

  1. Store your board in a dry, cool place away from direct sunlight.
  2. Never stack your board on top of other boards or objects.
  3. Store your board flat or on its side to prevent warping.

When to Oil Your Board

Oiling your wooden charcuterie board is essential to keep it from drying out and cracking. Here’s how to do it:

  1. Apply a food-grade mineral oil to your board using a clean cloth or paper towel.
  2. Rub the oil into the board, making sure to cover the entire surface.
  3. Let the oil soak into the board for at least 30 minutes.
  4. Wipe off any excess oil with a clean cloth or paper towel.

You should oil your board once a month or as needed, depending on how often you use it.

By following these maintenance tips, you can keep your wooden charcuterie board in excellent condition and enjoy it for years to come.

How to Season a Wooden Charcuterie Board: Tips and Tricks

Are you looking to season your wooden charcuterie board but not sure where to start? Look no further! Seasoning your board is an important step in ensuring it lasts for years to come. Not only does it help protect the wood from damage, but it also makes it safe for food use by sealing any pores and preventing bacteria from growing.

To begin, make sure your board is clean and dry. You can lightly sand it down with fine-grit sandpaper to remove any rough spots or stains. Then, apply a food-safe oil or wax to the board. Beeswax and mineral oil are popular options that can be easily found at most hardware or kitchen supply stores. Apply the oil or wax in a thin, even layer and let it sit for at least 20 minutes before wiping off any excess.

Remember to regularly maintain your charcuterie board by wiping it down with a damp cloth and reapplying oil or wax as needed. With these simple steps, you can enjoy your beautifully seasoned board for years to come.

Understanding Charcuterie Boards

If you’re a fan of entertaining guests or simply enjoy snacking on a variety of foods, you’ve probably heard of a charcuterie board. A charcuterie board is a wooden board that is typically used to serve a variety of meats, cheeses, fruits, nuts, and other snacks. These boards are becoming increasingly popular, and for good reason. They’re not only practical, but they’re also visually appealing and add a touch of elegance to any gathering.

When it comes to selecting a charcuterie board, there are a few things to consider. First, you’ll want to choose a board that is made from a quality wood, such as acacia or bamboo. These types of wood are durable, easy to clean, and look great. You’ll also want to consider the size of the board. If you’re planning on serving a large group of people, you’ll want a larger board. If you’re serving a smaller group, a smaller board will suffice.

Once you’ve selected your board, it’s important to season it properly. Seasoning your board will help to protect it from moisture and prevent it from warping or cracking over time. To season your board, you’ll want to use a food-grade mineral oil. Apply a small amount of oil to the board and use a clean cloth to work it into the wood. Let the board sit for about 20 minutes, then wipe off any excess oil with a clean cloth. Repeat this process until the board is no longer absorbing the oil.

It’s important to note that you should avoid using vegetable or olive oil to season your board, as these oils can turn rancid over time and leave a bad taste on your food. Stick to food-grade mineral oil for the best results.

In addition to seasoning your board, it’s important to care for it properly. After each use, wash your board with warm, soapy water and dry it thoroughly. Avoid soaking your board in water or putting it in the dishwasher, as this can cause the wood to warp or crack. Instead, use a clean cloth to wipe down your board and store it in a cool, dry place.

By following these simple steps, you can ensure that your charcuterie board stays in great condition and is ready to use whenever you need it.

Choosing the Right Wood

Choosing the right wood for your charcuterie board is crucial to ensure that it lasts for years to come. Here are some factors to consider when selecting wood for your board:

Hardness

You want a wood that is hard enough to withstand the constant cutting and chopping that occurs on a charcuterie board. Softer woods like pine or cedar are not recommended as they will easily scratch and dent. Hardwoods like maple, cherry, and walnut are great options as they are durable and long-lasting.

Grain

The grain of the wood can also affect the durability of your board. Look for wood with a tight and straight grain pattern as this will make it less prone to cracking or warping over time. Avoid woods with an irregular or wavy grain pattern as these may be weaker and more likely to break.

Color

The color of the wood is also an important factor to consider. Some woods like maple and birch have a light, neutral color that can complement a variety of foods. Other woods like cherry and walnut have a darker, richer color that can add a touch of elegance to your presentation. Choose a wood color that complements your personal style and the types of foods you plan to serve.

Sustainability

Lastly, consider the sustainability of the wood you choose. Look for wood that has been sustainably sourced and harvested. Avoid woods that are endangered or over-harvested, such as teak or mahogany. Opt for woods like bamboo or acacia, which are fast-growing and renewable.

By considering these factors, you can choose the right wood for your charcuterie board and ensure that it will last for years to come.

Preparation Before Seasoning

Before seasoning your wooden charcuterie board, it’s important to properly prepare it to ensure the seasoning process is effective. Here are some steps you should follow to prepare your board:

Cleaning the Board

The first step in preparing your board is to clean it thoroughly. Use a mild dish soap and warm water to gently scrub the board, making sure to get into all the crevices. Avoid using harsh chemicals or abrasive sponges, as these can damage the wood. Rinse the board well with water to remove any soap residue.

For a deeper clean, you can use a mixture of white vinegar and water. Simply mix equal parts vinegar and water in a spray bottle and spray the board. Let it sit for a few minutes, then wipe it clean with a damp cloth. This will help to kill any bacteria on the board.

Drying the Board

After cleaning the board, it’s important to let it dry completely before seasoning it. Use a clean, dry towel to wipe the board down and remove any excess water. Then, allow the board to air dry completely before moving on to the seasoning process.

It’s important to note that you should never put a wet board away or store it in a damp area, as this can cause the wood to warp or crack. Always make sure your board is completely dry before storing it.

By following these simple steps to prepare your wooden charcuterie board, you’ll be ready to move on to the seasoning process and ensure your board stays in great condition for years to come.

Choosing Your Seasoning

When it comes to seasoning your wooden charcuterie board, choosing the right oil or wax is key to maintaining its quality and durability. In this section, we’ll explore the different types of oils and waxes you can use to season your board.

Types of Oils

There are several types of oils that work well for seasoning wooden charcuterie boards. Here are a few options to consider:

  • Mineral oil: This is a popular choice for seasoning cutting boards and charcuterie boards. It’s affordable, easy to find, and doesn’t go rancid like vegetable or olive oils. Plus, it’s food-safe and won’t affect the taste of your food.

  • Beeswax and mineral oil blend: This is a great option if you want to add a little extra protection to your board. Beeswax creates a barrier on the surface of the board, while mineral oil penetrates the wood to keep it moisturized.

  • Walnut oil: This oil is a bit more expensive than mineral oil, but it has a pleasant nutty aroma and adds a beautiful sheen to the wood. It’s also high in antioxidants, which can help prevent the wood from deteriorating over time.

Wax Selection

In addition to oils, you can also use wax to season your wooden charcuterie board. Here are a few options to consider:

  • Beeswax: This is a natural wax that creates a protective barrier on the surface of the board. It’s food-safe and won’t affect the taste of your food.

  • Carnauba wax: This wax is derived from the leaves of the carnauba palm and is often used in furniture wax. It creates a hard, durable finish on the wood that can help protect it from scratches and dings.

When choosing a wax, make sure it’s food-safe and won’t affect the taste of your food. Beeswax is a popular choice because it’s natural and safe to use around food.

The Seasoning Process

When it comes to caring for your wooden charcuterie board, seasoning is an important step to ensure its longevity. Seasoning involves applying oil to the board to protect it from moisture and prevent the wood from drying out. Here are the steps to properly season your wooden charcuterie board:

Applying the Oil

  1. Start by cleaning the board thoroughly with warm soapy water and a sponge or cloth.
  2. Dry the board completely with a clean towel.
  3. Apply a food-grade oil, such as mineral oil or butcher block oil, to the board. Use a clean cloth or paper towel to spread the oil evenly over the entire surface of the board.
  4. Be sure to apply oil to the sides and edges of the board as well.
  5. Let the oil soak into the wood for a few hours or overnight.

Curing the Board

  1. After the oil has soaked in, wipe off any excess oil with a clean cloth or paper towel.
  2. Place the board in a warm, dry place for a few days to allow the oil to fully cure.
  3. Avoid using the board during this time to allow the oil to fully penetrate the wood.

Buffing the Board

  1. After the curing process is complete, use a clean cloth or paper towel to buff the board and remove any remaining excess oil.
  2. Your board is now ready to use!

Remember to reapply oil to your board regularly to keep it protected and in good condition. With proper care and maintenance, your wooden charcuterie board will last for years to come.

Maintenance Tips

Regular Re-Seasoning

To keep your wooden charcuterie board in top condition, it’s important to re-season it regularly. This will help prevent the wood from drying out and cracking, and will also help to maintain its natural beauty.

To re-season your board, simply apply a food-safe oil, such as mineral oil or butcher block oil, to the surface of the board. Use a lint-free cloth to rub the oil into the wood, making sure to cover the entire surface of the board. Allow the oil to soak in for a few hours or overnight, then wipe away any excess with a clean cloth.

It’s a good idea to re-season your board every few months, or whenever it starts to look dry or dull. This will help to keep it looking and performing its best for years to come.

Avoiding Cross Contamination

Another important aspect of maintaining a wooden charcuterie board is to avoid cross contamination. This means making sure that you don’t use the same board for different types of food, as this can lead to the transfer of bacteria and other harmful substances.

To avoid cross contamination, it’s a good idea to have separate boards for different types of food, such as one for meats and another for cheeses and fruits. You should also make sure to clean your board thoroughly after each use, using hot water and soap to remove any food particles and bacteria.

Avoid using bleach or other harsh chemicals on your board, as these can damage the wood and make it more susceptible to cracking and warping. Instead, use a gentle soap and warm water, and dry the board thoroughly after cleaning to prevent moisture from seeping into the wood.

By following these simple maintenance tips, you can help to keep your wooden charcuterie board in top condition, ensuring that it looks and performs its best for years to come.

Common Mistakes to Avoid

When it comes to seasoning a wooden charcuterie board, there are a few common mistakes that you should avoid to ensure that your board stays in great condition and lasts for years to come.

Using the Wrong Type of Oil

One of the biggest mistakes that people make when seasoning their charcuterie board is using the wrong type of oil. It is important to use a food-grade oil that will not go rancid, such as butcher block oil. Avoid using vegetable oil or other types of oils that can spoil and turn rancid over time.

Over-Oiling the Board

Another mistake that people often make is over-oiling their board. While it is important to oil your board regularly to keep it in good condition, too much oil can actually damage the wood and cause it to warp or crack. Use a lint-free cloth to apply a thin layer of oil to the board, and wipe off any excess with a clean cloth.

Not Cleaning the Board Properly

Cleaning your charcuterie board is just as important as seasoning it. Make sure to clean your board thoroughly after each use, using a mild soap and warm water. Avoid using harsh detergents or abrasive sponges that can damage the wood. Once the board is clean, dry it thoroughly with a clean towel and allow it to air dry completely before storing it.

Using Harsh Chemicals or Cleaners

Finally, avoid using harsh chemicals or cleaners on your charcuterie board. These can damage the wood and cause it to deteriorate over time. Stick to mild soaps and food-grade oils for cleaning and seasoning your board, and avoid using anything that contains bleach, ammonia, or other harsh chemicals.

By avoiding these common mistakes, you can keep your wooden charcuterie board in great condition and ensure that it lasts for years to come.

preparation-before-gluing

What Glue Works Best for Gluing Glass to Wood? A Comprehensive Guide

Are you looking to glue glass to wood, but not sure which glue to use? It can be a tricky process, as glass and wood have very different properties and require a strong adhesive to create a lasting bond. In this article, we will explore the different types of glue that work best for gluing glass to wood and provide you with some tips to ensure a successful bond.

One of the best types of glue to use when attaching glass to wood is epoxy adhesive. Epoxy is known for its strong and durable bonding qualities and can be used on a wide range of surfaces. It dries clear and forms a seriously strong bond. Other popular options include superglue, silicone glue, or even hot glue from a glue gun. Each of these glues has its own unique properties and can work well depending on the specific needs of your project.

Understanding the Materials

understanding-the-materials

Characteristics of Glass

When it comes to gluing glass to wood, it’s important to understand the characteristics of both materials. Glass is a hard, brittle, and transparent material that is commonly used for windows, mirrors, and decorative items. It is made by heating sand, soda ash, and limestone to a high temperature until it melts and then cooling it rapidly to create a solid material.

Glass has a few important properties to consider when gluing it to wood. First, it is non-porous, which means that it doesn’t absorb liquids or gases. This can make it difficult for some adhesives to bond with glass. Second, glass is smooth and slippery, which can make it challenging for some adhesives to grip onto it. Finally, glass is fragile and can crack or shatter easily if it is not handled carefully.

Characteristics of Wood

Wood is a natural material that is commonly used for furniture, flooring, and building structures. It is made up of fibers that are held together by a natural adhesive called lignin. Wood can be soft or hard, depending on the species and how it is treated. It can also be porous or non-porous, depending on the type of wood and how it is finished.

When gluing glass to wood, it’s important to consider the characteristics of the wood as well. First, wood is porous, which means that it can absorb liquids and gases. This can make it easier for some adhesives to bond with wood. Second, wood can be rough or smooth, depending on how it is finished. A rough surface can provide more grip for an adhesive, while a smooth surface can make it more challenging for an adhesive to hold onto the wood. Finally, wood can be flexible or rigid, depending on the thickness and type of wood. It’s important to choose an adhesive that can accommodate the flexibility of the wood to prevent cracking or splitting.

Overall, understanding the characteristics of both glass and wood is important when choosing an adhesive for gluing them together. By considering the porosity, smoothness, and flexibility of each material, you can choose an adhesive that will provide a strong and durable bond.

Types of Glue

When it comes to gluing glass to wood, there are several types of glue that you can use. Each type of glue has its own unique properties that make it suitable for different applications. In this section, we will discuss the most common types of glue used for gluing glass to wood.

Epoxy Resin

Epoxy resin is a popular type of glue for bonding glass to wood. It is a two-part adhesive that consists of a resin and a hardener. When these two components are mixed together, they create a strong and durable bond. Epoxy resin is known for its excellent adhesion to a wide range of surfaces, including glass and wood. It also dries clear, which makes it ideal for applications where appearance is important.

One of the advantages of using epoxy resin is that it can be used on both porous and non-porous surfaces. It is also resistant to water, heat, and chemicals, which makes it suitable for outdoor applications. However, it can take several hours to cure, so you will need to be patient when using this type of glue.

Polyurethane Adhesive

Polyurethane adhesive is another type of glue that can be used for bonding glass to wood. It is a one-part adhesive that cures by reacting with moisture in the air. Polyurethane adhesive is known for its excellent bonding strength and flexibility. It can also be used on a wide range of surfaces, including glass and wood.

One of the advantages of using polyurethane adhesive is that it cures quickly, usually within 24 hours. It is also resistant to water, heat, and chemicals, which makes it suitable for outdoor applications. However, it can be difficult to remove once it has cured, so you will need to be careful when using this type of glue.

Silicone Adhesive

Silicone adhesive is a type of glue that is often used for bonding glass to wood. It is a one-part adhesive that cures by reacting with moisture in the air. Silicone adhesive is known for its excellent flexibility and durability. It can also be used on a wide range of surfaces, including glass and wood.

One of the advantages of using silicone adhesive is that it is easy to apply and can be used on both porous and non-porous surfaces. It is also resistant to water, heat, and chemicals, which makes it suitable for outdoor applications. However, it can take several hours to cure, so you will need to be patient when using this type of glue.

Preparation Before Gluing

preparation-before-gluing

Before you begin gluing glass to wood, there are a few important steps you should take to ensure a successful bond. In this section, we’ll cover the two main steps you should take before applying any glue: cleaning the surfaces and applying the glue.

Cleaning the Surfaces

The first step in preparing to glue glass to wood is to clean the surfaces that will be bonded. Any dirt, dust, or debris on the surfaces can prevent the glue from adhering properly, so it’s important to clean them thoroughly.

To clean the glass surface, use a glass cleaner and a lint-free cloth. Make sure to remove any fingerprints or smudges, as these can also interfere with the bonding process. If the glass surface is particularly dirty, you may need to use a degreaser or rubbing alcohol to remove any stubborn grime.

For the wood surface, use a damp cloth to remove any dust or debris. If the wood is particularly dirty, you can use a mild soap and water to clean it. Be sure to let the wood dry completely before proceeding to the next step.

Applying the Glue

Once the surfaces are clean and dry, it’s time to apply the glue. As we mentioned earlier, epoxy adhesive is the best glue to use for bonding glass to wood. Here’s how to apply it:

  1. Mix the two components of the epoxy adhesive according to the manufacturer’s instructions. Be sure to mix them thoroughly.
  2. Apply a thin layer of the epoxy to the wood surface using a brush or spatula. Make sure to cover the entire surface evenly.
  3. Carefully place the glass onto the wood surface, making sure it is aligned correctly.
  4. Apply pressure to the glass surface to ensure a strong bond. You can use clamps or weights to hold the glass in place while the glue dries.
  5. Allow the glue to dry completely according to the manufacturer’s instructions. This may take several hours or even a full day.

By following these preparation steps, you’ll be well on your way to successfully bonding glass to wood with epoxy adhesive.

Curing and Finishing

Curing Process

After applying the glue to your glass and wood surfaces, it’s important to allow sufficient time for the glue to cure. The curing time can vary depending on the type of glue used. For example, epoxy glue can take up to 24 hours to cure completely. During this time, it’s important to keep the glass and wood surfaces stationary and avoid any movement or jostling that could disrupt the curing process.

To ensure a strong bond, it’s also important to apply pressure to the glued surfaces during the curing process. This can be done by using clamps or weights to hold the surfaces together while the glue cures. Check the manufacturer’s instructions for specific pressure recommendations.

Finishing Touches

Once the glue has fully cured, you can remove any clamps or weights and inspect the bond between the glass and wood surfaces. If necessary, you can use sandpaper to smooth out any rough edges or excess glue that may have seeped out during the gluing process.

To give your project a professional finish, you can also consider painting or staining the wood surface. Be sure to use a paint or stain that is safe for use on glass surfaces if you plan to apply it to the glass as well.

Overall, taking the time to properly cure and finish your glass to wood project will ensure a strong and long-lasting bond that will stand up to everyday use.

Safety Precautions

safety-precautions-1

When working with glue, it’s important to take proper safety precautions to avoid any accidents or injuries. Here are a few safety tips to keep in mind when gluing glass to wood:

1. Wear Protective Gear

Before you start gluing, make sure you’re wearing protective gear such as gloves, goggles, and a mask. This will help protect your skin, eyes, and lungs from any harmful chemicals in the glue.

2. Work in a Well-Ventilated Area

When using glue, it’s important to work in a well-ventilated area to avoid inhaling any fumes. Open windows and doors, or use a fan to circulate the air in the room.

3. Use the Right Amount of Glue

Using too much glue can cause it to seep out and make a mess, while using too little can result in a weak bond. Follow the instructions on the glue packaging to ensure you’re using the right amount.

4. Keep Glue Away from Children and Pets

Glue can be toxic if ingested, so it’s important to keep it out of reach of children and pets. Store your glue in a safe place where it can’t be accidentally accessed.

5. Clean Up Spills Immediately

If you accidentally spill glue, clean it up immediately with a damp cloth. Avoid using hot water, as this can cause the glue to set and become even harder to remove.

By following these safety precautions, you can ensure that your gluing project goes smoothly and safely.

Frequently Asked Questions

What are some effective adhesives for attaching glass to a wooden frame?

Epoxy adhesive is one of the most effective adhesives for attaching glass to a wooden frame. It is strong, durable, and can be applied to a wide range of surfaces. Superglue, silicone glue, and hot glue from a glue gun are also popular options.

Which type of glue is best for attaching wood to a glass mirror?

For attaching wood to a glass mirror, silicone adhesive or clear epoxy is the best option. These adhesives provide a strong and durable bond that can withstand the weight of the mirror.

Can Gorilla Glue be used to attach glass to wood?

Gorilla Glue can be used to attach glass to wood, but it may not be the best option. Gorilla Glue expands as it dries, which can cause the glass to crack or break. It is best to use a clear epoxy or silicone adhesive for attaching glass to wood.

What is the best way to secure glass to a wooden table top?

The best way to secure glass to a wooden table top is to use clear silicone adhesive or clear epoxy. Apply the adhesive to the edges of the glass and press it firmly onto the wooden table top. Allow the adhesive to dry completely before using the table.

Does Liquid Nails work for attaching glass to wood?

Liquid Nails is not recommended for attaching glass to wood. It is designed for use with porous materials and may not provide a strong enough bond for glass.

Is E6000 a suitable adhesive for attaching glass to wood?

E6000 is a suitable adhesive for attaching glass to wood. It is a strong and durable adhesive that can be used on a wide range of surfaces. However, it is important to follow the manufacturer’s instructions carefully and allow the adhesive to dry completely before using the glass.