Tag Archives: wearing protective gear

How to Paint a Wooden Garage Door: A Beginner's Guide

Are you looking to spruce up the curb appeal of your home? Painting your wooden garage door can be a simple and cost-effective way to achieve this. Not only will a fresh coat of paint enhance the appearance of your home, but it can also protect your garage door from the elements and extend its lifespan.

Before you get started, it’s important to properly prepare your garage door for painting. This includes cleaning the surface thoroughly and sanding any rough spots. You’ll also need to choose the right type of paint and tools for the job. With the right preparation and technique, you can achieve a professional-looking finish that will make your garage door the envy of the neighborhood.

Understanding the Basics of Painting

Before you start painting your wooden garage door, it’s important to understand the basics of painting. This will ensure that your project goes smoothly and that you end up with a beautiful and long-lasting finish.

Choosing the Right Paint

The first step in painting your garage door is choosing the right paint. You’ll want to choose a high-quality exterior paint that is specifically designed for use on wood. Look for a paint that is water-resistant and has UV protection to prevent fading and peeling.

When choosing a color, keep in mind that darker colors will absorb more heat from the sun, which can cause the paint to crack and peel over time. Lighter colors are a better choice if you live in a hot and sunny climate.

Identifying the Wood Type

Before you start painting, it’s important to identify the type of wood your garage door is made of. Different types of wood require different types of preparation and paint.

If your garage door is made of cedar or redwood, it’s important to use an oil-based primer before painting. This will help to seal the wood and prevent tannin stains from bleeding through the paint.

If your garage door is made of pine or another softwood, it’s important to use a wood conditioner before painting. This will help to even out the wood’s porosity and prevent the paint from soaking in too deeply.

By choosing the right paint and identifying the wood type, you’ll be well on your way to a successful garage door painting project.

Preparing the Garage Door

Before painting your wooden garage door, you need to prepare it properly to ensure that the paint will adhere well and last longer. This section will guide you on how to prepare your garage door for painting.

Cleaning the Door

The first step in preparing your garage door is to clean it thoroughly. Dirt, grime, and other substances can prevent the paint from sticking to the surface, causing it to peel off easily. Here’s how to clean your garage door:

  1. Remove any loose dirt and debris using a broom or a dry brush.
  2. Mix a solution of warm water and mild detergent in a bucket.
  3. Dip a sponge or a soft-bristled brush into the solution and scrub the garage door thoroughly.
  4. Rinse the door with a hose or a bucket of clean water to remove any soap residue.
  5. Let the door dry completely before moving on to the next step.

If your garage door has mold or mildew, you can use a solution of bleach and water to remove it. However, be careful when using bleach as it can damage some surfaces and cause discoloration.

Sanding the Surface

After cleaning the garage door, the next step is to sand the surface. Sanding helps to smooth out any rough spots and create a better surface for the paint to adhere to. Here’s how to sand your garage door:

  1. Use a fine-grit sandpaper (120-150 grit) to sand the entire surface of the door, including the edges and corners.
  2. Sand in the direction of the wood grain to avoid creating scratches or marks on the surface.
  3. Wipe the door with a clean, damp cloth to remove any dust or debris.
  4. Let the door dry completely before moving on to the next step.

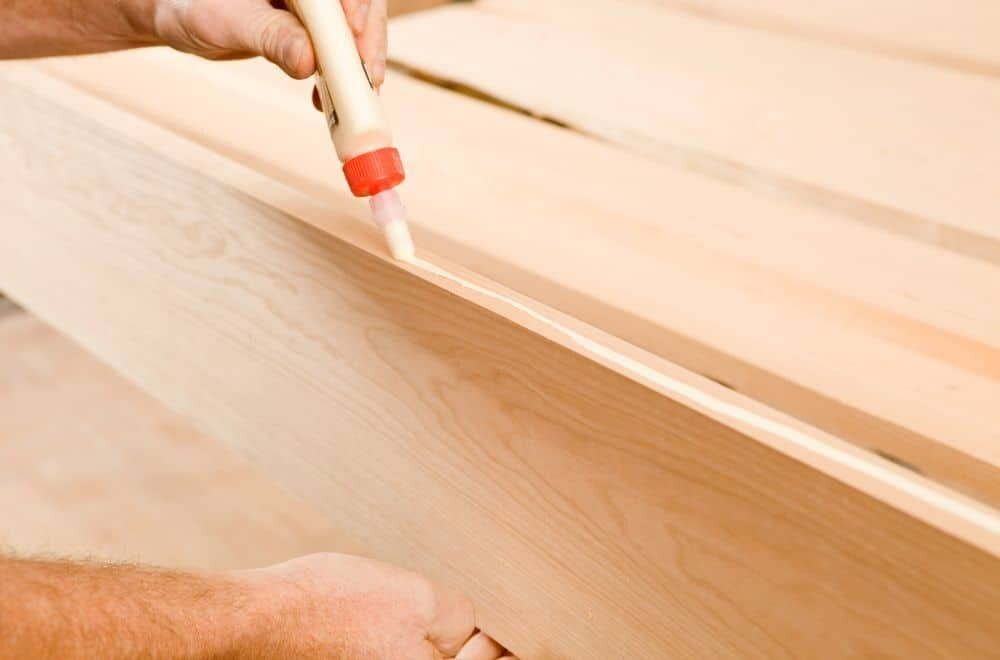
If your garage door has any cracks or holes, you can use wood filler to fill them in before sanding. Wood filler is a putty-like substance that hardens when it dries, creating a smooth surface for painting.

By following these steps, you can ensure that your wooden garage door is properly prepared for painting. Taking the time to prepare the surface will help the paint to adhere well and last longer, saving you time and money in the long run.

Painting Techniques

When it comes to painting your wooden garage door, there are three main techniques you can use: using a brush, using a roller, and using a spray. Each technique has its own advantages and disadvantages, so it’s important to choose the one that works best for you.

Using a Brush

Using a brush is the most traditional way to paint a wooden garage door. It allows for precise control and is great for getting into tight corners and edges. However, it can be time-consuming and may leave brush marks if not done correctly.

To use a brush, start by dipping the brush into the paint and tapping off any excess. Then, apply the paint in long, even strokes, working from top to bottom. Be sure to overlap each stroke slightly to avoid leaving any gaps.

Using a Roller

Using a roller is a faster way to paint your garage door, and it’s great for larger, flat surfaces. It can also create a smoother finish than a brush. However, it can be difficult to get into tight corners and edges with a roller.

To use a roller, start by pouring the paint into a roller tray. Then, dip the roller into the paint and roll it back and forth in the tray to evenly distribute the paint. Apply the paint to the garage door in long, even strokes, working from top to bottom. Be sure to overlap each stroke slightly to avoid leaving any gaps.

Using a Spray

Using a spray is the fastest way to paint your garage door, and it can create a very smooth finish. However, it requires more equipment and can be messy if not done correctly. It’s also important to use a respirator mask to protect yourself from inhaling any paint fumes.

To use a spray, start by masking off any areas you don’t want to paint with painter’s tape and plastic sheeting. Then, fill the spray gun with paint and adjust the nozzle to the desired spray pattern. Apply the paint to the garage door in long, even strokes, working from top to bottom. Be sure to overlap each stroke slightly to avoid leaving any gaps.

No matter which technique you choose, be sure to follow the manufacturer’s instructions for the paint and equipment you’re using. And always wear gloves and protective clothing to avoid getting paint on your skin.

Caring for Your Painted Door

Once you’ve painted your wooden garage door, you want to make sure it stays looking great for as long as possible. Here are some tips for caring for your painted door.

Regular Cleaning

Regular cleaning is important to keep your painted garage door looking fresh and new. Here are some steps to follow:

  1. Use a soft-bristled brush or a sponge to remove any loose dirt or debris from the surface of the door.
  2. Mix a solution of warm water and mild detergent in a bucket.
  3. Dip a clean sponge or cloth into the solution and use it to gently clean the surface of the door.
  4. Rinse the door with clean water using a garden hose or a bucket of clean water and a clean sponge or cloth.
  5. Allow the door to air dry completely before closing it.

Touching Up Damages

Even with proper care, your painted garage door may still get scratches or chips. Here are some steps to follow to touch up damages:

  1. Clean the damaged area with soap and water to remove any dirt or debris.
  2. Sand the damaged area with fine-grit sandpaper until it is smooth and even with the surrounding area.
  3. Wipe away any dust with a clean, damp cloth and let it dry completely.
  4. Apply a small amount of paint to the damaged area using a small brush or roller.
  5. Allow the paint to dry completely before applying a second coat, if necessary.
  6. Once the paint is dry, inspect the area to ensure it matches the surrounding paint. If it does not, repeat steps 4-5 until it matches.

By following these tips, you can keep your painted garage door looking great for years to come.
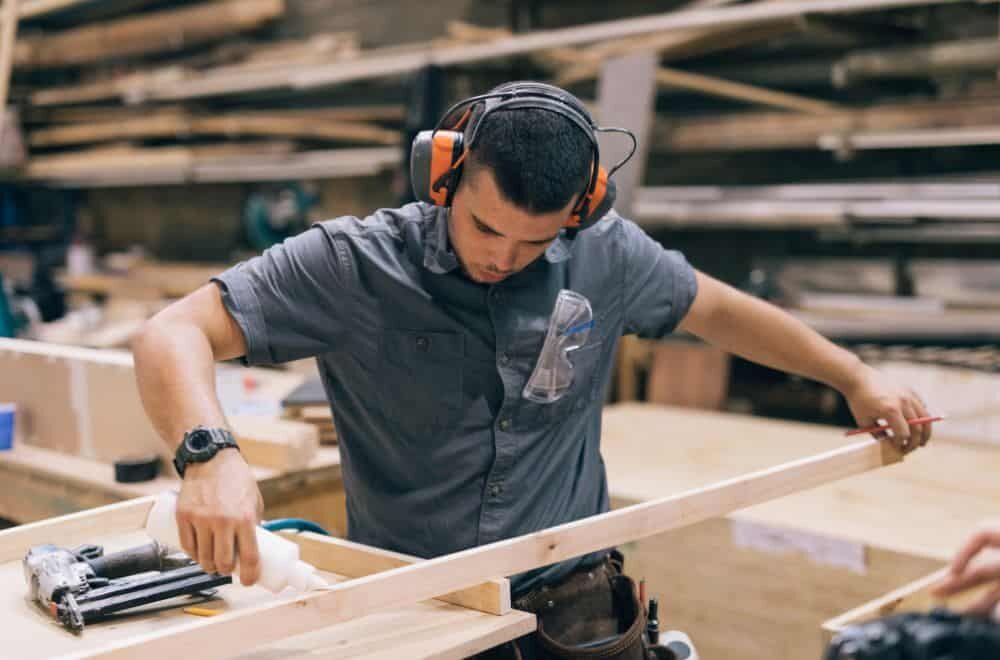
Safety Measures

When painting a wooden garage door, it is important to take safety measures to protect yourself and others around you. Here are some tips to ensure a safe painting process.

Using Protective Gear

Before you start painting, make sure to wear protective gear to avoid any accidents or injuries. Here are some essential items you should have:

  • Safety glasses or goggles to protect your eyes from paint splatters and debris.
  • Gloves to protect your hands from the paint and chemicals in the paint.
  • A respirator or mask to protect your lungs from inhaling paint fumes.

Wearing protective gear will not only keep you safe but also make the painting process more comfortable.

Proper Ventilation

Proper ventilation is crucial when painting a garage door. Paint fumes can be harmful if inhaled in large quantities, so it is important to have good air circulation. Here are some tips to ensure proper ventilation:

  • Open windows and doors to let fresh air in.
  • Use fans to circulate the air and push the fumes out.
  • If possible, paint outside or in a well-ventilated area.

Proper ventilation will help you breathe easier and make the painting process safer for everyone involved.

By following these safety measures, you can ensure a safe and successful painting process for your wooden garage door.

How to Make a Wooden Box with Lid: A Beginner's Guide

If you’re looking to add a touch of personalization to your home decor, making a wooden box with a lid is a great way to start. Not only can you customize the size and design of the box to fit your specific needs, but you can also choose the type of wood and finish to match your home’s aesthetic. In this article, we’ll guide you through the steps of making a wooden box with a lid, from choosing the right wood to adding the finishing touches.

The first step in making a wooden box with a lid is to choose the right type of wood. You’ll want to select a wood that is sturdy enough to hold its shape but also easy to work with. Some popular choices include cedar, oak, and ash, but you can also repurpose wood from previous projects or use boards from broken down pallets. Once you have your wood, you’ll need to measure and cut it to the desired size and shape for your box.

Next, you’ll need to assemble the box using either butt joints or mitered corners. If you’re making a box with a hinged lid, you’ll need to add hinges and a latch to secure the lid in place. Finally, you can add any finishing touches such as sanding, staining, or painting to give your wooden box with a lid a polished look. With a little bit of patience and attention to detail, you can create a beautiful and functional wooden box with a lid that will add character to any room in your home.

Understanding Wood Types

When it comes to building a wooden box, choosing the right type of wood is crucial. Different types of wood have different characteristics, such as color, texture, strength, and durability. In this section, we will discuss two main categories of wood: hardwood and softwood.

Hardwood

Hardwood is a type of wood that comes from deciduous trees, which lose their leaves in the fall. Hardwood is known for its durability, strength, and beauty. It is commonly used for furniture, flooring, and decorative items. Some popular types of hardwood include oak, maple, birch, and cherry.

Here are some characteristics of hardwood:

  • Hardwood is denser and heavier than softwood.
  • It has a finer texture and a more uniform grain pattern.
  • It is more resistant to wear and tear, scratches, and dents.
  • It is more expensive than softwood.

Softwood

Softwood is a type of wood that comes from coniferous trees, which have needles instead of leaves. Softwood is known for its versatility, affordability, and ease of use. It is commonly used for construction, decking, and fencing. Some popular types of softwood include pine, spruce, fir, and cedar.

Here are some characteristics of softwood:

  • Softwood is less dense and lighter than hardwood.
  • It has a coarser texture and a more irregular grain pattern.
  • It is less resistant to wear and tear, scratches, and dents.
  • It is less expensive than hardwood.

In conclusion, choosing the right type of wood for your wooden box is essential. Hardwood is a good choice if you want a durable and beautiful box, while softwood is a good choice if you want an affordable and easy-to-use box. Consider your budget, the purpose of the box, and your personal preferences when selecting the type of wood.

Tools and Materials Needed

To make a wooden box with a lid, you’ll need a few tools and materials. The following is a list of what you’ll need to get started:

Tools

  • Table saw or circular saw
  • Miter saw or hand saw
  • Drill and drill bits
  • Screwdriver
  • Sandpaper or sanding block
  • Clamps
  • Wood glue
  • Tape measure
  • Pencil

Materials

  • Wood boards (depending on the size of the box you want to make)
  • Wood glue
  • Screws
  • Wood filler (optional)
  • Stain or paint (optional)

When it comes to selecting the type of wood to use for your box, you have a few options. You can use repurposed wood from previous projects, boards from broken down pallets, or you can purchase and cut new wood. Consider what your box will be used for. For example, if you’re making a jewelry box, consider thin pieces of cedar, ash or oak.

It’s important to note that making a wooden box with a lid requires the right kind of tools, as well as specific materials in order to complete the project successfully. Make sure you have all the necessary tools and materials before you begin.

Safety Precautions

When working with wood, it is important to prioritize safety to avoid accidents and injuries. Here are some safety precautions you should take when making a wooden box with a lid:

1. Wear Protective Gear

Always wear protective gear such as safety glasses, earplugs, and a dust mask. Woodworking can be a noisy and dusty activity, and wearing protective gear can help protect your eyes, ears, and lungs.

2. Use the Right Tools

Make sure to use the right tools for the job. Using the wrong tool can be dangerous and can damage your materials. Make sure your tools are sharp and in good condition before using them.

3. Keep Your Workspace Clean

Keep your workspace clean and organized to avoid tripping hazards. Make sure to clean up sawdust and wood chips regularly to avoid slips and falls.

4. Follow the Instructions

Follow the instructions carefully when using power tools. Make sure to read the manual and follow all safety guidelines. If you are unsure about how to use a tool, ask for help or seek advice from a professional.

5. Be Mindful of Your Hands

Be mindful of your hands when using power tools. Keep your hands away from the blade and use push sticks or other tools to move your material through the saw.

By following these safety precautions, you can ensure a safe and enjoyable woodworking experience while making your wooden box with a lid.

Designing Your Box

When it comes to designing your wooden box with a lid, there are a few things to consider. First, think about what you will be using the box for. Will it be for storage, as a gift box, or as a decorative item? This will determine the size and shape of the box.

Next, consider the type of wood you will use. You can use repurposed wood from previous projects, boards from broken down pallets, or purchase and cut new wood. Consider the color, grain, and texture of the wood to ensure it matches the intended use and style of the box.

When it comes to the box’s shape, you have many options. You can create a rectangular or square box, or you can make a more unique shape, such as a hexagon or octagon. You can also add dividers inside the box for better organization.

Choose your corner joints early on. Most corner-joint options are more than strong enough to hold together a relatively light box. And joints with minimal strength, like butt joints and miter joints, are easily reinforced. So, most times, you can base your choice of corner joint on appearance rather than strength.

Finally, consider the lid. Will it be a hinged lid or a slide-in lid? Will it have decorative handles or remain plain? These choices will affect the overall look and functionality of the box.

By considering these factors, you can design a wooden box with a lid that is both functional and visually appealing.

Cutting the Wood

When making a wooden box with a lid, the first step is to cut the wood to the desired size. You can use repurposed wood from previous projects, boards from broken down pallets, or you can purchase and cut new wood.

Consider what your box will be used for. For example, if you’re making a jewelry box, consider thin pieces of cedar, ash or oak. For a larger box, you may want to use thicker wood to provide more stability.

To ensure that your box is the correct size, measure and mark the wood before cutting. Use a measuring tape, pencil, and square to make accurate marks.

When cutting the wood, it’s important to use the proper tools. A table saw or circular saw can be used to make straight cuts, while a jigsaw or handsaw can be used for curved cuts. Always wear safety goggles and gloves when using power tools.

If you’re new to woodworking, it’s a good idea to practice cutting on scrap wood before cutting the actual pieces for your box. This will help you get a feel for the tools and improve your accuracy.

Once all the pieces are cut, use sandpaper to smooth any rough edges or surfaces. This will give your box a professional look and prevent splinters.

Assembling the Box

Now that you have all the pieces cut and sanded, it’s time to assemble the box. Follow these simple steps to create a beautiful and functional wooden box with a lid:

  1. Start by applying a small amount of wood glue to the edge of one of the sides. Make sure to spread the glue evenly across the entire length of the edge.

  2. Align the edge with the corresponding edge of the bottom piece, making sure that the corners are perfectly square. Use clamps to hold the pieces together while the glue dries.

  3. Repeat the process with the other three sides, making sure that each one is perfectly aligned with the bottom piece and with the adjacent sides.

  4. Once all four sides are glued and clamped to the bottom piece, allow the glue to dry for at least an hour.

  5. After the glue has dried, remove the clamps and use a fine-grit sandpaper to smooth any rough edges or uneven surfaces.

  6. Now it’s time to attach the lid. Apply a small amount of wood glue to the top edge of the box and carefully place the lid on top, making sure that it is perfectly centered and flush with the edges of the box.

  7. Use clamps to hold the lid in place while the glue dries. It’s important to make sure that the lid is perfectly aligned with the box, so take your time to adjust it if necessary.

  8. Once the glue has dried, remove the clamps and sand any rough edges or uneven surfaces.

  9. You can now add any finishing touches to your box, such as staining or painting. Make sure to let the finish dry completely before using the box.

By following these simple steps, you can create a beautiful and functional wooden box with a lid that will last for years to come.

Creating the Lid

Once you have built the main body of your wooden box, it’s time to create the lid. There are several options for lid styles, including hinged lids, slide-in lids, and lift-off lids. In this section, we will cover how to create a simple lift-off lid.

Materials Needed

  • Wood for the lid (same thickness as the box)
  • Table saw or circular saw
  • Sandpaper
  • Wood glue
  • Clamps

Steps to Follow

  1. Measure the dimensions of the top of your box, and cut a piece of wood to match those dimensions. This will be the lid of your box.
  2. Sand the edges and surfaces of the lid until they are smooth.
  3. Apply wood glue to the top edges of the box.
  4. Place the lid on top of the box, making sure it is centered.
  5. Use clamps to hold the lid in place while the glue dries. Allow the glue to dry completely before removing the clamps.
  6. Sand any rough edges or surfaces on the lid until it is smooth.

Congratulations, you have now created a lift-off lid for your wooden box! This style of lid is simple and easy to create, making it a great option for beginners. If you want to add a decorative touch to your lid, consider adding a handle or carving a design into the wood.

Finishing Touches

Once you have built your wooden box with a lid, the next step is to give it a finishing touch. This will help to protect your box and make it look more attractive. Here are some finishing techniques you can use:

Sanding

Before finishing your wooden box, you need to sand it. Sanding helps to smooth out any rough edges and remove any scratches or imperfections. Start with a coarse sandpaper and work your way up to a finer grit. Be sure to sand in the direction of the wood grain to avoid damaging it. Once you have sanded your box, wipe it down with a damp cloth to remove any dust.

Painting

If you want to add some color to your wooden box, you can paint it. Choose a paint that is suitable for wood and apply it with a brush or roller. You may need to apply several coats, depending on the color and type of paint you are using. Be sure to let each coat dry completely before applying the next one. Once you have finished painting your box, let it dry completely before handling it.

Varnishing

Varnishing your wooden box will give it a glossy finish and protect it from moisture and scratches. Choose a varnish that is suitable for wood and apply it with a brush or roller. Be sure to apply the varnish in a well-ventilated area and follow the manufacturer’s instructions. You may need to apply several coats, depending on the type of varnish you are using. Once you have finished varnishing your box, let it dry completely before handling it.

Remember, the finishing touches you give to your wooden box will determine its final appearance. Choose a finishing technique that suits your style and the purpose of your box. With a little effort, you can create a beautiful and functional wooden box that will last for years.

How to Make a Wooden 5 Point Star: A Beginner's Guide

Are you interested in learning how to make a wooden 5 point star? Whether you want to create a rustic decoration for your home or a unique gift for a friend, making a wooden star can be a fun and rewarding project. With a few basic materials and tools, you can create a beautiful 5 point star that will add charm and character to any space.

To get started, you will need to choose the type of wood you want to use for your star. Popular options include pine, cedar, and oak, but you can use any type of wood that you prefer. Once you have your wood, you will need to cut it to the size of your star and then mark out the points of the star with a pencil or ruler. From there, you can drill holes in each point of the star and assemble the pieces together using screws.

If you are new to woodworking, don’t worry. Making a wooden 5 point star can be a great beginner project that will help you develop your skills and gain confidence in your abilities. With a little patience and practice, you can create a beautiful wooden star that will be admired for years to come. So, let’s get started and learn how to make a wooden 5 point star together!

Understanding the Basics of a 5 Point Star

Geometry Behind a 5 Point Star

Before you start making a wooden 5 point star, it’s important to understand the basic geometry behind it. A 5 point star is essentially a polygon with five vertices and five edges. Each vertex of the star is formed by the intersection of two lines, and each edge is formed by the intersection of two adjacent lines.

The angle of each point in a 5 point star is 36 degrees, while the angle between each point is 72 degrees. To ensure that your star looks symmetrical and proportional, it’s important to keep these angles consistent and precise.

Importance of Precision

When making a wooden 5 point star, precision is key. Even small variations in the angles or lengths of the lines can significantly impact the final result. To ensure that your star looks perfect, it’s important to measure and cut each piece with care and accuracy.

One way to ensure precision is to use a miter saw or table saw to make precise angled cuts. You can also use a measuring tape to ensure that each piece is cut to the correct length.

Another important factor to consider is the type of wood you use. Cedar is a good option for outdoor stars, as it is durable and resistant to weathering. However, any type of wood can be used as long as it is cut and assembled with precision.

By understanding the basic geometry behind a 5 point star and emphasizing precision in your measurements and cuts, you can create a beautiful wooden star that is sure to impress.

Choosing the Right Wood

When it comes to making a wooden 5 point star, choosing the right type of wood is crucial. Not all types of wood are suitable for every project, and selecting the wrong wood can result in a failed project. In this section, we will cover the types of wood that are best suited for making a wooden 5 point star, as well as some safety precautions you should take when working with wood.

Types of Wood

There are many types of wood that are suitable for making a wooden 5 point star. Some of the most popular types include:

  • Pine: Pine is a softwood that is easy to work with and readily available. It is also affordable, making it a popular choice for beginners.

  • Oak: Oak is a hardwood that is durable and strong. It is also resistant to moisture and decay, making it a good choice for outdoor projects.

  • Walnut: Walnut is a hardwood that is prized for its rich, dark color and beautiful grain patterns. It is also strong and durable, making it a good choice for a project that will be used frequently.

  • Maple: Maple is a hardwood that is known for its light color and fine grain. It is also strong and durable, making it a good choice for furniture and other projects that will be subjected to heavy use.

Wood Safety Precautions

When working with wood, it is important to take certain safety precautions to protect yourself from injury. Some of the most important safety precautions to take when working with wood include:

  • Wearing protective gear: This includes safety glasses, earplugs, and a dust mask.

  • Using the right tools: Make sure you are using the right tools for the job and that they are in good condition.

  • Keeping your work area clean: This will help prevent accidents and make it easier to work.

  • Following proper procedures: Always follow the proper procedures for cutting, sanding, and finishing wood.

By following these safety precautions, you can help ensure that your project is a success and that you stay safe while working with wood.

Tools and Materials Needed

When it comes to making a wooden 5 point star, there are a few essential woodworking tools and safety equipment that you will need to have on hand. Here are the tools and materials you will need:

Essential Woodworking Tools

  1. Table Saw: You will need a table saw to cut the wood into the size and shape you need for your star. Make sure the saw has a sharp blade and is properly set up before use.

  2. Drill Press: You will need a drill press to make the holes in each point of the star. Make sure the drill press is properly set up and has the correct size drill bit for your screws.

  3. Sander: You will need a sander to smooth out the edges and surfaces of the wood. A belt sander or orbital sander will work well for this.

  4. Clamps: You will need clamps to hold the wood in place while you work on it. Make sure the clamps are the right size for your project and are properly tightened.

  5. Measuring Tools: You will need measuring tools such as a ruler or tape measure to ensure accuracy when cutting and drilling.

Safety Equipment

  1. Safety Glasses: You should always wear safety glasses when working with power tools to protect your eyes from flying debris.

  2. Ear Protection: Some power tools can be very loud, so it’s a good idea to wear ear protection to prevent hearing damage.

  3. Dust Mask: Sanding and cutting wood can create a lot of dust, which can be harmful to your lungs. Wear a dust mask to protect yourself.

  4. Work Gloves: Work gloves can help protect your hands from splinters and other injuries.

  5. Apron: An apron can help protect your clothing from sawdust and other debris.

By having these essential woodworking tools and safety equipment on hand, you will be well-prepared to make a beautiful wooden 5 point star.

Creating the Star Template

To make a wooden 5 point star, you will need a template to guide you through the process. Here are the steps to create a star template:

  1. Start by drawing a circle with a radius of your desired star size on a piece of paper. For example, if you want a 6-inch star, draw a circle with a 3-inch radius.

  2. Next, divide the circle into five equal parts. To do this, draw a line from the center of the circle to the edge, and rotate the paper slightly. Draw another line from the center to the edge, intersecting the first line. Repeat this process until you have five lines that divide the circle into equal parts.

  3. Now, draw a line from the center of the circle to the intersection point of two adjacent lines. This will be one of the five points of the star.

  4. Repeat step 3 for each of the five points, until you have a complete star shape.

  5. Cut out the star shape from the paper, and use it as a template to trace onto your wooden board.

  6. Once you have traced the star shape onto the wooden board, use a saw to cut out the shape. Be sure to cut carefully along the lines to ensure that your star is symmetrical.

  7. Sand the edges of the star to smooth out any rough edges and give it a finished look.

By following these steps, you can create a template for your wooden 5 point star that will guide you through the rest of the construction process.

Cutting the Wood

Marking the Wood

Before cutting your wood, you need to mark it properly. To make a 5 point star, you will need 5 equal-length pieces of wood. Measure and mark the length of each piece using a measuring tape and a pencil. Make sure that each piece is the same length.

Next, mark the angles on each piece of wood. To do this, use a protractor to measure and mark a 36-degree angle at each end of the wood. This will give you the 72-degree angle needed to make a 5 point star.

Sawing Technique

Once you have marked your wood, it’s time to start sawing. A jigsaw is the best tool to use for this job. It’s important to use a sharp blade and to keep the saw level and straight while cutting.

Start by cutting along the marked angles at each end of the wood. Then, carefully cut along the length of the wood to create each point of the star. Take your time and make sure your cuts are precise.

After cutting all 5 pieces, sand the edges and corners smooth using sandpaper. This will give your wooden star a professional look and prevent any splinters.

Remember to always wear safety glasses and protective gear while sawing and sanding. With these tips, you’ll be able to cut your wood with ease and create a beautiful 5 point star decoration for your home.

Assembling the Star

Once you have all the pieces cut and sanded, it’s time to assemble the 5 point star. This section will guide you through aligning the pieces and securing the star.

Aligning the Pieces

To ensure that the star is symmetrical, you need to align the pieces correctly. Here’s how to do it:

  1. Start by laying out all the pieces on a flat surface, with the points facing up.
  2. Arrange the pieces so that they form a star shape, with each point touching the adjacent one.
  3. Check that the angles between the pieces are all the same. If they are not, adjust the pieces until they are.
  4. Once you are satisfied with the alignment, mark the positions of the pieces with a pencil.

Securing the Star

Now that the pieces are aligned, it’s time to secure them together. You can use glue, screws, or both to hold the star together. Here are the steps to follow:

  1. Apply a small amount of wood glue to the joints where the pieces meet.
  2. If you choose to use screws, drill pilot holes through the points where the pieces meet and then screw them together. Make sure the screws are not too long, or they will poke through the other side of the wood.
  3. If you choose not to use screws, clamp the pieces together until the glue dries.
  4. Repeat this process for all the points of the star until it is fully assembled.

Congratulations! You have successfully assembled your wooden 5 point star. Now you can add any finishing touches you desire, such as sanding or staining.

Finishing Touches

After cutting and assembling the wooden pieces for your 5 point star, it’s time to give it a finishing touch. This will not only enhance its appearance but also protect it from wear and tear. Here are the steps to follow:

Sanding the Star

Before applying any finish, it’s important to sand the star to make it smooth and remove any rough edges. Start with a coarse sandpaper (around 80 grit) and gradually move to a finer grit (up to 220 grit) for a smooth finish. Sand in the direction of the grain to avoid scratches.

If you’re using a power sander, be careful not to apply too much pressure and remove too much wood. For hard-to-reach areas, you can use sandpaper wrapped around a dowel or a small piece of wood.

After sanding, wipe the star with a clean cloth to remove any dust or debris.

Applying a Finish

There are many types of finishes you can use for your wooden star, such as oil, wax, varnish, or lacquer. Each has its own advantages and disadvantages, so choose one that suits your needs.

Here’s how to apply a simple oil finish:

  1. Apply a thin coat of oil (such as tung oil or linseed oil) with a brush or a cloth. Make sure to cover all the surfaces evenly.
  2. Let the oil soak in for 15-20 minutes.
  3. Wipe off any excess oil with a clean cloth.
  4. Let the star dry for at least 24 hours.
  5. Apply another coat if desired.

For a more durable finish, you can use varnish or lacquer. These require more preparation and application time, but they provide a hard and glossy surface.

Whatever finish you choose, make sure to follow the manufacturer’s instructions and safety precautions. Wear gloves and work in a well-ventilated area.

With these simple steps, you can give your wooden 5 point star a beautiful and long-lasting finish.

preparation-before-gluing

What Glue Works Best for Gluing Glass to Wood? A Comprehensive Guide

Are you looking to glue glass to wood, but not sure which glue to use? It can be a tricky process, as glass and wood have very different properties and require a strong adhesive to create a lasting bond. In this article, we will explore the different types of glue that work best for gluing glass to wood and provide you with some tips to ensure a successful bond.

One of the best types of glue to use when attaching glass to wood is epoxy adhesive. Epoxy is known for its strong and durable bonding qualities and can be used on a wide range of surfaces. It dries clear and forms a seriously strong bond. Other popular options include superglue, silicone glue, or even hot glue from a glue gun. Each of these glues has its own unique properties and can work well depending on the specific needs of your project.

Understanding the Materials

understanding-the-materials

Characteristics of Glass

When it comes to gluing glass to wood, it’s important to understand the characteristics of both materials. Glass is a hard, brittle, and transparent material that is commonly used for windows, mirrors, and decorative items. It is made by heating sand, soda ash, and limestone to a high temperature until it melts and then cooling it rapidly to create a solid material.

Glass has a few important properties to consider when gluing it to wood. First, it is non-porous, which means that it doesn’t absorb liquids or gases. This can make it difficult for some adhesives to bond with glass. Second, glass is smooth and slippery, which can make it challenging for some adhesives to grip onto it. Finally, glass is fragile and can crack or shatter easily if it is not handled carefully.

Characteristics of Wood

Wood is a natural material that is commonly used for furniture, flooring, and building structures. It is made up of fibers that are held together by a natural adhesive called lignin. Wood can be soft or hard, depending on the species and how it is treated. It can also be porous or non-porous, depending on the type of wood and how it is finished.

When gluing glass to wood, it’s important to consider the characteristics of the wood as well. First, wood is porous, which means that it can absorb liquids and gases. This can make it easier for some adhesives to bond with wood. Second, wood can be rough or smooth, depending on how it is finished. A rough surface can provide more grip for an adhesive, while a smooth surface can make it more challenging for an adhesive to hold onto the wood. Finally, wood can be flexible or rigid, depending on the thickness and type of wood. It’s important to choose an adhesive that can accommodate the flexibility of the wood to prevent cracking or splitting.

Overall, understanding the characteristics of both glass and wood is important when choosing an adhesive for gluing them together. By considering the porosity, smoothness, and flexibility of each material, you can choose an adhesive that will provide a strong and durable bond.

Types of Glue

When it comes to gluing glass to wood, there are several types of glue that you can use. Each type of glue has its own unique properties that make it suitable for different applications. In this section, we will discuss the most common types of glue used for gluing glass to wood.

Epoxy Resin

Epoxy resin is a popular type of glue for bonding glass to wood. It is a two-part adhesive that consists of a resin and a hardener. When these two components are mixed together, they create a strong and durable bond. Epoxy resin is known for its excellent adhesion to a wide range of surfaces, including glass and wood. It also dries clear, which makes it ideal for applications where appearance is important.

One of the advantages of using epoxy resin is that it can be used on both porous and non-porous surfaces. It is also resistant to water, heat, and chemicals, which makes it suitable for outdoor applications. However, it can take several hours to cure, so you will need to be patient when using this type of glue.

Polyurethane Adhesive

Polyurethane adhesive is another type of glue that can be used for bonding glass to wood. It is a one-part adhesive that cures by reacting with moisture in the air. Polyurethane adhesive is known for its excellent bonding strength and flexibility. It can also be used on a wide range of surfaces, including glass and wood.

One of the advantages of using polyurethane adhesive is that it cures quickly, usually within 24 hours. It is also resistant to water, heat, and chemicals, which makes it suitable for outdoor applications. However, it can be difficult to remove once it has cured, so you will need to be careful when using this type of glue.

Silicone Adhesive

Silicone adhesive is a type of glue that is often used for bonding glass to wood. It is a one-part adhesive that cures by reacting with moisture in the air. Silicone adhesive is known for its excellent flexibility and durability. It can also be used on a wide range of surfaces, including glass and wood.

One of the advantages of using silicone adhesive is that it is easy to apply and can be used on both porous and non-porous surfaces. It is also resistant to water, heat, and chemicals, which makes it suitable for outdoor applications. However, it can take several hours to cure, so you will need to be patient when using this type of glue.

Preparation Before Gluing

preparation-before-gluing

Before you begin gluing glass to wood, there are a few important steps you should take to ensure a successful bond. In this section, we’ll cover the two main steps you should take before applying any glue: cleaning the surfaces and applying the glue.

Cleaning the Surfaces

The first step in preparing to glue glass to wood is to clean the surfaces that will be bonded. Any dirt, dust, or debris on the surfaces can prevent the glue from adhering properly, so it’s important to clean them thoroughly.

To clean the glass surface, use a glass cleaner and a lint-free cloth. Make sure to remove any fingerprints or smudges, as these can also interfere with the bonding process. If the glass surface is particularly dirty, you may need to use a degreaser or rubbing alcohol to remove any stubborn grime.

For the wood surface, use a damp cloth to remove any dust or debris. If the wood is particularly dirty, you can use a mild soap and water to clean it. Be sure to let the wood dry completely before proceeding to the next step.

Applying the Glue

Once the surfaces are clean and dry, it’s time to apply the glue. As we mentioned earlier, epoxy adhesive is the best glue to use for bonding glass to wood. Here’s how to apply it:

  1. Mix the two components of the epoxy adhesive according to the manufacturer’s instructions. Be sure to mix them thoroughly.
  2. Apply a thin layer of the epoxy to the wood surface using a brush or spatula. Make sure to cover the entire surface evenly.
  3. Carefully place the glass onto the wood surface, making sure it is aligned correctly.
  4. Apply pressure to the glass surface to ensure a strong bond. You can use clamps or weights to hold the glass in place while the glue dries.
  5. Allow the glue to dry completely according to the manufacturer’s instructions. This may take several hours or even a full day.

By following these preparation steps, you’ll be well on your way to successfully bonding glass to wood with epoxy adhesive.

Curing and Finishing

Curing Process

After applying the glue to your glass and wood surfaces, it’s important to allow sufficient time for the glue to cure. The curing time can vary depending on the type of glue used. For example, epoxy glue can take up to 24 hours to cure completely. During this time, it’s important to keep the glass and wood surfaces stationary and avoid any movement or jostling that could disrupt the curing process.

To ensure a strong bond, it’s also important to apply pressure to the glued surfaces during the curing process. This can be done by using clamps or weights to hold the surfaces together while the glue cures. Check the manufacturer’s instructions for specific pressure recommendations.

Finishing Touches

Once the glue has fully cured, you can remove any clamps or weights and inspect the bond between the glass and wood surfaces. If necessary, you can use sandpaper to smooth out any rough edges or excess glue that may have seeped out during the gluing process.

To give your project a professional finish, you can also consider painting or staining the wood surface. Be sure to use a paint or stain that is safe for use on glass surfaces if you plan to apply it to the glass as well.

Overall, taking the time to properly cure and finish your glass to wood project will ensure a strong and long-lasting bond that will stand up to everyday use.

Safety Precautions

safety-precautions-1

When working with glue, it’s important to take proper safety precautions to avoid any accidents or injuries. Here are a few safety tips to keep in mind when gluing glass to wood:

1. Wear Protective Gear

Before you start gluing, make sure you’re wearing protective gear such as gloves, goggles, and a mask. This will help protect your skin, eyes, and lungs from any harmful chemicals in the glue.

2. Work in a Well-Ventilated Area

When using glue, it’s important to work in a well-ventilated area to avoid inhaling any fumes. Open windows and doors, or use a fan to circulate the air in the room.

3. Use the Right Amount of Glue

Using too much glue can cause it to seep out and make a mess, while using too little can result in a weak bond. Follow the instructions on the glue packaging to ensure you’re using the right amount.

4. Keep Glue Away from Children and Pets

Glue can be toxic if ingested, so it’s important to keep it out of reach of children and pets. Store your glue in a safe place where it can’t be accidentally accessed.

5. Clean Up Spills Immediately

If you accidentally spill glue, clean it up immediately with a damp cloth. Avoid using hot water, as this can cause the glue to set and become even harder to remove.

By following these safety precautions, you can ensure that your gluing project goes smoothly and safely.

Frequently Asked Questions

What are some effective adhesives for attaching glass to a wooden frame?

Epoxy adhesive is one of the most effective adhesives for attaching glass to a wooden frame. It is strong, durable, and can be applied to a wide range of surfaces. Superglue, silicone glue, and hot glue from a glue gun are also popular options.

Which type of glue is best for attaching wood to a glass mirror?

For attaching wood to a glass mirror, silicone adhesive or clear epoxy is the best option. These adhesives provide a strong and durable bond that can withstand the weight of the mirror.

Can Gorilla Glue be used to attach glass to wood?

Gorilla Glue can be used to attach glass to wood, but it may not be the best option. Gorilla Glue expands as it dries, which can cause the glass to crack or break. It is best to use a clear epoxy or silicone adhesive for attaching glass to wood.

What is the best way to secure glass to a wooden table top?

The best way to secure glass to a wooden table top is to use clear silicone adhesive or clear epoxy. Apply the adhesive to the edges of the glass and press it firmly onto the wooden table top. Allow the adhesive to dry completely before using the table.

Does Liquid Nails work for attaching glass to wood?

Liquid Nails is not recommended for attaching glass to wood. It is designed for use with porous materials and may not provide a strong enough bond for glass.

Is E6000 a suitable adhesive for attaching glass to wood?

E6000 is a suitable adhesive for attaching glass to wood. It is a strong and durable adhesive that can be used on a wide range of surfaces. However, it is important to follow the manufacturer’s instructions carefully and allow the adhesive to dry completely before using the glass.