Tag Archives: entire surface evenly

Understanding the Problem

How to Make Wooden Drawers Slide Easier: Simple Tips and Tricks

Are you tired of struggling to open and close your wooden drawers? Sticky drawers can be frustrating and time-consuming, especially when you use them regularly. Fortunately, there are simple and affordable ways to make your wooden drawers slide more easily.

One common cause of sticky drawers is debris or material that has jammed the drawer and prevents it from sliding properly. Before attempting any fixes, check the guides for any paper or other material that may be causing the issue. If you find any debris, remove it carefully to avoid damaging the drawer or the guides.

Understanding the Problem

Understanding the Problem

When your wooden drawers start to stick, it can be frustrating and time-consuming to open and close them. Fortunately, there are several ways to make wooden drawers slide more easily. Before you can fix the problem, it’s important to understand what’s causing it. Here are some things to consider:

Identifying Sticking Points

The first step in fixing sticking drawers is to identify where the problem is occurring. Is the drawer sticking when you try to open or close it? Is it rubbing against the sides of the cabinet or the other drawers? Is it getting caught on something inside the drawer itself? Once you know where the sticking point is, you can start to address the problem.

Assessing Drawer Material

Another important factor to consider is the material your drawers are made of. Different types of wood and finishes can affect how easily your drawers slide. For example, unfinished wood may be more prone to swelling and warping, which can cause drawers to stick. If your drawers are made of a softer wood, they may be more likely to wear down over time, causing the tracks to become misaligned.

By understanding the problem and assessing the material, you can start to take steps to make your wooden drawers slide more easily. From lubricating the tracks to sanding down the sides of the drawer, there are several simple fixes you can try to get your drawers working smoothly again.

Gathering Necessary Tools

Gathering Necessary Tools

Before you start fixing your wooden drawers, you need to gather some essential tools. Here are the tools you will need to make your wooden drawers slide easier:

Choosing the Right Sandpaper

To make your wooden drawers slide easier, you may need to sand the sides of the drawers. You will need to choose the right sandpaper to get the job done. Here are some things to consider when choosing sandpaper:

  • Grit: The grit of sandpaper is determined by the number of abrasive particles per square inch. The higher the number, the finer the grit. For sanding wooden drawers, you will need medium/fine grit sandpaper.
  • Type: There are different types of sandpaper, including aluminum oxide, silicon carbide, and garnet. For sanding wooden drawers, you will need aluminum oxide sandpaper.
  • Backing: Sandpaper can be backed with paper or cloth. Paper-backed sandpaper is cheaper, but it wears out quickly. Cloth-backed sandpaper is more durable but more expensive.

Selecting a Suitable Wax

Wax can help lubricate the sides of your wooden drawers and make them slide easier. Here are some things to consider when selecting a suitable wax:

  • Type: There are different types of wax, including beeswax, paraffin wax, and carnauba wax. Beeswax is a popular choice for lubricating wooden drawers.
  • Form: Wax comes in different forms, including paste, liquid, and spray. Paste wax is the most common form for lubricating wooden drawers.
  • Application: You will need a cloth or brush to apply the wax to the sides of your wooden drawers. Make sure to apply the wax evenly and let it dry before testing the drawers.

By gathering the necessary tools, you can make your wooden drawers slide easier and improve the functionality of your furniture.

Preparation Process

Before you start making your wooden drawers slide easier, you need to prepare them properly. This section will guide you through the preparation process, which includes emptying the drawers and removing them from the cabinet.

Emptying the Drawers

The first step in preparing your wooden drawers for easier sliding is to empty them. Remove all the items from the drawers and place them in a safe place. This will make it easier for you to work on the drawers without any obstructions.

Removing the Drawers

Once you have emptied the drawers, you need to remove them from the cabinet. Depending on the type of drawer you have, this may involve removing screws or pulling out the drawer from its runners. Refer to the manufacturer’s instructions or seek professional help if you are unsure how to remove the drawers safely.

Once you have removed the drawers, inspect them for any damage or wear and tear. If you notice any issues, such as loose joints or broken parts, you may need to repair or replace them before proceeding with the sliding process.

By properly preparing your wooden drawers, you can ensure that you have a smooth and hassle-free experience when making them slide easier.

Smoothening the Surfaces

If your wooden drawers are sticking or not sliding smoothly, one of the reasons could be rough surfaces. The edges of the drawers might be rough or uneven, causing friction and making it difficult for the drawers to slide in and out. Smoothening the surfaces of the drawers can help reduce friction and make them slide easier. Here are some tips on how to do it:

Sanding the Drawer Edges

The first step in smoothening the surfaces of your wooden drawers is to sand the edges. You can use sandpaper or a sanding block to sand the edges of the drawers. Start with a coarse grit sandpaper and then move to a finer grit. Sand the edges until they are smooth and even. Be careful not to sand too much, as this can damage the wood.

Cleaning After Sanding

After sanding the edges of the drawers, it’s important to clean them thoroughly. Use a soft cloth or a vacuum cleaner to remove any dust or debris from the drawers. You can also use a damp cloth to wipe down the drawers. Make sure the drawers are completely dry before moving on to the next step.

By smoothening the surfaces of your wooden drawers, you can reduce friction and make them slide easier. Sanding the edges and cleaning them afterwards is a simple and effective way to achieve this.

Applying the Solution

Once you have identified the cause of your wooden drawers sticking, it’s time to apply the solution. Here are the steps to follow:

Waxing the Drawer Edges

One way to make wooden drawers slide easier is by applying furniture wax to the edges of the drawers. This helps to reduce friction between the drawer and the frame. Here’s how to do it:

  1. Remove the drawers from the frame and clean them thoroughly with a dry cloth.
  2. Apply a thin layer of furniture wax to the edges of the drawers using a clean cloth. Be sure to cover the entire surface evenly.
  3. Let the wax dry for a few minutes, then buff it with a clean cloth to remove any excess.

Reinstalling the Drawers

Once you have waxed the edges of the drawers, it’s time to reinstall them. Here are the steps to follow:

  1. Clean the frame thoroughly with a dry cloth to remove any dust or debris.
  2. Slide the drawers back into the frame, making sure they are aligned properly.
  3. Test the drawers to ensure they slide smoothly. If they still stick, you may need to adjust the alignment or apply more wax.

By following these simple steps, you can make your wooden drawers slide easier and avoid the frustration of sticky drawers. Remember to clean and maintain your drawers regularly to keep them in good condition.

Maintenance Tips

To ensure your wooden drawers slide smoothly, it’s important to perform regular maintenance. Here are some tips to keep your drawers in good working order.

Regular Cleaning

Dirt and debris can accumulate in the tracks of your drawers, causing them to stick and slide less easily. To prevent this, make sure to clean out the tracks regularly. You can use a soft brush or cloth to remove any debris, and then wipe the tracks down with a damp cloth.

Periodic Waxing

Periodic waxing can help reduce friction and make your drawers slide more easily. To wax your drawers, you can use a paraffin wax or a specialized drawer wax. Apply the wax to the tracks and the sides of the drawers, and then use a soft cloth to buff it in. Be sure to follow the manufacturer’s instructions when using a specialized wax.

By following these maintenance tips, you can keep your wooden drawers sliding smoothly for years to come.

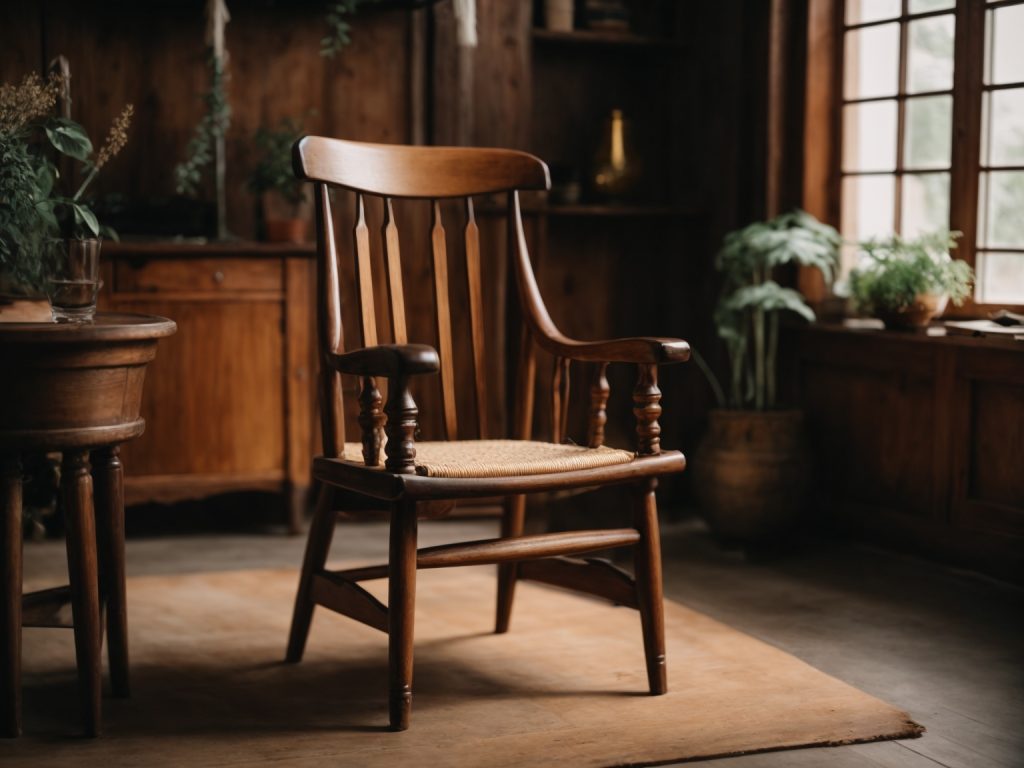
how-to-make-a-wooden-chair-a-beginners-guide-2

How to Make a Wooden Chair: A Beginner's Guide

Making a wooden chair can be a fun and rewarding experience. Not only will you have a functional piece of furniture, but you will also have the satisfaction of knowing that you made it yourself. Whether you are an experienced woodworker or a beginner, building a wooden chair is a great project to take on.

Before you start building your chair, it’s important to have a plan. You can find plans online or in woodworking books and magazines. Make sure to choose a plan that matches your skill level and the tools you have available. Once you have your plan, gather all the necessary materials and tools. You will need wood, screws, glue, clamps, a saw, a drill, and sandpaper, among other things.

Building a wooden chair can be a time-consuming process, but it’s important to take your time and work carefully. Make sure to measure twice and cut once, and always follow the instructions in your plan. With a little patience and effort, you can create a beautiful and functional piece of furniture that you will be proud to use and display in your home.

Understanding the Basics of Woodworking

Woodworking is a rewarding hobby that allows you to create beautiful and functional pieces of furniture. If you’re interested in making a wooden chair, it’s important to understand the basics of woodworking before you get started.

Choosing the Right Wood

The first step in making a wooden chair is to choose the right wood. Hardwoods like maple, oak, and cherry are ideal for furniture-making because they are durable and can be finished to a high shine. Softwoods like pine and cedar can also be used, but they are more prone to dents and scratches.

When selecting wood, look for boards that are straight and free of knots or other defects. You should also consider the grain pattern and color of the wood, as these can affect the appearance of your finished chair.

Tools Required

To make a wooden chair, you will need a variety of tools. Some of the essential tools include:

  • Table saw
  • Band saw
  • Jointer
  • Planer
  • Router
  • Chisels
  • Hand saws
  • Clamps

You will also need sandpaper, wood glue, and finishing materials like stain or varnish.

Before you start using any of these tools, it’s important to read the manufacturer’s instructions and take appropriate safety measures.

Safety Measures

Working with woodworking tools can be dangerous if you’re not careful. To protect yourself, you should wear safety glasses, ear protection, and a dust mask. You should also avoid wearing loose clothing or jewelry that could get caught in the machinery.

When using power tools like saws and routers, make sure the blades are sharp and properly adjusted. Always keep your hands away from the blades and use push sticks or other tools to guide the wood through the machine.

By understanding the basics of woodworking and taking appropriate safety measures, you can create a beautiful and functional wooden chair that will last for years to come.

Designing Your Wooden Chair

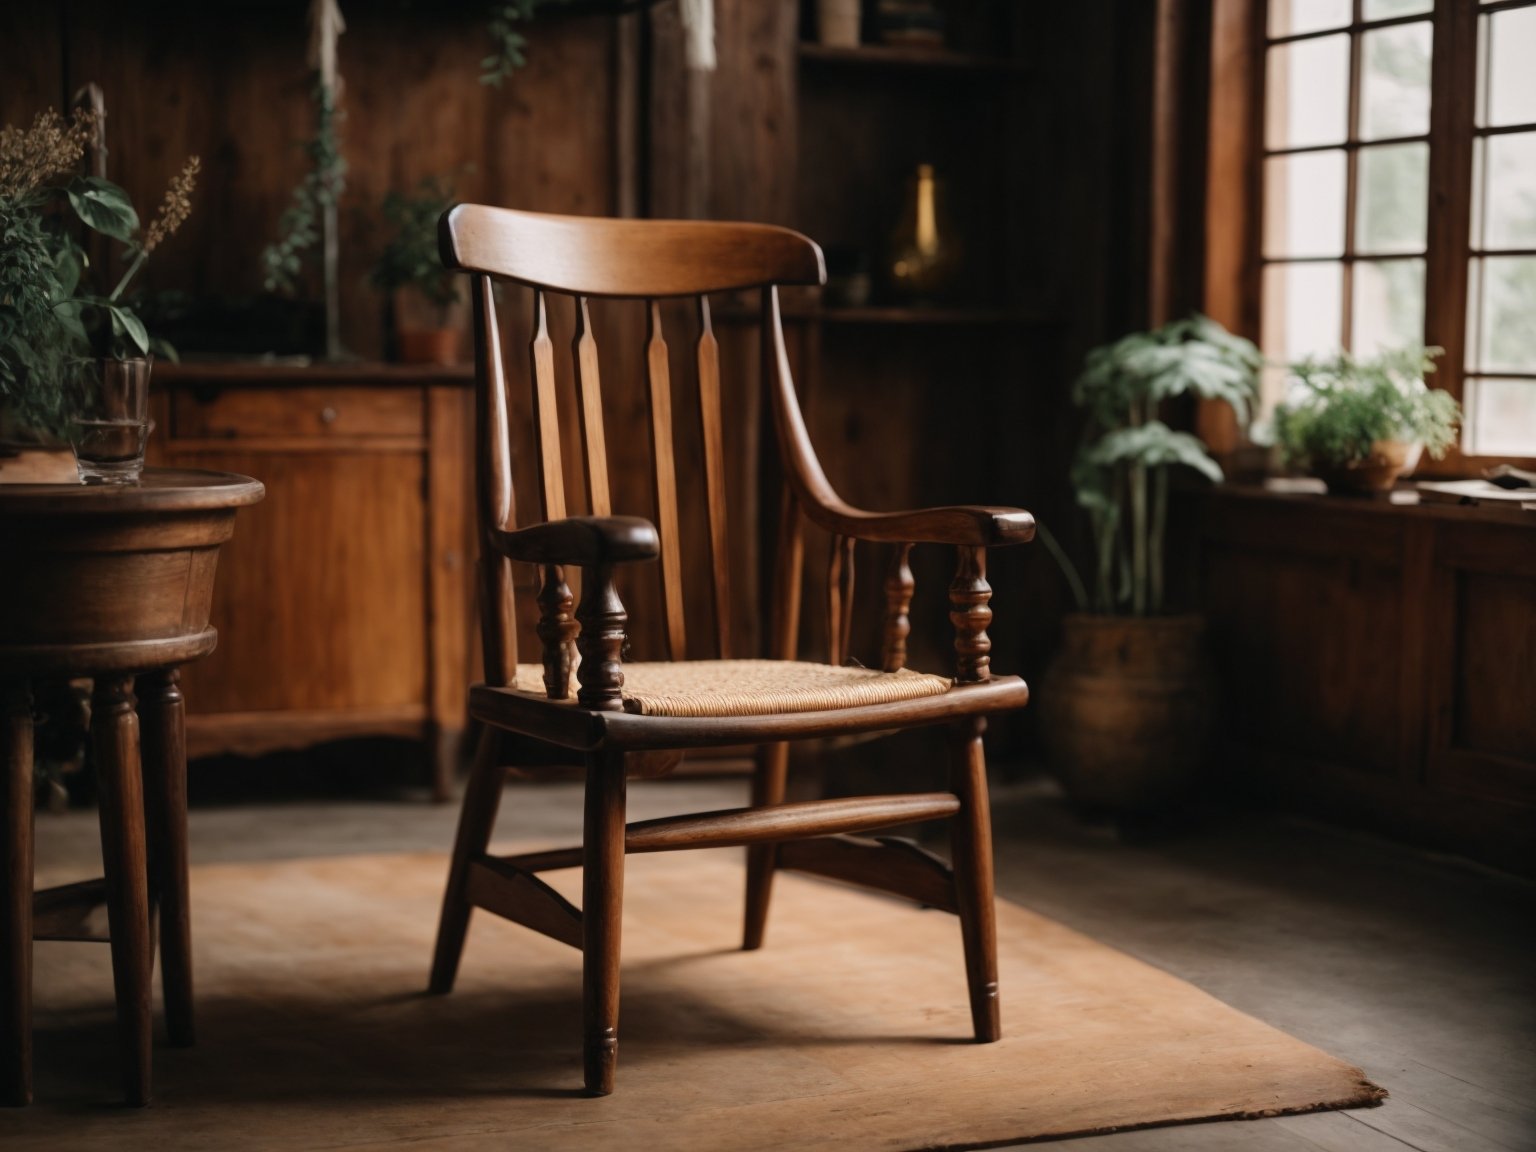
how-to-make-a-wooden-chair-a-beginners-guide-2

When it comes to designing your wooden chair, there are a few things to consider to ensure that your final product is both functional and visually appealing. Here are two sub-sections to help you get started:

Sketching a Blueprint

Before you start building your wooden chair, it’s important to sketch out a blueprint of your design. This will help you visualize your final product and make any necessary adjustments before you start cutting your wood.

When sketching your blueprint, consider the overall style of your chair. Do you want a modern or traditional design? Will your chair have a backrest or armrests? These are all important factors to consider when designing your chair.

Deciding Dimensions

Once you have a rough sketch of your design, you’ll need to decide on the dimensions of your chair. This includes the height, width, and depth of your seat, as well as the height and angle of your backrest.

When deciding on your dimensions, consider the average size of the person who will be using the chair. You’ll want to make sure that your chair is comfortable and supportive for the user.

It’s also important to consider the type of wood you’ll be using when deciding on your dimensions. Different types of wood have different strengths and weaknesses, so you’ll need to choose a wood that can support the weight and size of your chair.

By sketching a blueprint and deciding on your dimensions, you’ll be well on your way to designing a wooden chair that is both functional and visually appealing.

Preparing the Wood

Before you start making a wooden chair, it is important to properly prepare the wood. This will ensure that your chair is strong, durable, and looks great. In this section, we will cover the two main steps for preparing the wood: cutting and sanding.

Cutting the Wood

The first step in preparing the wood is to cut it to the correct size and shape. You will need to use a saw to cut the wood into the appropriate pieces for your chair. Make sure to measure and mark the wood carefully before cutting it to avoid mistakes.

When cutting the wood, it is important to use the correct type of saw for the job. A hand saw or a circular saw can be used for most cuts, but a jigsaw may be necessary for more intricate cuts or curves.

Sanding the Wood

Once the wood is cut to the correct size and shape, the next step is to sand it. Sanding the wood will smooth out any rough edges and prepare it for finishing. Start with a coarse grit sandpaper and work your way up to a finer grit for a smooth finish.

When sanding the wood, it is important to sand with the grain of the wood. Sanding against the grain can cause scratches and damage to the wood. Use a sanding block or a power sander for larger pieces of wood to make the job easier.

In conclusion, preparing the wood is an important step in making a wooden chair. By cutting the wood to the correct size and shape and sanding it properly, you will ensure that your chair is strong, durable, and looks great.

Assembling the Chair

Joining the Pieces

Now that you have all the pieces cut and sanded, it’s time to start assembling the chair. Begin by laying out all the pieces and checking that you have everything you need. You will need wood glue, clamps, and screws.

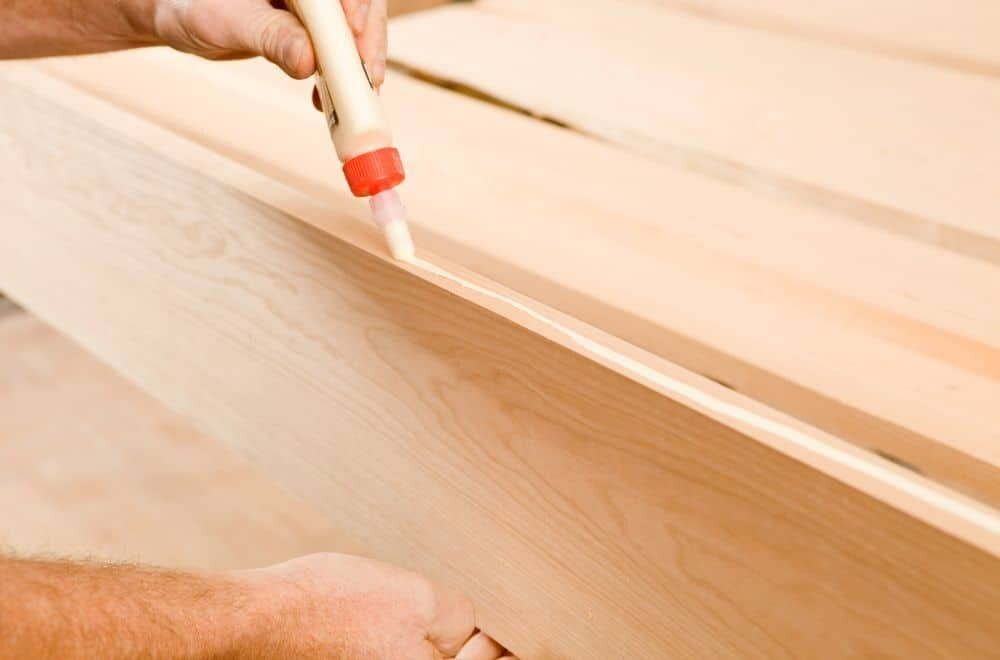
Start by gluing the joints together. Apply a generous amount of wood glue to the joints and use clamps to hold them in place. Make sure to wipe off any excess glue with a damp cloth. Let the glue dry completely, which usually takes about 24 hours.

Once the glue has dried, you can start screwing the pieces together. Use a drill with a screwdriver bit to attach the pieces together. Make sure to pre-drill the holes to prevent the wood from splitting.

Securing the Structure

After you have screwed all the pieces together, it’s time to secure the structure. You want to make sure that the chair is sturdy and will not wobble.

To do this, you can add corner braces to the chair. These are small metal brackets that you can attach to the corners of the chair. They will help to reinforce the structure and prevent it from wobbling.

Another option is to add dowels to the joints. These are small wooden pegs that you can insert into the joints to add extra strength. To do this, you will need to drill holes into the joints and then insert the dowels.

Once you have secured the structure, you can sand the chair to remove any rough edges and apply a finish. You can use a stain or paint to give the chair the look you want.

Congratulations! You have successfully assembled your wooden chair.

Finishing Touches

finishing-touches-2

Applying Wood Finish

Now that you have completed building your wooden chair, it’s time to give it a beautiful finish. Applying a wood finish will not only enhance the look of your chair but also protect it from moisture and wear. There are various types of wood finishes available, such as oil-based, water-based, and wax-based finishes. Choose the one that suits your chair and your preferences.

Before applying the finish, make sure the chair is clean and free of dust. Sand the chair lightly with fine-grit sandpaper to smooth out any rough spots. Apply the finish with a brush or a cloth, following the manufacturer’s instructions. Let the finish dry completely before applying a second coat. Repeat the process until you achieve the desired finish.

Polishing the Chair

Once the finish has dried, you can polish your chair to give it a shiny and smooth appearance. Polishing also helps to protect the finish and make it more durable. There are various polishing products available, such as paste wax, liquid wax, and oil-based polishes.

To polish your chair, apply a small amount of polish to a soft cloth and rub it onto the surface of the chair in a circular motion. Make sure to cover the entire surface evenly. Let the polish dry for a few minutes, then buff the chair with a clean cloth to remove any excess polish.

Remember to polish your chair regularly to maintain its shine and protect the finish. Avoid using abrasive cleaners or harsh chemicals that can damage the finish. With proper care and maintenance, your wooden chair will last for many years to come.

How to Make a Wooden Futon Frame: A DIY Guide

Are you tired of spending a fortune on furniture? Why not try making your own wooden futon frame? Not only is it a cost-effective solution, but it’s also a fun and rewarding DIY project that can be done with basic woodworking tools. In this article, we will guide you through the steps of building your own wooden futon frame.

The first step in making a wooden futon frame is to gather the necessary materials and tools. You will need wood boards, screws, a saw, drill, measuring tape, and sandpaper. Once you have all the materials, you can begin constructing the frame. The process involves cutting the wood to the appropriate size, drilling holes, and assembling the pieces together. With some patience and attention to detail, you can create a sturdy and stylish wooden futon frame that will last for years to come.

Whether you’re a seasoned woodworker or a beginner, making a wooden futon frame is a great way to add a personal touch to your home decor. Plus, you’ll have the satisfaction of knowing that you created something with your own two hands. So, roll up your sleeves, grab your tools, and let’s get started on building your very own wooden futon frame.

Understanding the Basics of a Futon Frame

If you’re looking for a versatile piece of furniture that can be used as both a bed and a couch, a futon is a great option. And if you’re handy with tools and enjoy DIY projects, building your own wooden futon frame can be a fun and rewarding experience. But before you get started, it’s important to understand the basics of a futon frame.

The Parts of a Futon Frame

A futon frame consists of several key parts that work together to create a sturdy and functional piece of furniture. These parts include:

  • Arms: The arms are the vertical pieces at the ends of the frame that support the backrest and provide a place to rest your arms.
  • Backrest: The backrest is the horizontal piece that supports the futon mattress when it’s in the upright position.
  • Seat: The seat is the horizontal piece that supports the futon mattress when it’s in the flat position.
  • Slats: The slats are the horizontal pieces that support the futon mattress and allow air to circulate.
  • Deck: The deck is the platform that supports the slats and the futon mattress.

Choosing the Right Wood

When building a wooden futon frame, it’s important to choose the right type of wood. You want a wood that is strong, durable, and able to withstand the weight of the mattress and the people who will be using it. Some good options include:

  • Hardwoods: Hardwoods like oak, maple, and cherry are strong and durable, making them a great choice for a futon frame.
  • Softwoods: Softwoods like pine and cedar are less expensive than hardwoods and can be used to create a rustic look.

Tools You’ll Need

To build a wooden futon frame, you’ll need a few basic tools, including:

  • Saw: A saw is necessary for cutting the wood to the right size and shape.
  • Drill: A drill is needed for making holes for screws and other hardware.
  • Screwdriver: A screwdriver is needed for tightening screws and other hardware.
  • Sandpaper: Sandpaper is needed for smoothing out rough edges and surfaces.

Now that you understand the basics of a futon frame, you’re ready to get started on your DIY project. With the right tools and materials, you can create a beautiful and functional piece of furniture that will provide years of use and enjoyment.

Materials Needed

To make a wooden futon frame, you will need the following materials:

  • Wood: The main material you’ll need is wood. You can use different types of wood, but pine or fir is the most common because they are inexpensive and easy to work with. You’ll need enough wood to create the frame and the slats that will support the mattress.

  • Screws: You’ll need screws to hold the frame together. Make sure to choose screws that are long enough to go through the wood but not too long that they poke through the other side.

  • Wood glue: Wood glue will help to hold the frame together and make it stronger.

  • Sandpaper: You’ll need sandpaper to smooth the wood and remove any rough edges.

  • Stain or paint: If you want to add color or protect the wood, you can use stain or paint.

  • Tools: You’ll need some tools to help you build the frame, including a saw, drill, screwdriver, measuring tape, and level.

Before you start building your futon frame, make sure you have all the materials and tools you need. It’s also a good idea to have a clear workspace where you can lay out all the pieces of wood and work on the frame. With these materials and tools, you’ll be on your way to creating a comfortable and stylish futon frame that you can enjoy for years to come.

Choosing the Right Wood

When it comes to building a wooden futon frame, choosing the right wood is crucial. Not all woods are created equal, and some types of wood are better suited for this project than others. Here are some factors to consider when selecting wood for your futon frame:

Durability

You want your futon frame to be sturdy and long-lasting, so it’s important to choose a durable wood. Hardwoods like oak, maple, and cherry are excellent choices because they are strong and resistant to wear and tear. Softwoods like pine and cedar are less durable but can still work well if properly treated.

Grain Pattern

The grain pattern of the wood you choose can affect the appearance of your futon frame. Some woods have a straight grain that gives a clean, modern look, while others have a more pronounced grain pattern that can add character and warmth to your frame. Consider what style you’re going for and choose a wood with a grain pattern that complements it.

Cost

The cost of the wood you choose can vary widely depending on the type of wood and where you purchase it. Hardwoods tend to be more expensive than softwoods, so keep that in mind when budgeting for your project. You may also be able to save money by purchasing rough-cut lumber and planing it yourself.

Sustainability

If you’re concerned about the environmental impact of your futon frame, you may want to choose a wood that is sustainably sourced. Look for woods that are certified by organizations like the Forest Stewardship Council (FSC) or the Sustainable Forestry Initiative (SFI). These certifications ensure that the wood comes from responsibly managed forests.

Overall, choosing the right wood for your futon frame is an important decision that can affect the look, durability, and sustainability of your project. Consider these factors carefully before making your final selection.

Planning Your Futon Frame Design

Before you start building your own futon frame, it is important to plan out your design. This will ensure that you have all the necessary materials and tools, and that your finished product will meet your needs and style preferences. Here are some things to consider when planning your futon frame design:

Dimensions

The first thing to consider when planning your futon frame design is the size of your mattress. Futon mattresses come in a variety of sizes, including twin, full, queen, and king. Make sure to measure the dimensions of your mattress before starting your project, so that you can create a frame that fits perfectly.

You should also consider the height of your frame. A standard futon frame is typically around 10 inches high, but you can adjust the height to your liking. Keep in mind that a higher frame will give you more storage space underneath, while a lower frame will make it easier to get in and out of bed.

Style

When it comes to style, there are a variety of options to choose from. Some people prefer a simple, minimalist design, while others prefer a more ornate and decorative look. Here are some style options to consider:

  • Traditional: A traditional futon frame is made from wood and has a simple, rectangular design. This style is perfect for those who prefer a classic, timeless look.

  • Modern: A modern futon frame often features clean lines and a minimalist design. This style is perfect for those who prefer a sleek, contemporary look.

  • Rustic: A rustic futon frame is made from natural materials like wood and often has a distressed or weathered look. This style is perfect for those who prefer a cozy, cabin-like feel.

  • Futon Bunk Bed: If you need to save space, a futon bunk bed is a great option. This style features a futon on the bottom and a regular bed on top, allowing you to sleep two people in the same space.

By considering these factors, you can create a futon frame that meets your needs and matches your personal style.

Preparation of the Wood

Before you start building your futon frame, it’s important to properly prepare the wood. Here are some steps you can follow to ensure your wood is ready for construction:

1. Choose the Right Type of Wood

Selecting the right type of wood is crucial for building a sturdy and durable futon frame. You should choose a hardwood such as oak, maple, or cherry, as these woods are strong and can withstand the weight of a mattress. Avoid softwoods like pine or cedar, as they are not as durable and can easily warp or break.

2. Measure and Cut the Wood

Measure the wood according to the dimensions of your futon frame design. Use a saw to cut the wood to the appropriate size. Make sure to wear protective gear like safety glasses and gloves while cutting the wood.

3. Sand the Wood

Sand the wood using a fine-grit sandpaper to remove any roughness or splinters. This will ensure a smooth finish and prevent any injuries while handling the wood.

4. Apply a Finish

Applying a finish to the wood will not only enhance its appearance but also protect it from moisture and wear. You can use a variety of finishes like stain, paint, or varnish. Make sure to apply the finish evenly and let it dry completely before proceeding with construction.

By following these steps, you can prepare your wood for building a sturdy and beautiful futon frame.

Assembling the Futon Frame

Once you have all the wooden pieces cut and sanded, you can start assembling your futon frame. This section will guide you through the process of creating the base, building the backrest, and attaching the parts.

Creating the Base

To create the base of your futon frame, follow these steps:

  1. Lay the two side rails on the ground, parallel to each other, and about 2.5 feet apart.
  2. Place the two end rails between the side rails, perpendicular to them, and flush with the ends of the side rails.
  3. Screw the end rails to the side rails using wood screws. Make sure the screws are countersunk so that they do not protrude from the wood.

Building the Backrest

To build the backrest of your futon frame, follow these steps:

  1. Take the two backrest rails and lay them on the ground, parallel to each other, and about 3 inches apart.
  2. Place the two backrest slats between the backrest rails, perpendicular to them, and flush with the ends of the backrest rails.
  3. Screw the backrest slats to the backrest rails using wood screws. Make sure the screws are countersunk so that they do not protrude from the wood.

Attaching the Parts

To attach the base and the backrest of your futon frame, follow these steps:

  1. Stand the base upright, with the end rails on the ground and the side rails pointing up.
  2. Slide the backrest assembly into the grooves on the side rails. Make sure the backrest assembly is centered and level.
  3. Screw the backrest assembly to the side rails using wood screws. Make sure the screws are countersunk so that they do not protrude from the wood.
  4. Attach the support braces to the base and the backrest assembly using wood screws. Make sure the screws are countersunk so that they do not protrude from the wood.

Congratulations! You have now assembled your wooden futon frame.

Finishing Touches

Once you have completed building your wooden futon frame, it’s time to add the finishing touches. This includes sanding, painting, or staining the wood to give it a polished look.

Sanding

Before painting or staining the wood, it’s important to sand it down to remove any rough spots or splinters. Start with a coarse grit sandpaper and gradually work your way up to a finer grit to achieve a smooth finish. Be sure to sand in the direction of the wood grain to avoid creating scratches.

Painting or Staining

Once the wood is sanded, you can choose to paint or stain it. Painting the wood will give it a colorful finish, while staining will enhance the natural wood grain. When selecting paint or stain, be sure to choose one that is suitable for wood and follow the manufacturer’s instructions for application.

Before applying paint or stain, use a tack cloth to remove any dust or debris from the wood. Apply the paint or stain with a brush or roller, making sure to cover the entire surface evenly. If you are using a stain, wipe off any excess with a clean cloth.

Allow the paint or stain to dry completely before using your futon frame. This may take several hours or even overnight, depending on the product and conditions. Once dry, your wooden futon frame will be ready to use and enjoy.

Safety Tips

When building a wooden futon frame, safety should always be your top priority. Here are some tips to keep in mind to ensure a safe and successful project:

Wear Protective Gear

Before starting any construction project, it is important to wear the appropriate protective gear. This includes safety glasses, ear protection, and a dust mask. Gloves can also be helpful when working with wood and power tools.

Use the Right Tools

Using the right tools for the job can make a big difference in both the quality of your work and your safety. Make sure you have the necessary tools, such as a saw, drill, and screwdriver, and that they are in good working condition. Using dull or damaged tools can be dangerous and can result in poor quality work.

Follow Instructions Carefully

When using plans or instructions to build your futon frame, make sure to read them carefully and follow them closely. Skipping steps or making assumptions can lead to mistakes and safety hazards. If you are unsure about any part of the instructions, seek guidance from a professional or experienced woodworker.

Secure Your Work Area

Before starting your project, make sure your work area is clean and organized. Remove any clutter or debris and ensure that your tools and materials are stored safely. This will help prevent accidents and make it easier to work efficiently.

Take Breaks

Building a futon frame can be a time-consuming and physically demanding task. It is important to take breaks as needed to rest and recharge. This can help prevent fatigue and reduce the risk of injury.

By following these safety tips, you can help ensure a successful and safe project. Remember to always prioritize safety and take the necessary precautions to protect yourself and those around you.

preparation-before-gluing

What Glue Works Best for Gluing Glass to Wood? A Comprehensive Guide

Are you looking to glue glass to wood, but not sure which glue to use? It can be a tricky process, as glass and wood have very different properties and require a strong adhesive to create a lasting bond. In this article, we will explore the different types of glue that work best for gluing glass to wood and provide you with some tips to ensure a successful bond.

One of the best types of glue to use when attaching glass to wood is epoxy adhesive. Epoxy is known for its strong and durable bonding qualities and can be used on a wide range of surfaces. It dries clear and forms a seriously strong bond. Other popular options include superglue, silicone glue, or even hot glue from a glue gun. Each of these glues has its own unique properties and can work well depending on the specific needs of your project.

Understanding the Materials

understanding-the-materials

Characteristics of Glass

When it comes to gluing glass to wood, it’s important to understand the characteristics of both materials. Glass is a hard, brittle, and transparent material that is commonly used for windows, mirrors, and decorative items. It is made by heating sand, soda ash, and limestone to a high temperature until it melts and then cooling it rapidly to create a solid material.

Glass has a few important properties to consider when gluing it to wood. First, it is non-porous, which means that it doesn’t absorb liquids or gases. This can make it difficult for some adhesives to bond with glass. Second, glass is smooth and slippery, which can make it challenging for some adhesives to grip onto it. Finally, glass is fragile and can crack or shatter easily if it is not handled carefully.

Characteristics of Wood

Wood is a natural material that is commonly used for furniture, flooring, and building structures. It is made up of fibers that are held together by a natural adhesive called lignin. Wood can be soft or hard, depending on the species and how it is treated. It can also be porous or non-porous, depending on the type of wood and how it is finished.

When gluing glass to wood, it’s important to consider the characteristics of the wood as well. First, wood is porous, which means that it can absorb liquids and gases. This can make it easier for some adhesives to bond with wood. Second, wood can be rough or smooth, depending on how it is finished. A rough surface can provide more grip for an adhesive, while a smooth surface can make it more challenging for an adhesive to hold onto the wood. Finally, wood can be flexible or rigid, depending on the thickness and type of wood. It’s important to choose an adhesive that can accommodate the flexibility of the wood to prevent cracking or splitting.

Overall, understanding the characteristics of both glass and wood is important when choosing an adhesive for gluing them together. By considering the porosity, smoothness, and flexibility of each material, you can choose an adhesive that will provide a strong and durable bond.

Types of Glue

When it comes to gluing glass to wood, there are several types of glue that you can use. Each type of glue has its own unique properties that make it suitable for different applications. In this section, we will discuss the most common types of glue used for gluing glass to wood.

Epoxy Resin

Epoxy resin is a popular type of glue for bonding glass to wood. It is a two-part adhesive that consists of a resin and a hardener. When these two components are mixed together, they create a strong and durable bond. Epoxy resin is known for its excellent adhesion to a wide range of surfaces, including glass and wood. It also dries clear, which makes it ideal for applications where appearance is important.

One of the advantages of using epoxy resin is that it can be used on both porous and non-porous surfaces. It is also resistant to water, heat, and chemicals, which makes it suitable for outdoor applications. However, it can take several hours to cure, so you will need to be patient when using this type of glue.

Polyurethane Adhesive

Polyurethane adhesive is another type of glue that can be used for bonding glass to wood. It is a one-part adhesive that cures by reacting with moisture in the air. Polyurethane adhesive is known for its excellent bonding strength and flexibility. It can also be used on a wide range of surfaces, including glass and wood.

One of the advantages of using polyurethane adhesive is that it cures quickly, usually within 24 hours. It is also resistant to water, heat, and chemicals, which makes it suitable for outdoor applications. However, it can be difficult to remove once it has cured, so you will need to be careful when using this type of glue.

Silicone Adhesive

Silicone adhesive is a type of glue that is often used for bonding glass to wood. It is a one-part adhesive that cures by reacting with moisture in the air. Silicone adhesive is known for its excellent flexibility and durability. It can also be used on a wide range of surfaces, including glass and wood.

One of the advantages of using silicone adhesive is that it is easy to apply and can be used on both porous and non-porous surfaces. It is also resistant to water, heat, and chemicals, which makes it suitable for outdoor applications. However, it can take several hours to cure, so you will need to be patient when using this type of glue.

Preparation Before Gluing

preparation-before-gluing

Before you begin gluing glass to wood, there are a few important steps you should take to ensure a successful bond. In this section, we’ll cover the two main steps you should take before applying any glue: cleaning the surfaces and applying the glue.

Cleaning the Surfaces

The first step in preparing to glue glass to wood is to clean the surfaces that will be bonded. Any dirt, dust, or debris on the surfaces can prevent the glue from adhering properly, so it’s important to clean them thoroughly.

To clean the glass surface, use a glass cleaner and a lint-free cloth. Make sure to remove any fingerprints or smudges, as these can also interfere with the bonding process. If the glass surface is particularly dirty, you may need to use a degreaser or rubbing alcohol to remove any stubborn grime.

For the wood surface, use a damp cloth to remove any dust or debris. If the wood is particularly dirty, you can use a mild soap and water to clean it. Be sure to let the wood dry completely before proceeding to the next step.

Applying the Glue

Once the surfaces are clean and dry, it’s time to apply the glue. As we mentioned earlier, epoxy adhesive is the best glue to use for bonding glass to wood. Here’s how to apply it:

  1. Mix the two components of the epoxy adhesive according to the manufacturer’s instructions. Be sure to mix them thoroughly.
  2. Apply a thin layer of the epoxy to the wood surface using a brush or spatula. Make sure to cover the entire surface evenly.
  3. Carefully place the glass onto the wood surface, making sure it is aligned correctly.
  4. Apply pressure to the glass surface to ensure a strong bond. You can use clamps or weights to hold the glass in place while the glue dries.
  5. Allow the glue to dry completely according to the manufacturer’s instructions. This may take several hours or even a full day.

By following these preparation steps, you’ll be well on your way to successfully bonding glass to wood with epoxy adhesive.

Curing and Finishing

Curing Process

After applying the glue to your glass and wood surfaces, it’s important to allow sufficient time for the glue to cure. The curing time can vary depending on the type of glue used. For example, epoxy glue can take up to 24 hours to cure completely. During this time, it’s important to keep the glass and wood surfaces stationary and avoid any movement or jostling that could disrupt the curing process.

To ensure a strong bond, it’s also important to apply pressure to the glued surfaces during the curing process. This can be done by using clamps or weights to hold the surfaces together while the glue cures. Check the manufacturer’s instructions for specific pressure recommendations.

Finishing Touches

Once the glue has fully cured, you can remove any clamps or weights and inspect the bond between the glass and wood surfaces. If necessary, you can use sandpaper to smooth out any rough edges or excess glue that may have seeped out during the gluing process.

To give your project a professional finish, you can also consider painting or staining the wood surface. Be sure to use a paint or stain that is safe for use on glass surfaces if you plan to apply it to the glass as well.

Overall, taking the time to properly cure and finish your glass to wood project will ensure a strong and long-lasting bond that will stand up to everyday use.

Safety Precautions

safety-precautions-1

When working with glue, it’s important to take proper safety precautions to avoid any accidents or injuries. Here are a few safety tips to keep in mind when gluing glass to wood:

1. Wear Protective Gear

Before you start gluing, make sure you’re wearing protective gear such as gloves, goggles, and a mask. This will help protect your skin, eyes, and lungs from any harmful chemicals in the glue.

2. Work in a Well-Ventilated Area

When using glue, it’s important to work in a well-ventilated area to avoid inhaling any fumes. Open windows and doors, or use a fan to circulate the air in the room.

3. Use the Right Amount of Glue

Using too much glue can cause it to seep out and make a mess, while using too little can result in a weak bond. Follow the instructions on the glue packaging to ensure you’re using the right amount.

4. Keep Glue Away from Children and Pets

Glue can be toxic if ingested, so it’s important to keep it out of reach of children and pets. Store your glue in a safe place where it can’t be accidentally accessed.

5. Clean Up Spills Immediately

If you accidentally spill glue, clean it up immediately with a damp cloth. Avoid using hot water, as this can cause the glue to set and become even harder to remove.

By following these safety precautions, you can ensure that your gluing project goes smoothly and safely.

Frequently Asked Questions

What are some effective adhesives for attaching glass to a wooden frame?

Epoxy adhesive is one of the most effective adhesives for attaching glass to a wooden frame. It is strong, durable, and can be applied to a wide range of surfaces. Superglue, silicone glue, and hot glue from a glue gun are also popular options.

Which type of glue is best for attaching wood to a glass mirror?

For attaching wood to a glass mirror, silicone adhesive or clear epoxy is the best option. These adhesives provide a strong and durable bond that can withstand the weight of the mirror.

Can Gorilla Glue be used to attach glass to wood?

Gorilla Glue can be used to attach glass to wood, but it may not be the best option. Gorilla Glue expands as it dries, which can cause the glass to crack or break. It is best to use a clear epoxy or silicone adhesive for attaching glass to wood.

What is the best way to secure glass to a wooden table top?

The best way to secure glass to a wooden table top is to use clear silicone adhesive or clear epoxy. Apply the adhesive to the edges of the glass and press it firmly onto the wooden table top. Allow the adhesive to dry completely before using the table.

Does Liquid Nails work for attaching glass to wood?

Liquid Nails is not recommended for attaching glass to wood. It is designed for use with porous materials and may not provide a strong enough bond for glass.

Is E6000 a suitable adhesive for attaching glass to wood?

E6000 is a suitable adhesive for attaching glass to wood. It is a strong and durable adhesive that can be used on a wide range of surfaces. However, it is important to follow the manufacturer’s instructions carefully and allow the adhesive to dry completely before using the glass.