Tag Archives: avoid wearing loose clothing

prepare-the-wood

How to Make Wooden Rings on a Lathe: A Beginner's Guide

Are you interested in making your own wooden rings on a lathe? With the right tools and techniques, you can create beautiful and unique rings that are perfect for gifts or personal use. In this article, we will guide you through the process of making wooden rings on a lathe, including the materials you need, the steps involved, and some tips for getting the best results.

Before you get started, it’s important to choose the right type of wood for your rings. Hardwoods like maple, oak, and walnut are good choices because they are durable and have a fine grain that looks great when polished. You will also need a lathe, which is a machine that rotates the wood while you shape it with cutting tools. Other tools you may need include a drill press, sandpaper, and finish such as wax or oil.

Once you have your materials and tools ready, you can start making your wooden rings. The process involves cutting the wood to the right size, drilling a hole in the center, and shaping it on the lathe. With some practice and patience, you can create rings that are truly one-of-a-kind. So let’s get started and learn how to make wooden rings on a lathe!

Understanding the Basics of a Lathe

understanding-the-basics-of-a-lathe

If you’re new to woodworking, using a lathe can seem intimidating at first. However, with a little bit of practice, you’ll soon be able to create beautiful wooden rings that will impress your friends and family. Here are some basic concepts you need to understand before you begin:

Lathe Components

The lathe is made up of several components, including the headstock, tailstock, tool rest, and bed. The headstock holds the spindle, which rotates the wood. The tailstock supports the other end of the wood and can be moved along the bed to accommodate different lengths of wood. The tool rest is used to hold the cutting tool in place, and the bed provides a stable platform for the lathe.

Safety Precautions

Before you begin using the lathe, it’s important to take some safety precautions. Make sure you wear eye protection, as wood chips and dust can fly off the lathe and into your eyes. You should also avoid wearing loose clothing or jewelry that could get caught in the lathe. Finally, make sure the lathe is properly secured to a sturdy workbench or stand to prevent it from moving while you’re working.

Cutting Tools

There are several types of cutting tools you can use to create wooden rings, including gouges, scrapers, and parting tools. Gouges are used for roughing out the shape of the ring, while scrapers are used for smoothing and refining the shape. Parting tools are used to cut the ring off the wood once it’s complete.

Wood Selection

When selecting wood for your ring, it’s important to choose a species that is hard enough to withstand wear and tear. Some good options include maple, cherry, and walnut. You should also choose a piece of wood that is straight and free of knots or defects.

Conclusion

By understanding the basic components of a lathe, taking proper safety precautions, selecting the right cutting tools, and choosing the right wood, you’ll be well on your way to creating beautiful wooden rings that you can be proud of. With practice and patience, you’ll soon be able to create rings that are as unique as they are beautiful.

Choosing the Right Wood

When making wooden rings on a lathe, it is essential to choose the right wood for your project. Here are some factors to consider when selecting the wood for your ring:

Hardness

Choose a type of wood that is hard enough to withstand everyday wear and tear. Softer woods, such as pine or cedar, may be easier to work with, but they are not durable enough for a ring that will be worn regularly. Hardwoods like oak, cherry, or walnut are better choices for making wooden rings.

Grain Pattern

The grain pattern of the wood can add character and uniqueness to your ring. Some woods, such as burl or spalted wood, have distinctive patterns that can make your ring stand out. However, keep in mind that highly figured woods can be more difficult to work with and may require more sanding and finishing.

Color

The color of the wood can also play a role in the final appearance of your ring. Choose a wood that complements your skin tone and personal style. Woods like ebony or rosewood can add a touch of elegance to your ring, while lighter woods like maple or birch can give it a more natural look.

Sustainability

Consider using sustainably sourced wood for your ring. Some types of wood, such as ebony or rosewood, may be endangered or illegally harvested. Look for wood that has been certified by organizations like the Forest Stewardship Council (FSC) or the Sustainable Forestry Initiative (SFI).

By considering these factors, you can choose the right wood for your wooden ring project. Remember to take your time and select a wood that fits your style and needs.

Preparing the Wood

prepare-the-wood

Before you start turning your wooden ring on a lathe, you need to prepare the wood. Here are some steps to follow:

Step 1: Choose the Right Wood

The first step in preparing the wood is to choose the right type of wood. You can use any type of wood, but some are better than others. Hardwoods like walnut, cherry, and maple are popular choices because they are durable and have a beautiful grain pattern.

Step 2: Cut the Wood

Once you have chosen the wood, the next step is to cut it into the right size and shape. You can use a saw or a knife to cut the wood into a block that is slightly larger than the finished ring size. Make sure that the wood is cut straight and even.

Step 3: Drill a Hole

After cutting the wood, you need to drill a hole in the center of the block. The hole should be slightly larger than the size of the mandrel you will be using on the lathe. This will allow you to mount the wood securely on the lathe.

Step 4: Mount the Wood on the Lathe

Once you have drilled the hole, you can mount the wood on the lathe using a mandrel. Make sure that the wood is mounted securely and that the mandrel is centered in the hole.

Step 5: Turn the Wood

Now that the wood is mounted on the lathe, you can start turning it into a ring. Use a roughing gouge to shape the wood into a cylinder and then use a skew chisel to create the desired shape. Be sure to work slowly and carefully to avoid damaging the wood or injuring yourself.

By following these steps, you can prepare the wood for turning a beautiful wooden ring on a lathe.

Shaping the Ring

Once you have the wood mounted on the lathe, it’s time to start shaping the ring. This process involves two main steps: Mounting the Wood and Carving the Ring.

Mounting the Wood

To mount the wood on the lathe, you will need to use a chuck or a faceplate. A chuck is a device that holds the wood securely in place while it spins on the lathe. A faceplate is a flat metal plate that is screwed onto the end of the wood. This allows you to mount the wood on the lathe and shape it with a variety of tools.

Once you have the wood mounted on the lathe, you can start shaping the ring. Start by using a roughing gouge to remove any excess wood and create a cylinder shape. Be sure to take your time and work slowly so that you don’t accidentally remove too much wood.

Carving the Ring

Once you have a cylinder shape, you can start carving the ring. Use a parting tool to create a groove where you want the ring to be. This will help guide your cuts and ensure that you create a uniform ring.

Next, use a spindle gouge to shape the ring. Start at the top of the ring and work your way down to the bottom. Be sure to keep the tool at a consistent angle and work slowly to create a smooth surface.

As you work, you can use a caliper to measure the diameter of the ring and ensure that it is the correct size. You can also use sandpaper to smooth out any rough spots or imperfections.

Overall, shaping a wooden ring on a lathe can be a fun and rewarding process. With a little practice and patience, you can create beautiful and unique rings that are sure to impress.

Sanding the Ring

Once you have turned your wooden ring on the lathe, sanding is the next crucial step in the process. Sanding the ring will help to smooth out any rough spots, remove any tool marks, and bring out the natural beauty of the wood grain. Here are some tips to help you sand your wooden ring to perfection.

Choosing the Right Sandpaper

Choosing the right sandpaper is important when sanding your wooden ring. You will want to start with a coarse grit sandpaper, such as 120-grit, and work your way up to a finer grit, such as 320-grit or higher. Here is a table to help you choose the right sandpaper for your wooden ring:

Grit Use
120-150 Coarse sanding, removing tool marks, shaping
180-220 Medium sanding, smoothing out rough spots
320-400 Fine sanding, getting a smooth finish

Applying the Sanding Technique

When sanding your wooden ring, it is important to use the right technique. Here are some tips to help you get the best results:

  • Sand with the grain of the wood. Sanding against the grain can cause scratches and damage to the wood.
  • Use a sanding block or a soft object like a cloth to wrap the sandpaper around. This will help you get an even sanding surface and avoid creating uneven spots on the ring.
  • Apply light pressure when sanding. Too much pressure can cause the sandpaper to tear and create uneven spots on the ring.
  • Sand evenly around the ring. Make sure to sand all sides and edges of the ring evenly to avoid creating flat spots or uneven surfaces.

By following these tips, you can sand your wooden ring to a smooth, beautiful finish.

Finishing the Ring

finishing-your-wooden-ring

When it comes to finishing your wooden ring, there are a few things to keep in mind. First, you want to choose a finish that will protect the wood from moisture and wear, while also enhancing its natural beauty. Second, you want to apply the finish carefully and evenly, to avoid any drips or bubbles that could ruin the final product.

Choosing the Right Finish

There are many different finishes you can use for your wooden ring, but some are better suited than others. Here are a few options to consider:

  • Tung oil: This is a popular choice for wooden rings because it is easy to apply and provides a durable, water-resistant finish. Tung oil also brings out the natural beauty of the wood and gives it a warm, amber hue.
  • Shellac: This is another good option for wooden rings because it dries quickly and provides a hard, protective finish. Shellac is also easy to repair if it gets scratched or damaged.
  • Polyurethane: This is a more modern finish that provides a tough, durable coating for your wooden ring. Polyurethane is resistant to water, chemicals, and abrasion, making it a good choice for everyday wear.

Applying the Finish

Once you have chosen your finish, it’s time to apply it to your wooden ring. Here are some tips to help you get the best results:

  • Sand the ring first: Before applying any finish, make sure to sand the ring with a fine-grit sandpaper to smooth out any rough spots and prepare the surface for the finish.
  • Apply in thin coats: It’s better to apply several thin coats of finish rather than one thick coat. This will help the finish dry evenly and avoid any drips or bubbles.
  • Use a brush or cloth: You can apply the finish with a brush or a cloth, depending on your preference. Just make sure to use a clean, lint-free cloth or a high-quality brush to avoid leaving any fibers or bristles behind.
  • Let it dry completely: Make sure to let each coat of finish dry completely before applying the next one. This will ensure that the finish is hard and durable when it’s done.

With these tips in mind, you should be able to finish your wooden ring with a beautiful, durable coating that will protect it for years to come.

Safety Measures

When working with a lathe, it is important to prioritize safety measures to avoid any accidents or injuries. In this section, we will discuss the personal protective equipment and lathe safety practices that you should follow when making wooden rings on a lathe.

Personal Protective Equipment

Wearing the right personal protective equipment (PPE) is crucial when working with a lathe. Here are some essential PPEs that you should wear:

  • Eye protection: Wear safety glasses or a face shield to protect your eyes from any debris that may fly off the lathe.
  • Ear protection: Use earplugs or earmuffs to protect your ears from the loud noise produced by the lathe.
  • Respiratory protection: Wear a dust mask or respirator to protect yourself from inhaling wood dust.
  • Clothing: Avoid wearing loose clothing or jewelry that may get caught in the lathe. Wear close-fitting clothes and tie back long hair.

Lathe Safety Practices

Apart from wearing PPE, there are several safety practices that you should follow when working with a lathe. Here are some of the most important ones:

  • Keep the work area clean: Keep the area around the lathe clean and free of clutter. This will prevent any tripping hazards and make it easier to move around the lathe.
  • Check the lathe before use: Before using the lathe, check for any loose or damaged parts. Make sure that all the guards and safety devices are in place.
  • Secure the workpiece: Always secure the workpiece firmly in place before starting the lathe. This will prevent it from flying off and causing an accident.
  • Start the lathe slowly: Start the lathe at a slow speed and gradually increase it as needed. This will prevent any sudden movements that may cause the workpiece to fly off.
  • Use the right tools: Use only the right tools for the job and make sure that they are sharp and in good condition. Dull or damaged tools can cause accidents.
  • Never leave the lathe unattended: Always stay with the lathe while it is in use. If you need to leave the lathe for any reason, turn it off first.

By following these safety measures, you can ensure a safe and enjoyable experience when making wooden rings on a lathe.

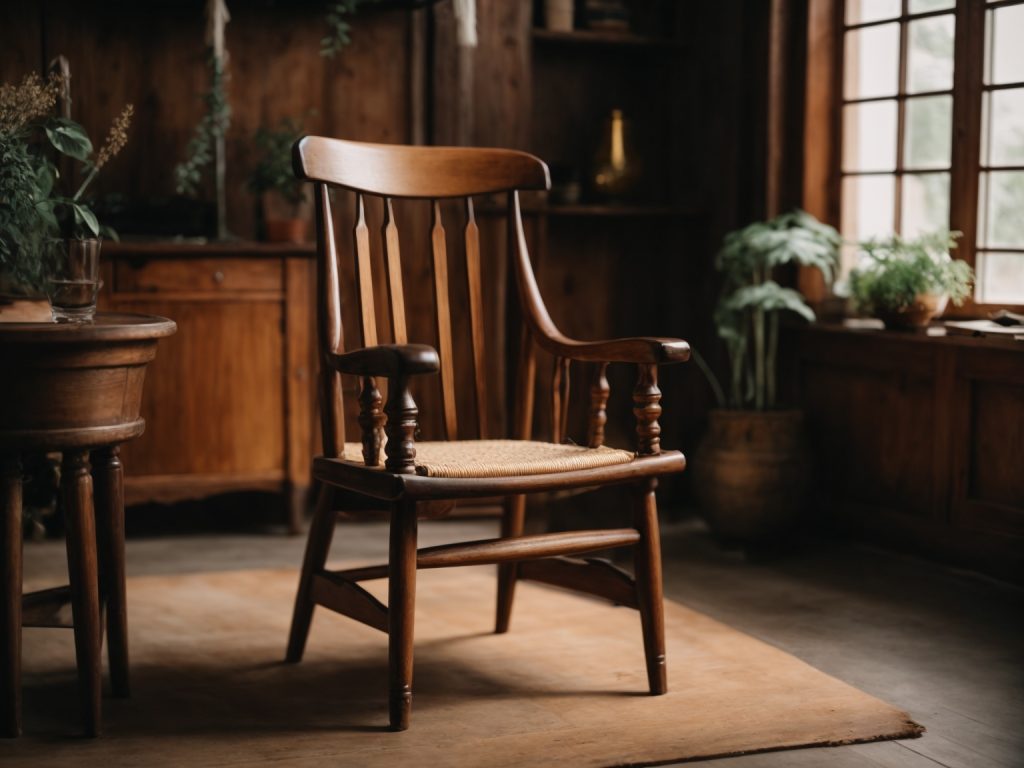
how-to-make-a-wooden-chair-a-beginners-guide-2

How to Make a Wooden Chair: A Beginner's Guide

Making a wooden chair can be a fun and rewarding experience. Not only will you have a functional piece of furniture, but you will also have the satisfaction of knowing that you made it yourself. Whether you are an experienced woodworker or a beginner, building a wooden chair is a great project to take on.

Before you start building your chair, it’s important to have a plan. You can find plans online or in woodworking books and magazines. Make sure to choose a plan that matches your skill level and the tools you have available. Once you have your plan, gather all the necessary materials and tools. You will need wood, screws, glue, clamps, a saw, a drill, and sandpaper, among other things.

Building a wooden chair can be a time-consuming process, but it’s important to take your time and work carefully. Make sure to measure twice and cut once, and always follow the instructions in your plan. With a little patience and effort, you can create a beautiful and functional piece of furniture that you will be proud to use and display in your home.

Understanding the Basics of Woodworking

Woodworking is a rewarding hobby that allows you to create beautiful and functional pieces of furniture. If you’re interested in making a wooden chair, it’s important to understand the basics of woodworking before you get started.

Choosing the Right Wood

The first step in making a wooden chair is to choose the right wood. Hardwoods like maple, oak, and cherry are ideal for furniture-making because they are durable and can be finished to a high shine. Softwoods like pine and cedar can also be used, but they are more prone to dents and scratches.

When selecting wood, look for boards that are straight and free of knots or other defects. You should also consider the grain pattern and color of the wood, as these can affect the appearance of your finished chair.

Tools Required

To make a wooden chair, you will need a variety of tools. Some of the essential tools include:

  • Table saw
  • Band saw
  • Jointer
  • Planer
  • Router
  • Chisels
  • Hand saws
  • Clamps

You will also need sandpaper, wood glue, and finishing materials like stain or varnish.

Before you start using any of these tools, it’s important to read the manufacturer’s instructions and take appropriate safety measures.

Safety Measures

Working with woodworking tools can be dangerous if you’re not careful. To protect yourself, you should wear safety glasses, ear protection, and a dust mask. You should also avoid wearing loose clothing or jewelry that could get caught in the machinery.

When using power tools like saws and routers, make sure the blades are sharp and properly adjusted. Always keep your hands away from the blades and use push sticks or other tools to guide the wood through the machine.

By understanding the basics of woodworking and taking appropriate safety measures, you can create a beautiful and functional wooden chair that will last for years to come.

Designing Your Wooden Chair

how-to-make-a-wooden-chair-a-beginners-guide-2

When it comes to designing your wooden chair, there are a few things to consider to ensure that your final product is both functional and visually appealing. Here are two sub-sections to help you get started:

Sketching a Blueprint

Before you start building your wooden chair, it’s important to sketch out a blueprint of your design. This will help you visualize your final product and make any necessary adjustments before you start cutting your wood.

When sketching your blueprint, consider the overall style of your chair. Do you want a modern or traditional design? Will your chair have a backrest or armrests? These are all important factors to consider when designing your chair.

Deciding Dimensions

Once you have a rough sketch of your design, you’ll need to decide on the dimensions of your chair. This includes the height, width, and depth of your seat, as well as the height and angle of your backrest.

When deciding on your dimensions, consider the average size of the person who will be using the chair. You’ll want to make sure that your chair is comfortable and supportive for the user.

It’s also important to consider the type of wood you’ll be using when deciding on your dimensions. Different types of wood have different strengths and weaknesses, so you’ll need to choose a wood that can support the weight and size of your chair.

By sketching a blueprint and deciding on your dimensions, you’ll be well on your way to designing a wooden chair that is both functional and visually appealing.

Preparing the Wood

Before you start making a wooden chair, it is important to properly prepare the wood. This will ensure that your chair is strong, durable, and looks great. In this section, we will cover the two main steps for preparing the wood: cutting and sanding.

Cutting the Wood

The first step in preparing the wood is to cut it to the correct size and shape. You will need to use a saw to cut the wood into the appropriate pieces for your chair. Make sure to measure and mark the wood carefully before cutting it to avoid mistakes.

When cutting the wood, it is important to use the correct type of saw for the job. A hand saw or a circular saw can be used for most cuts, but a jigsaw may be necessary for more intricate cuts or curves.

Sanding the Wood

Once the wood is cut to the correct size and shape, the next step is to sand it. Sanding the wood will smooth out any rough edges and prepare it for finishing. Start with a coarse grit sandpaper and work your way up to a finer grit for a smooth finish.

When sanding the wood, it is important to sand with the grain of the wood. Sanding against the grain can cause scratches and damage to the wood. Use a sanding block or a power sander for larger pieces of wood to make the job easier.

In conclusion, preparing the wood is an important step in making a wooden chair. By cutting the wood to the correct size and shape and sanding it properly, you will ensure that your chair is strong, durable, and looks great.

Assembling the Chair

Joining the Pieces

Now that you have all the pieces cut and sanded, it’s time to start assembling the chair. Begin by laying out all the pieces and checking that you have everything you need. You will need wood glue, clamps, and screws.

Start by gluing the joints together. Apply a generous amount of wood glue to the joints and use clamps to hold them in place. Make sure to wipe off any excess glue with a damp cloth. Let the glue dry completely, which usually takes about 24 hours.

Once the glue has dried, you can start screwing the pieces together. Use a drill with a screwdriver bit to attach the pieces together. Make sure to pre-drill the holes to prevent the wood from splitting.

Securing the Structure

After you have screwed all the pieces together, it’s time to secure the structure. You want to make sure that the chair is sturdy and will not wobble.

To do this, you can add corner braces to the chair. These are small metal brackets that you can attach to the corners of the chair. They will help to reinforce the structure and prevent it from wobbling.

Another option is to add dowels to the joints. These are small wooden pegs that you can insert into the joints to add extra strength. To do this, you will need to drill holes into the joints and then insert the dowels.

Once you have secured the structure, you can sand the chair to remove any rough edges and apply a finish. You can use a stain or paint to give the chair the look you want.

Congratulations! You have successfully assembled your wooden chair.

Finishing Touches

finishing-touches-2

Applying Wood Finish

Now that you have completed building your wooden chair, it’s time to give it a beautiful finish. Applying a wood finish will not only enhance the look of your chair but also protect it from moisture and wear. There are various types of wood finishes available, such as oil-based, water-based, and wax-based finishes. Choose the one that suits your chair and your preferences.

Before applying the finish, make sure the chair is clean and free of dust. Sand the chair lightly with fine-grit sandpaper to smooth out any rough spots. Apply the finish with a brush or a cloth, following the manufacturer’s instructions. Let the finish dry completely before applying a second coat. Repeat the process until you achieve the desired finish.

Polishing the Chair

Once the finish has dried, you can polish your chair to give it a shiny and smooth appearance. Polishing also helps to protect the finish and make it more durable. There are various polishing products available, such as paste wax, liquid wax, and oil-based polishes.

To polish your chair, apply a small amount of polish to a soft cloth and rub it onto the surface of the chair in a circular motion. Make sure to cover the entire surface evenly. Let the polish dry for a few minutes, then buff the chair with a clean cloth to remove any excess polish.

Remember to polish your chair regularly to maintain its shine and protect the finish. Avoid using abrasive cleaners or harsh chemicals that can damage the finish. With proper care and maintenance, your wooden chair will last for many years to come.

How to Make Wooden Wheels for Toys: A Beginner's Guide

Are you looking to create your own wooden toys? One important aspect of toy-making is crafting the wheels. Wooden wheels can add a classic and charming touch to your toys. However, making them requires some skill and knowledge. In this article, we will guide you through the process of making wooden wheels for your toys.

Choosing the right wood is the first step in making wooden wheels. The type of wood you choose can have a significant impact on the durability, appearance, and overall quality of your wheels. Hardwoods such as maple, oak, and beech are excellent choices for wooden wheels. They are strong and sturdy, making them ideal for toys that will be played with frequently. Softer woods such as pine or cedar may be more prone to wear and tear over time.

Once you have selected the right wood, the next step is to shape the wheels. There are several methods you can use to create wooden wheels, including using a lathe, a jigsaw, or a hand saw. You can also purchase a toy wheel cutter to make the process easier. Whatever method you choose, it is important to take your time and be precise. With a little patience and practice, you can create beautiful and functional wooden wheels for your toys.

Understanding the Basics of Wooden Wheel Making

If you’re into toy-making, you know how important it is to have the right wheels for your project. Wooden wheels are a great option, and they’re easy to make with the right tools and materials. In this section, we’ll cover the basics of wooden wheel making so you can get started on your next toy project.

Types of Wood Suitable for Toy Wheels

The type of wood you choose for your toy wheels is crucial. You want a wood that is strong, durable, and can withstand the wear and tear of playtime. Here are some types of wood that are suitable for toy wheels:

Type of Wood Characteristics
Maple Hard, durable, and has a fine grain
Oak Hard and durable, with a coarse grain
Beech Hard and durable, with a fine grain
Birch Hard and durable, with a fine grain
Ash Hard and durable, with a coarse grain

Essential Tools and Materials

To make wooden wheels, you’ll need some essential tools and materials. Here’s a list of what you’ll need:

  • Wood: Choose a type of wood that is suitable for toy wheels.
  • Saw: You’ll need a saw to cut your wood into the desired shape.
  • Drill: You’ll need a drill to make a hole in the center of your wheel.
  • Sandpaper: You’ll need sandpaper to smooth out any rough edges on your wheel.
  • Axle: You’ll need an axle to attach your wheel to your toy.

Once you have all the necessary tools and materials, you can start making your wooden wheels. With a little practice, you’ll be able to make perfect wheels for all your toy-making projects.

Remember, safety is important when working with tools and machinery. Always wear protective gear and follow all safety guidelines. Now that you know the basics of wooden wheel making, it’s time to get started on your next toy project.

Designing Your Wooden Wheel

When it comes to designing wooden wheels for your toy, there are a few important factors to consider. In this section, we’ll cover how to determine the size of your wheel and choose the style that best fits your toy.

Determining the Size

The size of your wooden wheel will depend on the size of your toy and the function you want the wheel to serve. For example, if you’re making a toy car, you’ll want to choose a wheel size that is proportional to the size of the car. On the other hand, if you’re making a toy wagon, you may want to choose a larger wheel size to make it easier to pull.

To determine the size of your wheel, you’ll need to consider the diameter and width. The diameter is the distance across the wheel from one side to the other, while the width is the distance from the front of the wheel to the back. You can use a ruler or measuring tape to measure these dimensions.

Choosing the Style

There are many different styles of wooden wheels to choose from, each with its own unique look and function. Here are a few popular styles to consider:

  • Solid Wheels: These wheels are made from a single piece of wood and are great for toys that don’t require a lot of movement.

  • Spoked Wheels: These wheels have spokes that connect the hub to the rim, giving them a more intricate look. They’re great for toys that require a lot of movement, like cars and wagons.

  • Flanged Wheels: These wheels have a flange on one side that helps keep them in place. They’re great for toys that need to move in a straight line, like trains.

When choosing the style of your wooden wheel, consider the overall look of your toy and the function you want the wheel to serve. Remember to keep the size of your toy in mind as well, as larger toys may require larger wheels to function properly.

By considering the size and style of your wooden wheel, you can create a toy that not only looks great but functions properly as well.

Creating the Wheel Blueprint

Before you start making wooden wheels for your toys, you need to create a blueprint. This will help you determine the size and shape of your wheels, as well as the number of wheels you need for your toy.

To create a blueprint, follow these steps:

  1. Determine the size of the wheels you need. The size of the wheels will depend on the size of your toy and the purpose of the wheels. For example, if you are making a toy car, you may need larger wheels than if you are making a toy train.

  2. Decide on the shape of the wheels. Wooden wheels can be round or have a specific shape, such as square or hexagonal. The shape of the wheels will depend on the design of your toy.

  3. Determine the number of wheels you need. Most toys require at least two wheels, but some may require more. Consider the weight and balance of your toy when deciding on the number of wheels.

  4. Draw your blueprint. Use a ruler and pencil to draw the size and shape of your wheels. Label each wheel with its size and shape, and indicate the number of wheels you need for your toy.

  5. Review your blueprint. Make sure your blueprint is accurate and includes all the necessary information. You may want to make a few copies of your blueprint in case you need to make changes.

Creating a blueprint may seem like a small step, but it can save you time and frustration later on. By having a clear plan, you can ensure that your wooden wheels fit your toy perfectly and function as intended.

Cutting the Wheel

When it comes to making wooden wheels for toys, cutting the wheel is one of the most crucial steps. You want to make sure that your wheel is perfectly round and smooth to ensure that it rolls smoothly. Here are a few tips to help you cut your wooden wheel:

Using a Circle Cutter

One of the easiest ways to cut a wooden wheel is to use a circle cutter. This tool allows you to cut a perfect circle out of your wooden block. To use a circle cutter, simply adjust the size of the cutter to the diameter of your desired wheel, and then attach it to your drill press. Once you have the cutter set up, you can start cutting your wooden wheel.

Using a Hole Saw

Another option for cutting wooden wheels is to use a hole saw. This tool is similar to a circle cutter, but it has teeth that allow it to cut through the wood more easily. To use a hole saw, simply attach it to your drill press, and then adjust the size of the saw to the diameter of your desired wheel. Once you have the saw set up, you can start cutting your wooden wheel.

Using a Bandsaw

If you don’t have a drill press, you can also cut your wooden wheel using a bandsaw. This tool allows you to cut curves and circles more easily than a regular saw. To use a bandsaw, simply set the blade to the diameter of your desired wheel, and then slowly cut around the wooden block until you have a perfect circle.

No matter which method you choose, it’s important to take your time and be patient when cutting your wooden wheel. Remember, the key to a smooth and perfectly round wheel is to take your time and make sure that each cut is precise.

Sanding and Smoothing

When it comes to making wooden wheels for toys, sanding and smoothing are important steps to ensure a quality finish. Here are some tips and techniques to help you achieve a smooth and polished look for your wooden wheels.

Choosing the Right Sandpaper

Choosing the right sandpaper can make a big difference in the quality of your finished product. Here are some things to consider when selecting sandpaper:

  • Grit: The grit of sandpaper refers to how coarse or fine the abrasive particles are. Use a coarse grit, such as 80 or 100, to remove rough surfaces and shape the wheel. Then, move to a finer grit, such as 220 or 320, to smooth out the surface and prepare it for finishing.
  • Material: Sandpaper is available in a variety of materials, including aluminum oxide, garnet, and silicon carbide. For woodworking projects, aluminum oxide is a good choice because it is durable and long-lasting.
  • Type: Sandpaper comes in sheets, discs, and belts. Sheets are good for hand sanding, while discs and belts are better for power sanding.

Techniques for a Smooth Finish

Once you have selected the right sandpaper, it’s time to start sanding. Here are some techniques to help you achieve a smooth finish:

  • Sand with the grain: Sanding against the grain can create scratches and rough spots. Always sand with the grain of the wood to achieve a smooth finish.
  • Use a sanding block: A sanding block helps to distribute pressure evenly across the surface of the wood, preventing uneven sanding and gouging.
  • Change sandpaper often: As sandpaper becomes clogged with sawdust and debris, it becomes less effective. Change the sandpaper often to ensure that you are getting the best results.
  • Finish with a fine grit: Once you have sanded with a coarse grit, move to a finer grit to smooth out any remaining rough spots. A final sanding with a fine grit, such as 220 or 320, will prepare the surface for finishing.

By following these tips and techniques, you can achieve a smooth and polished finish for your wooden wheels, giving your toys a professional look and feel.

Adding Details and Finishing Touches

After making the wooden wheels for your toy, it’s time to add some details and finishing touches to make it look more appealing. Here are some tips on how to do it.

Carving Patterns

One way to add details to your wooden wheels is by carving patterns on them. You can use a carving knife, chisel, or rotary tool to create intricate designs on the surface of the wheel. You can also use a woodburning tool to add some texture or create a unique pattern.

Before carving, make sure to draw your design on the wheel using a pencil or marker. This will serve as your guide as you carve. Start with small cuts and work your way up to larger ones. Be careful not to cut too deep or you might ruin the wheel.

Painting and Varnishing

Painting and varnishing your wooden wheels can also add some color and protection to them. You can use acrylic or oil-based paint to color your wheels. Make sure to choose a paint that is safe for children’s toys.

Before painting, sand the surface of the wheel to remove any rough spots or splinters. Apply a primer first to help the paint adhere better. Once the primer is dry, you can start painting your design. Apply multiple coats if needed.

After painting, you can apply a clear varnish to protect the paint and give the wheel a glossy finish. Apply the varnish using a brush or spray can. Let it dry completely before handling the wheel.

By following these tips, you can make your wooden wheels look more attractive and durable. Have fun adding your own personal touch to your toy!

Assembling the Toy Wheels

Once you have made your wooden toy wheels, it’s time to assemble them onto your toy. Here are some tips for attaching the wheels and ensuring mobility.

Attaching to the Toy

To attach the wheels to your toy, you will need to drill holes in the bottom of your toy where you want the wheels to go. Make sure the holes are the same size as the dowels on your wheels. You can use a drill press or a hand drill for this step.

Once you have drilled the holes, insert the dowels into the holes and secure them with wood glue. Make sure the wheels are level and straight before the glue dries. You can use clamps to hold the wheels in place while the glue dries.

Ensuring Mobility

To ensure your toy can move smoothly, you need to make sure the wheels are aligned properly and can rotate freely. Here are some tips:

  • Check that the wheels are aligned straight and not wobbling.
  • Sand the edges of the wheels to ensure they rotate smoothly.
  • If the wheels are too tight, sand the dowels slightly to make them fit better.
  • If the wheels are too loose, add a small amount of wood glue to the dowels before inserting them into the holes.

By following these tips, you can assemble your wooden toy wheels onto your toy and ensure it can move smoothly.

Safety Precautions

When making wooden wheels for toys, it is important to take certain safety precautions. Here are some things to keep in mind during the making process and for the end user.

During the Making Process

  1. Wear safety glasses and a dust mask to protect your eyes and lungs from wood dust.
  2. Use sharp tools to reduce the risk of slipping and injuring yourself.
  3. Keep your work area clean and organized to prevent tripping hazards and accidents.
  4. Follow the manufacturer’s instructions when using power tools, and always unplug them when not in use.
  5. Avoid wearing loose clothing or jewelry that could get caught in the machinery.

For the End User

  1. Make sure the toy is age-appropriate and meets safety standards.
  2. Check the toy regularly for any damage or wear and tear that could cause harm.
  3. Always supervise young children when they are playing with toys to prevent choking, strangulation, or other accidents.
  4. Keep small parts and toys with magnets away from young children who may swallow them.
  5. Store toys in a safe place when not in use to prevent accidents.

By following these safety precautions, you can create and enjoy wooden toys that are both beautiful and safe for children to play with.

How to Make a Wooden Crate: A Beginner's Guide

If you’re looking for a simple and versatile storage solution, wooden crates are a great option. Not only are they functional, but they can also add a rustic and charming touch to your home decor. In this article, we’ll show you how to make your own wooden crate with just a few basic tools and materials.

Before we get started, it’s important to note that safety should always be your top priority when working with power tools. Be sure to wear appropriate safety gear and follow all manufacturer’s instructions. With that in mind, let’s begin by selecting the wood for your crate. You can use new or reclaimed wood, but keep in mind that reclaimed wood may require extra preparation before use. Once you have your wood, you’ll need to measure and cut it to size using a saw. From there, you can assemble your crate using nails or screws and finish it with paint or stain if desired.

Understanding Wood Types

When it comes to making wooden crates, choosing the right type of wood is important. Here, we’ll discuss the two main types of wood: hardwood and softwood.

Hardwood

Hardwood comes from deciduous trees, which means that they shed their leaves annually. Hardwood is generally denser and more durable than softwood, making it a good choice for crates that will be used for heavy items or that need to withstand wear and tear. Some common types of hardwood used for crates include oak, maple, and walnut.

Softwood

Softwood comes from evergreen trees, which means that they keep their leaves year-round. Softwood is generally less dense and less durable than hardwood, but it is often more affordable and easier to work with. Some common types of softwood used for crates include pine, cedar, and spruce.

When choosing the type of wood for your crate, consider the weight and fragility of the items you will be storing or shipping. If you’re unsure which type of wood to use, consult with a professional or do some research to ensure you make the best choice for your specific needs.

Remember to also consider the environmental impact of your wood choice. Some types of wood are more sustainable than others, so do your research to ensure you’re making an eco-friendly choice.

Tools Required

To make a wooden crate, you will need a few essential tools. Here are the tools you will need:

Saw

The saw is the most important tool you will need to make a wooden crate. You can use a circular saw, a hand saw, or a miter saw. A circular saw is the most versatile and efficient option. It can make straight cuts and angled cuts, making it ideal for cutting the slats and end pieces of the crate. A hand saw is a good option if you don’t have access to a power saw, but it will take longer to make the cuts. A miter saw is great for making precise cuts, but it’s not necessary for making a simple wooden crate.

Hammer

A hammer is another essential tool that you will need to make a wooden crate. You will use it to drive nails into the wood. A claw hammer is the most common type of hammer and is suitable for most woodworking projects. If you plan on making a lot of wooden crates, you might want to invest in a framing hammer, which is larger and heavier and can drive nails more efficiently.

Nails

You will need nails to hold the wooden crate together. The size of the nails you use will depend on the thickness of the wood you are using. For a standard wooden crate made from 1×3 boards, you can use 1-inch brad nails or 2-inch brad nails. Brad nails are thin and small, making them ideal for woodworking projects. You can also use screws instead of nails, but nails are easier to work with and will give your crate a more traditional look.

That’s it! With these tools, you’ll be able to make a classic wooden crate in no time.

Choosing the Right Size

When it comes to making a wooden crate, choosing the right size is crucial. You want to make sure that the crate is big enough to hold whatever you plan on putting inside, but not so big that it becomes cumbersome to handle.

One way to determine the right size is to measure the items you plan on putting in the crate. Make sure to measure the length, width, and height of each item, and then add a few extra inches to each measurement to give yourself some wiggle room.

Another way to determine the right size is to consider the purpose of the crate. If you plan on using it for storage, you may want to make it larger so that it can hold more items. If you plan on using it for shipping, you may want to make it smaller so that it can fit in the back of a truck or on a pallet.

It’s also important to consider the size of the materials you plan on using to build the crate. If you have limited amounts of wood, you may need to adjust the size of the crate accordingly.

Here are some tips to keep in mind when choosing the right size for your wooden crate:

  • Make sure to measure the items you plan on putting in the crate and add a few extra inches to each measurement.
  • Consider the purpose of the crate and adjust the size accordingly.
  • Take into account the size of the materials you plan on using to build the crate.

Cutting the Wood

When it comes to making a wooden crate, cutting the wood is an important step. It is essential to ensure that the wood is cut to the right length and width, so the crate is the right size and shape.

To begin, gather all the necessary tools and materials, including a saw, measuring tape, and the wood you need for the crate. Measure and mark the wood according to the dimensions you want for your crate.

When cutting the wood, make sure to use a saw that is appropriate for the type of wood you are using. A handsaw or circular saw is ideal for cutting softwood, while a jigsaw is better for cutting hardwood.

Take your time when cutting the wood and make sure to follow your measurements precisely. It’s better to cut the wood a little longer than needed so that you can trim it down to the exact size later.

If you are making multiple crates, it’s a good idea to cut all the wood at once to ensure consistency in size and shape. You can use a table saw or miter saw to make the process faster and more efficient.

Remember to wear protective gear, such as safety glasses and gloves, when cutting the wood to avoid any accidents or injuries. With careful planning and precision cutting, you can create a wooden crate that is the perfect size for your needs.

Assembling the Crate

Once you have all the materials cut to size, it’s time to assemble your wooden crate. This section will cover the two main steps of building the frame and attaching the panels.

Building the Frame

To start building the frame, lay out two of the longer slats parallel to each other on a flat surface. Then, place the shorter slats between them, perpendicular to the longer slats. Make sure the ends of the shorter slats are flush with the longer slats.

Next, use wood glue to attach the shorter slats to the longer slats. Apply a generous amount of glue to the ends of the shorter slats and press them firmly against the longer slats. Use clamps to hold the pieces together while the glue dries.

Once the glue is dry, reinforce the joints by drilling pilot holes and driving wood screws through the longer slats and into the ends of the shorter slats. Repeat this process for the other end of the crate.

Attaching the Panels

With the frame complete, it’s time to attach the panels. Start by placing one of the panels on one side of the frame. Make sure the edges of the panel are flush with the edges of the frame.

Use a nail gun or hammer and nails to attach the panel to the frame. Drive nails through the panel and into the frame every few inches. Repeat this process for the other three panels.

Once all the panels are attached, reinforce the joints by driving wood screws through the panels and into the frame. Make sure to countersink the screws so they don’t stick out and snag on anything.

And that’s it! Your wooden crate is now complete and ready to be used.

Sanding and Finishing

Sanding Process

Before applying any finish to your wooden crate, it’s essential to sand it properly to ensure a smooth surface. Here are the steps you need to follow to sand your crate:

  1. Start by sanding the rough spots and edges with a coarse-grit sandpaper (around 80 grit). Use a sanding block to keep the surface even and avoid creating dips or uneven spots.
  2. Once the rough spots are gone, switch to a medium-grit sandpaper (around 120 grit) to smooth out the surface. Sand in the direction of the wood grain to avoid creating scratches or marks on the surface.
  3. Finally, use a fine-grit sandpaper (around 220 grit) to give your crate a smooth finish. Sand lightly and evenly to avoid creating any scratches or marks.

After sanding, use a tack cloth to remove any dust or debris left on the surface.

Applying Finish

Now that your crate is sanded and clean, it’s time to apply the finish. Here are some popular options you can choose from:

  • Stain: Staining your crate can add color and depth to the wood, highlighting the natural grain. Apply the stain with a brush or cloth, following the manufacturer’s instructions. Let it dry completely before applying any sealer or topcoat.
  • Paint: Painting your crate can give it a uniform color and protect it from moisture and scratches. Use a primer first, then apply the paint with a brush or roller. Let it dry completely before using the crate.
  • Varnish: Varnishing your crate can give it a shiny and protective finish. Apply the varnish with a brush or cloth, following the manufacturer’s instructions. Let it dry completely before using the crate.

No matter what finish you choose, make sure to apply it evenly and let it dry completely before using the crate. You can also add some decorative touches like stencils or decals to personalize your crate.

Safety Precautions

When building a wooden crate, safety should be your top priority. Here are some important safety precautions to take:

Proper Handling

When handling wood, it’s important to be careful and use common sense. Here are some tips to keep in mind:

  • Wear gloves to protect your hands from splinters and cuts.
  • Lift with your legs, not your back, to avoid injury.
  • Use caution when using power tools and follow all manufacturer’s instructions.
  • Keep your work area clean and free of clutter to avoid tripping hazards.

Eye Protection

Woodworking can create a lot of dust and debris, which can be harmful to your eyes. Here are some tips to protect your eyes:

  • Wear safety glasses or goggles to protect your eyes from flying debris.
  • Use a dust mask or respirator to protect your lungs from dust and other particles.
  • Avoid wearing loose clothing or jewelry that could get caught in machinery.

By following these safety precautions, you can ensure that your woodworking project is not only successful, but also safe.

How to Make a Wooden Boat Watertight: Tips and Tricks

If you’re a wooden boat owner, you know how important it is to keep your vessel watertight. A leaky boat can be a major problem, causing damage to the boat and putting you in danger. Fortunately, there are steps you can take to make your wooden boat watertight. In this article, we will provide you with some tips and tricks on how to do just that.

One of the most important things you can do to make your wooden boat watertight is to properly seal the wood. This involves using the right materials and techniques to ensure that water cannot penetrate the wood. We will provide you with step-by-step instructions on how to seal your boat, including how to prepare the surface, clean the boat, and apply sealant.

Another key factor in keeping your wooden boat watertight is understanding the conditions that can affect the wood. Humidity, temperature, and exposure to the elements can all impact the wood and its ability to keep water out. We will discuss these factors in detail and provide you with tips on how to protect your boat from these conditions. With the right knowledge and techniques, you can keep your wooden boat watertight and enjoy many years of safe and enjoyable boating.

Understanding Wood and Water

The Nature of Wood

Wood is a natural material that can absorb and release moisture. It is a porous material that can expand and contract with changes in humidity and temperature. Wood is also an anisotropic material, which means that it has different properties in different directions. The grain of the wood affects its strength, stiffness, and durability.

Different types of wood have different properties. Some woods are more resistant to decay and insects than others. Some woods are harder and denser than others. Some woods are more stable and less likely to warp or crack than others.

How Water Affects Wood

When wood absorbs water, it swells. This can cause the wood to crack, warp, or split. If the wood dries out too quickly, it can shrink and lose its strength. If the wood stays wet for too long, it can rot and decay.

Water can also affect the strength of the wood. Wet wood is weaker than dry wood. The presence of water can also accelerate the growth of fungi and bacteria that can cause decay.

To make a wooden boat watertight, you need to understand how water affects wood and take steps to protect the wood from water damage. This can involve using the right type of wood, sealing the wood with a waterproof coating, and maintaining the boat to prevent water from entering the wood.

Choosing the Right Wood

When it comes to making a wooden boat watertight, choosing the right wood is crucial. The type of wood you use will determine the durability, strength, and overall quality of your boat. In this section, we’ll discuss the different types of wood you can use for your boat, as well as the benefits of using hardwood.

Types of Wood

There are several types of wood that are commonly used for boat building. Here are some of the most popular:

  • Cedar: Cedar is a lightweight and durable wood that is known for its resistance to rot and insects. It is a popular choice for small boats and canoes.

  • Mahogany: Mahogany is a hardwood that is prized for its strength, durability, and beauty. It is commonly used for larger boats and yachts.

  • Teak: Teak is a hardwood that is known for its resistance to water and rot. It is a popular choice for decks and other areas of the boat that are exposed to the elements.

  • Pine: Pine is a softwood that is lightweight and easy to work with. It is a popular choice for small boats and canoes.

Benefits of Using Hardwood

While softwoods like pine are popular for small boats, hardwoods are often the preferred choice for larger boats and yachts. Here are some of the benefits of using hardwood:

  • Strength: Hardwoods like mahogany and teak are much stronger than softwoods like pine. This makes them ideal for larger boats that need to withstand the rigors of the open sea.

  • Durability: Hardwoods are also more durable than softwoods, which means they are less likely to warp, crack, or rot over time.

  • Beauty: Hardwoods like mahogany and teak are prized for their beauty and natural grain patterns. They can add a touch of elegance to any boat.

When choosing the right wood for your boat, it’s important to consider your budget, the size of your boat, and the type of water you’ll be sailing in. With the right wood and proper maintenance, you can ensure that your wooden boat will be watertight and last for many years to come.

Preparation of the Wood

Before you can make your wooden boat watertight, you need to prepare the wood. This involves cleaning and sanding the wood to ensure that it is free from dirt, debris, and any previous coatings that may interfere with the sealing process.

Cleaning the Wood

The first step in preparing the wood is to clean it thoroughly. This can be done using soap and water or a specialized wood cleaner. Be sure to remove any dirt, grime, or other debris that may be on the surface of the wood. You can use a scrub brush or a sponge to help with the cleaning process.

After cleaning, rinse the wood thoroughly with clean water and allow it to dry completely before moving on to the next step.

Sanding the Wood

Once the wood is clean and dry, it’s time to sand it. Sanding is important because it helps to create a smooth surface that will allow the sealing agent to adhere properly. Use a fine-grit sandpaper to sand the surface of the wood. Sand in the direction of the grain to avoid damaging the wood.

After sanding, wipe the wood with a clean cloth to remove any dust or debris. You can also use a vacuum cleaner to remove any remaining dust particles.

By properly preparing the wood, you can ensure that it is ready for the sealing process. This will help to make your wooden boat watertight and protect it from damage caused by water and moisture.

Sealing Techniques

To make your wooden boat watertight, you need to use the right sealing techniques. Two popular methods are applying a wood sealer and using marine varnish.

Applying a Wood Sealer

A wood sealer is a protective coating that penetrates the wood to prevent moisture from seeping in. Here are the steps to apply a wood sealer to your boat:

  1. Sand the wood surface to remove any previous finish or rough spots.
  2. Clean the surface with a damp cloth to remove any dust or debris.
  3. Apply the wood sealer with a brush or roller, following the manufacturer’s instructions.
  4. Allow the sealer to dry completely before applying additional coats.

Using a wood sealer is ideal for protecting the wood against moisture, but it may not provide long-term protection against UV rays and other weather elements.

Using Marine Varnish

Marine varnish is a clear, protective coating that provides long-lasting protection against water, UV rays, and other weather elements. Here are the steps to apply marine varnish to your boat:

  1. Sand the wood surface to remove any previous finish or rough spots.
  2. Clean the surface with a damp cloth to remove any dust or debris.
  3. Apply the marine varnish with a brush or roller, following the manufacturer’s instructions.
  4. Allow the varnish to dry completely before applying additional coats.

Marine varnish is a popular choice for sealing wooden boats because it provides long-lasting protection against the elements. However, it can be more expensive than a wood sealer.

By using these sealing techniques, you can make your wooden boat watertight and protect it from moisture and other weather elements.

Maintenance and Care

Regular Inspection

To keep your wooden boat watertight, regular inspection is crucial. You should inspect your boat at least once a year, preferably before the boating season starts. During the inspection, check for any cracks, splits, or holes in the wood. Pay special attention to the seams and joints, as they are the most vulnerable areas.

Make sure to inspect the boat’s exterior and interior, including the hull, deck, and cabin. Look for any signs of rot, mildew, or mold. If you notice any of these issues, take immediate action to prevent them from spreading.

Timely Repairs

If you find any damage during the inspection, repair it as soon as possible. Delaying repairs can lead to more significant problems down the line. Use a high-quality marine sealant or epoxy to fill any cracks or holes. Sand the surface smooth after the sealant dries.

Regularly check the boat’s hardware, such as cleats, winches, and hatches. Make sure they are secure and not leaking. Replace any damaged hardware immediately.

Additionally, keep your boat clean and dry. Wipe down the interior and exterior after each use. Use a cover or tarp to protect the boat from the elements when not in use.

By following these maintenance and care tips, you can ensure your wooden boat remains watertight and in good condition for years to come.

Safety Measures

When working on your wooden boat, it’s important to prioritize safety measures to prevent accidents and injuries. Here are some safety tips to keep in mind:

Proper Ventilation

When applying sealants or paints to your boat, make sure to work in a well-ventilated area. This will help to prevent the buildup of toxic fumes that can be harmful to your health. If you’re working in an enclosed space, consider using a fan or wearing a respirator to help circulate the air.

Using Protective Gear

To protect yourself from harmful chemicals and materials, it’s important to wear the appropriate protective gear. This includes gloves, safety glasses, and a dust mask. When working with epoxy resin, make sure to wear a respirator to prevent inhalation of harmful fumes.

It’s also important to wear appropriate clothing that covers your skin to prevent contact with the sealants and paints. Avoid wearing loose clothing or jewelry that can get caught in machinery or tools.

By following these safety measures, you can ensure that your boat maintenance is done safely and effectively.