Tag Archives: good working order

Understanding the Problem

How to Make Wooden Drawers Slide Easier: Simple Tips and Tricks

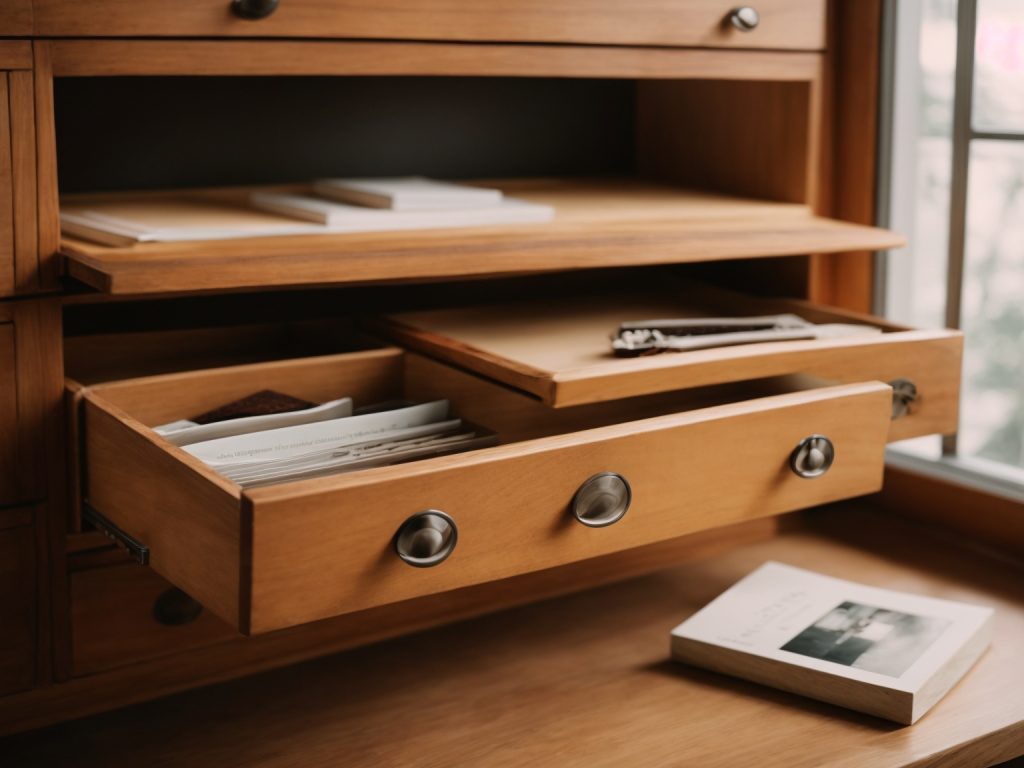
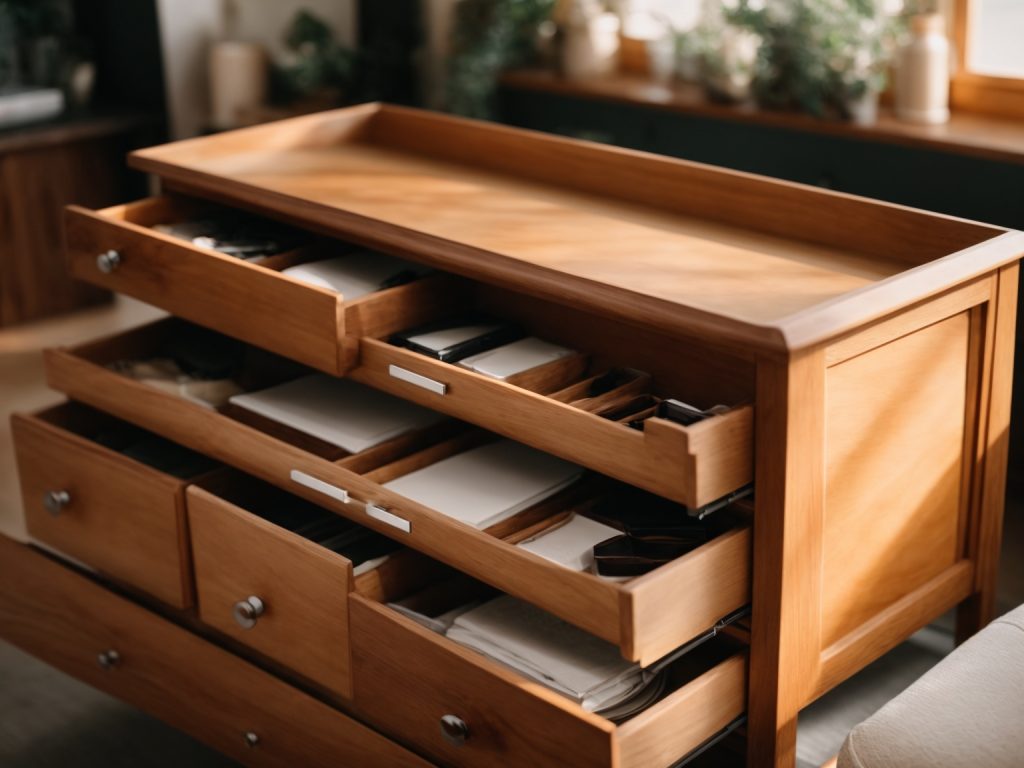
Are you tired of struggling to open and close your wooden drawers? Sticky drawers can be frustrating and time-consuming, especially when you use them regularly. Fortunately, there are simple and affordable ways to make your wooden drawers slide more easily.

One common cause of sticky drawers is debris or material that has jammed the drawer and prevents it from sliding properly. Before attempting any fixes, check the guides for any paper or other material that may be causing the issue. If you find any debris, remove it carefully to avoid damaging the drawer or the guides.

Understanding the Problem

Understanding the Problem

When your wooden drawers start to stick, it can be frustrating and time-consuming to open and close them. Fortunately, there are several ways to make wooden drawers slide more easily. Before you can fix the problem, it’s important to understand what’s causing it. Here are some things to consider:

Identifying Sticking Points

The first step in fixing sticking drawers is to identify where the problem is occurring. Is the drawer sticking when you try to open or close it? Is it rubbing against the sides of the cabinet or the other drawers? Is it getting caught on something inside the drawer itself? Once you know where the sticking point is, you can start to address the problem.

Assessing Drawer Material

Another important factor to consider is the material your drawers are made of. Different types of wood and finishes can affect how easily your drawers slide. For example, unfinished wood may be more prone to swelling and warping, which can cause drawers to stick. If your drawers are made of a softer wood, they may be more likely to wear down over time, causing the tracks to become misaligned.

By understanding the problem and assessing the material, you can start to take steps to make your wooden drawers slide more easily. From lubricating the tracks to sanding down the sides of the drawer, there are several simple fixes you can try to get your drawers working smoothly again.

Gathering Necessary Tools

Gathering Necessary Tools

Before you start fixing your wooden drawers, you need to gather some essential tools. Here are the tools you will need to make your wooden drawers slide easier:

Choosing the Right Sandpaper

To make your wooden drawers slide easier, you may need to sand the sides of the drawers. You will need to choose the right sandpaper to get the job done. Here are some things to consider when choosing sandpaper:

  • Grit: The grit of sandpaper is determined by the number of abrasive particles per square inch. The higher the number, the finer the grit. For sanding wooden drawers, you will need medium/fine grit sandpaper.
  • Type: There are different types of sandpaper, including aluminum oxide, silicon carbide, and garnet. For sanding wooden drawers, you will need aluminum oxide sandpaper.
  • Backing: Sandpaper can be backed with paper or cloth. Paper-backed sandpaper is cheaper, but it wears out quickly. Cloth-backed sandpaper is more durable but more expensive.

Selecting a Suitable Wax

Wax can help lubricate the sides of your wooden drawers and make them slide easier. Here are some things to consider when selecting a suitable wax:

  • Type: There are different types of wax, including beeswax, paraffin wax, and carnauba wax. Beeswax is a popular choice for lubricating wooden drawers.
  • Form: Wax comes in different forms, including paste, liquid, and spray. Paste wax is the most common form for lubricating wooden drawers.
  • Application: You will need a cloth or brush to apply the wax to the sides of your wooden drawers. Make sure to apply the wax evenly and let it dry before testing the drawers.

By gathering the necessary tools, you can make your wooden drawers slide easier and improve the functionality of your furniture.

Preparation Process

Before you start making your wooden drawers slide easier, you need to prepare them properly. This section will guide you through the preparation process, which includes emptying the drawers and removing them from the cabinet.

Emptying the Drawers

The first step in preparing your wooden drawers for easier sliding is to empty them. Remove all the items from the drawers and place them in a safe place. This will make it easier for you to work on the drawers without any obstructions.

Removing the Drawers

Once you have emptied the drawers, you need to remove them from the cabinet. Depending on the type of drawer you have, this may involve removing screws or pulling out the drawer from its runners. Refer to the manufacturer’s instructions or seek professional help if you are unsure how to remove the drawers safely.

Once you have removed the drawers, inspect them for any damage or wear and tear. If you notice any issues, such as loose joints or broken parts, you may need to repair or replace them before proceeding with the sliding process.

By properly preparing your wooden drawers, you can ensure that you have a smooth and hassle-free experience when making them slide easier.

Smoothening the Surfaces

If your wooden drawers are sticking or not sliding smoothly, one of the reasons could be rough surfaces. The edges of the drawers might be rough or uneven, causing friction and making it difficult for the drawers to slide in and out. Smoothening the surfaces of the drawers can help reduce friction and make them slide easier. Here are some tips on how to do it:

Sanding the Drawer Edges

The first step in smoothening the surfaces of your wooden drawers is to sand the edges. You can use sandpaper or a sanding block to sand the edges of the drawers. Start with a coarse grit sandpaper and then move to a finer grit. Sand the edges until they are smooth and even. Be careful not to sand too much, as this can damage the wood.

Cleaning After Sanding

After sanding the edges of the drawers, it’s important to clean them thoroughly. Use a soft cloth or a vacuum cleaner to remove any dust or debris from the drawers. You can also use a damp cloth to wipe down the drawers. Make sure the drawers are completely dry before moving on to the next step.

By smoothening the surfaces of your wooden drawers, you can reduce friction and make them slide easier. Sanding the edges and cleaning them afterwards is a simple and effective way to achieve this.

Applying the Solution

Once you have identified the cause of your wooden drawers sticking, it’s time to apply the solution. Here are the steps to follow:

Waxing the Drawer Edges

One way to make wooden drawers slide easier is by applying furniture wax to the edges of the drawers. This helps to reduce friction between the drawer and the frame. Here’s how to do it:

  1. Remove the drawers from the frame and clean them thoroughly with a dry cloth.
  2. Apply a thin layer of furniture wax to the edges of the drawers using a clean cloth. Be sure to cover the entire surface evenly.
  3. Let the wax dry for a few minutes, then buff it with a clean cloth to remove any excess.

Reinstalling the Drawers

Once you have waxed the edges of the drawers, it’s time to reinstall them. Here are the steps to follow:

  1. Clean the frame thoroughly with a dry cloth to remove any dust or debris.
  2. Slide the drawers back into the frame, making sure they are aligned properly.
  3. Test the drawers to ensure they slide smoothly. If they still stick, you may need to adjust the alignment or apply more wax.

By following these simple steps, you can make your wooden drawers slide easier and avoid the frustration of sticky drawers. Remember to clean and maintain your drawers regularly to keep them in good condition.

Maintenance Tips

To ensure your wooden drawers slide smoothly, it’s important to perform regular maintenance. Here are some tips to keep your drawers in good working order.

Regular Cleaning

Dirt and debris can accumulate in the tracks of your drawers, causing them to stick and slide less easily. To prevent this, make sure to clean out the tracks regularly. You can use a soft brush or cloth to remove any debris, and then wipe the tracks down with a damp cloth.

Periodic Waxing

Periodic waxing can help reduce friction and make your drawers slide more easily. To wax your drawers, you can use a paraffin wax or a specialized drawer wax. Apply the wax to the tracks and the sides of the drawers, and then use a soft cloth to buff it in. Be sure to follow the manufacturer’s instructions when using a specialized wax.

By following these maintenance tips, you can keep your wooden drawers sliding smoothly for years to come.

How to Make a Wooden Bench with a Back: A Beginner's Guide

Looking to add a comfortable and stylish bench to your outdoor space? A wooden bench with a back is a great choice! Not only does it provide a comfortable place to sit, but it also adds a touch of charm to your garden or patio. In this article, we’ll walk you through the steps to make your own wooden bench with a back.

To get started, you’ll need some basic tools and materials. The good news is that you don’t need to be an expert woodworker to make this bench. With just a few tools and some basic carpentry skills, you can create a beautiful and functional piece of furniture that will last for years to come. In the next section, we’ll go over the tools and materials you’ll need to get started.

Choosing the Right Wood

When it comes to building a wooden bench with a back, choosing the right type of wood is crucial. You want to select a sturdy and durable wood that can withstand outdoor weather conditions and last for years. Here are some factors to consider when choosing the right wood for your bench.

Types of Wood

There are several types of wood that are commonly used for outdoor furniture, but not all of them are suitable for a bench with a back. Here are some of the best options:

  • Cedar: Cedar is a popular choice for outdoor furniture because it is naturally resistant to rot and insects. It also has a beautiful natural color that can be left untreated or stained.
  • Redwood: Redwood is another durable and beautiful option for outdoor furniture. It is naturally resistant to decay and insects and has a rich, reddish color.
  • Teak: Teak is a high-end option for outdoor furniture because it is extremely durable and resistant to water, rot, and insects. It also has a beautiful golden color that can be maintained with regular oiling.
  • Pressure-treated pine: Pressure-treated pine is a more affordable option for outdoor furniture. It is treated with chemicals to resist decay and insects, but it may not last as long as other types of wood.

Wood Treatment

Even if you choose a naturally resistant wood like cedar or redwood, it is still a good idea to treat your bench with a protective finish to extend its lifespan. Here are some options:

  • Stain: Staining your bench can enhance its natural color and protect it from UV rays and water damage. Choose a stain that is specifically designed for outdoor use.
  • Paint: Painting your bench can give it a unique look and protect it from the elements. However, paint may peel or crack over time, so it may require more maintenance than other finishes.
  • Sealant: A clear sealant can protect your bench from water damage and UV rays without changing its color. Be sure to choose a sealant that is specifically designed for outdoor use.

By considering the type of wood and the right treatment, you can ensure that your wooden bench with a back will withstand the test of time and provide a comfortable and stylish seating option for your outdoor space.

Tools Needed

When building a wooden bench with a back, you will need a variety of hand and power tools to complete the project. Here is a list of the tools you will need:

Hand Tools

  • Measuring tape
  • Speed square
  • Carpenter’s pencil
  • Clamps
  • Sandpaper
  • Paint brush
  • Safety gloves and glasses
  • Wood filler and wood glue (optional)

Power Tools

  • Circular saw or miter saw
  • Drill and impact driver
  • Drill bit and countersink bit
  • Brad nailer (optional)
  • Jigsaw (optional)

Before starting the project, make sure you have all the necessary tools and that they are in good working condition. It’s also important to wear appropriate safety gear, such as gloves and glasses, when using power tools.

Using a measuring tape and speed square, mark and measure the wood pieces you will need for the bench. Use a circular saw or miter saw to cut the wood to the desired lengths. A power drill and impact driver will also be necessary to attach the pieces together with screws.

If you want to add decorative details to the bench, a jigsaw can be used to create curved or angled cuts in the wood. A brad nailer can also be used to attach pieces together without visible screws or nails.

Overall, having the right tools for the job will make building a wooden bench with a back much easier and more efficient.

Creating the Bench Design

When designing a wooden bench with a back, there are a few factors to consider to ensure that your bench is both comfortable and functional. Here are some things to keep in mind as you create your bench design:

Size and Dimensions

The size and dimensions of your bench will depend on how many people you want it to seat and where you plan to place it. A standard bench is usually around 18 inches tall, 16-20 inches deep, and 4-5 feet long. If you plan to place your bench against a wall, make sure to measure the space to ensure it will fit comfortably.

Backrest Angle

The angle of the backrest is an important factor to consider when designing your bench. A backrest angle of around 15 degrees is comfortable for most people, but you may want to adjust this angle depending on your personal preference or the intended use of the bench.

Seat Height

The height of the seat is another important consideration. A seat height of around 16-18 inches is comfortable for most people, but again, you may want to adjust this height depending on your personal preference or the intended use of the bench.

Materials

When choosing materials for your bench, make sure to select wood that is sturdy and weather-resistant, such as cedar or redwood. You may also want to consider using pressure-treated lumber to ensure your bench lasts for years to come.

Design Details

Finally, consider any additional design details you want to include, such as armrests or decorative elements. Keep in mind that these details may add to the complexity of the project, so make sure you have the necessary tools and skills to complete them.

By considering these factors and taking the time to plan out your bench design, you can create a beautiful and functional piece of outdoor furniture that will be enjoyed for years to come.

Cutting the Wood

Before you start cutting the wood, it’s important to have a clear plan in mind. Make sure you have the right measurements and the right tools for the job. Here are some tips to help you cut the wood for your wooden bench with a back:

1. Measure Twice, Cut Once

Take your time when measuring the wood. Make sure you double-check your measurements before you start cutting. It’s better to be safe than sorry, so take the time to be accurate.

2. Use the Right Tools

Make sure you have the right tools for the job. You’ll need a circular saw, a jigsaw, a drill, and a sander. Make sure your tools are sharp and in good working order.

3. Cut the Wood to Size

Once you have your measurements and your tools, it’s time to start cutting the wood. Use a circular saw to cut the boards to the right length. Use a jigsaw to cut the curves for the backrest and armrests.

4. Sand the Wood

After you’ve cut the wood, use a sander to smooth out any rough edges. Make sure the wood is sanded evenly and that there are no splinters.

5. Assemble the Bench

Once you’ve cut and sanded the wood, it’s time to assemble the bench. Follow the instructions carefully and make sure everything is lined up correctly. Use wood screws to attach the pieces together.

By following these tips, you can ensure that your wooden bench with a back is sturdy, comfortable, and looks great.

Assembling the Bench Base

Now that you have cut and sanded all the necessary pieces for your wooden bench, it’s time to start assembling the base.

  1. Begin by laying out the two legs and the stretcher pieces on a flat surface. Make sure the legs are facing the right way and that the stretcher pieces are lined up evenly.

  2. Take your drill and attach the stretcher pieces to the legs using screws. Make sure to pre-drill the holes to prevent the wood from splitting.

  3. Once the stretcher pieces are attached, add the seat support piece to the top of the stretcher pieces. Again, pre-drill the holes and use screws to attach the support piece.

  4. Flip the base over and attach the back support piece to the legs using screws. Make sure the support piece is level and centered before attaching it.

  5. Finally, attach the seat boards to the seat support piece using screws. Make sure the boards are evenly spaced and flush with the edges of the support piece.

  6. Once all the pieces are attached, give the base a thorough check to make sure everything is secure and level. If needed, adjust any screws or pieces that are not fitting correctly.

Congratulations, you have assembled the base of your wooden bench with a back! Now it’s time to move on to attaching the backrest and finishing the bench with stain or paint.

Building the Bench Back

Now that you have built the bench seat, it’s time to work on the bench back. The bench back will provide support and comfort while sitting on the bench. Here are the steps to build the bench back:

Step 1: Cut the Backrest Frame Pieces

To build the backrest frame, you will need to cut two pieces of 2×4 lumber to the same length as the width of the bench seat. These pieces will serve as the top and bottom rails of the backrest frame. Then, cut two more pieces of 2×4 lumber to the same height as the desired height of the backrest. These pieces will serve as the side supports of the backrest frame.

Step 2: Assemble the Backrest Frame

Lay the two top and bottom rails on a flat surface and attach the two side supports to them using wood screws. Make sure the frame is square and level before tightening the screws.

Step 3: Cut and Attach the Backrest Slats

Cut several pieces of 1×4 lumber to the same length as the width of the bench seat. These pieces will serve as the backrest slats. Attach the slats to the backrest frame using wood screws. Make sure to space the slats evenly and leave a small gap between them for comfort.

Step 4: Attach the Backrest to the Bench

Finally, attach the backrest to the bench seat using wood screws. Make sure the backrest is level and centered on the bench seat. You may also add some decorative touches to the backrest, such as carving or painting, to make it more visually appealing.

Congratulations, you have now built a wooden bench with a comfortable backrest!

Finishing the Bench

After building your wooden bench with a back, it’s time to finish it. Finishing the bench will protect the wood from weather damage and give it a polished look. Here are some steps to follow when finishing your bench.

Sanding

Before finishing your bench, you need to sand it down. Sanding will smooth out any rough edges and prepare the wood for staining or painting. Start with a coarse-grit sandpaper and work your way up to a fine-grit sandpaper. Sand in the direction of the wood grain to avoid damaging the wood.

Painting or Staining

Once your bench is sanded, you can either paint or stain it. Painting will give your bench a colorful finish, while staining will enhance the natural beauty of the wood. Here are some tips for painting or staining your bench:

  • Use a high-quality paint or stain that is suitable for outdoor use.
  • Apply the paint or stain in thin, even coats, following the manufacturer’s instructions.
  • Allow each coat to dry completely before applying the next coat.
  • Apply at least two coats of paint or stain for best results.
  • Consider using a sealer to protect the paint or stain from fading or chipping.

Overall, finishing your wooden bench with a back is an important step in the building process. By sanding and painting or staining your bench, you will create a durable and attractive piece of outdoor furniture that you can enjoy for years to come.

How to Make a Wooden Turntable: A Step-by-Step Guide

Are you looking for a fun and creative project to do in your spare time? Why not try making your own wooden turntable? Not only is it a great way to showcase your DIY skills, but it also allows you to customize your turntable to your own personal taste and style.

Making a wooden turntable may seem like a daunting task, but with the right tools and a little bit of patience, it can be a fun and rewarding experience. Whether you’re a seasoned woodworker or a beginner, there are plenty of resources available to help guide you through the process. From cutting your scrap wood boards to the desired size and shape, to assembling the hardware and base, each step is crucial in creating a functional and beautiful turntable. So why not give it a try and see what you can create?

Understanding the Basics of Turntables

If you’re interested in making a wooden turntable, it’s important to understand the basics of how turntables work. Here are a few key things to keep in mind:

Components of a Turntable

A turntable is made up of several key components, including:

  • Plinth: This is the base of the turntable, and it’s typically made of wood or plastic.
  • Platter: This is the circular disc that spins and holds the record.
  • Tonearm: This is the long, thin arm that holds the cartridge and stylus.
  • Cartridge: This is the component that holds the stylus (needle) and converts the vibrations from the stylus into an electrical signal.
  • Stylus: This is the needle that actually touches the record and reads the grooves.

How Turntables Work

When you place a record on a turntable and start it spinning, the stylus on the tonearm is lowered onto the record. As the record spins, the stylus follows the grooves, which vibrate the stylus. The cartridge converts these vibrations into an electrical signal, which is then sent to an amplifier and eventually to your speakers.

Types of Turntables

There are several types of turntables available, including:

  • Belt-drive: These turntables use a belt to connect the motor to the platter, which reduces vibrations and noise.
  • Direct-drive: These turntables have the motor directly connected to the platter, which provides more torque and faster start-up times.
  • Idler-wheel: These turntables use a wheel to connect the motor to the platter, which provides good speed stability but can be noisy.

Turntable Maintenance

To keep your turntable in good working order, it’s important to perform regular maintenance. This includes:

  • Cleaning the stylus regularly to remove dust and debris.
  • Keeping the platter and tonearm clean and free of dust.
  • Checking and adjusting the tracking force (the pressure of the stylus on the record).
  • Replacing the stylus and cartridge as needed.

By understanding the basics of turntables, you’ll be better equipped to make a wooden turntable that sounds great and is easy to maintain.

Choosing the Right Type of Wood

When it comes to making a wooden turntable, the type of wood you choose can make a significant impact on the final product’s quality and durability. Here are some things to consider when choosing the right type of wood for your turntable project:

Hardwoods vs. Softwoods

Hardwoods are denser and more durable than softwoods, making them an excellent choice for turntable construction. Some popular hardwood options include oak, maple, and walnut. Softwoods, such as pine or cedar, are less dense and more prone to warping or distortion, which can negatively affect the turntable’s sound quality.

Plywood vs. Solid Wood

Plywood is a popular choice for turntable construction due to its stability and strength. It consists of thin layers of wood glued together, making it less prone to warping or distortion. Solid wood, on the other hand, can be more challenging to work with, as it is more prone to warping and cracking. However, solid wood can provide a more natural and organic look to your turntable.

Grain Orientation

The direction of the wood grain can also affect the sound quality of your turntable. Generally, it is best to choose wood with a straight, consistent grain pattern. Avoid wood with knots or irregularities that can cause distortion or vibration.

Other Considerations

In addition to the factors mentioned above, you should also consider the wood’s color and texture and how it will match your overall design aesthetic. Some woods, such as cherry or mahogany, have a rich, warm tone that can add to the turntable’s overall sound quality. Others, such as ash or birch, have a lighter, more natural look that can complement modern or minimalist designs.

Ultimately, the choice of wood for your turntable project will depend on your personal preferences and the specific qualities you are looking for in your final product. Take the time to research and compare different wood types to find the one that best suits your needs and budget.

Gathering Necessary Tools

To make a wooden turntable, you will need to gather a few essential tools. In this section, we will go over the necessary measuring tools, cutting tools, and sanding tools you will need for the project.

Measuring Tools

Accuracy is key when building a turntable, so you will need a few measuring tools to ensure everything is cut to the correct size. Here are the measuring tools you will need:

  • Tape measure: A tape measure is essential for measuring the length and width of your wood boards accurately.
  • Combination square: This tool will help you make precise 90-degree cuts and measure angles.
  • Carpenter’s square: A carpenter’s square is useful for checking the accuracy of your cuts and ensuring your turntable is square.

Cutting Tools

To cut your wooden boards to size, you will need a few cutting tools. Here are the cutting tools you will need:

  • Circular saw: A circular saw is a power tool that will make quick work of cutting your wooden boards to size.
  • Jigsaw: A jigsaw is useful for cutting curves and intricate shapes.
  • Hand saw: A hand saw is a good backup option if you don’t have access to a circular saw or jigsaw.

Sanding Tools

After cutting your wooden boards, you will need to sand them to ensure they are smooth and free of splinters. Here are the sanding tools you will need:

  • Sandpaper: You will need sandpaper in various grits, from coarse to fine, to sand your wooden boards.
  • Sanding block: A sanding block will help you sand your wooden boards evenly and prevent over-sanding in certain areas.
  • Orbital sander: An orbital sander is a power tool that will make sanding your wooden boards much quicker and easier.

With these measuring tools, cutting tools, and sanding tools, you will be well-equipped to start building your wooden turntable.

Creating the Base of the Turntable

The base of the turntable is the foundation of your wooden turntable. It’s important to make sure that it is sturdy and level to ensure that your turntable functions properly. Here are the steps to create the base of your turntable:

  1. Cut a piece of scrap wood to the desired size and shape of your turntable base. A circular or square shape is common for turntables.
  2. Sand the edges and surface of the wood to ensure it is smooth and free of any rough spots or splinters.
  3. Apply a wood finish to the base to protect it from moisture and give it a polished look. You can use a clear coat or stain depending on your preference.
  4. Attach the turntable bearing to the center of the base. The bearing is what allows the turntable to rotate smoothly. You can use screws or wood glue to secure the bearing in place.
  5. Install the motor to the base. The motor is what drives the rotation of the turntable. Make sure it is securely attached and level to prevent any wobbling or uneven rotation.
  6. Finally, attach the platter to the top of the bearing. The platter is what holds your vinyl record and rotates as the motor spins. Make sure it is centered and level to prevent any warping or skipping of your records.

By following these steps, you can create a sturdy and functional base for your wooden turntable. With a little bit of patience and attention to detail, you’ll be able to enjoy your favorite vinyl records with a handmade turntable that you can be proud of.

Making the Platter

The platter is one of the most important parts of a turntable because it holds the record and spins it. It’s crucial to have a flat and stable platter to get the best sound quality. Here’s how you can make your own platter:

Step 1: Choose the Material

The platter can be made of various materials such as wood, acrylic, aluminum, or glass. Each material has its own advantages and disadvantages, so choose the one that suits your needs and budget. For example, wood can provide a warm sound but may require more maintenance, while aluminum is durable and easy to clean but can be expensive.

Step 2: Cut and Shape the Material

Once you have chosen the material, cut it to the desired size and shape. A circular shape is the most common, but you can also make a square or rectangular platter. Use a saw or a CNC machine to cut the material and a router to shape the edges.

Step 3: Add Weight and Stability

To improve stability and reduce vibrations, you can add weight to the platter. You can do this by attaching a metal weight to the bottom or by filling the platter with sand or lead shot. Make sure the weight is evenly distributed to avoid imbalances.

Step 4: Finish the Platter

Sand the surface of the platter to make it smooth and flat. You can also apply a finish to protect the material and enhance its appearance. For example, you can use oil or wax for wood, or powder coat for metal.

By following these steps, you can make a platter that will provide a stable and flat surface for your records, resulting in a better sound quality.

Assembling the Parts

Now that you have all the necessary parts, it’s time to assemble your wooden turntable. Follow these steps to put everything together:

  1. Begin by placing the platter onto the spindle. Make sure it fits snugly and is centered.

  2. Attach the motor to the motor mount using screws or bolts. Then, attach the motor mount to the base of the turntable using screws or bolts.

  3. Attach the belt to the motor pulley and the platter pulley. Make sure it is tight and properly aligned.

  4. Place the tonearm onto the tonearm mount and secure it with screws or bolts. Attach the counterweight to the end of the tonearm.

  5. Connect the tonearm wires to the phono preamp or amplifier. Make sure you connect the left and right channels correctly.

  6. Attach any additional components, such as a dust cover or feet.

  7. Finally, plug in the turntable and test it out. Make sure everything is working properly before using it to play your vinyl records.

Congratulations, you have successfully assembled your own wooden turntable!

Finishing Touches

Once you have constructed your wooden turntable, it is time to add the finishing touches. This will ensure that your turntable looks great and is protected from wear and tear. There are two main steps to finishing your turntable: sanding the surface and applying the finish.

Sanding the Surface

Before applying any finish, you should sand the surface of your turntable. This will remove any rough spots or imperfections and create a smooth surface for the finish to adhere to. Here are some tips for sanding your turntable:

  • Start with a coarse sandpaper (around 80 grit) and work your way up to a finer grit (around 220 grit).
  • Sand in the direction of the grain to avoid creating scratches.
  • Use a sanding block to ensure even sanding.
  • Wipe the surface with a damp cloth to remove any dust or debris.

Applying the Finish

Once you have sanded your turntable, you can apply the finish. There are many different types of finishes you can use, including oils, varnishes, and stains. Here are some tips for applying the finish:

  • Follow the manufacturer’s instructions for the specific finish you are using.
  • Apply the finish in thin, even coats using a brush or cloth.
  • Allow each coat to dry completely before applying the next coat.
  • Sand lightly between coats to remove any imperfections.
  • Apply at least 2-3 coats for a durable finish.

With these simple steps, you can add the finishing touches to your wooden turntable and ensure that it looks great and lasts for years to come.

Installing the Turntable Mechanism

Once you have finished constructing the wooden turntable, it’s time to install the turntable mechanism. Here’s a step-by-step guide to help you through the process:

  1. Gather the necessary tools and materials. You will need a drill, screws, a screwdriver, and the turntable mechanism itself.

  2. Determine the placement of the turntable mechanism. You want to make sure it is centered and level. Use a ruler or measuring tape to find the exact center of the turntable and mark it with a pencil.

  3. Drill a pilot hole for the mechanism. Use a drill bit that is slightly smaller than the screws that came with the mechanism. This will help prevent the wood from splitting when you screw in the screws.

  4. Screw in the mechanism. Place the mechanism over the pilot hole and screw it in place using the screws provided. Make sure it is level and centered.

  5. Test the turntable. Give it a spin to make sure it rotates smoothly. If it doesn’t, adjust the placement of the mechanism until it does.

  6. Attach the platter. The platter is the circular piece that sits on top of the turntable mechanism. It is usually held in place with a spindle or clamp. Follow the instructions that came with your turntable mechanism to attach the platter.

Congratulations! You have successfully installed the turntable mechanism on your wooden turntable. Now it’s time to enjoy your new creation and listen to some music!

Safety Tips While Working with Wood

Woodworking is a fun and rewarding hobby, but it can also be dangerous if proper safety precautions are not taken. Here are some safety tips to keep in mind while working with wood:

Wear Safety Gear

Always wear appropriate safety gear when woodworking. This includes safety glasses, hearing protection, and a dust mask. Gloves can also be worn to protect your hands, but make sure they fit properly and do not get caught in the machinery.

Keep Your Workspace Clean and Organized

A clean and organized workspace is essential for safe woodworking. Keep your tools and materials organized and within easy reach. Sweep up sawdust and wood chips regularly to prevent slips and falls.

Use Tools Properly

Make sure you know how to use each tool properly before using it. Follow the manufacturer’s instructions and use the appropriate blade or bit for the job. Never force a tool or use it in an unintended way.

Avoid Loose Clothing and Jewelry

Loose clothing and jewelry can get caught in machinery and cause serious injury. Wear close-fitting clothing and remove all jewelry before working with wood.

Keep Children and Pets Away

Children and pets should never be allowed in a woodworking area. They can distract you or accidentally get in harm’s way. Always work in a secure area away from children and pets.

Take Breaks

Working with wood can be tiring and lead to fatigue, which can increase the risk of accidents. Take frequent breaks to rest and stretch your muscles. This will help you stay focused and alert while working.

Remember to always prioritize safety when working with wood. By following these tips, you can enjoy your woodworking hobby while minimizing the risk of injury.

How to Take Down Wooden Blinds: A Simple Guide

If you are planning to replace your wooden blinds or simply want to clean your windows, you may need to take down your wooden blinds. Removing wooden blinds may seem like a daunting task, but with the right tools and techniques, it can be done easily and quickly. In this article, we will guide you through the process of taking down your wooden blinds step-by-step.

Before you begin, it is important to gather all the necessary tools you will need. This includes a screwdriver, pliers, a ladder, and a partner to help you if needed. Once you have all the tools, start by opening your wooden blinds all the way up to expose the headrail. From there, you can begin removing the blinds from the headrail by carefully unhooking them or unscrewing any brackets holding them in place.

It is important to take your time and be gentle when removing your wooden blinds to avoid damaging them or your window frames. By following these simple steps, you can easily take down your wooden blinds and prepare your windows for cleaning or replacement.

Understanding Wooden Blinds

Wooden blinds are a popular choice for homeowners who want to add a touch of elegance to their homes. These blinds are made of high-quality wood and are available in a range of colors and finishes. They are also durable and easy to maintain, making them a great investment for any home.

Types of Wooden Blinds

There are two types of wooden blinds: real wood and faux wood. Real wood blinds are made of natural wood and are more expensive than faux wood blinds. Faux wood blinds, on the other hand, are made of composite materials and are less expensive than real wood blinds.

Components of Wooden Blinds

Wooden blinds consist of several components, including the headrail, slats, cords, and ladder strings. The headrail is the top part of the blind that holds the slats in place. The slats are the horizontal pieces of wood that make up the body of the blind. The cords are used to raise and lower the blind, while the ladder strings are used to hold the slats in place.

Benefits of Wooden Blinds

Wooden blinds offer several benefits, including:

  • Durability: Wooden blinds are made of high-quality wood and are built to last.
  • Style: Wooden blinds add a touch of elegance to any room.
  • Insulation: Wooden blinds provide insulation, which can help reduce energy costs.
  • Privacy: Wooden blinds provide privacy by blocking out light and preventing people from seeing into your home.

In summary, wooden blinds are a great investment for any homeowner who wants to add style and elegance to their home. They are durable, easy to maintain, and offer several benefits, including insulation and privacy.

Tools Needed

When it comes to taking down wooden blinds, it is important to have the right tools on hand. Here are the tools you will need to safely and effectively remove your wooden blinds.

Safety Gear

Before you start removing your wooden blinds, it is important to make sure you have the right safety gear. Here are some items you should consider:

  • Safety goggles: These will help protect your eyes from any dust or debris that may be released during the removal process.
  • Dust mask: A dust mask will help prevent you from inhaling any dust or debris that may be released during the removal process.
  • Gloves: Gloves will help protect your hands from any sharp edges or splinters that may be present on the blinds.

Hand Tools

In addition to safety gear, you will also need some hand tools to remove your wooden blinds. Here are the tools you will need:

Tool Description
Screwdriver You will need a screwdriver to remove any screws that are holding the brackets in place.
Pliers Pliers can be useful for removing any stubborn screws or brackets.
Hammer A hammer can be used to gently tap the brackets loose if they are stuck.
Putty knife A putty knife can be used to gently pry the brackets away from the wall.

With these tools on hand, you should be able to safely and effectively remove your wooden blinds. Remember to take your time and be careful when removing the brackets to avoid damaging your walls or window frames.

Preparation Steps

Before you start taking down your wooden blinds, it is important to prepare the area and inspect the blinds to ensure a smooth and safe removal process. This section will cover the necessary preparation steps to take before removing your wooden blinds.

Clearing the Area

The first step in preparing to take down your wooden blinds is to clear the area around the window. Move any furniture, decorations, or other objects away from the window to create a clear workspace. This will help prevent any accidental damage to your belongings or the blinds during the removal process.

Inspecting the Blinds

Once the area around the window is clear, inspect the wooden blinds to determine the best way to remove them. Look for any screws, brackets, or other hardware that may be holding the blinds in place. If you are unsure how the blinds are attached to the window, refer to the manufacturer’s instructions or consult with a professional.

Inspect the condition of the blinds to ensure they are in good working order. Check for any signs of damage or wear, such as broken slats or frayed cords. If the blinds are damaged, it may be necessary to replace them instead of removing and reinstalling them.

By following these preparation steps, you can ensure a safe and efficient removal process for your wooden blinds.

Removing the Blinds

Taking down wooden blinds may seem like a daunting task, but with the right tools and a bit of patience, it can be done easily and safely. Here are some simple steps to follow when removing wooden blinds from your windows.

Loosening the Brackets

The first step in removing wooden blinds is to loosen the brackets that hold them in place. Start by locating the brackets on either side of the window frame. Use a screwdriver to loosen the screws that hold the brackets in place. Once the screws are loose, gently pull the brackets away from the window frame.

Handling the Blinds Carefully

Once the brackets are loosened, it’s time to remove the blinds themselves. Before you do this, make sure to handle them carefully to avoid damaging them. Wooden blinds can be fragile, so it’s important to take your time and be gentle.

To remove the blinds, start by lifting them up and out of the brackets. If the blinds are too heavy or awkward to lift, you may need to ask someone to help you. Once the blinds are out of the brackets, lay them flat on a table or other surface.

If you plan to reuse the blinds, make sure to store them carefully to avoid scratches or other damage. You can wrap them in a soft cloth or paper to protect them during storage.

In conclusion, removing wooden blinds is not as difficult as it may seem. By following these simple steps, you can safely and easily remove your wooden blinds from your windows. With a bit of patience and care, you can have your blinds down in no time.

Cleaning Up After Removal

After successfully removing your wooden blinds, it’s important to clean up the area properly to avoid any damage or mess. This section will cover the steps you need to take to dispose of your old blinds and clean the window area.

Disposing of Old Blinds

Before you dispose of your old blinds, it’s important to check if they can be recycled. If they are made of real wood, they may be able to be recycled or repurposed. Check with your local recycling center or donation center to see if they will accept your old blinds.

If your old blinds cannot be recycled, the best way to dispose of them is to wrap them up and put them in a garbage bag. Make sure the bag is securely tied and labeled as “trash” to avoid confusion.

Cleaning the Window Area

After removing your blinds, you may notice some dust or debris on the window area. Here are some steps to follow to clean the area properly:

  1. Use a soft-bristled brush or a vacuum cleaner to remove any dust or debris from the window area.
  2. Wipe the window area with a damp cloth to remove any remaining dust or debris.
  3. If there are any stubborn stains or marks on the window area, use a glass cleaner and a soft cloth to remove them.

It’s important to avoid using harsh chemicals or abrasive materials when cleaning the window area, as this can damage the glass or window frame.

By following these simple steps, you can ensure that your window area is clean and ready for your new blinds.

Tips for Future Blind Installations

If you are planning to install new wooden blinds in your home, here are some tips that can help you make the process easier and more successful.

Choosing the Right Blinds

When choosing wooden blinds, consider the following factors:

  • Size: Measure your windows carefully to ensure that the blinds you choose will fit properly.
  • Style: Choose a style that complements your home’s décor.
  • Material: Consider the type of wood and finish that will work best in your space.
  • Cost: Set a budget and choose blinds that fit within it.

Professional Installation

While it is possible to install wooden blinds yourself, professional installation can save you time and ensure that the blinds are installed correctly. Here are some reasons why you might want to consider hiring a professional:

  • Experience: Professional installers have experience installing a variety of blinds and can ensure that your blinds are installed correctly.
  • Tools: Professional installers have the tools necessary to install blinds quickly and efficiently.
  • Warranty: Many professional installers offer a warranty on their work, giving you peace of mind.

Whether you choose to install your wooden blinds yourself or hire a professional, following these tips can help ensure that your new blinds look great and function properly.