Tag Archives: oil-based paint

paint-wooden-beads

How to Paint Wooden Beads: A Beginner's Guide

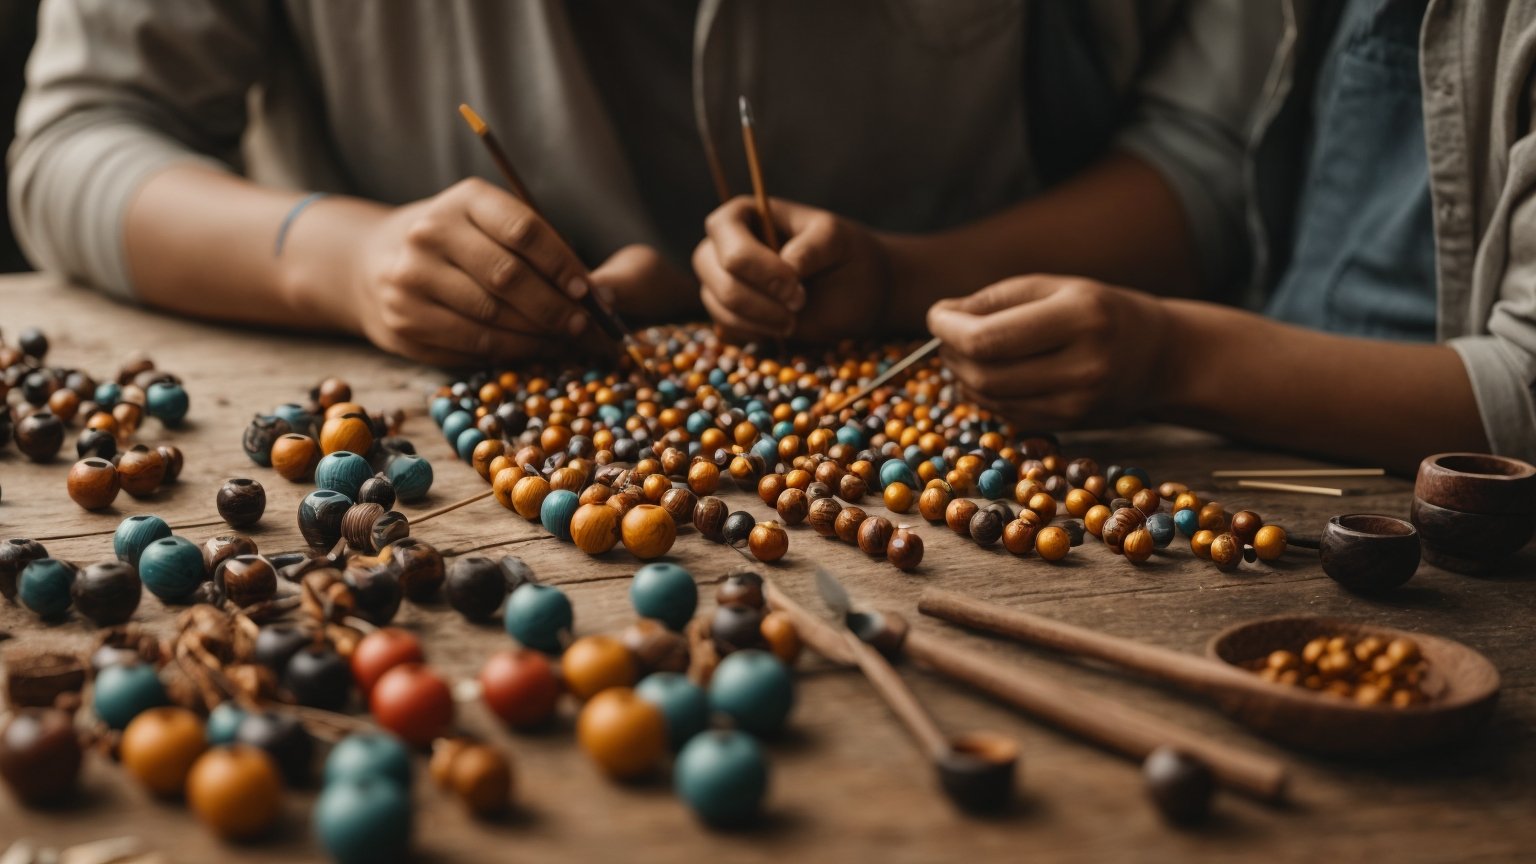
If you’re looking for a fun and easy DIY project, painting wooden beads is a great option. Not only is it a relaxing activity, but it also allows you to create unique and personalized accessories for your home or wardrobe. Whether you’re a beginner or an experienced crafter, painting wooden beads can be a simple and enjoyable way to express your creativity.

To get started, you’ll need some basic supplies such as wooden beads, paint, brushes, and a skewer or toothpick. You can use any type of paint you like, including acrylic, watercolor, or spray paint, depending on your preference and the effect you want to achieve. Before you start painting, it’s a good idea to sand the wooden beads lightly to create a smooth surface for the paint to adhere to. Once you have your supplies ready, you can start experimenting with different colors, patterns, and techniques to create your own unique designs.

Understanding Wooden Beads

paint-wooden-beads

Wooden beads are a versatile and popular crafting material that can be used for a wide range of projects. They come in different shapes, sizes, and colors, and can be painted, stained, or left natural. Whether you’re a seasoned crafter or just starting out, understanding wooden beads is essential to creating beautiful and functional projects.

Types of Wooden Beads

There are several types of wooden beads available, each with its own unique characteristics. Here are some of the most common types:

  • Round beads: These are the most common type of wooden beads and come in a variety of sizes and colors. They are perfect for jewelry making, home decor, and other craft projects.
  • Faceted beads: These beads have flat surfaces that reflect light, creating a sparkling effect. They are often used in jewelry making and other decorative projects.
  • Barrel beads: These beads have a cylindrical shape and are often used in jewelry making and home decor projects.
  • Spacer beads: These beads are small and are used to separate other beads in jewelry making and other projects.

Choosing the Right Size

When choosing wooden beads for your project, size matters. Beads come in a wide range of sizes, from tiny seed beads to large statement beads. Here are some tips for choosing the right size:

  • Consider the project: The size of the beads you choose will depend on the project you’re working on. For example, if you’re making a delicate necklace, you’ll want to choose smaller beads. If you’re making a statement piece, larger beads may be more appropriate.
  • Think about the design: The size of the beads you choose can also impact the overall design of your project. Consider the other materials you’ll be using and choose beads that will complement them.
  • Experiment: Don’t be afraid to experiment with different sizes to find the perfect fit for your project.

Painting Wooden Beads

Painting wooden beads is a great way to customize them for your project. Here are some tips for painting wooden beads:

  • Choose the right paint: Acrylic paint is a good choice for painting wooden beads. It dries quickly and comes in a wide range of colors.
  • Prepare the beads: Before painting, sand the beads lightly to remove any rough spots. Wipe them clean with a damp cloth and let them dry completely.
  • Paint the beads: You can paint the beads with a brush or use a spray paint. Apply a thin coat of paint and let it dry completely before applying a second coat.
  • Seal the beads: To protect the paint and make it last longer, seal the beads with a clear varnish.

Understanding wooden beads is the first step to creating beautiful and unique projects. With the right tools and techniques, you can create stunning jewelry, home decor, and more.

Choosing the Right Paint

When it comes to painting wooden beads, choosing the right paint is crucial to achieving the desired result. There are several types of paint to choose from, each with its own unique properties. Here are some options to consider:

Acrylic Paint

Acrylic paint is a popular choice for painting wooden beads. It is water-based, which means it dries quickly and is easy to clean up. Acrylic paint is also versatile and can be used on a variety of surfaces, including wood, plastic, and metal. When using acrylic paint, it is important to thin it with water to achieve a smooth and consistent finish. You can also mix different colors of acrylic paint to create custom shades.

Spray Paint

Spray paint is another option for painting wooden beads. It is quick and easy to apply, and it dries quickly. Spray paint is available in a variety of colors and finishes, including matte, satin, and glossy. When using spray paint, it is important to protect your work surface and wear a mask to avoid inhaling fumes. Spray paint is not recommended for intricate designs or small details.

Oil-Based Paint

Oil-based paint is a durable option for painting wooden beads. It is resistant to water and can withstand wear and tear. Oil-based paint is also available in a variety of colors and finishes, including high-gloss and semi-gloss. When using oil-based paint, it is important to work in a well-ventilated area and wear gloves to avoid skin contact. Oil-based paint takes longer to dry than other types of paint, so be sure to allow plenty of time for it to dry before handling.

No matter which type of paint you choose, be sure to read the manufacturer’s instructions carefully and follow all safety precautions. Always work in a well-ventilated area and wear protective gear as necessary. With the right paint and a little creativity, you can create beautiful and unique wooden beads that are sure to impress.

Preparation of Wooden Beads

Before painting wooden beads, it is important to properly prepare them. This will ensure that the paint adheres well to the surface and that the finished product looks smooth and professional. Here are some steps to follow when preparing wooden beads for painting:

Cleaning the Beads

The first step in preparing wooden beads for painting is to clean them. This will remove any dirt, dust, or oils that may be on the surface and prevent the paint from adhering properly. To clean the beads, you can use a soft cloth or a small brush and a mild soap solution. Be sure to rinse the beads thoroughly with water and allow them to dry completely before proceeding to the next step.

Sanding the Beads

The next step in preparing wooden beads for painting is to sand them. Sanding the beads will help to smooth out any rough spots or imperfections on the surface and create a better surface for the paint to adhere to. To sand the beads, you can use a fine-grit sandpaper or a sanding sponge. Be sure to sand the beads lightly and evenly, and wipe away any dust with a soft cloth before proceeding to the next step.

By following these simple steps, you can ensure that your wooden beads are properly prepared for painting. This will help to create a smooth and professional-looking finished product that you can be proud of.

Painting Techniques

When it comes to painting wooden beads, there are several techniques you can use to achieve the desired result. In this section, we will explore three popular painting techniques: brush painting, dipping method, and spray painting.
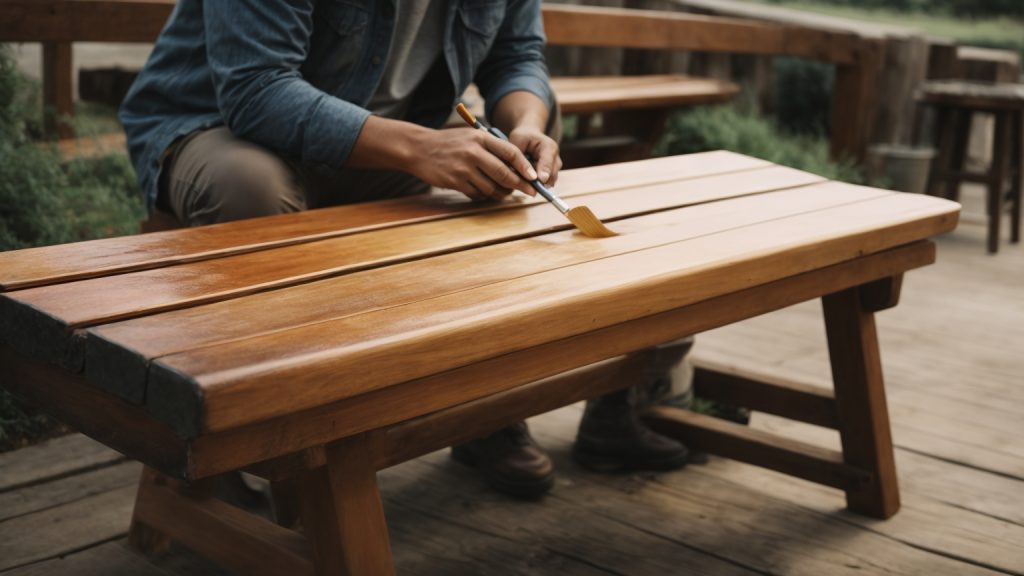
Brush Painting

Brush painting is a traditional and straightforward method of painting wooden beads. It involves using a paintbrush to apply paint to the surface of the beads. This technique is ideal for those who want to achieve a more precise and detailed finish.

To brush paint wooden beads, you will need a few supplies, including a paintbrush, paint, and a palette. Start by pouring a small amount of paint onto the palette. Dip the tip of the brush into the paint and apply it to the surface of the bead. Make sure to cover the entire surface of the bead evenly. Allow the paint to dry completely before applying a second coat if needed.

Dipping Method

The dipping method is another popular technique for painting wooden beads. This method involves dipping the beads into a container of paint to coat them evenly. It is a quick and easy technique that is ideal for those who want to paint a large number of beads at once.

To use the dipping method, you will need a container of paint and a pair of tongs. Start by pouring the paint into the container. Hold the beads with the tongs and dip them into the paint. Make sure to coat the entire surface of the bead evenly. Allow the paint to dry completely before handling the beads.

Spray Painting

Spray painting is a modern and popular technique for painting wooden beads. It involves using a can of spray paint to apply an even coat of paint to the surface of the beads. This technique is ideal for those who want to achieve a smooth and even finish quickly.

To spray paint wooden beads, you will need a can of spray paint and a well-ventilated area. Start by placing the beads on a piece of cardboard or newspaper. Hold the can of spray paint about 6 inches away from the beads and spray a thin coat of paint evenly over the surface of the beads. Allow the paint to dry completely before handling the beads.

In conclusion, brush painting, dipping method, and spray painting are three popular techniques for painting wooden beads. Each technique has its advantages and disadvantages, so choose the one that best suits your needs and preferences.

Drying and Sealing

Proper Drying

After painting your wooden beads, it is important to let them dry completely before handling them. The drying time will depend on the type of paint you used and the humidity levels in your environment. If you are in a rush, you can use a hair dryer on a low setting to speed up the drying process. However, be careful not to hold the hair dryer too close to the beads, or they may go flying.

To avoid any sticking, it is recommended to place the beads on a paper towel or wax paper while they dry. This will prevent any paint from transferring onto other surfaces. Once the beads are completely dry, you can move on to the next step.

Applying Sealant

To protect your painted wooden beads from wear and tear, it is a good idea to apply a sealant. There are several types of sealants available, including varnish, polyurethane, and wax. Each type of sealant has its own advantages and disadvantages, so choose the one that best suits your needs.

Before applying the sealant, make sure the beads are completely dry. Then, use a brush to apply a thin layer of sealant to each bead. Be sure to cover the entire surface of the bead, including any crevices or details.

Once you have applied the sealant, let it dry completely before handling the beads. This will ensure that the sealant has enough time to cure and provide maximum protection. Depending on the type of sealant you used, you may need to apply multiple coats for optimal protection.

By properly drying and sealing your painted wooden beads, you can ensure that they will last for years to come.

Safety Tips

When painting wooden beads, safety should always be a top priority. Here are some safety tips to keep in mind:

Using Protective Gear

It is important to wear protective gear when painting wooden beads. This includes gloves, eye protection, and a mask. Gloves will protect your hands from the paint and eye protection will protect your eyes from any paint splatters. A mask will prevent you from inhaling any harmful fumes from the paint.

Proper Ventilation

Proper ventilation is also important when painting wooden beads. Make sure you are in a well-ventilated area, preferably outdoors or in a room with open windows. This will prevent you from inhaling any fumes from the paint. If you are painting indoors, consider using a fan to help circulate the air.

Remember to always follow the manufacturer’s instructions when using paint and other materials. By taking the necessary safety precautions, you can ensure a safe and enjoyable painting experience.

Troubleshooting Common Issues

Paint Bubbling

If you notice bubbling in your painted wooden beads, it could be due to a few reasons. One possible cause is that the paint was applied too thickly, causing air bubbles to form. Another cause could be that the surface of the beads was not properly cleaned before painting, causing the paint to bubble up as it dries.

To avoid paint bubbling, make sure to clean the surface of the wooden beads before painting. Additionally, apply the paint in thin layers, allowing each layer to dry completely before applying the next. If you do notice bubbling, gently sand the affected area and repaint.

Uneven Coating

An uneven coating on your wooden beads can be frustrating, but it is a common issue that can be easily fixed. One possible cause is that the paint was not mixed well enough before application, causing the pigment to settle and create an uneven finish.

To avoid uneven coating, make sure to mix the paint thoroughly before applying it to the wooden beads. Additionally, use a brush or spray paint in a well-ventilated area to avoid drips and uneven application. If you do notice an uneven coating, lightly sand the affected area and repaint.

Remember, with a little patience and attention to detail, you can easily troubleshoot common issues when painting wooden beads.

paint-to-use-on-outdoor-wooden-bench

What Paint to Use on Outdoor Wooden Bench: Tips and Recommendations

Are you looking to spruce up your outdoor wooden bench with a fresh coat of paint? Choosing the right type of paint for your project is crucial to ensure it lasts through various weather conditions. With so many options available, it can be overwhelming to determine the best paint to use on your outdoor wooden bench.

One of the most efficient and visually appealing ways to paint your outdoor wooden bench is by using spray paint. This type of paint provides even coverage and a glossy finish, making your bench look brand new. Additionally, spray paint is less time-consuming compared to brush painting, making it a great option for those who want to complete their project quickly. Oil-based spray paints are also a great choice as they provide a stronger finish than latex paint, making it more durable for outdoor use.

Understanding Outdoor Paints

paint-to-use-on-outdoor-wooden-bench

When it comes to painting an outdoor wooden bench, it is crucial to choose the right type of paint that will provide protection against the elements. There are several types of outdoor paints available in the market, each with its unique features and benefits. In this section, we’ll take a closer look at some of the most commonly used outdoor paints and what makes them suitable for use on wooden benches.

Latex Paint

Latex paint is a popular choice for outdoor wooden benches because it is easy to apply, dries quickly, and is resistant to cracking and peeling. This type of paint is water-based, making it easy to clean up with soap and water. Latex paint also comes in a variety of finishes, from flat to high gloss, allowing you to choose the perfect look for your bench.

Oil-based Paint

Oil-based paint is another popular choice for outdoor wooden benches because it offers excellent durability and protection against the elements. This type of paint is resistant to moisture, UV rays, and mildew, making it an excellent choice for areas with high humidity or frequent rain. However, oil-based paint takes longer to dry than latex paint and requires mineral spirits or paint thinner for cleanup.

Acrylic Paint

Acrylic paint is a versatile type of paint that can be used on a variety of surfaces, including wood, metal, and plastic. This type of paint is water-based, making it easy to clean up, and dries quickly. Acrylic paint is also resistant to fading, cracking, and peeling, making it an excellent choice for outdoor wooden benches.

Stain

Stain is another option for protecting your outdoor wooden bench. Stain allows the natural beauty of the wood to show through while providing protection against the elements. Stain comes in a variety of colors, from natural to deep brown, allowing you to choose the perfect look for your bench. However, stain does not provide as much protection as paint and may need to be reapplied more frequently.

In summary, when choosing a paint for your outdoor wooden bench, it is essential to consider the durability, protection, and ease of use of the paint. Each type of paint has its unique features and benefits, so it’s important to choose the one that best suits your needs and preferences.

Types of Paint for Outdoor Wooden Bench

When it comes to painting your outdoor wooden bench, there are a few types of paint to choose from. Each type has its own advantages and disadvantages, so it’s important to choose the right one for your specific needs. Here are some of the most common types of paint for outdoor wooden benches:

Latex Paint

Latex paint is a popular choice for outdoor wooden benches because it is easy to use and dries quickly. It is also water-resistant and can withstand harsh weather conditions. Latex paint is available in a variety of colors and finishes, so you can choose the one that best suits your style.

One of the best latex paints for outdoor wooden benches is Behr Premium Plus Exterior Paint & Primer. It offers excellent adhesion, coverage, and durability, and is available in a variety of finishes. It is also low VOC, which means it has fewer harmful chemicals than other types of paint.

Oil-Based Paint

Oil-based paint is another option for outdoor wooden benches. It is more durable than latex paint and can withstand harsh weather conditions. It also provides a smooth, glossy finish that looks great on wooden benches. However, oil-based paint takes longer to dry and requires more cleanup than latex paint.

One of the best oil-based paints for outdoor wooden benches is Rust-Oleum Marine Coatings Topside Paint. It is specifically designed for use on boats, so it can withstand even the harshest weather conditions. It provides a high-gloss finish and is available in a variety of colors.

Chalk Paint

Chalk paint is a popular choice for those who want a more rustic or shabby-chic look for their outdoor wooden bench. It is easy to use and dries quickly, and it provides a matte finish that looks great on wooden benches. However, chalk paint is not as durable as other types of paint, so it may need to be reapplied more frequently.

One of the best chalk paints for outdoor wooden benches is Annie Sloan Chalk Paint. It is water-based and non-toxic, so it is safe to use around children and pets. It is also available in a variety of colors and can be used on a variety of surfaces, including wood, metal, and concrete.

In conclusion, when choosing the right type of paint for your outdoor wooden bench, it’s important to consider your specific needs and preferences. Latex paint is a great all-around option, oil-based paint is more durable, and chalk paint is perfect for those who want a more rustic look. Whatever type of paint you choose, be sure to follow the manufacturer’s instructions for best results.

Factors to Consider When Choosing Paint

When it comes to painting an outdoor wooden bench, there are several factors you should consider to ensure that the paint you choose is durable and long-lasting. Here are some of the most important factors to keep in mind.

Weather Conditions

One of the most important factors to consider when choosing paint for your outdoor wooden bench is the weather conditions it will be exposed to. If your bench will be exposed to harsh sunlight, rain, or other weather elements, you will need to choose a paint that is specifically designed to withstand these conditions. Look for paint that is labeled as “weather-resistant” or “outdoor use.”

Durability

Another important factor to consider is the durability of the paint. You want a paint that will last for years without chipping, cracking, or fading. Look for paint that is labeled as “durable” or “long-lasting.” You may also want to consider using a paint that is specifically designed for outdoor use, as these paints tend to be more durable than indoor paints.

Color and Aesthetic Appeal

While durability and weather resistance are important factors, you also want to choose a paint that looks good and complements the overall aesthetic of your outdoor space. Consider the color of your bench and the surrounding environment when choosing a paint color. You may also want to consider using a paint that has a matte or satin finish, as these finishes tend to look more natural and blend in better with the outdoor environment.

In summary, when choosing paint for your outdoor wooden bench, it is important to consider factors such as weather conditions, durability, and color and aesthetic appeal. By taking these factors into account, you can choose a paint that will protect your bench and look great for years to come.

Preparation of Wooden Bench for Painting

preparation-of-wooden-bench-for-painting

Before you start painting your outdoor wooden bench, it is important to prepare the surface properly to ensure the paint adheres well and lasts longer. Here are the steps you should follow to prepare your wooden bench for painting.

Cleaning

The first step in preparing your wooden bench for painting is to clean it thoroughly. Use a stiff-bristled brush to remove any dirt, debris, or loose paint from the surface of the bench. You can also use a pressure washer to clean the bench, but be careful not to damage the wood.

Once you have removed all the dirt and debris, wash the bench with a mixture of warm water and mild soap. Rinse the bench with clean water and let it dry completely before moving on to the next step.

Sanding

After the bench is dry, sand the surface with medium-grit sandpaper to remove any remaining loose paint or rough spots. Sand in the direction of the wood grain to avoid damaging the surface. Once you have finished sanding, wipe the bench with a clean cloth to remove any dust or debris.

For a smoother finish, you can also sand the bench with fine-grit sandpaper. This will help to create a smooth surface and ensure the paint adheres well.

Priming

Before you start painting, it is important to prime the surface of the bench. Priming will help the paint adhere better and last longer. Apply a coat of primer to the bench using a brush or roller, making sure to cover the entire surface evenly.

Allow the primer to dry completely before applying the paint. The drying time will depend on the type of primer you use, so be sure to read the manufacturer’s instructions carefully.

By following these simple steps, you can prepare your wooden bench for painting and ensure a smooth, long-lasting finish.

Painting Techniques for Outdoor Wooden Bench

When it comes to painting an outdoor wooden bench, there are several techniques to choose from. The most common methods are brushing, spraying, and rolling. Each technique has its own advantages and disadvantages, so it’s important to choose the one that works best for you.

Brushing

Brushing is the most traditional method of painting and is great for small projects. It’s a good option if you want to achieve a more textured finish. However, it can be time-consuming and may require multiple coats to achieve the desired coverage. If you choose to use a brush, make sure to choose one that is appropriate for the type of paint you are using.

Spraying

Spraying is a popular technique for painting outdoor wooden benches because it is quick and easy. It is also great for achieving a smooth finish. However, it can be messy and requires more preparation than other methods. You will need to cover the surrounding area to prevent overspray. Additionally, you will need to use a respirator mask to protect yourself from inhaling the fumes.

Rolling

Rolling is a good option if you want to achieve a smooth finish without the mess of spraying. It is also less time-consuming than brushing. However, it can be difficult to get into tight spaces with a roller. Additionally, you will need to choose the right type of roller for the type of paint you are using.

No matter which technique you choose, make sure to properly prepare the surface before painting. This includes cleaning and sanding the bench to ensure that the paint adheres properly. Additionally, make sure to choose a high-quality outdoor paint that is specifically designed for wooden surfaces. This will ensure that your bench looks great and lasts for years to come.

Maintenance Tips for Painted Outdoor Wooden Bench

If you want your painted outdoor wooden bench to last longer and look good, you need to take good care of it. Here are some maintenance tips to help you keep your bench in good condition.

Routine Cleaning

Cleaning your painted outdoor wooden bench regularly is essential to keep it looking good. You can use a soft-bristled brush or a sponge to remove dirt, dust, and debris from the surface of your bench. You can also use a mild detergent and warm water to clean your bench.

Avoid using harsh chemicals or abrasive cleaners as they can damage the paint or the wood. After cleaning, rinse your bench thoroughly with clean water and let it dry completely before using it.

Touch-Ups

Over time, the paint on your outdoor wooden bench may start to fade or chip. To keep your bench looking good, you may need to do some touch-ups. You can use a small brush and some touch-up paint to fix any chips or scratches on your bench.

Before you start touching up your bench, make sure it is clean and dry. Apply the touch-up paint carefully and let it dry completely before using your bench.

Re-Painting

If the paint on your outdoor wooden bench is severely faded or damaged, you may need to repaint it. Repainting your bench can give it a fresh new look and protect it from the elements.

Before you start repainting your bench, you need to remove the old paint. You can use a paint stripper or sandpaper to remove the old paint. Once you have removed the old paint, clean your bench thoroughly and let it dry completely.

Apply a primer to your bench before painting it. The primer will help the paint adhere better and last longer. Once the primer is dry, you can paint your bench with a high-quality outdoor paint.

In conclusion, taking good care of your painted outdoor wooden bench is essential to keep it looking good and lasting longer. Regular cleaning, touch-ups, and repainting can help you maintain your bench and protect it from the elements.

How to Paint a Wooden Box: A Beginner's Guide

If you’re looking for a fun and easy DIY project, painting a wooden box is a great option. Not only is it a practical item to have around the house, but it can also be a beautiful decorative piece. Whether you’re a seasoned painter or a beginner, this article will provide you with some tips and tricks to help you create a stunning wooden box.

Before you start painting, it’s important to properly prepare your wooden box. This includes sanding down any rough edges or imperfections and applying a primer to seal the wood. Once your box is prepped and ready to go, you can start painting. There are a variety of techniques you can use, from simple solid colors to more intricate designs. With a little bit of creativity and patience, you can create a one-of-a-kind wooden box that you’ll be proud to display.

Understanding Wood Types

When it comes to painting a wooden box, understanding the type of wood you are working with is essential. Different types of wood have different characteristics that can affect how they take paint and how long the paint will last. In this section, we will discuss the three main types of wood used for making boxes: hardwood, softwood, and plywood.

Hardwood

Hardwood is a type of wood that comes from deciduous trees, such as oak, maple, and cherry. It is generally denser and more durable than softwood, making it ideal for furniture and other high-quality items. Hardwood is also more expensive than softwood.

When painting a hardwood box, it is important to choose a primer and paint that are compatible with the wood. Some hardwoods, such as cherry, can bleed through paint if not properly sealed with a primer. Sanding the wood before painting can also help the paint adhere better.

Softwood

Softwood comes from coniferous trees, such as pine, spruce, and cedar. It is less dense and less durable than hardwood, but it is also less expensive. Softwood is commonly used for making boxes and other decorative items.

When painting a softwood box, it is important to choose a primer and paint that are compatible with the wood. Softwood can be more porous than hardwood, which can affect how the paint adheres. Sanding the wood before painting can help the paint adhere better.

Plywood

Plywood is a type of engineered wood made from thin layers of wood veneer that are glued together. It is often used for making boxes because it is less expensive than solid wood and can be more stable.

When painting a plywood box, it is important to choose a primer and paint that are compatible with the wood. Plywood can be more porous than solid wood, which can affect how the paint adheres. Sanding the wood before painting can help the paint adhere better. It is also important to seal the edges of the plywood with wood filler or another type of sealant to prevent the paint from seeping into the wood.

Choosing the Right Paint

When it comes to painting a wooden box, choosing the right paint is essential to ensure a long-lasting and beautiful finish. There are several types of paint available in the market, but not all will work well with wood. In this section, we’ll discuss the three most common types of paint for wooden boxes: Acrylic, Oil-Based, and Latex.

Acrylic Paint

Acrylic paint is a popular choice for painting decorative wooden boxes due to its versatility and wide range of colors. It adheres well to wood and dries relatively quickly, making it ideal for DIY projects. Acrylic paint is available in both matte and glossy finishes, allowing you to achieve the desired look for your wooden box. Moreover, it is water-based, which means it is easy to clean up with soap and water.

Oil-Based Paint

Oil-based paint is another option for painting wooden boxes. It is durable and long-lasting, making it ideal for outdoor use. However, it takes a long time to dry, and the fumes can be harmful, so it’s essential to work in a well-ventilated area. Oil-based paint is also more challenging to clean up, as it requires solvents like mineral spirits or turpentine.

Latex Paint

Latex paint is a water-based paint that is easy to apply and dries quickly. It is an excellent choice for indoor wooden boxes, as it is low in odor and easy to clean up. Latex paint is available in a wide range of colors and finishes, including matte, satin, and glossy. However, it may not be as durable as oil-based paint and may not hold up well in outdoor conditions.

When choosing the right paint for your wooden box, consider the location of the box, the desired finish, and the level of durability required. Each type of paint has its advantages and disadvantages, so it’s essential to weigh them carefully before making a decision.

Preparation of the Wooden Box

Before you start painting your wooden box, it is important to properly prepare the surface to ensure the paint adheres well and the finished product looks great. This section will guide you through the steps of cleaning, sanding, and priming your wooden box.

Cleaning

The first step in preparing your wooden box for painting is cleaning it. Any dirt, dust, or debris on the surface can prevent the paint from adhering properly. Use a damp cloth or sponge to wipe down the entire surface of the box, including the corners and edges. If your box has any stubborn stains or marks, you can use a mild detergent and water solution to scrub them away. Be sure to rinse the box thoroughly with clean water and let it dry completely before moving on to the next step.

Sanding

Once your wooden box is clean and dry, the next step is sanding. Sanding the surface of the box will create a rougher texture that allows the paint to grip onto the surface better. Use a fine-grit sandpaper to sand the entire surface of the box, including the corners and edges. Be sure to sand in the direction of the wood grain to avoid damaging the surface. After sanding, wipe away any dust with a clean, dry cloth.

Priming

The final step in preparing your wooden box for painting is priming. Priming helps the paint adhere better and creates a smoother surface for the paint to go on. Apply a thin coat of wood primer to the entire surface of the box using a paintbrush or roller. Be sure to cover the corners and edges as well. Let the primer dry completely according to the manufacturer’s instructions before moving on to painting.

By following these simple steps, you can ensure that your wooden box is properly prepared for painting and that the finished product looks great.

Painting Techniques

When it comes to painting a wooden box, there are several techniques you can use to achieve the desired look. Here are three popular methods: brushing, spraying, and rolling.

Brushing

Brushing is the most traditional way of painting a wooden box. It requires a paintbrush and a steady hand. Start by applying a thin layer of paint to the surface of the box. Use long, even strokes to cover the entire area. Make sure to keep the brush strokes in the same direction to avoid any visible brush marks. Allow the first coat to dry completely before applying a second coat.

If you want a smoother finish, you can sand the surface of the box lightly between coats. This will help to remove any bumps or imperfections in the paint. You can also use a foam brush instead of a traditional paintbrush. Foam brushes are less likely to leave brush marks on the surface of the box.

Spraying

Spraying is a popular technique for painting wooden boxes. It requires a paint sprayer and some practice to get the hang of it. Before you start, make sure to cover the surrounding area with a drop cloth or plastic sheeting to protect it from overspray.

To spray paint a wooden box, hold the sprayer about 6-8 inches away from the surface and apply a thin, even coat of paint. Move the sprayer in a back-and-forth motion to cover the entire area. Allow the first coat to dry completely before applying a second coat.

Spraying is a great technique for achieving a smooth, even finish. It’s also faster than brushing or rolling, but it requires more preparation and cleanup.

Rolling

Rolling is another technique you can use to paint a wooden box. It requires a paint roller and a paint tray. Start by pouring the paint into the tray and dipping the roller into the paint. Roll off any excess paint on the tray before applying it to the surface of the box.

Use long, even strokes to cover the entire area. Make sure to keep the roller in the same direction to avoid any visible roller marks. Allow the first coat to dry completely before applying a second coat.

Rolling is a great technique for covering large areas quickly. It’s also easy to use and requires minimal cleanup. However, it may not provide the same level of smoothness as brushing or spraying.

Overall, each painting technique has its advantages and disadvantages. Choose the one that works best for you based on your skill level, the tools you have available, and the desired outcome.

Adding Finishing Touches

Once you’ve painted your wooden box, it’s time to add some finishing touches to make it look even better. Here are some tips to help you achieve a professional-looking finish.

Sealing

Before you add any additional finishes, you need to seal the paint with a clear coat. This will protect the paint from scratches and other damage. You can use a spray sealant or a brush-on sealant, depending on your preference. Make sure to apply the sealant in a well-ventilated area and follow the manufacturer’s instructions.

Sanding Between Coats

If you plan to apply multiple coats of paint or other finishes, it’s important to sand between each coat. This will help the next coat adhere better and create a smoother finish. Use a fine-grit sandpaper (220 grit or higher) and sand lightly. Make sure to wipe away any dust before applying the next coat.

Decorating

Once the sealant is dry, you can add some decorative touches to your wooden box. Here are some ideas:

  • Stenciling: Use stencils to add designs or patterns to your box. You can use a contrasting paint color or a metallic paint for a more dramatic effect.
  • Decoupage: Cut out images or designs from paper or fabric and glue them to your box. You can use a clear sealant to protect the design.
  • Stickers: Use stickers or decals to add a fun or whimsical touch to your box. Make sure to seal the stickers with a clear coat to protect them.

Remember, the key to adding finishing touches is to be creative and have fun. Don’t be afraid to try new techniques and experiment with different colors and designs. With a little bit of practice, you’ll be able to create beautiful and unique wooden boxes that you’ll be proud to display.

Maintenance Tips

Maintaining your painted wooden box is essential to ensure that it stays looking great for years to come. Here are some tips to help you keep your wooden box in top condition.

Cleaning

Regular cleaning is important to prevent dirt and grime from building up on the surface of your wooden box. To clean your painted wooden box, use a soft cloth or sponge and mild soap and water. Avoid using harsh chemicals or abrasive cleaners as they can damage the paint and the wood.

After cleaning, make sure to dry the box thoroughly with a clean, dry cloth. Moisture can cause the wood to warp or rot, so it’s important to keep your wooden box as dry as possible.

Touch Ups

Over time, the paint on your wooden box may start to chip or fade. If this happens, you can touch up the paint to keep your box looking fresh and new.

To touch up the paint on your wooden box, first, clean the surface of the box with soap and water and let it dry completely. Then, use a small brush to apply a thin layer of paint to the affected area. Let the paint dry completely before applying a second coat, if necessary.

Repainting

If your wooden box is looking worn or outdated, you may want to repaint it. Before you start, make sure to remove any old paint or varnish from the surface of the box. You can use a paint stripper or sandpaper to remove the old finish.

Once the surface is clean and smooth, you can apply a new coat of paint. Make sure to use a high-quality paint that is suitable for wooden surfaces. Apply the paint in thin, even coats, and let each coat dry completely before applying the next one.

By following these maintenance tips, you can keep your painted wooden box looking great for years to come.

How to Paint a Wooden Exterior Door: A Beginner's Guide

Are you looking to give your home’s exterior a fresh new look? Painting your wooden exterior door is a great place to start! Not only is it a simple and affordable way to update your home’s curb appeal, but it can also protect your door from the elements and extend its lifespan.

Before you dive into the project, it’s important to gather the necessary supplies and prepare your door properly. You’ll need paint, primer (if your door is not pre-primed), sandpaper, screwdrivers, caulk, and other tools depending on your specific door. In this article, we’ll walk you through the steps to paint your wooden exterior door like a pro.

Choosing the Right Paint

When it comes to painting your wooden exterior door, choosing the right paint is crucial. Not only will it affect the overall appearance of your door, but it will also impact its durability and ability to withstand the elements.

Types of Paint

There are several types of paint that can be used on a wooden exterior door. Here are a few options to consider:

  • Oil-based paint: This type of paint is known for its durability and ability to resist moisture, making it a great option for exterior doors. However, it can take longer to dry and may require a primer.
  • Latex paint: Latex paint is a popular choice for its ease of use and quick drying time. It also tends to be more environmentally friendly than oil-based paint. However, it may not be as durable as oil-based paint and may require more coats.
  • Acrylic paint: Acrylic paint is similar to latex paint but is more durable and fade-resistant. It also tends to adhere well to wood surfaces. However, it may not be as moisture-resistant as oil-based paint.

Color Selection

When it comes to choosing a color for your exterior door, there are a few things to keep in mind. First, consider the overall style and color scheme of your home. You want your door to complement the rest of your exterior, not clash with it.

Next, think about the practicality of the color. Lighter colors may show dirt and grime more easily, while darker colors may absorb more heat from the sun. Consider the climate in your area and how it may impact the color you choose.

Finally, don’t be afraid to get creative with your color selection. A bold, eye-catching color can add personality and charm to your home’s exterior. Just make sure it still fits with the overall aesthetic of your home.

Preparation Steps

Before you start painting your wooden exterior door, it’s important to prepare it properly. This will ensure that the paint adheres well and lasts longer. Here are the two main steps you should follow:

Removing the Door

First, you need to remove the door from its hinges. This will make it easier to clean and sand the door, and also prevent any accidental paint drips on your floor or hardware. Here’s how to remove the door:

  1. Use a screwdriver to remove the screws from the hinges on the door frame.
  2. Have someone hold the door steady while you lift it off the hinges.
  3. Place the door on a flat surface, such as sawhorses or a workbench.

Cleaning and Sanding

Once the door is removed, it’s time to clean and sand it. This will remove any dirt, grime, or old paint, and also create a smooth surface for the new paint to adhere to. Here’s how to clean and sand the door:

  1. Use a plastic sheet to cover any windows or openings in the door to prevent paint from getting inside.
  2. Use a scraper to remove any loose or flaking paint from the door.
  3. Use a sandpaper to sand the surface of the door. Start with a coarse grit sandpaper (60-80 grit) to remove any rough spots, and then move to a finer grit (120-150 grit) to create a smooth surface.
  4. Wipe the door with a damp cloth to remove any dust or debris.
  5. Allow the door to dry completely before moving on to the next step.

By following these preparation steps, you’ll be well on your way to a beautifully painted wooden exterior door.

Priming the Door

Before painting your wooden exterior door, it is important to prime it first. Priming the door will help the paint adhere better and last longer. Here are the steps to follow when priming your wooden exterior door:

  1. Clean the Door: Use a damp cloth to wipe down the door and remove any dirt or debris. Allow the door to dry completely before proceeding.

  2. Sand the Door: Use 220-grit sandpaper to sand the door. This will help the primer adhere better to the wood. Make sure to sand in the direction of the wood grain.

  3. Apply the Primer: Apply a coat of primer to the door using a paintbrush or roller. Make sure to cover the entire surface of the door, including any crevices or corners. Allow the primer to dry completely before proceeding.

  4. Sand the Door Again: Once the primer is dry, use 220-grit sandpaper to sand the door again. This will help smooth out any rough spots and prepare the door for painting.

  5. Clean the Door Again: Use a damp cloth to wipe down the door and remove any dust or debris from sanding.

  6. Inspect the Door: Take a close look at the door to make sure there are no bare spots or areas where the primer did not adhere properly. If you find any, apply another coat of primer to those areas and allow it to dry completely.

By following these steps, you can ensure that your wooden exterior door is properly primed and ready for painting.

Painting Techniques

Brush or Roller

When it comes to painting a wooden exterior door, you can either use a brush or a roller. Using a brush can give you more control over the paint and allow you to get into tight spots. A roller, on the other hand, can cover larger areas quickly. Ultimately, the choice is up to you and your personal preference.

Applying the First Coat

Before you start painting, make sure the door is clean and dry. Apply a coat of primer to the door, using a brush or roller. Make sure to apply the primer evenly and let it dry completely before moving on to the next step. Once the primer is dry, you can start applying the first coat of paint.

Using a brush, start painting the door from the top down, making sure to smooth out any drips or brush marks as you go. If you’re using a roller, start at the top of the door and work your way down, using long, even strokes. Make sure to overlap each stroke slightly to avoid leaving any gaps.

Adding Additional Coats

After the first coat has dried completely, you can add additional coats of paint as needed. Depending on the color and type of paint you’re using, you may need to apply two or three coats to get the desired coverage. Make sure to let each coat dry completely before adding the next one.

When applying additional coats, use the same technique as before, making sure to smooth out any drips or brush marks as you go. If you’re using a roller, make sure to use long, even strokes and overlap each stroke slightly to avoid leaving any gaps.

Remember, painting a wooden exterior door takes time and patience. Take your time and make sure to apply each coat evenly for the best results.

Drying and Reinstallation

Proper Drying

After you have painted your wooden exterior door, the next step is to allow it to dry properly. This is an essential step to ensure that your door looks great and lasts for a long time. The drying time will depend on the type of paint you used, the weather conditions, and the humidity levels. In general, oil-based paints take longer to dry than water-based paints.

To ensure proper drying, you should follow these tips:

  • Leave the door open for at least 24 hours to allow the paint to dry completely.
  • If the weather is humid, it may take longer for the paint to dry. You can use a dehumidifier or fan to speed up the process.
  • Avoid touching the door or closing it until the paint is completely dry.
  • If you notice any drips or uneven areas, you can sand them down lightly after the paint has dried.

Reinstalling the Door

Once the paint has dried completely, you can reinstall the door. This is a straightforward process, but you should take care to avoid damaging the freshly painted surface. Here are the steps to follow:

  1. Remove any protective coverings or tape that you used to protect the hardware or glass.
  2. Carefully lift the door back into place in the frame. You may want to ask someone to help you hold the door while you attach the hinges.
  3. Reattach the hinges to the frame using the screws that you removed earlier. Make sure that the screws are tight and secure.
  4. Test the door to make sure that it opens and closes smoothly. If there are any issues, you may need to adjust the hinges or sand down the door slightly.
  5. Finally, add any hardware or accessories that you removed earlier, such as the doorknob or lockset.

By following these steps, you can ensure that your newly painted wooden exterior door looks great and functions properly. Remember to take your time and be careful during the reinstallation process to avoid damaging the door or the surrounding area.