Tag Archives: high-traffic areas

How to Clean Wooden Floors Before Sealing: A Quick Guide

Cleaning wooden floors before sealing is an essential step in maintaining their quality and longevity. Proper cleaning ensures that the floors are free of dirt, debris, and other contaminants that can affect the quality of the sealant. With the right tools and techniques, you can clean your wooden floors effectively and prepare them for sealing.

The first step in cleaning wooden floors is to remove all dirt and debris from the surface. This can be done by sweeping, vacuuming, or using a dust mop. It is important to get rid of all dirt and debris, including the smallest specks, to ensure that the sealant adheres properly to the surface of the wood. Once you have removed all the dirt, you can proceed to clean the floors thoroughly using a damp mop and a cleaning solution that is safe for wood surfaces.

Understanding the Importance of Cleaning Wooden Floors Before Sealing

Before you start sealing your wooden floors, it is crucial to clean them thoroughly. Cleaning your floors before sealing them ensures that the sealant adheres correctly to the wood surface, providing a long-lasting finish. Here are some reasons why cleaning your wooden floors before sealing is essential:

Removes Dirt and Grime

Cleaning your wooden floors before sealing removes dirt and grime that has accumulated over time. Dirt and grime can cause the sealant to adhere unevenly to the wood surface, leading to an uneven finish. Cleaning your floors ensures that the sealant adheres evenly, providing a smooth and uniform finish.

Removes Stains

Stains on wooden floors can be challenging to remove, especially if they have been there for a long time. Cleaning your floors before sealing removes any stains, ensuring that the sealant adheres correctly to the wood surface. This prevents the stains from showing through the sealant, providing a clean and polished finish.

Removes Residues

Cleaning your wooden floors before sealing removes any residues that may be present on the surface. Residues can cause the sealant to adhere unevenly to the wood surface, leading to an uneven finish. Cleaning your floors ensures that the sealant adheres evenly, providing a smooth and uniform finish.

Improves Durability

Cleaning your wooden floors before sealing improves the durability of the sealant. A clean surface ensures that the sealant adheres correctly to the wood surface, providing a long-lasting finish. This prevents the sealant from peeling or flaking off, ensuring that your floors look beautiful for years to come.

In conclusion, cleaning your wooden floors before sealing is crucial to ensure a long-lasting and beautiful finish. It removes dirt, stains, and residues and improves the durability of the sealant. Make sure to clean your floors thoroughly before sealing them to achieve the best results.

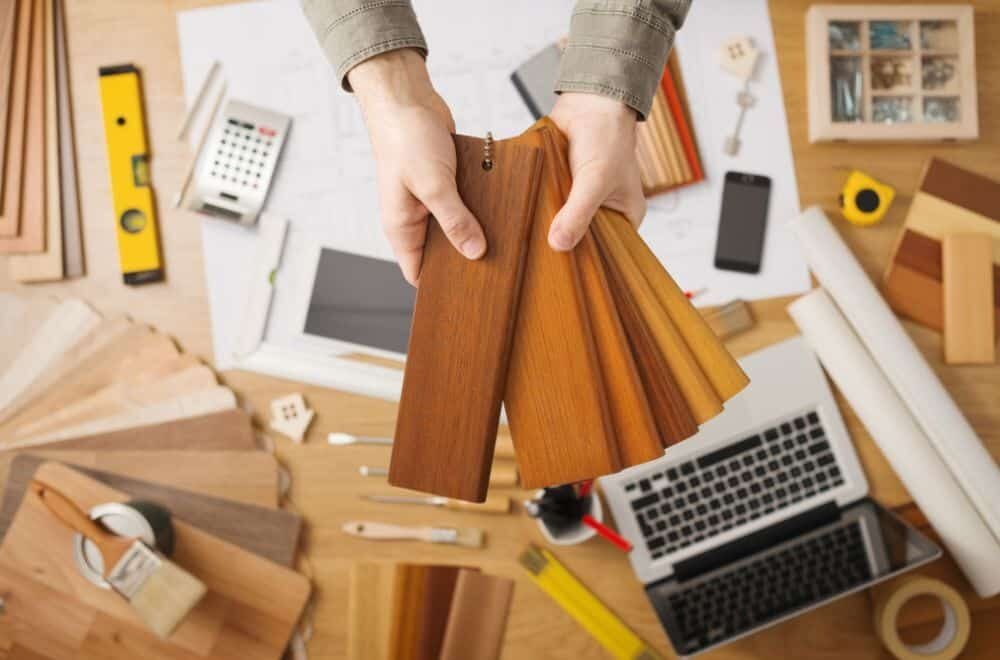
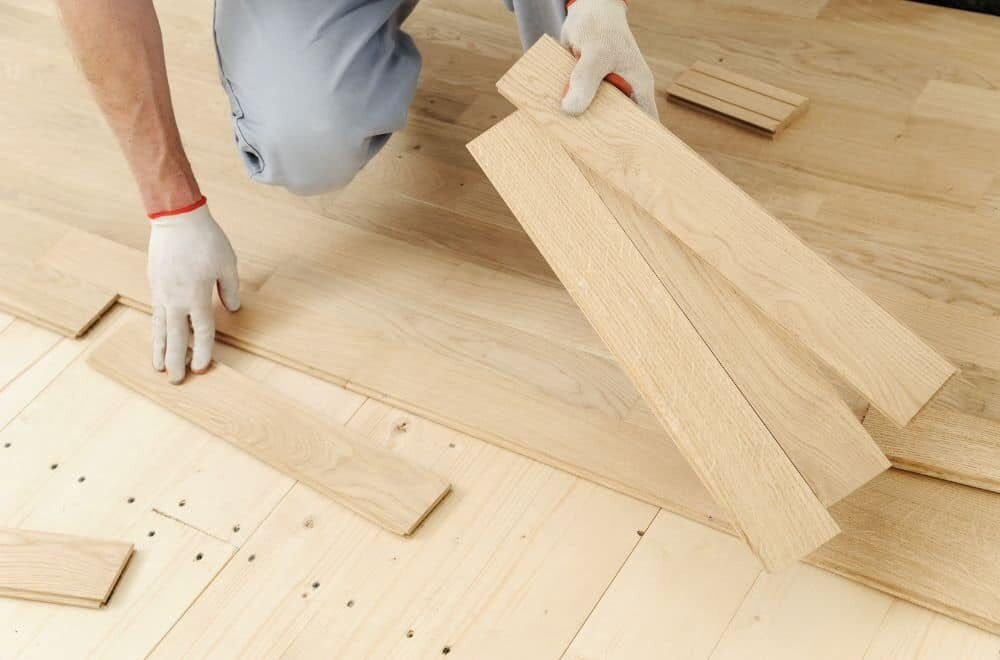
Identifying the Type of Wood

Before you start cleaning your wooden floors, it’s important to determine the type of wood you have. Different types of wood require different cleaning methods, and using the wrong method can damage your floors.

Here are some ways to identify the type of wood you have:

Look for a Label

If you have recently installed your wooden floors, there may be a label on the packaging or the back of the boards that indicates the type of wood.

Check the Grain

The grain pattern can help you identify the type of wood. For example, oak has a distinctive grain pattern with prominent lines and knots, while maple has a more subtle grain pattern with fewer knots.
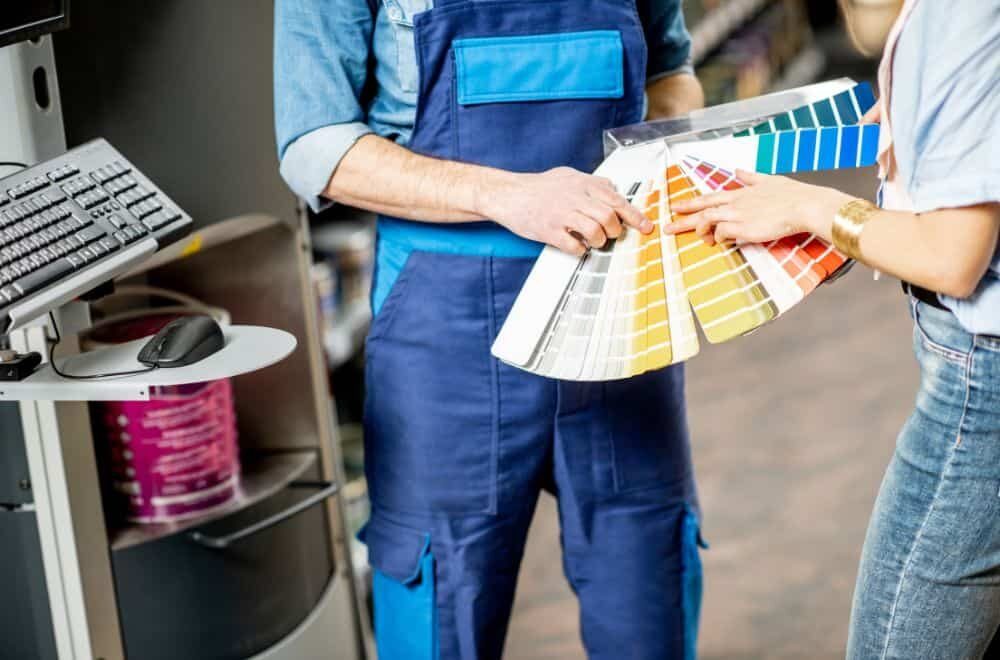
Check the Color

The color of the wood can also give you a clue about the type of wood. For example, cherry wood has a reddish-brown color, while walnut has a dark brown color.

Do a Scratch Test

If you’re still unsure about the type of wood, you can do a scratch test. Use a sharp object to make a small scratch on a hidden area of the floor. If the scratch is light-colored, the wood is likely to be a softwood like pine or fir. If the scratch is dark-colored, the wood is likely to be a hardwood like oak or maple.

Once you have identified the type of wood, you can choose the appropriate cleaning method to ensure that your floors stay in good condition.

Choosing the Right Cleaning Materials

Cleaning your wooden floors before sealing is an essential step to ensure a smooth and long-lasting finish. However, choosing the right cleaning materials is equally important to avoid damaging the wood surface. Here are some tips on selecting the right cleaning materials for your wooden floors:

1. Avoid Harsh Chemicals

When it comes to cleaning wooden floors, it’s crucial to avoid harsh chemicals that can cause damage to the wood surface. Avoid using acidic or alkaline cleaners, bleach, ammonia, or any other harsh chemicals that can strip the wood of its natural oils and cause discoloration.

2. Consider the Type of Wood

Different types of wood have different cleaning requirements. For instance, softwoods like pine and cedar are more susceptible to scratches and dents, so you need to be extra careful when cleaning them. Hardwoods like oak and maple, on the other hand, are more durable and can withstand more aggressive cleaning.

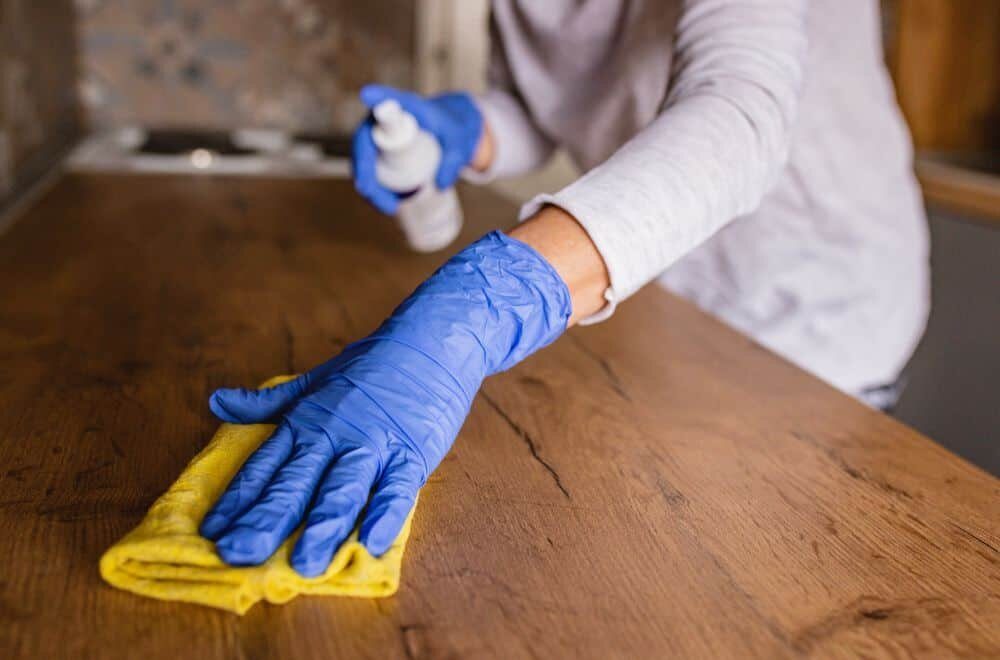
3. Use Microfiber Cloths

When cleaning your wooden floors, it’s best to use microfiber cloths instead of traditional mops or rags. Microfiber cloths are gentle on the wood surface and can trap dirt and dust without scratching the wood. They are also reusable and easy to clean.

4. Use a pH-Neutral Cleaner

A pH-neutral cleaner is the best option for cleaning wooden floors. pH-neutral cleaners are gentle on the wood surface and won’t strip the wood of its natural oils. They are also safe to use on all types of wood and won’t cause discoloration.

5. Test the Cleaner First

Before using any cleaner on your wooden floors, it’s essential to test it first on a small, inconspicuous area. This will help you determine whether the cleaner is safe to use on your wood surface and prevent any potential damage.

By following these tips, you can choose the right cleaning materials for your wooden floors and ensure a smooth and long-lasting finish.

Step-by-Step Guide to Cleaning Wooden Floors

Cleaning your wooden floors is an essential step before sealing them. Here’s a step-by-step guide to help you clean your wooden floors effectively:

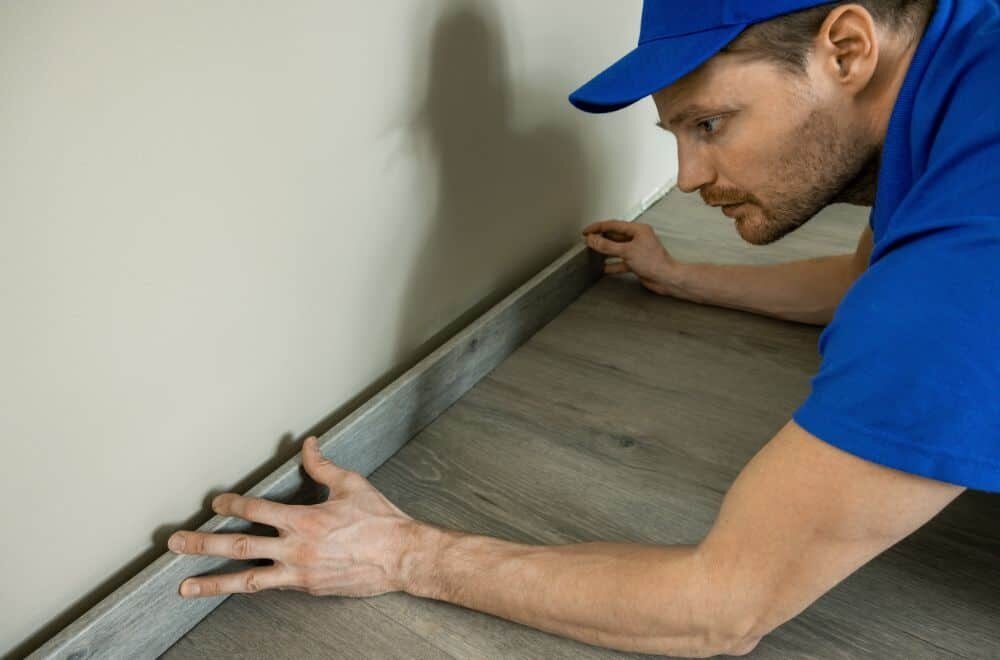
  1. Start by removing any dirt and debris from your floor. Sweep or vacuum the floor using a soft-bristled broom or a vacuum cleaner recommended for hardwood floors. Avoid using a hard-bristled broom or a vacuum cleaner with a beater bar as it may scratch the surface of the floor.

  2. Use a damp mop to clean the floor. Make sure the mop is only slightly damp, as excess water can damage the wood. You can use a commercial wood floor cleaner or a homemade solution of water and vinegar. Mix one part vinegar with ten parts water and apply it to the floor using a mop.

  3. Wipe up any excess moisture with a clean, dry cloth. Make sure the floor is completely dry before moving on to the next step.

  4. If there are any stubborn stains or marks on the floor, you can use a mild abrasive cleaner. Mix baking soda and water to form a paste and apply it to the stain. Leave it for a few minutes before scrubbing gently with a soft-bristled brush. Rinse the area with water and wipe it dry with a clean cloth.

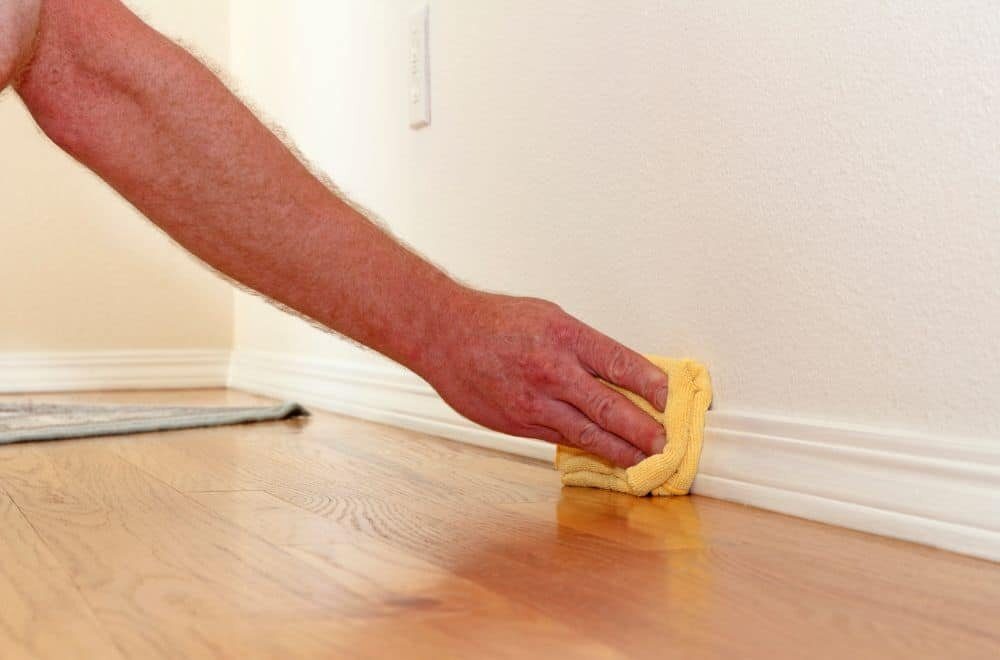
  5. Finally, inspect the floor for any remaining dirt or debris. Use a microfiber cloth to wipe down the floor and remove any remaining dust or debris.

By following these simple steps, you can effectively clean your wooden floors before sealing them. This will ensure that your floors are prepped and ready for the sealing process, and will help to protect them from damage and wear over time.

Proper Drying Techniques Before Sealing

Before you start sealing your wooden floors, it is crucial to ensure that they are completely dry. Proper drying techniques are essential to avoid trapping moisture in the wood, which can lead to warping, cracking, or even mold growth. Here are some tips to help you dry your wooden floors effectively:

1. Allow Sufficient Drying Time

The amount of time required for your wooden floors to dry depends on various factors, such as the type of wood, the humidity level, and the temperature. As a general rule, you should allow at least 24 to 48 hours for the floors to dry completely after cleaning or sanding. However, it is best to follow the manufacturer’s instructions for the specific product you are using.

2. Use Air Circulation

Air circulation can help speed up the drying process by promoting evaporation. Open windows and doors to increase ventilation, or use fans to circulate the air. You can also use a dehumidifier to reduce the humidity level in the room.

3. Check the Moisture Content

To ensure that your wooden floors are dry enough for sealing, you can use a moisture meter to measure the moisture content. The ideal moisture content for most wooden floors is between 6% and 8%. If the moisture content is higher than that, you should wait for the floors to dry further.

4. Test for Dryness

Before you start sealing your wooden floors, you should perform a simple test to check if they are dry enough. Place a small piece of plastic wrap on the floor and tape down the edges. Leave it for 24 hours. If there is condensation on the underside of the plastic wrap, the floors are not dry enough. If the plastic wrap is dry, you can proceed with sealing.

By following these proper drying techniques, you can ensure that your wooden floors are ready for sealing, and you can avoid potential problems down the line.

Pre-Sealing Preparations

Before you start sealing your wooden floors, it is essential to prepare them properly to ensure that the sealant adheres properly and lasts longer. Proper preparation will also help to remove any dirt or debris that may affect the quality of the sealant. Here are some steps you can follow to prepare your wooden floors for sealing:

Step 1: Clean the floors thoroughly

The first step in preparing your wooden floors for sealing is to clean them thoroughly. Sweep away any dirt or debris with a broom and then mop the floor with warm water and detergent. You can also use a vacuum cleaner to remove any dust or debris that may be difficult to reach with a broom.

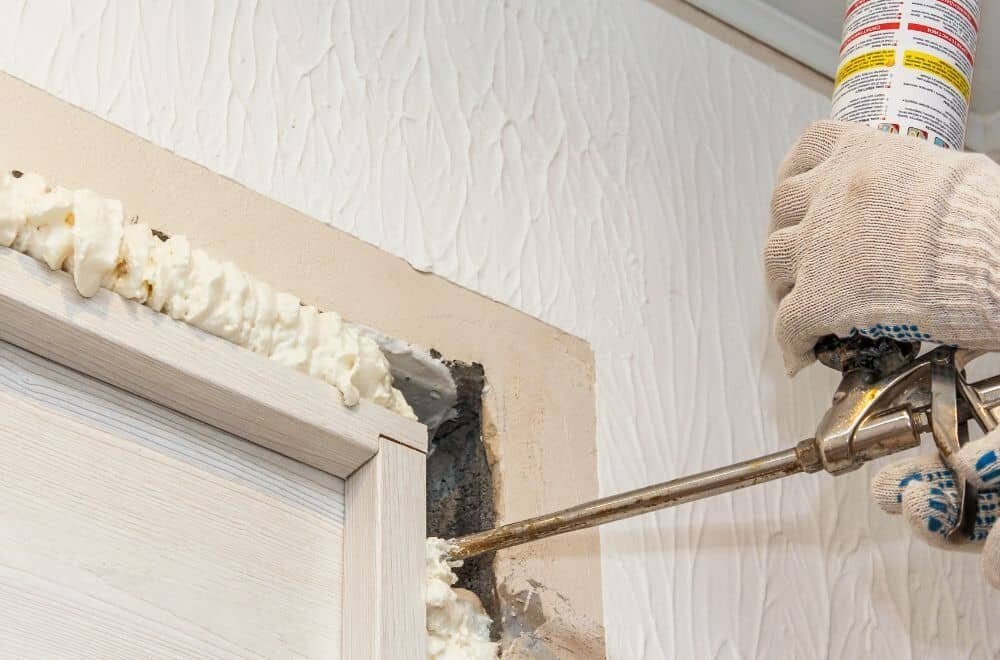
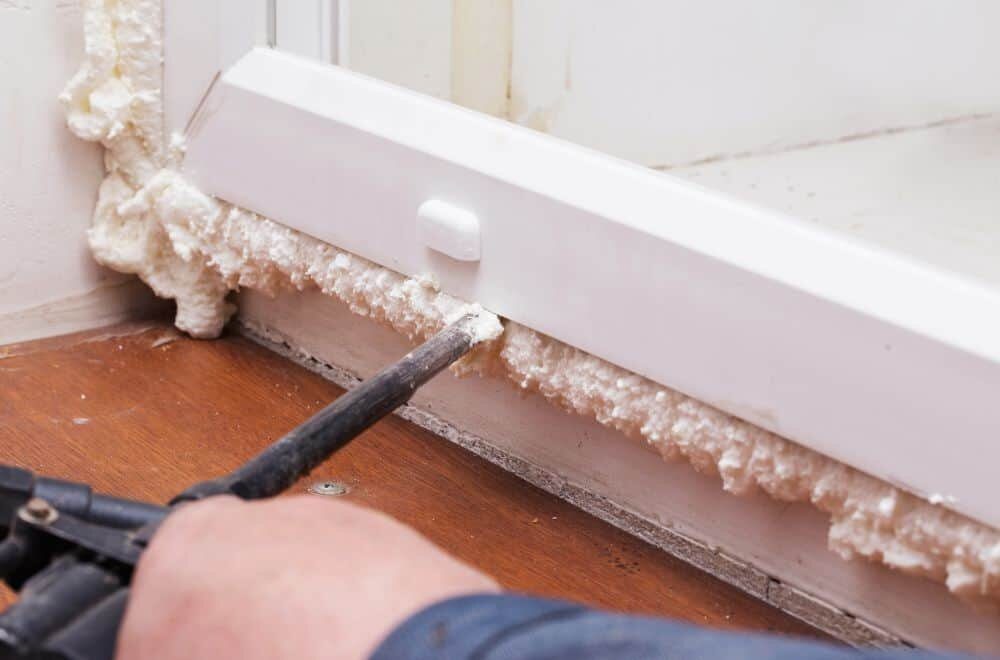
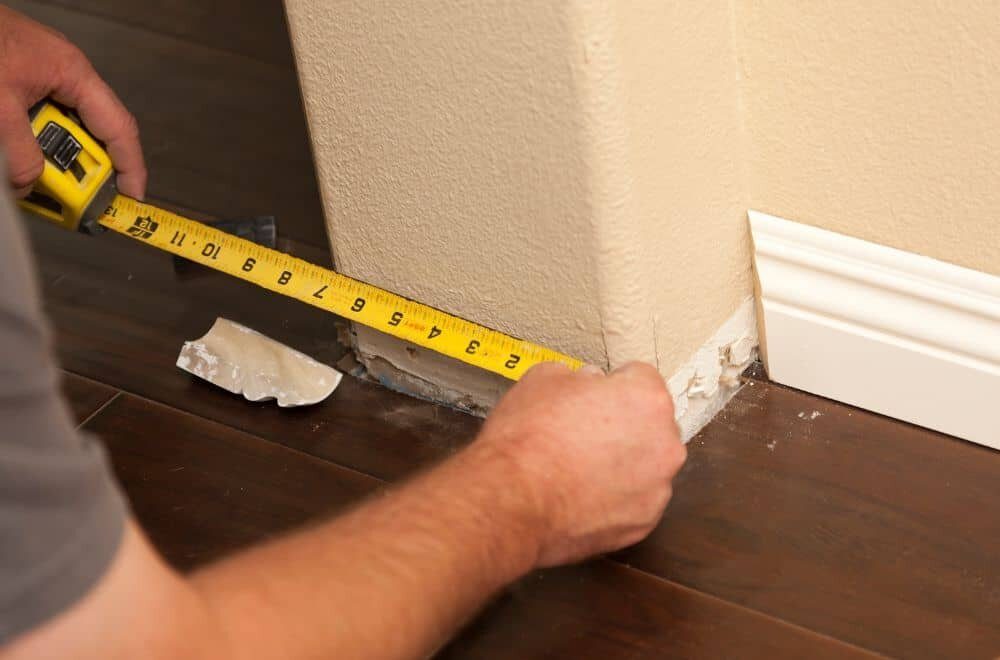
Step 2: Fill any holes or gaps

After cleaning the floors, inspect them for any holes or gaps that need to be filled. You can use a wood filler to fill any gaps or holes in the floor. Apply the filler to the gaps or holes and then use a putty knife to smooth it out. Allow the filler to dry completely before proceeding to the next step.

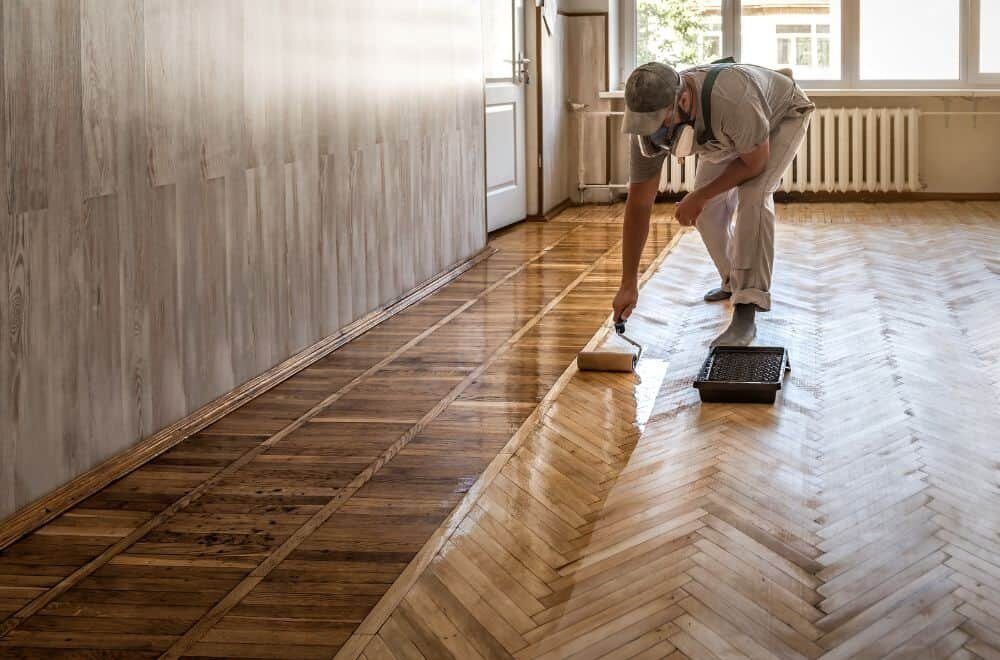
Step 3: Sand the floors

Once the filler has dried, sand the floors to remove any old coatings or finishes. It’s best to hire a proper floor sander for this task. Sand the floors until they are smooth and even. After sanding, clear up the dust with a vacuum. Wipe your floor with white spirit, and leave it to dry.

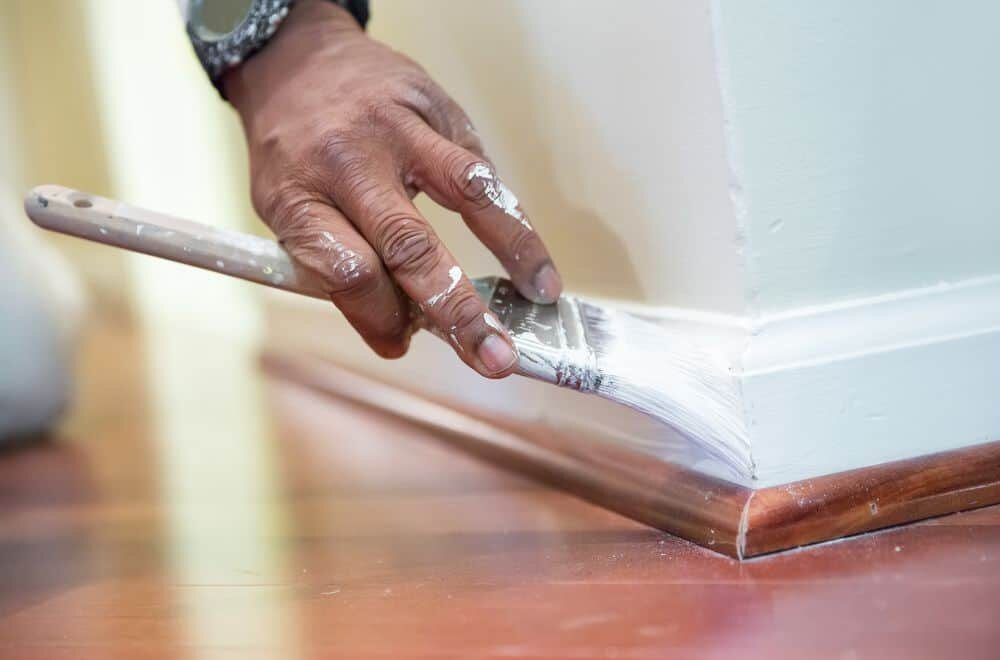
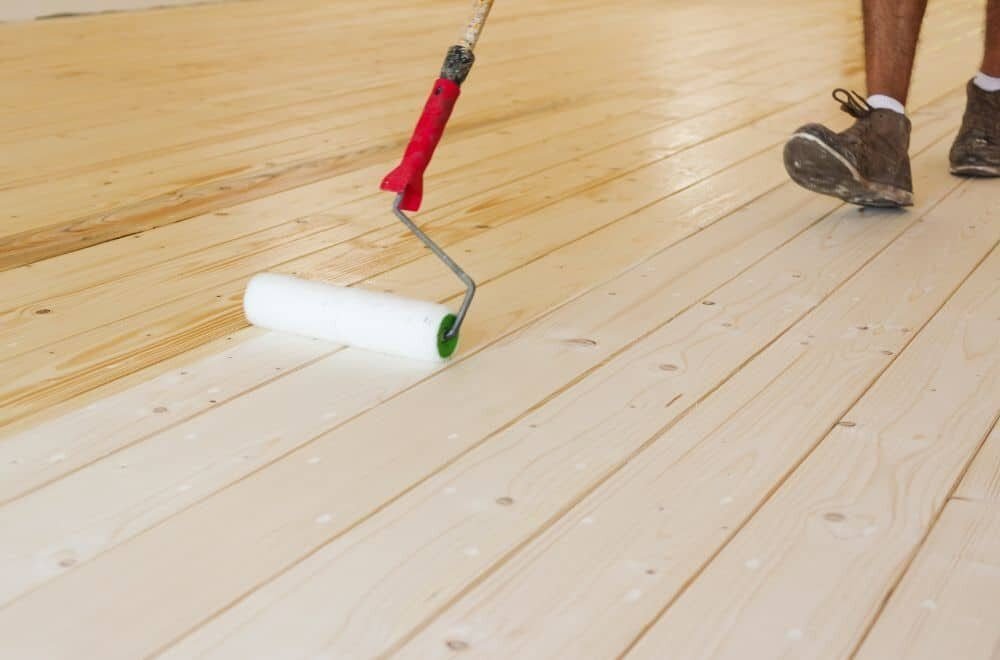
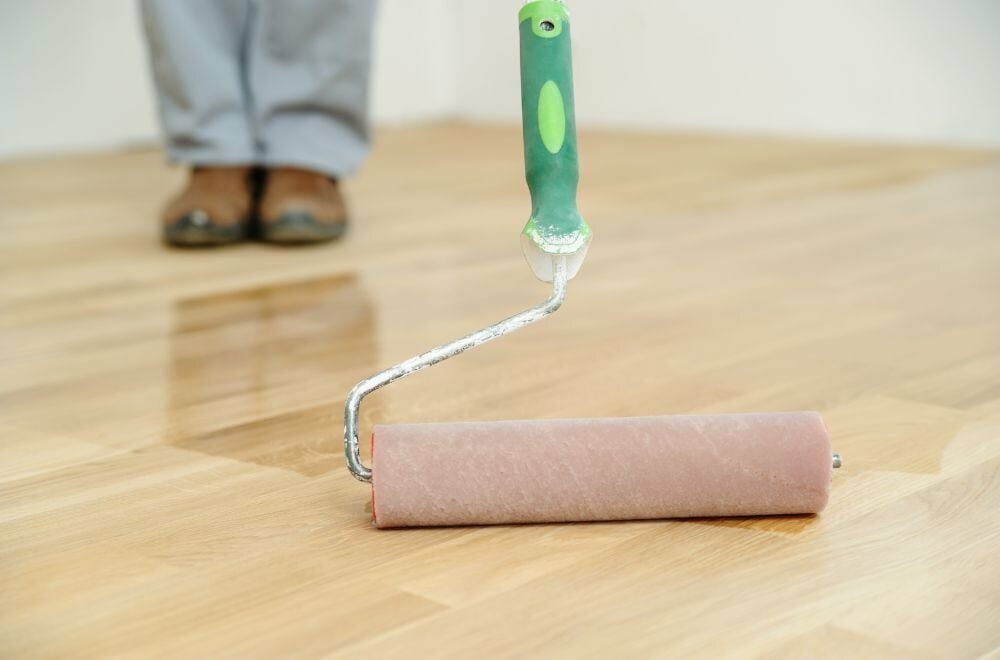
Step 4: Apply the sealant

After the floors have been sanded and cleaned, you can now apply the sealant. Follow the manufacturer’s instructions carefully when applying the sealant. Use a brush or roller to apply the sealant evenly to the floor. Allow the sealant to dry completely before proceeding to the next step.

By following these steps, you can prepare your wooden floors properly before sealing, ensuring that the sealant adheres properly and lasts longer. Proper preparation will also help to remove any dirt or debris that may affect the quality of the sealant.

Common Mistakes to Avoid

When it comes to cleaning and sealing your hardwood floors, there are a few common mistakes you should avoid to ensure that your floors stay in top condition. Here are some of the most common mistakes and how to avoid them:

Using the Wrong Cleaning Products

One of the biggest mistakes people make when cleaning their hardwood floors is using the wrong cleaning products. Harsh chemicals and abrasive cleaners can damage your floors and strip away the protective finish, leaving them vulnerable to scratches and other damage. Instead, use a gentle cleaner specifically designed for hardwood floors, and always follow the manufacturer’s instructions.

Over-Wetting the Floors

Another common mistake is over-wetting the floors during the cleaning process. Excess moisture can seep into the wood and cause it to warp or buckle, which can be difficult and expensive to repair. To avoid this, use a damp mop or cloth to clean your floors, and be sure to wring out excess water before you start.

Using Rough or Abrasive Tools

Using rough or abrasive tools to clean your floors can also cause damage. Scrubbing with steel wool or using a stiff-bristled brush can scratch the surface of your floors and leave them looking dull and worn. Instead, use a soft-bristled brush or a microfiber mop to gently clean your floors.

Neglecting Regular Maintenance

Finally, neglecting regular maintenance is a common mistake that can lead to costly repairs down the line. Sweeping or vacuuming your floors regularly can prevent dirt and debris from building up and scratching the surface. Additionally, be sure to wipe up spills and stains as soon as they occur to prevent them from setting in and causing permanent damage.

By avoiding these common mistakes and taking the time to properly clean and maintain your hardwood floors, you can keep them looking beautiful and extend their lifespan for years to come.

Maintenance Tips for Sealed Wooden Floors

Once you have sealed your wooden floors, it’s important to maintain them properly to keep them looking beautiful for years to come. Here are some tips to help you maintain your sealed wooden floors:

  • Sweep or vacuum your floors regularly to remove any dirt or debris. Use a soft-bristled broom or a vacuum cleaner with a hardwood floor attachment to avoid scratching the surface of your floors.
  • Use a damp mop to clean your floors as needed. Avoid using too much water, as excess moisture can damage your floors over time. Instead, wring out your mop thoroughly before using it on your floors.
  • Use a pH-neutral cleaner specifically designed for sealed wooden floors. Avoid using harsh chemicals or abrasive cleaners, as they can strip away the protective sealant on your floors.
  • Wipe up any spills or stains immediately to prevent them from setting into your floors. Use a soft, damp cloth to clean up spills, and avoid using any abrasive materials that could scratch your floors.
  • Place rugs or mats in high-traffic areas to protect your floors from wear and tear. Be sure to use rugs or mats with a non-slip backing to prevent them from slipping on your floors.
  • Avoid dragging heavy furniture or appliances across your floors. Instead, use furniture pads or sliders to protect your floors from scratches and dents.
  • Consider refinishing your floors every few years to keep them looking their best. Refinishing can help to restore the protective sealant on your floors and remove any scratches or stains that have accumulated over time.

By following these simple maintenance tips, you can keep your sealed wooden floors looking beautiful and protect them from damage over time.

hardwood

What are Some Examples of Cheap Types of Wood? – Affordable Options for Your Next Project

Are you looking for affordable wood options for your next DIY project? You’re not alone. Many people want to create beautiful pieces without breaking the bank. Fortunately, there are several types of wood that are both cheap and versatile. In this article, we’ll explore some examples of cheap types of wood and what they are commonly used for.

Dari sekian banyak jenis taruhan judi online, memilih slot sebagai fokus permainan taruhan Anda adalah hal paling cerdik di tahun 2024 ini. Bukan karena berdasarkan kepada hiburannya saja, melainkan juga keuntungan yang bisa didapatkan. IDN Slot 88 adalah salah satu permainan judi yang menjanjikan keuntungan besar, karena ada jackpot progresif dan RTP tinggi yang menjadi ciri khasnya.

One of the most popular types of cheap wood is pine. Pine wood is sourced from various pine species that grow natively around the world. It is one of the best wood options when high strength and low cost are needed. Pine wood is easy to work with and can be used for a variety of projects, including furniture, flooring, and construction.

Another option is American white oak or maple. These homegrown species perform well for many projects, including DIY furniture. For general projects, 3 Common is a good choice because it’s strong and affordable. If you’re looking for something a little bit nicer, 2 Common can be substituted for 1 without too much sacrifice in terms of strength. Stay tuned to learn more about other examples of cheap types of wood and their uses.

Secara keseluruhan, situs toto togel online membuka pintu bagi para pecinta taruhan untuk menikmati pengalaman taruhan yang menyenangkan, seru, dan terpercaya. Dengan berbagai pasaran, informasi terpercaya, fitur menarik, dan keamanan yang dijamin, situs-situs ini menjelma menjadi destinasi utama bagi mereka yang ingin menjelajahi dunia taruhan togel secara online.

Understanding Wood Types

understanding-wood-typesWhen it comes to woodworking, choosing the right type of wood is essential. There are many different types of wood available, each with its own unique properties and characteristics. Some woods are more expensive than others, while some are more durable or easier to work with.

Here are a few things to keep in mind when selecting a type of wood for your project:

Hardwood vs. Softwood

One of the first things to consider is whether you need hardwood or softwood. Hardwood comes from deciduous trees, while softwood comes from evergreen trees. Hardwood is generally denser and stronger than softwood, but it is also more expensive. Softwood is usually less expensive and easier to work with, but it may not be as durable.

Grain Patterns

Another important consideration when choosing wood is the grain pattern. The grain pattern refers to the way the wood fibers are oriented. Some woods have a straight grain pattern, while others have a more complex pattern. The grain pattern can affect the strength and appearance of the wood.

Color and Texture

The color and texture of the wood can also be important factors to consider. Some woods are naturally light in color, while others are darker. Some woods have a smooth, even texture, while others have a more rustic, rough texture. The color and texture of the wood can affect the overall look and feel of your project.

Cost

Lastly, cost is always a consideration when choosing wood. Some types of wood are more expensive than others, so it’s important to consider your budget when selecting a type of wood for your project. Keep in mind that the cost of the wood may also be affected by its availability and how difficult it is to work with.

By considering these factors, you can choose the right type of wood for your project and ensure that it will be both beautiful and functional.

Softwood

If you’re looking for cheap wood options, softwood is a great choice. Softwoods come from coniferous trees and are generally less expensive than hardwoods. Here are a few examples of softwoods that won’t break the bank:

Pine

Pine is a popular choice for furniture, flooring, and construction. It’s easy to work with and relatively inexpensive. Pine is also lightweight, making it a good option for projects that require a lighter touch. Keep in mind that pine can be prone to dents and scratches, so it may not be the best choice for high-traffic areas.

Cedar

Cedar is another softwood that’s often used for outdoor projects like decks and fences. It’s naturally resistant to rot and insects, making it a good choice for outdoor applications. Cedar also has a pleasant scent, which can help repel insects. Keep in mind that cedar can be more expensive than other softwoods, so it may not be the best choice if you’re on a tight budget.

Fir

Fir is a versatile softwood that’s often used for framing and construction. It’s relatively inexpensive and easy to work with, making it a good choice for DIY projects. Fir is also strong and durable, making it a good option for structural applications. Keep in mind that fir can be prone to warping and splitting, so it may not be the best choice for projects that require a lot of precision.

Overall, softwoods are a great choice if you’re looking for inexpensive wood options. Pine, cedar, and fir are just a few examples of softwoods that can be used for a variety of projects. When choosing a softwood, consider the project you’re working on and the specific qualities you need in your wood.

Hardwood

hardwood

When it comes to cheap hardwood, there are a few options that you can consider. In this section, we will discuss two of them: Poplar and Beech.

Poplar

Poplar is a hardwood that is often overlooked because it is not as hard as some of the other hardwoods. However, it is a great option if you are looking for a cheap wood that is easy to work with. Poplar has a straight grain and a uniform texture, which makes it easy to cut and sand. It is also lightweight, which makes it a good option for projects that require a lighter wood.

One of the downsides of poplar is that it is not as strong as some of the other hardwoods. This means that it may not be the best option for projects that require a lot of weight-bearing. However, if you are looking for a cheap wood that is easy to work with and is suitable for lighter projects, poplar is a great option.

Beech

Beech is another hardwood that is often overlooked because it is not as hard as some of the other hardwoods. However, it is a great option if you are looking for a cheap wood that is easy to work with. Beech has a straight grain and a fine, even texture, which makes it easy to cut and sand. It is also a very stable wood, which means that it is less likely to warp or twist.

One of the downsides of beech is that it can be difficult to stain. If you are planning on staining your project, you may want to consider a different wood. However, if you are looking for a cheap wood that is easy to work with and is suitable for projects that do not require staining, beech is a great option.

In conclusion, if you are looking for a cheap hardwood, poplar and beech are two great options to consider. They are both easy to work with and are suitable for a variety of projects. However, it is important to keep in mind that they may not be the best option for projects that require a lot of weight-bearing or staining.

Manufactured Wood

If you’re looking for a cheap type of wood, you might want to consider manufactured wood. Manufactured wood is made by combining wood fibers and resins, which are then pressed into boards. This process creates a strong and durable material that can be used for a variety of projects.

Plywood

Plywood is a type of manufactured wood that is made by gluing together several layers of thin wood veneers. This creates a strong and stable material that is perfect for a variety of projects. Plywood is often used for furniture, cabinets, and flooring.

One of the great things about plywood is that it comes in a variety of grades and thicknesses. This means that you can choose the perfect type of plywood for your project, depending on your needs and budget.

MDF

MDF, or medium-density fiberboard, is another type of manufactured wood that is made by combining wood fibers and resins. MDF is a great option if you’re looking for a cheap and versatile material that can be used for a variety of projects.

MDF is often used for furniture, cabinets, and shelving. It’s also a popular choice for molding and trim work. One of the great things about MDF is that it’s easy to work with and can be cut, drilled, and shaped just like solid wood.

When choosing MDF, it’s important to consider the thickness and density of the material. Thicker and denser MDF will be stronger and more durable, but it will also be more expensive. Thinner and less dense MDF will be cheaper, but it may not be as strong or durable.

Reclaimed Wood

reclaimed-wood

If you are looking for a cheap and eco-friendly option for your woodworking projects, reclaimed wood may be the way to go. Reclaimed wood is wood that has been salvaged from old buildings, barns, or other structures that are no longer in use. Instead of being discarded, this wood is repurposed and given a new life.

One of the benefits of using reclaimed wood is that it is often available in larger sizes than new lumber. This is because the old-growth trees that were used in construction projects in the past were much larger than the trees that are harvested today. Reclaimed wood can also have unique character and a weathered look that is difficult to replicate with new wood.

When it comes to the types of wood that can be reclaimed, the possibilities are endless. Some of the most common species of reclaimed wood include Douglas fir, redwood, pine, and oak. However, any wood species can be reclaimed and repurposed for use in building structures, floors, paneling, siding, and even furniture.

The cost of reclaimed wood can vary depending on the type of wood and its intended use. In most cases, reclaimed wood can range from $10 to $40 per square foot. While this may be more expensive than new lumber, the environmental benefits and unique character of reclaimed wood make it a worthwhile investment for many woodworkers.

Overall, reclaimed wood is a great option for those looking for a cheap and eco-friendly alternative to new lumber. With its unique character and larger sizes, it can add a touch of history and charm to any woodworking project.

Factors Affecting Wood Prices

When it comes to buying wood, the price is one of the most important factors to consider. The cost of wood can vary significantly depending on a number of factors. Here are some of the most important factors that can affect wood prices:

Type of Wood

The type of wood you choose can have a significant impact on the cost. Some types of hardwoods like mahogany and teak tend to be more expensive than other softwoods like pine or spruce. Factors affecting the price include how rare they are, where they were sourced from (e.g., imported), and their quality.

Grade of Wood

The grade of wood you choose can also affect the price. Wood is graded based on its appearance, strength, and other factors. Higher grade wood is generally more expensive than lower grade wood. If you’re using the wood for a project where appearance is important, you may want to consider spending more for a higher grade.

Season and Availability

Season and availability can also affect wood prices. For example, in the winter, when construction slows down, the demand for wood may decrease, which can lead to lower prices. On the other hand, during the summer, when construction is in full swing, prices may be higher due to increased demand.

Location

The location of the wood can also affect the price. If you’re buying wood from a local supplier, you may be able to save money on shipping costs. However, if you’re buying wood from a supplier that’s located far away, you may have to pay more for shipping, which can increase the overall cost.

Market Conditions

Finally, market conditions can also affect wood prices. For example, if there’s a shortage of wood due to a natural disaster or other event, prices may increase. On the other hand, if there’s an oversupply of wood, prices may decrease. It’s important to keep an eye on market conditions if you want to get the best price for your wood.

Where to Buy Cheap Wood

where-to-buy-cheap-wood

If you’re looking to save money on your woodworking projects, buying cheap wood is a great way to do it. Here are some places where you can find affordable lumber:

Home Improvement Stores

Home improvement stores like Home Depot and Lowe’s are great places to find cheap wood. They often have a wide selection of lumber, including pine, poplar, and other inexpensive woods. You can also find sales and discounts on wood at these stores, so be sure to check regularly.

Lumberyards

Lumberyards are another great place to find affordable wood. They often have a wider selection than home improvement stores and may have better prices, especially if you’re buying in bulk. You can also ask the salespeople at the lumberyard for advice on the best types of wood for your project.

Online Retailers

Online retailers like Amazon and Etsy can be great places to find cheap wood, especially if you’re looking for specialty woods that may be harder to find locally. Be sure to read reviews and check the seller’s ratings before making a purchase, and factor in shipping costs when comparing prices.

Salvage Yards

If you’re willing to do a little digging, salvage yards can be a great source of cheap wood. Look for old barns, fences, and other structures that are being torn down, and ask the owner if you can salvage any usable wood. You may need to do some cleaning and sanding, but the savings can be worth it.

Local Sawmills

If you live in a rural area, local sawmills can be a great source of cheap wood. They may have a limited selection, but the prices are often lower than what you’ll find at a home improvement store or lumberyard. You can also ask the sawmill owner for advice on the best types of wood for your project.

Remember, when buying cheap wood, it’s important to check for quality. Look for wood that is straight, free of knots and cracks, and has a consistent color and texture. With a little research and some smart shopping, you can find affordable wood that will work great for your woodworking projects.

Frequently Asked Questions

Where can I find affordable wood boards?

You can find affordable wood boards at your local lumberyard or home improvement store. You can also check online retailers for competitive prices.

What are some inexpensive options for wood sheets?

Plywood and particle board are two inexpensive options for wood sheets. They are both made from wood particles and fibers, making them strong and affordable.

What are some types of pine wood that are affordable?

Pine is a popular option for affordable wood. Some types of pine wood that are affordable include Eastern White Pine, Southern Yellow Pine, and Ponderosa Pine.

What are some examples of strong and affordable wood?

American White Oak and Maple are both strong and affordable options for wood. 3 Common is also a good choice for general projects because it is both strong and affordable.

What is the most affordable natural wood to buy?

Pine is the most affordable natural wood to buy. It is widely available and comes in many different grades, making it a versatile and cost-effective option.

What are some cheaper alternatives to oak for furniture?

If you’re looking for a cheaper alternative to oak for furniture, consider using Birch or Poplar. Both woods have a similar look and feel to oak but are more affordable.

choosing-the-right-filler

What should you use to fill large gaps in wood? A guide to choosing the right wood filler

If you’re working with wood, you may encounter gaps that need to be filled. These gaps can be caused by a variety of factors, including wood shrinkage, warping, or damage. Filling large gaps in wood can be a daunting task, but it’s important to choose the right filler for the job to ensure a successful repair.

There are several options available for filling large gaps in wood, including epoxy fillers, powdered fillers, and wood putty. Each type of filler has its own unique properties and advantages, so it’s important to consider the specific needs of your project before choosing a filler. Factors to consider include the size of the gap, the type of wood, and the desired appearance of the finished repair.

When selecting a filler, it’s also important to consider the strength and durability of the product. Some fillers may be more suitable for high-traffic areas or outdoor use, while others may be better suited for indoor projects. By taking the time to carefully evaluate your options and choose the right filler for your project, you can ensure a successful repair that will last for years to come.

Understanding Wood Gaps

If you’ve ever worked with wood, you’ve probably encountered gaps. These gaps can be frustrating, especially when they’re large. But understanding why gaps occur and how they can affect your project can help you choose the best way to fill them.

Causes of Large Wood Gaps

Large wood gaps can be caused by a variety of factors. Some of the most common causes include:

  • Wood movement: Wood is a natural material that expands and contracts with changes in temperature and humidity. If you don’t account for this movement when building your project, gaps can occur.
  • Drying: As wood dries, it can shrink and crack, leading to gaps.
  • Poor joinery: If your joints aren’t tight, gaps can occur.
  • Knots: Knots can create voids in the wood that can lead to gaps.

Effects of Unfilled Gaps

Unfilled gaps can have several negative effects on your project, including:

  • Weakness: Gaps can weaken your project by reducing the amount of contact between the wood pieces.
  • Appearance: Large gaps can be unsightly and detract from the appearance of your project.
  • Dirt and debris: Gaps can collect dirt and debris, making your project harder to clean.

By understanding the causes and effects of large wood gaps, you can choose the best method for filling them and ensure that your project looks and performs its best.

Choosing the Right Filler

choosing-the-right-filler

When it comes to filling large gaps in wood, it’s important to choose the right filler for your project. Here are three options to consider:

Wood Putty

Wood putty is a popular choice for filling small to medium-sized gaps in wood. It’s made from a mixture of wood particles and a binding agent, such as linseed oil or epoxy. Wood putty is easy to apply and can be sanded and painted over once it dries. However, it’s not the best option for larger gaps as it can crack and shrink over time.

Epoxy Resin

For larger gaps or holes, epoxy resin is a more durable and long-lasting option. Epoxy is a two-part adhesive that hardens when mixed together. It’s strong, waterproof, and can be sanded and painted over once it dries. Epoxy resin is also heat-resistant, making it a good choice for outdoor projects. However, it can be more difficult to work with and requires careful mixing and application.

Sawdust and Glue Mix

Another option for filling large gaps is to create a mixture of sawdust and wood glue. This method is cost-effective and easy to make at home. Simply mix sawdust with wood glue to create a thick paste and apply it to the gap. Once it dries, sand it down and paint over it if desired. However, this method may not be as strong or long-lasting as other options and may not work well for larger gaps.

When choosing the right filler for your project, consider the size of the gap, the type of wood you’re working with, and the desired finish. Always follow the manufacturer’s instructions and take necessary safety precautions when working with any type of filler.

Application Process

application-process-2

Preparation

Before applying wood filler to large gaps, it is important to prepare the surface properly. Here are the steps to follow:

  1. Clean the surface: Use a clean cloth or brush to remove any dust, debris, or loose particles from the gap. You can also use a vacuum cleaner to ensure that the gap is completely clean.
  2. Sand the surface: Use sandpaper to roughen up the surface around the gap. This will help the wood filler adhere better to the surface.
  3. Apply wood conditioner: If you are working with softwood, it is recommended to apply a wood conditioner before applying the wood filler. This will help the wood filler dry evenly and prevent it from soaking into the wood.

Application

Once you have prepared the surface, you can start applying the wood filler. Here are the steps to follow:

  1. Choose the right filler: Select a wood filler that is appropriate for the size of the gap you are filling. For large gaps, use a filler that is specifically designed for this purpose.
  2. Mix the filler: If you are using a two-part wood filler, mix the two components together according to the manufacturer’s instructions. If you are using a pre-mixed filler, you can skip this step.
  3. Apply the filler: Use a putty knife to apply the filler to the gap. Make sure to press the filler firmly into the gap to ensure that it fills the entire space. If the gap is deep, you may need to apply the filler in layers, allowing each layer to dry before applying the next.

Finishing

Once the wood filler has dried, you can finish the surface to match the rest of the wood. Here are the steps to follow:

  1. Sand the surface: Use sandpaper to smooth out the surface of the wood filler. Start with a coarse grit sandpaper and work your way up to a finer grit sandpaper.
  2. Stain or paint the surface: If you want the surface to match the rest of the wood, apply a stain or paint to the surface. Make sure to use a product that is compatible with the wood filler you used.
  3. Seal the surface: Once the stain or paint has dried, apply a sealer to the surface. This will protect the surface from moisture and prevent the wood filler from cracking or shrinking over time.

Safety Measures

safety-measures-3

When working with wood, safety should always be a top priority. Here are a few safety measures to keep in mind when filling large gaps in wood:

1. Wear Protective Gear

Before starting any woodworking project, it’s important to wear the appropriate protective gear. This includes safety glasses to protect your eyes from flying debris, a dust mask to prevent inhalation of sawdust, and gloves to protect your hands from sharp tools and splinters.

2. Work in a Well-Ventilated Area

When filling large gaps in wood, you may be working with wood glue or other chemicals that can emit fumes. It’s important to work in a well-ventilated area, such as a workshop or garage, to prevent inhalation of these fumes.

3. Use the Right Tools

Using the right tools for the job can help prevent accidents and injuries. When filling large gaps in wood, use a putty knife or scraper to apply the filler, and a sandpaper to smooth it out.

4. Follow Manufacturer Instructions

When using wood filler or other products, be sure to follow the manufacturer’s instructions carefully. This includes using the product in the recommended amounts, allowing sufficient drying time, and disposing of any leftover materials properly.

5. Clean Up Thoroughly

After filling large gaps in wood, be sure to clean up any leftover materials, such as sawdust or wood filler. This will help prevent accidents and keep your work area clean and safe.

By following these safety measures, you can ensure a safe and successful woodworking project.

Maintenance Tips

To ensure that your wood stays in good condition, it is important to perform regular maintenance. Here are some tips to keep in mind:

  • Clean your wood regularly with a soft cloth or brush to remove dust and dirt. Avoid using harsh chemicals or abrasive materials that can damage the surface of the wood.
  • Use a wood conditioner or oil to protect the wood from drying out and cracking. Apply the conditioner or oil with a soft cloth, following the manufacturer’s instructions.
  • Keep your wood away from direct sunlight and heat sources, which can cause the wood to warp or fade over time.
  • Repair any cracks or gaps in the wood as soon as possible to prevent further damage. Use a wood filler or putty to fill in the gap, following the manufacturer’s instructions.
  • If you notice any signs of insect damage, such as small holes or sawdust, take action immediately to prevent further infestation. Use an insecticide or contact a professional pest control service for assistance.

By following these maintenance tips, you can help ensure that your wood stays in good condition for years to come.

Frequently Asked Questions

What is the best product for filling large gaps in wood?

There are several products that you can use to fill large gaps in wood, including wood filler, epoxy, and caulk. The best product for filling large gaps in wood depends on the size of the gap, the type of wood, and the intended use of the wood. For example, wood filler is a good choice for filling small to medium-sized gaps in indoor wood projects, while epoxy is a better choice for filling larger gaps in outdoor wood projects.

How do you fill large gaps in outdoor wood?

To fill large gaps in outdoor wood, you should use a product that is specifically designed for outdoor use, such as epoxy or a high-quality outdoor wood filler. Before applying the filler, make sure the wood is clean and dry. Apply the filler using a putty knife, and then smooth it out with a damp cloth. Allow the filler to dry completely before sanding and painting or staining the wood.

What is the best wood filler for large holes in outdoor projects?

The best wood filler for large holes in outdoor projects is an epoxy-based filler. Epoxy is a durable and weather-resistant material that can withstand exposure to the elements. It is also strong enough to support heavy loads, making it ideal for filling large holes in outdoor projects like decks and fences.

How do you fill gaps in wood furniture?

To fill gaps in wood furniture, you should use a wood filler that matches the color of the wood. Start by cleaning the area around the gap with a damp cloth, and then apply the filler using a putty knife. Make sure to apply enough filler to completely fill the gap. Once the filler has dried, sand it down until it is flush with the surrounding wood.

What is the best wood filler for large gaps in floors?

The best wood filler for large gaps in floors is a two-part epoxy filler. This type of filler is strong and durable, and can withstand the heavy foot traffic that floors are subjected to. It is also water-resistant, which is important for areas like kitchens and bathrooms.

How can you fill large gaps in exterior wood trim effectively?

To fill large gaps in exterior wood trim effectively, you should use a high-quality exterior wood filler. Before applying the filler, make sure the area around the gap is clean and dry. Apply the filler using a putty knife, and then smooth it out with a damp cloth. Allow the filler to dry completely before sanding and painting the trim.

the-role-of-the-piece-of-wood-at-the-bottom-of-walls

Baseboard: What is it and its Purpose in Your Home

If you’re a homeowner or have ever been inside a house, you’ve probably noticed a piece of wood running along the bottom of the walls. It’s a common feature in most homes, but have you ever wondered what it’s called? This piece of wood serves both a functional and aesthetic purpose, but it’s not always referred to by the same name.

In England, this piece of wood is generally known as the skirting board, while Americans often refer to it as a kick board. However, it can also be called a baseboard, mopboard, or floor molding. Despite the different names, they all serve the same purpose of covering the gap between the wall surface and the floor, protecting the wall from damage and providing a finished look to the room.

Skirting boards come in a variety of materials, including wood, MDF, PVC, and plaster. They can be simple and plain or ornate and decorative, depending on the style of the room. In addition to its functional purpose, skirting boards can also be used to add character and style to a room, serving as a decorative feature that complements the overall design.

Understanding the Basics of House Structure

When it comes to understanding the basics of house structure, it’s important to know the different components that make up a house. One of these components is the piece of wood that runs along the bottom of the walls in a house, which is known as the baseboard or skirting board.

The baseboard is typically made from wood and is installed along the bottom of the walls to cover the joint between the wall and the floor. It serves both a functional and aesthetic purpose, as it helps to protect the wall from damage and also adds a finishing touch to the room.

In addition to the baseboard, there are other important components of house structure that you should be familiar with. These include the foundation, frame, roof, windows and doors, plumbing, electrical, and HVAC systems, as well as the finishes such as siding, drywall, paint, and flooring.

Overall, understanding the basics of house structure is essential for homeowners, builders, and anyone involved in the construction or maintenance of a house. By knowing the different components that make up a house, you can better understand how it all fits together and ensure that your home is safe, functional, and aesthetically pleasing.

The Role of the Piece of Wood at the Bottom of Walls

the-role-of-the-piece-of-wood-at-the-bottom-of-walls

If you’ve ever looked closely at the bottom of the walls in your house, you may have noticed a piece of wood running along the length of the wall. This piece of wood is known as the baseboard or skirting board and serves several important purposes.

Firstly, the baseboard provides a finished look to the bottom of the wall. Without it, the wall would appear unfinished and rough. Additionally, it covers any gaps or imperfections between the wall and the floor, creating a smooth transition between the two surfaces.

Another important function of the baseboard is to protect the wall from damage caused by furniture, vacuums, and other household items. By providing a barrier between the wall and the floor, the baseboard prevents scratches, scuffs, and other types of damage.

Finally, the baseboard can also serve as a decorative element in your home. There are many different styles and designs of baseboards available, ranging from simple and understated to ornate and elaborate. Choosing the right baseboard can add a touch of elegance and sophistication to any room in your home.

In summary, the baseboard is an essential component of any home’s interior design. It provides a finished look to the bottom of the wall, protects the wall from damage, and can even serve as a decorative element.

Different Types of Baseboards

different-types-of-baseboards

When it comes to baseboards, there are a variety of materials and styles to choose from. Here are some of the most common types of baseboards:

  • MDF: Medium-density fiberboard is a popular choice for baseboards because it is affordable, easy to install, and can be painted to match any decor. However, it is not as durable as other materials and can be easily damaged.
  • Pine: Pine is another popular choice for baseboards because it is affordable and easy to work with. It can be stained or painted to match any decor, but it is not as durable as other materials and can dent or scratch easily.
  • Oak: Oak is a more expensive option, but it is also more durable and can be stained to bring out its natural beauty. It is a good choice for high-traffic areas.
  • Maple: Maple is another hardwood that is durable and can be stained to match any decor. It is more expensive than pine but less expensive than oak.
  • Vinyl: Vinyl baseboards are a good choice for bathrooms and other areas where moisture is a concern. They are easy to clean, durable, and come in a variety of colors and styles.
  • Hardwood: Other hardwoods like mahogany, cherry, and walnut can be used for baseboards, but they are more expensive than oak or maple.
  • Shoe molding: Shoe molding is a small molding that is installed at the bottom of baseboards to cover any gaps between the baseboard and the floor. It is available in a variety of materials, including hardwood, MDF, and vinyl.

When choosing a baseboard, consider the style of your home, your budget, and the durability you need for the area where it will be installed. With so many options available, you’re sure to find a baseboard that fits your needs and your style.

Material Choices for Baseboards

material-choices-for-baseboards

When it comes to choosing the material for your baseboards, there are a few options to consider. Each material has its own advantages and disadvantages, so it’s important to choose the one that best fits your needs and budget.

Wood

Wood is a popular choice for baseboards because it is durable and can be stained or painted to match your decor. Oak, pine, and maple are common types of wood used for baseboards. Pine is a popular choice because it is affordable and easy to work with. Oak is more expensive but is known for its durability and strength. Maple is also a strong and durable option but is more expensive than pine.

Medium-Density Fiberboard (MDF)

MDF is a composite material made from wood fibers and resin. It is a popular choice for baseboards because it is affordable and easy to work with. MDF can be painted to match your decor, but it cannot be stained like natural wood. It is also not as durable as wood and can be easily damaged.

PVC

PVC is a plastic material that is becoming more popular for baseboards. It is affordable, durable, and resistant to moisture and insects. PVC can be painted to match your decor, but it cannot be stained. It is also not as strong as wood and can be easily damaged.

Other Materials

Other materials used for baseboards include extruded polyurethane and natural wood such as poplar and cherry. These materials are more expensive than MDF and PVC but are stronger and more durable. They can also be stained and painted to match your decor.

Overall, the material you choose for your baseboards will depend on your needs and budget. Wood is a classic choice that offers durability and versatility, while MDF and PVC are more affordable options that are easy to work with. Consider your options carefully and choose the material that best fits your needs and style.

Installation Process of Baseboards

installation-process-of-baseboards

Installing baseboards is a simple process that can be completed by anyone with a few basic tools and some patience. Here are the steps you need to follow to install baseboards in your home:

  1. Measure the room: Before you begin, you need to measure the length of each wall in the room where you will be installing the baseboards. This will help you determine how much baseboard material you will need.
  2. Choose your baseboard material: Baseboards can be made from a variety of materials, including wood, MDF, and PVC. Each material has its own advantages and disadvantages, so it’s important to choose the one that is right for your needs.
  3. Cut the baseboard to size: Using a miter saw, cut the baseboard to the appropriate length for each wall. Be sure to make precise cuts to ensure that the baseboards fit together properly.
  4. Install the baseboards: Using a nail gun, attach the baseboards to the wall. Be sure to nail the baseboards into the studs to ensure that they are secure.
  5. Fill in nail holes: Once the baseboards are installed, use spackle to fill in any nail holes or gaps between the baseboards and the wall.
  6. Caulk the baseboards: Using a caulk gun, apply caulk to the gaps between the baseboards and the wall. This will help create a seamless finish.
  7. Paint the baseboards: Finally, paint the baseboards to match the color of your walls. This will help create a cohesive look in the room.

Overall, installing baseboards is a relatively simple process that can be completed by anyone with some basic DIY skills. By following these steps, you can add a finishing touch to your home that will make it look more polished and complete.

Maintenance and Care of Baseboards

maintenance-and-care-of-baseboards

Baseboards are an essential part of any home’s interior design. They cover the gap between the wall and the floor and provide a finished look to the room. However, they can accumulate dirt, dust, and scuff marks over time, which can make them look unsightly. Here are some tips on how to maintain and care for your baseboards to keep them looking their best:

Regular Cleaning

One of the best ways to keep your baseboards looking good is to clean them regularly. You can use a soft cloth or a microfiber duster to remove any dust or dirt that has accumulated on them. If there are any stubborn stains, you can use a magic eraser or a gentle all-purpose cleaner to remove them.

Deep Cleaning

If your baseboards are really dirty or have not been cleaned for a long time, you may need to do a deep cleaning. Start by removing any loose dirt or dust with a soft cloth or a microfiber duster. Then, mix some warm water with a gentle all-purpose cleaner and use a sponge or a microfiber cloth to clean the baseboards thoroughly. Be sure to rinse the cloth with clean water and wipe down the baseboards to remove any cleaner residue.

Protecting Your Baseboards

To keep your baseboards looking their best, you can take some steps to protect them from damage. For example, you can use a dryer sheet to rub them down after cleaning, which can help repel dust and dirt. You can also use furniture pads to protect them from scratches and scuff marks caused by moving furniture.

Repairing Baseboards

If your baseboards are damaged or have holes in them, you may need to repair or replace them. You can use a repair patch to fix small imperfections or holes, or you can replace the entire piece of baseboard if it is beyond repair. However, if you are not comfortable with DIY repairs, it may be best to hire a professional to do the job for you.

By following these tips, you can keep your baseboards looking their best and maintain the overall appearance of your home. Regular cleaning and maintenance can go a long way toward preserving the beauty and value of your property.

Impact of Baseboards on Interior Design

impact-of-baseboards-on-interior-design

Baseboards are an essential part of interior design that can make or break the overall aesthetic appeal of a room. They are the piece of wood or vinyl that runs along the bottom of the walls in a house, hiding the joint between the floor and wall. Here are some ways baseboards can impact interior design:

1. Aesthetic Appeal

Baseboards can add a finishing touch to a room, giving it a polished and complete look. They can be simple or ornate, depending on the style of the room. For example, minimalist baseboards can complement a modern and sleek design, while more detailed and decorative baseboards can enhance a traditional or vintage look.

2. Protection

Baseboards protect the walls from damage caused by furniture, vacuums, and other objects that come into contact with the walls. They also prevent dust and debris from accumulating in the gap between the wall and floor, making cleaning easier.

3. Visual Separation

Baseboards can visually separate different materials used in a room, such as different types of flooring or wallpaper. They can also create a transition between different colors or patterns used in the room.

4. Increased Home Value

Well-designed baseboards can add value to a home by enhancing its overall appearance. Potential buyers may be more interested in a home with attractive and well-maintained baseboards.

In conclusion, baseboards are an important part of interior design that can impact the overall look and feel of a room. They can enhance the aesthetic appeal, protect the walls, create visual separation, and increase home value.

Common Problems and Solutions with Baseboards

common-problems-and-solutions-with-baseboards

Baseboards are an essential part of any home’s interior design. They serve as a protective barrier between the walls and the floor, covering the gap that is often left between the two. However, baseboards can also present some problems. In this section, we’ll discuss some common issues with baseboards and their solutions.

Problem: Damaged or Cracked Baseboards

Baseboards can become damaged or cracked over time due to wear and tear or accidents. This can make them look unsightly and can even cause safety hazards.

Solution: Repair or Replace

If your baseboards are only slightly damaged, you can repair them using a repair patch. This is a simple and cost-effective solution that can be done in a few hours. However, if the damage is severe, it may be best to replace the baseboard entirely. This can be a more time-consuming and costly solution, but it will ensure that your baseboards are safe and look great.

Problem: Crooked Baseboards

Sometimes, baseboards can become crooked due to uneven walls or floors. This can make your home look unprofessional and can even cause gaps between the baseboard and the wall.

Solution: Install Properly

To avoid crooked baseboards, it’s important to install them properly. This means using the right tools and techniques to ensure that they are level and straight. You can also use tricks such as shimming and caulking to help close any gaps and make your baseboards look seamless.

Problem: Water Damage

Baseboards are often the first place to show signs of water damage. This can be caused by leaks from pipes or appliances, or even from floods or storms.

Solution: Dry and Repair

If you notice water damage to your baseboards, it’s important to act quickly. First, dry out the affected area using fans or dehumidifiers. Then, assess the damage and repair or replace the baseboard as needed. It’s also important to address the source of the water damage to prevent future issues.

Baseboards may present some challenges, but with the right solutions, you can ensure that they look great and protect your home for years to come.

Choosing the Right Baseboards for Your House

When it comes to choosing the right baseboards for your house, there are a few things to consider such as your house style, ceiling height, preferred material, and budget plan. Baseboards come in a wide variety of styles and materials, and selecting the right one can help to enhance the overall appearance of your home.

Baseboard Styles and Profiles

Baseboards come in a range of styles, including smooth, beaded, ornate, and many more. The style you choose will depend on the look you want to achieve and the overall style of your home. For instance, if you have a traditional-style home, you may want to consider a more ornate baseboard with intricate details. On the other hand, if you have a modern-style home, you may want to go for a simple and sleek baseboard.

Baseboard Materials

Baseboards can be made from a variety of materials, including solid wood, MDF (medium-density fiberboard), vinyl, and more. Solid wood is a popular choice because it can be painted or stained, and it can be repaired, sanded, and repainted as needed. However, keep in mind that solid wood can be slightly more expensive than other trim materials and may split when nailed. MDF is another popular choice because it is less expensive than solid wood and can be easily painted or stained. Vinyl is also a great option because it is affordable, easy to install, and requires little maintenance.

Baseboard Height

The height of your baseboard can also play a significant role in enhancing the overall look of your home. Generally, the taller the baseboard, the more elegant and luxurious your home will look. However, keep in mind that taller baseboards can also be more expensive. If you have a low ceiling, you may want to consider a shorter baseboard to avoid making your room feel cramped.

In conclusion, choosing the right baseboards for your house can help to enhance the overall appearance of your home. By considering your house style, ceiling height, preferred material, and budget plan, you can find the perfect baseboard to suit your needs.

Frequently Asked Questions

What is the name of the board that runs along the bottom of the walls in a house?

The board that runs along the bottom of the walls in a house is called a baseboard, skirting board, or kick board.

What is the purpose of the board that runs along the bottom of the walls in a house?

The purpose of the board that runs along the bottom of the walls in a house is to cover the joint between the wall and the floor, protect the wall from kicks and abrasions, and provide a decorative finish to the room.

What are other names for the board that runs along the bottom of the walls in a house?

Other names for the board that runs along the bottom of the walls in a house include base molding, base shoe, mopboard, and floor molding.

How do I clean the board that runs along the bottom of the walls in a house?

To clean the board that runs along the bottom of the walls in a house, use a soft cloth or sponge dampened with warm water and mild soap. Avoid using abrasive cleaners or scrubbers that can damage the finish.

What is the difference between baseboards and wainscoting?

Baseboards are boards that run along the bottom of the walls, while wainscoting is a decorative paneling that covers the lower part of the walls. Wainscoting can be installed above or below the baseboard.

Why do houses need a board that runs along the bottom of the walls?

Houses need a board that runs along the bottom of the walls to protect the wall from damage, cover the joint between the wall and the floor, and provide a decorative finish to the room. Baseboards also help to hide electrical wiring and other unsightly elements along the bottom of the walls.

importance-of-properly-lacquering-over-painted-wood

How to Properly Lacquer Over Painted Wood: A Beginner's Guide

Lacquering over painted wood can be a daunting task, but with proper preparation and technique, you can achieve a beautiful and long-lasting finish. Whether you’re looking to revitalize an old piece of furniture or add a glossy finish to a new project, lacquer can be a great option. However, it’s important to note that not all paints are compatible with lacquer, so it’s crucial to choose the right type of paint and lacquer for your project.

Before you begin, make sure the painted surface is clean and free of any dirt, dust, or debris. Sand the surface lightly to create a rough texture that will help the lacquer adhere properly. If there are any cracks or holes in the surface, fill them in with wood filler and sand them down until they’re smooth. Once the surface is prepped, you can apply a coat of lacquer using a spray gun or brush, depending on your preference. It’s important to apply thin, even coats and allow each coat to dry completely before applying the next.

Understanding Lacquer and Paint

When it comes to refinishing painted wood, lacquer is a popular choice due to its durability and ability to provide a strong, shiny finish. However, it’s important to understand the basics of both lacquer and paint before attempting to apply one over the other.

Basics of Lacquer

Lacquer is a type of finish that is commonly used on wood and metal surfaces. It’s a clear, protective coating that provides a hard, glossy finish. Lacquer is typically applied in thin layers using a spray gun or brush, and it dries quickly.

One of the benefits of lacquer is its durability. It’s resistant to scratches and wear, making it ideal for high-traffic areas. It also provides a smooth, even finish that enhances the natural beauty of the wood.

Basics of Paint

Paint is a mixture of pigments, binders, and solvents that is used to color and protect surfaces. It’s available in a wide range of colors and finishes, from matte to high gloss.

When painting over wood, it’s important to choose the right type of paint. Latex-based paints are the best option for applying lacquer over painted wood, as they provide a good base for the lacquer to adhere to. Oil-based paints, on the other hand, can cause issues with adhesion and should be avoided.

In addition to the type of paint, the condition of the painted surface is also important. The surface should be clean, dry, and free of any loose or flaking paint. Any imperfections should be sanded and filled before applying lacquer.

By understanding the basics of lacquer and paint, you can ensure that you’re using the right materials and techniques to properly lacquer over painted wood.

Importance of Properly Lacquering Over Painted Wood

importance-of-properly-lacquering-over-painted-wood

If you want to protect your painted wood surfaces and give them a glossy finish, lacquering over them can be a great option. However, it is important to do it properly to avoid any issues. Here are some reasons why it is important to properly lacquer over painted wood:

Improves Durability

Lacquer is a hard, durable finish that can protect your painted wood surfaces from wear and tear. When applied properly, it can make the surface more resistant to chipping, fading, and other types of damage. This can help extend the life of your painted wood surfaces and save you money in the long run.

Enhances Appearance

Lacquer can give your painted wood surfaces a glossy, professional-looking finish. This can make them look more attractive and add value to your home or business. Additionally, lacquer can help bring out the natural beauty of the wood grain, making your surfaces look even more appealing.

Provides Easy Maintenance

Lacquered surfaces are easy to clean and maintain. They can be wiped down with a damp rag or a spray-and-wipe furniture polish. However, it is important to avoid using cleaners containing ammonia, bleach, alcohol, or acetone, as they can damage the lacquer finish.

Offers Versatility

Lacquer can be applied to a variety of painted wood surfaces, including furniture, cabinets, and floors. It can be used on both indoor and outdoor surfaces, making it a versatile option for many different projects.

In summary, properly lacquering over painted wood can improve durability, enhance appearance, provide easy maintenance, and offer versatility. If you want to give your painted wood surfaces a long-lasting, professional-looking finish, consider using lacquer.

Preparation Steps

preparation-steps

Before you start lacquering over painted wood, you need to properly prepare the surface. This will ensure that the lacquer adheres well and provides a smooth finish. Here are the two main preparation steps you should follow:

Cleaning the Surface

The first step is to clean the surface thoroughly. Any dirt, dust, or grease on the surface can affect the adhesion of the lacquer. Here’s how you can clean the surface:

  • Use a soft cloth or sponge and a mild detergent to clean the surface.
  • Rinse the surface with clean water and let it dry completely.
  • If there are any stubborn stains or marks, you can use a sandpaper or a degreaser to remove them.

Sanding the Surface

The second step is to sand the surface. Sanding will help the lacquer adhere better to the surface and also remove any imperfections. Here’s how you can sand the surface:

  • Use a sandpaper with a grit of 120 or 150 to sand the surface.
  • Sand in the direction of the wood grain to avoid scratches.
  • Sand the surface lightly until it becomes smooth and even.
  • Use a tack cloth to remove any dust or debris from the surface.

By following these preparation steps, you can ensure that the surface is clean, smooth, and ready for lacquering. This will help you achieve a professional-looking finish that is durable and long-lasting.

Choosing the Right Lacquer

choosing-the-right-lacquer

When it comes to lacquering over painted wood, choosing the right lacquer is crucial. Not all lacquers are created equal, and using the wrong one can result in a poor finish or even damage to your painted surface. Here are some key factors to consider when choosing a lacquer for your project:

1. Type of Paint

The type of paint you used on your wood surface will determine the type of lacquer you should use. If you used oil-based paint, you should use a lacquer that is also oil-based. If you used water-based paint, you should use a water-based lacquer. Using the wrong type of lacquer can cause the paint to peel or crack.

2. Sheen

Lacquers come in a range of sheens, from matte to high-gloss. Consider the look you want to achieve and choose a lacquer with the appropriate sheen. Keep in mind that high-gloss finishes tend to show imperfections more easily than matte finishes.

3. Drying Time

Some lacquers dry faster than others, which can be an important factor if you are working on a time-sensitive project. Check the drying time of the lacquer before you buy it, and make sure it fits your needs.

4. VOC Content

Volatile organic compounds (VOCs) are chemicals that can be harmful to human health and the environment. Many lacquers contain VOCs, so if you are concerned about the impact of your project on the environment or your health, look for a low-VOC or no-VOC lacquer.

5. Application Method

Finally, consider the application method you plan to use. Some lacquers are designed for spray application only, while others can be brushed on. Make sure the lacquer you choose is compatible with your application method.

By considering these factors, you can choose a lacquer that will give you a beautiful, durable finish on your painted wood surface.

Applying the Lacquer

applying-the-lacquer

When it comes to lacquering over painted wood, the application process is crucial for achieving a smooth and durable finish. Here are the steps you need to follow to apply the lacquer properly:

Priming the Surface

Before applying the lacquer, you need to prime the surface to ensure that the lacquer adheres properly. To do this, you can use a sanding block to lightly sand the surface of the painted wood. Then, wipe the surface clean with a tack cloth to remove any dust or debris.

Once the surface is clean, apply a coat of primer using a brush or spray can. Make sure to choose a primer that is compatible with both the paint and the lacquer you plan to use. Let the primer dry completely before moving on to the next step.

Applying the First Coat

After the primer has dried, it’s time to apply the first coat of lacquer. Use a high-quality brush or spray gun to apply a thin, even coat of lacquer. Be sure to follow the manufacturer’s instructions for the lacquer you are using, as drying times and application methods can vary.

Sanding Between Coats

After the first coat has dried, use a fine-grit sandpaper to lightly sand the surface. This will help the next coat of lacquer adhere properly and create a smooth finish. Be sure to wipe away any dust or debris with a tack cloth before applying the next coat.

Repeat the process of applying a coat of lacquer, letting it dry, and sanding between coats until you have achieved the desired level of coverage and smoothness.

Applying the Final Coat

Once you have applied the final coat of lacquer, let it dry completely before handling or using the painted wood. It’s important to be patient during this process to ensure that the lacquer has fully cured and hardened.

Overall, with the right tools and techniques, lacquering over painted wood can be a great way to achieve a durable and attractive finish. Just be sure to follow the steps carefully and choose high-quality products for the best results.

Safety Measures

safety-measures

When working with lacquer and painted wood, it’s important to take necessary safety measures to avoid any accidents or health hazards. Here are some safety measures you should follow:

1. Work in a Well-Ventilated Area

Lacquer fumes can be harmful if inhaled in large quantities. Therefore, it’s important to work in a well-ventilated area to avoid any health hazards. Open windows and doors or use a fan to circulate the air in the room.

2. Wear Protective Gear

Wearing protective gear is essential when working with lacquer and painted wood. Wear a respirator mask to avoid inhaling any fumes and gloves to protect your hands from the chemicals. Additionally, wear protective eyewear to avoid any splashes or drips of lacquer getting into your eyes.

3. Keep the Work Area Clean

Keep your work area clean and free from any debris or flammable materials. Lacquer is highly flammable, so avoid smoking or using any open flames in the work area.

4. Store Lacquer Properly

Store lacquer in a cool, dry place away from any heat sources or direct sunlight. Keep lacquer containers tightly closed to avoid any spills or leaks.

By following these safety measures, you can ensure a safe and successful lacquering process.

Maintaining Lacquered Painted Wood

Once you have properly lacquered over painted wood, it’s important to maintain it to ensure its longevity. Here are some tips for maintaining your lacquered painted wood:

  • Avoid using abrasive cleaners or tools when cleaning your lacquered painted wood. Instead, use a soft, damp cloth to wipe down the surface.
  • If you need to remove any stains or grime, use a mild soap and water solution. Be sure to rinse the surface thoroughly and dry it with a clean cloth.
  • To prevent scratches and dings, avoid placing sharp or heavy objects on your lacquered painted wood. Use coasters and placemats to protect the surface.
  • Keep your lacquered painted wood out of direct sunlight to prevent fading and discoloration.
  • If you notice any chips or scratches in the lacquer, touch them up with a matching paint or lacquer.

By following these simple tips, you can keep your lacquered painted wood looking beautiful for years to come.

Frequently Asked Questions

What is the best way to apply lacquer over painted wood?

The best way to apply lacquer over painted wood is to start by cleaning the surface thoroughly. Then, sand the painted surface with fine-grit sandpaper to create a rough surface that the lacquer can adhere to. Apply a thin coat of lacquer and allow it to dry completely before applying additional coats.

How many coats of lacquer should be applied over painted wood?

It is recommended to apply at least two coats of lacquer over painted wood. However, the number of coats may vary depending on the desired finish and the type of lacquer being used. Be sure to read the manufacturer’s instructions for specific recommendations.

Can you use lacquer over latex or enamel paint?

Yes, you can use lacquer over latex or enamel paint. However, it is important to ensure that the painted surface is clean and free of debris before applying the lacquer. Additionally, it is recommended to test a small area before applying lacquer to the entire surface.

Is it recommended to lacquer over gloss paint?

It is not recommended to lacquer over gloss paint. The glossiness of the paint may prevent the lacquer from adhering properly, resulting in a poor finish. It is recommended to sand the gloss paint before applying lacquer.

What type of clear coat should be used on painted wood?

The type of clear coat that should be used on painted wood depends on the desired finish. Lacquer is a popular choice for a high-gloss finish, while polyurethane is a good option for a durable, protective finish. Be sure to choose a clear coat that is compatible with the type of paint used.

Can clear lacquer be sprayed over chalk paint?

Yes, clear lacquer can be sprayed over chalk paint. However, it is important to ensure that the chalk paint is fully cured before applying the lacquer. Additionally, it is recommended to test a small area before applying lacquer to the entire surface.