
Are you interested in making your own knife handle out of wood? Crafting a wooden handle for your knife is a great way to add a personal touch and improve the grip of your knife. While it may seem like a daunting task, making a wooden knife handle can be done with just a few tools and some basic woodworking skills.
Before you begin, it’s important to choose the right type of wood for your handle. Some popular choices include maple, walnut, and oak. Make sure the wood you choose is strong and durable enough to withstand the rigors of use. Once you have your wood selected, you’ll need to cut it to the right size and shape for your knife. This can be done with a saw or other cutting tool. Next, you’ll need to sand the wood down to a smooth finish and then apply a protective coating to help preserve the wood. With a little patience and some attention to detail, you’ll have a beautiful and functional wooden knife handle in no time.
Understanding the Basics of a Wooden Knife Handle
When it comes to making a knife, the handle is just as important as the blade. A well-designed handle can improve your grip and make the knife more comfortable to use. Wooden knife handles are a popular choice because they are durable, attractive, and easy to work with. In this section, we will discuss the basics of a wooden knife handle.
Choosing the Right Wood
The first step in making a wooden knife handle is choosing the right wood. You want a wood that is strong, durable, and resistant to moisture. Some popular choices include:
- Maple
- Walnut
- Rosewood
- Ebony
- Cocobolo
When selecting your wood, make sure it is free of defects such as knots or cracks. You also want to make sure the wood is dry and stable. Green wood or wood with a high moisture content can warp or crack over time.
Preparing the Wood
Once you have selected your wood, you need to prepare it for use. This involves cutting it to the desired size and shape and sanding it smooth. You may also want to add some texture or grip to the handle by carving or sanding in some grooves or ridges.
Attaching the Handle to the Blade
Attaching the handle to the blade is the final step in making a wooden knife handle. There are a few different methods you can use, including:
- Gluing: Apply a strong adhesive to the tang of the blade and slide the handle onto it. Clamp the handle in place until the glue dries.
- Pinning: Drill holes through the handle and tang of the blade and insert pins to hold the handle in place.
- Riveting: Drill holes through the handle and tang of the blade and insert a rivet to hold the handle in place.
No matter which method you choose, make sure the handle is securely attached to the blade and that there are no gaps or spaces between the handle and the blade.
In conclusion, making a wooden knife handle is a fun and rewarding project that can improve the look and feel of your knife. By choosing the right wood, preparing it properly, and attaching it securely to the blade, you can create a handle that is both functional and beautiful.
Choosing the Right Wood
Choosing the right wood for your knife handle is crucial to ensure durability, strength, and comfort. Here are some factors to consider when selecting the wood for your knife handle:
Hardness
The hardness of the wood affects the durability and strength of the knife handle. Hardwoods such as cocobolo, ebony, and rosewood are great options for knife handles because of their high density and strength. Softwoods like pine or spruce are not recommended as they can easily dent and scratch.
Grain Pattern
The grain pattern of the wood can also affect the durability and aesthetics of the knife handle. Straight-grained woods like maple or cherry are easier to work with and provide a classic look. Burls or figured woods like curly maple or birdseye maple can add a unique and eye-catching design to the knife handle.
Stability
The wood’s stability is important to consider, especially if you live in an area with high humidity or temperature changes. Woods like ebony and cocobolo are known for their stability, while woods like maple or walnut can be prone to warping or cracking.
Availability
The availability of the wood can also be a factor to consider. Some exotic woods like cocobolo or ebony can be expensive and difficult to find. Birch, maple, and walnut are more widely available and affordable options.
Overall, choosing the right wood for your knife handle depends on your personal preferences and needs. Consider the hardness, grain pattern, stability, and availability of the wood before making your final decision.
Designing Your Knife Handle
When making a wooden knife handle, designing it is an important step. The handle should not only look good, but it should also be comfortable and functional. In this section, we will discuss the different aspects of designing your knife handle.
Shape
The shape of your knife handle is important because it affects how comfortable it is to hold and use. There are many different shapes you can choose from, but it’s important to consider the type of knife you are making and what it will be used for. For example, a chef’s knife handle may have a different shape than a hunting knife handle.
Size
The size of your knife handle is also important. It should fit comfortably in your hand and be easy to grip. If the handle is too small, it may be difficult to hold onto, and if it’s too large, it may be uncomfortable to use. Consider the size of your own hand when designing your handle.
Ergonomics
Ergonomics refers to the study of how people interact with objects and how to make those objects more comfortable, efficient, and safe to use. When designing your knife handle, consider the ergonomics of your design. A well-designed handle will reduce the risk of hand fatigue and strain and make it more comfortable to use for extended periods of time.
In conclusion, designing your knife handle is an important step in the knife-making process. Consider the shape, size, and ergonomics of your design to create a handle that is not only aesthetically pleasing but also comfortable and functional to use.
Preparing the Materials
Before you start making a wooden knife handle, it’s important to gather all the necessary materials and tools. This will ensure that you have everything you need to complete the project successfully. In this section, we’ll cover the two main steps involved in preparing the materials: cutting the wood and gathering other essentials.
Cutting the Wood
The first step in making a wooden knife handle is to select the wood you want to use. You can choose from a variety of woods, including walnut, maple, and oak. Once you’ve chosen your wood, it’s time to cut it to size.
To do this, you’ll need a saw. A bandsaw is ideal for this step as it will give you a clean, straight cut. If you don’t have a bandsaw, a handsaw or jigsaw will also work.
Measure the length of your knife handle and mark the wood accordingly. Use your saw to cut the wood to the desired length. Make sure to wear safety goggles and gloves to protect yourself while cutting the wood.
Gathering Other Essentials
In addition to the wood, you’ll need a few other essentials to make a wooden knife handle. These include:
- Sandpaper: You’ll need sandpaper to smooth out the edges of the wood and give it a polished finish. Start with a coarse grit and work your way up to a finer grit for a smooth finish.
- Drill: You’ll need a drill to make holes in the wood for the pins that will hold the handle together.
- Pins: You’ll need pins to hold the handle together. Brass or stainless steel pins are good options.
- Epoxy: You’ll need epoxy to glue the pins in place and to attach the handle to the knife blade.
- Clamps: You’ll need clamps to hold the handle in place while the epoxy dries.
Once you have all of these materials, you’re ready to move on to the next step: shaping the wood into a handle.
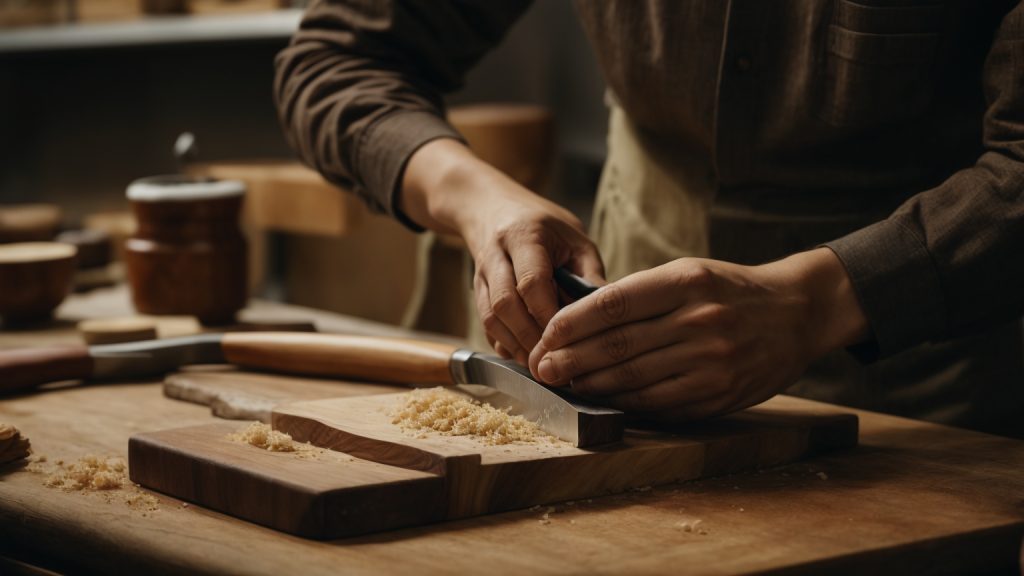
Carving the Handle
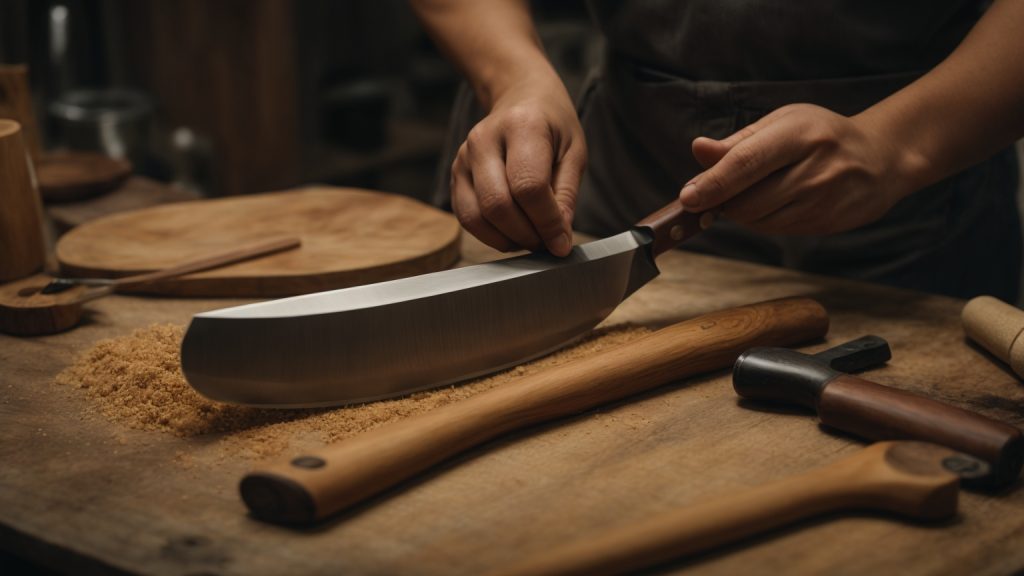
Carving the handle is the most important part of making a wooden knife handle. It requires precision and attention to detail to ensure that the handle is comfortable to hold and fits the knife blade perfectly. Here are some steps to follow when carving the handle:
- Choose the right wood: The first step is to choose the right wood for your handle. Hardwoods like maple, oak, and cherry are great options because they are durable and can withstand the wear and tear of regular use.
- Mark the outline: Once you have selected your wood, use a pencil to mark the outline of your handle on the wood. Make sure to leave some extra space around the outline to allow for carving.
- Carve the basic shape: Use a carving knife or chisel to carve the basic shape of the handle. Start by removing the excess wood around the outline and then slowly work your way towards the center of the handle.
- Sand the handle: After you have carved the basic shape of the handle, use sandpaper to smooth out any rough edges or bumps. Sand the handle in the direction of the grain to avoid damaging the wood.
- Add the details: Once the handle is smooth, you can add any details you want, such as a grip pattern or decorative carvings. Use a small chisel or carving knife to add these details.
- Finish the handle: Finally, apply a finish to the handle to protect the wood from moisture and give it a polished look. You can use a variety of finishes, such as oil, wax, or varnish, depending on your preference.
Carving a wooden knife handle requires patience and practice, but with these steps, you can create a beautiful and functional handle for your knife.
Sanding and Finishing
Sanding Process
After shaping and attaching the wooden scales to the tang of your knife handle, it is time to sand the handle to a smooth finish. Sanding the handle will not only make it look better but also make it more comfortable to hold.
Start with a coarse grit sandpaper, such as 80 or 120 grit, to remove any rough spots or imperfections on the wood. Sand the handle in the direction of the wood grain, using even pressure. Move on to a finer grit sandpaper, such as 220 or 320 grit, to smooth out the handle further. Finally, use a very fine grit sandpaper, such as 400 or 600 grit, to achieve a smooth finish.
It is important to take your time and not rush the sanding process. Rushing the process can result in uneven sanding and an unsatisfactory finish. Make sure to sand the handle evenly and avoid over-sanding any particular area.
Applying Finish
Once you have sanded the handle to your desired smoothness, it is time to apply a finish to protect the wood and enhance its appearance. There are various finishes you can use, such as oils, waxes, and varnishes.
One popular finish is boiled linseed oil. Boiled linseed oil is easy to apply and penetrates the wood to provide a protective layer. Apply the oil generously to the handle, making sure to cover all areas evenly. Let the oil soak into the wood for about 10 to 15 minutes, then wipe off any excess oil with a clean cloth. Repeat this process until the handle has absorbed enough oil.
Another option is to use a wax finish. Wax finishes provide a protective layer and enhance the natural beauty of the wood. Apply the wax to the handle using a clean cloth, making sure to cover all areas evenly. Let the wax dry for a few minutes, then buff the handle with a clean cloth to achieve a shiny finish.
No matter which finish you choose, make sure to follow the manufacturer’s instructions and apply the finish in a well-ventilated area. Allow the finish to dry completely before handling the knife.
Assembling the Knife and Handle
Once you have prepared the wood for your knife handle, it’s time to attach it to the blade. This process can be broken down into two main steps: attaching the handle and securing the handle.
Attaching the Handle
To attach the handle, you will need to use epoxy or another strong adhesive. Here’s how to do it:
- Apply a thin layer of epoxy to the tang of the blade.
- Carefully slide the handle onto the tang, making sure it is aligned properly.
- Use clamps to hold the handle in place while the epoxy dries. Make sure the clamps are tight enough to hold the handle securely, but not so tight that they damage the wood.
- Allow the epoxy to dry completely according to the manufacturer’s instructions.
Securing the Handle
Once the epoxy has dried, you will need to secure the handle to the tang of the blade. Here are a few different methods you can use:
- Rivets: Drill holes through the tang and handle, then insert rivets to hold them together. This method is commonly used for full-tang knives.
- Corby bolts: Similar to rivets, but with a threaded bolt that screws into the handle. This method is also commonly used for full-tang knives.
- Mosaic pins: Decorative pins that also help to secure the handle to the tang. These are often used in combination with epoxy or other adhesives.
- Peening: For hidden-tang knives, the tang can be peened or hammered to create a mushroom-shaped head that holds the handle in place.
No matter which method you choose, make sure the handle is securely attached to the blade before using the knife. With a little bit of patience and attention to detail, you can create a beautiful and functional knife that will last for years to come.
Maintenance Tips
Now that you have successfully made your wooden knife handle, it is important to maintain it properly to ensure its longevity. Here are some tips to help you take care of your wooden knife handle:
Wash and Dry by Hand
Even though wooden knife handles are durable, they are not dishwasher safe. You should always wash your knife handle by hand and dry it off quickly after use. This will prevent water from seeping into the wood grain and causing it to warp or crack.
Oil Your Handle
One of the most effective ways to maintain wooden knife handles is by oiling them. Oiling wooden handles helps to protect and nourish the wood. This enhances the handle’s appearance by bringing out the natural patterns and colors of the wood. You can use mineral oil, linseed oil, or even olive oil to oil your handle. Apply the oil generously to the handle and let it soak in for a few hours before wiping off any excess oil.
Store Properly
When storing your knife, make sure to keep it in a dry place away from direct sunlight. Avoid storing it in a damp or humid area, as this can cause the wood to swell and warp. You can also use a knife block or sheath to protect the handle from scratches and dents.
Avoid Harsh Chemicals
Harsh chemicals can damage the wood and cause it to lose its natural luster. Avoid using bleach, ammonia, or any other abrasive cleaners on your wooden knife handle. Instead, use a mild soap and warm water to clean it.
By following these simple maintenance tips, you can ensure that your wooden knife handle stays in excellent condition for years to come.