
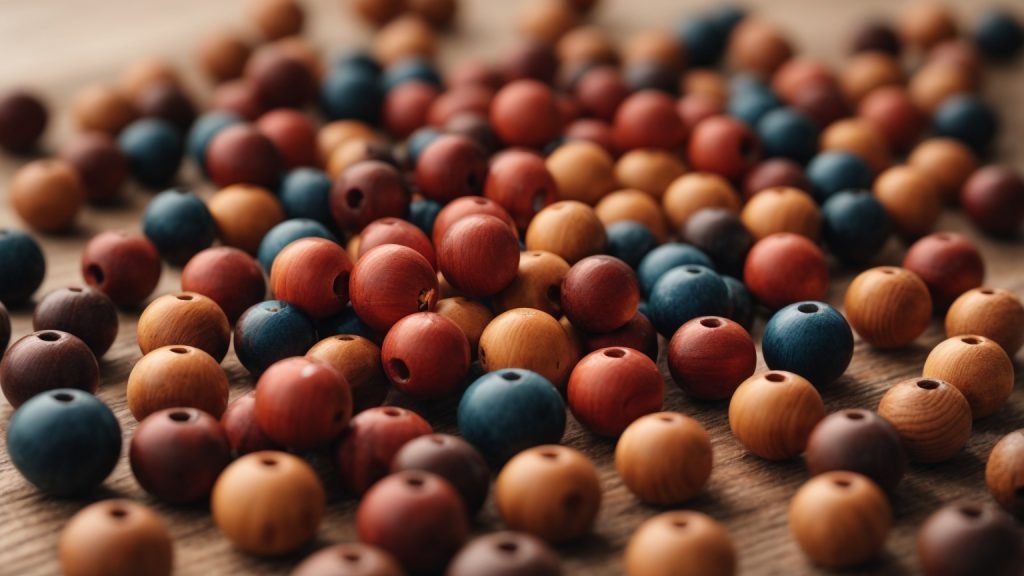
Are you looking for a fun and easy way to add some color to your wooden beads? Dyeing wooden beads is a simple and cost-effective way to customize your jewelry-making projects. With a few basic materials and some creativity, you can create beautiful, unique beads in a variety of colors and shades.
One of the best things about dyeing wooden beads is the versatility of the process. You can use a variety of dyes, including liquid dye, food coloring, and acrylic paint, to achieve different effects and colors. Additionally, you can experiment with different types of wood to see how they absorb the dye and create different shades and patterns. Whether you’re a beginner or an experienced crafter, dyeing wooden beads is a fun and rewarding project that you can enjoy with family and friends.
Understanding Wood and Beads
When it comes to dyeing wooden beads, it’s important to understand the materials you’re working with. Here are a few things to keep in mind:
Types of Wood
Not all types of wood are created equal when it comes to dyeing. Light-colored woods like maple, cherry, and pine are best for dyeing because they contain fewer natural oils that can interfere with the dye absorption process. If you’re unsure about the type of wood you’re working with, do a test dye on a small piece of wood before dyeing your beads.
Types of Beads
There are many different types of wooden beads available, each with its own unique characteristics. Here are a few common types:
- Round beads: These are the most common type of wooden bead and come in a variety of sizes and colors.
- Square beads: These are less common but can add an interesting element to your designs.
- Barrel beads: These are shaped like small barrels and are great for making bracelets and necklaces.
- Oval beads: These are oval-shaped and can add a unique touch to your designs.
Preparing Your Beads
Before dyeing your wooden beads, it’s important to prepare them properly. Here are a few steps to follow:
- Sand your beads: Use a fine-grit sandpaper to sand your beads lightly. This will help the dye absorb more evenly.
- Clean your beads: Use a damp cloth to wipe down your beads and remove any dust or debris.
- Soak your beads: Soak your beads in water for 10-15 minutes before dyeing. This will help the dye absorb more evenly.
By understanding the types of wood and beads you’re working with and properly preparing your beads, you can achieve beautiful, vibrant colors when dyeing your wooden beads.
Choosing the Right Type of Wood Beads
When it comes to dyeing wooden beads, it is important to choose the right type of wood. Not all woods are created equal, and some will take dye better than others. Here are some things to consider when selecting wood for your wooden beads:
Light-Colored Woods Work Best
Light-colored woods such as maple, cherry, or pine are the best choices for dyeing wooden beads. These woods have fewer natural oils, which can decrease the amount of dye absorbed by the wood. Lighter woods also allow for a wider range of color options, as darker woods can alter the final color of the dye.
Avoid Woods with Large Pores
Woods with large pores, such as oak or ash, can be difficult to dye evenly. The large pores can absorb more dye in some areas, resulting in a blotchy or uneven appearance. If you do choose to use a wood with large pores, consider using a darker dye to help even out the color.
Consider the Grain Pattern
The grain pattern of the wood can also affect the final appearance of the dyed beads. Woods with a tight, even grain pattern will produce a more uniform color, while woods with a more varied grain pattern may result in a more unique and interesting look.
Other Factors to Consider
In addition to the type of wood, there are other factors to consider when selecting wooden beads for dyeing. Make sure the beads are smooth and free of any rough spots or blemishes that could affect the dyeing process. It is also important to choose beads that are the right size and shape for your project.
By taking the time to choose the right type of wood for your wooden beads, you can ensure that your final product will be beautiful and long-lasting.
Materials Needed for Dyeing Wooden Beads
Dyeing wooden beads is a fun and easy DIY project that can add a pop of color to any craft or jewelry design. Here are the materials you will need to get started:
Wooden Beads
The first and most obvious material you will need is wooden beads. When choosing wooden beads, it is important to select light-colored woods such as maple, cherry, or pine. These woods will produce the best results when dyed as they contain fewer natural oils which can decrease the amount of dye absorbed by the wood.
Liquid Dye
Liquid dye is the most popular and easiest type of dye to use for dyeing wooden beads. You can find liquid dye at most craft stores and online. It comes in a variety of colors, and you can mix colors to create your own custom results.
Mason Jar
A mason jar or any other glass jar will work well for dyeing wooden beads. Make sure it is large enough to fit the amount of beads you want to dye.
Hot Water
You will need hot water to mix with the liquid dye. The hotter the water, the more intense the color will be.
Tablespoon or Two of Vinegar
Adding a tablespoon or two of vinegar to the dye mixture can help the dye adhere better to the wood.
Gloves
Wearing gloves will protect your hands from getting stained by the dye.
Plastic Spoon
A plastic spoon or any other non-reactive utensil will work well for stirring the dye mixture.
Paper Towels
Paper towels will come in handy for wiping up any spills or drips.
With these materials on hand, you are ready to start dyeing your wooden beads.
Preparation Before Dyeing
Before you start dyeing your wooden beads, it is important to prepare them properly. Here are some tips to ensure that your beads are ready to be dyed:
Choose Your Wooden Beads
When selecting wood for your wooden beads, it is important to choose light-colored woods such as maple, cherry, or pine. These woods will produce the best results when dyed as they contain fewer natural oils which can decrease the amount of dye absorbed by the wood.
Sand Your Beads
Before dyeing your wooden beads, make sure to sand them with fine-grit sandpaper. This will help to remove any rough spots or imperfections on the surface of the wood, allowing the dye to penetrate more evenly.
Soak Your Beads
To help the dye penetrate the wood more effectively, it is a good idea to soak your wooden beads in water for at least 30 minutes before dyeing them. This will help to open up the pores in the wood, allowing the dye to be absorbed more easily.
Protect Your Work Area
Dyeing wooden beads can be messy, so it is important to protect your work area before you start. Use a plastic tablecloth or newspaper to cover your work surface, and wear gloves and an apron to protect your clothing.
By following these simple steps, you can ensure that your wooden beads are properly prepared for dyeing, and that you will achieve the best possible results.
Selecting the Right Dye
When it comes to dyeing wooden beads, selecting the right dye is crucial to achieving the desired color and finish. Here are some factors to consider when selecting a dye:
Type of Dye
There are two main types of dyes to choose from: liquid dye and powder dye. Liquid dye is easier to use and provides more consistent results, but it may not be as vibrant as powder dye. Powder dye, on the other hand, is more concentrated and can produce brighter colors, but it requires more skill to use.
Colorfastness
Colorfastness refers to the ability of a dye to resist fading or bleeding when exposed to light, water, or other elements. When selecting a dye, it is important to choose one that is colorfast to ensure that the color stays vibrant and does not fade or bleed over time.
Compatibility with Wood Type
Not all dyes are compatible with all types of wood. Some dyes may work better with lighter woods, while others may work better with darker woods. It is important to choose a dye that is compatible with the type of wood you are using to ensure that the dye is absorbed evenly and produces the desired color.
Safety
When selecting a dye, it is important to consider safety. Some dyes may contain harmful chemicals that can be hazardous to your health if not used properly. It is important to choose a dye that is safe to use and follow all safety precautions when working with it.
Overall, selecting the right dye is an important step in the process of dyeing wooden beads. By considering factors such as type of dye, colorfastness, compatibility with wood type, and safety, you can ensure that you achieve the desired color and finish while also staying safe.
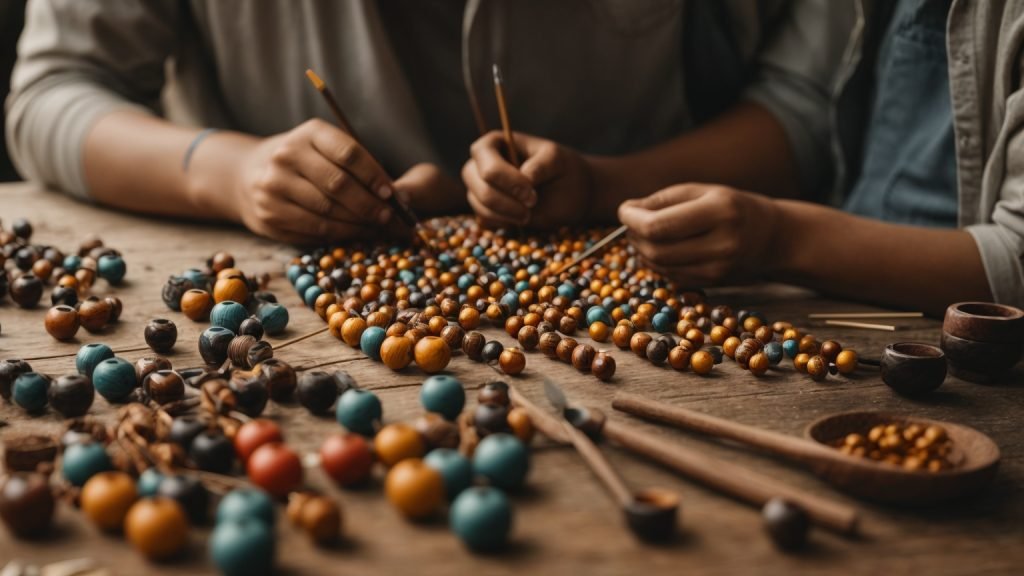
Step-by-Step Guide to Dyeing Wooden Beads
Dyeing wooden beads is a fun and creative way to add color to your jewelry and craft projects. Here is a step-by-step guide to help you dye your wooden beads:
Step 1: Soaking the Beads
Before dyeing your wooden beads, it is important to soak them in water for at least 30 minutes. This will help the beads absorb the dye evenly. You can also add a tablespoon of vinegar to the water to help the dye adhere better.
Step 2: Preparing the Dye
There are several types of dyes that you can use to color your wooden beads, such as liquid dye, food coloring, acrylic paint, and watercolor paint. Choose the type of dye that you prefer and mix it according to the manufacturer’s instructions.
You can also mix different colors to create your own custom shades. For example, mixing red and blue will give you purple, while mixing yellow and blue will give you green.
Step 3: Dyeing Process
Once your beads have soaked and your dye is prepared, it’s time to start dyeing your wooden beads. Here’s how:
- Place your wooden beads in the dye solution and stir them gently with a spoon or skewer to ensure that they are evenly coated.
- Let the beads soak in the dye for at least 30 minutes, or until they reach the desired color.
- If you want a darker color, you can leave the beads in the dye solution overnight.
- Once the beads have reached the desired color, remove them from the dye solution and rinse them under cold water to remove any excess dye.
- Pat the beads dry with a clean towel.
Step 4: Drying the Beads
After rinsing and drying your beads, it’s important to let them dry completely before using them in your craft projects. You can lay them out on a clean towel or paper towel to air dry, or you can use a hair dryer on low heat to speed up the drying process.
Once your beads are completely dry, you can use them to make colorful jewelry, keychains, or other craft projects. Have fun experimenting with different colors and dyeing techniques to create unique and beautiful wooden beads!
Safety Measures When Dyeing Wooden Beads
When dyeing wooden beads, it is important to take safety measures to prevent any accidents or injuries. Here are some safety tips to keep in mind:
1. Wear Protective Gear
Wear protective gear such as gloves, goggles, and an apron to protect your skin and eyes from the dye. Some dyes can be harmful if they come into contact with your skin or eyes, so it is important to take precautions.
2. Work in a Well-Ventilated Area
Dyeing wooden beads can produce fumes that can be harmful to your health if inhaled. Make sure to work in a well-ventilated area, such as near an open window or outside.
3. Use the Right Dye
Make sure to use a dye that is safe for wooden beads and that is appropriate for the type of wood you are using. Some dyes may not work well with certain types of wood or may cause the wood to warp or crack.
4. Follow Instructions Carefully
Always read and follow the instructions on the dye package carefully. Improper use of the dye can lead to accidents or injuries.
5. Dispose of Dye Properly
Dispose of any unused dye or dye containers properly. Some dyes may be harmful to the environment if not disposed of correctly, so make sure to follow the instructions on the package for proper disposal.
By following these safety measures, you can ensure a safe and successful dyeing process for your wooden beads.
Maintaining and Caring for Dyed Wooden Beads
Once you have successfully dyed your wooden beads, it is important to maintain and care for them properly. This will help to ensure that the color remains vibrant and the beads last for a long time.
Here are some tips for maintaining and caring for your dyed wooden beads:
- Avoid getting them wet: Water can cause the dye to fade or bleed, so it is important to keep your dyed wooden beads dry. If you need to clean them, use a dry cloth or a soft-bristled brush to remove any dirt or dust.
- Store them properly: To prevent damage to your dyed wooden beads, store them in a dry and cool place. Avoid exposing them to direct sunlight or extreme temperatures, as this can cause the color to fade or the wood to warp.
- Handle them gently: Wooden beads can be fragile, so it is important to handle them gently. Avoid dropping them or exposing them to rough surfaces that could scratch or damage the surface.
- Avoid using harsh chemicals: Harsh chemicals such as bleach or ammonia can damage the dye and the wood of your beads. Instead, use a mild soap and water to clean them if necessary.
- Re-dye as needed: Over time, the color of your dyed wooden beads may fade or become less vibrant. If this happens, you can re-dye them to restore their color. Follow the same steps you used to dye them initially, and be sure to allow them to dry completely before using them again.
By following these tips, you can help to ensure that your dyed wooden beads remain vibrant and beautiful for a long time.
Exploring Creative Ideas with Dyed Wooden Beads
Dyed wooden beads can add a pop of color and a touch of personality to any DIY project. Whether you are making jewelry, home decor, or a fun craft with the kids, there are many creative ways to use dyed wooden beads. Here are a few ideas to get you started:
1. Jewelry Making
Dyed wooden beads can be used to make unique and colorful jewelry pieces. Mix and match different colors and sizes to create a one-of-a-kind necklace, bracelet, or pair of earrings. You can also use dyed wooden beads as accents for metal or glass beads to add a natural touch to your designs.
2. Home Decor
Dyed wooden beads can be used to add a pop of color to your home decor. String them together to make a colorful garland to hang on your wall or drape over a mantle. You can also use them as accents for picture frames, lampshades, or even as drawer pulls for a unique and colorful touch.
3. Kids Crafts
Dyed wooden beads are a great addition to any kids’ craft project. Use them to make colorful keychains, bracelets, or even as beads for a homemade dreamcatcher. Kids can also use them to make colorful necklaces or bracelets for themselves or as gifts for friends and family.
4. Gift Wrapping
Dyed wooden beads can also be used to add a unique touch to your gift wrapping. String them together to make a colorful gift tag or use them as accents for a ribbon or bow. You can also use them to make a colorful tassel to attach to a gift bag or box.
With these creative ideas, you can explore the endless possibilities of using dyed wooden beads in your DIY projects. Let your imagination run wild and see what colorful creations you can come up with!