Tag Archives: double-sided tape

How to Make Wooden Letters: A Beginner's Guide

Are you looking to add a personal touch to your home decor? Wooden letters are a great way to do just that. Whether you want to spell out your family name or create a custom message, making your own wooden letters is a fun and rewarding project. In this article, we’ll walk you through the steps to make your own wooden letters.

The first step in making wooden letters is to choose the wood you want to use. You can use a variety of woods, but it’s important to choose one that is easy to work with and will hold up over time. We recommend using high-quality plywood, such as Baltic Birch, as it is durable and has a smooth surface that is easy to paint or stain.

Once you have your wood selected, the next step is to create a template for your letters. You can either draw your letters by hand or use a computer program to create a template. Then, transfer the template onto your wood and cut out your letters using a scroll saw or jigsaw. Sand the edges of your letters to smooth them out, and you’re ready to paint or stain them to match your decor.

Understanding the Basics of Woodworking

Woodworking is a fun and rewarding hobby that allows you to create beautiful and functional objects from wood. Whether you’re a beginner or an experienced woodworker, it’s important to understand the basics before starting any project. In this section, we’ll cover the types of wood, woodworking tools, and safety measures you need to know.

Types of Wood

Choosing the right type of wood is crucial for any woodworking project. Here are some common types of wood used in woodworking:

Type of Wood Characteristics
Pine Softwood, easy to work with, affordable
Oak Hardwood, durable, expensive
Maple Hardwood, fine grain, good for carving
Birch Hardwood, pale color, good for painting

Woodworking Tools

Having the right tools is essential for any woodworking project. Here are some basic tools you’ll need:

  • Saw: Used for cutting wood to size.
  • Hammer: Used for driving nails and other fasteners.
  • Drill: Used for making holes in wood.
  • Chisel: Used for carving and shaping wood.
  • Sandpaper: Used for smoothing rough surfaces.

There are many other tools you can use for woodworking, but these are the most essential.

Safety Measures

Working with wood can be dangerous if you’re not careful. Here are some safety measures you should always follow:

  • Wear protective gear: Safety glasses, earplugs, and a dust mask are essential.
  • Keep your workspace clean: This will help prevent accidents and make it easier to work.
  • Use tools properly: Follow the manufacturer’s instructions for each tool you use.
  • Never rush: Take your time and work carefully to avoid mistakes.

By following these basic safety measures, you can enjoy woodworking without putting yourself or others at risk.

Designing Your Letters

When it comes to making wooden letters, the design process is crucial. Before you start cutting, you need to have a clear idea of what your letters will look like. Here are some important factors to consider when designing your letters:

Choosing a Font

The font you choose will have a big impact on the overall look and feel of your wooden letters. There are countless fonts to choose from, so take some time to explore your options and find one that fits the style you’re going for.

Some popular font choices for wooden letters include:

  • Serif fonts like Times New Roman or Georgia
  • Sans-serif fonts like Helvetica or Arial
  • Script fonts like Brush Script or Pacifico

Remember, the font you choose should be legible and easy to read from a distance. If you’re not sure which font to choose, try printing out a few different options and seeing how they look when scaled to the size you want.

Size and Proportions

The size and proportions of your letters will also play a big role in the final product. Consider where you’ll be displaying your wooden letters and how much space you have to work with.

Here are some things to keep in mind when deciding on the size and proportions of your letters:

  • The height of your letters should be at least 1/4 inch for every foot of viewing distance.
  • The width of your letters should be between 1/3 and 1/2 of their height.
  • The spacing between your letters should be roughly equal to the width of the letters themselves.

Drafting the Design

Once you’ve chosen a font and decided on the size and proportions of your letters, it’s time to draft the design. This can be done using a computer program like Adobe Illustrator or by hand using pencil and paper.

Here are some tips for drafting your design:

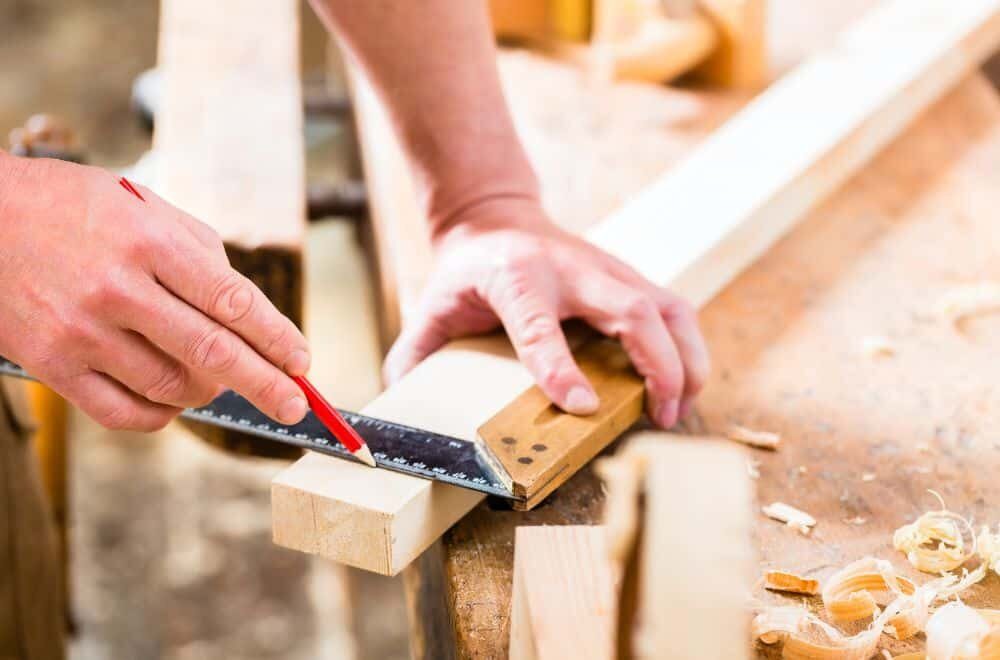
  • Use a ruler to ensure your lines are straight and your proportions are accurate.
  • Draw your letters at the size you want them to be displayed.
  • Experiment with different layouts and arrangements to find the one that looks best.

By taking the time to carefully design your wooden letters, you’ll end up with a finished product that looks polished and professional.

Cutting the Letters

Cutting the wooden letters is the most important part of this DIY project. You want to make sure that you cut them accurately and smoothly. Here are the steps you need to follow to cut the letters:

Setting up the Work Area

Before you start cutting, you need to set up your work area. You will need a flat surface to work on, a jigsaw, and a clamp to hold the wood in place. Make sure that the area is well-lit and free from distractions.

Using a Jigsaw

Using a jigsaw is the easiest way to cut wooden letters. Here are the steps:

  1. Print out the letter template and trace it onto the wood with a pencil.
  2. Clamp the wood to the work surface.
  3. Put on your safety glasses and turn on the jigsaw.
  4. Slowly and carefully cut along the pencil lines.
  5. If you are cutting out the center of a letter, drill a hole in the center first, and then insert the blade of the jigsaw.

Sanding and Smoothing

After you have cut out the letters, you need to sand and smooth them. Here are the steps:

  1. Use a sandpaper block to sand the edges of the letters.
  2. Sand the front and back of the letters to remove any rough spots.
  3. Use a fine-grit sandpaper to smooth the letters.
  4. Wipe the letters clean with a damp cloth.

Cutting wooden letters may seem like a daunting task, but with the right tools and techniques, it can be a fun and rewarding DIY project.

Finishing Touches

Now that you have made your wooden letters, it’s time to add the finishing touches to make them stand out. Here are a few tips on how to apply paint and seal the wood.

Applying Paint

Painting your wooden letters is a great way to add color and personality to your project. Here are some steps to follow when applying paint:

  1. Sand the surface of the wood to make it smooth and remove any rough spots.
  2. Apply a primer to the wood to help the paint adhere better.
  3. Once the primer has dried, apply your desired paint color using a brush or spray paint.
  4. Apply a second coat of paint if necessary.
  5. Let the paint dry completely before moving on to the next step.

Sealing the Wood

Sealing the wood is an important step to protect your wooden letters from damage and wear-and-tear. Here are some steps to follow when sealing the wood:

  1. Sand the surface of the wood to make it smooth and remove any rough spots.
  2. Apply a wood sealer to the surface of the wood using a brush or spray.
  3. Let the sealer dry completely before applying a second coat.
  4. Apply a second coat of sealer if necessary.
  5. Let the sealer dry completely before using your wooden letters.

By following these simple steps, you can make your wooden letters look professional and polished. Whether you’re using them for a home decor project or a special event, these finishing touches will make your project stand out.

Mounting and Displaying the Letters

Choosing the Right Location

Before mounting your wooden letters, you need to choose the right location. Consider the following factors:

  • Visibility: Choose a location where the letters will be easily visible.

  • Lighting: Make sure the area is well-lit to highlight the letters.

  • Wall color: Choose a wall color that contrasts well with the color of the letters.

  • Room decor: Consider the overall decor of the room and choose a location that complements it.

Methods of Mounting

There are several methods you can use to mount your wooden letters. Here are some of the most popular methods:

  1. Adhesives: You can use adhesives like double-sided tape or mounting putty to attach the letters to the wall. This method is easy and does not require any tools, but it may not be suitable for heavy letters.

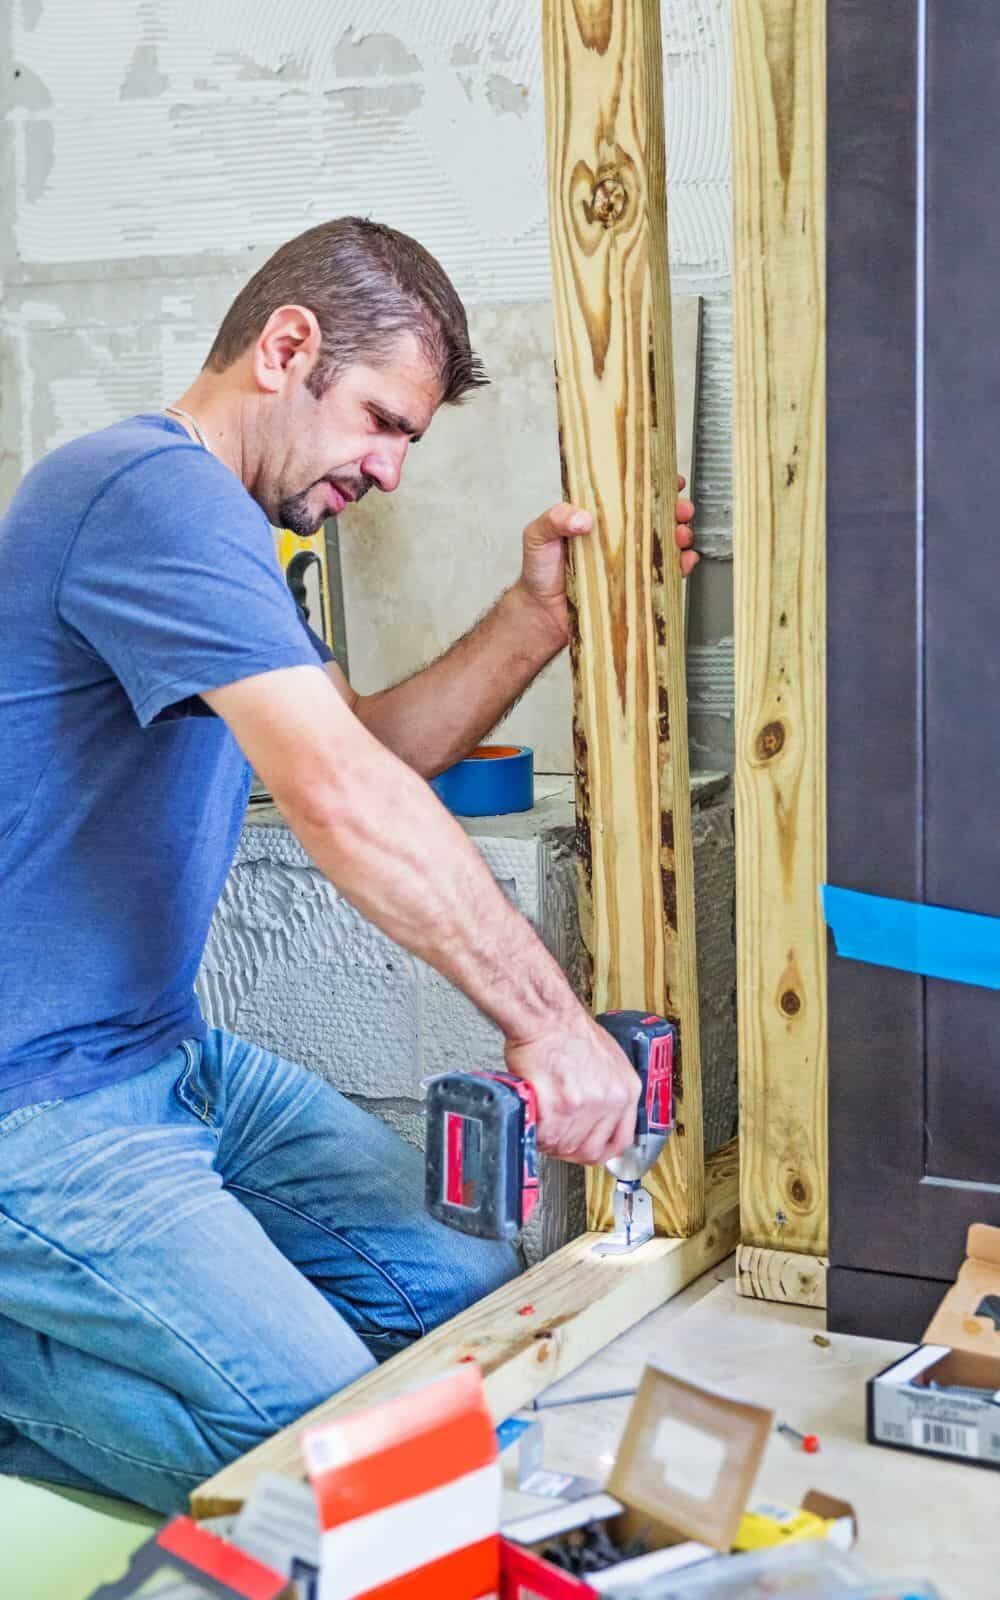
  2. Screws: If your letters are heavy, you can use screws to attach them to the wall. Make sure to use the appropriate screws and drill pilot holes to avoid damaging the letters.

  3. Picture hangers: You can attach picture hangers to the back of the letters and hang them from nails or hooks on the wall. This method is suitable for medium-weight letters.

  4. Command strips: Command strips are a popular alternative to screws and picture hangers. They are easy to use and do not damage the wall. However, they may not be suitable for heavy letters.

When mounting your letters, make sure to measure and mark the position of each letter before attaching it to the wall. Use a level to ensure that the letters are straight and evenly spaced.

With these tips, you can easily mount and display your wooden letters in any room of your home.

Understanding Metal Surfaces

Does Wood Glue Work on Metal? A Comprehensive Guide

Have you ever wondered if wood glue works on metal? Many people believe that wood glue is only suitable for wood-to-wood bonding, but this is not entirely true. It is possible to use wood glue to attach metal to wood, but it depends on the type of glue you use.

While wood and metal have vastly different properties, there are certain types of wood glue that have been specifically designed to bond with metal. Two-part epoxy or acrylate glue are considered to be the strongest options for metal-to-wood bonding. However, polyurethane-based wood glue and contact cement can also work well. It’s important to choose the right type of glue based on the materials you are working with to ensure a strong and lasting bond.

Understanding Wood Glue

When it comes to woodworking, wood glue is an essential tool that can be used to bond pieces of wood together. But what about bonding wood to metal? Can wood glue be used for that purpose?

The answer is yes, but it’s important to understand the properties of wood glue and how they interact with metal surfaces.

Wood glue, also known as PVA glue, is a water-based adhesive that is specifically formulated to bond porous surfaces like wood. When applied to wood, the glue penetrates the pores and creates a strong bond between the wood fibers.

However, metal surfaces are non-porous and do not have the same type of structure as wood. This means that regular wood glue may not be effective for bonding metal surfaces.

To bond wood to metal, you will need to use a specialized type of wood glue that is designed to work with non-porous surfaces. These types of wood glue typically contain additives that help the glue adhere to metal surfaces.

It’s also important to note that the strength of the bond will depend on the type of metal you are working with. Some metals, like aluminum, are more difficult to bond than others.

In summary, wood glue can be used to bond wood to metal, but you need to use a specialized type of glue that is designed for non-porous surfaces. The strength of the bond will depend on the type of metal you are working with, so it’s important to choose the right type of glue for your project.

Understanding Metal Surfaces

understanding-metal-surfacesUnderstanding Metal Surfaces

When it comes to bonding metal to wood using glue, it is essential to understand the characteristics of the metal surface. Here are a few things to keep in mind:

  • Cleanliness: Before applying any glue, make sure the metal surface is clean. Dirt, grease, oil, and rust can all affect the bonding ability of the glue. Use a damp cloth to wipe the surface to get rid of any grease, oil, and dirt. Finish by wiping with a dry cloth so that you are left with bare metal.
  • Texture: The texture of the metal surface can also affect the bonding ability of the glue. Smooth, shiny surfaces may not provide enough surface area for the glue to bond properly. In contrast, rough or porous surfaces may absorb too much glue, weakening the bond. To improve bonding, consider sanding the metal surface lightly to create a slightly rougher texture.
  • Type of metal: Different types of metals have different properties that can affect the bonding ability of the glue. For example, aluminum is a lightweight metal that can be challenging to bond because it is non-porous and has a smooth surface. On the other hand, steel is a more porous metal that can bond well with glue.
  • Expansion and contraction: Metal and wood expand and contract at different rates due to temperature changes and moisture levels. This can cause stress on the bond, leading to failure over time. To minimize this effect, choose a glue that can handle some degree of flexibility and movement, such as 2-part epoxy.

By understanding the characteristics of the metal surface, you can choose the right glue and surface preparation techniques to create a strong bond between metal and wood.

Adhesion Principles

When it comes to bonding materials together, the process of adhesion is essential. Adhesion is the attraction between two different substances that causes them to stick together. The principles of adhesion are important to understand when considering whether wood glue can work on metal.

Adhesion occurs when the adhesive molecules interact with the surface of the material being bonded. The strength of the bond depends on several factors, including the surface energy of the materials, the adhesive’s chemical composition, and the environmental conditions during bonding.

Wood glue, also known as PVA glue, is designed to bond porous materials such as wood, paper, and fabric. It works by penetrating the pores of the material and creating a strong bond within the fibers. However, metal surfaces are non-porous, which means that wood glue may not be able to penetrate the surface and create a strong bond.

Another factor to consider is the chemical composition of the adhesive. Wood glue is typically water-based, which means that it may not be able to bond with metal surfaces that are not water-absorbent. In addition, wood glue may not be able to withstand the stress and strain that metal surfaces can experience.

Overall, while wood glue may be able to bond some types of metal surfaces, it is not recommended for use as a primary adhesive for metal bonding. Instead, it is best to use specialized metal adhesives that are designed specifically for bonding metal surfaces. These adhesives are formulated to provide strong bonds that can withstand the stress and strain of metal bonding, ensuring a long-lasting bond that will not fail over time.

Wood Glue on Metal: The General Consensus

When it comes to bonding metal and wood together, many people wonder if wood glue is a viable option. While some types of wood glue can be used on certain metals, the general consensus is that wood glue is not the best adhesive for metal bonding.

Regular wood glue, also known as polyvinyl acetate (PVA) glue, is formulated as a water-based adhesive. Its functionality is rooted in its ability to permeate the wood’s porous structure and establish a strong bond within the wood fibers. However, this mechanism is not effective on non-porous surfaces like metal, which makes it unsuitable for bonding most metals.

Wood glue can be used on soft metals like aluminum and copper, but the bond will be weaker than with other types of metal. PVA glues are also suitable for bonding steel, but again, the bond will not be as strong as with other adhesives.

If you need to bond metal and wood together, there are other adhesives that are more suitable for the job. Epoxy and polyurethane glue are the best options for attaching metal and wood as they form the strongest bond between the two materials. They are also more resistant to water and heat, making them ideal for outdoor or high-temperature applications.

In summary, while wood glue can be used on certain types of metal, it is not the best adhesive for bonding metal and wood together. If you need a strong and reliable bond, it is best to use epoxy or polyurethane glue instead.

Exploring Alternative Adhesives

When it comes to bonding wood and metal, wood glue may not always be the best option. In some cases, you may need to explore alternative adhesives to achieve a strong and durable bond. Here are a few options to consider:

Epoxy Resins

Epoxy resins are a popular choice for bonding metal and wood. These adhesives consist of two parts – a resin and a hardener – that must be mixed together before use. Once applied, epoxy resins cure to form a strong and durable bond that can withstand high stress and strain. They are also resistant to water, heat, and chemicals, making them ideal for use in harsh environments.

Here are a few things to keep in mind when using epoxy resins:

  • Mix the resin and hardener thoroughly before use
  • Apply the adhesive evenly to both surfaces
  • Clamp the surfaces together until the adhesive cures
  • Allow the adhesive to cure completely before subjecting the bond to stress or strain

Polyurethane Adhesives

Polyurethane adhesives are another option for bonding wood and metal. These adhesives are known for their high strength and flexibility, which makes them ideal for use in applications where the bond may be subjected to movement or vibration. They also have good resistance to water and chemicals.

Here are a few tips for using polyurethane adhesives:

  • Apply the adhesive evenly to both surfaces
  • Clamp the surfaces together until the adhesive cures
  • Allow the adhesive to cure completely before subjecting the bond to stress or strain

Cyanoacrylate Adhesives

Cyanoacrylate adhesives, also known as superglues, are a fast and easy option for bonding wood and metal. These adhesives work by reacting with moisture in the air to form a strong and durable bond. They are ideal for use in small applications where a quick bond is needed.

Here are a few things to keep in mind when using cyanoacrylate adhesives:

  • Apply the adhesive sparingly to one surface
  • Press the surfaces together firmly and hold for a few seconds
  • Allow the adhesive to cure completely before subjecting the bond to stress or strain

Overall, there are several alternative adhesives that can be used to bond wood and metal. The best option will depend on the specific application and the conditions the bond will be subjected to. By considering the properties of each adhesive and following the manufacturer’s instructions, you can achieve a strong and durable bond between wood and metal.

Practical Applications of Wood Glue on Metal

practical-applications-of-wood-glue-on-metal

If you’re wondering whether wood glue can be used on metal, the answer is yes. While wood glue is primarily used for bonding wood, it can also be used on metal surfaces. Here are some practical applications of using wood glue on metal:

1. Wood and Metal Combination Projects

Wood and metal combination projects are becoming increasingly popular in the world of DIY. If you’re working on a project that involves both wood and metal, using wood glue can be a great way to bond the two materials together. This will help you avoid the hassle of maintaining two sets of glue.

2. Repairing Metal Objects

If you have a metal object that needs repairing, wood glue can be a great solution. It can be used to bond broken pieces of metal together, or to fill in gaps and cracks. However, it’s important to keep in mind that not all types of wood glue are suitable for use on metal. Be sure to choose a wood glue that is specifically designed for use on metal surfaces.

3. Creating Metal Art

If you’re a fan of metal art, you can use wood glue to create unique and interesting pieces. For example, you can use wood glue to bond metal pieces together to create a sculpture or other decorative object. You can also use wood glue to attach other materials, such as wood or fabric, to metal surfaces.

4. Building Metal Furniture

If you’re building metal furniture, wood glue can be a great way to bond metal pieces together. It can also be used to attach other materials, such as wood or glass, to metal surfaces. However, it’s important to keep in mind that wood glue may not be strong enough for all types of metal furniture. Be sure to choose a wood glue that is strong enough for the job.

Overall, wood glue can be a great solution for bonding wood and metal surfaces together. However, it’s important to choose the right type of wood glue for the job, and to use it properly. With the right approach, you can create unique and interesting projects that combine the beauty of wood and metal.

Safety Measures When Using Adhesives

When using adhesives, safety should always be your top priority. Here are some safety measures to keep in mind when using wood glue or any other adhesive to attach metal to wood:

Wear Protective Gear

Wear protective gear to avoid any accidents. We recommend wearing safety goggles and nitrile gloves to protect your eyes and hands from any harmful chemicals that may be present in the adhesive.

Work in a Well-Ventilated Area

Make sure to work in a well-ventilated area to avoid inhaling any fumes that may be produced by the adhesive. If possible, work outside or in a room with open windows.

Follow the User Manual

Always follow the user manual that comes with the adhesive. The manual will provide you with important information about the adhesive, including how to use it safely.

Keep the Workspace Clear

Keep your workspace clear of any hazards that may cause accidents. Make sure that the surface you are working on is clean and free of any debris.

Store Adhesives Properly

Store adhesives in a cool, dry place, away from direct sunlight and heat sources. Make sure that the adhesive is stored in its original container with the lid tightly closed.

By following these safety measures, you can ensure that you use wood glue or any other adhesive safely and effectively.

Additional Tips for Adhesive Use

additional-tips-for-adhesive-use

When it comes to bonding wood and metal together using adhesive, there are a few additional tips that can help ensure a strong and long-lasting bond. Here are some tips to keep in mind:

1. Choose the Right Adhesive

While wood glue can work on metal, it is important to choose the right type of adhesive for the job. Some adhesives, such as epoxy and cyanoacrylate (super glue), are specifically designed to bond metal and wood together. Make sure to read the label carefully and choose an adhesive that is suitable for both materials.

2. Prepare the Surfaces

Before applying the adhesive, it is important to prepare the surfaces of the wood and metal. Make sure they are clean, dry, and free of any debris or dust. You can use sandpaper or a wire brush to roughen up the surface of the metal, which will help the adhesive bond better.

3. Apply the Adhesive Correctly

When applying the adhesive, make sure to follow the instructions carefully. Apply a thin, even layer of adhesive to both the wood and metal surfaces, and then press them together firmly. Use clamps or weights to hold the pieces in place while the adhesive dries.

4. Allow Time for Drying

Different adhesives have different drying times, so make sure to follow the instructions on the label. It is important to allow the adhesive to dry completely before using the bonded pieces. This will ensure a strong and long-lasting bond.

5. Consider Using Mechanical Fasteners

While adhesive can be a great way to bond wood and metal together, it is not always the strongest option. For heavy-duty applications, consider using mechanical fasteners such as screws or bolts in addition to adhesive. This will provide extra strength and durability.

By following these tips, you can ensure a strong and long-lasting bond between wood and metal using adhesive.

Frequently Asked Questions

What kind of glue works best for metal to metal bonding?

When it comes to metal to metal bonding, epoxy or cyanoacrylate (super glue) are the best options. These types of glue create a strong and durable bond that can withstand stress and pressure.

Can wood glue be used to attach metal to wood?

Regular wood glue is not recommended for attaching metal to wood as it is not designed to bond with metal. However, there are specialized wood glues available that are formulated to work with metal, such as polyurethane-based adhesives.

What is the strongest glue for metal to wood?

The strongest glue for metal to wood bonding is epoxy. Epoxy provides a strong and durable bond that can withstand stress and pressure. It is also resistant to water and chemicals, making it a great choice for outdoor projects.

How to attach metal to wood without screws or nails?

One option for attaching metal to wood without screws or nails is to use adhesive strips or double-sided tape. Another option is to use specialized metal-to-wood adhesives, such as epoxy or polyurethane-based adhesives.

Will Gorilla Wood Glue stick to metal?

No, Gorilla Wood Glue is not designed to bond with metal. It is specifically formulated for wood-to-wood bonding.

Will Titebond Wood Glue adhere to metal?

No, Titebond Wood Glue is not designed to bond with metal. It is specifically formulated for wood-to-wood bonding.

choosing-the-right-wood

How to Hang a Thin Piece of Wood on a Wall: Simple Tips and Tricks

Hanging a thin piece of wood on a wall can be a tricky task, especially if you want to ensure that it is secure and won’t fall off. There are several methods that you can use to hang a thin piece of wood on a wall, such as using adhesive, double-sided tape, or wire. However, it is important to choose the right method based on the weight of the wood and the type of wall you are hanging it on.

One popular method for hanging a thin piece of wood on a wall is using a French cleat. This involves cutting a 45-degree bevel on a piece of hardwood, which is then attached to the wall. The other half of the cleat is attached to the back of the wood, allowing it to slide onto the cleat and be held securely in place. This method is particularly useful for heavy pieces of wood that need to be securely attached to the wall.

Another option for hanging a thin piece of wood on a wall is using velcro wall hangers. These hangers are designed to hold lightweight items, such as pictures or posters, but can also be used for thin pieces of wood. They are easy to install and remove, making them a good choice if you want to change the position of the wood frequently. However, they may not be suitable for heavier pieces of wood.

Understanding Wall Types

understanding-wall-types

When it comes to hanging a thin piece of wood on a wall, it’s important to understand the type of wall you are working with. Different wall types require different methods of hanging, and using the wrong method can result in damage to your wall or your artwork. Here are some common wall types and the best ways to hang a thin piece of wood on them.

Drywall

Drywall is the most common type of wall found in modern homes. It’s made of gypsum plaster sandwiched between two layers of paper, and it’s relatively easy to hang things on. Here’s how to hang a thin piece of wood on drywall:

  1. Find the studs: Use a stud finder to locate the studs behind the drywall. This will give you a secure anchor point for your screws or nails.
  2. Mark the location: Use a pencil to mark the location of the studs on the wall.
  3. Drill pilot holes: Use a drill to make pilot holes in the wood where you want to attach it to the wall.
  4. Attach the wood: Use screws or nails to attach the wood to the wall, making sure to drive them into the studs.

Plaster

Plaster walls are common in older homes, and they can be a bit trickier to hang things on than drywall. Here’s how to hang a thin piece of wood on a plaster wall:

  1. Find the studs: Use a stud finder to locate the studs behind the plaster. If you can’t find the studs, use a toggle bolt or molly bolt to anchor your screws or nails.
  2. Mark the location: Use a pencil to mark the location of the studs or anchor points on the wall.
  3. Drill pilot holes: Use a drill to make pilot holes in the wood where you want to attach it to the wall.
  4. Attach the wood: Use screws or nails to attach the wood to the wall, making sure to drive them into the studs or anchor points.

Brick

Brick walls are common in older homes and commercial buildings, and they require a different approach to hanging things than drywall or plaster. Here’s how to hang a thin piece of wood on a brick wall:

  1. Use a masonry bit: Use a masonry bit and drill to make pilot holes in the brick where you want to attach the wood.
  2. Insert anchors: Insert plastic or metal anchors into the pilot holes.
  3. Attach the wood: Use screws or nails to attach the wood to the anchors.

By understanding the type of wall you are working with and using the appropriate hanging method, you can safely and securely hang a thin piece of wood on your wall.

Choosing the Right Wood

choosing-the-right-wood

When hanging a thin piece of wood on a wall, it’s important to choose the right type of wood. Here are some factors to consider:

Thickness

The thickness of the wood you choose will affect how it hangs on the wall. Thinner pieces of wood may require additional support, while thicker pieces may be too heavy to hang securely. A 1/4″ thickness is a common choice for thin wood pieces.

Type of Wood

Different types of wood have different characteristics that can affect how they hang on the wall. Here are some popular options:

  • Plywood: A strong and lightweight option that is easy to work with.
  • MDF: A dense and stable option that is resistant to warping and cracking.
  • Hardwood: A durable and attractive option that can add a high-end look to your space.

Grain Pattern

The grain pattern of the wood you choose can also affect its appearance and hanging capabilities. Here are some common grain patterns:

  • Plain sawn: A simple and traditional pattern that can add texture and interest to your space.
  • Quarter sawn: A more stable and uniform pattern that is less likely to warp or twist.
  • Rift sawn: A unique and modern pattern that can add a contemporary look to your space.

Finish

Finally, consider the finish of the wood you choose. A smooth and polished finish can add a sleek look to your space, while a rough and rustic finish can add character and charm. Just be sure to choose a finish that complements the overall style of your room.

By considering these factors, you can choose the right type of wood for your thin piece and ensure it hangs securely and looks great on your wall.

Required Tools

required-tools

To hang a thin piece of wood on a wall, you’ll need a few essential tools to ensure a secure and level installation. Here are the tools you’ll need:

Drill

A drill is essential for creating holes in the wall to anchor the screws that will hold the wood in place. Make sure to use a drill bit that is slightly smaller than the diameter of the screws you will be using to ensure a snug fit.

Level

A level is crucial for ensuring that the wood is hung straight and level. A small bubble level is usually sufficient for this task.

Stud Finder

If you plan to hang the wood on a stud wall, a stud finder will help you locate the studs behind the drywall. This will allow you to anchor the screws directly into the studs for a more secure installation.

Screws

The type of screws you use will depend on the weight of the wood and the type of wall you are hanging it on. For lightweight wood and drywall, picture hanging strips or adhesive hooks may be sufficient. For heavier wood and stud walls, use wood screws that are long enough to anchor securely into the studs.

By having these tools on hand, you’ll be able to hang your thin piece of wood securely and level on any type of wall.

Locating the Studs

Before you hang a thin piece of wood on a wall, you need to locate the studs. This is important because hanging the wood on drywall alone can result in it falling off the wall. Here are some ways to locate the studs:

  • Use a Stud Finder: A stud finder is a handy tool that can help you locate the studs quickly. Simply place the stud finder on the wall and move it around until it beeps or lights up, indicating the presence of a stud.
  • Knock on the Wall: Another way to locate the studs is to knock on the wall. Start by tapping with your fingertip wherever you need to find a stud and slowly move to the right or to the left. If the tapping sound becomes more solid, you’re approaching a stud. If it sounds hollow, you’re moving away from a stud. Once you’ve found the stud, measure 16 inches to find the next stud, then tap to verify.
  • Look for Outlets or Switches: Electrical boxes are typically attached to studs, so finding a light switch or power outlet can help you locate the studs. Once you’ve found an outlet or switch, measure 16 inches to find the next stud.
  • Measure from Window or Door Trim: Window and door trim are anchored into studs. Sometimes, you can see dimples left by the nail where it is attached, but if not, choose a spot one inch from the edge of your window, and then measure out an additional 16 inches to find the next stud on the wall.

Remember to mark the location of the studs with a pencil or tape measure so that you can easily refer to them when hanging the thin piece of wood on the wall.

Preparing the Wood

preparing-the-wood

Before hanging a thin piece of wood on a wall, there are a few steps you should take to ensure that the wood is ready for mounting.

Sanding

First, you should sand the wood to ensure that it is smooth and free of any rough spots or splinters. Use a fine-grit sandpaper to gently sand the surface of the wood until it is completely smooth. Be sure to sand the edges of the wood as well to prevent any sharp edges from causing injury.

Staining or Painting

Once the wood is sanded, you can choose to stain or paint it to give it a finished look. If you choose to stain the wood, be sure to apply a clear coat of polyurethane to protect the wood and prevent any damage from moisture or humidity.

If you choose to paint the wood, be sure to use a primer to help the paint adhere to the surface. Apply two coats of paint, allowing each coat to dry completely before applying the next.

Adding Hardware

Before mounting the wood on the wall, you will need to add hardware to the back of the wood to hang it securely. There are several options for hardware, including keyhole slots, D-rings, or sawtooth hangers.

If you choose to use keyhole slots, be sure to measure and mark the location of the slots on the back of the wood before drilling the holes. Use a drill bit that is slightly larger than the diameter of the screws you will be using to mount the wood.

Once the hardware is attached, your thin piece of wood is ready to be mounted on the wall.

Drilling the Holes

To hang a thin piece of wood on a wall, you will need to drill holes in the wood and the wall. Here’s how to do it:

  1. Measure the length and width of the wood piece, and determine where you want to hang it on the wall. Mark the spot on the wall where you want to drill the holes.
  2. Choose the right drill bit size for the job. You want a bit that is slightly smaller than the size of the screw you will use to hang the wood. For example, if you plan to use a 1/4 inch screw, use a 3/16 inch drill bit.
  3. Insert the drill bit into the drill and tighten it securely.
  4. Hold the drill perpendicular to the wall and drill a hole at the marked spot. Be sure to drill straight and not at an angle.
  5. Repeat the process for the other holes you need to drill.
  6. If you are drilling into drywall, use a drywall anchor to provide extra support for the screws. Insert the anchor into the hole and then screw the wood piece into the anchor.
  7. If you are drilling into a stud, you can skip the drywall anchor and screw the wood piece directly into the stud.

By following these steps, you can easily drill the necessary holes to hang your thin piece of wood securely on the wall.

Mounting the Wood

mounting-the-wood

When it comes to mounting a thin piece of wood on a wall, there are a few options to choose from. Here are some methods you can try:

1. Picture Hanging Strips or Adhesive Hooks

If the wood is lightweight and the wall is made of drywall, you can use picture hanging strips or adhesive hooks. These are easy to use and won’t damage your walls. Simply attach the strips or hooks to the back of the wood and press firmly onto the wall.

2. Glue a Strip of Wood to the Back

For a more permanent solution, you can glue a strip of wood to the back of the thin piece of wood. This will add support and make it easier to hang. You can then attach your hanging hardware to the strip of wood.

3. Keyhole Slots

If your piece of wood has keyhole slots, you can use them to hang the wood on the wall. First, measure the distance between the slots and mark the wall where you want the wood to hang. Then, attach screws or hooks to the wall and hang the wood on them.

4. French Cleat

If you have a heavy piece of wood, you can use a French cleat to mount it on the wall. A French cleat is a type of hardware that consists of two pieces of wood, one attached to the back of the wood and the other attached to the wall. The two pieces interlock to provide a secure mount.

With these methods, you can easily mount a thin piece of wood on a wall. Just make sure to choose the right method for your specific piece of wood and wall type.

Safety Precautions

When hanging a thin piece of wood on a wall, it is important to take safety precautions to prevent any accidents or damage to your walls. Here are some tips to keep in mind:

1. Determine the weight of the wood

Before you start hanging the wood, it’s important to know its weight. This will help you choose the right hardware and ensure that the wood is properly secured. You can use a bathroom scale to weigh the wood.

2. Use appropriate hardware

Make sure to use the appropriate hardware for the weight of the wood. For a thin piece of wood, you can use picture hangers, sawtooth hangers or adhesive strips. If the wood is heavier, use wall anchors or toggle bolts to secure it to the wall.

3. Check the wall for studs

If possible, hang the wood on a wall stud. This will provide extra support and stability. You can use a stud finder to locate the studs in your wall.

4. Use a level

To ensure that the wood is straight, use a level to mark the position of the hangers or hardware. This will help you avoid any crooked or uneven hanging.

5. Wear protective gear

When drilling or hammering into the wall, wear protective gear such as safety glasses and gloves to prevent any injuries.

By following these safety precautions, you can hang your thin piece of wood on the wall safely and securely.

Frequently Asked Questions

What are some ways to hang a thin piece of wood on a wall?

There are several ways to hang a thin piece of wood on a wall. One is to use wood glue to attach a strip of wood to the back of the wood piece and then hang it on a nail or hook. Another way is to use picture hangers or adhesive strips that are specifically designed for hanging lightweight objects on walls.

How can I hang a wood shelf on a wall?

To hang a wood shelf on a wall, you can use brackets or cleats. Brackets are L-shaped metal or wood pieces that attach to the wall and support the shelf. Cleats are strips of wood that are attached to the wall and the shelf, providing a secure hold.

What are some methods for hanging things on walls without causing damage?

There are several methods for hanging things on walls without causing damage, such as using adhesive strips, suction cups, or removable hooks. These options are great for renters or anyone who wants to avoid drilling holes in their walls.

How do I hang plywood art on a wall?

To hang plywood art on a wall, you can use a strip of wood trim material that is glued on the back side of the plywood with carpenter’s glue. Then, you can hang the piece on a nail or hook. Alternatively, you can use a French cleat system, which involves mounting a cleat to the wall and attaching another cleat to the back of the plywood.

What’s the best way to hang something on a stud?

The best way to hang something on a stud is to use a stud finder to locate the stud and then use a screw or nail to attach the object to the stud. This will provide a secure hold and prevent damage to the wall.

How do I hang thin wood panels on a wall?

To hang thin wood panels on a wall, you can use adhesive strips or picture hangers. Another option is to use a French cleat system, which involves mounting a cleat to the wall and attaching another cleat to the back of the wood panel.