
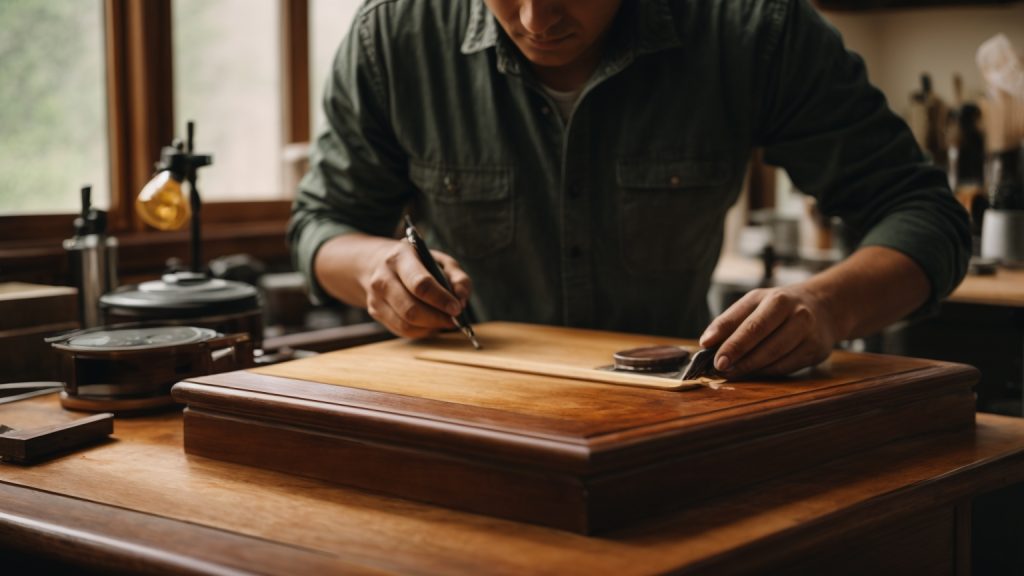
Refinishing a wooden desk can be a daunting task, but with the right tools and techniques, it can be a rewarding DIY project. Whether you’re looking to give your old desk a new lease of life or simply want to update its look, refinishing can be a cost-effective solution. In this article, we’ll guide you through the steps to refinish a wooden desk and give it a brand new look.
Before you begin, it’s important to determine the original finish of your desk. This will help you choose the right refinishing method and ensure that the wood is suitable for refinishing. Some finishes and types of wood may not be able to be refinished, so it’s important to verify this before taking any action. Once you’ve determined that your desk can be refinished, you can begin the process of stripping the old finish.
Understanding the Importance of Refinishing
If you have a wooden desk that has seen better days, refinishing it may be just what it needs to restore its beauty and functionality. Refinishing a wooden desk involves removing the old finish, repairing any damage, and applying a new finish to protect the wood and give it a fresh look.
Refinishing your wooden desk is important for several reasons. First, it helps to protect the wood from damage caused by moisture, heat, and other environmental factors. Over time, wooden desks can become discolored, warped, or cracked if they are not properly maintained. Refinishing your desk can help to prevent these issues and keep it looking great for years to come.
Second, refinishing your wooden desk can help to restore its beauty and value. A well-maintained wooden desk can be a valuable piece of furniture that adds character and style to any room. By refinishing your desk, you can bring out its natural beauty and give it a fresh, updated look that will enhance its appeal and value.
Finally, refinishing your wooden desk can be a fun and rewarding DIY project that you can tackle on your own. With the right tools and materials, you can strip and refinish your desk in a weekend or two, depending on the size and complexity of the project. Plus, by doing it yourself, you can save money and have the satisfaction of knowing that you restored your desk to its former glory with your own hands.
In summary, refinishing your wooden desk is an important step in maintaining its beauty, functionality, and value. By taking the time to strip, repair, and refinish your desk, you can protect it from damage, restore its natural beauty, and enjoy the satisfaction of a job well done.
Identifying the Type of Wood
When it comes to refinishing a wooden desk, one of the first things you need to do is identify the type of wood you are working with. Knowing the type of wood will help you choose the right refinishing technique and products to use. Here are some tips for identifying the type of wood:
Hardwood vs Softwood
The first thing you need to determine is whether the wood is a hardwood or a softwood. Hardwoods come from deciduous trees, such as oak, maple, and cherry, while softwoods come from coniferous trees, such as pine and cedar. Hardwoods are generally more durable and harder to work with, while softwoods are easier to work with but less durable.
To determine whether your wood is a hardwood or a softwood, look at the grain pattern. Hardwoods have a tighter and more complex grain pattern, while softwoods have a simpler and more open grain pattern. You can also try to dent the wood with your fingernail. If it dents easily, it is likely a softwood.
Exotic Wood Types
If you are working with an exotic wood, such as teak or mahogany, you may need to do some additional research to identify the type of wood. Exotic woods can come from all over the world and can have unique characteristics and properties.
One way to identify exotic woods is to look at the color and grain pattern. For example, teak is a golden brown color with a straight grain, while mahogany is a reddish-brown color with a ribbon-like grain. You can also try to identify the wood by its smell. Some exotic woods have a distinct smell, such as cedar and rosewood.
Overall, identifying the type of wood is an important step in refinishing a wooden desk. By knowing the type of wood, you can choose the right refinishing technique and products to use, and ensure that your finished product looks beautiful and lasts for years to come.
Materials and Tools Needed
Refinishing a wooden desk can be a rewarding DIY project that can transform an old, worn-out piece of furniture into a beautiful and functional addition to your home or office. To get started, you’ll need a few basic materials and tools. Here are the essentials:
Safety Equipment
Before you begin refinishing your desk, it’s important to ensure that you have the necessary safety equipment to protect yourself from harmful chemicals and dust. Here are some items you should have on hand:
- Safety glasses or goggles
- Dust mask or respirator
- Gloves
- Protective clothing
Sanding Tools
Sanding is a crucial step in the refinishing process, as it helps to remove the old finish and prepare the surface for a new one. Here are some tools you’ll need for sanding your desk:
- Sandpaper (150, 220, and 300 grit)
- Sanding block or palm sander
- Low-grit sandpaper for removing varnish or paint
- High-grit sandpaper for removing thin layers of varnish or paint and for use after applying wood putty or filler
- Steel wool (medium grade)
Finishing Products
The finishing products you choose will depend on the look you want to achieve and the level of protection you need. Here are some options to consider:
- Stain: Stain can enhance the natural beauty of the wood and add color. Choose a stain that is appropriate for the type of wood you are refinishing.
- Polyurethane: Polyurethane is a durable, protective finish that can be applied in a variety of sheens. Choose a finish that is appropriate for the level of use your desk will receive.
- Lacquer: Lacquer is a fast-drying, durable finish that can be applied in a variety of sheens. It is a good choice for high-use areas.
- Wood filler: Wood filler can be used to fill in gaps or holes in the wood before refinishing.
With these materials and tools, you’ll be well on your way to refinishing your wooden desk. Remember to take your time and follow the instructions carefully to achieve the best results.
Preparing the Workspace
Before you begin refinishing your wooden desk, it is important to prepare your workspace properly. This will ensure that the process is smoother and safer. Here are some steps to follow:
Clear the Area
First, clear the area where you will be working. Remove any items that could get in the way or get damaged during the refinishing process. This includes any other furniture, decorations, or accessories.
Cover the Floor
Next, cover the floor with a drop cloth or plastic sheeting to protect it from any spills or drips. You can also use old newspapers or cardboard boxes if you don’t have a drop cloth. Make sure the covering extends beyond the area where you will be working to catch any stray drips or spills.
Ventilation
Refinishing a wooden desk can produce fumes that can be harmful if inhaled. It is important to work in a well-ventilated area to avoid any health issues. Open windows and doors, or use a fan to help circulate the air. If you have a respirator mask, wear it to protect yourself from the fumes.
Lighting
Make sure your workspace is well-lit. This will help you see any imperfections or missed spots during the refinishing process. Natural light is best, but if that’s not possible, use bright artificial light.
Tools and Materials
Gather all the tools and materials you will need before starting the refinishing process. This includes sandpaper, paint stripper, wood filler, stain, and a sealer. Make sure you have enough of each item to complete the job. Keep them within easy reach so you don’t have to stop and search for them during the process.
By following these steps, you can prepare your workspace for refinishing your wooden desk efficiently and safely.
Stripping the Old Finish
Before you can refinish your wooden desk, you need to remove the old finish first. The process of stripping the old finish can be messy and time-consuming, but it’s essential to achieve a smooth and even surface for the new finish.
Step 1: Choose a Stripping Method
There are two main methods for stripping the old finish off your wooden desk: sanding and chemical stripping. Sanding involves using sandpaper to remove the old finish manually, while chemical stripping uses a chemical solvent to dissolve the old finish.
Sanding is a good option for flat surfaces, but it can be challenging to remove the finish from curved or detailed areas. Chemical stripping is a better option for those areas, but it requires more caution and care.
Step 2: Gather Your Supplies
To strip the old finish off your wooden desk, you’ll need the following supplies:
- Chemical stripper or sandpaper
- Rubber gloves
- Protective eyewear
- Respirator mask
- Paintbrush or scraper
- Steel wool or sandpaper
- Clean rags
Step 3: Apply the Chemical Stripper
If you choose to use a chemical stripper, follow the manufacturer’s instructions carefully. Apply the stripper to the desk surface with a paintbrush or scraper, and let it sit for the recommended time. Then, use steel wool or sandpaper to remove the old finish.
Be sure to work in a well-ventilated area and wear protective gear, as the fumes from the chemical stripper can be harmful.
Step 4: Sand the Surface
If you choose to sand the old finish off your wooden desk, start with a coarse-grit sandpaper and work your way up to a finer grit. Sand in the direction of the wood grain to avoid scratches and uneven spots.
Once you’ve removed the old finish, wipe down the surface with a clean rag to remove any dust or debris.
By following these steps, you can strip the old finish off your wooden desk and prepare it for a new finish.
Sanding the Desk
Sanding the desk is a crucial step in the process of refinishing a wooden desk. It helps to remove the old finish and create a smooth surface for the new finish to adhere to. Here are some tips to help you sand your desk effectively:
- Choose the right sandpaper: Depending on the condition of your desk, you may need to start with a coarse sandpaper and work your way up to a finer grit. A good rule of thumb is to start with 100-grit sandpaper and move up to 150-grit, 220-grit, and finally 320-grit.
- Use an orbital sander: An orbital sander is a great tool for sanding large surfaces like a desk. It is easy to use and creates a smooth finish. If you don’t have an orbital sander, you can use a sanding block with sandpaper.
- Sand with the grain: Always sand with the grain of the wood to avoid creating scratches or marks on the surface.
- Clean as you go: As you sand, dust and debris will accumulate on the surface of the desk. Use a vacuum or a tack cloth to clean the surface and remove any debris.
- Check your progress: As you sand, check your progress by running your hand over the surface of the desk. You should feel a smooth, even surface.
- Be patient: Sanding can be a time-consuming process, but it is essential for achieving a beautiful finish. Take your time and don’t rush the process.
By following these tips, you can effectively sand your desk and prepare it for the next step in the refinishing process.
Applying the New Finish
After removing the old finish, it’s time to apply the new finish to your wooden desk. This is the step that will give your desk a fresh new look and protect it from damage. There are many different types of finishes to choose from, so it’s important to choose the right one for your desk.
Choosing the Right Finish
When choosing a new finish for your desk, consider the following factors:
- Durability: How much wear and tear will your desk be subjected to? If your desk will be used frequently, you’ll want a more durable finish.
- Appearance: What look are you going for? Do you want a glossy or matte finish? Do you want the natural wood grain to show through?
- Ease of application: Some finishes are easier to apply than others. Consider your skill level and the tools you have available.
Here are some common types of finishes and their characteristics:
| Finish | Characteristics |
|---|---|
| Polyurethane | Durable, water-resistant, glossy finish |
| Varnish | Durable, glossy finish |
| Lacquer | Durable, glossy finish, dries quickly |
| Oil-based stain | Penetrates the wood, enhances natural grain, requires a topcoat |
| Water-based stain | Low odor, dries quickly, requires a topcoat |
Techniques for Application
Once you’ve chosen your finish, it’s time to apply it to your desk. Here are some tips for a successful application:
- Work in a well-ventilated area.
- Stir the finish thoroughly before use.
- Apply the finish in thin, even coats, using a brush, roller, or spray gun.
- Sand lightly between coats with fine-grit sandpaper.
- Apply at least two coats for best results.
- Allow the finish to dry completely between coats and before using the desk.
Remember, applying a new finish can be a time-consuming process, but the end result is worth it. With the right finish and application techniques, your wooden desk will look beautiful and be protected for years to come.
Final Touches
After you have stripped, sanded, stained, and sealed your wooden desk, it’s time to add the final touches to bring out the best in your hard work. This section will cover two essential final touches: buffing and polishing and adding a protective coating.
Buffing and Polishing
Buffing and polishing are the final steps to give your desk a smooth and shiny finish. To do this, you will need:
- Soft cloth
- Polishing compound
- Electric buffer (optional)
First, apply a small amount of polishing compound to the soft cloth. Then, rub the cloth onto the surface of the desk in circular motions. If you have an electric buffer, you can use it to buff the desk more quickly and efficiently.
Be careful not to overdo it, as too much buffing can remove the protective coating you applied earlier. Once you are satisfied with the shine, wipe off any excess polishing compound with a clean cloth.
Adding Protective Coating
Adding a protective coating is crucial to ensure that your desk stays in good condition for years to come. There are several options for protective coatings, including:
Polyurethane is a popular choice for its durability and resistance to scratches and stains. Lacquer is also durable but requires more maintenance and can yellow over time. Wax is a natural option that provides a soft, matte finish but needs to be reapplied regularly.
To apply the protective coating, follow the instructions on the product label carefully. Generally, you will need to apply several thin coats, allowing each coat to dry completely before applying the next.
Congratulations, you have successfully refinished your wooden desk! With proper care, your desk will continue to look beautiful and serve you well for years to come.
Maintenance Tips
Taking care of your refinished wooden desk is important to ensure it stays looking great for years to come. Here are some maintenance tips to keep your desk in top condition.
Regular Cleaning
Regular cleaning is essential to maintaining the beauty of your refinished wooden desk. Dust and dirt can accumulate quickly and cause scratches and damage to the surface. Use a soft, lint-free cloth to wipe down your desk regularly. Avoid using abrasive cleaners or harsh chemicals that can damage the finish. Instead, use a mild soap and water solution to clean your desk. Be sure to dry the surface thoroughly to prevent water damage.
Preventing Scratches and Stains
Preventing scratches and stains is key to keeping your refinished wooden desk looking its best. Here are some tips to help prevent damage:
- Use coasters and placemats to protect the surface from spills and stains.
- Avoid placing hot items directly on the surface to prevent heat damage.
- Use desk pads or mouse pads to protect the surface from scratches and wear.
- Avoid dragging heavy items across the surface, as this can cause scratches and damage.
By following these maintenance tips, you can keep your refinished wooden desk looking beautiful and in top condition for years to come.