If you have a mouse problem in your home, setting a wooden mouse trap can be an effective way to eliminate the issue. Unlike electronic traps, wooden traps are affordable and easy to use. However, if you’ve never set a wooden mouse trap before, the process can seem daunting. Don’t worry, we’ve got you covered with this step-by-step guide on how to set a wooden mouse trap.
First, you’ll need to choose the right bait. Peanut butter is a popular choice, but you can also use cheese, chocolate, or even small pieces of bread. Once you have your bait, place a small amount on the bait holder on the trap. Be sure not to use too much, as this can prevent the trap from triggering. Next, you’ll need to set the trap. This can be done by using a lever or spring-loaded mechanism. Make sure the trap is set securely and the bait is in place. Finally, place the trap in an area where mice are known to frequent, such as along walls or near food sources. If a mouse is caught, be sure to remove it as soon as possible and reset the trap.
By following these simple steps, you can effectively set a wooden mouse trap and eliminate your mouse problem. Remember to use caution when handling the trap and always wash your hands after disposing of a caught mouse. Happy trapping!
Understanding Mouse Traps

Setting up a mouse trap might seem like a daunting task, but it’s actually quite simple once you understand how they work. Mouse traps are designed to capture and kill mice, and there are various types of traps available, including snap traps, glue traps, and live traps. In this section, we’ll focus on how to set up a wooden mouse trap, which is a classic and effective option.
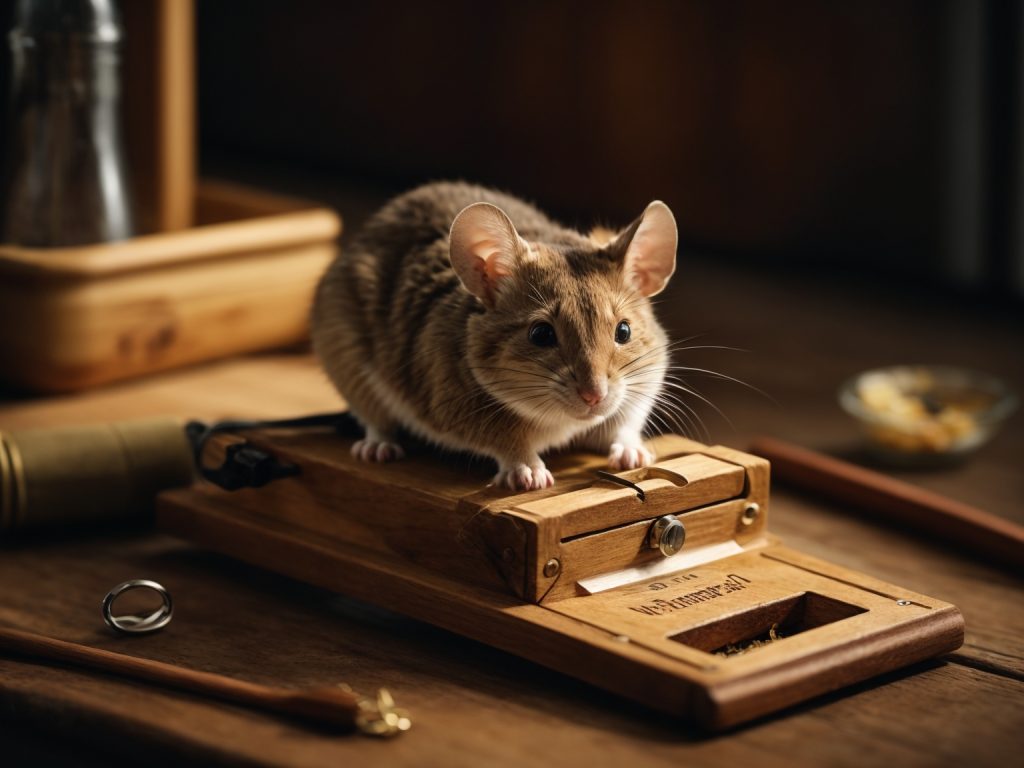
When it comes to wooden mouse traps, the basic design involves a small wooden platform with a spring-loaded metal bar that snaps down when triggered. The idea is to place a piece of bait on the platform, and when a mouse tries to take the bait, it triggers the metal bar, which then snaps down and kills the mouse.
Before setting up the trap, it’s important to choose the right location. Mice tend to follow the same paths repeatedly, so look for signs of mouse activity, such as droppings or chewed-up items, and set up the trap along their path. You should also wear gloves when handling the trap to avoid leaving your scent, which could deter mice from approaching.
Once you’ve chosen the location, it’s time to set up the trap. Start by placing a small amount of bait, such as peanut butter or cracker crumbs, on the platform. You can use a toothpick or cotton swab to spread the bait evenly and avoid getting your scent on it.
Next, carefully pull back the metal bar and hold it in place with one hand. With your other hand, position the baited platform under the metal bar and align the metal bar with the groove on the platform. Slowly release the metal bar, making sure it’s securely in place.
Finally, use cable ties or twine to attach the trap to a stationary object, such as a pipe or a wall. This will prevent the mouse from dragging the trap away once it’s caught.
In summary, setting up a wooden mouse trap is a simple process that involves choosing the right location, baiting the platform, and carefully setting the metal bar in place. By following these steps, you can effectively capture and eliminate mice from your home or business.
Types of Wooden Mouse Traps
When it comes to wooden mouse traps, there are a few different types to choose from. Each type has its own advantages and disadvantages, so it’s important to choose the right one for your needs.
Snap Traps
Snap traps are the most common type of wooden mouse trap. They work by using a spring-loaded bar that snaps down on the mouse when it takes the bait. Snap traps are very effective and can kill a mouse instantly. However, they can also be dangerous if not used properly. Make sure to keep them out of reach of children and pets.
Glue Traps
Glue traps are another type of wooden mouse trap. They work by using a sticky adhesive to trap the mouse. Glue traps are very easy to use and don’t require any bait. However, they can be cruel and inhumane. The mouse can get stuck on the trap for hours or even days, and may die a slow and painful death.
Multiple-Catch Traps
Multiple-catch traps are a humane alternative to snap and glue traps. They work by using a one-way door that allows the mouse to enter but not exit. Once the mouse is inside, it can be released into the wild unharmed. Multiple-catch traps are great for people who want to catch and release mice without harming them.
Live Traps
Live traps are similar to multiple-catch traps, but they work by using a cage instead of a one-way door. Once the mouse is inside, it can be released into the wild unharmed. Live traps are great for people who want to catch and release mice without harming them. However, they can be more expensive than other types of traps and may require more maintenance.
Safety Precautions
When setting up a wooden mouse trap, it is important to take certain safety precautions to avoid any accidents. Here are some safety guidelines you should follow:
Handling the Trap
When handling the trap, make sure to wear gloves. This will protect your hands from any sharp edges and prevent the transfer of your scent onto the trap, which could scare away the mice. You should also handle the trap gently to avoid accidentally triggering it.
Setting the Trap
When setting the trap, make sure to follow the manufacturer’s instructions carefully. This will help you avoid any mishaps and ensure that the trap is set up correctly. Before setting the trap, make sure to check for any damage or defects that could affect its performance.
When placing the bait, make sure to use a small amount and place it underneath the trigger mechanism, not on top. This will force the mouse to wrestle the bait free and increase the chances of catching it. Avoid using too much bait, as this could cause the trap to malfunction.
Once the trap is set up, make sure to place it in a safe location away from children and pets. You should also check the trap regularly to see if it has caught any mice. If you do catch a mouse, make sure to dispose of it safely and hygienically.
By following these safety precautions, you can set up a wooden mouse trap safely and effectively.
Choosing the Right Bait
When it comes to setting a wooden mouse trap, choosing the right bait is crucial. The bait you use will determine whether or not you will be successful in catching the mice. Here are some tips to help you choose the right bait for your wooden mouse trap:
1. Use Food That Mice Love
Mice are attracted to certain types of food. Some of the best options for bait include peanut butter, hazelnut spread, chocolate, bacon, and dried fruit. You can also try using cheese, but keep in mind that not all mice are attracted to it.
2. Mix Your Bait with Cotton
Mixing your bait with cotton can be an effective way to catch mice. Simply tear off a bit of cotton from a cotton swab and roll it into your bait. This will get cotton stuck in the mouse’s teeth and make it more likely to get caught in the trap.
3. Freshness Matters
Mice prefer fresh food, so make sure your bait is fresh and hasn’t been sitting out for too long. You should also replace the bait regularly to keep it fresh.
4. Experiment with Different Baits
If one type of bait doesn’t work, don’t be afraid to experiment with different options. Try different types of food and mixtures until you find something that works.
Remember, setting a wooden mouse trap requires patience and persistence. It may take some trial and error to find the right bait and placement for your trap, but with a little effort, you can successfully catch those pesky mice.
Setting the Trap
Step-by-Step Guide
Setting a wooden mouse trap is an effective way to get rid of pesky rodents in your home. Here is a step-by-step guide to help you set up your trap:
- First, choose the right bait for your trap. Peanut butter is a popular choice, but you can also use cheese, bacon, or even chocolate.
- Next, place a small amount of bait on the bait holder located on the trap.
- Carefully pull back the spring-loaded arm and hold it in place with your thumb.
- With your other hand, position the trap where you want it. Make sure to place it in an area where mice are known to frequent.
- Release the spring-loaded arm slowly and make sure it snaps into place.
- Finally, test the trap by tapping it lightly with a pencil or your finger. If it snaps shut, then it is set and ready to catch mice.
Tips for Success
Here are some tips to help you set up your wooden mouse trap successfully:
- Use enough bait to entice the mouse but not so much that it can easily grab the bait without triggering the trap.
- Place the trap in areas where mice are known to frequent, such as along walls or near food sources.
- Check the trap regularly, at least once a day, to see if you have caught a mouse. If you have, dispose of the mouse and reset the trap.
- Use gloves when handling the trap to avoid leaving your scent on the bait.
- Consider using multiple traps to increase your chances of catching mice.
By following these simple steps and tips, you can set up your wooden mouse trap with ease and increase your chances of catching those pesky rodents.
Location for the Trap
Now that you know how to set up a wooden mouse trap, it’s essential to place it in the right location to increase the chances of catching a mouse. Here are some tips on where to place the trap:
1. Identify the High Traffic Areas
Look for signs of mouse activity in your home, such as droppings, gnaw marks, and urine stains. These areas are usually where mice travel the most, making them the perfect spot to place the trap.
2. Place the Trap Along Walls
Mice tend to travel along walls, so it’s best to place the trap perpendicular to the wall with the bait side facing the wall. This way, the mouse will run into the trap while traveling along the wall.
3. Keep the Trap Away from Children and Pets
It’s important to keep the trap out of reach of children and pets to avoid any accidents. Place the trap in a location where it’s not easily accessible to them.
4. Consider Using Multiple Traps
If you have a severe mouse infestation, consider using multiple traps. Place the traps in different locations to increase the chances of catching a mouse.
Remember to check the trap regularly and dispose of any dead mice promptly. With these tips, you should be able to catch those pesky mice in no time.
Monitoring and Releasing
Once you have set up your wooden mouse trap, it’s important to monitor it regularly to ensure that it’s working effectively. Check the trap daily, and if you catch a mouse, release it as soon as possible to avoid unnecessary suffering.
When releasing a mouse, it’s best to do so in a location far away from your home or any other buildings. Mice have a strong homing instinct, so releasing them too close to your home may result in them returning.
Here are some tips for monitoring and releasing your wooden mouse trap:
- Check the trap daily: This will allow you to quickly release any mice you catch and reset the trap if necessary.
- Wear gloves: When handling the trap or a caught mouse, wear gloves to avoid any potential diseases that mice may carry.
- Release the mouse quickly: Once you catch a mouse, release it as soon as possible to avoid causing unnecessary suffering.
- Release the mouse far away: Release the mouse at least a mile away from your home or any other buildings to prevent it from returning.
- Clean the trap: After releasing a mouse, clean the trap thoroughly to remove any lingering scent that may deter other mice from approaching the trap.
By following these tips, you can effectively monitor and release mice caught in your wooden mouse trap, ensuring that the trap remains an effective tool for rodent control.