Tag Archives: soft-bristled brush

How to Build a Wooden Garden Gate: A Step-by-Step Guide

Building a wooden garden gate can add both beauty and functionality to your yard. Whether you want to keep animals out of your garden or simply create a charming entrance to your outdoor space, a well-built gate can do the trick. In this article, we will guide you through the steps of building a wooden garden gate, from selecting the right materials to hanging the finished product.

Before you start building, it’s important to determine the size and style of your gate. Consider the overall aesthetic of your yard and choose a design that complements it. Once you have a plan in place, gather the necessary tools and materials, including a screwdriver, power drill, compound miter saw, carpenter’s level, and jigsaw. You’ll also need wood boards, screws, hinges, and a latch. With these items on hand, you’re ready to get started on your DIY garden gate.

Understanding the Basics

Building a wooden garden gate is a great way to add character and security to your outdoor space. However, before you start constructing your gate, you need to understand the basics of gate building. This section will help you get started by discussing the types of wood you can use, the tools you will need, and some safety measures to keep in mind.

Types of Wood

When it comes to building a wooden garden gate, you have a few options for the type of wood you can use. Here are some of the most popular choices:

  • Cedar: A popular choice for its durability and resistance to rot and insects.
  • Redwood: Another durable option that is resistant to decay and insects.
  • Pressure-treated pine: A budget-friendly option that is treated with chemicals to resist rot and insects.
  • Mahogany: A more expensive option that is very durable and has a beautiful grain.

When choosing your wood, make sure to select boards that are straight and free of knots.

Tools Needed

To build a wooden garden gate, you will need a few basic tools. Here are some of the most important ones:

  • Circular saw: Used to cut the boards to size.
  • Drill: Used to drill pilot holes and screw the boards together.
  • Level: Used to make sure the gate is straight.
  • Tape measure: Used to measure the boards.
  • Sawhorses: Used to support the boards while you work.
  • Clamps: Used to hold the boards in place while you work.

Safety Measures

When building a wooden garden gate, it is important to keep safety in mind. Here are a few safety measures to follow:

  • Wear eye protection: When cutting wood, sawdust can fly into your eyes, so make sure to wear safety glasses.
  • Use ear protection: Power tools can be loud, so wear earplugs or earmuffs to protect your hearing.
  • Use a dust mask: Sawdust can be harmful to breathe in, so wear a dust mask to protect your lungs.
  • Use caution with power tools: Make sure to read the instructions and follow safety guidelines when using power tools.

By understanding the basics of gate building, you can start constructing your own wooden garden gate with confidence.

Designing Your Garden Gate

When it comes to designing your garden gate, there are a few key factors to consider. In this section, we’ll go over the size and dimensions as well as the style and aesthetics you should keep in mind when designing your gate.

Size and Dimensions

Before you begin building your garden gate, you’ll need to determine the size and dimensions that will best fit your space. Consider the width of your gate opening, as well as the height of your fence. You’ll want to make sure your gate is wide enough to accommodate any equipment you may need to bring into your garden, such as a wheelbarrow or lawnmower.

When it comes to height, a standard garden gate is typically around 4 feet tall. However, you should consider your specific needs. If you have pets or small children, you may want to consider a taller gate to ensure their safety.

Style and Aesthetics

Once you’ve determined the size and dimensions of your gate, it’s time to consider the style and aesthetics. Do you want a gate that blends in with the rest of your fence, or do you want something that stands out as a focal point in your garden?

Consider the materials you’ll be using for your gate. Cedar is a popular choice for its durability and natural beauty, but you may also want to consider other woods or even metal for a unique look.

When it comes to style, you can choose from a variety of designs, from simple and traditional to more ornate and decorative. You may also want to consider adding a latch or lock for added security.

Overall, the design of your garden gate should complement the style of your garden while also serving its practical purpose. By keeping these factors in mind, you’ll be able to create a gate that is both functional and beautiful.

Preparing the Wood

Before you start building your wooden garden gate, you’ll need to prepare the wood. This involves selecting the right type of wood and cutting it to the right size. In this section, we’ll go over the steps you need to take to prepare your wood.

Selecting the Wood

The type of wood you choose for your garden gate will depend on your personal preference, budget, and the climate in your area. Some popular choices for garden gates include cedar, redwood, and pressure-treated pine. Cedar and redwood are naturally resistant to rot and insects, making them a good choice for outdoor use. Pressure-treated pine is an affordable option that can also withstand the elements, but it may not be as aesthetically pleasing as cedar or redwood.

When selecting your wood, make sure it is straight and free of knots or cracks. You should also check the moisture content of the wood using a moisture meter. Ideally, the moisture content should be between 12% and 15%. If the wood is too wet, it may warp or crack as it dries.

Cutting the Wood

Once you have selected your wood, it’s time to cut it to the right size. You’ll need a few tools for this, including a saw, a measuring tape, and a square. Make sure your saw is sharp and in good condition before you start cutting.

Start by measuring and marking the wood according to your gate design. Use the square to ensure your cuts are straight and accurate. If you are using a decorative profile, you may need to use a jigsaw to make the cuts.

After cutting the wood, sand the edges to remove any rough spots or splinters. You may also want to sand the entire surface of the wood to prepare it for staining or painting.

By following these steps, you can prepare your wood for building a beautiful and functional garden gate.

Assembling the Gate

Now that you have all the pieces cut to size, it’s time to assemble the gate. This section will walk you through the process step-by-step.

Joining the Pieces

  1. Lay out the cedar tongue and groove boards side by side on a flat surface, with the groove side facing up.
  2. Apply a thin layer of carpenter’s glue to the edges of each board where they will be joined.
  3. Insert the tongue of one board into the groove of the next, making sure they are flush.
  4. Use a straight edge ruler to ensure the boards are aligned and straight.
  5. Repeat steps 2-4 until all boards are joined together.
  6. Clamp the boards together and let the glue dry for at least 24 hours.

Installing the Hardware

  1. Determine where you want to install the hinges and latch on the gate and gate post.
  2. Measure and mark the locations for the hinges and latch on both the gate and gate post.
  3. Pre-drill holes for the screws using a small diameter drill bit.
  4. Attach the hinges to the gate using exterior grade screws.
  5. Hold the gate up to the gate post and attach the hinges to the post using exterior grade screws.
  6. Install the latch onto the gate and gate post.
  7. Test the gate to ensure it swings smoothly and the latch works properly.

Congratulations! You have successfully assembled your wooden garden gate.

Installing the Gate

Once you have built your wooden garden gate, it’s time to install it. Here are some steps to help you install your gate properly.

Positioning the Gate

Before you begin installing your gate, you need to decide where to position it. Make sure you choose a spot that is level and has enough clearance for the gate to swing open and closed without hitting any obstacles.

Once you have chosen the spot, use a measuring tape to measure the distance between the gate posts. This will help you determine the size of the gate you need to build.

Securing the Gate

To secure the gate, you will need to attach hinges to the gate and the gate post. Make sure the hinges are level and evenly spaced. You can use a carpenter’s level to ensure the hinges are level.

Once you have attached the hinges, you can hang the gate on the hinges. Make sure the gate is level and swings smoothly. If the gate is not level, you may need to adjust the hinges or the gate itself.

To keep the gate closed, you will need to install a latch. There are many types of gate latches available, so choose one that suits your needs. Make sure the latch is installed at a height that is easy to reach and that it securely holds the gate closed.

Congratulations! You have successfully installed your wooden garden gate. Now you can enjoy the beauty and functionality of your new gate.

Maintaining Your Wooden Garden Gate

To ensure the longevity and beauty of your wooden garden gate, it’s important to perform regular maintenance. Here are some tips on how to keep your gate looking great for years to come.

Regular Cleaning

Dirt, grime, and other debris can accumulate on your gate over time, making it look dull and unattractive. To keep your gate looking its best, it’s important to clean it regularly. Here’s how:

  • Use a soft-bristled brush or cloth to remove loose dirt and debris from the gate.
  • Mix a solution of warm water and mild detergent, such as dish soap or laundry detergent.
  • Dip a clean cloth or sponge into the solution and use it to scrub the gate, paying special attention to any areas that are particularly dirty.
  • Rinse the gate thoroughly with clean water and allow it to dry completely before applying any sealant or stain.

Yearly Sealing

Sealing your wooden garden gate is an important step in protecting it from the elements and prolonging its lifespan. Here’s how to do it:

  • Choose a high-quality sealant or stain that is specifically designed for use on outdoor wood.
  • Use a paintbrush or roller to apply the sealant or stain to the gate, making sure to cover all surfaces evenly.
  • Allow the sealant or stain to dry completely according to the manufacturer’s instructions before using the gate.
  • Repeat this process once a year to maintain the gate’s protection and appearance.

By following these simple maintenance tips, you can keep your wooden garden gate looking beautiful and functioning properly for years to come.
How to Make a Wooden Picnic Table: Step-by-Step Guide with Pictures

Are you looking for a fun and functional addition to your backyard? A wooden picnic table is a classic choice that can provide years of enjoyment for family and friends. Whether you’re planning a backyard BBQ or a simple outdoor meal, a picnic table can provide the perfect setting for your gathering.

Building your own wooden picnic table may seem like a daunting task, but with the right tools and materials, it can be a fun and rewarding project. In this article, we’ll provide you with step-by-step instructions and tips for building your very own picnic table. From selecting the right lumber to assembling the final product, we’ll guide you through the process to ensure your picnic table is sturdy, attractive, and long-lasting. So grab your tools and let’s get started!

Understanding Wood Types

When it comes to building a wooden picnic table, choosing the right type of wood is crucial. There are many different types of wood available, each with its own unique properties and characteristics. In this section, we will discuss three popular types of wood for building picnic tables: Pine, Oak, and Cedar.

Pine

Pine is a softwood that is widely available and relatively inexpensive. It is easy to work with and can be stained or painted to match your desired color scheme. However, pine is not the most durable wood and is susceptible to rot and insect damage, especially when exposed to the elements. If you choose to use pine for your picnic table, be sure to treat it with a weather-resistant finish to help prolong its lifespan.

Oak

Oak is a hardwood that is known for its strength and durability. It is more expensive than pine but is also more resistant to rot and insect damage. Oak has a distinctive grain pattern and can be stained to a variety of colors. However, oak can be difficult to work with due to its hardness, so it may not be the best choice for novice woodworkers.

Cedar

Cedar is a softwood that is naturally resistant to rot and insect damage. It has a pleasant aroma and a beautiful reddish-brown color. Cedar is easy to work with and can be stained or painted to match your desired color scheme. However, cedar is more expensive than pine and may not be as strong as oak. If you choose to use cedar for your picnic table, be sure to select a grade that is suitable for outdoor use.

In conclusion, choosing the right type of wood is an important decision when building a picnic table. Pine, oak, and cedar are all popular choices, each with its own unique properties and characteristics. Consider your budget, woodworking experience, and desired level of durability when selecting the type of wood for your picnic table.

Tools Required

Before starting to build your wooden picnic table, you need to ensure you have the necessary tools. Here are the tools you will need to complete the project:

Saw

A saw is an essential tool for cutting the lumber to the required length. You can use either a hand saw or a power saw, depending on your preference. A circular saw is a popular choice for cutting large pieces of wood, while a jigsaw is ideal for making curved cuts. Make sure the blade is sharp, and keep the saw blade clean to ensure smooth cuts.

Hammer

A hammer is necessary for attaching the pieces of wood together. A claw hammer is a common choice, but a framing hammer is a good option if you need to drive nails into thicker lumber. Make sure the hammer is comfortable to hold and has a good grip to avoid any accidents.

Screwdriver

A screwdriver is essential for attaching the screws to the wood. You can use either a manual screwdriver or a power screwdriver, depending on your preference. A power screwdriver can save time and effort, but a manual screwdriver allows for more control. Make sure you have different sizes of screwdrivers to fit the various screws you will be using.

Other tools that you may need include a tape measure, a level, a square, clamps, a drill, and a wrench set. Make sure you have all the necessary tools before starting the project to avoid any delays.

Safety Measures

When building a wooden picnic table, safety should always be your top priority. Here are some essential safety measures to keep in mind:

1. Wear Protective Gear

Before you begin, make sure you have the right protective gear. Wear safety glasses to protect your eyes from flying wood chips, and earplugs to protect your ears from the noise of power tools. If you’re using power tools, wear gloves to protect your hands from getting hurt.

2. Use the Right Tools

Using the right tools is essential to ensure that your picnic table is sturdy and safe. Make sure you have the right saws, drills, and other tools for the job. Use sharp blades and bits to make clean cuts, and avoid using dull or damaged tools.

3. Follow the Instructions Carefully

Make sure you read the instructions carefully before you start building your picnic table. Follow the steps in the order they are given, and don’t skip any steps. If you’re not sure about something, ask for help or do some research before you proceed.

4. Work in a Safe Environment

Make sure you work in a safe environment. Keep your work area clean and free of clutter, and make sure you have enough space to move around. Avoid working near children or pets, and keep them away from your work area.

5. Use Proper Lifting Techniques

When lifting heavy pieces of wood, use proper lifting techniques to avoid injuring yourself. Bend at the knees and lift with your legs, not your back. If a piece of wood is too heavy for you to lift, ask for help.

By following these safety measures, you can ensure that your wooden picnic table is not only beautiful but also safe for you and your loved ones to use.

Choosing the Right Design

When it comes to building a wooden picnic table, choosing the right design is an important step. There are many different styles of picnic tables to choose from, each with their own unique features and benefits. Here are some things to consider when selecting the right design for your needs:

Size

The first thing to consider when choosing a picnic table design is the size. How many people do you want to be able to seat at the table? Will the table be used for small family gatherings or larger parties? Make sure to choose a design that is the right size for your needs.

Style

There are many different styles of picnic tables to choose from, including traditional, modern, and rustic designs. Consider the overall aesthetic of your outdoor space and choose a style that complements it.

Material

Another important factor to consider when choosing a picnic table design is the material. Wooden picnic tables are a popular choice due to their durability and natural beauty. However, there are also picnic tables made from metal, plastic, and other materials.

Features

Finally, consider any additional features you may want in your picnic table design. Some picnic tables come with built-in benches, while others may have an umbrella hole for shade. Think about what features are important to you and choose a design that meets those needs.

Overall, choosing the right picnic table design is an important step in building a table that will meet your needs and enhance your outdoor space. Take the time to consider your options and choose a design that is the perfect fit for you.

Measuring and Cutting the Wood

Before you start building your picnic table, you will need to measure and cut the wood to the appropriate size. Here is a step-by-step guide to help you through the process.

Step 1: Gather the Required Tools

You will need a few tools to measure and cut the wood for your picnic table. These tools include:

  • Tape measure
  • Circular saw or handsaw
  • Speed square
  • Pencil
  • Clamps

Step 2: Measure and Mark the Wood

Using a tape measure, measure the length and width of the tabletop, seats, and legs. Once you have the measurements, mark the wood with a pencil. Make sure to double-check your measurements before making any cuts.

Step 3: Cut the Wood

Using a circular saw or handsaw, carefully cut the wood along the marked lines. Make sure to follow safety precautions when using power tools. If you are using a circular saw, use a speed square to guide your cuts and ensure they are straight.

Step 4: Sand the Edges

After cutting the wood, use sandpaper to smooth out any rough edges. This will prevent splinters and make the wood easier to work with.

Step 5: Repeat for Each Piece

Repeat these steps for each piece of wood needed for the picnic table. Make sure to label each piece to avoid confusion during assembly.

By following these steps, you can measure and cut the wood for your picnic table with ease.

Assembling the Table

Now that you have all the pieces cut, it’s time to assemble your picnic table. Follow these steps to put everything together:

  1. Lay out the tabletop boards on a flat surface, making sure they’re evenly spaced and aligned. Then, place the two end pieces on top of the tabletop boards, making sure they’re flush with the ends.

  2. Drill pilot holes through the end pieces and into the tabletop boards. Then, screw the pieces together using 3-inch screws.

  3. Next, attach the seat supports to the legs. Place the legs on a flat surface, and then attach the seat supports to the inside of the legs using 2 1/2-inch screws.

  4. Attach the cross braces to the legs. Place the legs on a flat surface, and then attach the cross braces to the inside of the legs using 2 1/2-inch screws.

  5. Now it’s time to attach the tabletop to the legs. Turn the tabletop assembly upside down, and then place the legs on top of the tabletop, making sure they’re evenly spaced and aligned. Then, drill pilot holes through the tabletop and into the legs. Finally, screw the legs to the tabletop using 3-inch screws.

  6. Attach the seats to the seat supports. Place the seats on top of the seat supports, making sure they’re evenly spaced and aligned. Then, drill pilot holes through the seats and into the seat supports. Finally, screw the seats to the seat supports using 2 1/2-inch screws.

  7. Sand the table and chairs to remove any rough edges or splinters. Apply a coat of wood sealer or stain to protect your new picnic table from the elements.

Congratulations! You have successfully assembled your wooden picnic table. Invite your friends and family over for a fun picnic and enjoy your new outdoor furniture.

Sanding and Finishing

Sanding Process

Before applying any finish to your wooden picnic table, you need to sand it properly. Sanding is an essential step to ensure the surface of the wood is smooth and ready to receive the finish. Here are the steps to follow to sand your wooden picnic table:

  1. Start with coarse-grit sandpaper: Begin by sanding the table with coarse-grit sandpaper, such as 60 grit. Sand the entire surface of the table, including the top, sides, and legs. This will help remove any rough spots, splinters, or bumps.

  2. Move to finer-grit sandpaper: Once you have sanded the table with coarse-grit sandpaper, switch to finer-grit sandpaper, such as 120 grit. Sand the entire surface of the table again, making sure to remove any scratches or marks left by the coarse-grit sandpaper.

  3. Sand with the grain: Always sand with the grain of the wood to avoid damaging the surface. Sanding against the grain can cause scratches and marks that will be difficult to remove.

  4. Use a sanding block: To ensure an even sanding job, use a sanding block to hold the sandpaper. This will help you apply even pressure across the surface of the table.

Applying Finish

Once you have sanded your wooden picnic table, it is time to apply the finish. The finish will protect the wood from moisture, UV rays, and other environmental factors. Here are the steps to follow to apply the finish:

  1. Choose the right finish: There are different types of finishes available, such as varnish, polyurethane, and oil-based finishes. Choose the finish that suits your needs and preferences.

  2. Apply the finish: Apply the finish using a brush or a rag. Make sure to apply an even coat across the surface of the table, including the top, sides, and legs.

  3. Wait for the finish to dry: Allow the finish to dry completely before applying another coat. Follow the manufacturer’s instructions to determine how long you need to wait for the finish to dry.

  4. Sand between coats: Sand the surface of the table lightly between coats of finish using fine-grit sandpaper, such as 220 grit. This will help remove any bumps or imperfections and ensure a smooth finish.

  5. Apply multiple coats: Apply multiple coats of finish to ensure maximum protection. Follow the manufacturer’s instructions to determine how many coats you need to apply.

By following these steps, you can sand and finish your wooden picnic table like a pro. With a little patience and effort, you can create a beautiful and durable picnic table that will last for years to come.

Maintaining Your Picnic Table

Maintaining your wooden picnic table is essential to ensure its longevity and keep it looking great. Here are a few tips to help you maintain your picnic table.

Cleaning Your Picnic Table

To start, you will need to clean your picnic table. Use a soft-bristled brush and a mild detergent to scrub the surface of the table. Rinse it off with a hose and let it dry completely before moving on to the next step.

Applying a Protective Coating

Once your picnic table is clean and dry, you can apply a protective coating to help prevent damage from the elements. There are several options to choose from, including:

  • Linseed oil
  • Teak oil
  • Tung oil
  • Water-resistant, UV-protected sealer

Apply the protective coating according to the manufacturer’s instructions. Be sure to apply it evenly and let it dry completely before using the table.

Regular Maintenance

Regular maintenance is key to keeping your picnic table in good condition. Here are a few things you can do to keep it looking great:

  • Remove debris and dirt regularly
  • Keep it covered when not in use
  • Sand and refinish as needed

By following these tips, you can keep your wooden picnic table looking great for years to come.

How to Make Wooden Sunglass Frames: A Beginner's Guide

Are you tired of the same old plastic sunglasses? Want to stand out in a crowd with a unique accessory? Why not try making your own wooden sunglasses frames? Not only will you have a one-of-a-kind pair of shades, but you’ll also get the satisfaction of creating something with your own two hands.

Making wooden sunglass frames may seem like a daunting task, but with the right tools and materials, it can be a fun and rewarding project. There are many different techniques and styles to choose from, whether you prefer a classic wayfarer shape or a more modern, geometric design. And the best part is, you can customize your frames to fit your personal style and taste. Plus, wooden frames are lightweight and comfortable to wear, making them a great alternative to traditional plastic frames.

In this article, we’ll guide you through the process of making your own wooden sunglass frames. We’ll cover everything from selecting the right wood and tools to cutting and shaping the frames. With a little patience and creativity, you’ll have a stylish and eco-friendly accessory in no time. So, grab your tools and let’s get started!

Understanding the Basics of Wooden Sunglasses

When it comes to making wooden sunglasses, understanding the basics is crucial to achieving a successful outcome. In this section, we will discuss two important aspects of wooden sunglasses: the types of wood used and the importance of grain direction.

Types of Wood Used

Selecting the right type of wood is essential for creating high-quality wooden sunglasses. The wood must be both durable and lightweight, while also being suitable for the design you have in mind. Some popular types of wood used for making wooden sunglasses include:

  • Bamboo
  • Ebony
  • Walnut
  • Maple
  • Zebrawood
  • Rosewood

Each type of wood has its own unique characteristics, such as color and grain pattern. It’s important to choose a wood that not only looks good but is also strong enough to withstand the stress of everyday use.

Importance of Grain Direction

The direction of the grain in the wood is another important factor to consider when making wooden sunglasses. The grain direction affects the strength and durability of the frames, as well as their appearance.

When cutting the wood for the frames, it’s important to pay attention to the direction of the grain. The grain should run parallel to the long axis of the frame, as this provides the greatest strength. If the grain runs perpendicular to the frame, it can weaken the wood and make it more susceptible to cracking or breaking.

In addition to affecting the strength of the frames, the grain direction can also affect the appearance of the sunglasses. The grain pattern can add an interesting and unique texture to the frames, giving them a natural and organic feel.

By understanding the types of wood used and the importance of grain direction, you can create beautiful and functional wooden sunglasses that will stand the test of time.

Tools and Materials Needed

To make wooden sunglasses frames, you will need a variety of tools and materials. Here are the essential items you will need to get started:

Tools

  • Saw (hand or power)
  • Sandpaper (80, 120, and 220 grit)
  • Wood glue
  • Clamps
  • Dremel tool with sanding disks
  • Small screwdriver
  • Brush

Materials

  • Wooden veneer (straight grain and flexible)
  • Lenses and hinges from store-bought sunglasses
  • Super glue
  • Walnut oil and beeswax for wood finish
  • Clothespins

When selecting your wooden veneer, choose a type that is flexible and has a straight grain. This will make it easier to shape and mold into the desired frame shape. You will also need to purchase lenses and hinges from a store-bought pair of sunglasses to use in your wooden frame.

In terms of tools, a saw (either hand or power) will be necessary to cut the wooden veneer to the correct shape and size. Sandpaper of varying grits will be needed to smooth out any rough edges and ensure a polished finish. Wood glue and clamps will be necessary to hold the frame together while it dries.

A Dremel tool with sanding disks will be useful for shaping and sanding the frame, while a small screwdriver will be necessary for attaching the hinges. A brush will be necessary for applying the wood finish, and clothespins can be used to hold the frame together while the glue dries.

With these tools and materials, you will be well on your way to creating your very own pair of stylish and unique wooden sunglasses frames.

Designing Your Sunglass Frames

When it comes to designing your wooden sunglass frames, there are a few important things to consider. In this section, we’ll cover the basics of choosing the right shape and creating a template for your frames.

Choosing the Right Shape

The shape of your frames will play a big role in the overall look and feel of your wooden sunglasses. There are a few things to consider when choosing a shape:

  • Face Shape: Consider the shape of your face when choosing a frame shape. Round faces often look best with angular frames, while angular faces can benefit from rounder frames.
  • Style: Think about the overall style you want to achieve with your sunglasses. Do you want something classic and timeless, or something more modern and trendy?
  • Functionality: Consider how you will be using your sunglasses. If you plan on using them for outdoor activities, you may want a more wrap-around style to provide better protection from the sun.

Once you have a general idea of the shape you want, you can start creating a template.

Creating the Template

Creating a template for your wooden sunglass frames is an important step in the design process. This will help ensure that your frames are the right size and shape, and will make it easier to create multiple pairs of sunglasses with consistent sizing.

To create a template, you can start with a basic outline of the shape you want. You can then use this outline to create a more detailed template, including measurements for the width of the frame, the height of the lenses, and the angle of the arms.

There are a few different ways to create a template, depending on your preferences and available tools. Some people prefer to draw their templates by hand, while others use computer software to create a more precise design.

Once you have a template, you can use it as a guide for cutting and shaping your wooden frames. With a little bit of practice, you’ll be able to create beautiful and unique wooden sunglass frames that are perfect for your style and needs.

Cutting and Shaping the Frames

Cutting the Wood

When making wooden sunglass frames, the first step is to cut the wood to the desired size and shape. You can use a table saw or a band saw to cut the wood into the rough shape of the frames. It’s important to use a high-quality, durable wood that can withstand wear and tear. Some popular choices include cherry, maple, and walnut.

Before cutting the wood, it’s essential to measure the size of the lenses and take into account the width of the nose bridge and the length of the temples. You should also consider the thickness of the wood and the desired thickness of the frames. Once you have these measurements, you can cut the wood to the right size and shape.

Sanding and Shaping

After cutting the wood, the next step is to sand and shape the frames. Start by sanding the rough edges and corners of the frames using a coarse-grit sandpaper. Then, switch to a finer-grit sandpaper to smooth out the surface of the wood.

Once the frames are sanded, you can start shaping them. You can use a router or a Dremel tool to create the desired shape of the frames. Be sure to take your time and work carefully to avoid making any mistakes.

When shaping the frames, it’s important to pay attention to the details. You can use a template or a guide to ensure that the frames are symmetrical and well-proportioned. You can also add decorative elements such as patterns or engravings to make the frames more unique.

Overall, cutting and shaping the frames is an important step in making wooden sunglass frames. With the right tools and techniques, you can create frames that are both functional and stylish.

Assembling the Sunglasses

Congratulations on making it this far! You’re almost done with your wooden sunglasses. In this section, we’ll cover how to assemble the sunglasses with the lenses and arms.

Installing the Lenses

The first step is to install the lenses. If you’re using lenses from store-bought sunglasses, you can simply pop them into the frames. If you’re using custom lenses, you may need to have them cut to size. Here are the steps to install the lenses:

  1. Clean the lenses with a microfiber cloth to remove any dust or debris.
  2. Insert the lenses into the frame grooves, making sure they are centered and level.
  3. Gently press down on the lenses to secure them in place.

Attaching the Arms

Now it’s time to attach the arms to the frame. You can use hinges from store-bought sunglasses or make your own hinges out of wood. Here are the steps to attach the arms:

  1. Mark the location of the hinges on the frame and arms.
  2. Drill pilot holes for the hinge screws.
  3. Attach the hinges to the frame and arms using screws.
  4. Test the hinges to make sure they open and close smoothly.

Once you’ve installed the lenses and attached the arms, your wooden sunglasses are ready to wear! Make sure to store them in a protective case when not in use to keep them safe from scratches and damage.

Finishing Touches

Applying a Finish

Once you have shaped and sanded your wooden sunglass frames, it’s time to apply a finish. A finish will protect the wood from moisture, sunlight, and wear and tear. There are many different finishes you can use, such as oil-based finishes, water-based finishes, and wax finishes.

Before applying the finish, make sure the frames are completely clean and dust-free. You can use a tack cloth or a soft-bristled brush to remove any dust or debris. Then, apply the finish according to the manufacturer’s instructions. You may need to apply multiple coats, depending on the type of finish you choose.

Adding the Hinges

Once the finish has dried, it’s time to add the hinges. You can purchase hinges specifically designed for wooden sunglass frames, or you can make your own hinges out of wire or metal strips.

To install the hinges, use a small drill bit to make a pilot hole in the frame where the hinge will be attached. Then, screw the hinge into place using a small screwdriver. Make sure the hinge is secure and the arms of the frame move smoothly.

Congratulations! You have now completed your own unique pair of wooden sunglass frames. Enjoy wearing them and showing off your craftsmanship.

How to Make a Wooden Gate Frame: A Beginner's Guide

If you’re looking to add some privacy to your property or just want to secure your backyard, building a wooden gate frame is a great option. Not only does it provide security, but it can also add a decorative touch to your fence. Building a gate frame may seem like a daunting task, but with the right tools and materials, it can be a straightforward project.

To get started, you’ll need some basic carpentry tools such as a screwdriver, power drill, compound miter saw, carpenter’s level, and a jigsaw for cutting a decorative profile. You’ll also need pressure-treated lumber and stainless steel hinges for the gate. It’s important to choose the right type of wood for your gate frame, as it needs to withstand the elements and provide durability.

In this article, we’ll guide you through the steps to build a wooden gate frame that will complement your fence and provide security for your property. From choosing the right wood to measuring and cutting the frame, we’ll cover everything you need to know to get the job done. So, let’s get started on building your perfect gate frame.

Understanding the Basics of a Wooden Gate Frame

If you’re planning to build a wooden gate, it’s important to understand the basics of a gate frame. The frame is the backbone of the gate, and it needs to be strong and sturdy to support the weight of the gate and withstand the elements. In this section, we’ll cover the types of wood suitable for gate frames, as well as the essential tools and materials you’ll need to get started.

Types of Wood Suitable for Gate Frames

When it comes to choosing the right wood for your gate frame, you’ll want to look for a species that is strong, durable, and resistant to rot and insects. Some of the most common types of wood used for gate frames include:

  • Cedar: A popular choice for its natural beauty, resistance to decay, and insect-repelling properties.
  • Redwood: Another beautiful and durable option that is naturally resistant to rot and insects.
  • Pressure-treated pine: A cost-effective choice that has been chemically treated to resist rot and insects.

Before you choose a wood species, consider the climate in your area and the level of maintenance you’re willing to commit to. Some woods may require more upkeep than others to keep them looking their best.

Essential Tools and Materials

To build a wooden gate frame, you’ll need a few essential tools and materials. Here’s what you’ll need:

  • Wood: Choose a wood species that is suitable for gate frames, as discussed above.
  • Saw: A compound miter saw is ideal for cutting precise angles.
  • Drill: A power drill will make it easier to drive screws and attach hardware.
  • Screws: Use corrosion-resistant screws that are long enough to securely fasten the frame together.
  • Gate hardware: You’ll need hinges, a latch, and any other hardware necessary to attach the gate to the fence and allow it to swing open and closed.
  • Level: A carpenter’s level will help ensure that your gate frame is straight and level.
  • Measuring tape: Use a measuring tape to measure and mark your cuts.

With these tools and materials on hand, you’ll be ready to start building your wooden gate frame.

Designing Your Wooden Gate Frame

When it comes to designing your wooden gate frame, you need to consider both the size and style of your gate. Here are some tips to help you get started:

Choosing the Right Size

The size of your gate will depend on the size of the opening you want to cover. Measure the width and height of the opening to determine the size of your gate. Remember to leave some clearance for the gate to swing open and closed.

Once you have the measurements, you can choose the size of your gate frame. The most common sizes for gate frames are 4×4, 2×4, and 2×6. The size you choose will depend on the weight of your gate and the size of the opening.

Deciding on a Style

There are many different styles of wooden gates to choose from. Some popular styles include:

  • Picket fence gate
  • Privacy fence gate
  • Ranch-style gate
  • Arched gate

Choose a style that complements the style of your fence and your home. You can also add decorative elements to your gate, such as a lattice or a decorative cut-out.

When designing your gate, make sure to choose materials that are durable and weather-resistant. Cedar and redwood are both popular choices for wooden gates because they are naturally resistant to rot and decay.

By considering the size and style of your gate, you can design a wooden gate frame that is both functional and attractive.

Building the Wooden Gate Frame

When it comes to building a wooden gate, the frame is the foundation of the entire structure. Here’s how you can build a sturdy wooden gate frame in just a few easy steps.

Cutting the Wood

Before you can assemble the gate frame, you’ll need to cut your wood to the appropriate sizes. Here’s what you’ll need:

  • 2x4s for the vertical pieces
  • 2x6s for the horizontal pieces
  • A circular saw or miter saw
  • A measuring tape

Measure and cut your wood according to the size of your gate. For a standard 6-foot gate, you’ll need two vertical pieces that are 6 feet tall and two horizontal pieces that are 3 feet wide. Make sure to measure twice and cut once to ensure accuracy.

Assembling the Frame

Once you have your wood cut to size, it’s time to assemble the frame. Follow these steps:

  1. Lay out the vertical pieces parallel to each other with the ends flush.
  2. Place the horizontal pieces on top of the vertical pieces, making sure they are flush with the top and bottom.
  3. Use wood screws to attach the horizontal pieces to the vertical pieces. Make sure to pre-drill the holes to avoid splitting the wood.
  4. Check that the frame is square by measuring diagonally from corner to corner. The measurements should be equal.

Securing the Frame

To ensure that your gate frame is sturdy and secure, you’ll need to add additional support. Here’s how:

  1. Cut two diagonal braces from 2x4s. The length of the brace should be the distance from the top of the gate to the bottom of the opposite side.
  2. Attach the braces to the gate frame using wood screws. Make sure the braces are flush with the top and bottom of the frame.
  3. Check that the gate frame is still square by measuring diagonally from corner to corner.

With the gate frame complete, you’re ready to move on to adding the gate boards and hardware.

Installing the Wooden Gate Frame

When it comes to installing a wooden gate frame, there are a few key steps you need to follow. In this section, we’ll walk you through the process of preparing the installation area and mounting the frame.

Preparing the Installation Area

Before you can install your wooden gate frame, you need to prepare the installation area. Here’s what you need to do:

  1. Clear the area: Remove any debris, rocks, or other obstacles from the installation area. This will ensure that the gate frame sits level and secure.

  2. Measure and mark the placement: Measure and mark the placement of the gate frame using a tape measure and chalk line. Make sure the placement is level and square.

  3. Dig post holes: Use a post hole digger to dig holes for the gate posts. The depth of the holes will depend on the size of your gate and the soil conditions in your area. As a general rule, the holes should be one-third the height of the gate.

  4. Pour concrete: Pour concrete into the post holes and allow it to set for at least 24 hours. This will provide a solid foundation for the gate posts.

Mounting the Frame

Once you’ve prepared the installation area, it’s time to mount the gate frame. Here’s how:

  1. Attach hinges: Attach hinges to the gate frame using screws and a drill. Make sure the hinges are level and evenly spaced.

  2. Hang the gate: Hang the gate on the hinges and test its swing. Adjust the hinges as necessary to ensure a smooth swing.

  3. Install latch: Install a latch on the gate frame using screws and a drill. Make sure the latch is level and secure.

  4. Test the gate: Test the gate to make sure it opens and closes smoothly and latches securely.

By following these steps, you’ll be able to install a wooden gate frame that is secure and functional.

Maintenance Tips for a Wooden Gate Frame

If you want your wooden gate frame to last for a long time, you need to maintain it properly. Here are some maintenance tips that you can follow:

Regular Cleaning

Regular cleaning is essential to keep your wooden gate frame in good condition. Dirt, dust, and debris can accumulate on the gate, which can cause damage over time. To clean your wooden gate frame, you can follow these steps:

  1. Use a soft-bristled brush to remove dirt and debris from the surface of the gate.
  2. Mix a solution of mild soap and warm water.
  3. Dip a sponge or cloth into the solution and use it to clean the gate.
  4. Rinse the gate with clean water and let it dry completely.

Applying Protective Finishes

Applying protective finishes can help to protect your wooden gate frame from the elements and prevent it from rotting or warping. Here are some protective finishes that you can use:

  1. Stain: Stains are a great option if you want to enhance the natural beauty of the wood. They come in a variety of colors and can protect the wood from UV rays and water damage.
  2. Paint: Paint can provide a high level of protection for your wooden gate frame. It can protect the wood from moisture, UV rays, and insects. However, it can also hide the natural beauty of the wood.
  3. Sealant: Sealants can protect your wooden gate frame from moisture and UV rays. They can also prevent the wood from cracking or splitting.

Before applying any protective finish, make sure that the gate is clean and dry. Follow the manufacturer’s instructions for application and drying times.

By following these maintenance tips, you can ensure that your wooden gate frame lasts for a long time and continues to look great.

characteristics-of-wood

What is the Best Way to Attach Tile to Wood? Tips and Tricks

Are you planning to attach tile to a wooden surface and wondering what the best way to do it is? If so, you’re not alone. Many people face this challenge, and it can be tricky to find the right solution. Fortunately, there are several methods you can use to attach tile to wood, each with its own advantages and disadvantages.

One of the most popular ways to attach tile to wood is by using construction adhesive. This strong, durable adhesive is ideal for wet areas like bathrooms and kitchens, as it is waterproof and can hold your tiles in place for years. Another option is to use mastic glue, which is cost-effective and can be used to fix tiles into plywood effortlessly. However, mastic glue is not suitable for outdoor tiling as it is susceptible to harsh weather conditions. Additionally, you can use a combination of thinset mortar and construction adhesive for a more secure attachment. Whatever method you choose, it’s essential to make sure that the wood surface is even, flat, and finished before beginning the tiling process.

Understanding Tile and Wood

When it comes to attaching tile to wood, it’s important to understand the properties of both materials. In this section, we’ll take a closer look at the characteristics of tile and wood.

Properties of Tile

properties-of-tile

Tile is a popular flooring material that comes in a variety of materials, including ceramic, porcelain, and natural stone. Here are some of the key properties of tile:

  • Durability: Tile is a highly durable material that can withstand heavy foot traffic and is resistant to scratches, stains, and moisture.
  • Variety: With so many different types of tile available, there’s a style to suit every taste and decor.
  • Maintenance: Tile is relatively easy to clean and maintain, making it a popular choice for kitchens and bathrooms.
  • Installation: Installing tile can be a complex process that requires specialized tools and expertise.

Characteristics of Wood

characteristics-of-wood

Wood is a classic flooring material that adds warmth and character to any space. Here are some of the key characteristics of wood:

  • Natural beauty: Wood has a natural beauty that can’t be replicated by other materials.
  • Versatility: Wood can be stained or painted to match any decor style.
  • Comfort: Wood flooring is comfortable underfoot and provides insulation against cold temperatures.
  • Maintenance: Wood requires regular maintenance, including refinishing and sealing, to keep it looking its best.
  • Susceptibility to moisture: Wood is susceptible to moisture damage and should not be installed in areas with high humidity or moisture levels.

By understanding the properties of tile and wood, you can make an informed decision about which material is best for your flooring needs.

Necessary Tools and Materials

Tile Adhesives

When attaching tile to wood, you’ll need to use a tile adhesive that is specifically designed for this purpose. There are several types of adhesives available, including thinset mortar, mastic, and epoxy. Thinset mortar is the most commonly used adhesive for tile installation, as it provides a strong bond and is resistant to moisture. Mastic is a good choice for smaller tiles and for walls, but it is not recommended for high-moisture areas. Epoxy is the strongest adhesive available, but it is also the most expensive and difficult to work with.

To choose the right adhesive for your project, consider the size and type of tile you’ll be using, as well as the location and level of moisture in the area. Always follow the manufacturer’s instructions for mixing and applying the adhesive.

Equipment Needed

In addition to the tile adhesive, you’ll need a few other tools and materials to attach tile to wood. Here are the essentials:

  • Backer board: This is a cement-based material that is installed over the wood subfloor to provide a stable surface for the tile. It comes in sheets and should be cut to fit the room using a circular saw or jigsaw.
  • Trowel: This is used to spread the adhesive onto the backer board. Choose a trowel with the appropriate size notches for your tile size.
  • Level: A level will help you ensure that the backer board is installed evenly.
  • Tile spacers: These small plastic pieces are used to create even gaps between the tiles.
  • Tile cutter or wet saw: Depending on the type of tile you’re using, you’ll need either a tile cutter or a wet saw to cut the tiles to size.
  • Grout: This is used to fill in the gaps between the tiles. Choose a color that complements your tile and follow the manufacturer’s instructions for mixing and applying the grout.
  • Rubber float: This tool is used to spread the grout over the tiles and into the gaps.
  • Sponge: A damp sponge is used to wipe away excess grout and clean the tiles after grouting.

With these tools and materials on hand, you’ll be ready to tackle your tile installation project with confidence.

Preparation Steps

preparation-steps-3

Before you start attaching tiles to wood, there are some essential preparation steps you need to follow. These steps will ensure that your tiles adhere properly to the surface, and you get the desired results. Here are the two critical preparation steps you should follow:

Preparing the Wood Surface

The first step is to prepare the wood surface where you will attach the tiles. The wood surface needs to be clean, smooth, and free from any dust, dirt, or debris. You can use a vacuum cleaner or a broom to remove any dirt or debris. After cleaning, you need to sand the wood surface to make it smooth. Sanding will also help the adhesive bond better with the wood surface.

Choosing the Right Tile

The second step is to choose the right tile for your project. When choosing tiles, you need to consider the size, shape, and type of tile. The size and shape of the tile should match the surface where you will attach them. The type of tile should also be suitable for the area where you will install it. For example, if you are installing tiles in a bathroom, you should choose tiles that are water-resistant and slip-resistant.

Once you have prepared the wood surface and chosen the right tile, you are ready to attach the tiles to the wood surface. Remember to follow the manufacturer’s instructions when applying the adhesive and grout. With proper preparation and installation, you can achieve a beautiful and long-lasting tile installation on wood.

Attachment Process

When it comes to attaching tile to wood, there are a few key steps you need to follow to ensure a successful installation. In this section, we’ll go over the two main steps of the attachment process: applying the adhesive and setting the tile.

Applying the Adhesive

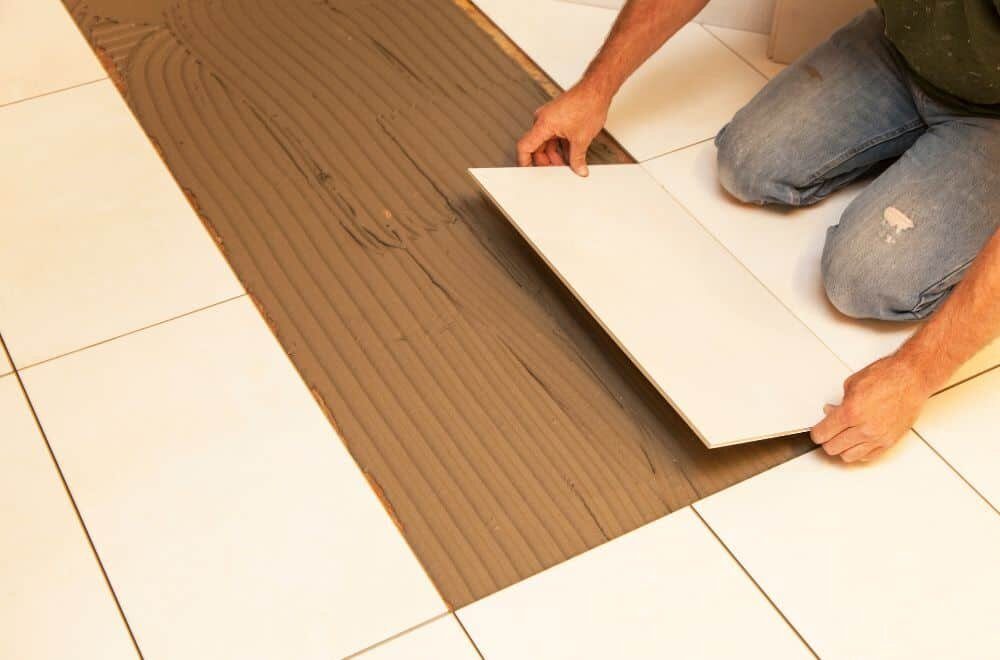
The first step in attaching tile to wood is to apply the adhesive. There are a few different types of adhesive you can use, but the most common is thinset mortar. Here’s how to apply it:

  1. Mix the mortar according to the manufacturer’s instructions. You’ll want to mix it to a consistency that’s similar to peanut butter.
  2. Using a notched trowel, spread the mortar onto the wood surface in an even layer.
  3. Make sure the mortar is spread evenly and covers the entire surface. You don’t want any areas to be missed.
  4. Once the mortar is applied, wait a few minutes for it to set up. This will help it bond better to the tile.

Setting the Tile

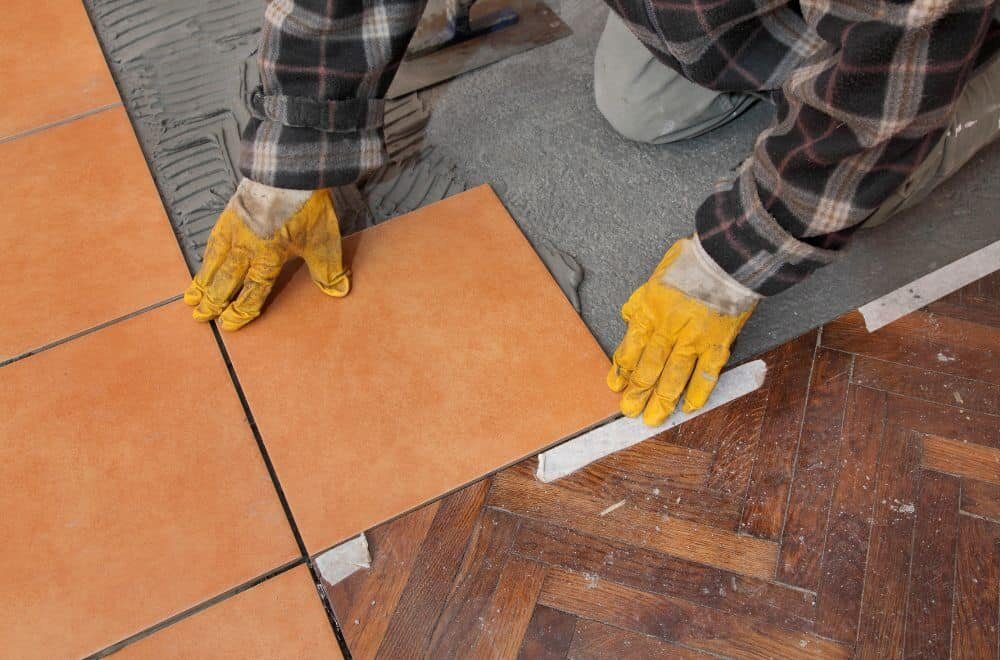
Once the adhesive is applied, it’s time to set the tile. Here’s how to do it:

  1. Start by placing the first tile in the corner of the room. Make sure it’s lined up with your layout lines.
  2. Press the tile down firmly into the adhesive. You’ll want to wiggle it back and forth a bit to ensure it’s fully embedded in the mortar.
  3. Continue placing tiles in a straight line along the first row. Use spacers to ensure even spacing between the tiles.
  4. Once the first row is complete, start on the second row. Stagger the tiles so that the joints don’t line up with the joints in the first row.
  5. Continue setting tiles row by row until the entire surface is covered.

Remember to work in small sections at a time to ensure the adhesive doesn’t dry out before you have a chance to set the tile. And always double-check your layout lines to make sure your tiles are going in straight. With these steps, you’ll be able to attach tile to wood with confidence and create a beautiful, long-lasting installation.

Post-Attachment Care

post-attachment-care-1

After attaching tile to wood, it’s important to take proper care of the surface to ensure it lasts as long as possible. Here are some tips for post-attachment care:

Cleaning the Tile

To keep your tile looking its best, it’s important to clean it regularly. Here are some tips for cleaning tile:

  • Use a soft-bristled brush or sponge to avoid scratching the surface of the tile.
  • Avoid using harsh chemicals or abrasive cleaners, as they can damage the surface of the tile.
  • Use a mild detergent and warm water to clean the tile. Be sure to rinse thoroughly to avoid leaving any residue behind.

Maintaining the Wood

In addition to cleaning the tile, it’s important to take care of the wood surface as well. Here are some tips for maintaining the wood:

  • Keep the wood surface dry to avoid warping or rotting. If the wood does get wet, be sure to dry it thoroughly.
  • Avoid placing heavy objects on the wood surface, as this can cause it to warp or crack.
  • Apply a sealant or protective coating to the wood surface to help protect it from moisture and other damage.

By following these tips for post-attachment care, you can help ensure that your tile and wood surface stay looking great for years to come.

Frequently Asked Questions

What is the recommended adhesive for attaching tile to wood?

The recommended adhesive for attaching tile to wood is a combination of thinset mortar and construction adhesive. This method is the most secure and will ensure that the tile stays in place for a long time. Make sure the wood surface is relatively even, flat, and finished before beginning.

Can ceramic tiles be safely installed on a wooden floor?

Yes, ceramic tiles can be safely installed on a wooden floor. However, it is important to ensure that the wooden floor is stable and free from any movement before installing the tiles. It is also recommended to use a cement backer board to help stabilize the wooden floor and provide a good surface for the tiles to adhere to.

How can I attach wood trim to tile without damaging either surface?

To attach wood trim to tile without damaging either surface, use a construction adhesive that is specifically designed for use with both wood and tile. Apply the adhesive to the back of the wood trim and press it firmly onto the tile surface. Hold it in place until the adhesive dries completely.

Is it possible to put tiles directly onto a wooden surface?

It is possible to put tiles directly onto a wooden surface, but it is not recommended. Wood is a porous material that can expand and contract with changes in temperature and humidity. This movement can cause the tiles to crack or come loose. It is recommended to use a cement backer board to provide a stable surface for the tiles to adhere to.

What is the best way to attach tile to a wooden countertop?

The best way to attach tile to a wooden countertop is to use a combination of thinset mortar and construction adhesive. Apply a layer of thinset mortar to the wooden countertop and then press the tiles firmly into place. Allow the mortar to dry completely before applying a layer of construction adhesive to the back of the tiles. Press the tiles firmly onto the countertop and hold them in place until the adhesive dries completely.

What are some tips for using mastic glue to attach tile to wood?

When using mastic glue to attach tile to wood, it is important to make sure that the wood surface is clean and free from any debris. Apply a thin layer of mastic glue to the back of the tiles and press them firmly into place. Make sure to work quickly, as mastic glue tends to dry quickly. Avoid using mastic glue in areas that are exposed to moisture, as it is not waterproof.

maintaining-wood-cabinets

How to Clean Wood Cabinets with Murphy's Oil Soap: A Step-by-Step Guide

Cleaning wood cabinets is an essential part of maintaining their beauty and prolonging their life. However, with so many cleaning products available in the market, it can be difficult to know which one is best for your cabinets. One popular option is Murphy’s oil soap, a natural and effective cleaner that can remove grime, grease, dirt, and layers of food from your wood cabinets without damaging them.

If you’re wondering how to clean wood cabinets with Murphy’s oil soap, you’ve come to the right place. In this article, we’ll provide you with step-by-step instructions on how to use this product to restore your cabinets to their former glory. We’ll also share some helpful tips and tricks to make the process easier and more effective. Whether you’re a seasoned cleaner or a beginner, you’ll find everything you need to know about cleaning wood cabinets with Murphy’s oil soap in this article.

Understanding Murphy’s Oil Soap

understanding-murphys-oil-soap-scaled-1

Murphy’s Oil Soap is a popular cleaning product for wood cabinets. It is a versatile cleaner that can be used on various surfaces, including wood, tile, and laminate. This soap is made from natural ingredients, such as vegetable oil and coconut oil. It is also free from harsh chemicals, making it a safe option for cleaning your cabinets.

When using Murphy’s Oil Soap, it is essential to follow the instructions carefully. Dilute the soap with water to the recommended ratio, usually 1/4 cup of soap to one gallon of water. Using too much soap can leave a residue on your cabinets, which can attract dust and dirt.

Before applying the soap, remove any loose dirt or debris from your cabinets. You can use a soft-bristled brush or a microfiber cloth to do this. Then, dip your cloth or sponge in the soapy water and wring it out to remove excess water. Gently wipe your cabinets with the cloth, making sure to cover all areas.

After cleaning, rinse your cabinets with clean water to remove any remaining soap residue. Dry your cabinets with a clean, dry cloth to prevent water stains.

Murphy’s Oil Soap is an excellent choice for cleaning your wood cabinets, but it is not suitable for all types of wood. Avoid using it on unfinished or waxed wood, as it can damage the surface. Always test a small, inconspicuous area before using the soap on your entire cabinet to ensure it does not cause any damage.

In summary, Murphy’s Oil Soap is a natural and safe option for cleaning your wood cabinets. Dilute the soap with water, remove loose dirt and debris, gently wipe your cabinets with the soapy water, rinse with clean water, and dry with a clean cloth. Remember to test a small area before using the soap on your entire cabinet.

Preparation Before Cleaning

Before you start cleaning your wood cabinets with Murphy’s Oil Soap, you need to prepare a few things. Here are some helpful tips to ensure that you have everything you need to get started:

  1. Gather Materials: You will need two large buckets, one for the soapy water and the other for clean water. You will also need a sponge or cloth to apply the soap and a dry cloth to wipe away excess water.
  2. Remove Items: Clear out all items from the cabinets to make sure you have easy access to all surfaces. This will also prevent any items from getting damaged or wet during the cleaning process.
  3. Test a Small Area: Before cleaning the entire cabinet, test a small area first. This will ensure that the soap does not damage the wood or finish.
  4. Follow Manufacturer’s Instructions: Be sure to read and follow the manufacturer’s instructions on the bottle of Murphy’s Oil Soap. This will help you determine the correct ratio of soap to water and ensure that you are using the product correctly.
  5. Protect Surrounding Areas: Cover any nearby surfaces or floors with a towel or drop cloth to protect them from any drips or spills during the cleaning process.

By following these simple steps, you will be ready to clean your wood cabinets with Murphy’s Oil Soap and restore their natural beauty.

Cleaning Wood Cabinets with Murphy’s Oil Soap

If you have wood cabinets in your home, you know how important it is to keep them clean and looking their best. Murphy’s Oil Soap is a great option for cleaning your wood cabinets, as it is gentle yet effective. Here’s how you can use Murphy’s Oil Soap to clean your wood cabinets.

Gathering Necessary Tools

Before you begin cleaning your wood cabinets with Murphy’s Oil Soap, you’ll need to gather a few necessary tools. Here’s what you’ll need:

  • Murphy’s Oil Soap
  • Warm water
  • Two buckets
  • A soft cloth or sponge
  • A dry towel

Applying the Soap

Once you have all your tools gathered, it’s time to apply the soap. Follow these steps:

  1. Fill one bucket with water and add Murphy’s Oil Soap. Check the instructions on the product to be sure of the ratio of water to soap.
  2. Use warm water because it will break up oil and help get rid of dirt.
  3. Fill your other bucket with clean, warm water.
  4. Dip your cloth or sponge into the bucket with the soap mixture, and wring it out so it’s not dripping wet.
  5. Begin wiping down your cabinets with the soapy cloth or sponge, making sure to get into all the nooks and crannies.
  6. Don’t forget to clean the handles and knobs of your cabinets too.

Wiping and Drying

After you’ve applied the soap, it’s time to wipe and dry your cabinets. Follow these steps:

  1. Dip your cloth or sponge into the bucket with clean, warm water, and wring it out so it’s not dripping wet.
  2. Wipe down your cabinets with the clean cloth or sponge to remove any soap residue.
  3. Dry your cabinets with a dry towel to prevent any water spots or damage to the wood.

And that’s it! With these simple steps, you can use Murphy’s Oil Soap to clean your wood cabinets and keep them looking their best.

Maintaining Wood Cabinets

maintaining-wood-cabinets

Once you’ve cleaned your wood cabinets with Murphy’s Oil Soap, it’s important to maintain them properly to keep them looking their best. Here are some tips to help you:

1. Avoid Harsh Chemicals

Avoid using harsh chemicals or abrasive cleaners on your wood cabinets, as they can damage the finish and cause discoloration. Instead, stick to gentle cleaners like Murphy’s Oil Soap or a mixture of warm water and vinegar.

2. Clean Up Spills Immediately

If you spill something on your wood cabinets, clean it up immediately to prevent staining and damage. Use a damp cloth and a mild cleaner to gently wipe away the spill.

3. Use Coasters and Placemats

To prevent scratches and water damage, use coasters and placemats on your wood cabinets. This will help protect the surface from heat, moisture, and scratches caused by dishes and glasses.

4. Dust Regularly

Dust your wood cabinets regularly to prevent the buildup of dirt and grime. Use a soft cloth or microfiber duster to gently wipe away dust and debris.

5. Polish Occasionally

To keep your wood cabinets looking shiny and new, polish them occasionally with a high-quality furniture polish. Be sure to follow the manufacturer’s instructions carefully and avoid using too much polish, as it can leave a sticky residue.

By following these simple tips, you can keep your wood cabinets looking beautiful for years to come.

Safety Precautions When Using Murphy’s Oil Soap

Cleaning your wood cabinets with Murphy’s Oil Soap is a great way to keep them looking clean and fresh. However, it’s important to use the product safely to avoid any accidents or damage to your cabinets. Here are some safety precautions you should keep in mind when using Murphy’s Oil Soap:

1. Read the Label

Before using Murphy’s Oil Soap, make sure to read the label carefully. The label will provide you with important information about how to use the product safely and effectively. Pay attention to any warnings or precautions listed on the label.

2. Wear Gloves

Murphy’s Oil Soap can be harsh on your skin, so it’s important to wear gloves when using it. Rubber gloves are the best option, as they will protect your hands from the soap and any dirt or grime you may be cleaning off your cabinets.

3. Test on a Small Area

Before using Murphy’s Oil Soap on your entire cabinet, test it on a small, inconspicuous area first. This will allow you to make sure that the soap is safe for your cabinets and won’t cause any damage or discoloration.

4. Don’t Use Too Much Water

When cleaning your cabinets with Murphy’s Oil Soap, be careful not to use too much water. Too much water can cause warping or damage to your cabinets. Instead, use a lightly damp cloth or sponge to apply the soap, and wring out any excess water before using it on your cabinets.

5. Keep Out of Reach of Children and Pets

Murphy’s Oil Soap should be kept out of reach of children and pets. Store the product in a safe, secure location where it cannot be accidentally ingested or spilled. If swallowed, seek medical attention immediately.

By following these safety precautions, you can safely and effectively clean your wood cabinets with Murphy’s Oil Soap, keeping them looking beautiful for years to come.

When to Seek Professional Help

Cleaning your wood cabinets with Murphy’s oil soap is a simple task that you can do on your own. However, there are some situations where it may be best to seek professional help. Here are some instances where you may want to consider hiring a professional:

The Cabinets Are Extremely Dirty or Stained

If your cabinets are extremely dirty or stained, it may be difficult for you to clean them effectively on your own. In some cases, you may even make the situation worse by using the wrong cleaning products or techniques. A professional cleaner will have the experience and knowledge to properly clean your cabinets and remove any stubborn stains.

The Cabinets Have Sustained Water Damage

Water damage can cause serious problems for wood cabinets. If your cabinets have sustained water damage, it is important to address the issue as soon as possible to prevent further damage. A professional cleaner will be able to assess the damage and determine the best course of action to repair or replace the affected cabinets.

You Are Not Comfortable Cleaning the Cabinets Yourself

If you are not comfortable cleaning your wood cabinets yourself, it may be best to hire a professional. This is especially true if you have expensive or antique cabinets that require special care. A professional cleaner will have the necessary skills and equipment to clean your cabinets safely and effectively.

In any of these situations, it is important to choose a reputable and experienced professional cleaner. Look for someone who specializes in cleaning wood cabinets and has positive reviews from previous customers. By hiring a professional, you can ensure that your cabinets are cleaned properly and maintain their beauty for years to come.

Frequently Asked Questions

What is the best way to clean wood cabinets?

The best way to clean wood cabinets is to use a gentle cleaner that is specifically designed for wood. Murphy’s Oil Soap is a great option because it is gentle and effective. To clean your wood cabinets, mix warm water with Murphy’s Oil Soap and use a soft cloth or sponge to gently wipe down the surfaces. Be sure to avoid using abrasive sponges or harsh chemicals, as these can damage the wood and its finish.

How do you make wood cabinets shine?

To make your wood cabinets shine, you can use a furniture polish or wax. However, it is important to choose a product that is specifically designed for wood and to avoid using products that contain silicone, which can leave a residue on the surface of the wood. Alternatively, you can use a mixture of warm water and vinegar to clean your wood cabinets, which can help to remove dirt and grime and leave the surface looking shiny and clean.

What type of oil is best for wood cabinets?

When it comes to oiling wood cabinets, it is important to choose an oil that is specifically designed for use on wood. Mineral oil is a great option because it is safe, natural, and effective. To oil your wood cabinets, simply apply a small amount of mineral oil to a soft cloth and rub it into the surface of the wood. Be sure to wipe away any excess oil with a clean cloth to avoid leaving a residue.

Is Murphy’s Oil Soap safe for painted cabinets?

Murphy’s Oil Soap is safe for painted cabinets, but it is important to use it correctly to avoid damaging the paint. To clean painted cabinets, mix warm water with Murphy’s Oil Soap and use a soft cloth or sponge to gently wipe down the surfaces. Be sure to avoid using abrasive sponges or harsh chemicals, as these can damage the paint. Additionally, be sure to rinse the cabinets thoroughly with clean water after cleaning to avoid leaving a soapy residue.

How do you clean sticky wood kitchen cabinets?

To clean sticky wood kitchen cabinets, mix warm water with Murphy’s Oil Soap and use a soft cloth or sponge to gently wipe down the surfaces. If the cabinets are particularly sticky, you can add a small amount of baking soda to the mixture to help break down the grime. Be sure to avoid using abrasive sponges or harsh chemicals, as these can damage the wood and its finish.

Do you need to rinse off Murphy’s Oil Soap after cleaning wood cabinets?

Yes, it is important to rinse off Murphy’s Oil Soap after cleaning wood cabinets to avoid leaving a soapy residue. After cleaning, rinse the cabinets thoroughly with clean water and then dry them with a clean cloth. This will help to ensure that your cabinets are clean and free from any residue that could attract dirt and grime.