Tag Archives: coarse grit sandpaper

build-a-wooden-garage-door

How to Build a Wooden Garage Door: A Step-by-Step Guide

Are you tired of your old, worn-out garage door? Building a wooden garage door can be a great DIY project that not only adds curb appeal to your home but also increases its value. With the right tools and materials, building a wooden garage door can be a fun and rewarding experience.

Before you begin, it’s important to consider the style and design of your garage door. Do you want a traditional or modern look? What type of wood do you want to use? Once you have a plan in place, you can start gathering materials and tools. Keep in mind that safety should always be a top priority when working with power tools and heavy materials.

Understanding the Basics
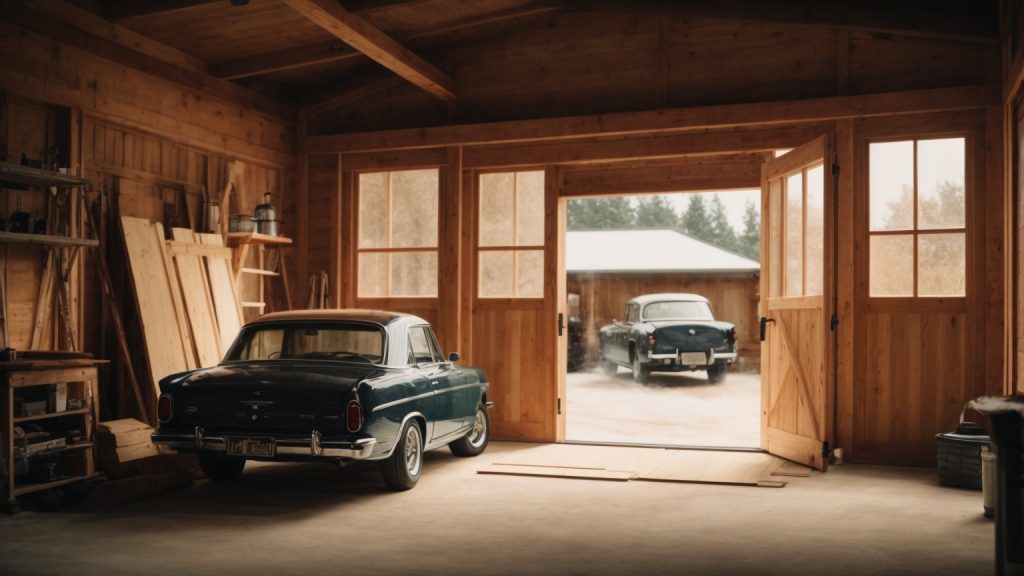
build-a-wooden-garage-door

If you’re looking to build a wooden garage door, it’s important to understand the basics before diving into the project. Here are some key things to consider:

Types of Wood

When it comes to selecting the right type of wood for your garage door, there are a few options to choose from. The most common types of wood used for garage doors include:

  • Cedar: A popular choice due to its natural resistance to rot and insects, as well as its durability and attractive appearance.
  • Redwood: Another popular option due to its natural resistance to decay and its beautiful, rich color.
  • Hemlock: A more affordable option that is still durable and resistant to decay, but may require more maintenance over time.
  • Douglas Fir: A strong and durable option that is also affordable, but may require more maintenance than cedar or redwood.

Consider the climate in your area, as well as your personal preferences and budget, when selecting the right type of wood for your garage door.

Garage Door Sizes

Before you start building your garage door, you’ll need to measure the size of your garage opening to determine the correct dimensions for your door. Standard garage door sizes typically range from 8 feet to 18 feet wide and 7 feet to 8 feet tall, but you may need to customize the size of your door based on the dimensions of your garage.

Tool Requirements

Building a wooden garage door requires a variety of tools, including:

  • Circular saw
  • Jigsaw
  • Drill
  • Hammer
  • Screwdriver
  • Clamps
  • Measuring tape
  • Level
  • Sandpaper

Make sure you have all the necessary tools before starting your project, and take the time to familiarize yourself with each tool and its proper use.

Designing Your Garage Door
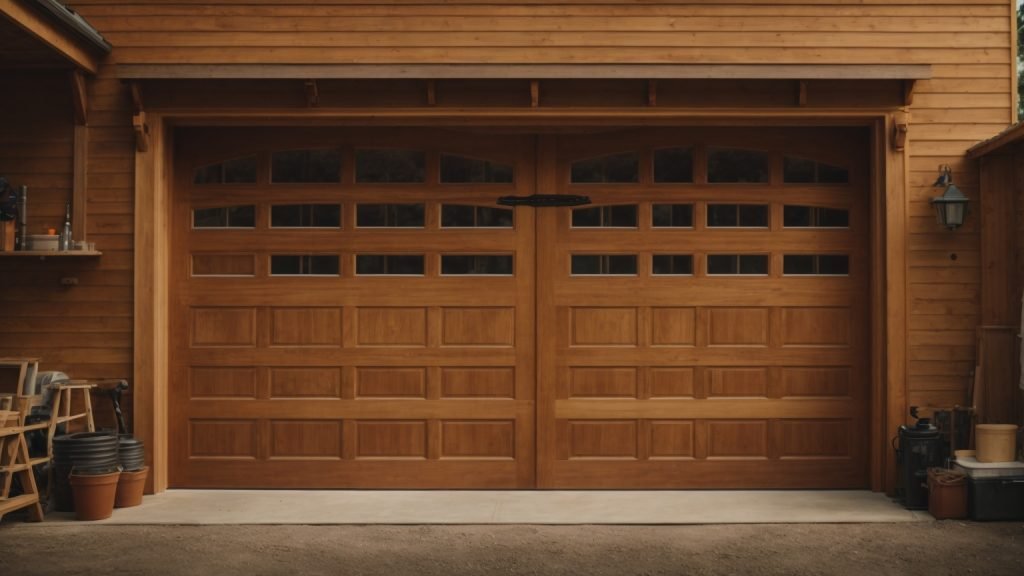
designing-your-garage-door

When it comes to designing your wooden garage door, there are a few things to consider. This section will cover two main sub-sections: Choosing a Design and Creating a Blueprint.

Choosing a Design

The design of your garage door can greatly impact the overall look of your home. There are several different styles to choose from, including:

  • Raised panel
  • Flat panel
  • Carriage house
  • Custom designs

Consider the style of your home and choose a design that complements it. Raised panel doors are a popular choice for traditional homes, while carriage house doors are a great option for a more rustic look.

In addition to the style of the door, you’ll also need to choose the type of wood and any additional features, such as windows or decorative hardware. Popular wood choices include cedar, redwood, and mahogany.

Creating a Blueprint

Before you start building your garage door, it’s important to create a detailed blueprint. This will ensure that you have all the necessary materials and that the door will fit properly.

Start by measuring the opening of your garage door. This will give you the dimensions for the door itself. Next, create a rough sketch of the design you’ve chosen, including any windows or decorative hardware.

Once you have a rough sketch, create a more detailed blueprint. This should include exact measurements and a list of all the materials you’ll need. Consider creating a table to organize your materials and keep track of your progress.

By taking the time to carefully choose a design and create a detailed blueprint, you’ll be well on your way to building a beautiful wooden garage door that will enhance the look of your home.

Preparing the Wood

When building a wooden garage door, selecting quality wood and cutting it properly are essential steps in ensuring a successful project. In this section, we’ll cover the basics of preparing the wood for your garage door.

Selecting Quality Wood

Choosing the right type of wood is crucial for a durable and long-lasting garage door. Here are some tips for selecting quality wood:

  • Choose a hardwood like mahogany, cedar, or redwood for a sturdy and durable garage door. These types of wood are resistant to rot, insects, and weather damage.
  • Avoid using softwoods like pine or spruce, which are more prone to damage and decay over time.
  • Look for wood that is straight-grained and free of knots or cracks. This will ensure that your garage door looks smooth and even.

Once you have selected the right type of wood, it’s important to purchase enough to complete your project. Make sure to account for any extra wood needed for mistakes or unexpected changes.

Cutting the Wood

Properly cutting your wood is essential for creating a garage door that fits your space and functions properly. Here are some tips for cutting your wood:

  • Use a circular saw or table saw to cut your wood to the appropriate size. Make sure to measure carefully and double-check your measurements before cutting.
  • Sand the edges of your wood to smooth out any rough edges or splinters.
  • Cut your wood into panels that will fit together to create your garage door. Make sure to label each panel to keep track of which one goes where.

By taking the time to select quality wood and cut it properly, you’ll be on your way to building a beautiful and functional wooden garage door.

Assembling the Garage Door

Once you have all the pieces cut and sanded, it’s time to assemble your wooden garage door. This section will walk you through the process of joining the pieces and installing the necessary hardware.

Joining the Pieces

Before you start joining the pieces together, make sure you have all the necessary tools and supplies, including wood glue, clamps, and screws. Follow these steps to join the pieces:

  1. Lay out all the pieces on a flat surface, making sure they are in the correct order.
  2. Apply wood glue to the edges of the pieces that will be joined together.
  3. Use clamps to hold the pieces together while the glue dries.
  4. Once the glue has dried, use screws to reinforce the joints.

Make sure to take your time during this process to ensure that the joints are strong and secure.

Installing the Hardware

Once your garage door is assembled, it’s time to install the necessary hardware. Here are the steps you need to follow:

  1. Attach the hinges to the door using screws and a drill.
  2. Install the rollers on the sides of the door, making sure they are level and secure.
  3. Attach the track to the ceiling of the garage using brackets and screws.
  4. Install the handle and lock on the outside of the door.

Make sure to follow the manufacturer’s instructions for installing the hardware and take your time to ensure that everything is installed correctly.

By following these steps, you’ll be able to assemble and install your wooden garage door with ease.

Finishing Touches

Once you have constructed your wooden garage door, it’s time to add the finishing touches to make it look polished and professional. This section will cover two important steps in the finishing process: sanding and polishing, and painting or staining.

Sanding and Polishing

Before painting or staining your wooden garage door, you’ll need to sand it down to ensure a smooth surface. Start by sanding the entire door with a coarse grit sandpaper, such as 80 grit. This will remove any rough spots or imperfections in the wood. Then, switch to a finer grit sandpaper, such as 120 grit, and sand the door again to create a smooth surface.

Once you’ve finished sanding, it’s time to polish the wood. Apply a wood polish or wax to the surface of the door using a soft cloth, and buff it in using circular motions. This will give your door a beautiful shine and protect the wood from moisture and other elements.

Painting or Staining

Now that your wooden garage door is sanded and polished, it’s time to choose a finish. You can either paint or stain the door, depending on your preference.

If you choose to paint the door, start by applying a coat of primer to the surface. This will help the paint adhere better and prevent it from chipping or peeling. Once the primer is dry, apply one or two coats of paint, depending on the desired coverage. Use a high-quality paintbrush or roller to ensure a smooth finish.

If you prefer to stain the door, choose a stain color that complements the wood’s natural grain. Apply the stain using a brush or rag, and wipe away any excess with a clean cloth. Allow the stain to dry completely before applying a coat of sealer or varnish to protect the wood.

By following these simple steps, you can give your wooden garage door a professional finish that will last for years to come.

Installation Process

Building a wooden garage door is a great way to add value to your home. Once you have built your garage door, the next step is to install it. In this section, we will go over the installation process for your wooden garage door. There are two main steps in the installation process: mounting the door and attaching the opener.

Mounting the Door

Before you begin mounting the door, make sure you have all the necessary tools and hardware. You will need a drill, screws, a level, and a helper. Here are the steps to mount your wooden garage door:

  1. Attach the hinges: Start by attaching the hinges to the door. Use a level to make sure they are straight.
  2. Hang the door: With the help of your assistant, hang the door onto the track. Make sure the door is level and centered.
  3. Secure the door: Secure the door to the track with screws. Make sure the screws are tight, but not too tight.
  4. Install the handles: Install the handles on the outside of the door. Make sure they are centered and secure.

Attaching the Opener

Attaching the opener is the final step in the installation process. Here are the steps to attach your opener:

  1. Install the opener: Follow the manufacturer’s instructions to install the opener. Make sure it is securely attached to the ceiling.
  2. Attach the arm: Attach the arm to the door. Make sure it is centered and secure.
  3. Test the opener: Test the opener to make sure it is working properly. Adjust the settings as needed.

With these steps, you should be able to successfully install your wooden garage door. Remember to take your time and follow the instructions carefully.

Maintenance Tips

To keep your wooden garage door functioning and looking great for years to come, regular maintenance is key. Here are some tips to help you maintain your wooden garage door.

Regular Cleaning

Cleaning your wooden garage door regularly is essential to keep it looking good. Dirt, grime, and other debris can accumulate on the surface of the door, making it look dull and unattractive. Here are some tips for cleaning your wooden garage door:

  • Use a soft-bristled brush or a cloth to remove any loose dirt or debris from the surface of the door.
  • Mix a solution of water and mild detergent or soap and use a soft cloth to wipe down the door. Avoid using harsh chemicals or abrasive cleaners that can damage the wood.
  • Rinse the door thoroughly with clean water and use a clean, dry cloth to wipe it down.

Annual Check-Up

In addition to regular cleaning, it’s important to perform an annual check-up on your wooden garage door to ensure that it’s functioning properly. Here are some things to check during your annual check-up:

  • Check the door for any signs of wear and tear, such as cracks, splits, or warping. If you notice any damage, repair it promptly to prevent further damage.
  • Lubricate the moving parts of the door, such as the hinges and rollers, with a silicone-based lubricant to keep them functioning smoothly.
  • Check the weatherstripping around the door and replace it if it’s worn or damaged. Weatherstripping helps to keep out drafts and moisture, which can damage the wood.
  • Inspect the door opener and make sure it’s functioning properly. If you notice any problems, such as slow operation or strange noises, contact a professional for repairs.

By following these maintenance tips, you can keep your wooden garage door looking and functioning great for years to come.
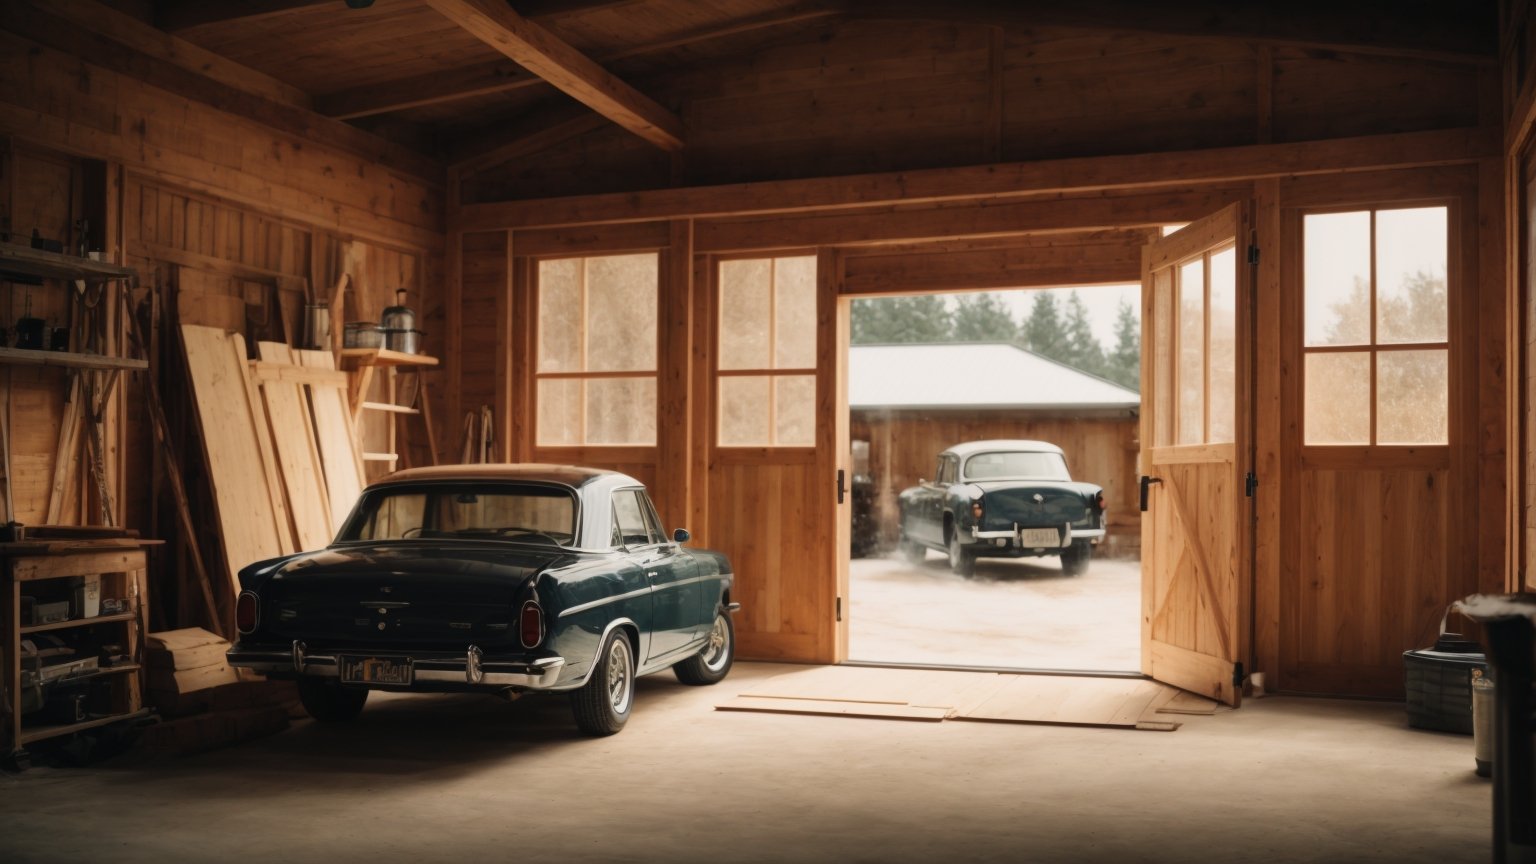
assembling-the-frame

How to Build a Wooden Picture Frame in 5 Easy Steps

If you’re looking to add a personal touch to your home decor, building your own wooden picture frames can be a great place to start. Not only do they add a rustic feel to your space, but they also allow you to showcase your favorite photos in a unique way. With a few basic tools and some simple steps, you can create custom frames that perfectly match your style.

Before you begin, it’s important to choose the right type of wood for your project. Softwoods like pine and cedar are easy to work with and can be found at most home improvement stores. Hardwoods like oak and cherry are more durable and offer a more polished look, but they can be more expensive. Once you’ve selected your wood, you’ll need to measure and cut it to the desired size. From there, you’ll use basic tools like a saw and sander to shape the wood and create the frame. Whether you’re a seasoned woodworker or a beginner, building a wooden picture frame is a fun and rewarding project that anyone can tackle.

Understanding the Basics

build-a-wooden-picture-frame

Building a wooden picture frame is a great way to showcase your favorite photos or artwork. With a few basic tools and some lumber, you can create a custom frame that perfectly fits your style and décor. In this section, we’ll cover the basics of building a wooden picture frame, including the types of wood to use and the tools you’ll need.

Types of Wood

When it comes to building a picture frame, you’ll want to choose a wood that is both attractive and durable. Some popular options include:

  • Oak: A strong and durable wood that is perfect for larger frames.
  • Maple: A light-colored wood that is easy to stain or paint.
  • Cherry: A beautiful and richly colored wood that is perfect for smaller frames.
  • Walnut: A dark and luxurious wood that is great for more formal or elegant frames.

When selecting your wood, be sure to choose boards that are straight and free of knots or other defects. You’ll also want to consider the grain pattern of the wood, as this can affect the overall look of your frame.

Choosing the Right Tools

To build a wooden picture frame, you’ll need a few basic tools, including:

  • Table saw: This will be used to rip your lumber to the correct size.
  • Miter saw: This will be used to cut your frame pieces to the correct length.
  • Router: This will be used to create a groove for your glass and backing.
  • Clamps: These will be used to hold your frame pieces together while the glue dries.
  • Sandpaper: This will be used to smooth out any rough edges or surfaces.

You may also want to invest in a few additional tools, such as a nail gun or a biscuit joiner, depending on the complexity of your frame design.

With these basics in mind, you’re ready to start building your own wooden picture frame.

Designing Your Picture Frame

When it comes to building a wooden picture frame, the design is just as important as the construction. A well-designed frame can enhance the beauty of your artwork and add a personal touch to your space. Here are some tips on how to design your picture frame.

Determining the Size

The first step in designing your picture frame is to determine the size of your artwork. Measure the width and height of your artwork and add an inch to each measurement to allow for the frame to overlap the artwork. This will be the size of your frame. Keep in mind that larger frames will require thicker and sturdier wood to support the weight of the artwork.

Choosing the Style

Once you have determined the size of your frame, you can choose the style that best suits your artwork and personal taste. Here are some popular styles to consider:

  • Traditional: A classic style with simple, clean lines and minimal ornamentation.
  • Ornate: A decorative style with intricate details and embellishments.
  • Rustic: A natural, earthy style with rough-hewn wood and a distressed finish.
  • Modern: A sleek, minimalist style with clean lines and a smooth finish.

Consider the style of your artwork and the decor of your space when choosing the style of your frame. A traditional frame may be best suited for a classic painting, while a rustic frame may complement a landscape photograph. A modern frame may work well with a contemporary abstract piece.

In summary, designing your picture frame involves determining the size of your artwork and choosing a style that complements both your artwork and your space. Keep these tips in mind when designing your frame to create a beautiful and personalized finished product.

Preparing the Wood

Before you start building your wooden picture frame, it is essential to prepare the wood properly. This process involves cutting and sanding the wood to achieve a smooth and even surface.

Cutting the Wood

The first step in preparing the wood is to cut it to the required size. You can use a table saw or a miter saw to cut the wood. It is essential to measure the wood accurately before cutting it to avoid any mistakes.

When cutting the wood, it is crucial to use the right blade for the job. A crosscut blade is ideal for cutting across the grain, while a rip blade is suitable for cutting along the grain. Using the wrong blade can result in a rough and uneven cut.

Sanding the Wood

After cutting the wood, the next step is to sand it to achieve a smooth and even surface. Sanding helps to remove any rough edges and splinters, making the wood easier to work with.

Start by using a coarse-grit sandpaper to remove any rough spots or imperfections on the wood. Then, switch to a finer-grit sandpaper to achieve a smooth surface. It is essential to sand the wood evenly to avoid any unevenness in the final product.

When sanding the wood, it is crucial to wear protective gear such as gloves, goggles, and a dust mask. Sanding produces a lot of dust, which can be harmful to your health if inhaled.

In conclusion, preparing the wood is an essential step in building a wooden picture frame. By cutting and sanding the wood properly, you can achieve a smooth and even surface, making it easier to work with.

Assembling the Frame

assembling-the-frame

Once you have all the pieces cut to size, it’s time to assemble your wooden picture frame. This section will cover the two main steps of joining the pieces and securing the corners.

Joining the Pieces

To join the pieces of your wooden picture frame, you will need wood glue and plastic pegs. Follow these steps:

  1. Apply a drop of wood glue to four of the eight miter faces.
  2. Spread the glue thinly over the miter face.
  3. Join the pieces together, making sure the corners are flush.
  4. Insert the plastic pegs into the pre-drilled holes in the back of the frame.

Securing the Corners

To secure the corners of your wooden picture frame, you have a few options:

  • Use a band clamp to hold the corners together while the glue dries.
  • Use corner clamps to hold the corners together while the glue dries.
  • Use a brad nailer to secure the corners.

If you choose to use a brad nailer, be sure to countersink the nails and fill the holes with wood filler before sanding and finishing your frame.

Once your frame is assembled and the glue is dry, you can sand it smooth and apply your finish of choice. Congratulations, you’ve built your own wooden picture frame!

Finishing Touches

Once you’ve assembled your wooden picture frame, it’s time to add the finishing touches that will make it look polished and professional. This section will cover two important steps: applying the finish and adding the glass and picture.

Applying the Finish

The finish you choose for your picture frame will depend on your personal preference and the look you’re going for. Some common options include stain, paint, or a clear coat to showcase the natural beauty of the wood.

Before applying any finish, make sure the frame is clean and free of dust and debris. Sand the frame lightly to smooth out any rough spots or imperfections. Then, apply the finish according to the manufacturer’s instructions. You may need to apply multiple coats, allowing each coat to dry completely before applying the next.

Adding the Glass and Picture

Once the finish has dried, it’s time to add the glass and picture to your frame. Start by cleaning the glass to remove any fingerprints or smudges. Then, carefully place the glass into the frame, making sure it fits snugly.

Next, add the picture. If you’re using a mat, make sure the picture is centered and straight within the mat. Then, carefully place the mat and picture into the frame, making sure everything is lined up correctly.

Finally, add any hardware you need to hang the frame. This may include picture hangers, wire, or hooks. Make sure the hardware is securely attached to the frame, and test the frame to make sure it hangs straight.

With these finishing touches, your wooden picture frame is complete and ready to display your favorite photo or artwork.

How to Make a Wooden Coffee Table: A Beginner's Guide

Are you tired of browsing furniture stores for the perfect coffee table, only to be disappointed by the limited options and high prices? Why not make your own wooden coffee table instead? Not only will it be a unique addition to your living space, but it will also be a fun and rewarding DIY project.

Building a wooden coffee table may seem daunting, but with the right tools and materials, it can be a straightforward process. Whether you prefer a simple design or something more intricate, there are plenty of plans and tutorials available to guide you through the process. From selecting the right wood to finishing touches, making your own coffee table allows you to customize every aspect of the piece to fit your personal style and needs.

Before you begin, it’s important to have a clear idea of the size and style you want for your coffee table. Consider the dimensions of your space and the function you want the table to serve. Do you need extra storage? Do you want a specific type of wood or finish? Once you have a solid plan in place, you can start gathering the necessary materials and tools to bring your vision to life.

Choosing the Right Wood

When it comes to making a wooden coffee table, choosing the right wood is crucial. The type of wood you choose will affect the appearance, durability, and cost of your table. In this section, we’ll discuss the types of wood commonly used for coffee tables and how to choose wood that is both high quality and durable.

Types of Wood

There are many types of wood to choose from when making a coffee table. Some popular options include:

  • Oak: A durable hardwood with a prominent grain pattern that can range from light to dark.
  • Maple: A light-colored hardwood with a fine, uniform grain pattern.
  • Cherry: A rich, reddish-brown hardwood with a distinctive grain pattern.
  • Walnut: A dark, luxurious hardwood with a straight grain pattern.

These are just a few examples of the many types of wood available. When choosing wood for your coffee table, consider the color, grain pattern, and texture of the wood. You should also think about the style and decor of your room and choose a wood that complements it.

Wood Quality and Durability

In addition to choosing the right type of wood, it’s important to consider the quality and durability of the wood. Look for wood that is free of knots and cracks, as these can weaken the structure of your table. You should also choose wood that has been properly dried and seasoned to prevent warping and cracking over time.

When it comes to durability, hardwoods like oak and maple are generally the best choice. Softwoods like pine and cedar are less durable and may not hold up as well over time. However, softwoods can be a good option if you’re on a budget or if you’re looking for a more rustic or casual look.

Overall, choosing the right wood for your coffee table is an important decision that will impact the appearance and durability of your table. Take the time to consider your options and choose a wood that meets your needs and fits your style.

Gathering Necessary Tools

Before starting to build your wooden coffee table, you need to gather all the necessary tools. Below are the woodworking tools and safety equipment that you will need.

Woodworking Tools

  • Table Saw: A table saw is used to cut the wood to the desired size and shape. It is a crucial tool for making a coffee table.
  • Circular Saw: A circular saw is another option for cutting the wood. It is useful for making straight cuts and is ideal for beginners.
  • Jigsaw: A jigsaw is used for making curved cuts in the wood. It is a versatile tool that can be used for various woodworking projects.
  • Drill: A drill is essential for making holes in the wood. You will need it to attach the legs and other parts of the coffee table.
  • Sander: A sander is used to smooth out the surface of the wood. It is necessary to achieve a polished and professional look.
  • Clamps: Clamps are used to hold the wood in place while cutting, drilling, or sanding. They are essential for safety and precision.

Safety Equipment

  • Safety Glasses: Safety glasses are necessary to protect your eyes from flying debris while cutting or sanding the wood.
  • Dust Mask: A dust mask is essential to protect your lungs from sawdust and other particles that may be released during the woodworking process.
  • Ear Protection: Ear protection is necessary to protect your ears from the loud noise produced by the power tools.

Make sure to have all the necessary tools and safety equipment before starting your project. It is important to prioritize safety and to use the tools properly to avoid accidents.

Designing Your Coffee Table

When it comes to designing your own wooden coffee table, there are a few things to consider. In this section, we will cover the size and shape of your coffee table, as well as how to add some personal touches to make it unique to your style.

Size and Shape

The size and shape of your coffee table will depend on your personal preferences and the space you have available. Here are some things to consider when designing your coffee table:

  • Height: A typical coffee table is around 18-20 inches tall, but you can adjust the height to fit your needs.
  • Length and width: Consider the size of your room and the other furniture in it. You want your coffee table to be proportional to the space and not overwhelm the room.
  • Shape: A rectangular or square coffee table is the most common, but you can also consider a round or oval shape for something different.

Once you have an idea of the size and shape you want, you can start planning the materials and construction.

Adding Personal Touches

One of the best things about making your own coffee table is the ability to add personal touches that reflect your style. Here are some ideas to consider:

  • Stain or paint: Choose a stain or paint color that matches your decor or adds a pop of color to the room.
  • Inlay design: Add a unique design or pattern to the top of your coffee table using inlay techniques.
  • Hardware: Choose hardware that complements the style of your coffee table, such as vintage knobs or modern handles.
  • Storage: Add drawers or shelves to your coffee table for added functionality.

Remember, the design possibilities are endless when it comes to making your own wooden coffee table. Take your time and have fun with the process!

Preparing the Wood

Before you can start building your wooden coffee table, you need to prepare the wood. This involves cutting the wood to size and sanding it to make it smooth.

Cutting the Wood

The first step in preparing the wood is to cut it to the right size. You will need a saw for this, and it’s important to measure carefully to ensure that you get the right dimensions.

When cutting the wood, make sure that you use a straight edge to guide the saw. This will help you to make straight cuts and ensure that your coffee table looks professional.

Sanding the Wood

Once you have cut the wood to the right size, it’s time to sand it. Sanding is important because it helps to smooth out any rough edges and make the wood more comfortable to touch.

To sand the wood, you will need sandpaper and a sanding block. Start with a coarse grit sandpaper and work your way up to a finer grit. This will help you to achieve a smooth finish.

When sanding, make sure that you sand with the grain of the wood. This will help you to avoid creating scratches or marks on the surface of the wood.

By following these steps, you can prepare your wood for building a beautiful and functional coffee table.

Assembling the Table

Now that you have all the pieces cut, it’s time to assemble the coffee table. This section will guide you through the process of joining the pieces and securing the table top.

Joining the Pieces

  1. Start by assembling the base of the table. Attach the legs to the apron using wood glue and pocket screws. Use a clamp to hold the pieces in place while the glue dries.

  2. Once the base is assembled, attach the tabletop supports. These will hold the tabletop in place. Use wood glue and pocket screws to attach the supports to the apron.

  3. Now it’s time to attach the tabletop. Apply wood glue to the tabletop supports and place the tabletop on top. Use clamps to hold the tabletop in place while the glue dries.

Securing the Table Top

  1. Once the glue is dry, it’s time to secure the tabletop to the base. Flip the table over and use screws to attach the tabletop to the tabletop supports.

  2. To hide the screws, you can add wooden plugs. Use a plug cutter to cut plugs from the same type of wood as your tabletop. Glue the plugs into the holes and sand them flush with the tabletop.

  3. Finish the table with a coat of stain or paint to protect the wood and give it a finished look.

By following these steps, you can assemble your own wooden coffee table that is both functional and beautiful.

Finishing Touches

After constructing your wooden coffee table, it’s time to add the finishing touches. This step is crucial to protect the wood and enhance its natural beauty. In this section, we’ll cover two important sub-sections: Staining the Wood and Sealing the Wood.

Staining the Wood

Staining the wood is an optional step that can add color and depth to your coffee table. Before staining, make sure the wood is sanded smooth and free of dust. You can use a pre-stain wood conditioner to ensure an even application of the stain.

When choosing a stain, consider the wood species and the desired color. Test the stain on a scrap piece of wood or an inconspicuous area of the table to ensure you’re happy with the color. Apply the stain with a brush or cloth, following the wood grain. Wipe off any excess stain with a clean cloth and let it dry completely before moving on to the next step.

Sealing the Wood

Sealing the wood is essential to protect it from moisture, scratches, and other damage. There are several options for sealing your coffee table, including polyurethane, varnish, and wax. Polyurethane is a popular choice because it’s durable and easy to apply.

Before applying the sealer, make sure the stain (if applied) is completely dry. Apply the sealer with a brush or cloth, following the wood grain. Let it dry according to the manufacturer’s instructions, then lightly sand the surface with fine-grit sandpaper. Wipe off any dust with a clean cloth and apply a second coat of sealer. Repeat this process until you achieve the desired level of protection.

In conclusion, staining and sealing your wooden coffee table will not only protect it but also enhance its natural beauty. Take your time and follow these steps carefully for a stunning finished product.

How to Make a Wooden Bench with a Back: A Beginner's Guide

Looking to add a comfortable and stylish bench to your outdoor space? A wooden bench with a back is a great choice! Not only does it provide a comfortable place to sit, but it also adds a touch of charm to your garden or patio. In this article, we’ll walk you through the steps to make your own wooden bench with a back.

To get started, you’ll need some basic tools and materials. The good news is that you don’t need to be an expert woodworker to make this bench. With just a few tools and some basic carpentry skills, you can create a beautiful and functional piece of furniture that will last for years to come. In the next section, we’ll go over the tools and materials you’ll need to get started.

Choosing the Right Wood

When it comes to building a wooden bench with a back, choosing the right type of wood is crucial. You want to select a sturdy and durable wood that can withstand outdoor weather conditions and last for years. Here are some factors to consider when choosing the right wood for your bench.

Types of Wood

There are several types of wood that are commonly used for outdoor furniture, but not all of them are suitable for a bench with a back. Here are some of the best options:

  • Cedar: Cedar is a popular choice for outdoor furniture because it is naturally resistant to rot and insects. It also has a beautiful natural color that can be left untreated or stained.
  • Redwood: Redwood is another durable and beautiful option for outdoor furniture. It is naturally resistant to decay and insects and has a rich, reddish color.
  • Teak: Teak is a high-end option for outdoor furniture because it is extremely durable and resistant to water, rot, and insects. It also has a beautiful golden color that can be maintained with regular oiling.
  • Pressure-treated pine: Pressure-treated pine is a more affordable option for outdoor furniture. It is treated with chemicals to resist decay and insects, but it may not last as long as other types of wood.

Wood Treatment

Even if you choose a naturally resistant wood like cedar or redwood, it is still a good idea to treat your bench with a protective finish to extend its lifespan. Here are some options:

  • Stain: Staining your bench can enhance its natural color and protect it from UV rays and water damage. Choose a stain that is specifically designed for outdoor use.
  • Paint: Painting your bench can give it a unique look and protect it from the elements. However, paint may peel or crack over time, so it may require more maintenance than other finishes.
  • Sealant: A clear sealant can protect your bench from water damage and UV rays without changing its color. Be sure to choose a sealant that is specifically designed for outdoor use.

By considering the type of wood and the right treatment, you can ensure that your wooden bench with a back will withstand the test of time and provide a comfortable and stylish seating option for your outdoor space.

Tools Needed

When building a wooden bench with a back, you will need a variety of hand and power tools to complete the project. Here is a list of the tools you will need:

Hand Tools

  • Measuring tape
  • Speed square
  • Carpenter’s pencil
  • Clamps
  • Sandpaper
  • Paint brush
  • Safety gloves and glasses
  • Wood filler and wood glue (optional)

Power Tools

  • Circular saw or miter saw
  • Drill and impact driver
  • Drill bit and countersink bit
  • Brad nailer (optional)
  • Jigsaw (optional)

Before starting the project, make sure you have all the necessary tools and that they are in good working condition. It’s also important to wear appropriate safety gear, such as gloves and glasses, when using power tools.

Using a measuring tape and speed square, mark and measure the wood pieces you will need for the bench. Use a circular saw or miter saw to cut the wood to the desired lengths. A power drill and impact driver will also be necessary to attach the pieces together with screws.

If you want to add decorative details to the bench, a jigsaw can be used to create curved or angled cuts in the wood. A brad nailer can also be used to attach pieces together without visible screws or nails.

Overall, having the right tools for the job will make building a wooden bench with a back much easier and more efficient.

Creating the Bench Design

When designing a wooden bench with a back, there are a few factors to consider to ensure that your bench is both comfortable and functional. Here are some things to keep in mind as you create your bench design:

Size and Dimensions

The size and dimensions of your bench will depend on how many people you want it to seat and where you plan to place it. A standard bench is usually around 18 inches tall, 16-20 inches deep, and 4-5 feet long. If you plan to place your bench against a wall, make sure to measure the space to ensure it will fit comfortably.

Backrest Angle

The angle of the backrest is an important factor to consider when designing your bench. A backrest angle of around 15 degrees is comfortable for most people, but you may want to adjust this angle depending on your personal preference or the intended use of the bench.

Seat Height

The height of the seat is another important consideration. A seat height of around 16-18 inches is comfortable for most people, but again, you may want to adjust this height depending on your personal preference or the intended use of the bench.

Materials

When choosing materials for your bench, make sure to select wood that is sturdy and weather-resistant, such as cedar or redwood. You may also want to consider using pressure-treated lumber to ensure your bench lasts for years to come.

Design Details

Finally, consider any additional design details you want to include, such as armrests or decorative elements. Keep in mind that these details may add to the complexity of the project, so make sure you have the necessary tools and skills to complete them.

By considering these factors and taking the time to plan out your bench design, you can create a beautiful and functional piece of outdoor furniture that will be enjoyed for years to come.

Cutting the Wood

Before you start cutting the wood, it’s important to have a clear plan in mind. Make sure you have the right measurements and the right tools for the job. Here are some tips to help you cut the wood for your wooden bench with a back:

1. Measure Twice, Cut Once

Take your time when measuring the wood. Make sure you double-check your measurements before you start cutting. It’s better to be safe than sorry, so take the time to be accurate.

2. Use the Right Tools

Make sure you have the right tools for the job. You’ll need a circular saw, a jigsaw, a drill, and a sander. Make sure your tools are sharp and in good working order.

3. Cut the Wood to Size

Once you have your measurements and your tools, it’s time to start cutting the wood. Use a circular saw to cut the boards to the right length. Use a jigsaw to cut the curves for the backrest and armrests.

4. Sand the Wood

After you’ve cut the wood, use a sander to smooth out any rough edges. Make sure the wood is sanded evenly and that there are no splinters.

5. Assemble the Bench

Once you’ve cut and sanded the wood, it’s time to assemble the bench. Follow the instructions carefully and make sure everything is lined up correctly. Use wood screws to attach the pieces together.

By following these tips, you can ensure that your wooden bench with a back is sturdy, comfortable, and looks great.

Assembling the Bench Base

Now that you have cut and sanded all the necessary pieces for your wooden bench, it’s time to start assembling the base.

  1. Begin by laying out the two legs and the stretcher pieces on a flat surface. Make sure the legs are facing the right way and that the stretcher pieces are lined up evenly.

  2. Take your drill and attach the stretcher pieces to the legs using screws. Make sure to pre-drill the holes to prevent the wood from splitting.

  3. Once the stretcher pieces are attached, add the seat support piece to the top of the stretcher pieces. Again, pre-drill the holes and use screws to attach the support piece.

  4. Flip the base over and attach the back support piece to the legs using screws. Make sure the support piece is level and centered before attaching it.

  5. Finally, attach the seat boards to the seat support piece using screws. Make sure the boards are evenly spaced and flush with the edges of the support piece.

  6. Once all the pieces are attached, give the base a thorough check to make sure everything is secure and level. If needed, adjust any screws or pieces that are not fitting correctly.

Congratulations, you have assembled the base of your wooden bench with a back! Now it’s time to move on to attaching the backrest and finishing the bench with stain or paint.

Building the Bench Back

Now that you have built the bench seat, it’s time to work on the bench back. The bench back will provide support and comfort while sitting on the bench. Here are the steps to build the bench back:

Step 1: Cut the Backrest Frame Pieces

To build the backrest frame, you will need to cut two pieces of 2×4 lumber to the same length as the width of the bench seat. These pieces will serve as the top and bottom rails of the backrest frame. Then, cut two more pieces of 2×4 lumber to the same height as the desired height of the backrest. These pieces will serve as the side supports of the backrest frame.

Step 2: Assemble the Backrest Frame

Lay the two top and bottom rails on a flat surface and attach the two side supports to them using wood screws. Make sure the frame is square and level before tightening the screws.

Step 3: Cut and Attach the Backrest Slats

Cut several pieces of 1×4 lumber to the same length as the width of the bench seat. These pieces will serve as the backrest slats. Attach the slats to the backrest frame using wood screws. Make sure to space the slats evenly and leave a small gap between them for comfort.

Step 4: Attach the Backrest to the Bench

Finally, attach the backrest to the bench seat using wood screws. Make sure the backrest is level and centered on the bench seat. You may also add some decorative touches to the backrest, such as carving or painting, to make it more visually appealing.

Congratulations, you have now built a wooden bench with a comfortable backrest!

Finishing the Bench

After building your wooden bench with a back, it’s time to finish it. Finishing the bench will protect the wood from weather damage and give it a polished look. Here are some steps to follow when finishing your bench.

Sanding

Before finishing your bench, you need to sand it down. Sanding will smooth out any rough edges and prepare the wood for staining or painting. Start with a coarse-grit sandpaper and work your way up to a fine-grit sandpaper. Sand in the direction of the wood grain to avoid damaging the wood.

Painting or Staining

Once your bench is sanded, you can either paint or stain it. Painting will give your bench a colorful finish, while staining will enhance the natural beauty of the wood. Here are some tips for painting or staining your bench:

  • Use a high-quality paint or stain that is suitable for outdoor use.
  • Apply the paint or stain in thin, even coats, following the manufacturer’s instructions.
  • Allow each coat to dry completely before applying the next coat.
  • Apply at least two coats of paint or stain for best results.
  • Consider using a sealer to protect the paint or stain from fading or chipping.

Overall, finishing your wooden bench with a back is an important step in the building process. By sanding and painting or staining your bench, you will create a durable and attractive piece of outdoor furniture that you can enjoy for years to come.

How to Build a Wooden Flat Bottom Boat: A Beginner's Guide

Building a wooden flat bottom boat can be a fun and rewarding experience. Whether you’re an experienced woodworker or a beginner, building a boat can be a great way to spend your time. With the right tools and materials, you can create a beautiful and functional boat that will provide you with years of enjoyment.

To start building your wooden flat bottom boat, you’ll need to gather the necessary materials. This will include wood, screws, nails, and other hardware. You’ll also need the right tools, such as a saw, drill, and hammer. Once you have everything you need, you can begin the process of building your boat.

One of the most important steps in building a wooden flat bottom boat is creating a solid foundation. This involves building a sturdy frame that will support the weight of the boat and keep it stable in the water. From there, you can begin adding the planks and other components that will make up the body of the boat. With patience and attention to detail, you can create a beautiful and functional wooden flat bottom boat that you can be proud of.

Understanding the Basics of Boat Building

Building a wooden flat bottom boat can be a rewarding experience, but it requires some basic knowledge of boat building. In this section, we will cover the materials needed and safety measures to take when building a wooden flat bottom boat.

Materials Needed

Before you start building your wooden flat bottom boat, you need to gather the necessary materials. Here is a list of the materials you will need:

Materials Quantity
Marine-grade plywood 6-8 sheets
Epoxy resin 2-3 gallons
Fiberglass cloth 5-6 yards
Wooden boards 2-3 pieces
Screws 1-2 boxes
Nails 1-2 boxes
Sandpaper 1-2 packs
Paint 1-2 gallons

These are the basic materials you will need to build a wooden flat bottom boat. You may need additional materials depending on the specific design of your boat.

Safety Measures

When building a wooden flat bottom boat, it is important to take safety measures to prevent accidents and injuries. Here are some safety measures to keep in mind:

  • Wear protective gear such as safety glasses, gloves, and a dust mask when cutting and sanding wood.
  • Use sharp tools to prevent injuries from slipping or losing control of the tool.
  • Make sure your work area is well-ventilated to prevent inhaling harmful fumes from epoxy resin and paint.
  • Keep a fire extinguisher nearby in case of a fire.
  • Never work alone, always have someone nearby in case of an emergency.

By following these safety measures, you can ensure a safe and enjoyable boat building experience.

Designing Your Flat Bottom Boat

When it comes to building a wooden flat bottom boat, the design process is crucial to ensure that your boat meets your needs and performs well on the water. Here are some important factors to consider when designing your flat bottom boat.

Choosing the Right Size

The size of your flat bottom boat will depend on your intended use. If you plan to use your boat for fishing or hunting, a smaller boat may be sufficient. However, if you plan to use your boat for recreational purposes or to transport cargo, a larger boat may be necessary.

Consider the size of the body of water where you will be using your boat. A smaller boat may be more maneuverable in narrow or shallow waterways, while a larger boat may be necessary for open water.

Drafting the Design

Before you begin building your flat bottom boat, you will need to draft a design. This can be done by hand or using computer-aided design (CAD) software.

Your design should include the dimensions of the boat, including the length, width, and depth. You should also consider the shape of the boat’s hull, which will affect its stability and performance on the water.

When designing your boat, it is important to consider the materials you will be using. Different types of wood and other materials will have different strengths and weaknesses, which will affect the durability and performance of your boat.

Overall, designing your flat bottom boat requires careful consideration of your needs and the conditions in which you will be using your boat. By taking the time to design your boat properly, you can ensure that it meets your needs and performs well on the water.

Building the Boat Frame

Building the frame of your wooden flat bottom boat is a crucial step in the boat-building process. In this section, we will cover the two main sub-sections of building the boat frame: Cutting the Wood and Assembling the Frame.

Cutting the Wood

Before you start cutting the wood, make sure you have all the necessary tools and materials. You will need a saw, a drill, screws, and wood glue. The wood you will be using for the frame should be at least 1 inch thick and of good quality.

Start by cutting the wood into the required lengths and widths. You can use a table saw or a circular saw for this. Make sure you measure the wood carefully and mark the cutting lines before you start cutting.

Once you have cut all the pieces, use a hand planer to smooth the edges and remove any rough spots. This will ensure that the pieces fit together perfectly.

Assembling the Frame

Now that you have all the pieces cut and smoothed, it’s time to assemble the frame. Start by laying out the bottom pieces and attaching the side pieces to them. Use wood glue and screws to attach the pieces securely.

Next, attach the bow and stern pieces to the sides. Make sure the pieces are aligned properly and use wood glue and screws to attach them.

Once you have assembled the basic frame, reinforce it by adding cross-braces and supports. These will help to make the frame strong and stable.

Finally, check the frame for any gaps or uneven spots. Use wood filler to fill in any gaps and sand the frame to make it smooth.

Congratulations! You have now successfully built the frame of your wooden flat bottom boat. In the next section, we will cover how to add the decking and finish the boat.

Adding the Flat Bottom

When building a wooden flat bottom boat, adding the flat bottom is a crucial step that requires careful consideration. In this section, we will discuss the two main aspects of adding the flat bottom: choosing the right wood and attaching the bottom.

Choosing the Right Wood

Choosing the right wood is important because it will affect the durability and overall quality of your boat. The wood you choose should be strong, lightweight, and resistant to rot and decay. Some common types of wood used for boat building include:

  • Marine-grade plywood
  • Cedar
  • Mahogany
  • Teak

Marine-grade plywood is a popular choice because it is strong, lightweight, and resistant to moisture. Cedar is also a good choice because it is lightweight and has natural rot-resistant properties. Mahogany and teak are more expensive options, but they are known for their beautiful appearance and durability.

When choosing your wood, make sure to select pieces that are straight and free of knots or other defects. This will ensure that your boat is strong and stable.

Attaching the Bottom

Attaching the flat bottom to your boat requires careful attention to detail. The bottom should be attached securely to prevent leaks and ensure stability. Here are some steps to follow when attaching the bottom:

  1. Cut the bottom to the correct size and shape, making sure to leave a small overhang around the edges.
  2. Apply a layer of epoxy to the bottom of the boat, making sure to spread it evenly.
  3. Place the bottom onto the epoxy and press down firmly.
  4. Use screws or nails to secure the bottom to the boat, making sure to space them evenly and avoid placing them too close to the edges.
  5. Apply another layer of epoxy over the screws or nails to seal them and prevent leaks.

By following these steps and choosing the right wood, you can ensure that your wooden flat bottom boat will be strong, stable, and reliable.

Finishing Touches

Once you have completed building your wooden flat bottom boat, it’s time to give it a finishing touch that will make it look great and extend its lifespan. In this section, we will discuss two essential finishing touches: sanding the boat and applying sealant.

Sanding the Boat

Sanding your boat is an essential step in the finishing process. Sanding helps to smooth out any rough spots, remove any splinters, and prepare the surface for sealing. To sand your boat, follow these steps:

  1. Start with a coarse grit sandpaper (60-80 grit) to remove any rough spots or splinters.
  2. Gradually move to a finer grit sandpaper (120-150 grit) to smooth out the surface.
  3. Finally, use a very fine grit sandpaper (220 grit) to give the surface a smooth finish.

Make sure to sand in the direction of the grain to avoid damaging the wood. After sanding, wipe the boat with a clean, damp cloth to remove any dust or debris.

Applying Sealant

Applying a sealant is an essential step in protecting your boat from water damage and weathering. There are different types of sealants available, but marine-grade varnish is the most commonly used. To apply sealant to your boat, follow these steps:

  1. Stir the sealant thoroughly to ensure that it is well-mixed.
  2. Use a brush to apply the sealant to the boat’s surface, working in the direction of the grain.
  3. Apply a thin coat of sealant and let it dry completely before applying another coat.
  4. Repeat the process until you have applied at least three coats of sealant.
  5. Allow the final coat of sealant to dry for at least 24 hours before using the boat.

Remember to sand lightly between coats to ensure a smooth finish. Also, avoid applying the sealant in direct sunlight or when the temperature is below 50°F.

By following these steps, you can give your wooden flat bottom boat a beautiful finish that will protect it from the elements and keep it looking great for years to come.

Launching Your Boat

Launching your wooden flat bottom boat can be an exciting and rewarding experience. Before you do, it is important to make sure you have completed all necessary pre-launch checks and are prepared for the first launch.

Pre-launch Checks

Before launching your boat, there are a few important checks you should make to ensure your safety and the safety of others on the water:

  • Check the weather forecast: Make sure the weather is suitable for boating and that there are no storms or high winds forecasted.
  • Check your equipment: Make sure you have all necessary safety equipment on board, such as life jackets, flares, and a fire extinguisher. Also, make sure your boat’s bilge pump is working properly.
  • Check the water level: Make sure the water level is high enough to launch your boat safely.
  • Check the launch site: Make sure the launch site is suitable for your boat and that there are no obstacles or hazards in the water.

First Launch

When launching your boat for the first time, it is important to take things slow and steady. Here are a few tips to help make your first launch a success:

  • Back your trailer into the water: Back your trailer into the water until the boat is partially submerged.
  • Release the boat: Release the boat from the trailer and let it float freely.
  • Secure the boat: Secure the boat to the dock or shore using ropes or anchors.
  • Check for leaks: Check the boat for leaks and make sure the bilge pump is working properly.
  • Start the engine: Start the engine and let it warm up before heading out on the water.
  • Take it slow: Take it slow and steady at first until you get a feel for how the boat handles.

With these pre-launch checks and first launch tips, you can safely and successfully launch your wooden flat bottom boat and enjoy all the fun and excitement of being out on the water.

How to Build a Wooden Side Table: A Beginner's Guide

Building your own side table can be a fun and rewarding DIY project. Not only can you save money by building it yourself, but you can also customize it to fit your specific style and needs. A wooden side table can add warmth and character to any room, and it’s a great beginner woodworking project.

Before you start building, it’s important to have a plan and gather all the necessary materials and tools. You can find free plans online or create your own design. The materials you’ll need will depend on the size and style of the table, but typically include wood boards, screws, wood glue, and a finish. You’ll also need basic woodworking tools like a saw, drill, and sander. Once you have everything you need, it’s time to get started on your wooden side table project.

Understanding the Basics

Before you start building your own wooden side table, it is important to understand the basics of woodworking. This will help you create a sturdy and functional piece of furniture that you can be proud of. In this section, we will cover the types of wood you can use for your project and the safety measures you need to take to avoid accidents.

Types of Wood

Choosing the right type of wood is crucial for the success of your project. There are many types of wood available, each with its own unique characteristics. Here are some of the most popular types of wood for furniture making:

  • Pine: A softwood that is easy to work with and has a rustic look.
  • Oak: A hardwood that is strong and durable, with a distinct grain pattern.
  • Maple: A hardwood that is hard and dense, with a fine grain pattern.
  • Cherry: A hardwood that is known for its rich, warm color and smooth texture.

When choosing your wood, consider the look you want to achieve and the durability you need. It is also important to choose wood that is straight and free of knots, as this will make it easier to work with and create a smooth finish.

Safety Measures

When working with wood, safety should always be your top priority. Here are some safety measures you should take before starting your project:

  • Wear protective gear: This includes safety glasses, earplugs, and a dust mask.
  • Use sharp tools: Dull tools can be dangerous and cause accidents. Make sure your tools are sharp and in good condition.
  • Keep your workspace clean: A cluttered workspace can lead to accidents. Keep your workspace clean and organized.
  • Use clamps: Clamps can help keep your wood in place and prevent it from moving while you work on it.
  • Follow instructions: Make sure you read and understand the instructions for your tools and equipment before using them.

By following these safety measures, you can ensure that your woodworking project is not only successful but also safe.

Gathering Your Materials

Before you begin building your wooden side table, you’ll need to gather all the necessary materials. Here are the two main things you’ll need to consider:

Wood Selection

Choosing the right wood for your side table is crucial. You want to select a wood that is strong, durable, and visually appealing. Here are some popular options:

  • Pine: A softwood that is easy to work with and affordable.
  • Oak: A hardwood that is strong and durable, but can be more expensive.
  • Maple: Another hardwood that is strong and durable, with a smooth and uniform grain pattern.
  • Walnut: A high-end hardwood that is known for its rich, dark color and beautiful grain pattern.

When selecting your wood, be sure to consider the size of your side table and the weight it will need to support. You’ll also want to choose a wood that matches your personal style and the overall look of your home.

Tool Requirements

In addition to your wood selection, you’ll also need to gather the necessary tools to build your side table. Here are some of the most common tools you’ll need:

  • Saw (circular or table saw)
  • Drill
  • Wood glue
  • Clamps
  • Sandpaper
  • Wood stain or paint (optional)

You may also need additional tools depending on the specific design of your side table. Be sure to review the instructions carefully and gather all the necessary tools before you begin.

Creating Your Design

When building a wooden side table, the first step is to create a design that fits your needs and style. Here are a few things to consider when creating your design:

Size and Shape

Think about where you will be placing your side table and how much space you have available. Consider the height of the table in relation to the furniture around it. You want to make sure that the table is the right size and shape for your space and needs.

Materials

Wood is a popular material for side tables because it is sturdy and durable. However, there are many different types of wood to choose from, each with its own unique characteristics. Consider the type of wood that will work best for your design and budget.

Style

The style of your side table should match the overall decor of your room. Do you want a modern or traditional look? Do you want a simple or ornate design? Consider the style of your existing furniture and choose a design that complements it.

Functionality

Think about how you will be using your side table. Will it be used for storage or as a decorative piece? Will it be used for holding drinks or as a place to set down your book? Consider the functionality of your table and design it accordingly.

Once you have considered these factors, you can start sketching out your design. Use graph paper to create a scale drawing of your table, including the dimensions and any decorative elements. This will help you visualize your design and make any necessary adjustments before you start building.

Remember, the design process is an important part of building a wooden side table. Take your time and create a design that reflects your personal style and meets your needs.

Cutting the Wood

Before you begin building your wooden side table, you need to cut the wood to the appropriate sizes. Here are the steps to follow:

  1. Measure and mark the wood. Use a measuring tape to measure the length and width of each piece of wood you need to cut. Mark the measurements on the wood using a pencil and a straight edge.

  2. Prepare your saw. You can use a miter saw or a table saw to cut the wood. Make sure your saw is properly set up and adjusted before you begin cutting.

  3. Cut the wood. Use your saw to cut the wood along the marked lines. Take your time and be careful to make straight and accurate cuts. If you’re using a miter saw, use the appropriate angle settings to make angled cuts.

  4. Sand the edges. After you’ve cut the wood, use sandpaper to smooth out any rough edges or splinters. This will help prevent injuries and give your table a more polished look.

  5. Repeat as necessary. Depending on the design of your table, you may need to cut multiple pieces of wood to the same size. Repeat the above steps for each piece of wood.

By following these steps, you’ll be able to cut your wood to the correct sizes and prepare it for assembly. Remember to always wear appropriate safety gear, such as safety glasses and ear protection, when using power tools.

Assembling the Table

Once you have all the pieces cut and ready, it’s time to assemble your side table. In this section, we’ll go over the steps to join the pieces and secure the table top.

Joining the Pieces

To join the legs and aprons, you can use pocket hole joinery or mortise and tenon joints. Pocket hole joinery is easier and faster, while mortise and tenon joints provide a stronger and more traditional joint.

Pocket Hole Joinery

If you’re using pocket hole joinery, start by drilling pocket holes in the aprons. Then, attach the aprons to the legs using pocket hole screws. Make sure the aprons are flush with the top of the legs and use clamps to hold them in place while you screw them together.

Mortise and Tenon Joints

If you’re using mortise and tenon joints, start by cutting the mortises in the legs and the tenons in the aprons. Then, dry fit the pieces together to make sure everything fits snugly. Finally, apply glue to the mortises and tenons and clamp the pieces together until the glue dries.

Securing the Table Top

To secure the table top, you can use screws or dowels. Screws are easier and faster, while dowels provide a more traditional and elegant look.

Screws

If you’re using screws, start by drilling pilot holes in the table top. Then, attach the top to the aprons using screws. Make sure the top is centered and use clamps to hold it in place while you screw it down.

Dowels

If you’re using dowels, start by drilling holes in the table top and aprons. Then, insert the dowels and apply glue to the holes. Finally, clamp the pieces together until the glue dries.

That’s it! Your side table is now assembled and ready to use.

Sanding and Finishing

Sanding Process

Before applying a finish to your wooden side table, it’s important to properly sand it to ensure a smooth surface. Follow these steps to sand your table:

  1. Start with coarse-grit sandpaper, around 100 grit, and sand in the direction of the grain. This will remove any rough spots or imperfections on the surface of the wood.

  2. Next, move on to a finer-grit sandpaper, around 150 grit, and sand again in the direction of the grain. This will help to smooth out the surface even more.

  3. Finally, use a very fine-grit sandpaper, around 220 grit, to give the surface a final sanding. This will create a smooth surface that is ready for finishing.

Be sure to wipe down the surface of the table with a tack cloth after each sanding step to remove any dust or debris.

Applying Finish

Once your wooden side table is sanded, it’s time to apply a finish to protect the wood and give it a beautiful, polished look. Here are some tips for applying finish:

  1. Apply a wood conditioner to the surface of the table before staining. This will help the stain to absorb evenly and prevent blotching.

  2. Apply the stain with a brush or cloth, making sure to work in the direction of the grain. Apply a thin, even coat and wipe away any excess with a clean cloth.

  3. Allow the stain to dry completely before applying a protective finish. You can use a clear coat of polyurethane or a wax finish to protect the wood and give it a polished look.

  4. Apply the protective finish with a brush or cloth, making sure to work in the direction of the grain. Apply a thin, even coat and allow it to dry completely before applying additional coats.

By following these steps, you can create a beautiful, polished wooden side table that will last for years to come.

Maintenance Tips

After building your wooden side table, you’ll want to keep it looking its best for years to come. Here are some simple maintenance tips to follow:

  • Clean regularly: Dust and debris can accumulate on your side table over time, so it’s important to clean it regularly. Use a soft cloth or a feather duster to remove any dirt or dust that has collected on the surface.

  • Avoid water damage: Water can cause damage to your wooden side table, so be sure to wipe up any spills immediately. Avoid placing wet items on the table, such as glasses or vases that may leave water rings.

  • Protect from direct sunlight: Direct sunlight can cause the wood to fade or discolor over time. To prevent this, try to position your side table away from direct sunlight or use window coverings to filter the light.

  • Use coasters: To prevent scratches or damage to the surface of your side table, use coasters under drinks and other items that may scratch the wood.

  • Apply furniture polish: To keep your side table looking shiny and new, apply furniture polish or wax every few months. Be sure to follow the manufacturer’s instructions and use a soft cloth to apply the polish evenly.

By following these simple maintenance tips, you can keep your wooden side table looking beautiful for years to come.

How to Make Wooden TV Trays: A Beginner's Guide

Are you looking for a fun and practical woodworking project? Look no further than building your own wooden TV trays! These versatile trays are perfect for meals, drinks, or even as a laptop stand. Plus, making them yourself allows you to customize the size, shape, and style to fit your specific needs and preferences.

To get started, you’ll need to choose the type of wood you want to use. Pine is a great option for beginners, as it is easy to work with and relatively inexpensive. You’ll also need to decide on the size of your tray. While a standard TV tray is typically 18 inches wide and 12 inches deep, you can adjust the dimensions to fit your space and needs.

Once you have your materials and measurements, it’s time to start building! With some basic woodworking tools and techniques, you can create a set of beautiful and functional TV trays that will last for years to come. So why not give it a try? Your family and guests will love having their own custom TV trays, and you’ll enjoy the satisfaction of creating something with your own two hands.

Understanding the Basics of Woodworking

Woodworking is a fun and rewarding hobby that allows you to create beautiful and functional objects out of wood. Whether you’re a beginner or an experienced woodworker, it’s important to understand the basics of woodworking before you start your next project.

Types of Wood

One of the most important things to consider when woodworking is the type of wood you’ll use for your project. Different types of wood have different properties and characteristics, which can affect how they’re cut, shaped, and finished.

Here are some common types of wood used in woodworking:

Type of Wood Characteristics
Pine Soft, lightweight, easy to work with
Oak Hard, durable, popular for furniture
Maple Hard, dense, good for carving and turning
Cherry Hard, fine-grained, reddish-brown color
Walnut Hard, durable, dark brown color

When choosing wood for your project, consider factors such as the wood’s strength, hardness, and grain pattern. It’s also important to consider the cost and availability of the wood you choose.

Safety Measures in Woodworking

Woodworking can be a safe and enjoyable hobby, but it’s important to take proper safety measures to prevent accidents and injuries. Here are some basic safety tips to keep in mind:

  • Always wear eye and ear protection when using power tools.
  • Use sharp tools and blades to reduce the risk of kickback and other accidents.
  • Keep your work area clean and free of clutter to prevent tripping hazards.
  • Never work with wood that has knots, cracks, or other defects that could cause it to split or break.
  • Always follow the manufacturer’s instructions when using power tools and equipment.

By following these basic safety tips, you can help ensure that your woodworking projects are safe and enjoyable for years to come.

Gathering Your Materials

Before you can start building your wooden TV trays, you need to gather all the necessary materials. This section will guide you through the materials you need to build your TV trays.

Wood

The first thing you need to consider is the type of wood you want to use for your TV trays. Pine is a great choice for beginners because it is easy to work with and relatively inexpensive. However, if you want a more durable and long-lasting tray, you may want to consider using oak or maple.

When purchasing your wood, you will need to decide on the thickness you want. A standard TV tray is typically around ¾ inch thick, but you can adjust this to your preference. You will also need to decide on the size of your tray, which is typically around 18 inches wide and 12 inches deep.

Tools and Equipment

To build your TV trays, you will need a few basic tools and equipment. Here is a list of what you will need:

  • Table saw or radial arm saw
  • Router with a corner rounding bit and a laminate trimming bit
  • Bandsaw or sabre saw
  • Drill
  • Chisel for scraping
  • Screwdrivers (straight and offset straight)
  • Sandpaper
  • Wood glue
  • Hardwood dowels
  • Aluminum bar stock
  • Brass woodscrews
  • Wood and sheet metal screws
  • Varnish or shellac

It’s important to have the right tools and equipment to make the job easier and ensure that your TV trays turn out as expected. If you don’t have all of the tools listed, you may be able to rent them from a local hardware store or borrow them from a friend.

Now that you have gathered all the necessary materials, you are ready to start building your wooden TV trays.

Designing Your Wooden TV Tray

When it comes to designing your wooden TV tray, there are a few key factors to consider. This section will cover the dimensions, style, and aesthetics of your TV tray.

Dimensions

The first thing to consider when designing your wooden TV tray is the dimensions. While a standard TV tray is typically 18 inches wide and 12 inches deep, you can adjust the measurements to suit your needs. Consider the size of your television and the height of your seating arrangement when deciding on the dimensions of your tray.

Additionally, you’ll want to consider the height of your tray. A good rule of thumb is to make the height of your tray equal to the height of your armrests. This will ensure that your tray is at a comfortable height for eating or working.

Style and Aesthetics

The style and aesthetics of your wooden TV tray are also important to consider. You’ll want to choose a style that complements the decor of your room. Consider the color, texture, and finish of your tray when making your design choices.

One popular option for wooden TV trays is to use pallet wood. This can give your tray a rustic, vintage look that is very trendy right now. Another option is to use hardwoods like oak or maple for a more classic, traditional look.

When it comes to the finish of your tray, you can choose from a variety of options. A clear coat of varnish or shellac will give your tray a natural, glossy finish. Alternatively, you can use a stain or paint to add color and texture to your tray.

Overall, the key to designing a wooden TV tray is to consider both form and function. Choose dimensions that are comfortable and practical, and select a style and finish that complements your room’s decor.

Preparing the Wood

Before you can start building your wooden TV trays, you need to prepare the wood. This involves cutting the wood to the appropriate size and sanding it to make it smooth and free of any rough edges. Here’s what you need to do:

Cutting the Wood

The first step is to cut the wood to the size you want. A standard TV tray is typically 18 inches wide and 12 inches deep, but you can adjust the size to fit your needs. To cut the wood, you’ll need a saw. A table saw or a radial arm saw works best, but you can also use a circular saw or a hand saw if that’s all you have.

When cutting the wood, make sure to measure twice and cut once. You don’t want to make any mistakes and end up with uneven pieces. If you’re not sure how to use a saw, ask someone for help or watch some tutorials online.

Sanding the Wood

Once you’ve cut the wood to size, the next step is to sand it. Sanding the wood will make it smooth and free of any rough edges. To sand the wood, you’ll need sandpaper. You can use a sanding block or an electric sander if you have one.

Start with a coarse grit sandpaper and work your way up to a finer grit. This will ensure that the wood is smooth and free of any imperfections. Make sure to sand the edges of the wood as well to remove any splinters.

After sanding the wood, wipe it down with a damp cloth to remove any dust. Your wood is now ready to be assembled into TV trays.

Assembling the TV Tray

Once you have cut and sanded all the pieces needed for your TV tray, it’s time to start assembling them. In this section, we’ll cover the two main steps of assembling your TV tray: joining the pieces and securing the tray top.

Joining the Pieces

The first step in assembling your TV tray is to join the legs to the side pieces. You can use a variety of methods to join these pieces, including pocket screws, dowels, or biscuits. No matter which method you choose, be sure to clamp the pieces together tightly while the glue dries to ensure a strong joint.

Next, attach the support pieces to the legs. These pieces will help keep the legs stable and prevent wobbling. Again, use clamps to hold the pieces together while the glue dries.

Securing the Tray Top

Once the legs and supports are attached, it’s time to add the tray top. Place the tray top on the supports and center it so that there is an equal amount of overhang on all sides. Use clamps to hold the tray top in place while you attach it to the supports.

To attach the tray top, you can use screws, nails, or even dowels. Be sure to pre-drill any holes to prevent splitting the wood. You can also add corner braces to the underside of the tray top for added stability.

With the tray top attached, your TV tray is almost complete. Finish the tray with a coat of stain or paint to protect the wood and give it a polished look.

Remember to take your time and work carefully when assembling your TV tray. With the right tools and techniques, you can create a beautiful and functional piece of furniture that will last for years to come.

Finishing Touches

Once you have completed the construction of your wooden TV tray, it’s time to add the finishing touches. This will not only enhance the appearance of your tray but also protect it from everyday wear and tear. In this section, we will cover two sub-sections: Applying the Finish and Adding Additional Features.

Applying the Finish

Before applying the finish, it’s important to sand the tray to ensure a smooth surface. You can use a sandpaper with a grit of 220 or higher. Once the sanding is complete, you can apply the finish of your choice. There are several options available, such as oil-based finishes, water-based finishes, and lacquer finishes. Each has its own advantages and disadvantages, so it’s important to choose the one that best suits your needs.

When applying the finish, make sure to follow the manufacturer’s instructions carefully. You can use a brush, roller, or spray gun to apply the finish. Make sure to apply it in thin, even coats and allow each coat to dry completely before applying the next one. You may need to sand lightly between coats to ensure a smooth finish.

Adding Additional Features

If you want to add some extra features to your TV tray, there are several options available. You can add a cup holder to keep your drink secure while you watch TV. You can also add a storage compartment to keep your remote control, magazines, or other items within reach. Another option is to add a non-slip surface to prevent items from sliding off the tray.

To add a cup holder or storage compartment, you can cut a hole in the tray and insert a cup holder or storage container. Make sure to sand the edges of the hole to ensure a smooth finish. You can also add a non-slip surface by attaching rubber feet or using a non-slip mat.

In conclusion, adding the finishing touches to your wooden TV tray is essential to enhance its appearance and protect it from everyday wear and tear. By following the instructions carefully, you can apply the finish of your choice and add additional features to make your tray more functional.

How to Remove Carpet Glue from Wooden Floor: A Step-by-Step Guide

Removing carpet glue from a wooden floor can be a daunting task, but it is necessary if you want to restore the natural beauty of your hardwood floors. Carpet glue can be stubborn and difficult to remove, but with the right tools and techniques, you can get the job done quickly and efficiently.

One of the most important things to keep in mind when removing carpet glue from a wooden floor is to be patient. It may take some time and effort to get all of the glue off, but rushing the process can damage your floors. It is also important to use the right tools and techniques to avoid damaging the wood. With the right approach, you can remove the glue without causing any harm to your floors.

Understanding Carpet Glue

If you have ever removed carpeting from a wood floor, you know that it can be a tedious task. One of the most challenging parts of this process is removing the residual glue that remains on the floor. Carpet glue is a stiff and strong solvent used to adhere a carpet to a floor. Because of its toughness, removing it is difficult, and as you will see, taking off carpet glue or adhesive off wood floors is not as simple as it looks.

Carpet glue is typically made of synthetic polymer resins that are mixed with solvents. The solvents help to dissolve the resins, which allows the glue to be spread evenly on the floor. Once the glue dries, it forms a strong bond with the floor, which keeps the carpet in place.

There are several types of carpet glue available on the market, and each has its unique properties. Some glue is water-based, while others are solvent-based. Some glue is designed for use on concrete floors, while others are designed for use on wood floors. It is essential to understand the type of glue you are dealing with to remove it effectively.

Carpet glue varies in color, texture, and thickness. Some glue looks more terrible than others. Some glue is easy to remove, while others require more effort and time. The type of carpet glue you are dealing with will determine the best method to remove it.

In the next section, we will look at some of the methods you can use to remove carpet glue from a wood floor.

Necessary Tools and Materials

Removing carpet glue from a wooden floor requires specific tools and materials. Here are the essential items that you will need:

Scraper

A scraper is a tool that you will use to remove the carpet glue from the wooden floor. You can use a spackling tool or a hoe as a scraper. A spackling tool is a flat metal tool that you can use to scrape off the glue from the floor. A hoe is a tool with a flat blade that you can use to scrape off the glue from the floor.

Adhesive Remover

An adhesive remover is a solvent that you can use to dissolve the carpet glue from the wooden floor. You can use a mineral-based solvent or an orange-based solvent. A mineral-based solvent is more effective in removing the glue, while an orange-based solvent is less pervasive. Make sure to read the instructions on the adhesive remover before using it.

Protective Gear

Protective gear is essential when removing carpet glue from a wooden floor. You should wear rubber gloves, rubber boots, and goggles to protect your skin and eyes from the adhesive remover. The adhesive remover can be harmful to your skin and eyes, so make sure to take the necessary precautions.

In summary, to remove carpet glue from a wooden floor, you will need a scraper, an adhesive remover, and protective gear. These tools and materials will help you remove the glue effectively and safely.

Safety Precautions

When removing carpet glue from a wooden floor, there are some safety precautions you should take to ensure your well-being and the safety of your property. Here are some tips to keep in mind:

Wear Protective Gear

Before starting the process, make sure you wear protective gear, including rubber gloves, goggles, and rubber boots. This will protect your skin from chemical burns, splinters, and other injuries that may occur during the removal process.

Ventilate the Room

When using any chemical solvents, make sure you have proper ventilation in the room. Open windows and doors to allow fresh air to circulate. If you are using a chemical solvent, wear a mask to avoid inhaling fumes.

Keep the Area Clean

Make sure the area you are working in is clean and free of clutter. This will prevent accidents and make it easier to move around. Also, keep children and pets away from the area to avoid any accidents.

Follow Instructions

Read and follow the instructions on the product label carefully. Some solvents may require specific instructions for use, and not following them may lead to accidents or damage to the floor.

Test the Solvent

Before using any solvent, test it on a small, inconspicuous area of the floor to make sure it does not damage the wood. If the solvent causes damage, do not use it on the rest of the floor.

By following these safety precautions, you can ensure a safe and successful removal of carpet glue from your wooden floor.

Step-By-Step Guide

Removing carpet glue from a wooden floor may seem like a daunting task, but with the right tools and techniques, it can be done efficiently. Here is a step-by-step guide to help you remove carpet glue from your wooden floor.

Clearing the Area

Before starting, clear the area around the wooden floor. Remove any furniture, rugs, or other items that may obstruct your work. Cover any vents, electrical outlets, or other openings to prevent dust and debris from entering.

Applying the Adhesive Remover

Apply adhesive remover to a small section of the wooden floor. Allow the adhesive remover to sit for a few minutes to dissolve the glue. Use a scraper to remove the softened glue. Repeat the process until all the glue is removed.

Scraping Off the Glue

Use a scraper to remove any remaining glue from the wooden floor. Be careful not to scratch the surface of the wood. Use a plastic scraper or putty knife to avoid damage to the surface.

Sanding the Floor

After removing the glue, sand the wooden floor to remove any remaining residue. Start with a coarse grit sandpaper and work your way up to a finer grit sandpaper. Sand in the direction of the wood grain to avoid damaging the surface.

Cleaning the Wooden Floor

After sanding, clean the wooden floor with a vacuum cleaner or broom to remove any dust or debris. Then, use a damp mop to clean the surface. Allow the floor to dry completely before applying any finish.

By following these steps, you can remove carpet glue from your wooden floor and restore its natural beauty.

Troubleshooting Common Problems

Residual Glue

If you have removed the carpet from your wooden floor, you may still be left with residual glue. This can be difficult to remove, but there are a few things you can try. First, try scraping the glue with a plastic putty knife. If this doesn’t work, you can try using a solvent to dissolve the glue. Be sure to follow the manufacturer’s instructions carefully and wear protective gear such as rubber gloves and a respirator. You may need to repeat the process several times to completely remove the glue.

Damage to the Wooden Floor

Removing carpet glue from a wooden floor can be a delicate process, and it’s possible to damage the floor if you’re not careful. If you notice any damage to the floor, stop immediately and assess the situation. If the damage is minor, you may be able to sand it out. If the damage is more severe, you may need to replace the affected boards.

It’s also important to be careful when using tools such as scrapers and sanders. Make sure you’re using the right tool for the job and that you’re using it correctly. If you’re not sure, it’s always a good idea to consult a professional.

In summary, removing carpet glue from a wooden floor can be a challenging task, but with the right tools and techniques, it can be done. Be patient, take your time, and be careful not to damage the floor. If you run into any problems, don’t hesitate to seek professional help.

Maintaining Your Wooden Floor After Glue Removal

Now that you have successfully removed the carpet glue from your wooden floor, it’s time to focus on maintaining your floor’s beauty and longevity. Here are some tips to help you take care of your wooden floor after glue removal:

1. Clean Your Floor Regularly

You should clean your wooden floor regularly to keep it looking good and to prevent any damage. Use a soft-bristled broom or a vacuum cleaner to remove dirt, dust, and debris. Avoid using a wet mop as it can damage your wooden floor.

2. Use a Protective Coating

After removing the glue, you can apply a protective coating to your wooden floor. This will help protect your floor from scratches, stains, and other damage. There are different types of protective coatings available, including polyurethane and wax. Choose the one that suits your needs and preferences.

3. Avoid Water Spills

Water can damage your wooden floor, so it’s important to avoid spills. If you spill water on your wooden floor, clean it up immediately. You can use a dry cloth or a mop to absorb the water. Don’t let water sit on your wooden floor for too long as it can cause warping and other damage.

4. Use Furniture Pads

Furniture can scratch your wooden floor, so it’s important to use furniture pads. These pads can be placed under the legs of your furniture to protect your floor from scratches. You can find furniture pads in different sizes and materials, such as felt or rubber.

By following these tips, you can maintain the beauty and longevity of your wooden floor after removing the carpet glue. Remember to clean your floor regularly, use a protective coating, avoid water spills, and use furniture pads.

How to Make a Wooden Sign Stand Up: A Simple Guide

Are you looking for a simple and effective way to make your wooden sign stand up? Look no further! In this article, we will show you a step-by-step process to make your sign stand securely and prominently. Whether you want to display your favorite quote, a family name, or a business logo, a wooden sign is a classic and timeless way to do it. However, if you don’t have a proper stand, your sign may not get the attention it deserves.

To start, you will need a few basic tools and materials. Depending on the size and design of your sign, you may need a saw, drill, sandpaper, and wood glue. You will also need a piece of wood for your sign and a separate piece of wood for the stand. Once you have gathered your supplies, you can begin the process of making your wooden sign stand up.

Understanding Wood Types

When it comes to making a wooden sign stand up, choosing the right type of wood is crucial. Not all woods are created equal, and some are better suited for certain projects than others. Here are the two main types of wood you’ll encounter:

Hardwood

Hardwood comes from deciduous trees, which are trees that lose their leaves in the fall. Hardwood is generally denser and more durable than softwood, making it a great choice for projects that need to withstand wear and tear. Some common types of hardwood used for woodworking projects include:

  • Oak
  • Maple
  • Cherry
  • Walnut
  • Mahogany

Softwood

Softwood comes from coniferous trees, which are trees that have needles instead of leaves. Softwood is generally less dense and less expensive than hardwood, making it a popular choice for many woodworking projects. Some common types of softwood used for woodworking projects include:

When choosing a wood for your sign, consider the look you’re going for, as well as the durability you need. Hardwoods can be more expensive, but they also tend to last longer. Softwoods are more affordable, but they may not hold up as well over time. Keep in mind that different woods also take stain and paint differently, so you may want to test a small piece of wood before committing to a larger project.

Choosing the Right Tools

When it comes to making a wooden sign stand up, having the right tools is crucial. Here are some tools you’ll need:

Saw

To create a wooden sign stand, you’ll need to cut the wood to size. A miter saw is a great option for making precise cuts at different angles. If you don’t have a miter saw, a circular saw or hand saw can also get the job done.

Hammer

A hammer is necessary for attaching the pieces of wood together. You’ll need to use finishing nails or screws to secure the wood pieces in place. A claw hammer is a good choice for this task.

Screws

Screws are another option for attaching the wood pieces together. They provide a stronger hold than finishing nails and are less likely to loosen over time. Make sure to choose screws that are the appropriate length for your wood pieces.

Overall, having the right tools will make your wooden sign stand project much easier and more enjoyable. With a saw, hammer, and screws, you’ll be well on your way to creating a beautiful and sturdy sign stand.

Designing Your Sign

Before you start building your wooden sign, you need to plan and design it. Here are some steps to help you design your sign:

Sketching

The first step in designing your sign is to sketch out your ideas. You can use a pencil and paper or a digital drawing tool to create your design. Make sure to include all the details you want on your sign, such as text, images, and any additional decorations.

Measuring

Once you have your sketch, you need to measure the size of your sign. Consider the location where you will place your sign and make sure it is the appropriate size. You can use a ruler or measuring tape to measure the length and width of your sign.

Cutting

After you have your design and measurements, it’s time to cut your wood. You can use a saw or a jigsaw to cut your wood to the appropriate size. Make sure to wear protective gear, such as safety glasses and gloves, when cutting your wood.

When cutting your wood, make sure to cut it straight and even. This will ensure that your sign looks neat and professional. If you are using a jigsaw, make sure to follow the lines of your design carefully.

By following these steps, you can design your wooden sign and prepare it for the next steps in the building process.

Creating a Base

Choosing the Base Material

When creating a wooden sign, the base is an important component that provides stability and ensures the sign stands upright. The material you choose for the base will depend on the size and weight of your sign, as well as the environment in which it will be displayed.

Some popular materials for bases include:

  • Wood: A wooden base can be easily customized to match the sign and is a great option for indoor use. However, it may not be as durable as other materials and may not hold up well in outdoor environments.

  • Metal: A metal base is strong and durable, making it a good option for outdoor use. It may also provide a modern or industrial look to the sign.

  • Concrete: A concrete base is heavy and sturdy, making it ideal for larger signs or outdoor use. It can also be painted or stained to match the sign.

Assembling the Base

Once you have chosen the material for your base, it’s time to assemble it. Here are some general steps to follow:

  1. Measure and cut the base material to the desired size. Make sure it is large enough to support the weight of the sign.

  2. Sand the edges of the base to smooth out any rough spots or sharp edges.

  3. If using wood, you may want to stain or paint the base to match the sign.

  4. Attach the sign to the base using screws or bolts. Make sure the sign is centered and level on the base.

  5. If using a metal or concrete base, you may want to add rubber feet or pads to the bottom to prevent scratching or damage to the surface it will be placed on.

By following these steps, you can create a sturdy and attractive base for your wooden sign that will help it stand up and stay in place.

Attaching the Sign to the Base

Once you have chosen the perfect wooden sign and created a sturdy base, it’s time to attach the sign to the base. Here are some simple steps to follow:

Positioning

First, you need to decide where on the base you want to position the sign. Place the sign on top of the base in the desired location and make sure it is level. You can use a level or simply eyeball it. Once you are happy with the position, mark the four corners of the sign on the base with a pencil.

Securing

Now that you have marked the corners, it’s time to secure the sign to the base. There are several ways to do this, but one of the easiest and most effective methods is to use screws.

  1. Drill pilot holes: Use a drill bit that is slightly smaller than your screws to drill pilot holes at each of the four corners where you made your marks.

  2. Attach the sign: Place the sign back on the base in the desired position and use wood screws to attach it to the base through the pilot holes. Make sure the screws are long enough to go through the sign and into the base, but not so long that they poke through the other side.

  3. Add additional support: For larger signs or signs that will be exposed to wind or other elements, you may want to add additional support. You can do this by attaching L-brackets or metal straps to the back of the sign and base, or by driving stakes into the ground and securing the base to the stakes.

By following these simple steps, you can securely attach your wooden sign to the base and ensure that it stands up straight and true.

Finishing Touches

Once you have completed the construction of your wooden sign, it’s time to add the finishing touches that will make it stand out. Here are some tips on sanding, painting, and varnishing your wooden sign to give it a professional look.

Sanding

Before painting or varnishing your wooden sign, it’s important to sand it down to a smooth finish. This will ensure that the paint or varnish adheres properly to the wood and that there are no rough spots or splinters that could cause injury.

To sand your wooden sign, start with a coarse grit sandpaper and work your way up to a finer grit. Use a sanding block to keep the sandpaper flat against the wood and to avoid creating uneven spots. Once you have sanded the entire surface of the sign, wipe it down with a damp cloth to remove any dust or debris.

Painting

Painting your wooden sign is a great way to add color and personality. Choose a paint color that complements the design of your sign and use a high-quality paint brush to apply the paint evenly.

To avoid drips or smudges, apply the paint in thin layers and allow each layer to dry completely before applying the next. If you want to add a distressed look to your wooden sign, use sandpaper to lightly sand away some of the paint after it has dried.

Varnishing

Varnishing your wooden sign will protect it from the elements and give it a glossy finish. Choose a clear, outdoor-grade varnish that will withstand rain, sun, and wind.

To apply the varnish, use a clean paint brush and work in long, even strokes. Apply two or three coats, allowing each coat to dry completely before applying the next. Once the varnish has dried, use a fine grit sandpaper to lightly sand away any rough spots or bubbles.

By following these tips for sanding, painting, and varnishing your wooden sign, you can create a beautiful and durable piece that will last for years to come.

How to Make a Wooden Bench-Vise: Simple DIY Guide

Are you looking to make your own wooden bench vise? With a few basic tools and some patience, you can create a functional and durable vise that will last for years to come. Whether you’re a seasoned woodworker or just starting out, making your own vise can be a rewarding and satisfying project.

Before you begin, it’s important to have a plan in place. You can find free PDF plans online or create your own based on the dimensions you need. Once you have your plan, gather your materials. You’ll need wood for the jaws, handle, and screw, as well as hardware like screws and nuts. With everything in hand, you’re ready to get started on your bench vise project.

Understanding the Basics of a Wooden Bench-Vise

If you are interested in woodworking, you know that a bench-vise is an essential tool that can help you hold your workpieces securely while you work on them. A wooden bench-vise is an excellent option for those who prefer a traditional and rustic look, and it can be a fun DIY project to build one yourself. In this section, we will go over the basics of a wooden bench-vise and what you need to know before you start building one.

What is a Bench-Vise?

A bench-vise is a clamping device that can be attached to a workbench. It consists of two jaws, one fixed and one movable, that can be tightened or released using a screw mechanism. The jaws can hold a workpiece securely, allowing you to work on it with both hands without worrying about it moving or slipping.

Why Choose a Wooden Bench-Vise?

A wooden bench-vise is an excellent option for those who prefer a traditional and rustic look in their workshop. It is also a fun DIY project that can be built using simple tools and materials. Wooden bench-vises are usually less expensive than metal ones, making them a great option for those on a budget.

Components of a Wooden Bench-Vise

A wooden bench-vise consists of several components that work together to hold a workpiece securely. The following table summarizes the main components of a wooden bench-vise:

Component Description
Jaws The two parts of the vise that hold the workpiece
Screw The mechanism that tightens or releases the jaws
Handle The part that turns the screw
Guide bars The bars that guide the movable jaw along the fixed jaw
Bench clamp The part that attaches the vise to the workbench

Building a Wooden Bench-Vise

Building a wooden bench-vise can be a fun and rewarding DIY project. You will need some basic woodworking skills and tools, as well as some materials like wood, screws, and a metal screw and nut. There are many plans and tutorials available online that can guide you through the process step by step.

In summary, a wooden bench-vise is an essential tool for any woodworker, and building one yourself can be a fun and rewarding DIY project. Understanding the basics of a wooden bench-vise, including its components and how it works, is essential before you start building one.

Tools and Materials Required

Essential Tools

When it comes to making a wooden bench vise, you will need a few essential tools to get started. Here are some of the tools that you will need:

  • Saw
  • Drill
  • Screwdriver
  • Chisels
  • Clamps
  • Hammer
  • Sandpaper
  • Measuring tape
  • Pencil

Choosing the Right Wood

Choosing the right wood is important when it comes to making a wooden bench vise. You will need a wood that is strong, durable, and can withstand a lot of pressure. Here are some of the best types of wood to use:

  • Hard Maple: This wood is strong and durable, making it a great choice for a bench vise.
  • Birch: Birch is another great choice for a bench vise. It is strong, durable, and has a fine grain.
  • Oak: Oak is a popular choice for a bench vise due to its strength and durability.

When choosing your wood, make sure that it is free from defects such as knots or cracks. You will also want to make sure that it is dry and stable. Wet or unstable wood can warp or crack over time, causing your bench vise to become less effective.

In addition to the wood, you will also need screws, nuts, and bolts to assemble your bench vise. Make sure to choose screws and bolts that are strong enough to withstand the pressure that your bench vise will be subjected to.

Preparing the Wood

Before you start making your wooden bench-vise, it is important to prepare the wood properly. Here are the steps you need to follow:

Step 1: Choose the Right Wood

The first step in preparing the wood is to choose the right type of wood. You want to choose a wood that is strong, durable, and resistant to warping. Some good options for a bench-vise include maple, birch, and beech.

Step 2: Cut the Wood to Size

Once you have chosen the right wood, the next step is to cut it to the right size. You will need to cut two pieces for the jaws of the vise, two pieces for the vise screw, and one piece for the handle.

Step 3: Smooth the Edges

After you have cut the wood to size, you will need to smooth the edges. You can use a hand plane or a belt sander to do this. Make sure that all the edges are smooth and free of splinters.

Step 4: Drill the Holes

Next, you will need to drill the holes for the vise screw and the handle. Make sure that the holes are straight and centered.

Step 5: Sand the Wood

After you have drilled the holes, you will need to sand the wood. Start with a coarse grit sandpaper and work your way up to a fine grit sandpaper. Make sure that the wood is smooth and free of any rough spots.

By following these steps, you will be able to prepare the wood for your wooden bench-vise. Once you have prepared the wood, you can move on to the next steps in the process.

Assembling the Bench-Vise

Now that you have constructed the jaws and the screw mechanism, it’s time to assemble your wooden bench-vise. Follow these steps to put everything together:

Constructing the Jaws

  1. Take the two jaw pieces and place them on the bench so that the flat sides are facing up.
  2. Take the two jaw liners and place them on top of the jaw pieces, making sure they are centered and aligned with the edges of the jaws.
  3. Clamp the jaw pieces and liners together, then drill pilot holes for the screws.
  4. Remove the clamps and apply glue to the jaw liners.
  5. Clamp the jaw pieces and liners together again, then screw them together.
  6. Sand the jaws smooth and round the corners to prevent splinters.

Installing the Screw Mechanism

  1. Place the two vise blocks on the bench, making sure they are aligned with the jaws and centered on the bench.
  2. Clamp the blocks in place, then drill pilot holes for the screws.
  3. Remove the clamps and apply glue to the blocks.
  4. Clamp the blocks in place again, then screw them to the bench.
  5. Insert the screw into the hole in the front vise block and thread the nut onto the end of the screw.
  6. Place the rear vise block onto the screw and thread it onto the screw until it is snug.
  7. Test the vise by tightening and loosening the screw. Adjust the position of the rear vise block if necessary.

Congratulations, you have successfully assembled your wooden bench-vise!

Finishing Touches

Now that you have completed the main construction of your wooden bench-vise, it’s time to add some finishing touches to make it look great and function even better. In this section, we will cover the final steps of the process, including sanding and smoothing the surfaces, and applying a finish to protect the wood and enhance its natural beauty.

Sanding and Smoothing

The first step in finishing your bench-vise is to sand and smooth all of the surfaces. Start with a coarse grit sandpaper, such as 80 grit, and work your way up to a finer grit, such as 220 grit. Sand in the direction of the wood grain, and be sure to sand all of the surfaces, including the jaws, the handle, and the screw.

After sanding, use a tack cloth or a soft-bristled brush to remove any dust or debris from the surfaces. You can also use a damp cloth to wipe down the surfaces and remove any remaining dust.

Applying a Finish

Once the surfaces are smooth and free of dust, it’s time to apply a finish to protect the wood and enhance its natural beauty. There are many different types of finishes you can use, including oils, waxes, and varnishes. Here are some popular options:

  • Linseed Oil: This natural oil is easy to apply and provides a warm, natural finish. It penetrates the wood and protects it from moisture and stains.
  • Beeswax: Beeswax is a natural wax that provides a soft, smooth finish. It also helps to protect the wood from moisture and stains.
  • Polyurethane Varnish: This synthetic varnish provides a durable, waterproof finish. It is easy to apply and dries quickly.

No matter which finish you choose, be sure to follow the manufacturer’s instructions for application and drying times. Apply the finish in thin, even coats, and use a brush or cloth to spread it evenly over the surfaces. Allow the finish to dry completely before using your bench-vise.

In conclusion, by following these simple steps, you can add the finishing touches to your wooden bench-vise and make it look great while also protecting it from wear and tear. With a little effort and attention to detail, you can create a functional and beautiful tool that will serve you well for years to come.

Safety Measures While Making a Wooden Bench-Vise

When making a wooden bench-vise, safety should be your top priority. Here are some safety measures to keep in mind:

1. Wear Protective Gear

Wear protective gear such as safety goggles, a dust mask, and gloves to protect yourself from wood chips, dust, and other debris that may fly off while working with wood.

2. Use Appropriate Tools

Use appropriate tools for the job. Avoid using tools that are damaged or not intended for the task at hand. Ensure that all tools are in good condition and are properly maintained.

3. Work in a Well-Ventilated Area

Work in a well-ventilated area to avoid inhaling sawdust and other particles. Proper ventilation is essential to prevent respiratory problems.

4. Follow the Plan

Follow the plan carefully and do not take shortcuts. Use the right measurements and tools as specified in the plan. Taking shortcuts can lead to accidents and may result in a poorly made bench-vise.

5. Take Breaks

Take regular breaks to avoid fatigue and prevent mistakes. Working for long hours without taking a break can lead to poor concentration and may cause accidents.

6. Keep Children and Pets Away

Keep children and pets away from the work area. The noise and flying debris can be dangerous to them. Ensure that the work area is secured and inaccessible to children and pets.

By following these safety measures, you can ensure that you make a wooden bench-vise without any accidents or injuries.

Maintaining Your Wooden Bench-Vise

To ensure the longevity of your wooden bench-vise, it’s important to maintain it properly. Here are some tips to help you keep your bench-vise in good condition:

Keep It Clean

Dirt, dust, and debris can accumulate in your bench-vise, which can cause it to malfunction. To prevent this, make sure you clean your bench-vise regularly. You can use a soft brush or cloth to remove any dirt or debris that has accumulated on the surface. If there is any stubborn dirt, you can use a degreaser such as WD-40 Specialist Degreaser to help remove it.

Lubricate It

To keep your bench-vise operating smoothly, it’s important to lubricate it regularly. You can use a dry or wet lubricant depending on your preference. A dry lubricant is ideal if you want to avoid any mess, while a wet lubricant offers better protection against corrosion. Once you have applied the lubricant, make sure you wipe off any excess to avoid attracting dirt and debris.

Protect It

To protect your bench-vise from rust and corrosion, you can use a protective coating. This coating will help prevent moisture from reaching the metal parts of your bench-vise, which can cause it to rust. You can use a spray-on coating or a wax-based coating depending on your preference.

Store It Properly

When you’re not using your bench-vise, it’s important to store it properly. Make sure you keep it in a dry and cool place to prevent moisture from reaching it. You can also cover it with a cloth or plastic sheet to protect it from dust and debris.

By following these tips, you can ensure that your wooden bench-vise stays in good condition for years to come.