
Are you tired of your old, worn-out garage door? Building a wooden garage door can be a great DIY project that not only adds curb appeal to your home but also increases its value. With the right tools and materials, building a wooden garage door can be a fun and rewarding experience.
Before you begin, it’s important to consider the style and design of your garage door. Do you want a traditional or modern look? What type of wood do you want to use? Once you have a plan in place, you can start gathering materials and tools. Keep in mind that safety should always be a top priority when working with power tools and heavy materials.
Understanding the Basics

If you’re looking to build a wooden garage door, it’s important to understand the basics before diving into the project. Here are some key things to consider:
Types of Wood
When it comes to selecting the right type of wood for your garage door, there are a few options to choose from. The most common types of wood used for garage doors include:
- Cedar: A popular choice due to its natural resistance to rot and insects, as well as its durability and attractive appearance.
- Redwood: Another popular option due to its natural resistance to decay and its beautiful, rich color.
- Hemlock: A more affordable option that is still durable and resistant to decay, but may require more maintenance over time.
- Douglas Fir: A strong and durable option that is also affordable, but may require more maintenance than cedar or redwood.
Consider the climate in your area, as well as your personal preferences and budget, when selecting the right type of wood for your garage door.
Garage Door Sizes
Before you start building your garage door, you’ll need to measure the size of your garage opening to determine the correct dimensions for your door. Standard garage door sizes typically range from 8 feet to 18 feet wide and 7 feet to 8 feet tall, but you may need to customize the size of your door based on the dimensions of your garage.
Tool Requirements
Building a wooden garage door requires a variety of tools, including:
- Circular saw
- Jigsaw
- Drill
- Hammer
- Screwdriver
- Clamps
- Measuring tape
- Level
- Sandpaper
Make sure you have all the necessary tools before starting your project, and take the time to familiarize yourself with each tool and its proper use.
Designing Your Garage Door
When it comes to designing your wooden garage door, there are a few things to consider. This section will cover two main sub-sections: Choosing a Design and Creating a Blueprint.
Choosing a Design
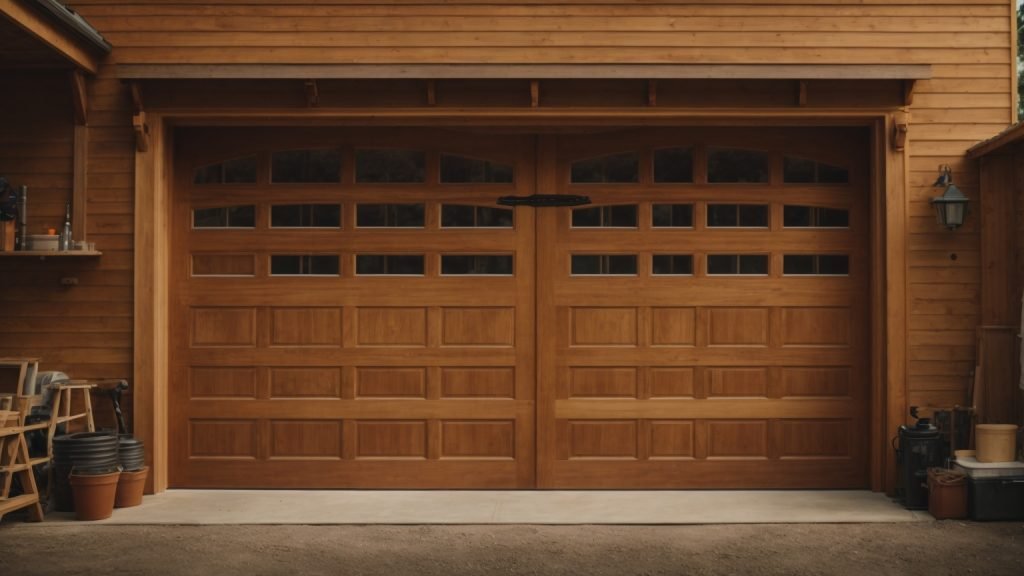
The design of your garage door can greatly impact the overall look of your home. There are several different styles to choose from, including:
- Raised panel
- Flat panel
- Carriage house
- Custom designs
Consider the style of your home and choose a design that complements it. Raised panel doors are a popular choice for traditional homes, while carriage house doors are a great option for a more rustic look.
In addition to the style of the door, you’ll also need to choose the type of wood and any additional features, such as windows or decorative hardware. Popular wood choices include cedar, redwood, and mahogany.
Creating a Blueprint
Before you start building your garage door, it’s important to create a detailed blueprint. This will ensure that you have all the necessary materials and that the door will fit properly.
Start by measuring the opening of your garage door. This will give you the dimensions for the door itself. Next, create a rough sketch of the design you’ve chosen, including any windows or decorative hardware.
Once you have a rough sketch, create a more detailed blueprint. This should include exact measurements and a list of all the materials you’ll need. Consider creating a table to organize your materials and keep track of your progress.
By taking the time to carefully choose a design and create a detailed blueprint, you’ll be well on your way to building a beautiful wooden garage door that will enhance the look of your home.
Preparing the Wood
When building a wooden garage door, selecting quality wood and cutting it properly are essential steps in ensuring a successful project. In this section, we’ll cover the basics of preparing the wood for your garage door.
Selecting Quality Wood
Choosing the right type of wood is crucial for a durable and long-lasting garage door. Here are some tips for selecting quality wood:
- Choose a hardwood like mahogany, cedar, or redwood for a sturdy and durable garage door. These types of wood are resistant to rot, insects, and weather damage.
- Avoid using softwoods like pine or spruce, which are more prone to damage and decay over time.
- Look for wood that is straight-grained and free of knots or cracks. This will ensure that your garage door looks smooth and even.
Once you have selected the right type of wood, it’s important to purchase enough to complete your project. Make sure to account for any extra wood needed for mistakes or unexpected changes.
Cutting the Wood
Properly cutting your wood is essential for creating a garage door that fits your space and functions properly. Here are some tips for cutting your wood:
- Use a circular saw or table saw to cut your wood to the appropriate size. Make sure to measure carefully and double-check your measurements before cutting.
- Sand the edges of your wood to smooth out any rough edges or splinters.
- Cut your wood into panels that will fit together to create your garage door. Make sure to label each panel to keep track of which one goes where.
By taking the time to select quality wood and cut it properly, you’ll be on your way to building a beautiful and functional wooden garage door.
Assembling the Garage Door
Once you have all the pieces cut and sanded, it’s time to assemble your wooden garage door. This section will walk you through the process of joining the pieces and installing the necessary hardware.
Joining the Pieces
Before you start joining the pieces together, make sure you have all the necessary tools and supplies, including wood glue, clamps, and screws. Follow these steps to join the pieces:
- Lay out all the pieces on a flat surface, making sure they are in the correct order.
- Apply wood glue to the edges of the pieces that will be joined together.
- Use clamps to hold the pieces together while the glue dries.
- Once the glue has dried, use screws to reinforce the joints.
Make sure to take your time during this process to ensure that the joints are strong and secure.
Installing the Hardware
Once your garage door is assembled, it’s time to install the necessary hardware. Here are the steps you need to follow:
- Attach the hinges to the door using screws and a drill.
- Install the rollers on the sides of the door, making sure they are level and secure.
- Attach the track to the ceiling of the garage using brackets and screws.
- Install the handle and lock on the outside of the door.
Make sure to follow the manufacturer’s instructions for installing the hardware and take your time to ensure that everything is installed correctly.
By following these steps, you’ll be able to assemble and install your wooden garage door with ease.
Finishing Touches
Once you have constructed your wooden garage door, it’s time to add the finishing touches to make it look polished and professional. This section will cover two important steps in the finishing process: sanding and polishing, and painting or staining.
Sanding and Polishing
Before painting or staining your wooden garage door, you’ll need to sand it down to ensure a smooth surface. Start by sanding the entire door with a coarse grit sandpaper, such as 80 grit. This will remove any rough spots or imperfections in the wood. Then, switch to a finer grit sandpaper, such as 120 grit, and sand the door again to create a smooth surface.
Once you’ve finished sanding, it’s time to polish the wood. Apply a wood polish or wax to the surface of the door using a soft cloth, and buff it in using circular motions. This will give your door a beautiful shine and protect the wood from moisture and other elements.
Painting or Staining
Now that your wooden garage door is sanded and polished, it’s time to choose a finish. You can either paint or stain the door, depending on your preference.
If you choose to paint the door, start by applying a coat of primer to the surface. This will help the paint adhere better and prevent it from chipping or peeling. Once the primer is dry, apply one or two coats of paint, depending on the desired coverage. Use a high-quality paintbrush or roller to ensure a smooth finish.
If you prefer to stain the door, choose a stain color that complements the wood’s natural grain. Apply the stain using a brush or rag, and wipe away any excess with a clean cloth. Allow the stain to dry completely before applying a coat of sealer or varnish to protect the wood.
By following these simple steps, you can give your wooden garage door a professional finish that will last for years to come.
Installation Process
Building a wooden garage door is a great way to add value to your home. Once you have built your garage door, the next step is to install it. In this section, we will go over the installation process for your wooden garage door. There are two main steps in the installation process: mounting the door and attaching the opener.
Mounting the Door
Before you begin mounting the door, make sure you have all the necessary tools and hardware. You will need a drill, screws, a level, and a helper. Here are the steps to mount your wooden garage door:
- Attach the hinges: Start by attaching the hinges to the door. Use a level to make sure they are straight.
- Hang the door: With the help of your assistant, hang the door onto the track. Make sure the door is level and centered.
- Secure the door: Secure the door to the track with screws. Make sure the screws are tight, but not too tight.
- Install the handles: Install the handles on the outside of the door. Make sure they are centered and secure.
Attaching the Opener
Attaching the opener is the final step in the installation process. Here are the steps to attach your opener:
- Install the opener: Follow the manufacturer’s instructions to install the opener. Make sure it is securely attached to the ceiling.
- Attach the arm: Attach the arm to the door. Make sure it is centered and secure.
- Test the opener: Test the opener to make sure it is working properly. Adjust the settings as needed.
With these steps, you should be able to successfully install your wooden garage door. Remember to take your time and follow the instructions carefully.
Maintenance Tips
To keep your wooden garage door functioning and looking great for years to come, regular maintenance is key. Here are some tips to help you maintain your wooden garage door.
Regular Cleaning
Cleaning your wooden garage door regularly is essential to keep it looking good. Dirt, grime, and other debris can accumulate on the surface of the door, making it look dull and unattractive. Here are some tips for cleaning your wooden garage door:
- Use a soft-bristled brush or a cloth to remove any loose dirt or debris from the surface of the door.
- Mix a solution of water and mild detergent or soap and use a soft cloth to wipe down the door. Avoid using harsh chemicals or abrasive cleaners that can damage the wood.
- Rinse the door thoroughly with clean water and use a clean, dry cloth to wipe it down.
Annual Check-Up
In addition to regular cleaning, it’s important to perform an annual check-up on your wooden garage door to ensure that it’s functioning properly. Here are some things to check during your annual check-up:
- Check the door for any signs of wear and tear, such as cracks, splits, or warping. If you notice any damage, repair it promptly to prevent further damage.
- Lubricate the moving parts of the door, such as the hinges and rollers, with a silicone-based lubricant to keep them functioning smoothly.
- Check the weatherstripping around the door and replace it if it’s worn or damaged. Weatherstripping helps to keep out drafts and moisture, which can damage the wood.
- Inspect the door opener and make sure it’s functioning properly. If you notice any problems, such as slow operation or strange noises, contact a professional for repairs.
By following these maintenance tips, you can keep your wooden garage door looking and functioning great for years to come.