finishing-touches-12

How to Make a Wooden Frame: A Beginner's Guide

If you’re looking for a way to display your favorite photos or artwork, making a wooden frame is a simple and rewarding DIY project. With just a few basic tools and some inexpensive materials, you can create a custom frame that perfectly fits your style and decor.

To get started, you’ll need to choose the wood for your frame. Pine boards or plywood are affordable options that are easy to cut and paint, while hardwoods like oak or maple will give your frame a more polished look. Once you have your wood, you can cut it to size using a circular saw or miter saw. If you don’t have access to these tools, most home improvement stores will cut the wood for you.

Once you have your wood cut to size, it’s time to assemble the frame. There are several ways to do this, including using screws and carpenter’s glue or using a handheld router to create a groove for the glass and artwork to sit in. Whichever method you choose, be sure to measure carefully and use clamps to hold the pieces in place while the glue dries. With a little patience and some attention to detail, you’ll have a beautiful wooden frame that you can be proud to display in your home or give as a gift.

Understanding Wood Types

When it comes to making a wooden frame, choosing the right type of wood is crucial. Different types of wood have different properties and characteristics that affect their durability, strength, and appearance. Here are the three main types of wood you should consider:

Hardwood

Hardwood comes from deciduous trees, which are trees that lose their leaves in the fall. Hardwood is known for its strength and durability, making it a great choice for furniture and other high-traffic items. Some common types of hardwood include oak, maple, cherry, and walnut. Hardwood is more expensive than softwood, but it can also be more beautiful and long-lasting.

Softwood

Softwood comes from coniferous trees, which are trees that have needles instead of leaves. Softwood is generally less expensive than hardwood and is often used for construction, such as framing and decking. Some common types of softwood include pine, spruce, and cedar. Softwood is less dense than hardwood, which means it is more susceptible to dents and scratches.

Engineered Wood

Engineered wood is made by bonding together layers of wood veneers or fibers with adhesives. This type of wood is often used for furniture and other decorative items because it can be made to look like hardwood at a lower cost. Some common types of engineered wood include plywood, particleboard, and MDF (medium-density fiberboard). Engineered wood is often more stable and consistent than natural wood, which means it is less likely to warp or shrink.

When choosing the type of wood for your frame, consider the look you want to achieve, the durability you need, and your budget. Remember that different types of wood have different strengths and weaknesses, so choose wisely.

Choosing the Right Wood

When it comes to making a wooden frame, choosing the right wood is crucial. The type of wood you choose will affect the overall look and durability of your frame. Here are some factors to consider when selecting the right wood for your frame:

Wood Type

Different types of wood have different characteristics that can affect the look and feel of your frame. Some common woods used for frames include:

  • Pine: This is a softwood that is easy to work with and is ideal for painting or staining.
  • Oak: This hardwood is durable and has a distinctive grain pattern that can add character to your frame.
  • Maple: This hardwood has a smooth, even texture and is ideal for staining.

Wood Thickness

The thickness of the wood you choose will affect the overall weight and sturdiness of your frame. Thicker wood will be heavier and more durable, while thinner wood will be lighter and easier to work with.

Grain Pattern

The grain pattern of the wood can also affect the look of your frame. Some woods, like oak, have a distinctive grain pattern that can add character to your frame. Other woods, like maple, have a more subtle grain pattern that can provide a smoother, more uniform look.

Finish

The finish you choose for your frame can also affect the look and durability of your frame. Some common finishes include:

  • Stain: This can enhance the natural color and grain pattern of the wood.
  • Paint: This can provide a uniform color and finish to your frame.
  • Varnish: This can provide a protective layer that can help prevent scratches and damage to your frame.

Overall, choosing the right wood for your frame will depend on your personal preferences and the look you are trying to achieve. Consider the characteristics of different woods and finishes to find the perfect fit for your project.

Required Tools

required-tools-2

To make a wooden frame, you will need a few tools to help you along the way. Here are the essential tools you will need to make a wooden frame:

Saw

A saw is one of the most important tools you’ll need when making a wooden frame. A circular or miter saw is recommended to cut the wood according to the cut list. You can obtain cheap scrap wood, pine boards, or plywood at many home improvement or hardware stores.

Hammer

A hammer is a necessary tool for driving in nails to hold the frame together. A claw hammer is the most common type of hammer, and it has a claw on the back for removing nails.

Nails

Nails are needed to hold the frame together. The size of the nails will depend on the thickness of the wood you are using. It is recommended to use finishing nails for a more professional look.

Remember to always wear protective gear, such as safety goggles and gloves, when using power tools or handling sharp objects. With these essential tools, you will be well on your way to creating a beautiful wooden picture frame.

Cutting the Wood

Before you start cutting the wood, make sure you have all the necessary tools and materials. You will need a saw, measuring tape, pencil, and the wood you will be using to make your frame.

The first step is to measure and mark the wood to the desired length. Use the measuring tape to measure the length you need and then mark it with a pencil. Make sure the marks are straight and even, so your cuts will be accurate.

Once you have marked the wood, it’s time to start cutting. Use a saw to cut the wood to the desired length. If you are using a circular saw, make sure the blade is set to the correct depth and angle before you start cutting. If you are using a hand saw, make sure you have a firm grip on the saw and use long, even strokes to make your cuts.

When cutting the wood, be sure to follow all safety precautions. Wear safety glasses and keep your fingers away from the blade. If you are using a power saw, make sure the blade is sharp and the saw is properly maintained.

After you have cut the wood to the desired length, you may need to make additional cuts to create the desired shape for your frame. Use the same techniques as before to make these cuts, and be sure to measure and mark the wood accurately before you start cutting.

Overall, cutting the wood is an important step in making a wooden frame. Take your time and be careful to ensure your cuts are accurate and safe.

Assembling the Frame

assembling-the-frame-1

Now that you have all the necessary materials and have cut your wood to the appropriate lengths, it’s time to assemble your wooden frame.

  1. First, lay out your four frame sections on a flat surface, making sure they are lined up correctly and the corners form a perfect 90-degree angle.
  2. Apply a drop of wood glue to each of the eight miter faces. Spread the glue thinly over the miter faces.
  3. Take one of the plastic pegs and insert it into the hole at the end of one of the frame sections. Repeat this process for the other three frame sections.
  4. Gently press the four frame sections together, making sure the pegs are fully inserted into the holes.
  5. Wipe off any excess glue that may have seeped out of the joints with a damp cloth.
  6. Clamp the frame together with corner clamps or use a strap clamp to hold the frame securely while the glue dries.
  7. Allow the glue to dry completely according to the manufacturer’s instructions.
  8. Once the glue is dry, remove the clamps and sand any rough spots or excess glue from the frame.

Congratulations! You have now successfully assembled your own wooden frame.

Sanding the Frame

Once you have joined the wooden pieces of your frame together, it’s time to sand it down. Sanding is a crucial step in creating a custom frame that looks professional and polished. However, it’s also where a frame can easily be ruined, so it’s important to take your time and be careful.

The first thing to keep in mind is that over-sanding is a common mistake that novice sanders make. If you sand too much, you can end up with a frame that is uneven or has rough spots. So, start with a coarse grit sandpaper and work your way up to a finer grit as you go. This will help you avoid removing too much material at once.

When sanding your frame, you should also pay attention to the direction of the grain. Sanding with the grain will help you achieve a smoother finish and prevent the wood from splintering or tearing. You can use a sanding block or a power sander to make the process easier, but be careful not to apply too much pressure or you could damage the wood.

Another thing to consider is the type of wood you are sanding. Some woods, like oak or maple, are harder and more difficult to sand than others. If you’re working with a harder wood, you may need to use a finer grit sandpaper or spend more time sanding to get the desired finish.

Finally, it’s important to clean your frame thoroughly after sanding. Use a tack cloth or a soft brush to remove any dust or debris, and make sure the surface is completely smooth before moving on to the next step. With these tips in mind, you should be able to sand your wooden frame like a pro!

Finishing Touches
finishing-touches-12

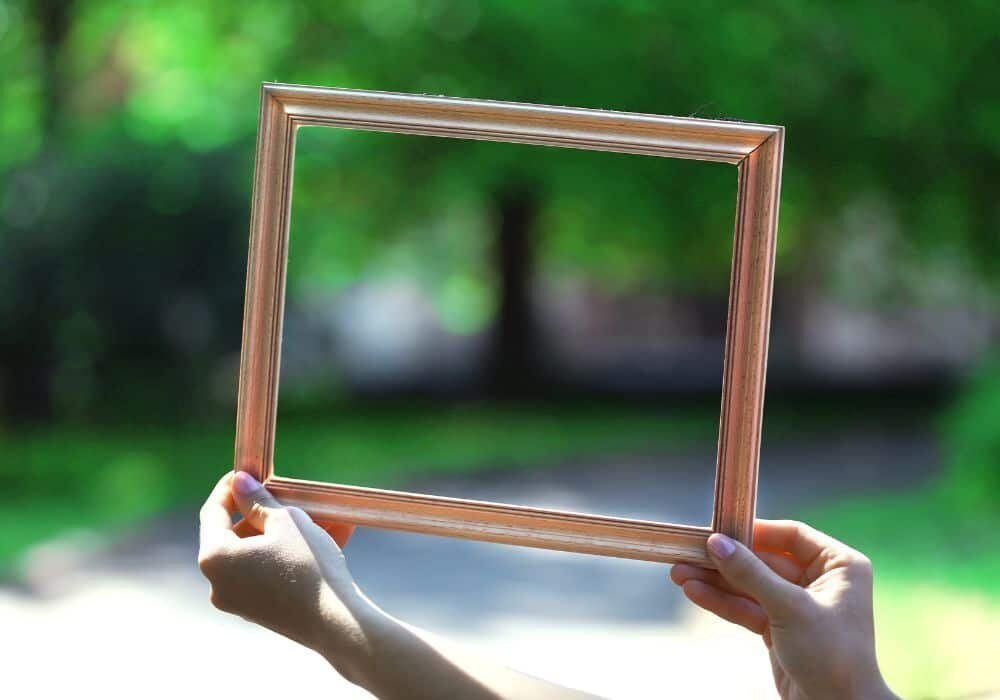
When it comes to creating a wooden frame, the finishing touches are what can really make it stand out. Here are some tips to help you add those final touches to your wooden frame.

Staining

Staining your wooden frame can help bring out the natural beauty of the wood and give it a more polished look. Here are some steps to follow when staining your wooden frame:

  1. Sand the frame: Before you begin staining, make sure the frame is smooth and free of any rough spots or imperfections. Sand the frame with a fine-grit sandpaper to achieve a smooth surface.
  2. Choose the right stain: Choose a stain that matches the color or tone you want to achieve. Test the stain on a small area of the frame to make sure it’s the right color before applying it to the entire frame.
  3. Apply the stain: Using a brush or cloth, apply the stain in the direction of the grain. Apply a thin, even coat and let it dry completely before applying a second coat if necessary.
  4. Seal the stain: Once the stain has dried, apply a clear sealer to protect the wood and give it a polished look.

Polishing

Polishing your wooden frame can give it a smooth, shiny finish and make it look more professional. Here are some steps to follow when polishing your wooden frame:

  1. Sand the frame: Sand the frame with a fine-grit sandpaper to achieve a smooth surface.
  2. Apply the polish: Apply a small amount of polish to a soft cloth and rub it onto the frame in a circular motion. Apply a thin, even coat and let it dry completely before applying a second coat if necessary.
  3. Buff the frame: Once the polish has dried, use a clean, dry cloth to buff the frame to a shine.

Remember to always work in a well-ventilated area and wear protective gear such as gloves and a mask when working with stains and polishes. With these tips, you can add the perfect finishing touches to your wooden frame and make it look like a professional piece of art.

Safety Precautions

When working with wood, it is important to take safety precautions to prevent accidents and injuries. In this section, we will cover two important safety precautions: protective gear and safe handling.

Protective Gear

Wearing the right protective gear can help prevent injuries. Here are some items you should consider wearing when working with wood:

  • Safety glasses: Protect your eyes from flying debris.
  • Work gloves: Protect your hands from splinters and cuts.
  • Dust mask: Protect your lungs from sawdust and other particles.
  • Earplugs or earmuffs: Protect your ears from loud noises.
  • Work boots with a heel and slip-resistant sole: Prevent falls.

Make sure your protective gear fits properly and is in good condition. Replace any damaged or worn-out gear.

Safe Handling

In addition to wearing protective gear, it is important to handle wood safely. Here are some tips:

  • Stack job materials near the work area to prevent tripping hazards.
  • Use mechanical lifting devices or a team to lift heavy or unstable loads.
  • Don’t lift and move loads that are too heavy or unstable.
  • Keep a first aid kit at your disposal in case of accidents.
  • Avoid drugs and alcohol when working with wood.

By following these safety precautions, you can help prevent accidents and injuries when making wooden frames.
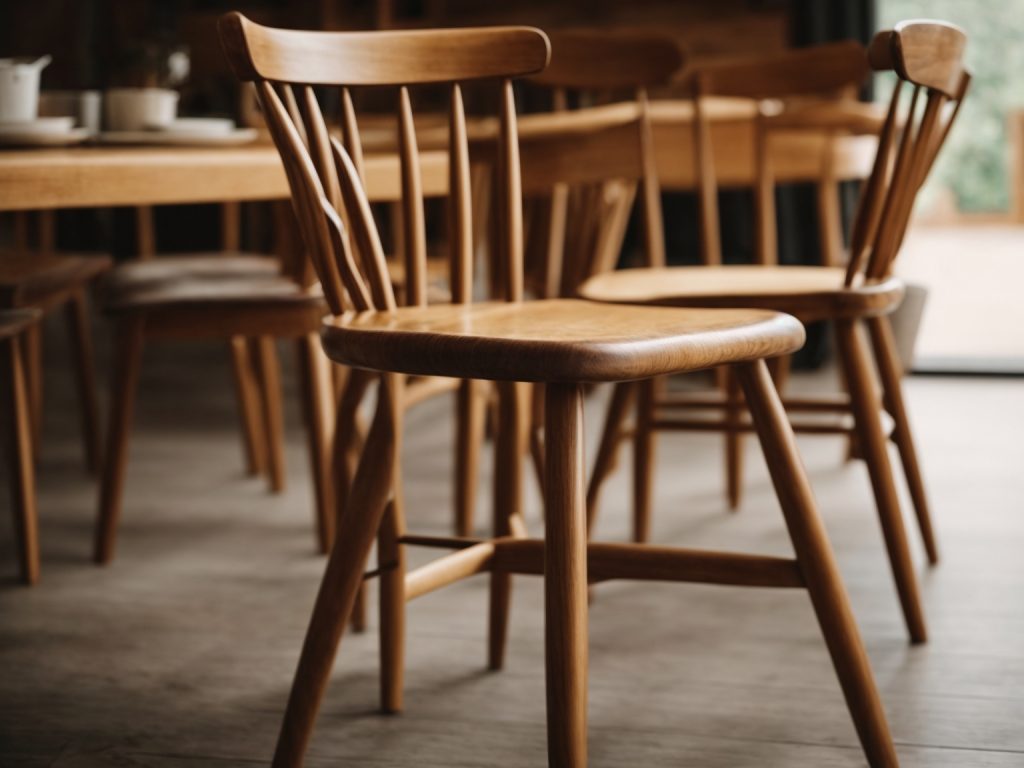
How to Clean Wooden Chairs Quick and Easy Tips

How to Clean Wooden Chairs: Quick and Easy Tips

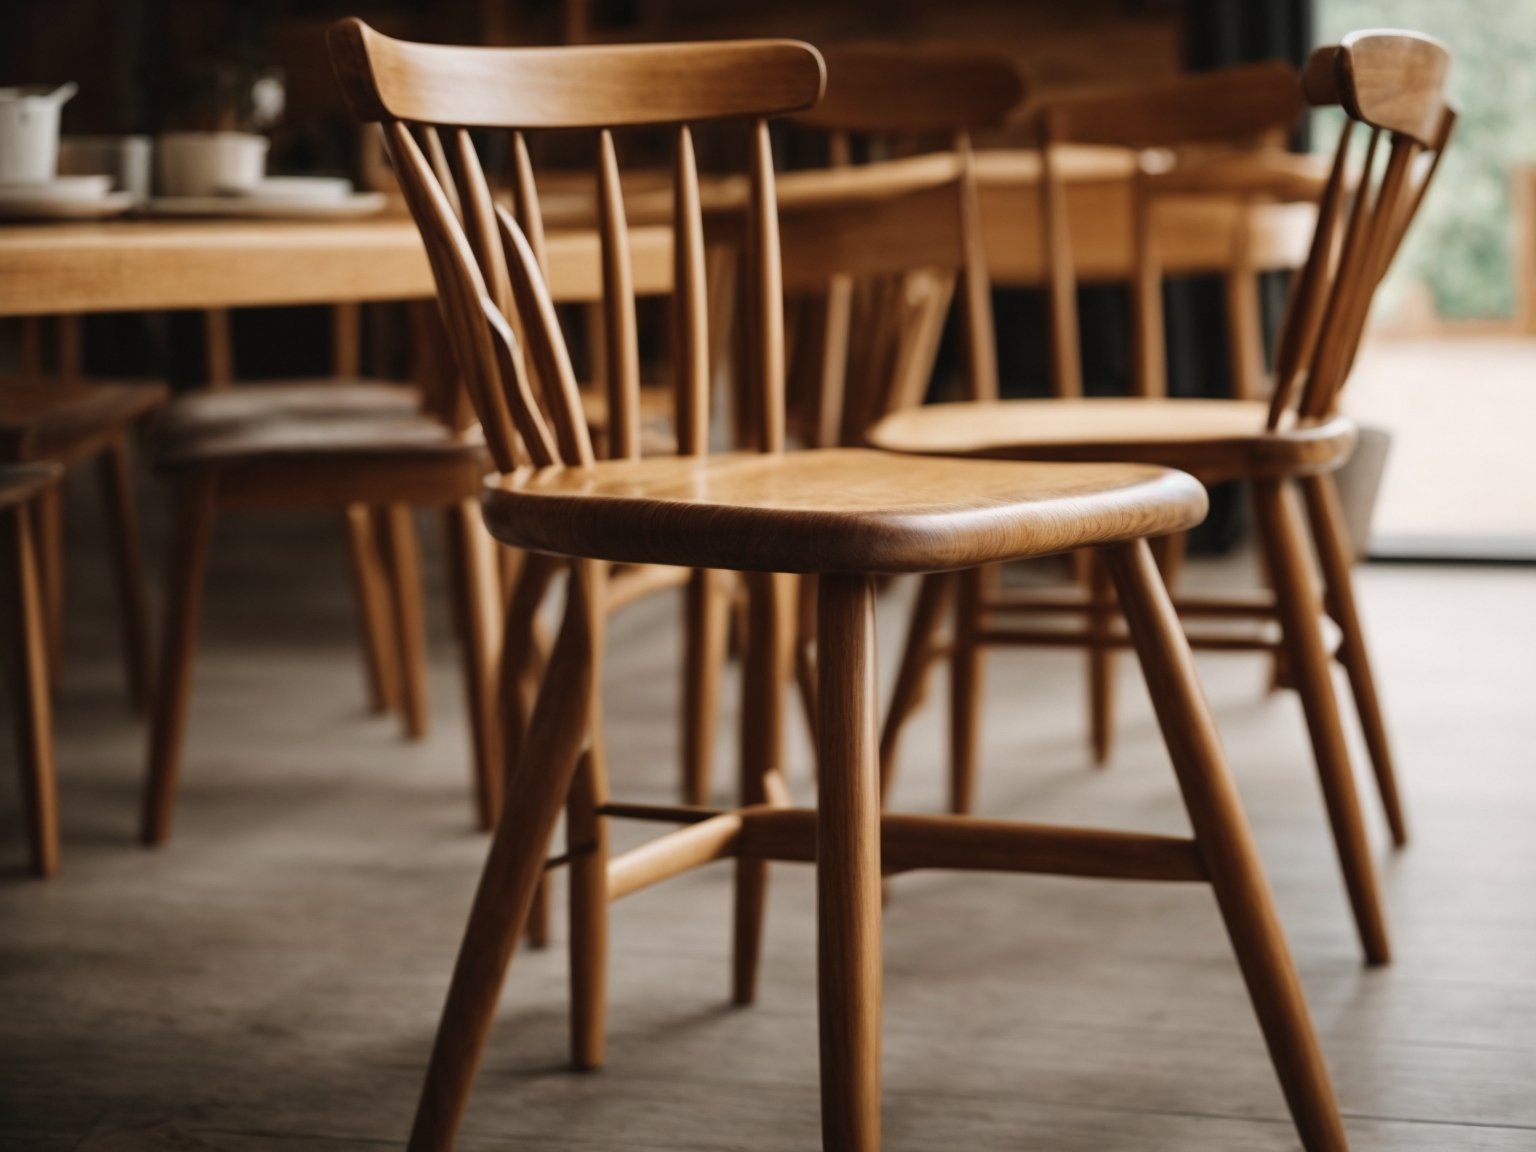
If you have wooden chairs in your home, you know that they can accumulate dirt, dust, and grime over time. Cleaning them may seem like a daunting task, but with the right tools and techniques, it can be a breeze. In this article, we will provide you with tips and tricks on how to clean your wooden chairs effectively and efficiently.

One of the most important things to keep in mind when cleaning wooden chairs is to avoid using harsh chemicals that can damage the wood. Instead, opt for gentle cleaners that are specifically designed for wood. You can use an oil-based cleaner or a mixture of dish soap and water to remove dirt and grime from the surface of the wood. It is also important to avoid using too much water, as this can cause the wood to warp or become discolored.

Another important aspect of cleaning wooden chairs is to pay attention to the details. Make sure to clean not only the surface of the wood but also the crevices and corners where dirt can accumulate. Use a soft-bristled brush or a toothbrush to get into hard-to-reach areas. By following these tips, you can keep your wooden chairs looking clean and beautiful for years to come.

Understanding the Type of Wood

How to Clean Wooden Chairs Quick and Easy Tips

When it comes to cleaning wooden chairs, it is essential to understand the type of wood and finish you are dealing with. Different types of wood and finishes require different cleaning methods to avoid damaging the wood. In this section, we will discuss how to identify your wood and determine the finish.

Identify Your Wood

The first step in cleaning your wooden chair is to identify the type of wood it is made of. Different types of wood have different characteristics, and some are more delicate than others. Here are some common types of wood used in furniture:

  • Oak: A hardwood that is durable and has a coarse texture.
  • Pine: A softwood that is lightweight and has a fine texture.
  • Mahogany: A hardwood that is durable and has a reddish-brown color.
  • Maple: A hardwood that is durable and has a fine texture.
  • Walnut: A hardwood that is durable and has a dark brown color.

To identify your wood, you can look for clues such as the color, grain pattern, and texture. You can also consult a furniture expert or use a wood identification guide.

Determine the Finish

Once you have identified your wood, the next step is to determine the finish. The finish is the protective layer applied to the wood to enhance its appearance and protect it from damage. Here are some common types of finishes:

  • Varnish: A clear or tinted finish that provides a hard, durable surface.
  • Lacquer: A clear or tinted finish that dries quickly and provides a hard, durable surface.
  • Wax: A natural finish that provides a soft, lustrous surface.
  • Oil: A natural finish that penetrates the wood to enhance its natural beauty.

To determine the finish, you can look for clues such as the color, texture, and sheen. You can also consult a furniture expert or use a finish identification guide.

In conclusion, understanding the type of wood and finish is crucial in cleaning wooden chairs. By identifying your wood and determining the finish, you can choose the appropriate cleaning method and avoid damaging the wood.

Gathering Cleaning Supplies

Before you start cleaning your wooden chairs, it’s important to gather all the necessary cleaning supplies. Here are some things you’ll need:

Choosing Wood Cleaners

When it comes to cleaning wooden chairs, you want to make sure you’re using the right cleaner. Here are a few options:

  • Oil-based cleaners: These are great for cleaning wood because they simultaneously cleanse the wood while infusing it with a conditioning treatment. Mineral oil is the most common oil used, but you can also use a vegetable oil-based treatment.
  • Dish soap: Start with liquid dish soap and add a drop to a water-moistened cotton ball. This is a simple and effective way to clean your wooden chairs.
  • Mineral spirits: This is an optional cleaner that can be used for tougher stains and grime. It’s important to use this cleaner with caution and follow the manufacturer’s instructions.

Selecting Cleaning Tools

In addition to choosing the right cleaner, you’ll also need the right tools to clean your wooden chairs. Here are a few options:

  • Soft-bristled brush: Use a soft-bristled brush to gently scrub away dirt and grime from your wooden chairs.
  • Microfiber cloth: This is a great tool for wiping down your wooden chairs after cleaning them.
  • Vacuum: Use a vacuum with a soft-brush attachment to remove any loose dirt or debris from your wooden chairs.

By gathering the right cleaning supplies and tools, you’ll be well on your way to cleaning your wooden chairs like a pro.

Pre-Cleaning Steps

Before diving in and cleaning your wooden chairs, there are a few pre-cleaning steps you should take to ensure that the process goes smoothly. These steps include removing dust and checking for scratches.

Removing Dust

The first step in cleaning your wooden chairs is to remove any dust that may have accumulated on them. Dust can scratch the surface of the wood, so it’s important to remove it before you start cleaning. Here are a few methods you can use to remove dust from your wooden chairs:

  • Use a soft-bristled brush or a microfiber cloth to gently brush away any dust.
  • Use a vacuum cleaner with a soft brush attachment to remove dust from hard-to-reach areas.
  • Use a can of compressed air to blow away dust from crevices and corners.

Checking for Scratches

Before you start cleaning your wooden chairs, it’s important to check for any scratches or other damage to the surface. Scratches can be caused by everyday wear and tear, pets, or furniture moving. Here’s how to check for scratches:

  • Run your hand over the surface of the chair to feel for any rough spots or scratches.
  • Use a flashlight to inspect the surface of the chair for any scratches or other damage.
  • If you find any scratches, take note of their location and severity. This will help you determine the best cleaning method to use.

By taking these pre-cleaning steps, you’ll ensure that your wooden chairs are ready for a deep clean. Removing dust and checking for scratches will help you avoid causing further damage to the surface of the wood.

Deep Cleaning Process

When your wooden chair needs a thorough cleaning, follow these steps to get it looking like new again.

Applying Wood Cleaner

  1. Choose a wood cleaner that is appropriate for the type of wood your chair is made of. Read the label carefully to ensure it is safe to use on your chair.
  2. Apply the cleaner to a soft cloth or sponge, rather than directly onto the chair, to avoid saturating the wood.
  3. Rub the cleaner onto the chair, working in the direction of the grain. Be sure to cover all surfaces, including the underside of the seat and any crevices.
  4. Let the cleaner sit on the chair for the recommended amount of time, usually 5-10 minutes.

Scrubbing the Chair

  1. After the cleaner has had time to work, use a soft-bristled brush to scrub the chair, again working in the direction of the grain.
  2. Pay extra attention to any areas with stubborn stains or grime buildup.
  3. Wipe away the cleaner and any dirt or grime with a clean, damp cloth.
  4. Rinse the cloth frequently to avoid spreading dirt around.
  5. Once you have removed all the cleaner and dirt, use a dry cloth to wipe the chair down and remove any remaining moisture.

By following these steps, you can deep clean your wooden chair and restore its natural beauty. Remember to always test any new cleaner on a small, inconspicuous area of the chair before using it on the entire surface.

Drying and Polishing

After cleaning your wooden chair, it is important to dry it properly to prevent any water damage and to give it a shiny finish. Here are some tips on how to properly dry and polish your wooden chair.

Proper Drying Techniques

To dry your wooden chair, use a clean and dry cloth to wipe off any excess water. Make sure to dry all the nooks and crannies of the chair, including the corners and edges. If there are any hard-to-reach areas, use a soft-bristled brush to gently remove any remaining water.

After drying, leave the chair in a well-ventilated area to air dry completely. Avoid exposing the chair to direct sunlight or heat as this can cause the wood to warp or crack.

Polishing for Shine

To give your wooden chair a shiny finish, you can use a polish or wax. Apply a small amount of polish or wax onto a clean and dry cloth and rub it onto the chair in a circular motion. Make sure to cover all areas of the chair, including the legs and backrest.

Once you have applied the polish or wax, use a clean cloth to buff the chair in a circular motion. This will help to remove any excess polish or wax and give the chair a shiny finish.

Remember to always read the instructions on the polish or wax before using it on your wooden chair. Some polishes or waxes may not be suitable for certain types of wood or finishes.

By following these proper drying techniques and polishing tips, you can keep your wooden chair looking clean and shiny for years to come.

Maintaining Your Wooden Chairs

Wooden chairs are an elegant addition to any home. However, they require maintenance to keep them looking their best. Here are some tips on how to maintain your wooden chairs.

Routine Cleaning

Routine cleaning is essential to maintain the beauty and longevity of your wooden chairs. Dust and dirt can accumulate on the surface of the chairs, which can lead to scratches and damage. Follow these steps to clean your wooden chairs:

  1. Start by dusting the chairs with a soft cloth or feather duster. This will remove any loose dirt or dust from the surface of the chairs.
  2. Next, dampen a microfiber cloth with clean water and wipe the chairs down. Avoid using too much water, as it can damage the wood.
  3. For stubborn stains, mix a few drops of dish soap with warm water and use a soft cloth to clean the chairs. Rinse the cloth with clean water and wipe the chairs down again to remove any soap residue.
  4. Dry the chairs with a clean, dry cloth to prevent water damage.

Preventing Damage

Preventing damage is key to maintaining the beauty and longevity of your wooden chairs. Here are some tips on how to prevent damage to your wooden chairs:

  1. Avoid placing your wooden chairs in direct sunlight or near sources of heat, such as radiators or fireplaces. This can cause the wood to dry out and crack.
  2. Use coasters and placemats to protect the surface of the chairs from spills and scratches.
  3. Avoid using harsh chemicals or abrasive cleaners on your wooden chairs, as they can damage the finish.
  4. Apply a furniture polish or wax to your wooden chairs every few months to protect the finish and keep them looking their best.

By following these tips, you can maintain the beauty and longevity of your wooden chairs for years to come.

prepare-the-wood

How to Make Wooden Rings on a Lathe: A Beginner's Guide

Are you interested in making your own wooden rings on a lathe? With the right tools and techniques, you can create beautiful and unique rings that are perfect for gifts or personal use. In this article, we will guide you through the process of making wooden rings on a lathe, including the materials you need, the steps involved, and some tips for getting the best results.

Before you get started, it’s important to choose the right type of wood for your rings. Hardwoods like maple, oak, and walnut are good choices because they are durable and have a fine grain that looks great when polished. You will also need a lathe, which is a machine that rotates the wood while you shape it with cutting tools. Other tools you may need include a drill press, sandpaper, and finish such as wax or oil.

Once you have your materials and tools ready, you can start making your wooden rings. The process involves cutting the wood to the right size, drilling a hole in the center, and shaping it on the lathe. With some practice and patience, you can create rings that are truly one-of-a-kind. So let’s get started and learn how to make wooden rings on a lathe!

Understanding the Basics of a Lathe

understanding-the-basics-of-a-lathe

If you’re new to woodworking, using a lathe can seem intimidating at first. However, with a little bit of practice, you’ll soon be able to create beautiful wooden rings that will impress your friends and family. Here are some basic concepts you need to understand before you begin:

Lathe Components

The lathe is made up of several components, including the headstock, tailstock, tool rest, and bed. The headstock holds the spindle, which rotates the wood. The tailstock supports the other end of the wood and can be moved along the bed to accommodate different lengths of wood. The tool rest is used to hold the cutting tool in place, and the bed provides a stable platform for the lathe.

Safety Precautions

Before you begin using the lathe, it’s important to take some safety precautions. Make sure you wear eye protection, as wood chips and dust can fly off the lathe and into your eyes. You should also avoid wearing loose clothing or jewelry that could get caught in the lathe. Finally, make sure the lathe is properly secured to a sturdy workbench or stand to prevent it from moving while you’re working.

Cutting Tools

There are several types of cutting tools you can use to create wooden rings, including gouges, scrapers, and parting tools. Gouges are used for roughing out the shape of the ring, while scrapers are used for smoothing and refining the shape. Parting tools are used to cut the ring off the wood once it’s complete.

Wood Selection

When selecting wood for your ring, it’s important to choose a species that is hard enough to withstand wear and tear. Some good options include maple, cherry, and walnut. You should also choose a piece of wood that is straight and free of knots or defects.

Conclusion

By understanding the basic components of a lathe, taking proper safety precautions, selecting the right cutting tools, and choosing the right wood, you’ll be well on your way to creating beautiful wooden rings that you can be proud of. With practice and patience, you’ll soon be able to create rings that are as unique as they are beautiful.

Choosing the Right Wood

When making wooden rings on a lathe, it is essential to choose the right wood for your project. Here are some factors to consider when selecting the wood for your ring:

Hardness

Choose a type of wood that is hard enough to withstand everyday wear and tear. Softer woods, such as pine or cedar, may be easier to work with, but they are not durable enough for a ring that will be worn regularly. Hardwoods like oak, cherry, or walnut are better choices for making wooden rings.

Grain Pattern

The grain pattern of the wood can add character and uniqueness to your ring. Some woods, such as burl or spalted wood, have distinctive patterns that can make your ring stand out. However, keep in mind that highly figured woods can be more difficult to work with and may require more sanding and finishing.

Color

The color of the wood can also play a role in the final appearance of your ring. Choose a wood that complements your skin tone and personal style. Woods like ebony or rosewood can add a touch of elegance to your ring, while lighter woods like maple or birch can give it a more natural look.

Sustainability

Consider using sustainably sourced wood for your ring. Some types of wood, such as ebony or rosewood, may be endangered or illegally harvested. Look for wood that has been certified by organizations like the Forest Stewardship Council (FSC) or the Sustainable Forestry Initiative (SFI).

By considering these factors, you can choose the right wood for your wooden ring project. Remember to take your time and select a wood that fits your style and needs.

Preparing the Wood

prepare-the-wood

Before you start turning your wooden ring on a lathe, you need to prepare the wood. Here are some steps to follow:

Step 1: Choose the Right Wood

The first step in preparing the wood is to choose the right type of wood. You can use any type of wood, but some are better than others. Hardwoods like walnut, cherry, and maple are popular choices because they are durable and have a beautiful grain pattern.

Step 2: Cut the Wood

Once you have chosen the wood, the next step is to cut it into the right size and shape. You can use a saw or a knife to cut the wood into a block that is slightly larger than the finished ring size. Make sure that the wood is cut straight and even.

Step 3: Drill a Hole

After cutting the wood, you need to drill a hole in the center of the block. The hole should be slightly larger than the size of the mandrel you will be using on the lathe. This will allow you to mount the wood securely on the lathe.

Step 4: Mount the Wood on the Lathe

Once you have drilled the hole, you can mount the wood on the lathe using a mandrel. Make sure that the wood is mounted securely and that the mandrel is centered in the hole.

Step 5: Turn the Wood

Now that the wood is mounted on the lathe, you can start turning it into a ring. Use a roughing gouge to shape the wood into a cylinder and then use a skew chisel to create the desired shape. Be sure to work slowly and carefully to avoid damaging the wood or injuring yourself.

By following these steps, you can prepare the wood for turning a beautiful wooden ring on a lathe.

Shaping the Ring

Once you have the wood mounted on the lathe, it’s time to start shaping the ring. This process involves two main steps: Mounting the Wood and Carving the Ring.

Mounting the Wood

To mount the wood on the lathe, you will need to use a chuck or a faceplate. A chuck is a device that holds the wood securely in place while it spins on the lathe. A faceplate is a flat metal plate that is screwed onto the end of the wood. This allows you to mount the wood on the lathe and shape it with a variety of tools.

Once you have the wood mounted on the lathe, you can start shaping the ring. Start by using a roughing gouge to remove any excess wood and create a cylinder shape. Be sure to take your time and work slowly so that you don’t accidentally remove too much wood.

Carving the Ring

Once you have a cylinder shape, you can start carving the ring. Use a parting tool to create a groove where you want the ring to be. This will help guide your cuts and ensure that you create a uniform ring.

Next, use a spindle gouge to shape the ring. Start at the top of the ring and work your way down to the bottom. Be sure to keep the tool at a consistent angle and work slowly to create a smooth surface.

As you work, you can use a caliper to measure the diameter of the ring and ensure that it is the correct size. You can also use sandpaper to smooth out any rough spots or imperfections.

Overall, shaping a wooden ring on a lathe can be a fun and rewarding process. With a little practice and patience, you can create beautiful and unique rings that are sure to impress.

Sanding the Ring

Once you have turned your wooden ring on the lathe, sanding is the next crucial step in the process. Sanding the ring will help to smooth out any rough spots, remove any tool marks, and bring out the natural beauty of the wood grain. Here are some tips to help you sand your wooden ring to perfection.

Choosing the Right Sandpaper

Choosing the right sandpaper is important when sanding your wooden ring. You will want to start with a coarse grit sandpaper, such as 120-grit, and work your way up to a finer grit, such as 320-grit or higher. Here is a table to help you choose the right sandpaper for your wooden ring:

Grit Use
120-150 Coarse sanding, removing tool marks, shaping
180-220 Medium sanding, smoothing out rough spots
320-400 Fine sanding, getting a smooth finish

Applying the Sanding Technique

When sanding your wooden ring, it is important to use the right technique. Here are some tips to help you get the best results:

  • Sand with the grain of the wood. Sanding against the grain can cause scratches and damage to the wood.
  • Use a sanding block or a soft object like a cloth to wrap the sandpaper around. This will help you get an even sanding surface and avoid creating uneven spots on the ring.
  • Apply light pressure when sanding. Too much pressure can cause the sandpaper to tear and create uneven spots on the ring.
  • Sand evenly around the ring. Make sure to sand all sides and edges of the ring evenly to avoid creating flat spots or uneven surfaces.

By following these tips, you can sand your wooden ring to a smooth, beautiful finish.

Finishing the Ring

finishing-your-wooden-ring

When it comes to finishing your wooden ring, there are a few things to keep in mind. First, you want to choose a finish that will protect the wood from moisture and wear, while also enhancing its natural beauty. Second, you want to apply the finish carefully and evenly, to avoid any drips or bubbles that could ruin the final product.

Choosing the Right Finish

There are many different finishes you can use for your wooden ring, but some are better suited than others. Here are a few options to consider:

  • Tung oil: This is a popular choice for wooden rings because it is easy to apply and provides a durable, water-resistant finish. Tung oil also brings out the natural beauty of the wood and gives it a warm, amber hue.
  • Shellac: This is another good option for wooden rings because it dries quickly and provides a hard, protective finish. Shellac is also easy to repair if it gets scratched or damaged.
  • Polyurethane: This is a more modern finish that provides a tough, durable coating for your wooden ring. Polyurethane is resistant to water, chemicals, and abrasion, making it a good choice for everyday wear.

Applying the Finish

Once you have chosen your finish, it’s time to apply it to your wooden ring. Here are some tips to help you get the best results:

  • Sand the ring first: Before applying any finish, make sure to sand the ring with a fine-grit sandpaper to smooth out any rough spots and prepare the surface for the finish.
  • Apply in thin coats: It’s better to apply several thin coats of finish rather than one thick coat. This will help the finish dry evenly and avoid any drips or bubbles.
  • Use a brush or cloth: You can apply the finish with a brush or a cloth, depending on your preference. Just make sure to use a clean, lint-free cloth or a high-quality brush to avoid leaving any fibers or bristles behind.
  • Let it dry completely: Make sure to let each coat of finish dry completely before applying the next one. This will ensure that the finish is hard and durable when it’s done.

With these tips in mind, you should be able to finish your wooden ring with a beautiful, durable coating that will protect it for years to come.

Safety Measures

When working with a lathe, it is important to prioritize safety measures to avoid any accidents or injuries. In this section, we will discuss the personal protective equipment and lathe safety practices that you should follow when making wooden rings on a lathe.

Personal Protective Equipment

Wearing the right personal protective equipment (PPE) is crucial when working with a lathe. Here are some essential PPEs that you should wear:

  • Eye protection: Wear safety glasses or a face shield to protect your eyes from any debris that may fly off the lathe.
  • Ear protection: Use earplugs or earmuffs to protect your ears from the loud noise produced by the lathe.
  • Respiratory protection: Wear a dust mask or respirator to protect yourself from inhaling wood dust.
  • Clothing: Avoid wearing loose clothing or jewelry that may get caught in the lathe. Wear close-fitting clothes and tie back long hair.

Lathe Safety Practices

Apart from wearing PPE, there are several safety practices that you should follow when working with a lathe. Here are some of the most important ones:

  • Keep the work area clean: Keep the area around the lathe clean and free of clutter. This will prevent any tripping hazards and make it easier to move around the lathe.
  • Check the lathe before use: Before using the lathe, check for any loose or damaged parts. Make sure that all the guards and safety devices are in place.
  • Secure the workpiece: Always secure the workpiece firmly in place before starting the lathe. This will prevent it from flying off and causing an accident.
  • Start the lathe slowly: Start the lathe at a slow speed and gradually increase it as needed. This will prevent any sudden movements that may cause the workpiece to fly off.
  • Use the right tools: Use only the right tools for the job and make sure that they are sharp and in good condition. Dull or damaged tools can cause accidents.
  • Never leave the lathe unattended: Always stay with the lathe while it is in use. If you need to leave the lathe for any reason, turn it off first.

By following these safety measures, you can ensure a safe and enjoyable experience when making wooden rings on a lathe.

how-to-clean-a-wooden-hairbrush-easy-tips-and-tricks-2

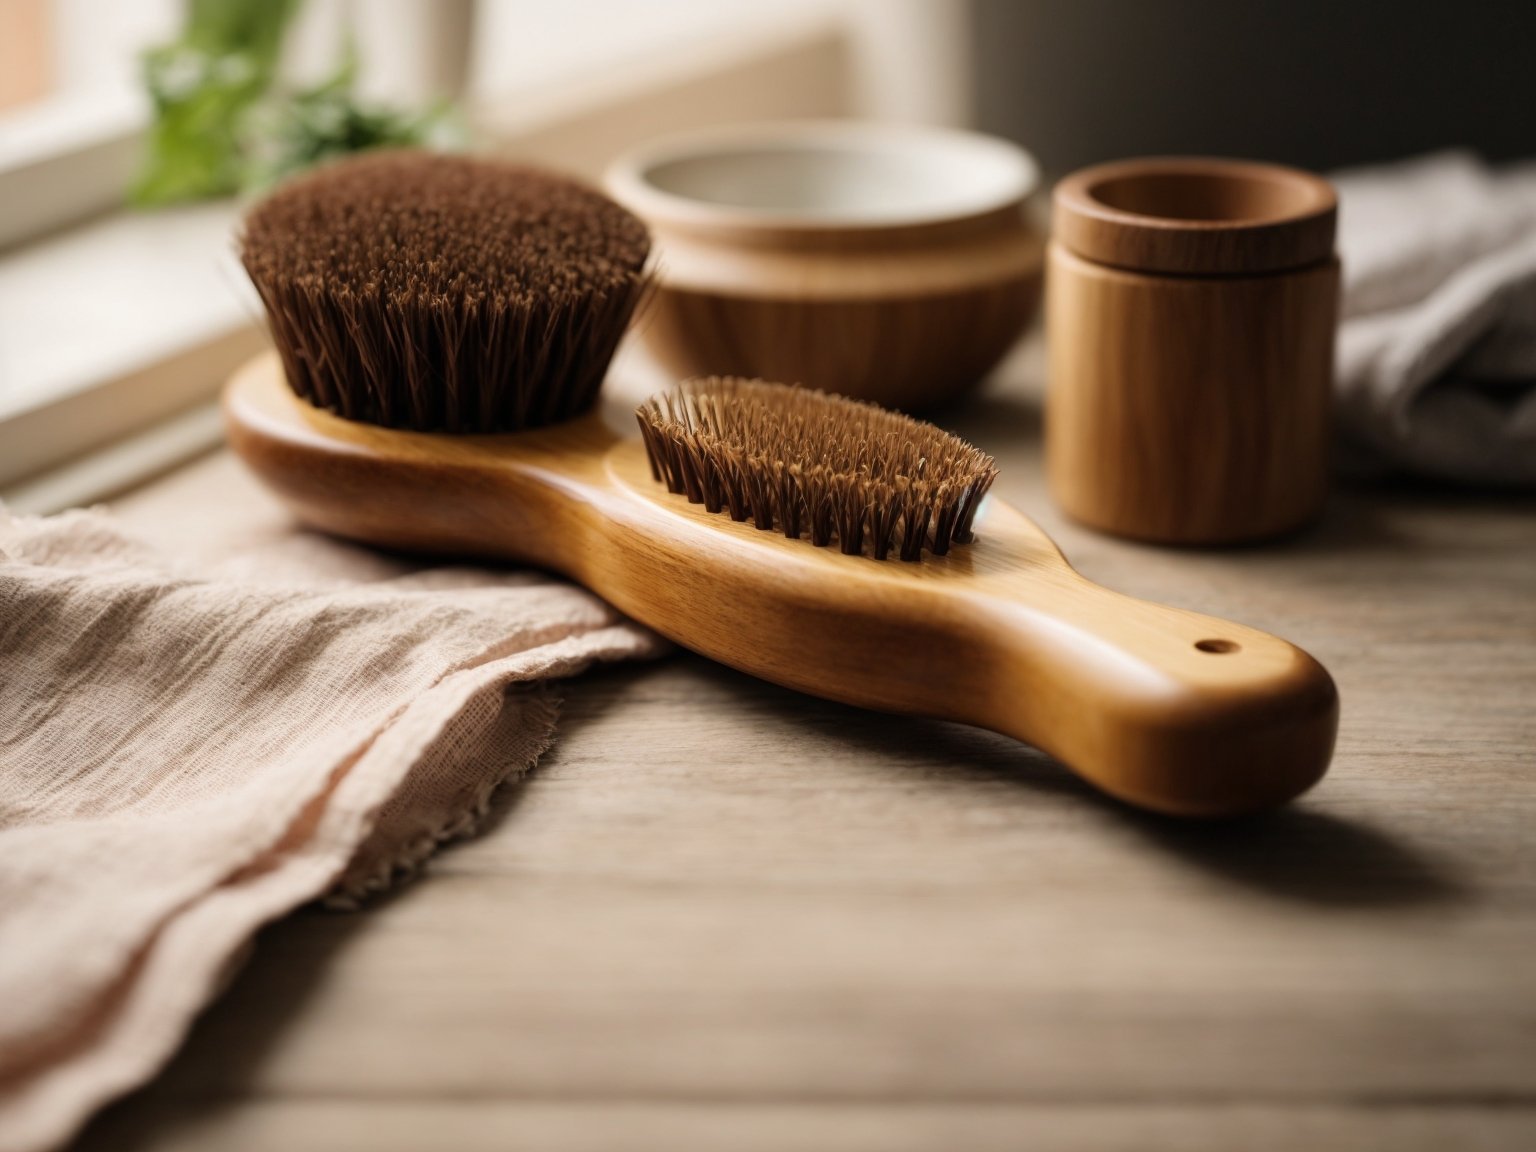
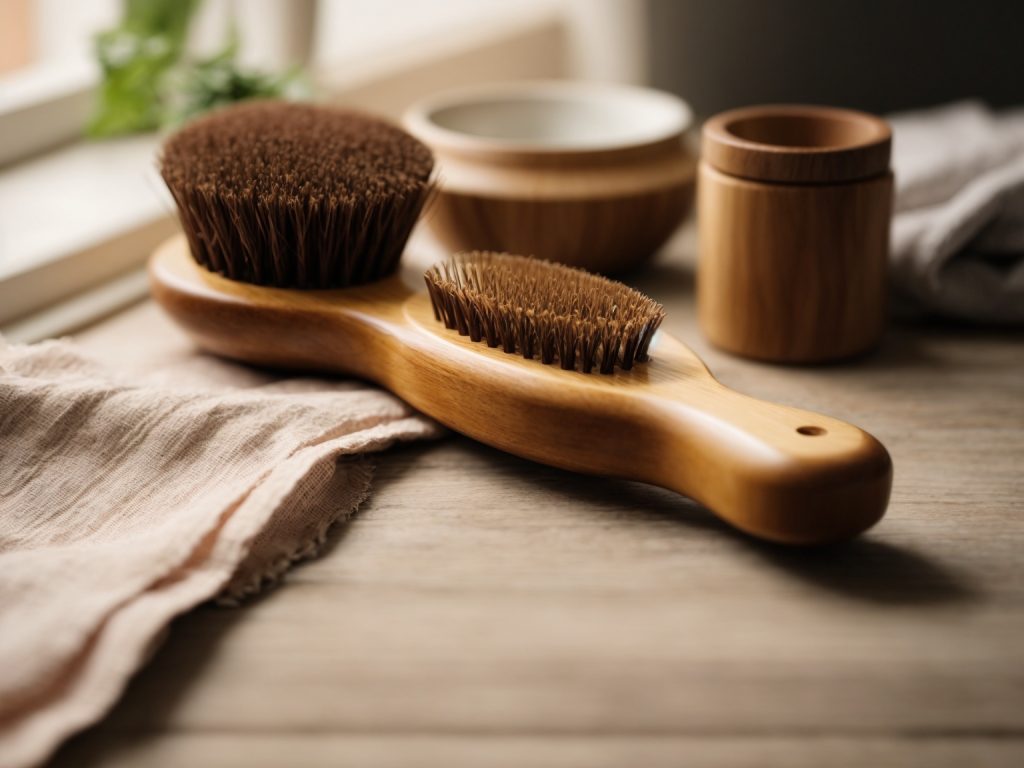
How to Clean a Wooden Hairbrush: Easy Tips and Tricks

Cleaning a wooden hairbrush may seem like a daunting task, but it’s actually quite simple once you know what to do. Wooden hairbrushes are great for distributing natural oils throughout your hair, but they can also collect dirt, oil, and hair over time. To keep your wooden hairbrush clean and functioning properly, it’s important to clean it regularly.

To begin cleaning your wooden hairbrush, start by removing any hair tangled around the bristles. This can be done using a comb or your fingers. Once the hair has been removed, you can begin cleaning the brush itself. One effective method is to mix water and tea tree oil and use a cloth to wipe down the brush. This will help remove any built-up dirt and oil. Another option is to use a gentle shampoo and warm water to clean the brush. Just be sure to rinse thoroughly and allow the brush to dry completely before using it again.

Understanding Your Wooden Hairbrush

how-to-clean-a-wooden-hairbrush-easy-tips-and-tricks-2

If you own a wooden hairbrush, it’s important to understand how to properly care for it. Wooden hairbrushes are known for their durability and natural bristles, which make them a popular choice among those who want to maintain healthy hair. Here are a few things you should know about your wooden hairbrush:

Material

Wooden hairbrushes are made from a variety of woods such as bamboo, beech, and olive. These woods are known for their durability and ability to withstand wear and tear. The bristles of a wooden hairbrush can be made from natural materials such as boar hair, or synthetic materials such as nylon.

Benefits

Using a wooden hairbrush has several benefits for your hair. The natural bristles help to distribute the natural oils from your scalp throughout your hair, which can help to prevent breakage and split ends. Wooden hairbrushes are also gentle on the scalp, which can help to reduce irritation and dandruff.

Cleaning

Cleaning your wooden hairbrush is important to maintain its effectiveness and longevity. To clean your brush, start by removing any loose hair and debris with a comb. Then, fill a sink or bowl with warm water and a few drops of shampoo. Soak the brush for a few minutes, then use a toothbrush to gently scrub the bristles. Rinse the brush thoroughly and allow it to air dry.

By understanding the material, benefits, and cleaning process of your wooden hairbrush, you can keep it in great condition and enjoy its benefits for years to come.

Why Cleaning Your Hairbrush is Important

Keeping your hairbrush clean is crucial for maintaining healthy hair and scalp. Here are a few reasons why cleaning your hairbrush should be a regular part of your hair care routine:

Prevents Product Buildup

Hair products like hairspray, gel, and mousse can leave residue on your hairbrush, which can build up over time. This buildup can make your hair look dull and lifeless, and can even cause your hair to become greasy and oily. By cleaning your hairbrush regularly, you can prevent product buildup and keep your hair looking healthy and shiny.

Removes Dirt and Oil

Your hairbrush can also collect dirt, oil, and dead skin cells from your scalp. If left untreated, these can contribute to dandruff and other scalp issues. Cleaning your hairbrush removes these impurities, helping to keep your scalp healthy and free from irritation.

Extends the Life of Your Hairbrush

Cleaning your hairbrush regularly can help to extend its lifespan. Over time, dirt and product buildup can cause the bristles to become clogged, making it less effective at detangling and smoothing your hair. By cleaning your hairbrush, you can keep the bristles clean and free from debris, ensuring that it works as well as it did when you first bought it.

By taking the time to clean your hairbrush regularly, you can keep your hair looking and feeling its best. So, make it a part of your hair care routine today!

Gathering The Necessary Cleaning Materials

Cleaning your wooden hairbrush is an essential task to keep your brush in good condition and prevent any damage to your hair. To get started, you will need to gather the necessary cleaning materials. Here are some tips on how to choose the right cleaning solution and select the right tools for cleaning your wooden hairbrush.

Choosing The Right Cleaning Solution

When it comes to cleaning your wooden hairbrush, you need to choose a cleaning solution that is gentle and effective. Here are some options to consider:

  • Water and Tea Tree Oil: This is a natural and effective cleaning solution that can help remove dirt, dust, and buildup from your wooden hairbrush. Simply mix a few drops of tea tree oil with water and use a cloth to wipe down your brush.
  • Shampoo: You can also use a mild shampoo to clean your wooden hairbrush. Mix a small amount of shampoo with water and use a toothbrush to scrub the bristles of your brush.
  • Vinegar: Vinegar is a natural cleaning agent that can help remove buildup and disinfect your wooden hairbrush. Mix equal parts of water and vinegar and use a cloth to wipe down your brush.

Selecting The Right Tools

In addition to a cleaning solution, you will also need some tools to help you clean your wooden hairbrush. Here are some options to consider:

  • Toothbrush: A toothbrush is a great tool for scrubbing the bristles of your wooden hairbrush and removing any dirt or buildup.
  • Cloth: A soft cloth can be used to wipe down your wooden hairbrush and remove any excess dirt or dust.
  • Comb: You can use a comb to remove any hair that is tangled in the bristles of your wooden hairbrush.

By using the right cleaning solution and tools, you can keep your wooden hairbrush clean and in good condition. Make sure to clean your brush regularly to prevent any damage to your hair and keep it looking its best.

Step-By-Step Guide to Cleaning Your Wooden Hairbrush

Cleaning a wooden hairbrush is an important part of maintaining its longevity and functionality. Here is a simple step-by-step guide to help you clean your wooden hairbrush effectively:

Removing Hair from The Brush

The first step in cleaning your wooden hairbrush is to remove any hair that is stuck in the bristles. You can use a comb or your fingers to do this. Simply run the comb or your fingers through the bristles to remove any hair.

Applying The Cleaning Solution

After removing the hair, you can apply a cleaning solution to the brush. You can use a mixture of warm water and mild shampoo or a solution of baking soda and water. Apply the cleaning solution to the bristles of the brush and use a toothbrush to scrub the bristles gently.

Rinsing and Drying Your Hairbrush

After scrubbing the bristles, rinse the brush thoroughly with warm water. Make sure to remove all the cleaning solution from the bristles. Then, use a clean towel to dry the brush. You can also leave the brush to air dry for a few hours before using it again.

Cleaning your wooden hairbrush regularly will help to keep it clean and free from bacteria, dirt, and oils. By following these simple steps, you can keep your wooden hairbrush in good condition for many years to come.

Maintaining Your Wooden Hairbrush

Taking care of your wooden hairbrush is essential to keep it in good condition and prolong its lifespan. Here are some tips on how to maintain your wooden hairbrush:

Regular Cleaning

Cleaning your wooden hairbrush regularly will help remove any buildup of dirt, oil, and hair products. Here are the steps to follow:

  1. Remove any loose hair from the brush by using a comb or your fingers.
  2. Mix a small amount of mild shampoo or soap with warm water in a bowl.
  3. Dip the bristles of the brush into the soapy solution and gently scrub them with a toothbrush.
  4. Rinse the brush thoroughly with clean water.
  5. Use a towel to remove any excess water and let the brush air dry completely before using it again.

Proper Storage

Proper storage of your wooden hairbrush is also important to keep it in good condition. Here are some tips on how to store your wooden hairbrush:

  1. Store your brush in a dry place away from moisture and humidity.
  2. Avoid leaving your brush in direct sunlight or near a heat source as it can cause the wood to warp or crack.
  3. If you need to travel with your brush, put it in a protective case or wrap it in a soft cloth to prevent any damage.

By following these simple tips, you can keep your wooden hairbrush clean and in good condition for years to come.

Common Mistakes to Avoid When Cleaning a Wooden Hairbrush

Cleaning a wooden hairbrush may seem like a straightforward task, but there are some common mistakes that you should avoid to ensure that you do not damage the brush or compromise its quality. Here are some of the mistakes that you should avoid when cleaning your wooden hairbrush:

Using Harsh Chemicals

One of the biggest mistakes that people make when cleaning their wooden hairbrush is using harsh chemicals. These chemicals can damage the brush and cause it to lose its natural oils, which can lead to cracking and splitting. Instead of using harsh chemicals, use a mild soap or shampoo to clean your brush. You can also use a mixture of water and vinegar to remove any buildup or residue on the brush.

Soaking the Brush in Water

Another mistake that people make when cleaning their wooden hairbrush is soaking it in water. Wooden brushes are not designed to be soaked in water, as this can cause the wood to swell and crack. Instead of soaking your brush, use a damp cloth or toothbrush to clean the bristles and remove any buildup or residue.

Using Excessive Force

Using excessive force when cleaning your wooden hairbrush can also damage the brush and cause it to lose its natural oils. Instead of scrubbing the brush vigorously, use gentle strokes to clean the bristles and remove any buildup or residue. You can also use a toothbrush to gently clean the bristles.

Not Allowing the Brush to Dry Completely

After cleaning your wooden hairbrush, it is important to allow it to dry completely before using it again. If you do not allow the brush to dry completely, it can become moldy or develop a musty smell. To dry your brush, place it in a well-ventilated area and allow it to air dry completely.

By avoiding these common mistakes, you can ensure that your wooden hairbrush remains in good condition and continues to provide you with the benefits of natural bristles.

how-to-restore-a-weathered-wooden-front-door

How to Restore a Weathered Wooden Front Door: Easy Tips and Tricks

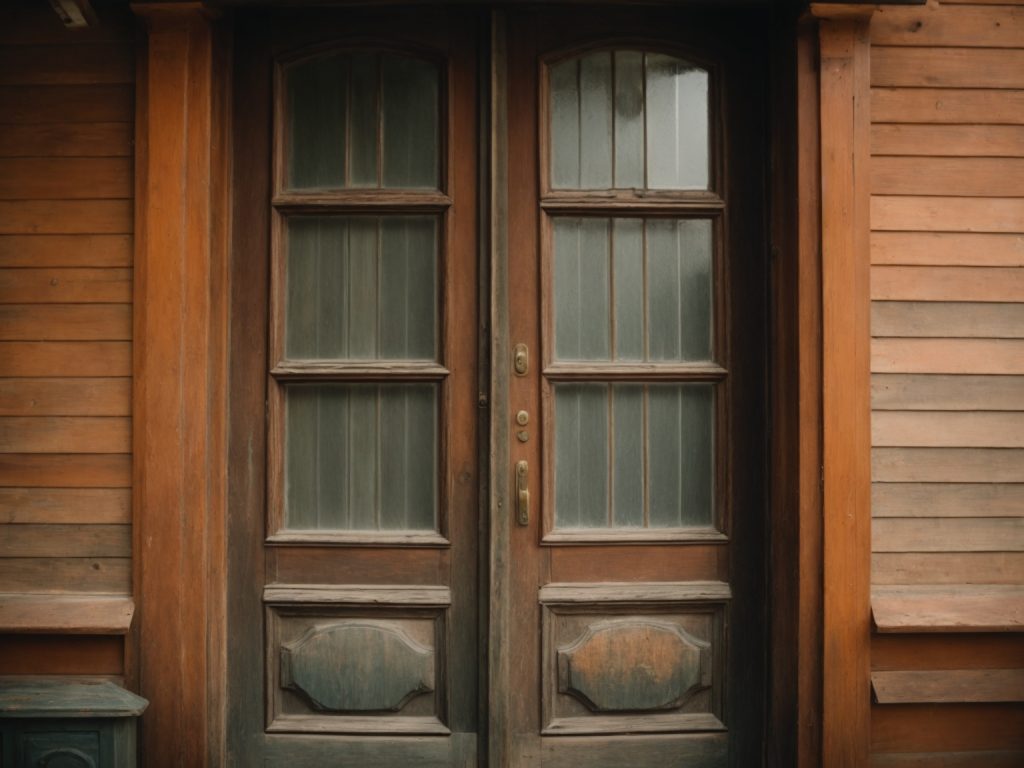
Is your wooden front door looking weathered and worn? If so, you’re not alone. Over time, exposure to the elements can cause wood doors to fade, crack, and peel. However, there’s good news! Restoring a weathered wooden front door is a simple and affordable process that can breathe new life into your entryway.

One easy step to restore your weathered wood door is to use a product called Sun Shield. This product can help to restore the finish of your door, making it look like new again. Additionally, you can refinish your door by sanding it down with a random-orbit sander and applying a fresh coat of varnish. By following these simple steps, you can restore your weathered wooden front door and make a great first impression on your guests.

Understanding the Damage

how-to-restore-a-weathered-wooden-front-door

If your wooden front door is looking weathered and worn, it’s important to understand the type of damage it has sustained before attempting to restore it. Here are some common types of damage that can occur:

Sun Damage

The sun’s UV rays can cause wood to dry out, fade, and crack over time. If your front door is exposed to direct sunlight for long periods of time, it’s likely that it has sustained sun damage.

Weather Damage

Rain, snow, and other types of weather can also take a toll on your front door. Moisture can cause wood to swell, warp, and rot, which can lead to structural damage over time.

Wear and Tear

Daily use can cause your front door to become scratched, dented, or chipped. This type of damage is usually cosmetic, but it can still detract from the overall appearance of your door.

Insect Damage

Termites and other wood-boring insects can cause serious damage to your front door over time. If you notice small holes or sawdust around your door, it’s possible that insects are present.

By understanding the type of damage your front door has sustained, you can choose the right restoration method and materials to bring it back to life.

Materials and Tools Needed

Restoring a weathered wooden front door is a simple DIY task that can be accomplished with a few basic tools and materials. Here’s what you’ll need:

Materials

  • Sandpaper (80-grit, 100-grit, and 120-grit)
  • Wood stain or paint
  • Clear coat or sealant
  • Rag or cloth
  • Mineral spirits (if using oil-based products)
  • Painter’s tape

Tools

  • Random-orbit sander
  • Paintbrush or foam roller
  • Screwdriver
  • Sawhorses or a sturdy work surface
  • Drop cloth or tarp

Before you begin, make sure you have all the necessary materials and tools. You may already have some of them on hand, but if not, they can be easily found at your local hardware or home improvement store.

When choosing your materials, consider the type of wood your door is made of and the look you want to achieve. If you prefer a natural wood look, choose a stain that complements the wood’s natural color. If you prefer a painted finish, choose a high-quality paint that is designed for exterior use.

Using a clear coat or sealant will help protect your door from future weather damage and ensure that your hard work lasts for years to come.

Preparation of the Door

Before you start restoring your weathered wooden front door, you need to prepare it properly. Here are the steps you should follow:

  1. Remove the Door: The first thing you need to do is remove the door from its hinges. This will make it easier to work on the door and ensure that you don’t accidentally damage the surrounding area.
  2. Clean the Door: Use a soft-bristled brush or a cloth to remove any dirt, dust, or debris from the door. You can also use a vacuum cleaner with a soft brush attachment to remove the dirt from the nooks and crannies.
  3. Sand the Door: Use sandpaper to remove any loose or flaking paint, varnish, or stain from the door. Start with a coarse-grit sandpaper and then move to a finer-grit sandpaper to achieve a smooth surface. Be sure to sand with the grain of the wood.
  4. Repair Any Damage: If your door has any cracks, holes, or other damage, you need to repair it before you start restoring it. Use wood filler to fill any holes or cracks and then sand the area smooth.
  5. Apply a Stripper: If your door has a lot of old paint or varnish, you may need to use a paint stripper to remove it. Be sure to follow the manufacturer’s instructions and wear protective gloves and eyewear.
  6. Clean Again: Once you have stripped the door, you need to clean it again to remove any residue from the stripper. Use a cloth and a mild detergent to clean the door thoroughly.

By following these steps, you can prepare your weathered wooden front door for restoration.

Stripping the Old Paint

If your wooden front door is covered in old paint, it’s important to strip it off before refinishing the wood. Here are the steps you need to follow to strip the old paint off your front door.

Safety Measures

Before you start stripping the paint off your front door, it’s important to take some safety measures to protect yourself from the chemicals involved in the process. Here are some things you should do:

  • Wear gloves and protective eyewear to protect your skin and eyes from the chemicals.
  • Work in a well-ventilated area to avoid inhaling fumes.
  • Cover the surrounding area with drop cloths to avoid getting paint stripper on anything else.

Process of Stripping

Here’s how to strip the old paint off your front door:

  1. Apply paint stripper to the door using a brush or roller. Be sure to follow the manufacturer’s instructions for the specific product you’re using.
  2. Wait for the paint stripper to work. This can take anywhere from a few minutes to several hours depending on the product and the thickness of the paint.
  3. Use a scraper to remove the paint. Be sure to scrape in the direction of the wood grain to avoid damaging the wood.
  4. Repeat steps 1-3 until all the paint is removed.
  5. Once all the paint is removed, use a fine-grit sandpaper to smooth out any rough spots.

Remember to dispose of the paint stripper and any paint chips in accordance with your local regulations. With the old paint stripped off, your front door is now ready for refinishing.

Sanding the Door

When restoring a weathered wooden front door, sanding is a crucial step to prepare the surface for refinishing. Here are some tips to help you sand your door effectively and efficiently.

Choosing the Right Sandpaper

Before starting, it’s important to choose the right sandpaper grit for your door. A lower grit sandpaper, such as 60 or 80, is best for removing old paint or finish. Once the old finish is removed, switch to a higher grit sandpaper, such as 120 or 150, to smooth out the surface and prepare it for refinishing.

Sanding Technique

When sanding your door, it’s important to use a consistent and even pressure. Sand with the grain of the wood to avoid creating scratches or marks on the surface. Use a sanding block or tool to ensure an even finish. Be sure to sand all areas of the door, including the edges and corners.

After sanding, use a tack cloth or a damp cloth to remove any dust or debris from the surface. This will ensure a smooth and even finish when refinishing your door.

Remember, sanding is a crucial step in restoring a weathered wooden front door. With the right sandpaper and technique, you can achieve a beautiful and long-lasting finish.

Addressing Weather Damage

If your wooden front door has been exposed to the elements for a long time, it can develop cracks, splits, and rot. These issues can make your door look unsightly and can even compromise its structural integrity. Fortunately, there are steps you can take to address these problems and restore your door to its former glory.

Fixing Cracks and Splits

If your door has developed cracks or splits, you can fix them using wood filler. Here’s how:

  1. Clean the damaged area with a stiff-bristled brush to remove any loose or splintered wood.
  2. Apply wood filler to the damaged area using a putty knife. Make sure to fill the crack or split completely.
  3. Smooth the surface of the wood filler with the putty knife.
  4. Allow the wood filler to dry completely, following the manufacturer’s instructions.
  5. Sand the surface of the wood filler with fine-grit sandpaper until it is smooth and flush with the surrounding wood.
  6. Apply a coat of primer to the repaired area to seal the wood filler and prepare it for paint or stain.

Treating Rotten Wood

If your door has developed rot, you will need to remove the affected wood and replace it with new wood. Here’s how:

  1. Use a screwdriver or chisel to remove any loose or rotten wood.
  2. Cut a piece of new wood to fit the area you removed.
  3. Apply wood glue to the edges of the new wood and the surrounding wood.
  4. Insert the new wood into the hole and press it firmly in place.
  5. Clamp the new wood in place and allow the glue to dry completely, following the manufacturer’s instructions.
  6. Sand the surface of the new wood until it is smooth and flush with the surrounding wood.
  7. Apply a coat of primer to the repaired area to seal the new wood and prepare it for paint or stain.

By following these steps, you can address weather damage to your wooden front door and restore its appearance and function.

Priming the Door

Now that you have cleaned and sanded your weathered wooden front door, it’s time to prime it. Priming the door is an essential step that will help the new paint or stain adhere better and last longer. Here are a few steps to follow when priming your door:

  1. Choose the right primer: There are many types of primers available, so make sure you choose the right one for your door. If you plan to stain your door, choose a wood conditioner or a clear primer. If you plan to paint your door, choose a primer that is compatible with the type of paint you will be using.
  2. Apply the primer: Using a brush or a roller, apply a thin and even coat of primer to the door. Make sure to apply the primer in the direction of the wood grain and avoid leaving any drips or brush marks. If you are using a spray primer, make sure to follow the manufacturer’s instructions and wear a mask to protect yourself from fumes.
  3. Let the primer dry: Allow the primer to dry completely before applying the paint or stain. The drying time will depend on the type of primer and the weather conditions, so make sure to check the label for instructions.
  4. Sand the primer: Once the primer is dry, use a fine-grit sandpaper to sand the surface of the door lightly. This will help smooth out any rough spots and create a better surface for the paint or stain to adhere to.
  5. Clean the door: Use a tack cloth or a damp cloth to remove any dust or debris from the surface of the door. Make sure the surface is clean and dry before applying the paint or stain.

By following these steps, you can ensure that your weathered wooden front door is properly primed and ready for the final coat of paint or stain.

Painting the Door

If you want to restore your weathered wooden front door, painting it is a great option. Here are some tips to help you get started.

Choosing the Right Paint

When choosing a paint for your front door, it’s important to select an exterior-grade paint that can withstand the elements. Look for a paint that is specifically designed for use on wood and offers UV protection to prevent fading from the sun.

Consider the color of your door and the style of your home when selecting a paint color. A bright color can add a pop of personality to your home, while a more neutral color can create a classic look.

Painting Technique

Before you start painting, make sure your door is clean and dry. Sand any rough spots or peeling paint to create a smooth surface.

Apply a primer to the door to help the paint adhere and create a more even finish. Once the primer is dry, apply the paint in thin, even coats. It’s better to apply multiple thin coats than one thick coat, which can lead to drips and an uneven finish.

Use a high-quality brush or roller to apply the paint, and work in the direction of the wood grain. Be sure to paint the edges of the door as well.

Allow each coat of paint to dry completely before applying the next coat. Once you’re happy with the coverage, allow the final coat to dry for at least 24 hours before reattaching any hardware or closing the door.

By following these tips, you can restore your weathered wooden front door with a fresh coat of paint.

Maintaining Your Restored Door

Once you’ve restored your weathered wooden front door, it’s important to maintain it properly to keep it looking beautiful and protect it from the elements. Here are some tips for maintaining your restored door:

Regular Cleaning

Regular cleaning is essential to keep your door looking great. Here’s what you need to do:

  • Use a soft cloth or sponge to wipe down the door with warm, soapy water. Avoid using harsh chemicals or abrasive materials, as these can damage the finish.
  • Rinse the door thoroughly with clean water and dry it with a soft towel.
  • If your door has glass panels, clean them with a glass cleaner and a soft cloth.

Annual Check-up

It’s a good idea to give your door an annual check-up to make sure it’s still in good condition. Here’s what you need to do:

  • Inspect the door for any signs of wear or damage, such as cracks, chips, or peeling paint. If you notice any problems, address them as soon as possible to prevent further damage.
  • Check the weatherstripping around the door to make sure it’s still in good condition. Replace any worn or damaged weatherstripping to keep your home energy-efficient.
  • Lubricate the hinges and locks with a silicone-based lubricant to keep them working smoothly.

By following these simple maintenance tips, you can keep your restored wooden front door looking beautiful for years to come.

how-to-clean-wooden-spoons-simple-tips-and-tricks-2

How to Clean Wooden Spoons: Simple Tips and Tricks

If you’re an avid cook, you know how important it is to have clean and well-maintained kitchen utensils. Wooden spoons are a staple in any kitchen, but they can be tricky to clean. Not only can they absorb flavors and odors, but they can also harbor bacteria if not cleaned properly. In this article, we’ll walk you through some simple steps to keep your wooden spoons clean and in good condition.

First and foremost, it’s important to wash your wooden spoons after each use. Use warm water and soap to remove any food residue, and then rinse thoroughly. Never put your wooden spoons in the dishwasher, as the high heat can cause them to warp or crack. Instead, wash them by hand and let them air dry.

If your wooden spoons are looking a bit worse for wear, don’t worry! There are a few simple steps you can take to restore them to their former glory. Some methods include soaking your spoons in a mixture of water and vinegar or hydrogen peroxide, while others suggest using a paste made of baking soda and lemon juice. We’ll go over these methods in more detail later in the article. By following these tips, you can keep your wooden spoons clean and in great condition for years to come.

Understanding the Importance of Cleaning Wooden Spoons

how-to-clean-wooden-spoons-simple-tips-and-tricks-2

Wooden spoons are a staple in most kitchens, and for good reason. They are versatile, durable, and gentle on your cookware. However, they require proper care and maintenance to ensure their longevity. One of the most important aspects of caring for wooden spoons is cleaning them regularly.

When you use wooden spoons to cook, they come into contact with various types of food, including acidic and oily substances. Over time, these substances can build up on the surface of the spoon, leading to discoloration, odors, and even mold growth. If left uncleaned, these spoons can become a breeding ground for harmful bacteria that can cause foodborne illnesses.

Regular cleaning of wooden spoons is essential to remove any build-up of food, oils, and bacteria. By cleaning your wooden spoons after each use, you will prevent any harmful substances from accumulating on the surface of the spoon. This will not only keep your spoons looking clean and new but also ensure that they are safe to use.

When cleaning wooden spoons, it is important to avoid using harsh chemicals or abrasive sponges, as these can damage the surface of the spoon. Instead, use mild soap and warm water to gently clean the spoon. You can also soak the spoon in a 50/50 mix of water and hydrogen peroxide or distilled white vinegar for a deep clean.

In conclusion, cleaning your wooden spoons regularly is crucial to maintaining their longevity and ensuring that they are safe to use. By taking the time to clean your spoons properly, you will not only keep them looking new but also protect your health and the health of those who use your kitchen.

Materials Needed for Cleaning

Cleaning your wooden spoons is a simple process that only requires a few materials. Here are the things you’ll need:

Dish soap

Dish soap is an essential ingredient for cleaning your wooden spoons. It helps to remove dirt, grime, and bacteria from the surface of the spoon.

Water

You’ll also need water to rinse off the soap and any debris from the spoon. Make sure to use warm water, as hot water can damage the wood.

Non-abrasive sponge

A non-abrasive sponge is perfect for cleaning wooden spoons. It’s gentle enough to avoid scratching the wood, but tough enough to remove any tough stains.

Hydrogen peroxide or distilled white vinegar

For a deep clean, you can use hydrogen peroxide or distilled white vinegar. These products have antibacterial properties that help to kill germs and bacteria on the surface of the spoon.

Mineral, walnut, tung, or linseed oil

To keep your wooden spoons in good condition, you’ll need to oil them periodically. Mineral, walnut, tung, or linseed oil are all excellent options for this. They help to keep the wood moisturized and prevent it from drying out and cracking.

Clean cloth

After cleaning and oiling your wooden spoons, you’ll need a clean cloth to wipe off any excess oil and make sure the spoon is dry before using it again.

By having these materials on hand, you’ll be able to keep your wooden spoons clean and in good condition for years to come.

Pre-Cleaning Steps

Before you start cleaning your wooden spoons, there are a few pre-cleaning steps you should take to ensure that the spoons are properly cleaned and maintained.

Rinsing the Spoons

The first step is to rinse the spoons under running water to remove any food particles or debris that may be stuck on them. You can use a non-abrasive sponge to gently scrub the surface of the spoons to remove any stubborn residue. Avoid using harsh detergents or abrasive cleaners as they can damage the wood and cause it to crack or split.

Inspecting for Damage

After rinsing the spoons, inspect them for any signs of damage. Check for cracks, splits, or splinters in the wood. If you find any damage, it’s best to discard the spoon as it can be a breeding ground for bacteria.

If the spoons are in good condition, you can proceed to the next step of cleaning them. Remember, it’s important to take care of your wooden spoons to extend their lifespan and ensure that they remain safe to use in your kitchen.

Deep Cleaning Process

When it comes to deep cleaning your wooden spoons, there are a few things to keep in mind. Here are two effective methods for deep cleaning your wooden spoons:

Using Mild Soap

To deep clean your wooden spoons with mild soap, follow these steps:

  1. Fill a sink or basin with warm water and add a small amount of mild dish soap.
  2. Place your wooden spoons in the water and use a non-abrasive sponge to gently scrub them.
  3. Rinse the spoons with warm water and dry them immediately with a clean towel.
  4. For extra protection, you can apply a thin layer of mineral oil to your wooden spoons after they have dried.

Using Vinegar

Another effective method for deep cleaning your wooden spoons is by using vinegar. Here’s how to do it:

  1. Mix equal parts of water and distilled white vinegar in a container.
  2. Immerse your wooden spoons in the mixture and let them soak for at least 15 minutes.
  3. Use a non-abrasive sponge to scrub the spoons gently.
  4. Rinse the spoons with warm water and dry them immediately with a clean towel.
  5. For extra protection, you can apply a thin layer of mineral oil to your wooden spoons after they have dried.

Remember, it’s important to avoid soaking your wooden spoons in water, as this can cause them to warp and crack. By following these deep cleaning methods, you can help extend the lifespan of your wooden spoons and keep them looking like new.

Drying Wooden Spoons Properly

After washing your wooden spoons, it is important to dry them properly to prevent warping, cracking, or mold growth. Here are some tips for drying your wooden spoons:

  • Air-dry your wooden spoons: The best way to dry wooden spoons is to let them air dry naturally. Place them in a dish rack or on a clean towel and let them dry completely before storing them.
  • Don’t use a dishwasher: Wooden spoons should never be washed in a dishwasher as the high heat and moisture can damage the wood and cause it to warp or crack.
  • Avoid direct sunlight: Direct sunlight can cause the wood to dry out too quickly and may cause it to crack. It is best to dry your wooden spoons in a shaded area or indoors.
  • Use a clean towel: If you need to dry your wooden spoons immediately, use a clean towel to wipe them dry. Make sure the towel is clean and dry to prevent any bacteria or mold growth.
  • Store your wooden spoons properly: Once your wooden spoons are completely dry, store them in a dry and well-ventilated area. Avoid storing them in airtight containers or plastic bags as this can trap moisture and cause mold growth.

By following these simple tips, you can ensure that your wooden spoons stay in good condition and last for years to come.

Maintenance Tips

Regular Cleaning

To keep your wooden spoons in good condition, it is essential to clean them regularly. Hand wash your wooden spoons with warm water and soap after each use. Avoid using harsh detergents or abrasive sponges that can damage the wood’s surface. Rinse the spoons thoroughly and dry them with a clean towel or air dry them.

If you notice any stubborn stains or food residue on the spoons, soak them in a mixture of warm water and vinegar for about 15 minutes before washing them. You can also use a non-abrasive sponge or a soft-bristled brush to scrub off any remaining stains. Make sure to rinse the spoons thoroughly and dry them completely before storing them.

Oil Treatment

Wooden spoons can dry out over time, which can cause them to split or crack. To prevent this from happening, it is essential to treat your wooden spoons with oil periodically. Mineral, walnut, tung, or linseed oil are all good options for treating wooden spoons.

To oil your wooden spoons, apply a small amount of oil to a clean cloth and rub it into the spoon’s surface. Make sure to coat the entire spoon, including the handle and any crevices or joints. Let the oil soak in for a few minutes, then wipe off any excess oil with a clean cloth. Repeat this process once a month or as needed to keep your wooden spoons in good condition.

By following these maintenance tips, you can extend the lifespan of your wooden spoons and keep them looking and functioning like new for years to come.

Common Mistakes to Avoid

When it comes to cleaning wooden spoons, there are a few common mistakes that people often make. Avoiding these mistakes will help ensure that your wooden spoons remain in good condition for years to come.

Mistake #1: Using Harsh Cleaners

One of the biggest mistakes people make when cleaning wooden spoons is using harsh cleaners. Harsh cleaners can damage the wood and cause it to dry out, crack, or split. Instead, use mild dish soap and warm water to clean your wooden spoons.

Mistake #2: Soaking Wooden Spoons

Another mistake people often make is soaking wooden spoons in water for extended periods. This can cause the wood to absorb too much moisture, which can lead to warping or cracking. Instead, wash your wooden spoons by hand and dry them immediately afterward.

Mistake #3: Putting Wooden Spoons in the Dishwasher

Putting wooden spoons in the dishwasher is a big no-no. The high heat and harsh detergents can damage the wood and cause it to split or crack. Instead, wash your wooden spoons by hand and dry them immediately afterward.

Mistake #4: Using High Heat to Dry Wooden Spoons

When drying your wooden spoons, avoid using high heat sources like ovens or microwaves. High heat can cause the wood to dry out too quickly, which can lead to cracking or splitting. Instead, air dry your wooden spoons or use a soft towel to dry them by hand.

By avoiding these common mistakes, you can help ensure that your wooden spoons remain in good condition for years to come.

FAQs About Cleaning Wooden Spoons

Cleaning wooden spoons is an essential part of maintaining their longevity and hygiene. Here are some frequently asked questions about how to clean wooden spoons.

How often should you clean your wooden spoons?

You should clean your wooden spoons after each use to prevent the buildup of bacteria and food residue. It’s best to wash them by hand with warm, soapy water and let them air dry completely before storing them.

Can you put wooden spoons in the dishwasher?

No, you should never put wooden spoons in the dishwasher. The high heat and harsh detergents can damage the wood and cause it to warp or crack. Hand washing is the best way to clean wooden spoons.

How do you remove stains from wooden spoons?

To remove stains from wooden spoons, mix equal parts baking soda and water to form a paste. Apply the paste to the stained area and let it sit for a few minutes before rinsing it off with warm water. For tougher stains, you can also try rubbing the area with a slice of lemon or a few drops of vinegar.

How do you prevent wooden spoons from drying out?

To prevent wooden spoons from drying out and cracking, it’s important to oil them regularly. Use a food-safe oil like mineral oil, walnut oil, or linseed oil. Apply a small amount of oil to a clean cloth and rub it into the wood, making sure to cover the entire surface. Let the oil soak in for a few hours before wiping off any excess with a clean cloth.

Can you use bleach to clean wooden spoons?

No, you should never use bleach to clean wooden spoons. Bleach is too harsh and can damage the wood, causing it to become brittle and crack. Stick to gentle, natural cleaning methods like soap and water or vinegar and baking soda.

how-to-build-a-wooden-fence

How to Build a Wooden Fence: A Beginner's Guide

If you’re looking to add some privacy to your yard or simply want to create a boundary around your property, building a wooden fence might be just what you need. A wooden fence is not only functional, but it can also add aesthetic appeal to your home. However, building a fence can be a daunting task, especially if you’ve never done it before. In this article, we’ll provide you with a step-by-step guide on how to build a wooden fence.

Before you start building your fence, it’s important to do some preparation work. This includes checking with your local authorities to ensure that you’re allowed to build a fence on your property and that you’re following any regulations or guidelines. You’ll also need to determine the location and dimensions of your fence, as well as the type of wood you want to use. Once you have all of this information, you can start gathering your materials and tools.

Building a wooden fence can be a fun and rewarding DIY project, but it does require some time and effort. In the following sections, we’ll take you through the steps of building a wooden fence, from setting the posts to attaching the pickets. By the end of this article, you’ll have the knowledge and skills you need to build a beautiful and functional wooden fence for your home.

Understanding the Basics

how-to-build-a-wooden-fence

If you’re looking to build a wooden fence, it’s important to understand the basics before you get started. In this section, we’ll cover the types of wood commonly used for fencing and the benefits of choosing a wooden fence.

Types of Wood

When it comes to choosing the right wood for your fence, there are a few options to consider. Some of the most popular types of wood for fencing include:

  • Cedar: This wood is naturally resistant to rot and insects, making it a great choice for outdoor use. It’s also lightweight and easy to work with, which can make installation easier.
  • Pine: Pine is a more affordable option than cedar, but it’s also less durable. It may require regular maintenance to keep it looking its best.
  • Redwood: This is a beautiful, durable wood that is naturally resistant to decay and insects. However, it’s also one of the most expensive options.

Benefits of a Wooden Fence

There are several benefits to choosing a wooden fence for your property. Some of the most notable include:

  • Privacy: A wooden fence can provide a barrier between your property and the outside world, giving you more privacy and security.
  • Aesthetics: Wooden fences have a classic, timeless look that can complement any home or landscape.
  • Customization: Wooden fences can be customized to fit your specific needs and preferences. You can choose the height, style, and color that best suits your property.

Overall, building a wooden fence can be a great way to improve the look and function of your property. By choosing the right wood and understanding the benefits of a wooden fence, you can create a beautiful and functional fence that will last for years to come.

Planning Your Fence

Before you start building your wooden fence, you need to plan it out carefully. This will help you avoid mistakes and ensure that your fence is sturdy and meets local regulations. Here are some important things to consider when planning your fence:

Determining the Layout

The first step in planning your fence is to determine its layout. You need to decide where you want to place your fence and how long it should be. This will help you calculate the amount of materials you need to buy.

To determine the layout, you can use stakes and string to mark the boundaries of your fence. You can also use a measuring tape to measure the length of each side. Make sure to keep the corners at a 90-degree angle to ensure that your fence is square.

Checking Local Regulations

Before you start building your fence, you need to check local regulations to make sure that your fence meets the requirements. This includes checking for any height restrictions, setback requirements, and other regulations that may apply in your area.

You can check with your local zoning department or homeowners’ association to find out what regulations apply in your area. Make sure to obtain any necessary permits before you start building your fence.

Choosing the Right Tools

When building your fence, it’s important to have the right tools. This includes a post hole digger, a level, a saw, and a drill. Make sure to choose high-quality tools that are suitable for the job.

You may also need to rent a power auger if you have a large fence to build. This will help you dig the post holes more quickly and efficiently.

By carefully planning your fence, checking local regulations, and choosing the right tools, you can ensure that your wooden fence is built to last.

Purchasing Materials

When building a wooden fence, purchasing quality materials is essential to ensure that your fence lasts for many years to come. Here are some tips to help you select the right materials for your project.

Selecting Quality Wood

Choosing the right type of wood is crucial to the longevity and appearance of your fence. Some popular options include cedar, redwood, and pressure-treated pine. Cedar and redwood are naturally resistant to decay and insect damage, while pressure-treated pine has been treated with chemicals to resist rot and decay.

When selecting your wood, look for boards that are straight, free of knots, and have minimal warping or twisting. You may also want to consider the grade of the wood, which can affect its appearance and durability. Higher grades of wood will have fewer knots and defects, but may also be more expensive.

Buying Necessary Hardware

In addition to your wood, you will also need to purchase hardware to assemble your fence. This includes posts, rails, pickets, and fasteners such as nails or screws. When selecting your hardware, make sure that it is compatible with the type of wood you have chosen.

You will also need to consider the size and spacing of your hardware. For example, if you are building a fence with 6-foot pickets, you will need to purchase rails that are long enough to accommodate the pickets. You may also want to consider using metal brackets or connectors to reinforce your fence and ensure that it stays sturdy over time.

Overall, taking the time to carefully select your materials and hardware will help ensure that your wooden fence is both beautiful and durable.

Preparing the Ground

Before you start building your wooden fence, it’s important to prepare the ground. This will help ensure that your fence is stable, level, and long-lasting. In this section, we will cover two important sub-sections: “Clearing the Area” and “Measuring and Marking”.

Clearing the Area

The first step in preparing the ground is to clear the area where you will be building your fence. This means removing any plants, rocks, or other debris that may be in the way. You’ll want to clear a path that is at least 3 feet wide so that you have enough space to work.

If there are any large rocks or tree stumps in the way, you may need to remove them using a shovel, pickaxe, or other digging tool. Make sure to wear gloves and eye protection when doing this, as it can be dangerous work.

Once you’ve cleared the area, you’ll want to make sure that the ground is level. Use a level to check for any high or low spots, and use a shovel to fill in any holes or low spots. This will help ensure that your fence is straight and level.

Measuring and Marking

The next step is to measure and mark the area where you will be building your fence. Use a measuring tape to measure the length of your fence line, and mark the corners and end points with stakes or flags.

Next, use a string line to mark the exact location of your fence line. Tie one end of the string to a stake or flag at one corner of your fence line, and stretch the string to the opposite corner. Make sure the string is level and straight, and tie it off at the other end.

Use a tape measure to measure the distance between the string and the ground at each stake or flag. This will help you determine how deep to dig your fence post holes.

By following these steps to prepare the ground, you’ll be well on your way to building a sturdy and long-lasting wooden fence.

Building the Fence

Building a wooden fence can be a challenging task, but with the right tools and a little bit of patience, you can create a beautiful fence that will last for years to come. In this section, we will cover the three main steps to building a wooden fence: setting the posts, attaching the rails, and installing the pickets.

Setting the Posts

The first step in building a wooden fence is to set the posts. This is a critical step because it will determine the stability and durability of your fence. Here are the steps to set the posts:

  1. Measure and mark the location of each post. Make sure the distance between each post is consistent.
  2. Dig a hole for each post using a post-hole digger. The depth of the hole should be at least one-third the length of the post.
  3. Place the post in the hole and fill it with concrete. Use a level to make sure the post is straight and plumb.
  4. Allow the concrete to dry for at least 24 hours before moving on to the next step.

Attaching the Rails

Once the posts are set, you can attach the rails. The rails are the horizontal pieces of wood that connect the posts and provide support for the pickets. Here are the steps to attach the rails:

  1. Measure and cut the rails to the correct length. Make sure they are level and evenly spaced.
  2. Attach the rails to the posts using galvanized screws or nails. Make sure the rails are flush with the top of the posts and evenly spaced.

Installing the Pickets

The final step in building a wooden fence is to install the pickets. The pickets are the vertical pieces of wood that are attached to the rails and provide privacy and security. Here are the steps to install the pickets:

  1. Measure and cut the pickets to the correct length. Make sure they are evenly spaced and level.
  2. Attach the pickets to the rails using galvanized screws or nails. Make sure they are flush with the top and bottom rails.
  3. Fill any gaps between the pickets with wood filler or caulk.

By following these steps, you can build a beautiful and sturdy wooden fence that will enhance the look of your property and provide privacy and security for years to come.

Maintaining Your Wooden Fence

To ensure that your wooden fence lasts as long as possible, you will need to take proper care of it. This includes regular cleaning, applying protective sealant, and repairing any damage that may occur.

Regular Cleaning

Cleaning your wooden fence regularly is important to prevent the buildup of dirt, grime, and other debris that can cause damage over time. Here are some tips for cleaning your fence:

  • Use a pressure washer or a garden hose to rinse off any loose dirt or debris.
  • Apply a wood or fence cleaner to the fence and work from the bottom to the top, coating the entire fence in the cleaner.
  • To get the solution behind tight areas, dip a brush into the solution and apply it between boards or tight corners.
  • Rinse the fence thoroughly with clean water.

Applying Protective Sealant

Applying a protective sealant to your wooden fence can help to prevent damage from the sun, moisture, and other elements. Here are some tips for applying sealant:

  • Choose a high-quality sealant that is appropriate for your specific type of wood.
  • Apply the sealant with a brush or sprayer, making sure to cover all surfaces of the fence.
  • Allow the sealant to dry completely before applying a second coat.
  • Repeat this process every few years to keep your fence protected.

Repairing Damage

Even with proper care, your wooden fence may become damaged over time. Here are some tips for repairing damage:

  • Replace any broken or damaged boards as soon as possible to prevent further damage.
  • Use wood filler to fill in any cracks or holes in the wood.
  • Sand the repaired areas smooth and apply a protective sealant to prevent further damage.

By following these tips for maintaining your wooden fence, you can help to ensure that it lasts for many years to come.

how-to-clean-wooden-cabinets-tips-and-tricks-for-a-sparkling-kitchen-2

How to Clean Wooden Cabinets: Tips and Tricks for a Sparkling Kitchen

Cleaning wooden cabinets can be a daunting task, but it’s an essential part of maintaining the look and quality of your kitchen. Over time, cabinets can accumulate dirt, grease, and grime, making them look dull and worn out. Fortunately, with the right tools and techniques, you can easily clean your wooden cabinets and restore their natural shine.

To start, it’s important to gather the necessary cleaning supplies. You’ll need a soft cloth or sponge, a mild soap or cleaning solution, and warm water. Avoid using harsh chemicals or abrasive materials that can damage the wood surface. Before you begin, remove any items from your cabinets and clear the surrounding area to prevent any spills or accidents.

Next, wipe down the cabinets with a damp cloth or sponge to remove any loose dirt or debris. Then, apply the cleaning solution to the cloth or sponge and gently scrub the cabinet surfaces, working in small sections. Be sure to rinse the cloth or sponge frequently and change the water as needed to avoid spreading dirt or grime. By following these simple steps, you can keep your wooden cabinets looking clean and polished for years to come.

Understanding the Basics of Wooden Cabinets

how-to-clean-wooden-cabinets-tips-and-tricks-for-a-sparkling-kitchen-2

If you have wooden cabinets in your kitchen, it’s important to understand how to properly clean and maintain them. Wooden cabinets can add warmth and beauty to your kitchen, but they also require special care to keep them looking their best. In this section, we’ll cover the basics of wooden cabinets, including the types of wood commonly used and the cleaning challenges you may encounter.

Types of Wood

Wooden cabinets can be made from a variety of different woods, each with its own unique properties and characteristics. Some of the most common types of wood used for cabinets include:

  • Oak: Oak is a popular choice for cabinets because it’s durable and has a distinctive grain pattern.
  • Maple: Maple is a hard, dense wood that’s often used for cabinets because of its strength and durability.
  • Cherry: Cherry is a beautiful, richly colored wood that’s often used for high-end cabinets.
  • Birch: Birch is a light-colored wood that’s often used for cabinets because of its affordability and versatility.

When it comes to cleaning wooden cabinets, the type of wood you have will determine the best cleaning methods to use. Some woods are more sensitive to moisture than others, so it’s important to use the right cleaning products and techniques to avoid damaging your cabinets.

Common Cleaning Challenges

Wooden cabinets can be challenging to clean because they’re prone to collecting dust, grease, and grime. Here are some common cleaning challenges you may encounter when cleaning your wooden cabinets:

  • Grease buildup: Over time, grease from cooking can build up on your cabinets, leaving them looking dull and dirty.
  • Water damage: Wooden cabinets can be damaged by water if they’re not properly sealed or if they’re exposed to moisture for an extended period of time.
  • Scratches and dents: Wooden cabinets can be easily scratched or dented, especially if they’re not properly cared for.

To keep your wooden cabinets looking their best, it’s important to clean them regularly and take steps to prevent damage. By using the right cleaning products and techniques, you can help ensure that your cabinets stay beautiful and functional for years to come.

Essential Cleaning Supplies

When it comes to cleaning your wooden cabinets, having the right supplies on hand can make all the difference. Here are some essential cleaning supplies you will need:

Natural Cleaning Agents

  • White vinegar: This is an excellent natural cleaning agent that can effectively clean your wooden cabinets without damaging them. You can mix equal parts of white vinegar and water to create a cleaning solution.
  • Lemon juice: Lemon juice is another natural cleaning agent that can help remove stains and grime from your wooden cabinets. You can mix lemon juice with water to create a cleaning solution.
  • Baking soda: Baking soda is a natural abrasive that can help remove tough stains and grime from your wooden cabinets. You can mix baking soda with water to create a paste and use it to scrub your cabinets.

Commercial Cleaning Products

  • Wood cleaner: A wood cleaner specifically formulated for cabinets can help keep your wooden cabinets looking clean and shiny. Look for a cleaner that is gentle and non-abrasive.
  • Multi-purpose cleaner: A multi-purpose cleaner can be used to clean your wooden cabinets as well as other surfaces in your kitchen. Look for a cleaner that is safe for use on wood.
  • Microfiber cloths: Microfiber cloths are great for cleaning wooden cabinets because they are gentle and won’t scratch the surface. They are also reusable and can be washed and used again.

Having these essential cleaning supplies on hand will make it easier for you to keep your wooden cabinets looking clean and shiny. Remember to always follow the manufacturer’s instructions when using commercial cleaning products.

Step-by-Step Cleaning Guide

Cleaning your wooden cabinets can be a daunting task, but with the right tools and techniques, you can have them looking brand new in no time. Follow these simple steps to clean your wooden cabinets effectively.

Dusting the Cabinets

Before you start cleaning your cabinets, it is essential to remove any dust or debris. Dusting your cabinets will prevent any damage to the wood and ensure that your cleaning solution works effectively. Use a soft cloth or a microfiber duster to remove any dust or debris from your cabinets. Be sure to get into all the nooks and crannies, including the corners and edges.

Applying the Cleaning Solution

Once you have dusted your cabinets, it’s time to apply the cleaning solution. You can use a mixture of warm water and mild dish soap or a wood cleaner diluted in warm water. Apply the solution to a soft cloth or a sponge, and gently rub it onto the surface of the cabinets. Be sure to cover all areas of the cabinets, including the doors, drawers, and shelves.

Wiping and Drying

After applying the cleaning solution, it’s time to wipe and dry your cabinets. Use a clean, dry cloth to wipe away any excess cleaning solution. Be sure to dry the cabinets thoroughly to prevent any water damage. You can also use a furniture polish or wax to give your cabinets a shine and protect the wood.

In conclusion, cleaning your wooden cabinets is a simple process that can be done with the right tools and techniques. By following these simple steps, you can have your cabinets looking brand new in no time.

Preventive Measures and Maintenance

Taking preventive measures and performing regular maintenance can help keep your wooden cabinets looking beautiful for years to come. Here are some tips to help you keep your cabinets in top shape.

Regular Dusting

Dust and dirt can accumulate on your cabinets over time, causing them to look dull and dirty. To prevent this, it’s important to dust your cabinets regularly. You can use a soft, dry cloth or a feather duster to remove dust and dirt from your cabinets. Be sure to dust the entire surface of the cabinet, including the corners and crevices.

Immediate Spill Cleaning

Spills can happen at any time, and if they’re not cleaned up immediately, they can cause damage to your wooden cabinets. To prevent this, it’s important to clean up spills as soon as they happen. Use a soft, damp cloth to wipe up spills, and be sure to dry the area thoroughly to prevent water damage.

Polishing and Conditioning

Polishing and conditioning your wooden cabinets can help keep them looking their best. There are a variety of products on the market that can help you do this, including furniture polish and conditioning oils. Be sure to choose a product that is safe for use on wooden surfaces, and follow the manufacturer’s instructions carefully.

By following these simple tips, you can help keep your wooden cabinets looking beautiful and in top condition for years to come. Regular maintenance and preventive measures are key to ensuring that your cabinets stay looking their best.

Dealing with Tough Stains

Wooden cabinets are a beautiful addition to any kitchen, but they can be difficult to clean, especially when it comes to tough stains. Here are some tips on how to deal with different types of tough stains.

Grease Stains

Grease stains are one of the most common types of stains on kitchen cabinets. To remove them, you will need a degreaser. Here’s how to do it:

  1. Mix one part white vinegar with one part water in a spray bottle.
  2. Spray the solution onto the stain and let it sit for a few minutes.
  3. Wipe the stain with a clean, damp cloth.
  4. Dry the area with a clean, dry cloth.

If the stain is particularly stubborn, you can try using baking soda. Mix baking soda with water to form a paste, apply it to the stain, and let it sit for a few minutes before wiping it away.

Water Stains

Water stains are another common problem when it comes to wooden cabinets. Here’s how to remove them:

  1. Mix one part white vinegar with one part water in a spray bottle.
  2. Spray the solution onto the stain and let it sit for a few minutes.
  3. Wipe the stain with a clean, damp cloth.
  4. Dry the area with a clean, dry cloth.

If the stain is particularly stubborn, you can try using toothpaste. Apply a small amount of toothpaste to the stain and rub it in with a soft cloth. Wipe the area clean with a damp cloth and dry with a clean, dry cloth.

Ink Stains

Ink stains can be difficult to remove from wooden cabinets. Here’s how to do it:

  1. Mix one part rubbing alcohol with one part water in a spray bottle.
  2. Spray the solution onto the stain and let it sit for a few minutes.
  3. Wipe the stain with a clean, damp cloth.
  4. Dry the area with a clean, dry cloth.

If the stain is particularly stubborn, you can try using a mixture of baking soda and water to form a paste. Apply the paste to the stain and let it sit for a few minutes before wiping it away with a damp cloth.

Understanding the Problem

How to Make Wooden Drawers Slide Easier: Simple Tips and Tricks

Are you tired of struggling to open and close your wooden drawers? Sticky drawers can be frustrating and time-consuming, especially when you use them regularly. Fortunately, there are simple and affordable ways to make your wooden drawers slide more easily.

One common cause of sticky drawers is debris or material that has jammed the drawer and prevents it from sliding properly. Before attempting any fixes, check the guides for any paper or other material that may be causing the issue. If you find any debris, remove it carefully to avoid damaging the drawer or the guides.

Understanding the Problem

Understanding the Problem

When your wooden drawers start to stick, it can be frustrating and time-consuming to open and close them. Fortunately, there are several ways to make wooden drawers slide more easily. Before you can fix the problem, it’s important to understand what’s causing it. Here are some things to consider:

Identifying Sticking Points

The first step in fixing sticking drawers is to identify where the problem is occurring. Is the drawer sticking when you try to open or close it? Is it rubbing against the sides of the cabinet or the other drawers? Is it getting caught on something inside the drawer itself? Once you know where the sticking point is, you can start to address the problem.

Assessing Drawer Material

Another important factor to consider is the material your drawers are made of. Different types of wood and finishes can affect how easily your drawers slide. For example, unfinished wood may be more prone to swelling and warping, which can cause drawers to stick. If your drawers are made of a softer wood, they may be more likely to wear down over time, causing the tracks to become misaligned.

By understanding the problem and assessing the material, you can start to take steps to make your wooden drawers slide more easily. From lubricating the tracks to sanding down the sides of the drawer, there are several simple fixes you can try to get your drawers working smoothly again.

Gathering Necessary Tools

Gathering Necessary Tools

Before you start fixing your wooden drawers, you need to gather some essential tools. Here are the tools you will need to make your wooden drawers slide easier:

Choosing the Right Sandpaper

To make your wooden drawers slide easier, you may need to sand the sides of the drawers. You will need to choose the right sandpaper to get the job done. Here are some things to consider when choosing sandpaper:

  • Grit: The grit of sandpaper is determined by the number of abrasive particles per square inch. The higher the number, the finer the grit. For sanding wooden drawers, you will need medium/fine grit sandpaper.
  • Type: There are different types of sandpaper, including aluminum oxide, silicon carbide, and garnet. For sanding wooden drawers, you will need aluminum oxide sandpaper.
  • Backing: Sandpaper can be backed with paper or cloth. Paper-backed sandpaper is cheaper, but it wears out quickly. Cloth-backed sandpaper is more durable but more expensive.

Selecting a Suitable Wax

Wax can help lubricate the sides of your wooden drawers and make them slide easier. Here are some things to consider when selecting a suitable wax:

  • Type: There are different types of wax, including beeswax, paraffin wax, and carnauba wax. Beeswax is a popular choice for lubricating wooden drawers.
  • Form: Wax comes in different forms, including paste, liquid, and spray. Paste wax is the most common form for lubricating wooden drawers.
  • Application: You will need a cloth or brush to apply the wax to the sides of your wooden drawers. Make sure to apply the wax evenly and let it dry before testing the drawers.

By gathering the necessary tools, you can make your wooden drawers slide easier and improve the functionality of your furniture.

Preparation Process

Before you start making your wooden drawers slide easier, you need to prepare them properly. This section will guide you through the preparation process, which includes emptying the drawers and removing them from the cabinet.

Emptying the Drawers

The first step in preparing your wooden drawers for easier sliding is to empty them. Remove all the items from the drawers and place them in a safe place. This will make it easier for you to work on the drawers without any obstructions.

Removing the Drawers

Once you have emptied the drawers, you need to remove them from the cabinet. Depending on the type of drawer you have, this may involve removing screws or pulling out the drawer from its runners. Refer to the manufacturer’s instructions or seek professional help if you are unsure how to remove the drawers safely.

Once you have removed the drawers, inspect them for any damage or wear and tear. If you notice any issues, such as loose joints or broken parts, you may need to repair or replace them before proceeding with the sliding process.

By properly preparing your wooden drawers, you can ensure that you have a smooth and hassle-free experience when making them slide easier.

Smoothening the Surfaces

If your wooden drawers are sticking or not sliding smoothly, one of the reasons could be rough surfaces. The edges of the drawers might be rough or uneven, causing friction and making it difficult for the drawers to slide in and out. Smoothening the surfaces of the drawers can help reduce friction and make them slide easier. Here are some tips on how to do it:

Sanding the Drawer Edges

The first step in smoothening the surfaces of your wooden drawers is to sand the edges. You can use sandpaper or a sanding block to sand the edges of the drawers. Start with a coarse grit sandpaper and then move to a finer grit. Sand the edges until they are smooth and even. Be careful not to sand too much, as this can damage the wood.

Cleaning After Sanding

After sanding the edges of the drawers, it’s important to clean them thoroughly. Use a soft cloth or a vacuum cleaner to remove any dust or debris from the drawers. You can also use a damp cloth to wipe down the drawers. Make sure the drawers are completely dry before moving on to the next step.

By smoothening the surfaces of your wooden drawers, you can reduce friction and make them slide easier. Sanding the edges and cleaning them afterwards is a simple and effective way to achieve this.

Applying the Solution

Once you have identified the cause of your wooden drawers sticking, it’s time to apply the solution. Here are the steps to follow:

Waxing the Drawer Edges

One way to make wooden drawers slide easier is by applying furniture wax to the edges of the drawers. This helps to reduce friction between the drawer and the frame. Here’s how to do it:

  1. Remove the drawers from the frame and clean them thoroughly with a dry cloth.
  2. Apply a thin layer of furniture wax to the edges of the drawers using a clean cloth. Be sure to cover the entire surface evenly.
  3. Let the wax dry for a few minutes, then buff it with a clean cloth to remove any excess.

Reinstalling the Drawers

Once you have waxed the edges of the drawers, it’s time to reinstall them. Here are the steps to follow:

  1. Clean the frame thoroughly with a dry cloth to remove any dust or debris.
  2. Slide the drawers back into the frame, making sure they are aligned properly.
  3. Test the drawers to ensure they slide smoothly. If they still stick, you may need to adjust the alignment or apply more wax.

By following these simple steps, you can make your wooden drawers slide easier and avoid the frustration of sticky drawers. Remember to clean and maintain your drawers regularly to keep them in good condition.

Maintenance Tips

To ensure your wooden drawers slide smoothly, it’s important to perform regular maintenance. Here are some tips to keep your drawers in good working order.

Regular Cleaning

Dirt and debris can accumulate in the tracks of your drawers, causing them to stick and slide less easily. To prevent this, make sure to clean out the tracks regularly. You can use a soft brush or cloth to remove any debris, and then wipe the tracks down with a damp cloth.

Periodic Waxing

Periodic waxing can help reduce friction and make your drawers slide more easily. To wax your drawers, you can use a paraffin wax or a specialized drawer wax. Apply the wax to the tracks and the sides of the drawers, and then use a soft cloth to buff it in. Be sure to follow the manufacturer’s instructions when using a specialized wax.

By following these maintenance tips, you can keep your wooden drawers sliding smoothly for years to come.

how-to-set-a-wooden-mouse-trap-easy-steps-to-catching-mice-2

How to Set a Wooden Mouse Trap: Easy Steps to Catching Mice

If you have a mouse problem in your home, setting a wooden mouse trap can be an effective way to eliminate the issue. Unlike electronic traps, wooden traps are affordable and easy to use. However, if you’ve never set a wooden mouse trap before, the process can seem daunting. Don’t worry, we’ve got you covered with this step-by-step guide on how to set a wooden mouse trap.

First, you’ll need to choose the right bait. Peanut butter is a popular choice, but you can also use cheese, chocolate, or even small pieces of bread. Once you have your bait, place a small amount on the bait holder on the trap. Be sure not to use too much, as this can prevent the trap from triggering. Next, you’ll need to set the trap. This can be done by using a lever or spring-loaded mechanism. Make sure the trap is set securely and the bait is in place. Finally, place the trap in an area where mice are known to frequent, such as along walls or near food sources. If a mouse is caught, be sure to remove it as soon as possible and reset the trap.

By following these simple steps, you can effectively set a wooden mouse trap and eliminate your mouse problem. Remember to use caution when handling the trap and always wash your hands after disposing of a caught mouse. Happy trapping!

Understanding Mouse Traps

how-to-set-a-wooden-mouse-trap-easy-steps-to-catching-mice-2

Setting up a mouse trap might seem like a daunting task, but it’s actually quite simple once you understand how they work. Mouse traps are designed to capture and kill mice, and there are various types of traps available, including snap traps, glue traps, and live traps. In this section, we’ll focus on how to set up a wooden mouse trap, which is a classic and effective option.

When it comes to wooden mouse traps, the basic design involves a small wooden platform with a spring-loaded metal bar that snaps down when triggered. The idea is to place a piece of bait on the platform, and when a mouse tries to take the bait, it triggers the metal bar, which then snaps down and kills the mouse.

Before setting up the trap, it’s important to choose the right location. Mice tend to follow the same paths repeatedly, so look for signs of mouse activity, such as droppings or chewed-up items, and set up the trap along their path. You should also wear gloves when handling the trap to avoid leaving your scent, which could deter mice from approaching.

Once you’ve chosen the location, it’s time to set up the trap. Start by placing a small amount of bait, such as peanut butter or cracker crumbs, on the platform. You can use a toothpick or cotton swab to spread the bait evenly and avoid getting your scent on it.

Next, carefully pull back the metal bar and hold it in place with one hand. With your other hand, position the baited platform under the metal bar and align the metal bar with the groove on the platform. Slowly release the metal bar, making sure it’s securely in place.

Finally, use cable ties or twine to attach the trap to a stationary object, such as a pipe or a wall. This will prevent the mouse from dragging the trap away once it’s caught.

In summary, setting up a wooden mouse trap is a simple process that involves choosing the right location, baiting the platform, and carefully setting the metal bar in place. By following these steps, you can effectively capture and eliminate mice from your home or business.

Types of Wooden Mouse Traps

types-of-wooden-mouse-traps

When it comes to wooden mouse traps, there are a few different types to choose from. Each type has its own advantages and disadvantages, so it’s important to choose the right one for your needs.

Snap Traps

Snap traps are the most common type of wooden mouse trap. They work by using a spring-loaded bar that snaps down on the mouse when it takes the bait. Snap traps are very effective and can kill a mouse instantly. However, they can also be dangerous if not used properly. Make sure to keep them out of reach of children and pets.

Glue Traps

Glue traps are another type of wooden mouse trap. They work by using a sticky adhesive to trap the mouse. Glue traps are very easy to use and don’t require any bait. However, they can be cruel and inhumane. The mouse can get stuck on the trap for hours or even days, and may die a slow and painful death.

Multiple-Catch Traps

Multiple-catch traps are a humane alternative to snap and glue traps. They work by using a one-way door that allows the mouse to enter but not exit. Once the mouse is inside, it can be released into the wild unharmed. Multiple-catch traps are great for people who want to catch and release mice without harming them.

Live Traps

Live traps are similar to multiple-catch traps, but they work by using a cage instead of a one-way door. Once the mouse is inside, it can be released into the wild unharmed. Live traps are great for people who want to catch and release mice without harming them. However, they can be more expensive than other types of traps and may require more maintenance.

Safety Precautions

When setting up a wooden mouse trap, it is important to take certain safety precautions to avoid any accidents. Here are some safety guidelines you should follow:

Handling the Trap

When handling the trap, make sure to wear gloves. This will protect your hands from any sharp edges and prevent the transfer of your scent onto the trap, which could scare away the mice. You should also handle the trap gently to avoid accidentally triggering it.

Setting the Trap

When setting the trap, make sure to follow the manufacturer’s instructions carefully. This will help you avoid any mishaps and ensure that the trap is set up correctly. Before setting the trap, make sure to check for any damage or defects that could affect its performance.

When placing the bait, make sure to use a small amount and place it underneath the trigger mechanism, not on top. This will force the mouse to wrestle the bait free and increase the chances of catching it. Avoid using too much bait, as this could cause the trap to malfunction.

Once the trap is set up, make sure to place it in a safe location away from children and pets. You should also check the trap regularly to see if it has caught any mice. If you do catch a mouse, make sure to dispose of it safely and hygienically.

By following these safety precautions, you can set up a wooden mouse trap safely and effectively.

Choosing the Right Bait

When it comes to setting a wooden mouse trap, choosing the right bait is crucial. The bait you use will determine whether or not you will be successful in catching the mice. Here are some tips to help you choose the right bait for your wooden mouse trap:

1. Use Food That Mice Love

Mice are attracted to certain types of food. Some of the best options for bait include peanut butter, hazelnut spread, chocolate, bacon, and dried fruit. You can also try using cheese, but keep in mind that not all mice are attracted to it.

2. Mix Your Bait with Cotton

Mixing your bait with cotton can be an effective way to catch mice. Simply tear off a bit of cotton from a cotton swab and roll it into your bait. This will get cotton stuck in the mouse’s teeth and make it more likely to get caught in the trap.

3. Freshness Matters

Mice prefer fresh food, so make sure your bait is fresh and hasn’t been sitting out for too long. You should also replace the bait regularly to keep it fresh.

4. Experiment with Different Baits

If one type of bait doesn’t work, don’t be afraid to experiment with different options. Try different types of food and mixtures until you find something that works.

Remember, setting a wooden mouse trap requires patience and persistence. It may take some trial and error to find the right bait and placement for your trap, but with a little effort, you can successfully catch those pesky mice.

Setting the Trap

Step-by-Step Guide

Setting a wooden mouse trap is an effective way to get rid of pesky rodents in your home. Here is a step-by-step guide to help you set up your trap:

  1. First, choose the right bait for your trap. Peanut butter is a popular choice, but you can also use cheese, bacon, or even chocolate.
  2. Next, place a small amount of bait on the bait holder located on the trap.
  3. Carefully pull back the spring-loaded arm and hold it in place with your thumb.
  4. With your other hand, position the trap where you want it. Make sure to place it in an area where mice are known to frequent.
  5. Release the spring-loaded arm slowly and make sure it snaps into place.
  6. Finally, test the trap by tapping it lightly with a pencil or your finger. If it snaps shut, then it is set and ready to catch mice.

Tips for Success

Here are some tips to help you set up your wooden mouse trap successfully:

  • Use enough bait to entice the mouse but not so much that it can easily grab the bait without triggering the trap.
  • Place the trap in areas where mice are known to frequent, such as along walls or near food sources.
  • Check the trap regularly, at least once a day, to see if you have caught a mouse. If you have, dispose of the mouse and reset the trap.
  • Use gloves when handling the trap to avoid leaving your scent on the bait.
  • Consider using multiple traps to increase your chances of catching mice.

By following these simple steps and tips, you can set up your wooden mouse trap with ease and increase your chances of catching those pesky rodents.

Location for the Trap

Now that you know how to set up a wooden mouse trap, it’s essential to place it in the right location to increase the chances of catching a mouse. Here are some tips on where to place the trap:

1. Identify the High Traffic Areas

Look for signs of mouse activity in your home, such as droppings, gnaw marks, and urine stains. These areas are usually where mice travel the most, making them the perfect spot to place the trap.

2. Place the Trap Along Walls

Mice tend to travel along walls, so it’s best to place the trap perpendicular to the wall with the bait side facing the wall. This way, the mouse will run into the trap while traveling along the wall.

3. Keep the Trap Away from Children and Pets

It’s important to keep the trap out of reach of children and pets to avoid any accidents. Place the trap in a location where it’s not easily accessible to them.

4. Consider Using Multiple Traps

If you have a severe mouse infestation, consider using multiple traps. Place the traps in different locations to increase the chances of catching a mouse.

Remember to check the trap regularly and dispose of any dead mice promptly. With these tips, you should be able to catch those pesky mice in no time.

Monitoring and Releasing

Once you have set up your wooden mouse trap, it’s important to monitor it regularly to ensure that it’s working effectively. Check the trap daily, and if you catch a mouse, release it as soon as possible to avoid unnecessary suffering.

When releasing a mouse, it’s best to do so in a location far away from your home or any other buildings. Mice have a strong homing instinct, so releasing them too close to your home may result in them returning.

Here are some tips for monitoring and releasing your wooden mouse trap:

  • Check the trap daily: This will allow you to quickly release any mice you catch and reset the trap if necessary.
  • Wear gloves: When handling the trap or a caught mouse, wear gloves to avoid any potential diseases that mice may carry.
  • Release the mouse quickly: Once you catch a mouse, release it as soon as possible to avoid causing unnecessary suffering.
  • Release the mouse far away: Release the mouse at least a mile away from your home or any other buildings to prevent it from returning.
  • Clean the trap: After releasing a mouse, clean the trap thoroughly to remove any lingering scent that may deter other mice from approaching the trap.

By following these tips, you can effectively monitor and release mice caught in your wooden mouse trap, ensuring that the trap remains an effective tool for rodent control.