If you’re looking for a fun and creative way to spend time with your kids, making wooden toys is a great option. Not only is it a great bonding activity, but it also allows you to create unique and personalized toys that your children will love. Plus, making wooden toys from scratch is a great way to teach your kids about the value of craftsmanship and the importance of using natural materials.
To get started, you’ll need some basic woodworking tools and materials. Some popular wooden toys you can make include balance boards, block stackers, dollhouses, and puzzles. You can find free project plans and tips online or create your own designs. Not only will making wooden toys provide hours of entertainment for your kids, but it’s also a great way to reduce screen time and encourage imaginative play. So why not give it a try and see what kind of unique and beautiful wooden toys you can create together?
Understanding Wood Types
When it comes to making wooden toys, understanding the different types of wood is essential. Each type of wood has its own unique characteristics that can affect the durability, safety, and appearance of the toy. In this section, we will discuss the three main types of wood used for toy-making: hardwood, softwood, and plywood.
Hardwood
Hardwood is a type of wood that comes from deciduous trees such as oak, maple, and cherry. Hardwood is known for its strength, durability, and resistance to wear and tear. It is also more expensive than softwood due to its slower growth rate and higher density.
Some common types of hardwood used in toy-making include:
- Beech
- Maple
- Oak
- Cherry
- Walnut
Hardwood is an excellent choice for toys that will be subjected to heavy use, such as building blocks, puzzles, and vehicles.
Softwood
Softwood comes from evergreen trees such as pine, spruce, and cedar. Softwood is less dense than hardwood, making it easier to work with and less expensive. However, it is also less durable and prone to dents and scratches.
Some common types of softwood used in toy-making include:
- Pine
- Spruce
- Cedar
- Fir
- Redwood
Softwood is a good choice for toys that will not be subjected to heavy use, such as dolls, figurines, and decorative items.
Plywood
Plywood is a type of engineered wood made by gluing together thin layers of wood veneer. Plywood is strong, durable, and resistant to warping and cracking. It is also less expensive than solid wood and can be made from both hardwood and softwood.
Plywood is commonly used in toy-making for items such as:
- Dollhouse furniture
- Toy chests
- Play kitchens
- Train sets
When selecting plywood for toy-making, it is important to choose a high-quality product that is free of knots, cracks, and other defects.
In conclusion, understanding the different types of wood is crucial when making wooden toys. By selecting the right type of wood for your project, you can create toys that are safe, durable, and beautiful.
Safety Precautions

When making wooden toys, safety should always be a top priority. Here are some precautions to take to ensure that your finished product is safe for children to play with:
Sand Smoothly
To prevent rough edges and splinters from forming, sand your wooden toys smoothly. Use fine-grit sandpaper and sand in the direction of the grain. Sanding also gives the toy a smooth texture, making it more pleasant for children to touch and play with.
Use Non-Toxic Paint or Stain
If you choose to paint or stain your wooden toys, make sure to use non-toxic options. Children may put toys in their mouths, so it’s important to avoid any harmful chemicals that could be ingested. Look for paints and stains that are labeled as safe for use on children’s toys.
Avoid Small Parts
Toys should not have any small parts that could be choking hazards. Be sure to avoid using beads, pellets, eyes, noses, or any other small parts that are smaller than 3cm (about 1¼ inches) in diameter.
Choose Hardwoods
When selecting wood for your toys, choose hardwoods like maple, cherry, or oak. These woods are durable and non-toxic, making them safe for children to play with. Avoid using softwood or pressure-treated lumber as they could splinter easily or contain harmful chemicals.
Follow Safety Guidelines
In addition to these precautions, be sure to follow any safety guidelines provided by the Consumer Product Safety Commission (CPSC) or other relevant organizations. These guidelines may include testing requirements or other safety standards that must be met to ensure that your toys are safe for children to play with.
By taking these safety precautions when making wooden toys, you can ensure that your finished product is safe and enjoyable for children to play with.
Tools Required
When it comes to making wooden toys, having the right tools is essential. You’ll need a combination of hand tools and power tools to create your masterpieces. Here are the tools you’ll need to get started:
Hand Tools
Hand tools are essential for any woodworking project. Here are some of the hand tools you’ll need to make wooden toys:
- Hand saw: A hand saw is used for cutting wood. It’s an essential tool for any woodworking project.
- Chisels: Chisels are used for carving and shaping wood. They come in a variety of shapes and sizes and are an essential tool for any woodworking project.
- Sandpaper: Sandpaper is used for smoothing out rough edges and surfaces. It comes in different grits, and the higher the number, the smoother the finish.
Power Tools
Power tools can make woodworking projects much easier and faster. Here are some of the power tools you’ll need to make wooden toys:
- Jigsaw: A jigsaw is used for cutting intricate shapes in wood. It’s a versatile tool that can make both straight and curved cuts.
- Drill: A drill is used for making holes in wood. It’s an essential tool for any woodworking project.
- Table saw: A table saw is used for making straight cuts in wood. It’s a powerful tool that can make quick work of cutting large pieces of wood.
When it comes to power tools, it’s important to use them safely. Always wear eye and ear protection and follow the manufacturer’s instructions.
Selecting the Toy Design
When it comes to making wooden toys, selecting the right design is crucial. You want to choose a design that is both fun to make and enjoyable for the child to play with. Here are some things to consider when selecting a toy design:
Age Range
Consider the age range of the child you are making the toy for. You want to select a design that is appropriate for their age and skill level. For example, a simple block set may be better for a younger child, while a more complex puzzle may be better for an older child.
Interests
Think about the child’s interests when selecting a toy design. Do they love animals? Consider making a wooden animal puzzle or figurine. Are they fascinated by cars? A wooden car or train set may be perfect for them. By selecting a design that aligns with their interests, you can ensure that the child will love and cherish the toy for years to come.
Complexity
Consider your own skill level and the amount of time you have to devote to the project. Some designs may be more complex and require more time and skill, while others may be simpler and more straightforward. Choose a design that you feel comfortable with and that fits within your timeline.
Materials
Consider the type of wood and other materials you will need for the design. Some designs may require specific types of wood or additional materials such as paint or glue. Make sure you have all the necessary materials before beginning the project.
By taking these factors into consideration, you can select the perfect wooden toy design for the child in your life.
Cutting the Wood
When it comes to making wooden toys, cutting the wood is one of the most important steps. Here are some tips to help you cut your wood safely and accurately.
Choose the Right Saw
The type of saw you use will depend on the type of wood you are cutting and the shape you need to cut it into. Here are some common types of saws and when to use them:
- Circular saw: Good for making straight cuts in thick boards.
- Jigsaw: Ideal for cutting curves and intricate shapes.
- Scroll saw: Similar to a jigsaw but with a smaller blade, making it better for cutting very intricate shapes.
- Band saw: Great for making curved cuts and cutting thick boards.
Measure Twice, Cut Once
Before you make any cuts, it’s important to measure your wood carefully. Use a ruler or tape measure to mark your wood where you need to cut it. Double-check your measurements to make sure they are accurate before you start cutting.
Use a Cutting Guide
If you need to make a straight cut, it’s a good idea to use a cutting guide. You can make your own cutting guide by clamping a straight piece of wood to your board and using it as a guide for your saw.
Wear Safety Gear
Whenever you are cutting wood, it’s important to wear safety gear to protect yourself. Wear safety glasses to protect your eyes from sawdust and debris, and wear earplugs to protect your hearing from the noise of the saw.
Take Your Time
Cutting wood can be dangerous if you rush or don’t pay attention. Take your time and make sure you are cutting your wood safely and accurately. If you are unsure about a cut, stop and double-check your measurements before you continue.
By following these tips, you can cut your wood safely and accurately, making it easier to create the wooden toys you want.
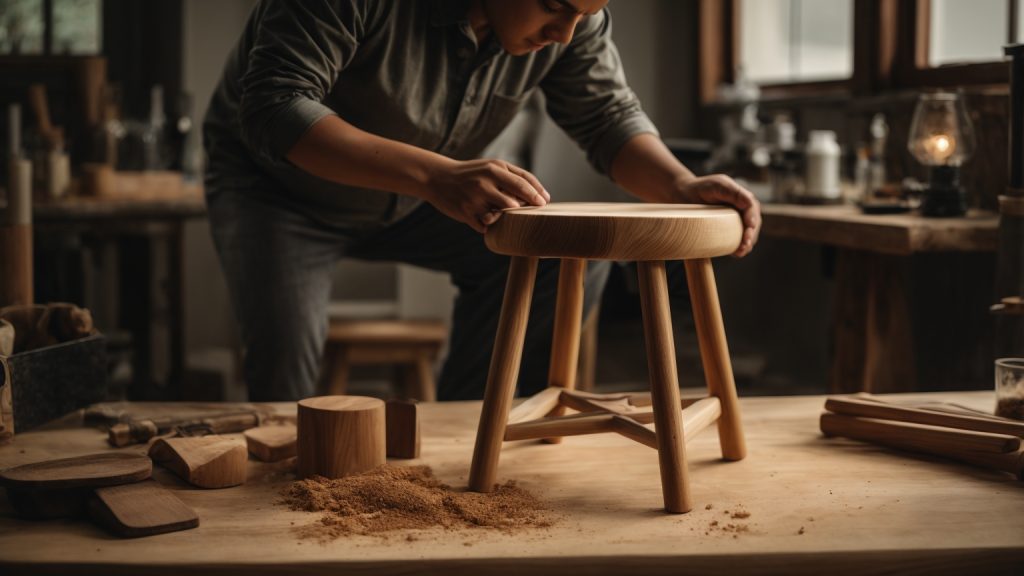
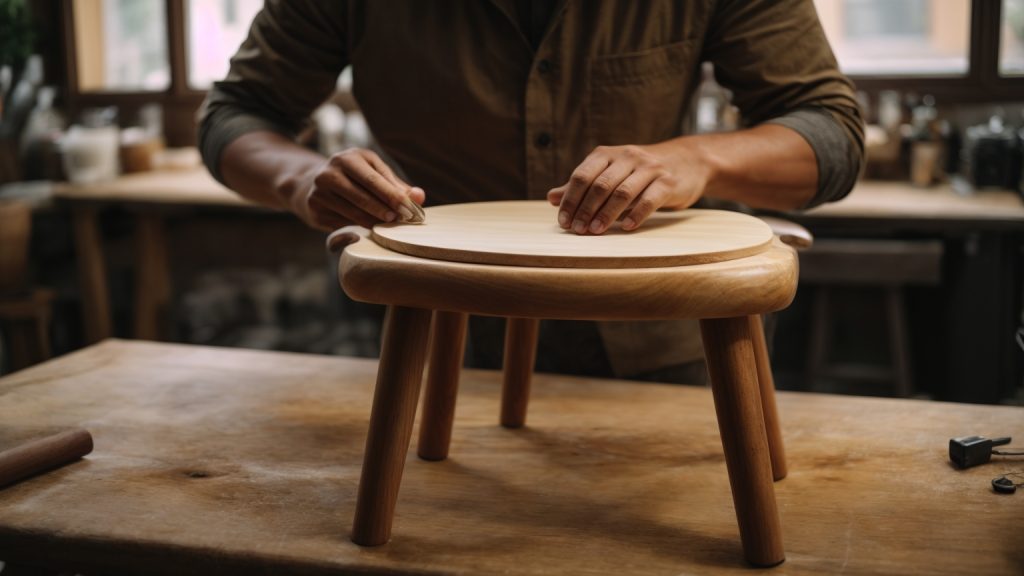
Sanding and Shaping
When it comes to making wooden toys, sanding and shaping are two essential steps that can make all the difference in the final product. Here are some tips and techniques to help you achieve a smooth and polished finish.
Sanding Techniques
Sanding is an important step in creating wooden toys. It helps to smooth out rough edges, remove any splinters, and prepare the surface for finishing. Here are some sanding techniques to keep in mind:
- Use the right sandpaper grit: Start with a coarse grit sandpaper (around 80-100 grit) to remove any rough spots or imperfections. Then move on to a finer grit (around 120-150 grit) to smooth out the surface. Finally, use an even finer grit (around 220-240 grit) for a polished finish.
- Sand with the grain: Always sand in the direction of the wood grain to avoid creating scratches or marks on the surface.
- Use a sanding block: A sanding block can help you achieve a more even and consistent finish. Wrap the sandpaper around the block and use even pressure to sand the surface.
Shaping Techniques
Shaping is the process of carving and sculpting the wood to create the desired shape and form of the toy. Here are some shaping techniques to consider:
- Use a template: A template can help you achieve a consistent shape and size for your toy. Trace the template onto the wood and use a bandsaw or jigsaw to cut out the shape.
- Use a Dremel tool: A Dremel tool can be used to carve and shape the wood with precision. Attach a sanding band or carving bit to the tool and use it to shape the wood.
- Hand carve: If you prefer a more traditional approach, you can hand carve the wood using a carving knife or chisel. This method requires more skill and patience, but can result in a unique and personalized toy.
By following these sanding and shaping techniques, you can create wooden toys that are both beautiful and functional.
Assembling the Parts

Now that you have all the wooden parts cut and sanded, it’s time to assemble them into a toy! Here are some tips to help you with the process:
1. Gather your materials
Before you begin, make sure you have all the materials you need to assemble the toy. This may include wood glue, clamps, screws, nails, and any other hardware required for the specific toy you are making.
2. Follow the instructions
If you are using a toy plan or kit, be sure to follow the instructions carefully. Make sure you understand each step before you begin, and double-check your work as you go along.
3. Use wood glue
Wood glue is the best way to attach wooden parts together. Apply a thin layer of glue to one surface, then press the two parts together firmly. Wipe away any excess glue with a damp cloth.
4. Clamp the parts together
If the parts need to be held together while the glue dries, use clamps to hold them in place. Make sure the clamps are tight enough to hold the parts together, but not so tight that they squeeze out all the glue.
5. Add hardware
If the toy requires screws, nails, or other hardware, be sure to use the correct size and type. Pre-drill any holes to prevent the wood from splitting, and use a screwdriver or hammer to insert the hardware.
6. Sand the edges
Once the parts are assembled, use sandpaper to smooth any rough edges or corners. This will make the toy safer for children to play with.
By following these tips, you can assemble your wooden toy with confidence and create a beautiful, durable toy that your child will love.
Finishing Touches
Once you have completed the construction of your wooden toy, it’s time to add the finishing touches to make it look its best. There are two main ways to finish a wooden toy: painting and polishing.
Painting
Painting a wooden toy can make it look more vibrant and colorful. Here are some tips to keep in mind when painting your wooden toy:
- Use non-toxic paint that is safe for children.
- Sand the toy before painting to ensure that the paint adheres properly.
- Apply a primer before painting to help the paint stick better.
- Use a paintbrush to apply the paint and let each layer dry completely before applying the next one.
- Consider using stencils or tape to create clean lines and shapes.
- Use a sealer or varnish to protect the paint and make it more durable.
Polishing
Polishing a wooden toy can give it a glossy, smooth finish. Here are some tips to keep in mind when polishing your wooden toy:
- Sand the toy before polishing to ensure that the surface is smooth.
- Apply a wood conditioner to the toy to help the wood absorb the polish better.
- Use a cloth to apply the polish in a circular motion, following the wood grain.
- Let the polish dry completely before applying a second coat.
- Use a soft cloth to buff the toy after the final coat of polish has dried.
Remember, the finishing touches are what make a wooden toy stand out. Whether you choose to paint or polish your toy, take your time and do it right to ensure that your creation looks its best.
Quality Control
When making wooden toys, ensuring quality control is essential to produce safe and durable toys. Here are some tips to help you maintain quality control throughout the manufacturing process:
1. Inspect Raw Materials
Before starting production, it is important to inspect the raw materials thoroughly. Check for any defects or damage that may affect the quality of the final product. Make sure the wood is of good quality and free from knots, cracks, or warping.
2. Test Prototypes
Before mass production, it is recommended to create a few prototypes to test the design and functionality of the toy. This will help identify any potential issues and allow you to make necessary adjustments before producing a large quantity of toys.
3. Monitor Production Process
During production, it is important to monitor the process closely to ensure that each toy is made to the same high-quality standard. Regular checks should be conducted to ensure that the toys are being made to the correct specifications and that there are no defects or errors.
4. Perform Safety Tests
Once the toys are completed, it is crucial to perform safety tests to ensure that they meet all safety standards. This includes testing for sharp edges, small parts that could be a choking hazard, and any other potential safety risks.
By following these quality control tips, you can ensure that your wooden toys are safe, durable, and of the highest quality.
Packaging and Storage
Once you’ve completed making your wooden toys, you’ll need to package and store them properly to keep them safe and in good condition. Here are some tips on how to do it:
Packaging
When it comes to packaging your wooden toys, you want to make sure they are protected from damage during transport. Here are some ideas for packaging materials:
- Bubble wrap: Wrap each toy in bubble wrap to protect it from scratches and other damage.
- Cardboard boxes: Use sturdy cardboard boxes to store and transport your toys. Make sure the boxes are the right size for your toys and use packing material to fill any empty space.
- Plastic bags: Use clear plastic bags to store smaller toys. This will keep them clean and protected from dust and other debris.
Storage
Once your wooden toys are packaged, you’ll need to store them properly to keep them in good condition. Here are some tips for storing your toys:
- Keep them dry: Moisture can damage wooden toys, so make sure they are stored in a dry place.
- Avoid direct sunlight: Prolonged exposure to sunlight can cause wooden toys to fade or crack. Store them in a shaded area or cover them with a cloth.
- Use shelves or bins: Store your toys on shelves or in bins to keep them organized and easy to access.
- Label your storage containers: If you have a lot of toys, it’s a good idea to label your storage containers so you can easily find what you’re looking for.
By following these tips, you can ensure that your wooden toys are packaged and stored properly, so they stay in great condition for years to come.