
Are you looking to add a touch of rustic charm to your home decor? One easy way to achieve this is by making your own wooden stool. Not only is it an affordable option, but it also allows you to customize the design to fit your personal style.
To get started, you’ll need to gather the necessary materials and tools, including wood, a saw, drill, screws, and sandpaper. Once you have everything you need, the first step is to plan out your project and create a design that suits your needs. From there, it’s a matter of cutting the wood to size, assembling the pieces, and sanding down any rough edges.
Whether you’re a seasoned woodworker or a beginner looking for a fun DIY project, making a wooden stool is a great way to flex your creative muscles and add a functional piece of furniture to your home. So why not give it a try and see what beautiful and unique stool you can create?
Understanding Wood Types
When it comes to building a wooden stool, choosing the right wood type is crucial to ensure the durability and longevity of your project. Here are the two main categories of wood types:
Hardwood
Hardwood is known for its strength, durability, and resistance to wear and tear. It comes from deciduous trees, which are trees that lose their leaves annually. Hardwood is generally more expensive than softwood due to its slower growth rate. Some common types of hardwood used in woodworking include:
- Oak
- Maple
- Cherry
- Walnut
- Mahogany
Hardwood is an excellent choice for building a stool that will last for years to come. It is also perfect for projects that require intricate designs or carvings.
Softwood
Softwood comes from coniferous trees, which are evergreen trees that have needles instead of leaves. Softwood is generally less expensive than hardwood, making it a popular choice for budget-friendly projects. Some common types of softwood used in woodworking include:
- Pine
- Cedar
- Spruce
- Fir
- Redwood
Softwood is often used for outdoor projects such as decks, fences, and garden furniture. However, it is not as durable as hardwood and may require more maintenance over time.
When choosing a wood type for your stool, consider the look, feel, and durability of the wood. Hardwood is a great choice for a long-lasting stool, while softwood is perfect for a more affordable option.
Choosing the Right Tools
When it comes to making a wooden stool, having the right tools is crucial to achieving a polished and professional finish. Here are the essential tools you’ll need for this project.
Saw
A saw is an essential tool for any woodworking project, and making a wooden stool is no exception. A handsaw or circular saw can be used to cut the wood to the correct size and shape. A miter saw is also useful for making angled cuts. Make sure to choose a saw with sharp teeth and a comfortable handle to make the job easier.
Hammer
A hammer is used to drive nails into the wood to secure the stool’s various parts together. A claw hammer is the most common type of hammer used for woodworking projects. It has a flat surface on one end for driving nails and a claw on the other end for removing them. Choose a hammer with a comfortable grip that is easy to handle.
Screws
Screws are an alternative to nails for attaching the stool’s various parts together. A drill is needed to create pilot holes for the screws. A cordless drill is a convenient option as it allows for greater mobility while working. Choose screws that are the appropriate length and thickness for the wood you’re using.
Overall, investing in high-quality tools is important for any woodworking project, including making a wooden stool. Having the right tools will make the job easier and result in a more polished finished product.
Creating a Design
Before you start building your wooden stool, you need to create a design that fits your needs and preferences. Here are a few tips to help you with the process:
Consider the Purpose
The first step in designing your stool is to consider its purpose. Will it be used as a seat, a footrest, or a decorative item? The purpose of your stool will determine its height, size, and shape. For example, if you plan to use it as a seat, you’ll want to make sure it’s comfortable to sit on and the right height for the intended use.
Choose the Material
The next step is to choose the material for your stool. Wood is a popular choice for its durability, natural beauty, and versatility. There are many types of wood to choose from, each with its own unique characteristics. Some popular options include oak, maple, cherry, and walnut. You can also choose to use reclaimed wood for a more rustic look.
Sketch Your Design
Once you have an idea of the purpose and materials, it’s time to sketch your design. You don’t need to be an artist to create a simple sketch of your stool. Start by drawing a rough outline of the stool’s shape and size. Then, add details such as the legs, seat, and any decorative elements. You can also use a computer program or app to create a more detailed design.
Consider Ergonomics
Finally, when designing your stool, consider ergonomics. Ergonomics is the study of how people interact with their environment and the tools they use. When designing your stool, think about how it will be used and make sure it’s comfortable and safe. For example, if you plan to use it as a seat, make sure the seat is wide enough and the legs are sturdy enough to support the weight of the user.
By following these tips, you can create a design for your wooden stool that is both functional and beautiful.
Cutting the Wood
To make a wooden stool, the first step is to cut the wood to the appropriate dimensions. Here are the steps to follow:
- Measure and mark the wood: Use a measuring tape and a pencil to measure and mark the wood according to the dimensions you need. Make sure to double-check your measurements before cutting.
- Use a saw: You can use a handsaw or a power saw to cut the wood. If you are using a power saw, make sure to follow the manufacturer’s instructions and wear appropriate safety gear.
- Sand the wood: Once you have cut the wood, use sandpaper to smooth out any rough edges or surfaces. This will make it easier to handle the wood and ensure a better finish for your stool.
Remember to always work in a well-ventilated area and follow proper safety precautions when cutting and sanding wood. If you are unsure about any of the steps, don’t hesitate to ask for help or consult a woodworking guide. With a little practice and patience, you can create a beautiful and functional wooden stool that will last for years to come.
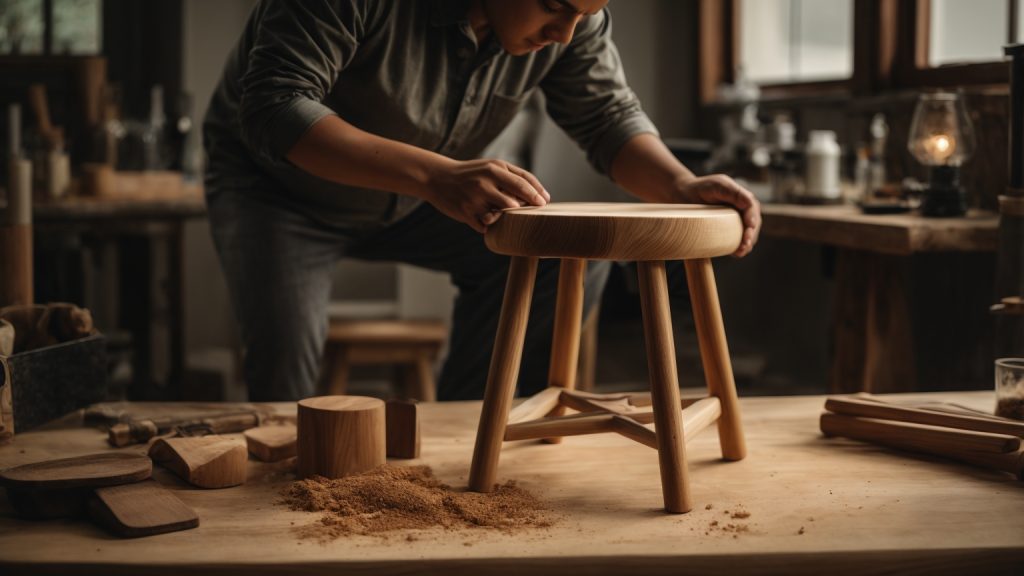
Assembling the Stool
Once you have completed all the necessary steps to create the legs, seat, and stretchers, it’s time to put everything together and assemble your wooden stool. This section will guide you through the process of connecting the legs and attaching the seat, so you can have a sturdy and functional stool.
Connecting the Legs
To connect the legs, you will need to insert the stretchers into the holes you previously drilled in the legs. It’s important to make sure that the stretchers are level and flush with the legs before proceeding. You can use a level or a square to check for alignment.
Once the stretchers are in place, you can secure them to the legs using wood glue and screws. Make sure to pre-drill the holes for the screws to avoid splitting the wood. You can use clamps to hold the pieces in place while the glue dries.
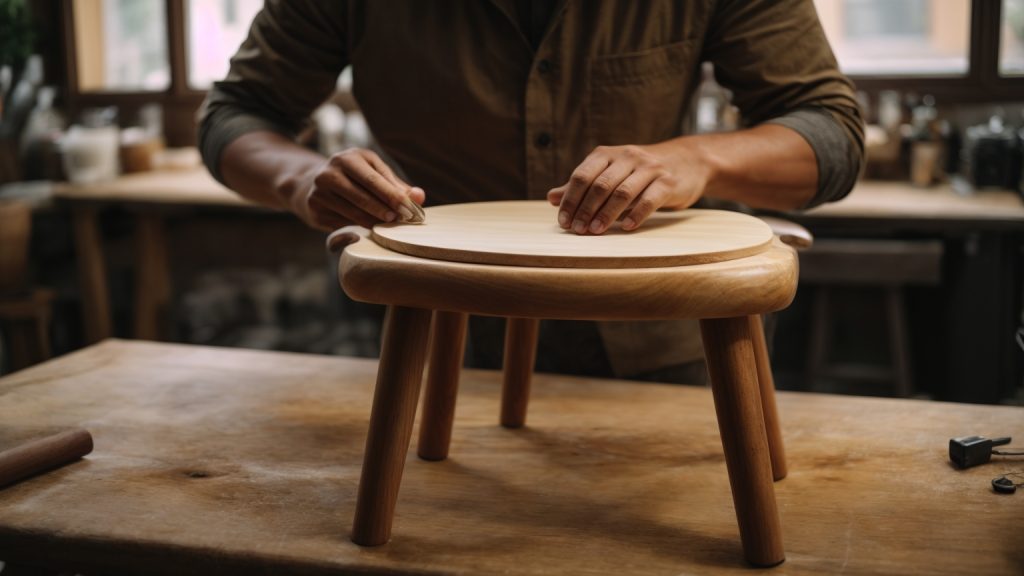
Attaching the Seat
Attaching the seat is the final step in assembling your wooden stool. To do this, you will need to place the seat on top of the legs and stretchers. Make sure it is centered and level before proceeding.
Next, drill holes through the seat and into the stretchers to prepare for attaching the seat. You can use wood screws to secure the seat to the stretchers. Again, make sure to pre-drill the holes to avoid splitting the wood.
Once the seat is attached, you can add any finishing touches, such as sanding or staining, to complete your wooden stool.
Congratulations! You have successfully assembled your own wooden stool. Now you can enjoy the satisfaction of having created a functional piece of furniture with your own hands.
Finishing Touches
Adding the finishing touches to your wooden stool can make all the difference in its appearance and durability. Here are some tips to help you get the best results.
Sanding
Before applying any finish, make sure to sand your stool thoroughly. This will help to smooth out any rough spots and ensure that the finish adheres properly. Start with a coarse grit sandpaper, such as 80 or 100, and work your way up to a finer grit, such as 220. Be sure to sand with the grain of the wood to avoid scratches.
Once you have finished sanding, use a tack cloth to remove any dust or debris from the surface of the stool. This will help to ensure a smooth finish.
Painting or Staining
When it comes to finishing your wooden stool, you have a few options. You can choose to paint it, stain it, or leave it natural. Each option has its own benefits and drawbacks.
If you decide to paint your stool, be sure to use a high-quality paint that is suitable for wood. You may need to apply several coats to achieve the desired coverage. Once the paint is dry, you can add a clear coat of polyurethane to protect the surface.
If you prefer the look of natural wood, you can choose to stain your stool. This will enhance the natural beauty of the wood while also providing some protection. Be sure to choose a stain that is suitable for the type of wood you are using. Apply the stain with a brush or rag, following the grain of the wood. Once the stain is dry, you can add a clear coat of polyurethane to protect the surface.
No matter which finish you choose, be sure to follow the manufacturer’s instructions carefully. This will help to ensure a beautiful and long-lasting finish for your wooden stool.
Safety Tips
When working with wood, safety should always be your top priority. Here are some tips to help you stay safe while making your wooden stool.
Proper Handling of Tools
It is important to handle your tools properly to avoid injuries. Always keep your tools sharp and in good condition, and use them only for their intended purpose. When using power tools, make sure to follow the manufacturer’s instructions and wear appropriate safety gear, such as safety goggles, ear protection, and a dust mask.
When handling sharp tools such as chisels, be sure to keep your hands and fingers away from the cutting edge. Use a clamp or vise to secure your workpiece, and never hold it in your hand while cutting or drilling.
Using Protective Gear
Wearing protective gear can help prevent injuries while working with wood. Here are some items you should consider wearing:
- Safety goggles: Protect your eyes from flying wood chips and sawdust.
- Ear protection: Reduce the risk of hearing damage from loud power tools.
- Dust mask: Prevent inhalation of sawdust and other particles.
- Gloves: Protect your hands from cuts and splinters.
Remember to always use your tools and protective gear as instructed, and never take shortcuts when it comes to safety. With these tips in mind, you can create a beautiful and functional wooden stool while staying safe in the workshop.