Tag Archives: regular cleaning regular cleaning

how-to-apply-polyurethane-on-stained-wood

Polyurethane and Stained Wood: A Quick Guide

Are you wondering if you need to put polyurethane on wood that was stained? The answer is yes, you should use a protective finish, such as polyurethane, to safeguard the wood’s beauty and integrity. Applying polyurethane over stain is essential to achieve a smooth, even finish, but it is important to ensure that the stain is completely dry before applying the polyurethane.

Polyurethane is a clear, durable finish that protects wood from scratches, stains, and water damage. It also enhances the natural beauty of the wood and adds a glossy or matte finish, depending on your preference. While you do not have to put polyurethane over the wood stain, it is highly recommended, especially if the wood will be exposed to wear and tear or moisture.

Choosing the right type of polyurethane based on the type of wood and the intended use of the project is important. There are two basic types of polyurethane: oil-based and water-based. Both have different pros and cons, such as drying time, odor, and exposure to heat or the elements. By understanding the benefits and drawbacks of each type, you can make an informed decision on which type of polyurethane to use on your stained wood project.

Understanding Polyurethane

Polyurethane is a popular finish used on wood surfaces to protect them from scratches, water damage, and other types of wear and tear. It is a synthetic polymer that is available in both oil-based and water-based forms.

Here are a few things you should know about polyurethane:

  • Oil-based vs. Water-based: Oil-based polyurethane is more durable and provides a richer finish, but it takes longer to dry and has a strong odor. Water-based polyurethane, on the other hand, dries faster, has a clear finish, and is low-odor. It is recommended for surfaces that see little exposure to heat or the elements.
  • Gloss vs. Satin vs. Matte: Polyurethane comes in a variety of sheens, including gloss, satin, and matte. Gloss provides a shiny finish, while satin and matte provide a more subdued finish. The sheen you choose depends on your personal preference and the look you are trying to achieve.
  • Application: Proper application of polyurethane is essential to achieving a smooth, even finish. It is best to apply polyurethane in thin coats using a high-quality brush or roller. Sanding between coats is also recommended to ensure a smooth finish.
  • Curing Time: Polyurethane takes time to cure, and it is important to avoid using the surface until it is fully cured. Oil-based polyurethane can take up to 24 hours to dry, while water-based polyurethane dries in as little as 2 hours. However, both types of polyurethane take several days to fully cure.

Overall, polyurethane is an excellent choice for protecting and enhancing the beauty of wood surfaces. Understanding the different types of polyurethane and how to properly apply them can help you achieve a beautiful, long-lasting finish on your wood projects.

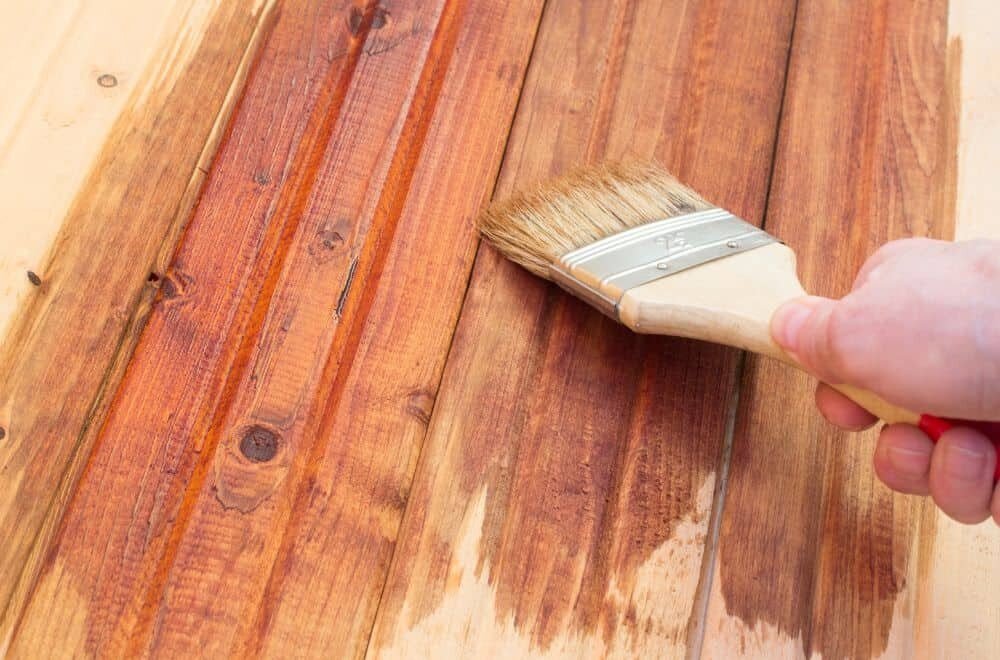
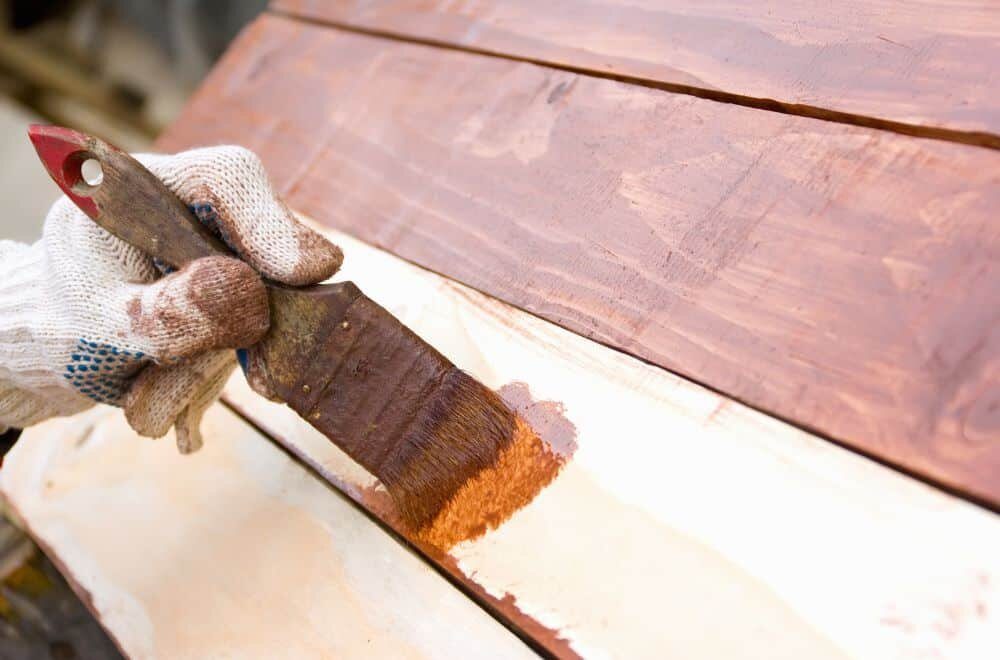
The Purpose of Staining Wood

the-purpose-of-staining-wood

Staining wood is a popular way to enhance its natural beauty and add color to it. It is a process of applying a pigmented liquid to the surface of the wood to change its color. The purpose of staining wood is to:

  • Enhance the natural beauty of the wood: Staining wood can bring out the natural grain patterns and textures of the wood, making it more visually appealing.
  • Add color to the wood: Staining wood can add color to the wood, which can help it blend in with other interior design elements.
  • Protect the wood: Staining wood can help protect it from damage caused by moisture, sunlight, and other environmental factors.
  • Create a uniform appearance: Staining wood can help create a uniform appearance by covering up any imperfections or blemishes in the wood.

It’s important to note that staining wood alone does not provide protection against moisture, heat, or checking. For this reason, it’s essential to use a protective finish, such as polyurethane, after staining to safeguard the wood’s beauty and integrity.

Applying Polyurethane on Stained Wood

If you have stained your wood, it is recommended to apply polyurethane to protect the wood and give it a polished look. Polyurethane is a clear, protective coating that can be applied on top of the stained wood to provide a durable finish. In this section, we will discuss the steps to apply polyurethane on stained wood.

Step 1: Choose the Right Type of Polyurethane

There are two types of polyurethane – oil-based and water-based. Oil-based polyurethane takes longer to dry, has a strong odor, and can yellow over time. On the other hand, water-based polyurethane dries quickly, has a low odor, and does not yellow over time. If you have a light-colored stain or want to maintain the natural color of the wood, water-based polyurethane is the best choice.

Step 2: Prepare the Surface

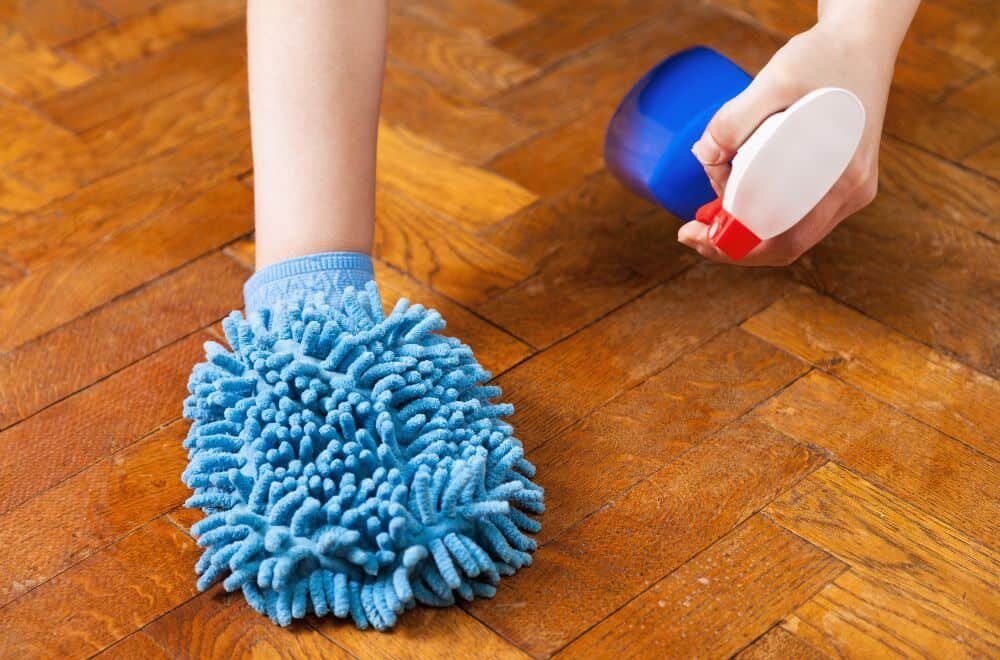
Before applying polyurethane, ensure that the surface is clean and free of dust and debris. Sand the surface with fine-grit sandpaper and wipe it down with a tack cloth to remove any remaining dust. If the surface has any imperfections, fill them with wood filler and sand them down until smooth.

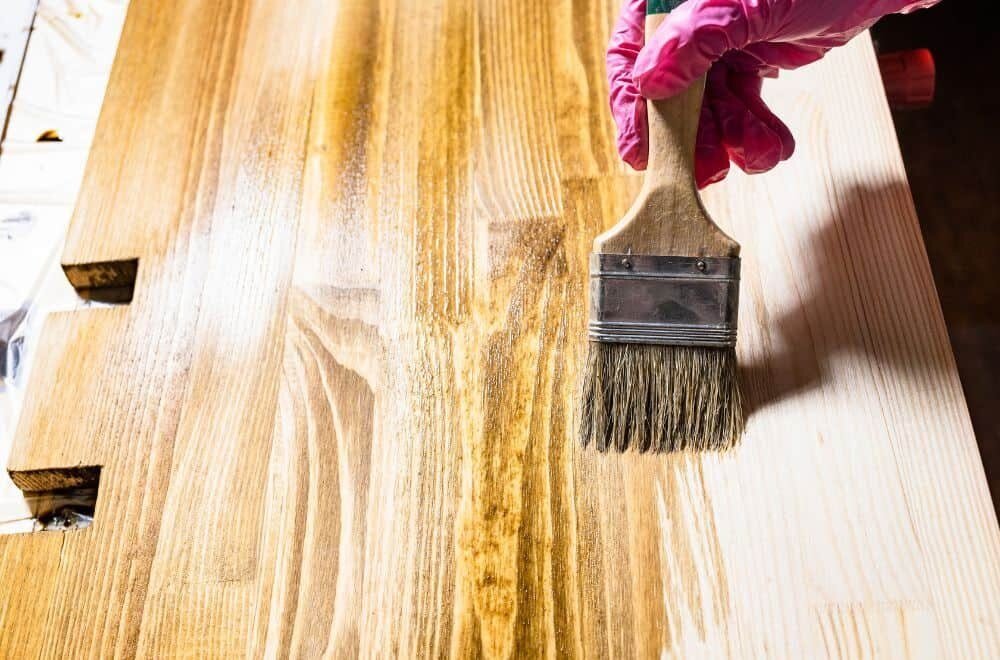
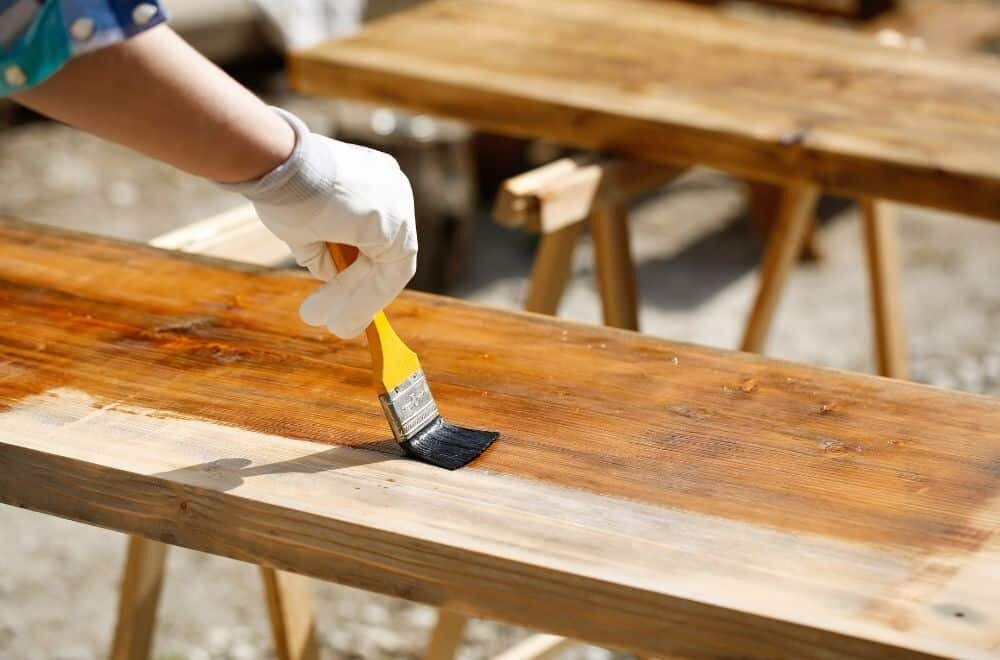
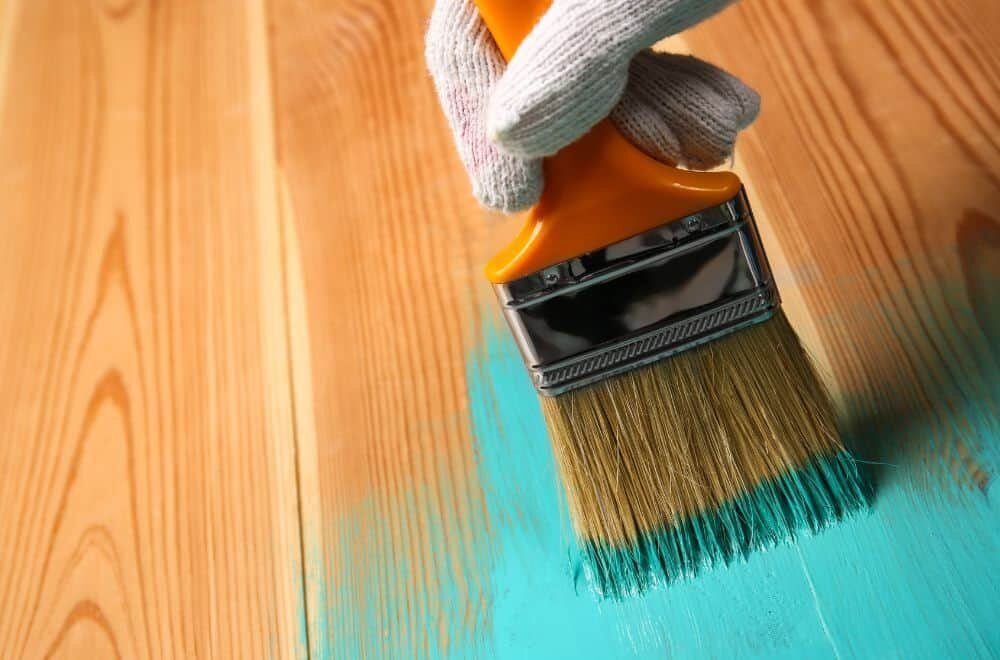
Step 3: Apply the First Coat

Using a natural bristle brush, apply a thin layer of polyurethane to the surface. Apply the polyurethane in long strokes in direct horizontal motions with the grain of the wood. Ensure that the brush strokes are even and smooth. Let the first coat dry completely before applying the second coat.

Step 4: Apply the Second Coat

Apply the second coat of polyurethane in the same manner as the first coat. The second coat will provide additional protection and give the wood a polished look. Let the second coat dry completely before using the surface.

In conclusion, applying polyurethane on stained wood is an important step to protect the wood and give it a polished look. By following these simple steps, you can apply polyurethane on stained wood and achieve a professional-looking finish.

Benefits of Applying Polyurethane on Stained Wood

benefits-of-applying-polyurethane-on-stained-wood

When it comes to preserving the look and feel of your wooden furniture, applying polyurethane on stained wood can be a game-changer. Here are some benefits of applying polyurethane on stained wood:

1. Protection from Scratches and Stains

Polyurethane is a durable and scratch-resistant coating that can help protect your wooden furniture from scratches and stains. By applying polyurethane on stained wood, you can ensure that your furniture stays looking new for longer.

2. Smooth and Shiny Finish

Polyurethane gives a smooth and shiny finish to the stained wood. It enhances the natural beauty of the wood and gives it a glossy look that can make it stand out in any room.

3. Longevity

Polyurethane can help extend the life of your wooden furniture. By providing a protective layer over the stained wood, polyurethane can help prevent damage caused by exposure to sunlight, moisture, and other environmental factors.

4. Easy Maintenance

Polyurethane makes maintenance of the stained wood easy. It prevents dust from settling on the surface of the wood and makes it easier to clean. You can simply wipe the surface of the wood with a damp cloth to keep it looking clean and shiny.

5. Versatility

Polyurethane can be used on a variety of wooden surfaces, from floors to furniture. It can be applied over different types of stains and finishes, making it a versatile coating for any wooden surface.

Overall, applying polyurethane on stained wood can be a great way to protect and enhance the natural beauty of your wooden furniture.

Potential Drawbacks of Applying Polyurethane on Stained Wood

If you are planning to apply polyurethane on stained wood, there are a few potential drawbacks that you should consider:

1. Polyurethane can alter the color of the stain

Polyurethane can have a slight yellowing effect on the wood, which can alter the color of the stain. This is especially true for oil-based polyurethane. If you want to maintain the color of the stain, it’s important to choose a water-based polyurethane that won’t yellow over time.

2. Polyurethane can create a plastic-like appearance

Polyurethane can create a plastic-like appearance on the wood, which can detract from the natural beauty of the grain. This is especially true for high-gloss polyurethane. If you want to maintain a natural look, it’s important to choose a satin or matte finish.

3. Polyurethane can be difficult to apply

Polyurethane can be difficult to apply, especially if you are not experienced with the process. It can be prone to drips, bubbles, and uneven coverage. It’s important to follow the manufacturer’s instructions carefully and to apply the polyurethane in thin, even coats.

4. Polyurethane can be difficult to remove

Polyurethane can be difficult to remove once it has been applied. If you make a mistake during the application process, it can be challenging to fix without sanding down the entire surface and starting over. It’s important to take your time and work carefully to avoid any mistakes.

Overall, there are some potential drawbacks to applying polyurethane on stained wood. However, if you choose the right type of polyurethane and apply it carefully, you can achieve a beautiful, durable finish that will protect your wood for years to come.

How to Apply Polyurethane on Stained Wood

how-to-apply-polyurethane-on-stained-wood

If you have recently stained your wood and are wondering whether to apply polyurethane on top of it or not, the answer is yes. Polyurethane is a protective coating that helps to prevent scratches and water damage while also enhancing the wood’s natural beauty. Here are the steps to follow when applying polyurethane on stained wood.

Preparation

Before you start applying polyurethane, make sure your wood is clean and free of any dust or debris. You can use a tack cloth or a vacuum cleaner to remove any dirt or sawdust. If you notice any imperfections on the wood surface, sand it down gently with a fine-grit sandpaper.

Next, choose the type of polyurethane you want to use. There are two types of polyurethane: water-based and oil-based. Water-based polyurethane is easy to clean up and dries faster, while oil-based polyurethane is more durable and gives a richer finish. Make sure to read the label carefully and follow the manufacturer’s instructions.
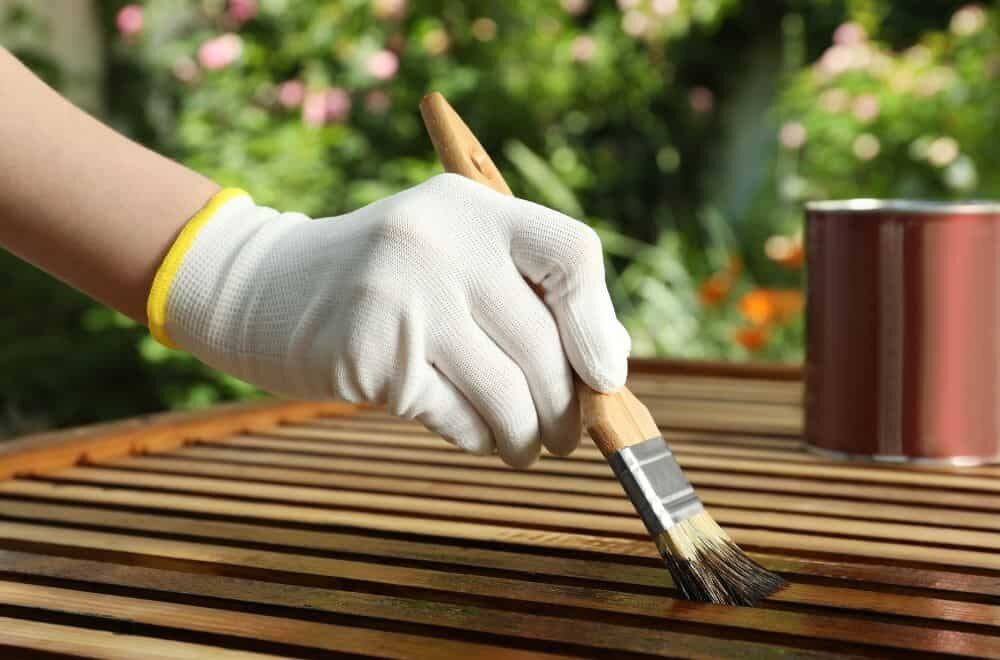
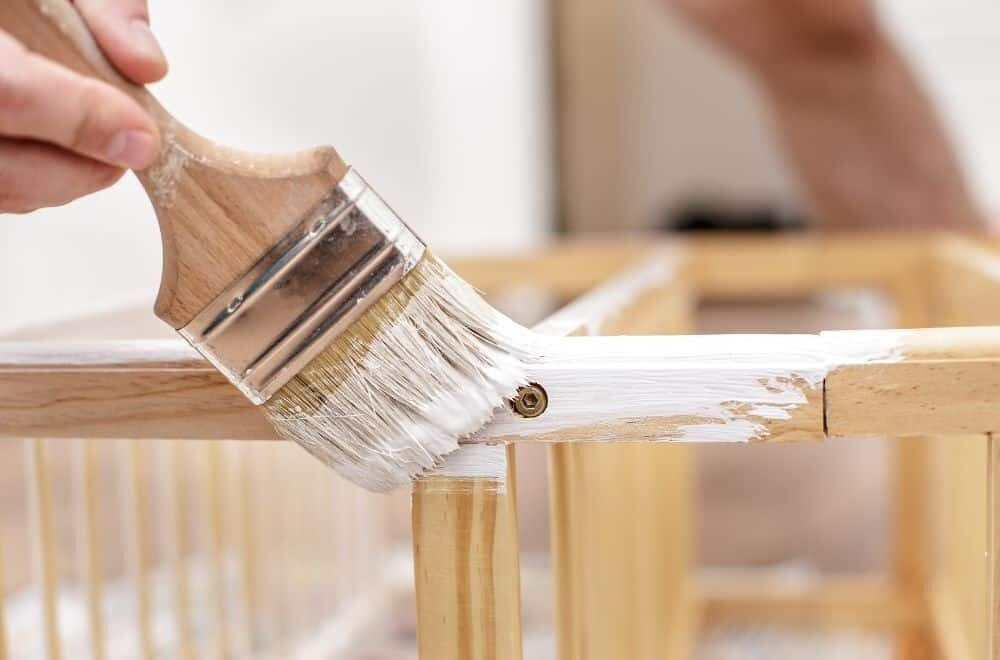
Application

When applying polyurethane, use a high-quality brush or a foam applicator. Start by applying a thin coat of polyurethane in the direction of the wood grain. Make sure to spread the polyurethane evenly and avoid leaving any brush marks or bubbles. If you notice any bubbles, gently brush them out with a dry brush.

Wait for the first coat to dry completely before applying the second coat. Depending on the type of polyurethane you are using, this may take anywhere from 2 to 24 hours. Once the first coat is dry, lightly sand the surface with a fine-grit sandpaper to remove any imperfections. Then, apply a second coat of polyurethane in the same manner as the first coat.

Drying and Curing

After applying the final coat of polyurethane, wait for it to dry completely before using the wood surface. This can take anywhere from 24 to 72 hours, depending on the type of polyurethane and the humidity level in your area.

Once the polyurethane is dry, it will still need to cure for several days before it reaches its maximum hardness and durability. Avoid placing any objects on the wood surface or exposing it to water or heat until the polyurethane has fully cured.

In summary, applying polyurethane on stained wood is a simple process that requires a bit of patience and attention to detail. With the right tools and techniques, you can protect and enhance the natural beauty of your wood for years to come.

Maintenance of Polyurethane-Coated Wood

Once you have applied polyurethane to your stained wood, it is important to properly maintain it to ensure its longevity and beauty. Here are some tips to help you maintain your polyurethane-coated wood:
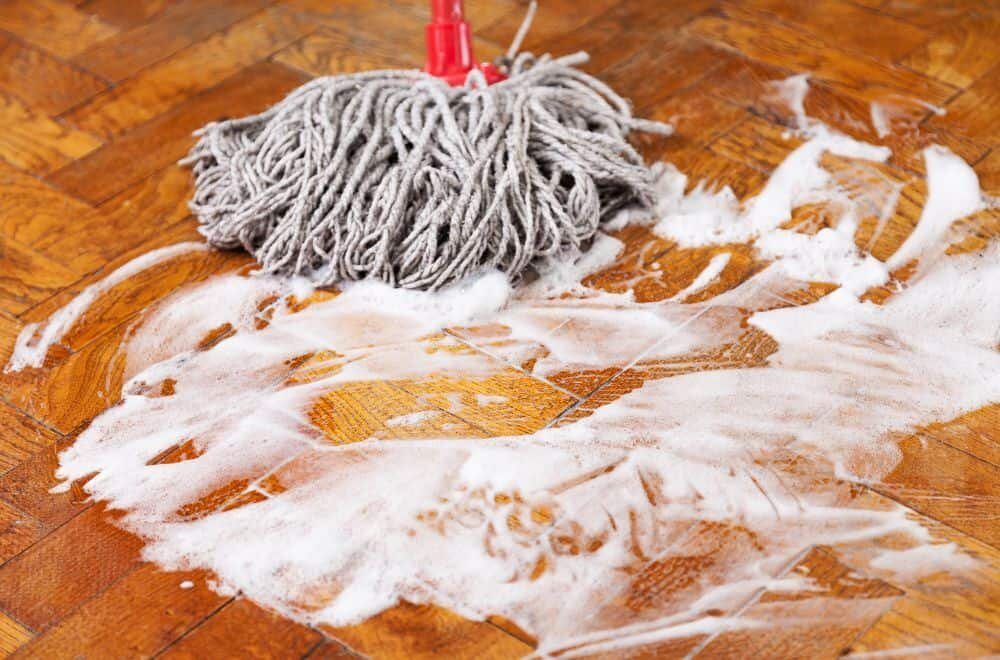
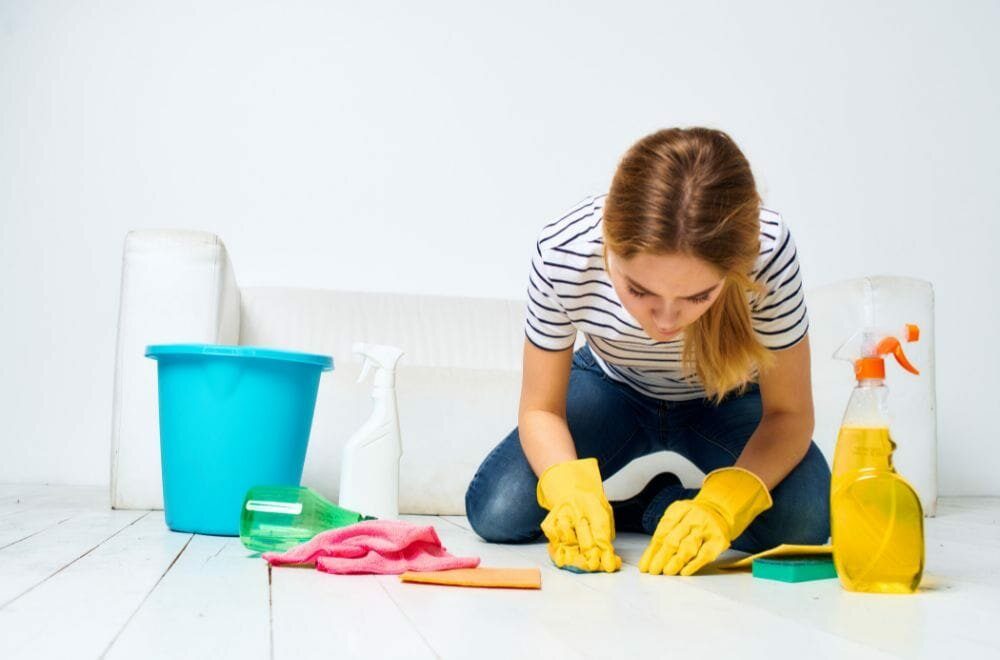
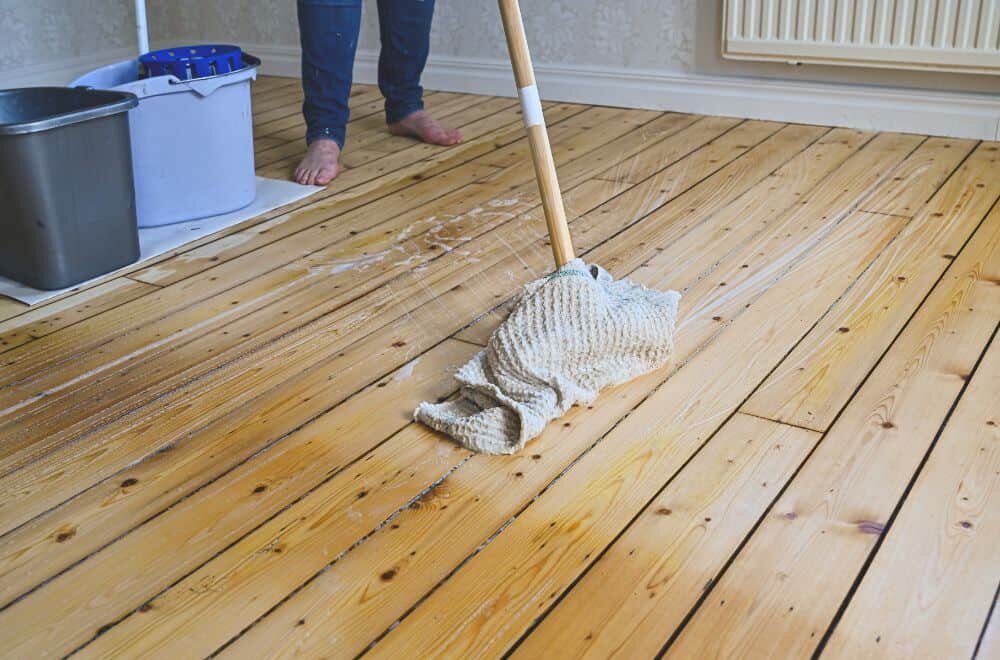
Regular Cleaning

Regular cleaning is essential to maintain the appearance and durability of your polyurethane-coated wood. You can use a soft cloth or a damp mop to clean the surface. Avoid using harsh chemicals or abrasive cleaners, as they can damage the polyurethane coating. Instead, use mild soap and water to clean the surface.

Avoid Scratches and Dents

Polyurethane-coated wood is durable, but it is not indestructible. Avoid dragging heavy objects across the surface, as this can cause scratches and dents. Use furniture pads or coasters to protect the surface from scratches and dents.

Avoid Extreme Temperatures

Polyurethane-coated wood can withstand moderate temperatures, but it is not designed to withstand extreme temperatures. Avoid placing hot objects directly on the surface, as this can cause the polyurethane coating to melt or warp. Similarly, avoid exposing the surface to extreme cold, as this can cause the polyurethane coating to crack.

Recoating

Over time, the polyurethane coating may start to wear away. When this happens, you can recoat the surface to restore its appearance and durability. Before recoating, clean the surface thoroughly and sand it lightly to remove any rough spots. Apply a thin coat of polyurethane and allow it to dry completely before applying a second coat.

By following these tips, you can maintain the beauty and durability of your polyurethane-coated wood for years to come.

Alternatives to Polyurethane for Stained Wood

alternatives-to-polyurethane-for-stained-wood

If you’re looking for alternatives to polyurethane for stained wood, you’re in luck! There are several options available that can provide a protective finish for your stained wood without using polyurethane.

Tung Oil

Tung oil is a natural oil that is derived from the seeds of the tung tree. It is a popular alternative to polyurethane because it is easy to apply and provides a durable finish that enhances the natural beauty of the wood. Tung oil is also resistant to water and stains, making it a great choice for high-traffic areas.

Shellac

Shellac is a natural resin that is derived from the secretions of the lac bug. It has been used for centuries as a wood finish and is still a popular choice today. Shellac is easy to apply and dries quickly, providing a hard, protective finish that resists water, alcohol, and heat.

Lacquer

Lacquer is a synthetic finish that is made from nitrocellulose and other chemicals. It is a popular alternative to polyurethane because it dries quickly and provides a hard, durable finish. Lacquer is also resistant to water and stains, making it a great choice for high-traffic areas.

Wax

Wax is a traditional finish that has been used for centuries to protect and enhance the natural beauty of wood. There are several types of wax available, including beeswax, carnauba wax, and candelilla wax. Wax is easy to apply and provides a low-luster finish that enhances the natural grain of the wood. However, wax is not as durable as other finishes and may require more frequent reapplication.

In conclusion, there are several alternatives to polyurethane for stained wood, each with its own unique benefits and drawbacks. Consider your specific needs and preferences when choosing a finish for your stained wood project.

Frequently Asked Questions

How do you apply polyurethane to wood that has been stained?

When applying polyurethane to stained wood, it is important to ensure that the surface is clean and free of dust. You can use a clean cloth or brush to apply the polyurethane in thin, even coats. Be sure to follow the manufacturer’s instructions for drying times and the number of coats recommended.

Is it necessary to apply polyurethane after staining wood?

While it is not absolutely necessary to apply polyurethane after staining wood, it is highly recommended. Polyurethane provides a protective layer that helps to prevent scratches and other damage to the stained surface. It also helps to enhance the color and grain of the wood.

Do you need to sand between staining and applying polyurethane?

Yes, it is recommended to sand between staining and applying polyurethane. This helps to ensure a smooth and even surface for the polyurethane to adhere to. Use a fine-grit sandpaper and be sure to remove all dust before applying the polyurethane.

How long should you wait after staining wood before applying polyurethane?

The recommended wait time before applying polyurethane after staining wood varies depending on the type of stain used. It is best to follow the manufacturer’s instructions for the specific stain you are using. In general, it is recommended to wait at least 24 hours before applying polyurethane.

Can you use water-based polyurethane on stained wood?

Yes, you can use water-based polyurethane on stained wood. However, it is important to ensure that the stain is completely dry before applying the water-based polyurethane. Water-based polyurethane dries faster than oil-based polyurethane, so be sure to work quickly and apply thin, even coats.

Do you need to seal wood after staining before applying polyurethane?

It is not necessary to seal wood after staining before applying polyurethane. However, if you are using a stain that is not compatible with polyurethane, you may need to apply a sealer before applying the polyurethane. Be sure to check the manufacturer’s instructions for compatibility and application guidelines.

why-consider-staining-over-polyurethane

Wood Stain Over Polyurethane: Is It Possible?

Are you wondering if you can put wood stain over polyurethane? If you have a wood surface that has been coated with polyurethane and you want to change its color, you may be wondering if it’s possible to apply a wood stain over the existing finish. The answer is not straightforward, but it is possible in some cases.

Regular wood stain is a penetrating finish, meaning it needs to penetrate the wood pores to stick. However, since polyurethane forms a moisture-resistant barrier over the surface, the wood stain can’t penetrate it and won’t stick. But, there are some topical stains, such as gel stains, that can stick to polyurethane. In this article, we will explore the options available to you if you want to put wood stain over polyurethane and the benefits of doing so.

Understanding Polyurethane and Wood Stain

When it comes to finishing woodwork, polyurethane and wood stain are two of the most commonly used products. Polyurethane is a clear, protective coating that is applied over wood to protect it from damage and wear. On the other hand, wood stain is a colored liquid that is applied to wood to enhance its natural beauty and add color.

Polyurethane is available in two types: water-based and oil-based. Water-based polyurethane dries faster and has a lower VOC (volatile organic compound) content, making it a more environmentally friendly option. Oil-based polyurethane, on the other hand, takes longer to dry but provides a more durable finish.

Wood stain is also available in two types: oil-based and water-based. Oil-based stains penetrate deeper into the wood grain, providing a richer color and a more natural look. Water-based stains, on the other hand, dry faster and have a lower VOC content.

One common question people have is whether they can put wood stain over polyurethane. The answer is no, regular wood stain won’t stick to polyurethane because it forms a moisture-resistant barrier over the surface. However, topical stains, such as gel stains, can stick to polyurethane because they don’t need to penetrate the wood pores to stick.

If you want to apply wood stain over polyurethane, you’ll need to remove the polyurethane first by sanding or stripping it off. Once the polyurethane is removed, you can apply the wood stain and then apply a new coat of polyurethane over it to protect it.

It’s important to note that when mixing wood stain with polyurethane, you should use the same bases, such as an oil-based stain with only oil-based poly and vice versa. This ensures that the two products will bond properly and provide the best results.

Why Consider Staining Over Polyurethane

why-consider-staining-over-polyurethane

If you have a wood project that has already been coated with polyurethane, you may be wondering if you can add more color to it. The answer is yes, you can stain over polyurethane. Here are a few reasons why you might consider staining over polyurethane:

To Add Color

Polyurethane is a clear coating that protects the wood but doesn’t add any color. If you want to add some color to your wood project, staining over polyurethane is a great option. You can choose from a variety of colors and shades to achieve the desired look.

To Enhance Durability

Staining over polyurethane can actually enhance the durability of the finish. By adding an additional layer of stain, you are also adding an additional layer of protection to the wood. This can help prevent scratches, dents, and other types of damage.

To Refresh the Look

Over time, polyurethane can become dull and worn-looking. Staining over polyurethane can help refresh the look of the wood and make it look new again. It’s a great way to give an old piece of furniture or a wood floor a fresh new look.

To Correct Mistakes

If you’ve already applied polyurethane to your wood project and made a mistake, such as a drip or a spot that didn’t get coated properly, you can fix it by staining over the polyurethane. The stain will help cover up the mistake and make it less noticeable.

Overall, staining over polyurethane is a great option if you want to add color, enhance durability, refresh the look, or correct mistakes. Just make sure to prepare the surface properly and choose the right type of stain for your project.

Preparation Before Staining Over Polyurethane

Before you start staining over polyurethane, it is crucial to prepare the surface properly. This will ensure that the stain adheres well and gives you the desired finish. Here are two important steps you should follow:

Cleaning the Surface

Before you start staining, ensure that the surface is clean and free of any dust, dirt, or debris. Use a soft cloth or a vacuum cleaner to remove any loose particles from the surface. For any stubborn stains, you can use a mild detergent and water solution. Ensure that you wipe off any excess soap with a clean, damp cloth.

Sanding the Surface

Sanding the surface is an essential step before staining. It helps to remove any existing polyurethane and gives the stain a better surface to adhere to. Use a fine-grit sandpaper to sand the surface gently. Ensure that you sand in the direction of the wood grain. Once you have sanded the surface, wipe off any dust with a soft cloth.

In summary, cleaning and sanding the surface are crucial steps in preparing to stain over polyurethane. By following these steps, you can ensure that the stain adheres well and gives you the desired finish.

Choosing the Right Wood Stain

choosing-the-right-wood-stain

When it comes to choosing the right wood stain, there are a few things you should consider. First, you need to decide what type of finish you want. Do you want a clear finish, or do you want a colored finish? If you want a colored finish, what color do you want? Once you have decided on the type of finish you want, you need to choose the right product.

There are two main types of wood stain: oil-based and water-based. Oil-based stains are the traditional choice and are known for their durability and rich color. They are also easier to apply and penetrate the wood more deeply. Water-based stains, on the other hand, are a newer option and are known for their low VOCs and easy cleanup. They also dry faster than oil-based stains.

Another factor to consider is the opacity of the stain. Some stains are more opaque than others, meaning they will hide the natural grain of the wood more. If you want to highlight the natural grain of the wood, you should choose a more transparent stain. If you want a more solid color, you should choose a more opaque stain.

Lastly, consider the type of wood you are staining. Different types of wood absorb stain differently, so you should choose a stain that is specifically designed for the type of wood you are working with. For example, if you are staining pine, you may want to choose a stain that is designed for softwoods.

Overall, choosing the right wood stain is an important part of the staining process. By considering the type of finish, the type of stain, the opacity, and the type of wood, you can ensure that you choose the right product for your project.

Application Process

Applying the Stain

If you want to apply wood stain over polyurethane, you need to follow a few steps to ensure that the stain adheres properly. First, you need to clean the surface of the wood thoroughly to remove any dirt, grime, or wax. You can use a scouring pad dipped in a 5-50 solution of denatured alcohol and water to scrub the surface. After cleaning, let the surface dry for at least two hours.

Next, you need to sand the surface of the wood lightly by hand with 400-grit sandpaper. This step is necessary to remove any glossiness and provide a rough surface for the stain to adhere to. After sanding, wipe the surface with a clean cloth to remove any dust or debris.

Now, it’s time to apply the stain. You can use a brush, foam applicator, or cloth to apply the stain. Make sure to apply the stain in the direction of the wood grain. Apply the stain evenly and wipe off any excess with a clean cloth. If you want a darker color, you can apply a second coat of stain after the first coat has dried.

Drying and Curing Time

After applying the stain, you need to let it dry completely before applying polyurethane. The drying time can vary depending on the type of stain you use, but it usually takes around 24 hours. Make sure to check the manufacturer’s instructions for specific drying times.

Once the stain has dried completely, you can apply polyurethane. Apply the first coat of polyurethane thinly and evenly with a brush or roller, and let it dry for at least six hours. After the first coat has dried, sand the surface lightly with 220-grit sandpaper to remove any bumps or imperfections. Then, apply the second coat of polyurethane and let it dry for another six hours.

In conclusion, applying wood stain over polyurethane requires proper preparation and application techniques. By following the steps outlined above, you can achieve a beautiful and long-lasting finish on your wood projects.

Potential Challenges and How to Overcome Them

potential-challenges-and-how-to-overcome-them

When staining over polyurethane, you may encounter some challenges that can affect the final outcome of your project. Here are some of the potential challenges and how to overcome them:

Uneven Stain Application

One of the challenges you may face when staining over polyurethane is uneven stain application. This can happen when the polyurethane surface is not properly prepared before applying the stain. To avoid this, follow these steps:

  • Sand the polyurethane surface lightly with fine-grit sandpaper to create a rough surface that the stain can adhere to.
  • Clean the surface thoroughly with denatured alcohol and a clean cloth to remove any dirt or debris.
  • Apply a pre-stain conditioner to the surface to help the stain absorb evenly.

Stain Not Adhering Properly

Another challenge you may face is the stain not adhering properly to the polyurethane surface. This can happen when the polyurethane is too smooth or when the stain is not applied properly. To overcome this challenge, follow these steps:

  • Sand the polyurethane surface with coarse-grit sandpaper to create a rough surface that the stain can adhere to.
  • Apply a gel stain, which is thicker and easier to control than traditional liquid stains.
  • Apply the stain in thin, even coats with a brush or rag, making sure to wipe off any excess stain.
  • Allow the stain to dry completely before applying a protective topcoat.

By following these steps, you can overcome the potential challenges of staining over polyurethane and achieve a beautiful, even finish.

Maintenance of Stained Wood Over Polyurethane

maintenance-of-stained-wood-over-polyurethane

If you have a stained wood surface that has been coated with polyurethane, it is essential to maintain it properly to keep it looking its best. Here are some tips to help you maintain your stained wood over polyurethane:

Regular Cleaning

Regular cleaning is essential to keep your stained wood over polyurethane looking its best. You can use a soft cloth or a vacuum cleaner with a soft brush attachment to remove dust and debris from the surface. Avoid using harsh chemicals or abrasive cleaners that can damage the polyurethane coating.

Avoid Excessive Moisture

Excessive moisture can damage the polyurethane coating and cause it to peel or crack. Avoid placing wet items directly on the surface and wipe up spills immediately to prevent them from penetrating the polyurethane coating.

Avoid Direct Sunlight

Direct sunlight can cause the stained wood over polyurethane to fade and lose its color over time. To prevent this, avoid placing the surface in direct sunlight for extended periods. You can also use window treatments or UV-blocking films to protect the surface from sunlight.

Touch-Up as Needed

If the polyurethane coating becomes damaged or begins to peel, you can touch it up with a polyurethane coating designed for stained wood surfaces. Follow the manufacturer’s instructions carefully to ensure a smooth and even application.

Refinish When Necessary

If the stained wood over polyurethane becomes severely damaged or begins to show signs of wear, it may be time to refinish the surface. Refinishing involves removing the old polyurethane coating and applying a new one. This process should be done by a professional to ensure a smooth and even finish.

By following these tips, you can keep your stained wood over polyurethane looking beautiful for years to come.

Frequently Asked Questions

Can I apply gel stain over polyurethane?

Yes, you can apply gel stain over polyurethane. However, before doing so, you need to ensure that the polyurethane is clean and free from any dirt or debris. You can use denatured alcohol or a degreaser to clean the surface. After cleaning, sand the polyurethane lightly with sandpaper to create a rough surface that the gel stain can adhere to. Once the surface is ready, you can apply the gel stain and wipe off the excess.

Is it possible to stain over water-based polyurethane?

Yes, it is possible to stain over water-based polyurethane. However, you need to ensure that the surface is clean and free from any contaminants. You can use a degreaser or denatured alcohol to clean the surface. After cleaning, sand the surface lightly with sandpaper to create a rough surface that the stain can adhere to. Once the surface is ready, you can apply the stain and wipe off the excess.

Can you put gel wood stain over polyurethane?

Yes, you can put gel wood stain over polyurethane. However, you need to ensure that the polyurethane is clean and free from any dirt or debris. You can use denatured alcohol or a degreaser to clean the surface. After cleaning, sand the polyurethane lightly with sandpaper to create a rough surface that the gel stain can adhere to. Once the surface is ready, you can apply the gel stain and wipe off the excess.

Can you apply PolyShades over polyurethane?

Yes, you can apply PolyShades over polyurethane. However, you need to ensure that the surface is clean and free from any contaminants. You can use a degreaser or denatured alcohol to clean the surface. After cleaning, sand the surface lightly with sandpaper to create a rough surface that the PolyShades can adhere to. Once the surface is ready, you can apply the PolyShades and wipe off the excess.

What type of stain can go over polyurethane?

You can use any type of stain over polyurethane as long as the surface is clean and free from any contaminants. However, it is recommended to use gel stain as it adheres well to polyurethane and provides a uniform finish.

Can I stain over varnished wood without sanding?

No, you cannot stain over varnished wood without sanding. Sanding is necessary to create a rough surface that the stain can adhere to. If you apply stain over varnished wood without sanding, it will not adhere properly and will result in an uneven finish.

understanding-the-type-of-paint

Affordable Solutions: How to Remove Fully Dried Paint from Wooden Floors

Are you dealing with a paint spill or splatter on your wooden floor? Removing dried paint from hardwood floors can seem like a daunting task, but it’s not impossible. With a few simple techniques and some inexpensive materials, you can remove fully dried paint from your wooden floor on the cheap.

One of the most effective and affordable ways to remove dried paint from hardwood floors is by using rubbing alcohol. If the paint is water-based, wet a cotton ball with rubbing alcohol and wipe it over the paint. If any residue comes off on the cotton ball, the paint is water-based. If nothing comes off, then it’s oil-based. Once you’ve identified the type of paint, you can get started with one of the methods mentioned in this article.

Another cheap and easy solution is to use dish soap and warm water. Simply apply a few drops of dish soap to a damp rag and then use the rag to rub the dried-up paint stains. This method works best for water-based paints. If the paint is oil-based, you can use paint thinner or mineral spirits to remove it. However, be careful when using these solvents as they can damage the finish of your wooden floor.

Understanding the Type of Paint

understanding-the-type-of-paint

When it comes to removing dried paint from your wooden floor, the first thing you need to consider is the type of paint that was used. Different types of paint require different methods of removal. In general, there are two main types of paint: water-based and oil-based.

Water-Based Paint

Water-based paint, also known as latex paint, is the most common type of paint used for interior surfaces. It is easy to clean up with soap and water, dries quickly, and is less toxic than oil-based paint. However, it can still be difficult to remove once it has dried.

To remove dried water-based paint from your wooden floor, you can try the following methods:

  • Scrape the paint off with a plastic scraper or putty knife.
  • Use a damp cloth to soften the paint and then scrape it off.
  • Apply a paint remover or solvent to the paint and then scrape it off.

Oil-Based Paint

Oil-based paint is a more durable and long-lasting type of paint that is often used for exterior surfaces and high-traffic areas. It is harder to clean up and requires solvents such as mineral spirits or turpentine. Once it has dried, it can be difficult to remove.

To remove dried oil-based paint from your wooden floor, you can try the following methods:

  • Scrape the paint off with a plastic scraper or putty knife.
  • Apply a paint remover or solvent to the paint and then scrape it off.
  • Use a heat gun or hair dryer to soften the paint and then scrape it off.

It is important to note that some paint removers and solvents can be toxic and should be used with caution. Always follow the manufacturer’s instructions and wear protective gear such as gloves and a mask. Additionally, be careful not to damage the wood underneath the paint while removing it.

Materials and Tools Needed

materials-and-tools-needed

Removing fully dried paint from your wooden floor can be a challenging task, but it’s not impossible. With the right tools and cleaning solutions, you can get rid of the paint and restore your floor’s natural beauty. Here are the materials and tools you’ll need:

Safety Gear

Before you start removing the paint, it’s important to protect yourself. Here are some safety gear you should have:

  • Gloves: Use gloves to protect your hands from the cleaning solutions and scraping tools.
  • Eye protection: Wear goggles to prevent the cleaning solutions and paint chips from getting into your eyes.
  • Respirator: Use a respirator to avoid inhaling the fumes from the cleaning solutions.

Cleaning Solutions

There are several cleaning solutions you can use to remove the paint from your wooden floor. Here are some options:

  • Vinegar and water: Mix equal parts of vinegar and water and apply it to the paint. Let it sit for a few minutes before scraping it off.
  • Baking soda and water: Mix baking soda and water to create a paste. Apply it to the paint and let it sit for a few minutes before scraping it off.
  • Rubbing alcohol: Apply rubbing alcohol to the paint and let it sit for a few minutes before scraping it off.

Scraping Tools

To remove the paint, you’ll need some scraping tools. Here are some options:

  • Putty knife: Use a putty knife to scrape off the paint. Be careful not to damage the wooden floor.
  • Scraper: A scraper is a more heavy-duty tool that can remove stubborn paint.
  • Sandpaper: Sandpaper can be used to remove any remaining paint after scraping.

Remember to be patient and take your time when removing the paint. Rushing the process can damage your wooden floor.

Safety Precautions

safety-precautions

Removing dried paint from wooden floors can be a challenging task, but it is essential to take safety precautions to avoid any accidents or health hazards. Here are some safety measures to consider before starting:

1. Wear Protective Gear

It is crucial to wear protective gear such as gloves, safety glasses, and a dust mask to avoid any contact with toxic chemicals or dust particles that may cause respiratory problems or skin irritation.

2. Ventilate the Area

Ensure that the room is well ventilated by opening windows and doors to allow fresh air to circulate. This will help to reduce the risk of inhaling toxic fumes or dust particles.

3. Use Safe Products

When selecting cleaning products, opt for non-toxic and eco-friendly options to avoid harmful chemicals that may damage the wood or pose a health risk. Always read the label and follow the instructions carefully.

4. Avoid Using Heat or Flame

Avoid using heat or flame to remove paint from wooden floors as it can be dangerous and may cause a fire. Instead, use a chemical paint stripper or a scraper to remove the paint.

5. Consult a Professional

If you are unsure about how to remove paint from your wooden floor or if you suspect that the paint may contain lead, it is best to consult a professional. They can provide expert advice and ensure that the job is done safely and effectively.

By taking these safety precautions, you can remove dried paint from your wooden floor safely and without any health or safety risks.

Step-by-Step Guide to Removing Paint

step-by-step-guide-to-removing-paint

If you have fully dried paint on your wooden floor, don’t worry. You can remove it using some simple steps. Here is a step-by-step guide to help you remove paint from your wooden floor on the cheap.

Initial Cleaning

Before you start removing the paint, you need to do some initial cleaning. Sweep the floor to remove any loose dirt or debris. Then, use a vacuum cleaner to remove any remaining dust or debris. This will ensure that the surface is clean and ready for the next step.

Applying the Cleaning Solution

The next step is to apply a cleaning solution to the paint. You can use a mixture of warm water and dish soap or vinegar. Apply the solution to the paint using a sponge or cloth and let it sit for a few minutes. This will help loosen the paint and make it easier to remove.

Scraping the Paint

After the cleaning solution has had time to work, use a scraper or putty knife to gently scrape the paint off the floor. Be careful not to scratch the wood. If the paint is stubborn, you can use a heat gun to soften it before scraping.

Sanding the Surface

Once you have removed as much paint as possible with the scraper, you can use sandpaper to sand the surface. This will help remove any remaining paint and smooth out the surface. Start with a coarse grit sandpaper and gradually work your way up to a finer grit.

Final Cleaning

After sanding, use a vacuum cleaner or damp cloth to remove any dust or debris. Then, wipe the surface with a clean, damp cloth to remove any remaining cleaning solution.

By following these simple steps, you can remove fully dried paint from your wooden floor on the cheap. Remember to be patient and take your time to avoid damaging the wood.

Maintaining Your Wooden Floor

maintaining-your-wooden-floor

Maintaining your wooden floor is crucial to keep it looking new and beautiful for years to come. Here are some tips to help you keep your wooden floor in top condition:

Regular Cleaning

Regular cleaning is essential to keep your wooden floor looking clean and shiny. You can use a soft-bristled broom or a vacuum cleaner to remove dust and dirt from the surface of your floor. Make sure to use a vacuum cleaner with a soft brush attachment to avoid scratching the surface of your floor.

Avoid Water Damage

Water can damage your wooden floor, so it’s essential to avoid spills and leaks. If you spill any liquid on your floor, clean it up immediately to prevent it from seeping into the wood and causing damage. You can also place mats and rugs in high-traffic areas to protect your floor from wear and tear.

Use Protective Pads

Furniture can scratch and damage your wooden floor, so it’s essential to use protective pads on the legs of your furniture. You can buy these pads at any hardware store or online. Make sure to replace them regularly to keep your floor protected.

Refinishing Your Floor

Over time, your wooden floor may become dull and damaged. If this happens, you can refinish your floor to restore its beauty. Refinishing your floor involves sanding down the surface and applying a new coat of finish. You can do this yourself if you have the right tools and experience, or you can hire a professional to do it for you.

By following these tips, you can keep your wooden floor looking beautiful and new for years to come.

Frequently Asked Questions

What is the best way to remove dried paint from hardwood floors without damaging the finish?

If you want to remove dried paint from your hardwood floor without damaging the finish, you can use a plastic scraper or putty knife to gently scrape off the paint. You can also use a mixture of warm water and soap to soften the paint and make it easier to remove. Be sure to avoid using any harsh chemicals or abrasive materials that could damage the finish of your hardwood floor.

How can I remove water-based paint from my wooden floor on a budget?

If you want to remove water-based paint from your wooden floor on a budget, you can use a mixture of warm water and dish soap. Apply the mixture to the paint stain and use a soft-bristled brush to gently scrub the area. You can also use a plastic scraper or putty knife to gently scrape off the paint. Be sure to rinse the area with clean water and dry it thoroughly to avoid any water damage to your wooden floor.

Is Goo Gone effective in removing paint from hardwood floors?

Goo Gone can be effective in removing paint from hardwood floors, but it’s important to use it carefully. Apply a small amount of Goo Gone to a clean cloth and gently rub the paint stain. Be sure to rinse the area with clean water and dry it thoroughly to avoid any damage to your hardwood floor. However, Goo Gone can also be harsh on some types of finishes, so it’s important to test it on a small, inconspicuous area first.

Can I use paint remover on my wooden floor?

You can use paint remover on your wooden floor, but it’s important to use it carefully and follow the manufacturer’s instructions. Be sure to test the paint remover on a small, inconspicuous area first to make sure it won’t damage your hardwood floor. You should also wear gloves and protective eyewear when using paint remover and work in a well-ventilated area.

What is the best way to remove paint splatters from my wooden floor?

If you have paint splatters on your wooden floor, you can use a plastic scraper or putty knife to gently scrape off the paint. You can also use a mixture of warm water and soap to soften the paint and make it easier to remove. Be sure to avoid using any harsh chemicals or abrasive materials that could damage your wooden floor.

How do I remove oil-based paint from my wooden floor?

Removing oil-based paint from your wooden floor can be more challenging than removing water-based paint. You can try using mineral spirits or paint thinner to soften the paint and make it easier to remove. Be sure to wear gloves and protective eyewear when using these chemicals and work in a well-ventilated area. You can also use a plastic scraper or putty knife to gently scrape off the paint, but be careful not to damage the finish of your hardwood floor.