
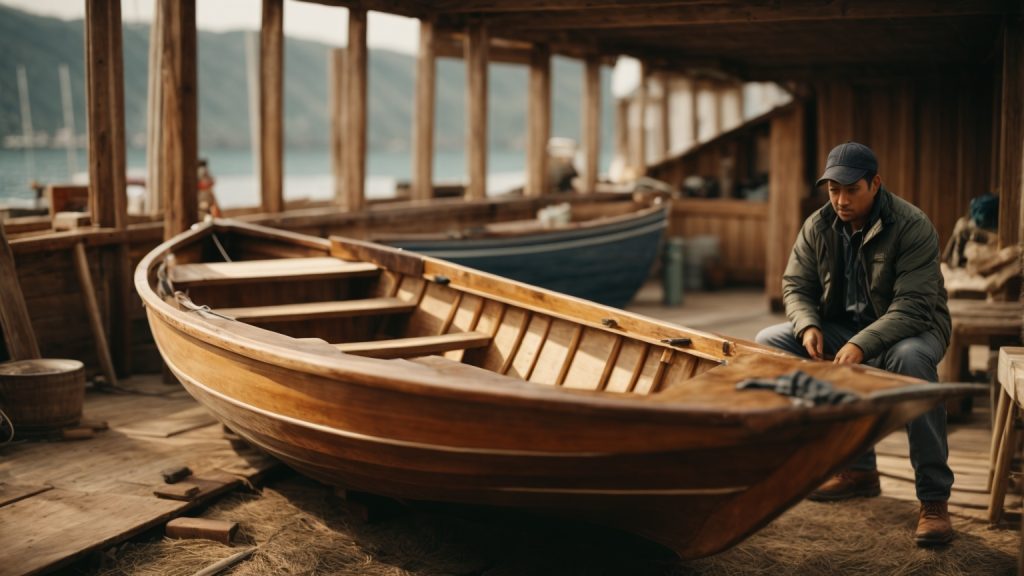
Building a wooden boat can be a fulfilling and rewarding experience. Whether you’re an experienced boat builder or a novice, building a wooden boat can be a great way to spend your time and create something that you can be proud of. With the right tools, materials, and guidance, you can build a wooden boat that will last for years to come.
The first step in building a wooden boat is to gather all the necessary materials and tools. You will need to choose the right type of wood for your boat, as well as other materials such as epoxy, fiberglass, and marine hardware. You’ll also need to have the right tools on hand, including saws, sanders, clamps, and drills. Once you have all the materials and tools you need, you can begin the process of building your wooden boat.
There are many different methods and techniques for building a wooden boat, and the best approach will depend on the type of boat you want to build and your level of experience. Some common techniques include stitch-and-glue, strip-planking, and lapstrake construction. Regardless of the method you choose, building a wooden boat requires patience, attention to detail, and a willingness to learn new skills. With dedication and hard work, you can create a beautiful and functional wooden boat that you can be proud of.
Understanding the Basics of Boat Building
Building a wooden boat may seem like a daunting task, but with a little bit of knowledge and patience, it can be a rewarding experience. Before you get started, it’s important to understand the basics of boat building.
Materials
The materials you choose for your boat will depend on the type of boat you want to build and your budget. Common materials for wooden boat building include:
- Plywood
- Cedar
- Mahogany
- Teak
- Oak
It’s important to choose high-quality materials that are suitable for your project. Poor quality materials can lead to a weaker, less durable boat.
Tools
You’ll need a variety of tools to build a wooden boat, including:
- Saw
- Drill
- Hammer
- Chisels
- Planes
- Clamps
It’s important to use the right tool for the job to ensure accuracy and safety. If you’re unsure about how to use a particular tool, seek advice from a professional or experienced boat builder.
Plans
Having a good set of plans is essential for building a wooden boat. Plans will provide you with the specifications and measurements you need to build a boat that is safe and seaworthy. You can find plans online, in books, or from boat building associations.
Construction
The construction process for a wooden boat involves several stages, including:
- Lofting: Transferring the plans to full size on the building floor.
- Framing: Building the framework of the boat.
- Planking: Attaching the planks to the framework.
- Finishing: Sanding, painting, and varnishing the boat.
Each stage requires attention to detail and careful planning to ensure a successful outcome.
By understanding the basics of boat building, you’ll be well on your way to building your own wooden boat. Remember to take your time, use high-quality materials, and seek advice when you need it. Happy building!
Choosing the Right Type of Wood
When building a wooden boat, choosing the right type of wood is crucial to ensure the boat is sturdy, durable, and long-lasting. In this section, we will discuss the two main categories of wood for boat building and the best types of wood to use.
Hardwood vs Softwood
Hardwood and softwood are the two main categories of wood used for boat building. Hardwood is denser, stronger, and more durable than softwood, making it ideal for keels, frames, thwarts, decks, and other major structural components of the boat. Softwood, on the other hand, is more flexible and easier to work with, making it suitable for smaller parts like gunwales, knees, and breasthooks.
Best Types of Wood for Boats
Here are some of the best types of wood to use when building a wooden boat:
| Type of Wood | Characteristics |
|---|---|
| Teak | Durable, water-resistant, and rot-resistant. Expensive. |
| Oak | Strong, durable, and resistant to rot. |
| Mahogany | Lightweight, strong, and resistant to rot. |
| Cedar | Lightweight, easy to work with, and resistant to rot. |
| Plywood | Affordable, easy to work with, and suitable for small boats. |
When choosing the type of wood to use, consider the size and type of boat you want to build, your budget, and the availability of the wood in your area. It’s also important to choose high-quality wood that is free of knots, cracks, and other defects.
In summary, choosing the right type of wood is essential when building a wooden boat. Hardwood is best for major structural components, while softwood is suitable for smaller parts. Teak, oak, mahogany, cedar, and plywood are some of the best types of wood to use, depending on your needs and budget.
Gathering Your Tools
Before you start building your wooden boat, it’s important to gather all the necessary tools. Having the right tools on hand will make your boat-building project much easier and more enjoyable. In this section, we’ll go over the essential hand tools and power tools you may need.
Essential Hand Tools
Here are some of the essential hand tools you’ll need for building a wooden boat:
| Tool | Description |
|---|---|
| Hacksaw | For cutting metal parts |
| Edge tools | Wide chisel (25-50mm or 1-2inch), narrow chisel (max 15mm or 5/8 inch) |
| Block plane | Preferably a rabbet block plane. Lie-Nielsen makes a wonderful model, but it is not cheap. More affordable models are available from Dictum, Juuma, Kunz, and Axminster – or you could find a vintage tool. |
| Clamps | Various sizes and types of clamps will be necessary for holding pieces together while glue dries. |
| Hand saw | A crosscut saw and a rip saw will be necessary for cutting wood to length and width. |
| Screwdrivers | A set of screwdrivers in various sizes will be needed for installing hardware and fasteners. |
| Measuring tools | A tape measure, combination square, and marking gauge will help you make accurate measurements and cuts. |
Power Tools You May Need
While many wooden boat builders prefer to work with hand tools, power tools can make the job faster and easier. Here are some power tools you may want to consider for your boat-building project:
| Tool | Description |
|---|---|
| Circular saw | A circular saw will make quick work of cutting large pieces of wood. |
| Jigsaw | A jigsaw is useful for cutting curves and intricate shapes. |
| Router | A router can be used for shaping edges and cutting grooves. |
| Power drill | A power drill will be necessary for drilling holes for hardware and fasteners. |
| Belt sander | A belt sander will make sanding large surfaces much faster and easier. |
Remember, having the right tools is essential for a successful boat-building project. Take the time to gather all the necessary tools before you start, and your project will be much smoother and more enjoyable.
Creating Your Boat Design
When it comes to building a wooden boat, creating a design that meets your needs and preferences is crucial. Here are some steps to help you create your boat design:
Sketching Your Initial Design
The first step in creating your boat design is to sketch out your ideas. You can use paper and pencil or a digital design program to create your initial sketches. Start by outlining the basic shape and size of your boat. Consider the type of water you will be using it in, the number of passengers you want it to hold, and any additional features you may want to include.
Once you have a basic outline, you can start adding details such as the placement of seats, storage compartments, and other features. Keep in mind that the more detailed your sketch is, the easier it will be to create a final blueprint.
Finalizing Your Boat Blueprint
After you have created your initial design, it’s time to finalize your boat blueprint. This is where you will add all the necessary details and measurements. You can use a design program or hire a professional boat designer to help you create a detailed blueprint.
When finalizing your blueprint, consider the materials you will be using to build your boat. Make sure your design takes into account the strength and durability of the wood you will be using. You should also consider the tools and equipment you will need to build your boat.
Once you have finalized your blueprint, you can use it to create a materials list and start building your boat. Remember to refer back to your blueprint throughout the building process to ensure you are staying on track and creating the boat you envisioned.
Creating a boat design can be a fun and rewarding experience. By taking the time to sketch out your ideas and finalize your blueprint, you can create a boat that meets your needs and preferences.
Cutting and Shaping the Wood
When building a wooden boat, cutting and shaping the wood is a crucial step in the process. In this section, we will cover the key aspects of preparing your wood, cutting techniques, and shaping your boat pieces.
Preparing Your Wood
Before you start cutting and shaping your wood, it’s important to ensure that it’s properly prepared. Here are a few things to keep in mind:
- Choose the right type of wood: The type of wood you choose will depend on your budget, the size of your boat, and the conditions it will be used in. Popular options include cedar, mahogany, and oak.
- Dry your wood: Make sure your wood is properly dried before you start working with it. This will prevent warping and cracking.
- Sand your wood: Sanding your wood will make it smoother and easier to work with. Use a fine-grit sandpaper to achieve the best results.
Cutting Techniques
When it comes to cutting your wood, there are a few techniques that you should be familiar with:
- Straight cuts: Use a saw to make straight cuts in your wood. Make sure to use a straight edge as a guide to ensure accuracy.
- Curved cuts: To make curved cuts, use a jigsaw or bandsaw. Make sure to use a template or pattern to guide your cuts.
- Bevel cuts: Bevel cuts are angled cuts made on the edge of a piece of wood. Use a table saw or circular saw to make these cuts.
Shaping Your Boat Pieces
Once you’ve cut your wood to the right size and shape, it’s time to start shaping your boat pieces. Here are a few tips to keep in mind:
- Use a plane: A hand plane is a great tool for shaping your wood. It allows you to remove small amounts of wood at a time, making it easier to achieve the desired shape.
- Sand your pieces: Sanding your pieces will help smooth out any rough edges and give them a finished look.
- Test fit your pieces: Before you start gluing your pieces together, make sure to test fit them to ensure they fit together properly.
By following these tips for cutting and shaping your wood, you’ll be well on your way to building a beautiful wooden boat.
Assembling Your Boat
When it comes to assembling your wooden boat, there are a few key things to keep in mind to ensure that your boat is sturdy and reliable. In this section, we’ll cover two important sub-sections: Joining the Pieces Together and Ensuring Structural Integrity.
Joining the Pieces Together
To join the pieces of your boat together, you have a few options. One of the most common methods is to use epoxy and fiberglass tape. This method involves applying a layer of epoxy to the joint, then laying down a strip of fiberglass tape and applying another layer of epoxy. This creates a strong, waterproof bond that will hold up over time.
Another option is to use wooden dowels or screws to join the pieces together. This method can be a bit more time-consuming, but it can also be more aesthetically pleasing since there won’t be any visible fiberglass tape.
Regardless of which method you choose, it’s important to ensure that the joints are tight and that there are no gaps between the pieces. This will help to prevent leaks and ensure that your boat is sturdy and reliable.
Ensuring Structural Integrity
Once the pieces of your boat are joined together, it’s important to ensure that the structure is sound. This means checking for any weak spots or areas where the wood may be prone to splitting or cracking.
One way to do this is to apply a layer of epoxy to the entire boat. This will help to strengthen the wood and prevent any potential issues down the line.
Another important step is to reinforce any areas that may be prone to stress, such as the joints between the bow and stern and the sides of the boat. This can be done by adding additional layers of fiberglass tape or by using wooden braces.
By taking these steps to ensure structural integrity, you can be confident that your wooden boat will be strong and reliable for years to come.
Applying Finishes
Choosing the Right Finish
When it comes to finishing a wooden boat, there are a variety of options to choose from. The most common finishes are varnish, paint, and epoxy. Each finish has its own advantages and disadvantages, so it’s important to consider your needs and preferences before making a decision.
- Varnish: Varnish is a popular choice for wooden boats because it enhances the natural beauty of the wood while also providing protection against the elements. It’s available in a range of gloss levels, from high gloss to matte, and can be applied in multiple coats for added durability. However, varnish requires regular maintenance and can be difficult to apply evenly.
- Paint: Paint is a good choice if you want a solid color or if your boat has a lot of imperfections that you want to hide. It’s also a good option if you want a finish that’s easy to maintain and repair. However, paint can be prone to chipping and cracking, and it doesn’t provide as much protection against the elements as varnish or epoxy.
- Epoxy: Epoxy is a two-part resin that can be used to seal and protect the wood. It’s a good choice if you want a finish that’s extremely durable and resistant to moisture and UV rays. However, epoxy can be difficult to apply and can be expensive.
Applying Your Chosen Finish
Once you’ve chosen your finish, it’s time to apply it to your wooden boat. Here are some tips to help you get the best results:
- Prepare the surface: Before applying any finish, make sure the surface of your boat is clean, dry, and free of dust and debris. Sand the surface to create a smooth, even surface.
- Apply the finish in thin coats: It’s better to apply several thin coats of finish rather than one thick coat. This will help the finish dry more evenly and reduce the risk of drips and runs.
- Use a high-quality brush: A good brush is essential for achieving a smooth, even finish. Choose a brush that’s appropriate for the type of finish you’re using and make sure it’s clean and free of debris before you start.
- Follow the manufacturer’s instructions: Different finishes have different application techniques, so it’s important to follow the manufacturer’s instructions carefully. This will ensure that you get the best results and that your finish lasts as long as possible.
With these tips in mind, you should be able to apply a beautiful and durable finish to your wooden boat. Remember to take your time and be patient, and you’ll be rewarded with a boat that looks great and lasts for years to come.
Maintenance Tips
Maintaining your wooden boat is essential to ensure its longevity and keep it looking beautiful. Here are a few tips to help you keep your boat in top condition.
Routine Cleaning
Regular cleaning is crucial to prevent dirt and grime buildup, which can lead to discoloration and deterioration of the wood. Here are some tips for routine cleaning:
- Use a soft-bristled brush or sponge to scrub the boat’s surface gently.
- Avoid using harsh chemicals or abrasive cleaners that can damage the wood’s finish.
- Rinse the boat thoroughly with freshwater after cleaning to remove any remaining soap or cleaning solution.
Periodic Inspections
Periodic inspections can help you identify any issues early on, preventing them from becoming bigger problems. Here are some tips for periodic inspections:
- Check for cracks, splits, or warping in the wood.
- Look for signs of rot or decay, such as soft spots or discoloration.
- Check the fasteners, such as screws and bolts, for corrosion or damage.
- Inspect the boat’s seams and joints for any signs of separation or leaks.
Repairing Common Wood Damage
Wooden boats are prone to damage from exposure to the elements, wear and tear, and accidents. Here are some tips for repairing common wood damage:
- Sand the damaged area to remove any loose or damaged wood.
- Apply a wood filler to the damaged area, following the manufacturer’s instructions.
- Sand the area again once the wood filler has dried.
- Apply a coat of primer and then a finish coat to match the boat’s existing finish.
By following these maintenance tips, you can keep your wooden boat looking great and ensure its longevity.