Tag Archives: cost-effective alternative

make-wooden-drawers

How to Make Wooden Drawers: A Beginner's Guide

If you’re looking to add some storage space to your home, building wooden drawers can be a great option. Not only do they provide a functional solution for organizing your belongings, but they can also add a touch of warmth and beauty to your decor. Whether you’re a seasoned woodworker or a beginner, making wooden drawers can be a fun and rewarding project.

To get started, you’ll need to determine the size and type of drawers you want to make. There are many different styles and sizes to choose from, so it’s important to consider your specific needs and preferences. You’ll also need to select the right type of wood and hardware for your project. Once you have your materials, you can begin building your drawers by following a few simple steps. With a little patience and attention to detail, you’ll have beautiful, functional drawers in no time.

Understanding Wood Types
make-wooden-drawers

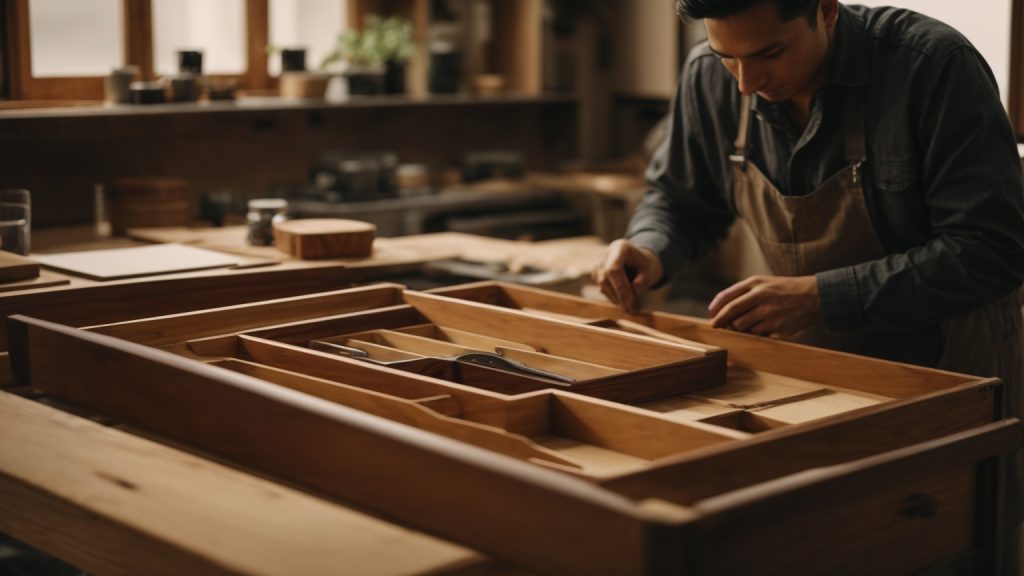
When it comes to making wooden drawers, choosing the right type of wood is crucial to ensure durability and longevity. Here are some common types of wood used for making drawers:

Hardwood

Hardwood is a popular choice for making drawers due to its strength and durability. Some common types of hardwood used for making drawers include oak, maple, cherry, and walnut. Hardwood is also resistant to wear and tear, making it an ideal choice for drawers that will be used frequently.

Plywood

Plywood is a type of engineered wood made by bonding several layers of wood veneers together. It is a cost-effective alternative to solid wood and is commonly used for making drawer bottoms and backs. Plywood is also strong and durable, making it a good choice for drawers that will be subjected to heavy use.

MDF

Medium-density fiberboard (MDF) is another type of engineered wood made by bonding wood fibers together with resin. It is a popular choice for making drawer fronts and sides due to its smooth surface and ability to hold paint well. MDF is also more affordable than solid wood and is less prone to warping and cracking.

When choosing the type of wood for your drawers, consider the intended use of the drawer and the overall aesthetic of your project. Each type of wood has its own unique characteristics and advantages, so it’s important to choose the one that best suits your needs.

Tools Required

When it comes to making wooden drawers, having the right tools is essential. Here are the basic tools you’ll need to get started:

Measuring Tape

The measuring tape is an essential tool for any woodworking project. You’ll need to measure the length, width, and height of the drawer, as well as the thickness of the wood you’ll be using. Make sure to get an accurate measurement to ensure that the drawer fits perfectly.

Saw

A saw is necessary for cutting the wood to the correct size. A table saw or a miter saw is ideal for making straight cuts, while a jigsaw is best for curved cuts. Choose the saw that is appropriate for the type of cut you need to make.

Sander

After cutting the wood, you’ll need to sand it to make it smooth and even. A belt sander or an orbital sander is ideal for this task. Make sure to sand the wood in the direction of the grain to avoid damaging it.

Screwdriver

A screwdriver is necessary for attaching the drawer slides and the drawer front. Make sure to choose the right size and type of screwdriver for the screws you’ll be using.

With these tools in hand, you’ll be ready to start building your wooden drawers. Make sure to use them safely and follow all the necessary precautions.

Safety Measures

When working with wood, safety should always be your top priority. Here are some safety measures you should take when making wooden drawers.

Protective Eyewear

Wearing protective eyewear is a must when working with wood. It will protect your eyes from flying wood chips, sawdust, and other debris. Make sure your eyewear is rated for impact resistance and fits snugly on your face. Safety glasses with side shields or goggles are recommended.

Gloves

Gloves can protect your hands from splinters and other injuries. However, you should avoid wearing gloves when operating power tools as they can get caught in the machinery and cause serious harm. When applying finishes, wear latex gloves to protect your skin from chemicals.

Ventilation

When working with wood, you should ensure proper ventilation in your workspace. Sawdust and other particles can be harmful to your respiratory system if inhaled. Use a dust collection system or wear a respirator to protect your lungs. Make sure your workspace is well-ventilated with fresh air to avoid inhaling toxic fumes from finishes or adhesives.

Remember to always prioritize safety when working with wood. By following these safety measures, you can prevent accidents and injuries and enjoy woodworking safely.

Preparing the Wood

Before you start making wooden drawers, you need to prepare the wood. This involves measuring, cutting, and sanding the wood to ensure that it is of the right size, shape, and smoothness. Here are the steps you need to follow:

Measuring

The first step in preparing the wood for your wooden drawers is measuring. You need to measure the length, width, and depth of the drawers you want to make. Make sure to measure twice to avoid any mistakes. You can use a measuring tape or a ruler to take accurate measurements. Write down your measurements so that you can refer to them later.

Cutting

Once you have measured your wood, it’s time to cut it to size. You can use a saw or a miter saw to cut the wood. Make sure to cut the wood precisely according to your measurements. You can use a table saw or a circular saw to make straight cuts. If you need to make angled cuts, use a miter saw or a compound miter saw. Be careful while cutting the wood and wear safety goggles to protect your eyes.

Sanding

After cutting the wood, you need to sand it to make it smooth and remove any rough edges. You can use sandpaper or a power sander to sand the wood. Start with a coarse grit sandpaper and gradually move to a finer grit sandpaper to get a smooth finish. Make sure to sand the edges and corners of the wood as well. If you are using a power sander, be careful not to sand too much or too fast as it can damage the wood.

By following these steps, you can prepare the wood for your wooden drawers and ensure that they are of the right size, shape, and smoothness.

Assembling the Drawers
assembling-the-drawers

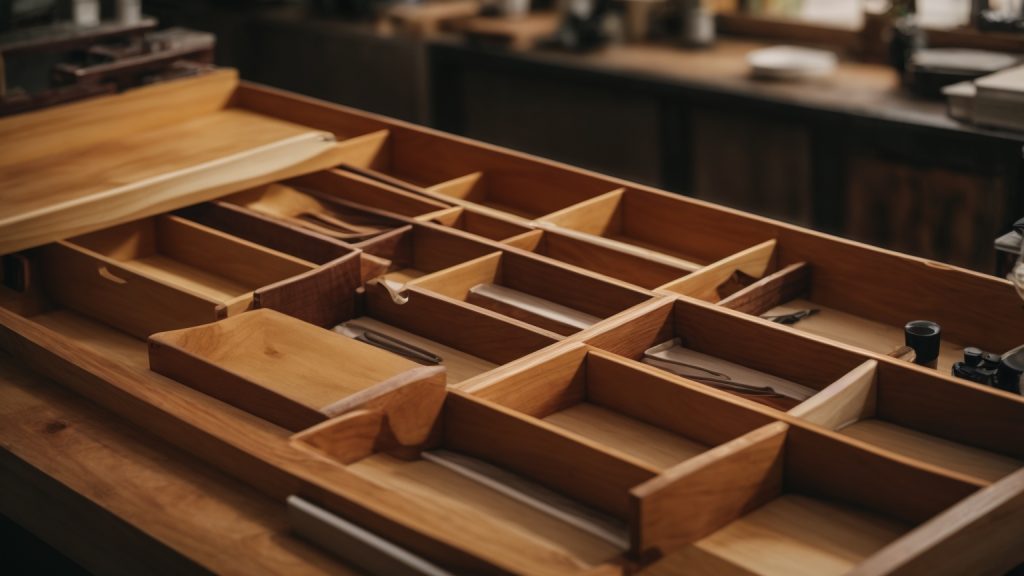
Assembling the drawers is the final step in making wooden drawers. It involves connecting the pieces, installing the bottom, and securing the joints. In this section, we’ll go over each step in detail to help you assemble your wooden drawers with ease.

Connecting the Pieces

To connect the pieces of your drawer, you can use wood glue, nails, or screws. Wood glue is a great option because it creates a strong bond and doesn’t leave any visible fasteners.

To use wood glue, apply a generous amount to the joints and then clamp the pieces together. Make sure the joints are flush and square before clamping. Leave the clamps on for at least an hour to allow the glue to dry.

If you prefer to use nails or screws, pre-drill the holes to prevent splitting and then attach the pieces together. Make sure the joints are flush and square before nailing or screwing.

Installing the Bottom

The bottom of the drawer is what holds everything inside, so it’s important to install it properly. You can use plywood or hardboard for the bottom.

To install the bottom, slide it into the groove on the bottom of the drawer. If your drawer doesn’t have a groove, you can attach the bottom using glue, nails, or screws. Make sure the bottom is flush with the bottom of the drawer.

Securing the Joints

To ensure that your drawer is sturdy and won’t fall apart, you need to secure the joints. You can use wood glue, nails, or screws to do this.

If you’re using wood glue, apply a generous amount to the joints and then clamp the pieces together. Make sure the joints are flush and square before clamping. Leave the clamps on for at least an hour to allow the glue to dry.

If you prefer to use nails or screws, pre-drill the holes to prevent splitting and then attach the pieces together. Make sure the joints are flush and square before nailing or screwing.

By following these steps, you can assemble your wooden drawers with ease. With a little patience and attention to detail, you’ll have a beautiful and functional set of drawers in no time.

Finishing Touches

Once you have built your wooden drawers, it’s time to add the finishing touches. This section will cover two important aspects of finishing touches: painting or staining and installing the handle.

Painting or Staining

Painting or staining your wooden drawers is an important step in protecting them from wear and tear. It also adds a decorative touch to your furniture. Here are some tips for painting or staining your wooden drawers:

  • Sand the surface of the drawer with a fine-grit sandpaper to ensure a smooth finish.
  • Apply a coat of wood conditioner to the surface of the drawer to help the wood absorb the stain or paint evenly.
  • Apply the stain or paint with a brush or a spray gun, depending on your preference.
  • Allow the first coat to dry completely before applying a second coat.
  • Apply a clear coat of polyurethane to protect the surface of the drawer from scratches and stains.

Installing the Handle

Installing a handle on your wooden drawer is a simple process that can be done in a few steps. Here’s how to do it:

  1. Measure the distance between the two screw holes on the back of the handle.
  2. Mark the location of the screw holes on the front of the drawer.
  3. Drill pilot holes at the marked locations using a drill bit that is slightly smaller than the screws.
  4. Line up the screw holes on the back of the handle with the pilot holes on the front of the drawer.
  5. Insert the screws through the back of the handle and into the pilot holes on the front of the drawer.
  6. Tighten the screws with a screwdriver until the handle is securely attached to the drawer.

With these finishing touches, your wooden drawers are now complete and ready to be used.

Installing the Drawers

Once you have built your wooden drawers, it’s time to install them. This can be a bit tricky, but with the right tools and techniques, you can get it done easily. Here are the steps to follow:

Drawer Slides

Drawer slides are essential for smooth and easy drawer operation. There are many types of drawer slides available in the market, but the most common ones are side-mount and under-mount slides. Here’s how to install them:

  1. Measure the distance between the sides of your cabinet where the drawer will be installed. This will help you determine the length of the slides you need.
  2. Install the slides on the sides of the cabinet. Make sure they are level and aligned with each other.
  3. Attach the other part of the slides to the sides of the drawer. Make sure they are level and aligned with each other as well.
  4. Test the drawer by sliding it in and out of the cabinet. Adjust the slides if necessary.

Securing the Drawer

Once the slides are installed, it’s time to secure the drawer in place. Here’s how to do it:

  1. Place the drawer in the cabinet and make sure it’s level and aligned with the cabinet.
  2. Use screws to attach the slides to the cabinet. Make sure the screws are long enough to go through the slides and into the cabinet securely.
  3. Test the drawer by sliding it in and out of the cabinet. Make sure it’s smooth and easy to operate.
  4. If the drawer is not aligned or level, adjust the slides or the drawer until it is.

By following these simple steps, you can easily install wooden drawers in your cabinet. Just remember to take your time and be patient, and you’ll have a functional and beautiful piece of furniture in no time.
How to Make a Wooden Door Mat: A Simple DIY Guide

Do you want to add some personality and charm to your front porch? A wooden door mat is a great way to do just that. Not only does it add a rustic touch, but it’s also a functional piece that can help keep your floors clean by wiping dirt and debris off shoes before entering your home.

Making a wooden door mat may sound daunting, but it’s actually a simple and fun DIY project that anyone can tackle. You can customize the size and design to your liking, and it’s a great way to use up any scrap wood you may have lying around. Plus, it’s a cost-effective alternative to buying a store-bought mat.

In this article, we’ll walk you through the steps to make your own wooden door mat. From choosing the right wood to cutting and assembling the pieces, we’ll cover everything you need to know to create a beautiful and functional addition to your front porch. So roll up your sleeves, grab your tools, and let’s get started!

Understanding Wood Types

When it comes to making a wooden door mat, choosing the right type of wood is crucial. Not all woods are created equal, and each type has its own unique characteristics that can affect the durability, appearance, and overall quality of your project. In this section, we’ll take a closer look at the two main categories of wood: hardwood and softwood.

Hardwood

Hardwood comes from deciduous trees, which are trees that lose their leaves in the fall. Some popular types of hardwood used in woodworking include oak, maple, cherry, and walnut. Hardwood is generally more durable and denser than softwood, making it ideal for projects that require strength and stability. It also tends to have a more attractive grain pattern and a richer color than softwood.

Here are some common hardwoods used in woodworking, along with their characteristics:

Type of Wood Characteristics
Oak Strong, durable, attractive grain pattern
Maple Hard, dense, fine grain
Cherry Smooth, easy to work with, reddish-brown color
Walnut Dense, durable, dark brown color

Softwood

Softwood comes from coniferous trees, which are trees that have needles instead of leaves. Some popular types of softwood used in woodworking include pine, cedar, and spruce. Softwood is generally less dense and more lightweight than hardwood, making it easier to work with. It also tends to be less expensive than hardwood.

Here are some common softwoods used in woodworking, along with their characteristics:

Type of Wood Characteristics
Pine Soft, lightweight, easy to work with
Cedar Naturally resistant to rot and insects, pleasant aroma
Spruce Straight grain, light color, easy to work with

When choosing a wood for your door mat, consider the specific qualities you’re looking for. Do you want a wood that’s strong and durable, or one that’s easy to work with? Do you want a wood with an attractive grain pattern, or one with a lighter color? By understanding the characteristics of different types of wood, you can make an informed decision and choose the best wood for your project.

Choosing the Right Tools

When making a wooden door mat, having the right tools is crucial to ensure a successful project. Here are the essential tools you’ll need to make your own wooden door mat.

Power Saw

A power saw is an essential tool that will help you cut the wooden pieces to the correct size. A circular saw or miter saw is recommended for this project. A circular saw is great for making straight cuts, while a miter saw is useful for making angled cuts.

Sanding Machine

A sanding machine is necessary to smooth out any rough edges and surfaces. A belt sander or orbital sander is recommended for this project. A belt sander is great for removing a lot of wood quickly, while an orbital sander is perfect for smoothing out surfaces.

Wood Stain

Wood stain is used to give the wooden door mat a finished look. There are many different types of wood stains available, so choose one that matches your desired color and finish. Be sure to apply the wood stain in a well-ventilated area and follow the manufacturer’s instructions.

Remember to always wear safety goggles and gloves when working with power tools. With the right tools and safety precautions, you’ll be able to create a beautiful wooden door mat that will welcome guests to your home in style.

Preparing the Wood

Before you start making your wooden door mat, you need to prepare the wood. This involves cutting the wood to size and sanding it.

Cutting the Wood

To make your wooden door mat, you will need to cut the wood into pieces of the right size. The exact measurements will depend on the design you have chosen, but you can use the search results as a guide.

You can cut the wood using a circular saw or a handsaw. Make sure you measure and mark the wood accurately before cutting it. You can use a measuring tape and pencil to do this.

Sanding the Wood

Once you have cut the wood to size, you need to sand it. Sanding the wood will smooth out any rough edges and make it easier to work with.

You can use a sanding block or an electric sander to sand the wood. Start with a coarse grit sandpaper and gradually work your way up to a finer grit. This will ensure that the wood is smooth and free from any rough patches.

Make sure you wear gloves and safety goggles when sanding the wood. This will protect your hands and eyes from any flying debris.

That’s it! You have now prepared the wood for your wooden door mat.

Assembling the Door Mat

Once you have all the pieces cut and sanded, it’s time to assemble your wooden doormat. This process involves arranging the pieces and securing them together.

Arranging the Pieces

To begin assembling your doormat, lay out the pieces in the pattern you want. You can follow the design you chose or come up with your own. Take the time to make sure all the pieces are facing the same direction and spaced evenly.

If you’re using a design with diagonals, use a speed square to make sure the angles are correct. You can also use a straight edge to make sure the pieces are aligned correctly.

Securing the Pieces

Once you have the pieces arranged, it’s time to secure them together. Start by drilling pilot holes in each end of the pieces where they will connect. Use a drill bit that is slightly smaller than your screws to avoid splitting the wood.

Next, use wood screws to attach the pieces together. Make sure the screws are long enough to go through both pieces of wood, but not so long that they stick out the other side.

If you want to add extra stability to your doormat, you can also use wood glue in addition to the screws. Apply a small amount of glue to each joint before securing the pieces together with screws.

Once you have all the pieces secured together, give your doormat a final sanding to smooth out any rough edges or corners. You can also add a coat of sealant or paint to protect the wood from the elements.

That’s it! Your wooden doormat is now ready to use. Place it outside your front door to welcome guests and add a touch of rustic charm to your entryway.

Applying the Finish

After assembling your wooden doormat, you can now apply the finish to protect it from the elements and give it a polished look. Here are some tips on how to apply the finish:

Choosing the Right Stain

When choosing a stain, consider the type of wood you used for your doormat and the look you want to achieve. A darker stain will give a richer look, while a lighter stain will bring out the natural grain of the wood.

It’s also important to choose a stain that is suitable for outdoor use. Look for a stain that is specifically designed for exterior wood and provides UV protection to prevent fading.

Applying the Stain

Before applying the stain, make sure your doormat is clean and dry. Sand the surface lightly with fine-grit sandpaper to remove any rough spots or splinters.

Next, apply the stain with a brush or rag, following the manufacturer’s instructions. Apply the stain evenly, working in the direction of the wood grain. Be sure to cover all surfaces, including the edges and undersides of the slats.

After applying the first coat, let it dry completely before applying a second coat if desired. Once the final coat is dry, you can add a coat of clear sealer for extra protection.

Remember to wear gloves and protective eyewear when applying the stain, and work in a well-ventilated area. With these simple steps, you can give your wooden doormat a beautiful and durable finish that will last for years to come.

Maintaining Your Wooden Door Mat

To ensure your wooden door mat lasts for years to come, it’s important to take proper care of it. Here are some tips for maintaining your wooden door mat:

Regular Cleaning

To keep your wooden door mat looking its best, it’s important to clean it regularly. Here’s how:

  • Sweep the mat with a broom or use a vacuum cleaner to remove any dirt or debris.
  • Use a damp cloth to wipe down the surface of the mat. Avoid using too much water, as this can damage the wood.
  • If your mat is particularly dirty, you can use a mild soap and water solution to clean it. Be sure to rinse the mat thoroughly and dry it completely before using it again.

Reapplying Stain

Over time, the stain on your wooden door mat may begin to fade or wear away. To keep your mat looking its best, you may need to reapply stain every few years. Here’s how:

  • Begin by cleaning the mat as described above.
  • Sand the surface of the mat lightly to remove any rough spots or stains. Be sure to sand in the direction of the grain.
  • Apply a new coat of stain using a brush or roller. Be sure to follow the manufacturer’s instructions for application and drying times.
  • Once the stain is dry, you can apply a coat of sealant to protect the wood from moisture and dirt.

By following these simple tips, you can keep your wooden door mat looking great for years to come.

How to Make a Wooden Cross Grave Marker: A Step-by-Step Guide

If you’re looking for a simple and meaningful way to mark a grave, a wooden cross may be the perfect solution. Making your own wooden cross grave marker is a great way to personalize the memorial and add a personal touch to the final resting place of your loved one. It can also be a cost-effective alternative to purchasing a pre-made marker.

To make a wooden cross grave marker, you’ll need some basic woodworking skills and tools, but even beginners can create a beautiful and meaningful marker with a little patience and effort. There are many different styles and designs to choose from, so you can customize your cross to fit the personality and tastes of your loved one. Whether you’re making a marker for a pet or a human, a wooden cross can be a touching and lasting tribute to their memory.

In this article, we’ll provide step-by-step instructions on how to make a wooden cross grave marker, including a list of materials and tools you’ll need. We’ll also offer tips and suggestions for customizing your cross, as well as ideas for decorating and personalizing the marker. With a little creativity and effort, you can create a beautiful and meaningful tribute to your loved one that will stand the test of time.

Understanding the Importance of Wooden Cross Grave Markers

When a loved one passes away, it is important to have a way to remember and honor their life. One way to do this is by creating a wooden cross grave marker. These markers serve as a symbol of remembrance and can help provide closure for those who are grieving.

Wooden cross grave markers are also a popular choice because they are simple and timeless. They can be customized to fit the personality and style of the person they are honoring, and can be decorated with flowers, ribbons, or other decorations.

Additionally, wooden cross grave markers are often used as temporary markers until a permanent headstone can be created. This allows the family to take their time in choosing the perfect headstone while still having a way to mark the grave.

When creating a wooden cross grave marker, it is important to use high-quality materials that can withstand the elements. Cedar and redwood are popular choices because they are naturally resistant to decay and insects.

Overall, wooden cross grave markers serve as a beautiful and meaningful way to honor the memory of a loved one. They provide comfort and closure for those who are grieving and serve as a lasting tribute to the person who has passed away.

Materials Needed for a Wooden Cross Grave Marker

If you’re looking to create a wooden cross grave marker, you’ll need a few materials to get started. Here are the essential materials you’ll need:

Wood

The first and most important material you’ll need is wood. You can choose any type of wood that you prefer, but some popular options include cedar, pine, and oak. You’ll want to select a piece of wood that is sturdy enough to withstand the elements and that is large enough to create the size of cross you want.

Tools

To create a wooden cross grave marker, you’ll need a few basic tools. Here are some of the tools you’ll need:

  • Table saw: This tool will be used to cut the wood to the desired size.
  • Miter saw: This tool will be used to cut the angles for the cross.
  • Drill: You’ll need a drill to create holes for the screws or nails that will hold the cross together.
  • Sandpaper: You’ll need sandpaper to smooth out any rough edges on the wood.
  • Paint or stain: If desired, you can paint or stain the wood to give it a finished look.

Hardware

In addition to wood and tools, you’ll also need some hardware to hold the cross together. Here are some options:

  • Screws: You can use screws to hold the cross together. Make sure to select screws that are weather-resistant and that are the appropriate size for the thickness of the wood.
  • Nails: You can also use nails to hold the cross together. Make sure to select nails that are long enough to go through the wood and that are also weather-resistant.
  • Rope or wire: If you don’t want to use screws or nails, you can use rope or wire to tie the cross together.

Creating a wooden cross grave marker can be a meaningful and personal way to honor a loved one. With these materials, you’ll be able to create a beautiful and lasting tribute.

Choosing the Right Type of Wood

When making a wooden cross for a grave marker, choosing the right type of wood is essential. You want a wood that is durable, weather-resistant, and easy to work with. Here are some common options to consider:

Pine

Pine is a popular choice for wooden crosses because it is easy to find, affordable, and easy to work with. It has a light color and a soft texture, which makes it easy to carve and sand. However, pine is not as durable as some other types of wood and may not hold up well over time.

Oak

Oak is a hardwood that is strong, durable, and weather-resistant. It has a beautiful grain pattern and a rich color that looks great with a natural finish or stain. However, oak can be more difficult to work with than softer woods like pine and may require more advanced tools and techniques.

Mahogany

Mahogany is a high-end wood that is known for its beauty, durability, and resistance to rot and decay. It has a rich, dark color and a smooth texture that looks great with a natural finish or stain. However, mahogany can be expensive and may not be readily available in all areas.

When choosing the right type of wood for your wooden cross, consider your budget, skill level, and the climate in your area. With the right wood and a little bit of creativity, you can create a beautiful and meaningful grave marker that will last for years to come.

Preparation of the Wood

Before you start making a wooden cross for a grave, you need to prepare the wood. Here are some steps to follow:

  1. Choose the type of wood: You can use any type of wood, but it’s best to choose a wood that is durable and resistant to weather conditions. Cedar, redwood, and cypress are good options.

  2. Cut the wood to size: Measure and cut the wood to the desired length and width. You can use a saw or a router to cut the wood.

  3. Sand the wood: Sand the wood to smooth out any rough edges or splinters. Use a coarse grit sandpaper to start and then finish with a finer grit sandpaper.

  4. Stain or paint the wood: You can stain or paint the wood to give it a finished look and protect it from the elements. Use a waterproof stain or paint that is suitable for outdoor use.

  5. Add any desired decorations: If you want to add any decorations to the cross, such as a name or a design, you can use a router or a wood burning tool to carve it into the wood.

By following these steps, you can prepare the wood for your wooden cross grave marker. Once the wood is prepared, you can start assembling the cross.

Designing the Cross

When designing a wooden cross grave marker, you’ll want to consider the size, shape, and style of the cross. Here are a few things to keep in mind:

Size

The size of the cross will depend on where it will be placed. If you’re making a cross for a pet’s grave in your backyard, a smaller size may be appropriate. However, if you’re making a cross for a cemetery, you’ll want to check with the cemetery’s regulations to ensure that the size is allowed.

Shape

The shape of the cross can vary depending on personal preference. Some people prefer a simple, traditional cross shape, while others may prefer a more ornate design. You can also choose to add decorative elements such as a heart or a dove.

Style

The style of the cross can also vary. Some people prefer a rustic, natural look, while others may prefer a more polished, refined look. You can use wood stain or paint to achieve the desired look.

When designing your cross, it’s important to keep in mind the purpose of the marker. A cross is a symbol of remembrance and faith, so you’ll want to create a design that honors the memory of the person or pet who has passed away.

Carving the Wooden Cross

Carving the wooden cross is the most important step in making a wooden cross grave marker. It requires some basic woodworking skills, but with a little patience and practice, anyone can do it. Here are some tips to help you get started:

Choose the Right Wood

The first step in carving a wooden cross is to choose the right type of wood. You want a wood that is easy to carve, but also durable enough to withstand the elements. Cedar, redwood, and cypress are all good choices. They are soft enough to carve easily, but also resistant to rot and decay.

Draw Your Design

Before you start carving, you need to draw your design on the wood. Use a pencil or chalk to sketch out the basic shape of the cross. Then, add any details or embellishments that you want to include. You can use stencils or templates to help you create more complex designs.

Carve the Wood

Once you have your design sketched out, it’s time to start carving. Use a sharp chisel or carving knife to remove the wood from around the edges of the cross. Work slowly and carefully, making sure to stay within the lines of your design.

As you carve, use a sandpaper or file to smooth out any rough spots or jagged edges. You can also use a wood-burning tool to add texture or details to the wood.

Finish Your Cross

Once you have finished carving your cross, it’s time to add the finishing touches. You can stain the wood to give it a darker, more polished look, or leave it natural for a rustic feel. You can also add a clear coat of varnish or polyurethane to protect the wood from weathering.

With these tips, you should be able to carve a beautiful wooden cross grave marker that will honor your loved one for years to come.

Finishing the Wooden Cross

Once you have completed the construction of your wooden cross, it is time to move on to the finishing stage. This is where you will sand the cross to make it smooth and apply a finish to protect it from the elements.

Sanding the Cross

To begin, you will need to sand the cross to remove any rough edges and make it smooth to the touch. Start with a coarse grit sandpaper and work your way up to a finer grit. Here are the steps you can follow:

  1. Use a sanding block or power sander to make the process faster.
  2. Sand with the grain of the wood to avoid scratches.
  3. Start with a coarse grit sandpaper (60-80 grit) and work your way up to a finer grit (120-220 grit).
  4. Sand the edges and corners of the cross carefully to avoid rounding them off.

Once you have finished sanding, wipe the cross clean with a damp cloth to remove any dust.

Applying a Finish

Now that the cross is smooth, it is time to apply a finish to protect it from the elements. Here are some options for finishes you can use:

  1. Paint: You can use any outdoor paint to give the cross a colorful finish. Make sure to use a primer first to help the paint adhere to the wood.
  2. Stain: A wood stain can be used to enhance the natural beauty of the wood. Choose a stain that is specifically designed for outdoor use.
  3. Varnish: A clear varnish can be used to protect the wood from moisture and UV rays.

Apply the finish according to the manufacturer’s instructions. Make sure to apply multiple coats, allowing each coat to dry completely before applying the next one.

Once you have finished applying the finish, allow the cross to dry completely before placing it in the ground. Your finished wooden cross is now ready to be used as a grave marker or decoration.

Adding Personal Touches

When creating a wooden cross grave marker, you may want to add some personal touches to make it more special. Here are some ideas for adding those special touches:

Engraving the Cross

Engraving the cross with a name, date, or special message is a great way to add a personal touch. You can use a router or chisel to carve the letters into the wood, or you can use a wood-burning tool to burn the letters into the wood. If you don’t have the tools or skills to do this yourself, you can take the cross to a professional engraver or woodworker who can do it for you.

Adding Decorative Elements

Adding decorative elements to the cross can also make it more special. Here are some ideas:

  • Paint the cross with a favorite color or design
  • Add a small picture or symbol that represents the person or pet who is buried there
  • Attach small trinkets or mementos to the cross, such as a favorite toy, a lock of hair, or a piece of jewelry
  • Use stencils or decals to add a design or pattern to the cross

Remember to keep the decorations simple and tasteful. You don’t want to overwhelm the cross or make it look gaudy.

By adding personal touches to your wooden cross grave marker, you can create a special tribute to your loved one or pet. Whether it’s engraving their name or adding a small decoration, these touches can make the cross more meaningful and special.

Installation of the Wooden Cross Grave Marker

Now that you have built your wooden cross grave marker, it’s time to install it. Here are the steps you need to follow:

  1. Choose the location: Before installing the cross, you need to choose the location carefully. Make sure that the spot you choose is easily visible, and it’s not obstructed by any other objects. You can also consult with the cemetery authorities to make sure that you are installing the cross in the right place.

  2. Dig the hole: Once you have chosen the location, it’s time to dig the hole. The hole should be at least 2 feet deep and wide enough to accommodate the cross. Make sure that the hole is straight and level.

  3. Place the cross: After digging the hole, place the cross in the hole. Make sure that the cross is straight and level. You can use a level to check if the cross is straight.

  4. Fill the hole: Once the cross is in place, it’s time to fill the hole. Use a shovel to fill the hole with dirt. Make sure that the dirt is packed tightly around the cross to keep it in place.

  5. Add decorative elements: If you want to add some decorative elements to the cross, you can do so now. You can add flowers, ribbons, or any other decorative elements that you like.

  6. Maintain the cross: Once the cross is installed, it’s important to maintain it. Check the cross regularly to make sure that it’s still straight and level. If you notice any damage or wear and tear, repair it immediately.

By following these simple steps, you can install a wooden cross grave marker that will serve as a lasting tribute to your loved one.

Maintenance Tips for Wooden Cross Grave Markers

If you have recently made a wooden cross grave marker, you want it to last as long as possible. Here are some maintenance tips that can help you keep your wooden cross in good condition:

1. Protect It from the Elements

Wooden crosses are susceptible to damage caused by the weather, especially if they are not treated properly. To protect your wooden cross from the elements, you should apply a coat of sealant or weatherproof paint. This will help prevent the wood from rotting or warping over time.

2. Clean It Regularly

Dirt, dust, and debris can accumulate on your wooden cross over time, making it look unsightly. To keep it looking its best, you should clean it regularly. Use a soft cloth or brush to gently wipe away any dirt or debris. Avoid using harsh chemicals or abrasive materials that can damage the wood.

3. Check for Damage

Over time, your wooden cross may become damaged due to weather conditions or other factors. To ensure that it remains in good condition, you should check it periodically for any signs of damage. Look for cracks, splits, or other damage that could compromise the integrity of the cross. If you notice any damage, repair it as soon as possible to prevent further damage from occurring.

4. Store It Properly

If you are not using your wooden cross, you should store it properly to prevent it from becoming damaged. Store it in a dry, cool place, away from direct sunlight. You should also cover it with a cloth or tarp to protect it from dust and debris.

By following these maintenance tips, you can help ensure that your wooden cross grave marker lasts for many years to come.