Are you interested in learning how to make a wooden bowl? Whether you’re a beginner or an experienced woodworker, making a wooden bowl can be a fun and rewarding project. There are several methods for making a wooden bowl, including using a lathe, carving by hand, or using power tools like a router. With the right tools and techniques, you can create a beautiful and functional bowl that you can use or display in your home.
One popular method for making a wooden bowl is using a lathe. This involves mounting a block of wood on a lathe and using various cutting tools to shape the wood into a bowl shape. Another method is carving the bowl by hand using chisels or gouges. This method requires more time and skill but can result in a unique and beautiful bowl with a handcrafted look. Using power tools like a router can also be a quick and easy way to make a wooden bowl, especially if you’re working with a larger piece of wood. Whatever method you choose, making a wooden bowl can be a fun and satisfying woodworking project that you can be proud of.
Understanding Woodworking
Woodworking is the art of creating objects made from wood. It is a skill that has been passed down from generation to generation and is still widely practiced today. Whether you are a beginner or an experienced woodworker, it is important to understand the basics of woodworking before you start making your own wooden bowl.
Types of Wood
There are many different types of wood that can be used for woodworking, each with its own unique properties. Some of the most common types of wood used for making wooden bowls include:
| Type of Wood | Characteristics |
|---|---|
| Maple | Hard, durable, and easy to work with |
| Cherry | Soft, easy to carve, and has a beautiful color |
| Walnut | Hard, strong, and has a rich color |
It is important to choose the right type of wood for your project based on your skill level and the desired outcome.
Use of Tools
Woodworking requires the use of various tools to shape and carve the wood. Some of the most common tools used for making wooden bowls include:
- Lathe: A machine used to turn the wood while it is being shaped
- Gouge: A chisel-like tool used to carve the wood
- Chisel: A sharp tool used to remove excess wood
- Sandpaper: Used to smooth the surface of the wood
It is important to use these tools properly and safely to avoid injury and to achieve the desired outcome. Always wear protective gear such as safety glasses and gloves when working with power tools.
By understanding the basics of woodworking, you can create a beautiful and functional wooden bowl that will last for years to come.
Choosing the Right Wood
When it comes to making a wooden bowl, selecting the right wood is crucial. Not all woods are suitable for turning on a lathe or safe for eating. Here are some popular types of wood that can be used for making wooden bowls:
Maple
Maple is a popular choice for making wooden bowls because it is hard and has a beautiful grain. It is also relatively inexpensive, making it an affordable option for beginners. A bowl made out of maple can cost between $30 and $50.
Cherry
Cherry is another popular wood for making wooden bowls. It is also hard and has a beautiful grain, but it is more expensive than maple. A bowl made out of cherry can cost between $50 and $100.
Red Oak
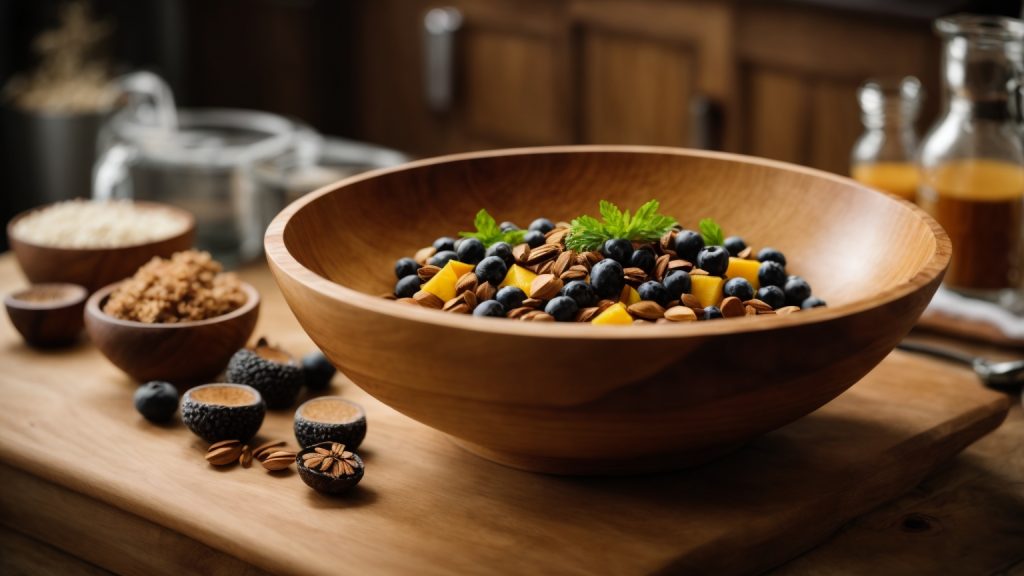
Red Oak is a well-loved hardwood with warm red and brown hues. It comes in a one-of-a-kind design with circular or parallel lines. With a Janka rating of 1,450, Red Oak offers solid performance for everyday chopping while creating a striking look to serve your favorite dishes. These wooden bowls are also popular as fruit bowls.
When selecting the right wood for your wooden bowl, it’s important to consider the type of wood, its hardness, and its grain pattern. Choose a wood that is suitable for turning on a lathe and safe for eating. With the right wood, you can create a beautiful and functional wooden bowl that will last for years to come.
Safety Measures in Woodworking
Woodworking can be a fun and rewarding hobby, but it can also be dangerous if proper safety measures are not taken. Here are some important safety measures to keep in mind when making a wooden bowl:
Wear Appropriate Safety Gear
Wearing the right safety gear is crucial in woodworking. The following are some essential safety gear that you should wear:
- Safety glasses or goggles: to protect your eyes from flying debris and sawdust.
- Hearing protection: to protect your ears from loud noises.
- Respirator or dust mask: to protect your lungs from inhaling sawdust and other particles.
- Gloves: to protect your hands from sharp tools and splinters.
- Closed-toe shoes: to protect your feet from falling objects and sharp tools.
Keep Your Work Area Clean and Organized
A clean and organized work area is essential for safety in woodworking. Here are some tips for keeping your work area clean and organized:
- Keep your tools and materials organized and easily accessible.
- Sweep up sawdust and wood shavings regularly.
- Keep your work area well-lit.
Use Tools and Equipment Properly
Using tools and equipment properly is crucial in woodworking. Here are some tips for using tools and equipment safely:
- Read the manufacturer’s instructions before using any tool or equipment.
- Use sharp tools to reduce the risk of accidents.
- Do not use tools that are damaged or defective.
- Keep your hands away from the cutting area of any tool or machine.
Know Your Limits
It’s important to know your limits when it comes to woodworking. Here are some tips for staying safe:
- Do not attempt a project that is too difficult for your skill level.
- Do not rush through a project.
- Take breaks when you feel tired or fatigued.
By following these safety measures, you can enjoy woodworking while keeping yourself safe.
Preparing the Wood
Before you can start making a wooden bowl, you need to prepare the wood. Here are the steps you need to follow:
Step 1: Choosing the Right Wood
The first step in creating a wooden bowl is selecting the proper wood. There are numerous varieties of wood that can be used, but it’s crucial to pick one that can be turned on a lathe and is also safe for eating. Wooden bowls are frequently crafted from the following popular types of wood:
| Wood Type | Description |
|---|---|
| Cherry | A hardwood with a warm, reddish-brown color and a fine grain. |
| Maple | A hardwood with a light, creamy color and a fine grain. |
| Walnut | A hardwood with a dark brown color and a coarse grain. |
| Oak | A hardwood with a light to medium brown color and a coarse grain. |
Step 2: Cutting the Wood
Once you have selected the wood, the next step is to cut it into a rough bowl shape. You can use a bandsaw or a jigsaw to do this. Make sure to wear safety goggles and a dust mask while cutting the wood.
Step 3: Mounting the Wood
After you have cut the wood into a rough bowl shape, you need to mount it on a lathe. Make sure to use a faceplate to attach the wood securely to the lathe.
Step 4: Turning the Wood
Now it’s time to turn the wood into a bowl shape. You can use a variety of lathe tools to do this, including gouges, chisels, and scrapers. Start by roughing out the shape of the bowl, and then refine the shape as you go.
Step 5: Sanding the Bowl
Once you have turned the bowl shape, you need to sand it to remove any rough spots and smooth out the surface. Start with a coarse grit sandpaper and gradually work your way up to a finer grit.
Step 6: Finishing the Bowl
The final step in preparing the wood is to apply a finish to the bowl. You can use a variety of finishes, including oil, wax, and varnish. Make sure to follow the manufacturer’s instructions for the finish you choose.
Carving the Bowl
Carving a wooden bowl is a satisfying and rewarding experience that requires patience, skill, and attention to detail. In this section, we’ll guide you through the process of carving a wooden bowl, from initial carving to refining the shape.
Initial Carving
To begin carving your wooden bowl, you’ll need to have a rough idea of the shape and size you want to achieve. You can use a template or sketch to guide you, or you can simply start carving and let the wood guide you.
Start by using a gouge or chisel to remove the bulk of the wood from the center of the bowl. Be sure to work slowly and carefully, removing small amounts of wood at a time to avoid making any mistakes.
As you carve, be mindful of the grain of the wood. Carving against the grain can result in tear-out and other unwanted defects. Instead, try to carve with the grain, using long, smooth strokes to remove the wood.
Refining the Shape
Once you’ve removed the bulk of the wood from the center of the bowl, it’s time to refine the shape. Use a smaller gouge or chisel to carve the sides of the bowl, working from the center outwards.
As you carve, be sure to keep the walls of the bowl even and symmetrical. You can use a caliper or ruler to measure the thickness of the walls and ensure they are consistent.
Once you’re happy with the shape of the bowl, it’s time to sand and finish it. Use a series of sandpapers, starting with a coarse grit and working up to a fine grit, to smooth the surface of the bowl.
Finally, apply a food-safe finish to the bowl to protect it and bring out the natural beauty of the wood. Beeswax or food-safe oils are excellent choices if you plan to use the bowl for culinary delights.
That’s it! With a little patience and practice, you can create a beautiful wooden bowl that will be a cherished addition to your home or a thoughtful gift for someone special.
Sanding and Finishing
Sanding the Bowl
After turning your wooden bowl, it’s time to sand it down to a smooth finish. Sanding is a crucial step in the bowl-making process as it removes any tool marks and imperfections, giving it a polished look. Here are some tips for sanding your wooden bowl:
- Start with a coarse grit sandpaper, such as 80 or 120 grit, to remove any rough spots or tool marks.
- Move on to a finer grit sandpaper, such as 220 or 320 grit, to smooth out the surface and remove any scratches left by the coarse grit sandpaper.
- Use a foam-padded sanding mandrel to make the sanding process easier and prevent harsh effects on the wood surface.
- Blend the transition areas on the bowl smoothly by using the foam pads.
It’s important to take your time with sanding and not rush the process. Ensure that you sand the entire surface of the bowl, including the inside and outside, to achieve a uniform finish.
Applying Finish
Once you’ve sanded your wooden bowl, it’s time to apply a finish to protect and enhance its natural beauty. Here’s how to apply finish to your wooden bowl:
- Apply a sanding paste to the bowl using a cloth or brush, following the manufacturer’s instructions.
- Allow the sanding paste to dry for the recommended time, then buff it off with a clean cloth.
- Apply a finishing wax to the bowl using a cloth or brush, following the manufacturer’s instructions.
- Allow the finishing wax to dry for the recommended time, then buff it off with a clean cloth.
A sanding paste and finishing wax will give your wooden bowl a smooth and polished finish, while also protecting it from moisture and wear. You can also experiment with different finishes, such as oil or varnish, to achieve different looks and levels of protection.
Remember to always follow the manufacturer’s instructions when applying finish to your wooden bowl, and to allow it to dry completely before using or displaying it.
Caring for Your Wooden Bowl
If you want to keep your wooden bowl looking beautiful and in good condition, you need to care for it properly. Here are some tips on how to clean and maintain your wooden bowl:
Cleaning
Cleaning your wooden bowl should be a simple and straightforward process. After each use, rinse your bowl with warm water and mild dish soap. Use a soft sponge or cloth to gently clean the surface of the bowl.
Avoid soaking your wooden bowl in water or putting it in the dishwasher. This can cause the wood to swell and crack. Instead, dry your bowl promptly with a soft towel.
If your wooden bowl has stains or a funky odor, you can do a deeper cleaning. Mix equal parts of lemon juice and salt to make a paste. Rub the paste onto the surface of the bowl and let it sit for a few minutes. Rinse the bowl with warm water and dry it with a soft towel.
Maintenance
To maintain your wooden bowl, you need to season it regularly. Seasoning helps to protect the wood and keep it from drying out. You can use food-grade mineral oil or beeswax to season your bowl.
To season your wooden bowl, apply a small amount of oil or wax to the surface of the bowl. Use a soft cloth to rub the oil or wax into the wood. Let the bowl sit for a few hours or overnight to allow the oil or wax to penetrate the wood.
After seasoning your wooden bowl, wipe off any excess oil or wax with a clean cloth. You can repeat this process every few months to keep your bowl in good condition.
In addition to seasoning your wooden bowl, you should also avoid exposing it to extreme temperatures or direct sunlight. This can cause the wood to warp or crack.
By following these simple tips, you can keep your wooden bowl looking beautiful and in good condition for years to come.