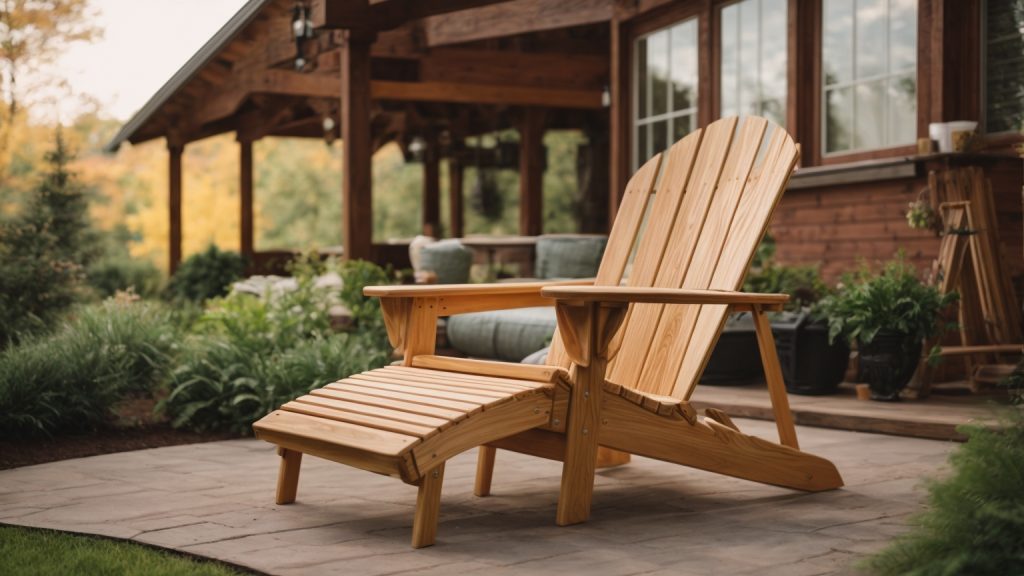
Are you looking for a comfortable and stylish addition to your outdoor space? Look no further than the classic Adirondack chair. With its wide armrests, slanted seat, and angled backrest, this iconic chair design is perfect for relaxing in the sun or enjoying a cool evening breeze. And the best part? You can easily build your own wooden Adirondack chairs with just a few basic tools and materials.
Building your own Adirondack chairs allows you to customize the design to fit your personal style and comfort preferences. Whether you prefer a traditional look with natural wood finishes or want to add a pop of color with painted chairs, the possibilities are endless. Plus, by building your own chairs, you can save money compared to purchasing pre-made options. So, grab your tools and let’s get started on building your very own Adirondack chairs.
Understanding Adirondack Chairs
History of Adirondack Chairs
Adirondack chairs have been a popular choice for outdoor furniture for over a century. They were originally designed by Thomas Lee in 1903 while he was vacationing in the Adirondack Mountains of upstate New York. Lee was looking for a comfortable outdoor chair that could be used on the uneven terrain of the Adirondacks. He came up with a design that featured wide armrests, a slanted back, and a seat that was low to the ground.
Lee’s original design was made from eleven pieces of wood, but over time, the design has been simplified. Today, Adirondack chairs are typically made from just a few pieces of wood, making them easy to build and affordable.
Why Wooden Adirondack Chairs
Wooden Adirondack chairs are a popular choice for outdoor furniture for a number of reasons. First, they are durable and long-lasting. With proper care, a wooden Adirondack chair can last for decades. Second, they are comfortable. The wide armrests and slanted back make them perfect for lounging and relaxing. Finally, they are aesthetically pleasing. Wooden Adirondack chairs have a classic, rustic look that complements any outdoor space.
When choosing the wood for your Adirondack chair, it’s important to select a type of wood that is both durable and attractive. Some popular choices include cedar, pine, and teak. Cedar is a good choice for those on a budget, as it is affordable and naturally resistant to rot and insects. Pine is also affordable and easy to work with, but it is not as durable as cedar or teak. Teak is the most expensive option, but it is also the most durable and weather-resistant.
Materials Needed
When it comes to building wooden Adirondack chairs, having the right materials is crucial to ensure the stability and durability of the finished product. In this section, we’ll discuss the types of wood and hardware and tools you’ll need to build your own Adirondack chairs.
Types of Wood
The first thing you’ll need to consider is the type of wood you’ll use for your Adirondack chairs. Here are some of the most popular options:
| Type of Wood | Characteristics |
|---|---|
| Cedar | Lightweight, naturally resistant to decay and insects, has a pleasant aroma |
| Pine | Affordable, easy to work with, has a rustic look |
| Redwood | Durable, naturally resistant to decay and insects, has a distinctive color |
| Teak | Extremely durable, naturally resistant to decay and insects, has a beautiful golden color |
While each type of wood has its own unique characteristics, the most important thing is to choose a wood that is strong and durable enough to withstand the elements and frequent use.
Hardware and Tools
In addition to the wood, you’ll also need a variety of hardware and tools to build your Adirondack chairs. Here’s a list of some of the most important items:
- Screws and nails
- Wood glue
- Sandpaper
- Circular saw or jigsaw
- Drill and drill bits
- Clamps
- Measuring tape
- Square
- Pencil
Make sure to choose high-quality hardware and tools to ensure that your Adirondack chairs are sturdy and well-constructed. With the right materials and tools, you’ll be well on your way to building beautiful and comfortable Adirondack chairs that will last for years to come.
Designing Your Chair
Before you begin building your Adirondack chair, it’s important to consider the design. This will ensure that your chair is comfortable, functional, and aesthetically pleasing. In this section, we’ll cover two important aspects of designing your chair: chair dimensions and creating a blueprint.
Chair Dimensions
The dimensions of your Adirondack chair will affect its comfort and functionality. Here are some general guidelines to follow:
- Seat height: 13-16 inches (33-41 cm)
- Seat width: 20-23 inches (51-58 cm)
- Seat depth: 18-20 inches (46-51 cm)
- Armrest height: 7-9 inches (18-23 cm) above the seat
- Backrest height: 32-37 inches (81-94 cm) above the ground
- Backrest angle: 100-110 degrees
Keep in mind that these are just guidelines, and you can adjust the dimensions to suit your needs. For example, if you’re taller or shorter than average, you may want to adjust the seat height and backrest height accordingly.
Creating a Blueprint
Once you have an idea of the dimensions you want to use, it’s a good idea to create a blueprint of your Adirondack chair. This will help you visualize the final product and identify any potential issues before you start building.
To create a blueprint, you can use a pencil and paper or a design software such as SketchUp. Start by drawing the basic shape of the chair, including the seat, backrest, and armrests. Then, add the dimensions you’ve chosen for each component.
As you’re creating your blueprint, pay attention to the angles and curves of the chair. The backrest and seat should have a gentle curve to provide comfort and support, while the armrests should be angled slightly downward for a natural resting position.
Once you’ve created your blueprint, you can use it as a guide when cutting and assembling your chair. This will help ensure that your chair is consistent and well-proportioned.
By taking the time to design your Adirondack chair properly, you’ll end up with a comfortable and functional piece of furniture that you can enjoy for years to come.
Building the Chair

Building an Adirondack chair can be a fun and rewarding project for any DIY enthusiast. With a little bit of woodworking experience and some basic tools, you can create a beautiful and comfortable chair that will be perfect for relaxing on your porch or in your backyard. In this section, we will go over the steps involved in building an Adirondack chair, from preparing the wood to adding the finishing touches.
Preparing the Wood
Before you can start building your Adirondack chair, you will need to prepare the wood. Start by selecting a high-quality, weather-resistant wood such as cedar or redwood. Cut the wood into the appropriate lengths and widths according to the plans you are using.
Once you have cut the wood, use a sander to smooth out any rough edges or surfaces. This will help ensure that your chair is comfortable and free of splinters. You may also want to apply a coat of wood sealer or preservative to protect the wood from the elements.
Assembling the Pieces
Next, it’s time to assemble the pieces of your Adirondack chair. Start by laying out all of the pieces and making sure that you have everything you need. Then, follow the instructions provided by your plans to assemble the chair.
Typically, you will need to use screws or bolts to attach the various pieces of the chair together. Make sure that you use the appropriate size and type of screws or bolts for each joint. It’s also a good idea to pre-drill the holes to prevent the wood from splitting.
As you assemble the chair, check each joint to make sure that it is secure and stable. You may need to make adjustments or add additional screws or bolts to ensure that the chair is sturdy.
Finishing Touches
Once you have assembled the chair, it’s time to add the finishing touches. Sand any rough edges or surfaces and apply a final coat of wood sealer or preservative to protect the wood from the elements.
You may also want to add some cushions or pillows to the chair for added comfort. Consider using weather-resistant fabrics that will hold up well in outdoor conditions.
With these simple steps, you can create a beautiful and comfortable Adirondack chair that will be the perfect addition to your outdoor space.
Safety Precautions
Building your own Adirondack chair can be a fun and rewarding experience, but it is important to take safety precautions to prevent accidents and injuries. Here are some tips to help you stay safe while building your chair:
- Wear protective gear: Always wear protective gear, such as safety glasses and earplugs, when using power tools. Wear gloves to protect your hands from splinters and cuts.
- Use tools correctly: Make sure you know how to use each tool correctly before you start using it. Always follow the manufacturer’s instructions and safety guidelines.
- Work in a well-ventilated area: If you are using paint or stain, make sure you work in a well-ventilated area to avoid breathing in harmful fumes.
- Keep your work area clean: Keep your work area clean and free of clutter to prevent tripping hazards. Make sure your tools are organized and stored safely when not in use.
- Use the right materials: Use high-quality materials that are appropriate for outdoor use. Make sure your wood is free of knots and cracks that could weaken the structure of your chair.
- Take breaks: Building a chair can be a time-consuming process, so make sure you take regular breaks to rest and stretch your muscles. This will help prevent fatigue and reduce the risk of injury.
By following these safety precautions, you can build your own Adirondack chair with confidence and enjoy the process without worrying about accidents or injuries.
Maintaining Your Wooden Adirondack Chair
To ensure your wooden Adirondack chair lasts for years to come, it’s important to take proper care of it. This section will provide you with some tips on how to clean, weatherproof, and regularly check your chair.
Cleaning
Cleaning your wooden Adirondack chair is essential to keep it looking great. Here are a few tips on how to do it:
- Use a mild soap and warm water to clean your chair. Avoid using harsh chemicals or abrasive cleaners that can damage the wood.
- Scrub the chair with a soft-bristled brush to remove any dirt or grime.
- Rinse the chair thoroughly with water and let it dry completely before using it again.
Weatherproofing
Weatherproofing your wooden Adirondack chair is important to protect it from the elements. Here are some tips on how to do it:
- Apply a waterproof sealant to your chair at least once a year to protect it from moisture and UV rays.
- Use a paint or stain that is specifically designed for outdoor use to protect your chair from the sun and rain.
- Cover your chair with a tarp or store it indoors during the winter months to protect it from snow and ice.
Regular Checks
Regularly checking your wooden Adirondack chair can help you catch any problems before they become major issues. Here are some things to look out for:
- Check for any cracks or splits in the wood. If you find any, fill them in with wood filler and sand them down.
- Check the screws and bolts to make sure they are tight. If they are loose, tighten them with a screwdriver or wrench.
- Check the overall stability of the chair. If it wobbles or feels unstable, reinforce it with additional screws or braces.
By following these tips, you can ensure that your wooden Adirondack chair stays in great condition for years to come.
Customizing Your Chair
When it comes to building your own Adirondack chair, there are plenty of opportunities to customize it to your liking. Here are a few ideas to get you started:
Painting and Staining
One of the easiest ways to customize your Adirondack chair is by painting or staining it. You can choose a color that matches your outdoor decor or go for a bold statement with a bright hue. Before you start painting or staining, make sure to sand the chair to ensure a smooth surface. You can also apply a primer to help the paint or stain adhere better.
If you’re staining the chair, consider using a wood conditioner first to help the stain absorb more evenly. Once you’ve applied the paint or stain, let it dry completely before using the chair.
Adding Cushions
While Adirondack chairs are known for their comfort, you can make them even cozier by adding cushions. There are plenty of outdoor cushion options available, from basic seat cushions to full back and seat sets. You can choose a color or pattern that complements your chair’s paint or stain, or go for a contrasting look.
When choosing cushions, make sure they’re made from outdoor fabric that’s resistant to water and UV rays. You can also opt for cushions with ties or Velcro to keep them securely in place on the chair.
Customizing your Adirondack chair is a fun way to make it your own. Whether you choose to paint it a bold color or add cushions for extra comfort, you’ll have a chair that’s uniquely yours.