Are you wondering why sanding is necessary after staining wood? If you’re a DIY enthusiast or a professional woodworker, you might have asked yourself this question at some point. Sanding is an essential step in the wood finishing process, and it can significantly affect the final outcome of your project. In this article, we’ll explore the reasons why sanding after staining is crucial and how it can improve the appearance and durability of your woodwork.
When you apply a wood stain, it can raise the grain of the wood, causing it to feel rough and uneven. Sanding after staining helps to smooth out the surface, removing any roughness or bumps caused by the raised grain. This step also helps to even out the color of the stain and enhance the natural beauty of the wood. Additionally, sanding after staining can help the subsequent coats of finish adhere better to the wood, improving the durability and longevity of your project.
Understanding Wood Staining
Staining wood is a popular way of enhancing its natural beauty. It involves applying a colored liquid to the wood surface to change its color or highlight its natural grain. Wood stains come in various colors, shades, and types, including oil-based, water-based, and gel stains.
Before staining wood, it’s essential to prepare the surface by sanding it to remove any dirt, debris, or old finishes. Sanding also opens up the wood pores, allowing the stain to penetrate deeper and adhere better.
When you apply the stain, it seeps into the wood fibers, coloring them and changing their appearance. The stain can also highlight the natural grain of the wood, making it look more attractive.
However, staining wood can also have some downsides. For instance, some types of wood, such as pine and birch, have a blotchy appearance and can absorb the stain unevenly. In such cases, you may need to use a pre-stain conditioner to help the wood absorb the stain more evenly.
Additionally, some types of wood stains, such as water-based stains, can cause the wood grain to rise. This can lead to the lifting of individual fibers, making the wood surface rough and uneven. To remedy this, you may need to sand the wood surface after staining to smooth it out and remove any raised fibers.
Overall, staining wood can be a great way of enhancing its natural beauty and character. By understanding the basics of wood staining and proper preparation techniques, you can achieve a beautiful and long-lasting finish on your woodworking projects.
The Purpose of Sanding

Sanding after staining is an essential step in achieving a smooth, professional-looking finish. The purpose of sanding is to prepare the surface of the wood for the next layer of finish, whether it be another coat of stain, a sealer, or a topcoat. Sanding also helps to promote adhesion between the layers of finish, ensuring that they bond properly and create a durable, long-lasting finish.
Smooth Surface Preparation
One of the main reasons for sanding after staining is to prepare the surface of the wood for the next layer of finish. Sanding helps to remove any rough spots or raised grain that may have resulted from the staining process. It also helps to smooth out any brush or roller marks that may have been left behind. Sanding creates a uniformly smooth surface that is ready for the next layer of finish.
Promoting Adhesion
Another important reason for sanding after staining is to promote adhesion between the layers of finish. Sanding creates a slightly rough surface that allows the next layer of finish to bond more effectively. This helps to ensure that the finish is durable and long-lasting. Without proper adhesion, the finish may peel or flake off over time, leaving the wood unprotected and vulnerable to damage.
In summary, sanding after staining is an important step in achieving a smooth, professional-looking finish. Sanding helps to prepare the surface of the wood for the next layer of finish and promotes adhesion between the layers of finish. By taking the time to sand properly, you can ensure that your finished product looks great and lasts for years to come.
The Process of Sanding After Staining
Tools Required
Before you start sanding, you need to have the right tools. Here are the tools you will need:
| Tools | Description |
|---|---|
| Sandpaper | Choose a grit that is appropriate for your project. |
| Sanding Block | This will help you keep the sandpaper flat and even. |
| Vacuum | You will need to clean up the dust and debris created by sanding. |
| Tack Cloth | Use this to wipe off any remaining dust or debris. |
Step by Step Guide
Now that you have the tools, you can start sanding. Here is a step-by-step guide:
- Allow the stain to dry completely before sanding. This will prevent the stain from being removed during sanding.
- Choose the appropriate grit sandpaper. If you are sanding a large surface area, start with a coarse grit and work your way up to a finer grit. If you are sanding a small area, start with a finer grit.
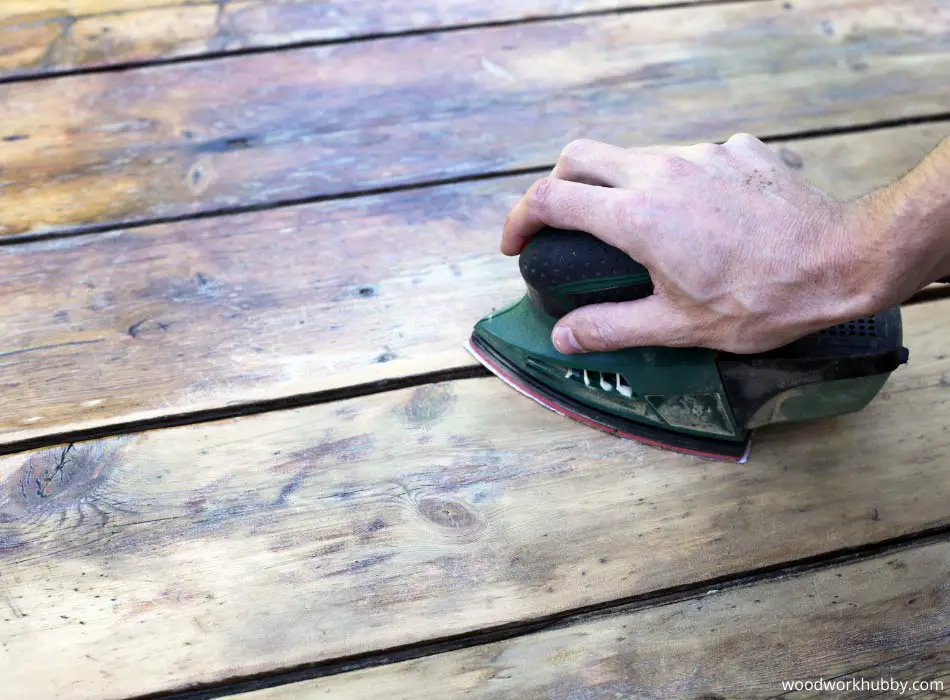
- Wrap the sandpaper around the sanding block and start sanding. Use even pressure and sand in the direction of the grain. Be careful not to sand too hard, as this can leave marks or scratches on the wood.
- After sanding, use a vacuum to clean up the dust and debris. Be sure to vacuum the entire area, including any crevices or corners.
- Use a tack cloth to wipe off any remaining dust or debris. This will ensure that the surface is clean and ready for finishing.
- If you need to apply another coat of stain, do so after sanding and cleaning the surface. This will help to ensure an even finish.
By following these steps, you can achieve a smooth and even finish on your stained wood project.
Benefits of Sanding After Staining

When it comes to staining wood, sanding is an important step that should not be overlooked. Sanding after staining offers several benefits that can help enhance the overall look and longevity of your project. In this section, we will discuss two major benefits of sanding after staining: enhanced wood grain and longevity of the stain.
Enhanced Wood Grain
Sanding after staining can help enhance the natural beauty of the wood grain. Staining can sometimes raise the wood grain, which can make the surface feel rough to the touch. Sanding can help smooth out the surface and bring out the natural patterns and colors of the wood. It can also help remove any excess stain that may have been applied, which can result in a more even and consistent color.
Longevity of the Stain
Sanding after staining can also help improve the longevity of the stain. When wood is stained, the stain penetrates the surface and can sometimes leave behind excess pigment on the surface. This excess pigment can cause the stain to wear off more quickly over time. By sanding after staining, you can remove any excess pigment and create a smoother surface that is less likely to wear off.
In addition, sanding after staining can also help prepare the surface for a topcoat. A topcoat can help protect the stain from wear and tear, but it needs a smooth surface to adhere to. Sanding after staining can help create this smooth surface and ensure that the topcoat adheres properly.
Overall, sanding after staining is an important step that should not be skipped. It can help enhance the natural beauty of the wood grain and improve the longevity of the stain. So, if you want your project to look its best and last for years to come, be sure to take the time to sand after staining.
Common Mistakes to Avoid
When it comes to sanding after staining wood, there are a few common mistakes that you should avoid to ensure a smooth and even finish. Here are two common mistakes to keep in mind:
Over Sanding
One of the most common mistakes people make when sanding after staining wood is over sanding. Over sanding can cause the stain to be removed in some areas, leaving you with an uneven finish. This can be especially problematic if you are using a dark stain, as the lighter areas will be more noticeable.
To avoid over sanding, start with a fine grit sandpaper and work your way up to a coarser grit if necessary. Be sure to sand lightly and evenly, and avoid applying too much pressure. If you’re not sure if you’re over sanding, stop and take a look at the wood. If the stain is starting to come off, you’re sanding too much.
Incorrect Sandpaper Grit
Another common mistake is using the wrong sandpaper grit. If you use a sandpaper that is too coarse, you can end up with scratches in the wood that will be visible after staining. On the other hand, if you use a sandpaper that is too fine, it may not be effective at removing the top layer of the wood, which can prevent the stain from penetrating evenly.
To avoid this mistake, start with a medium grit sandpaper and work your way up or down depending on the condition of the wood. For example, if the wood is rough or has a lot of scratches, you may need to start with a coarser grit. If the wood is already smooth, you can start with a finer grit.
By avoiding these common mistakes, you can ensure that your stained wood has a smooth and even finish that looks great.
Safety Tips for Sanding Stained Wood

Sanding stained wood can be a tricky task, but with the right tools and techniques, you can do it safely and effectively. Here are some safety tips to keep in mind when sanding stained wood:
1. Wear Protective Gear
Before you start sanding, make sure you have the right protective gear. This includes a dust mask or respirator, safety glasses, and gloves. Sanding can create a lot of dust, which can be harmful if inhaled or ingested. Protect your eyes and skin from dust and debris by wearing the appropriate gear.
2. Use Proper Sandpaper
Choosing the right sandpaper is crucial when sanding stained wood. Use a fine-grit sandpaper, such as 220-grit, to avoid damaging the stain or the wood. Coarse-grit sandpaper can scratch the surface of the wood and remove too much of the stain, while too fine-grit sandpaper may not be effective in removing rough spots or fibers.
3. Sand with the Grain
When sanding stained wood, always sand with the grain of the wood. Sanding against the grain can cause scratches and damage the surface of the wood. Sanding with the grain will help you achieve a smooth, even finish.
4. Avoid Over-Sanding
Be careful not to over-sand the wood. Sanding too much can remove too much of the stain, leaving the wood looking uneven or patchy. Sand just enough to remove any rough spots or fibers and achieve a smooth finish.
5. Clean Up Thoroughly
After sanding, make sure to clean up thoroughly. Use a vacuum or dustpan to remove any dust or debris left behind. Wipe down the surface of the wood with a clean cloth to remove any remaining dust or debris.
By following these safety tips, you can sand stained wood safely and achieve a beautiful, smooth finish.
Frequently Asked Questions
How does sanding after staining affect the final appearance of the wood?
Sanding after staining helps to smooth out any rough spots or unevenness on the surface of the wood. This creates a smooth and uniform surface, which enhances the overall appearance of the wood. Sanding also helps to remove any excess stain that has not been absorbed into the wood, which can cause blotches and uneven coloring.
Can you restain wood without sanding it first?
If you want to restain wood, it is generally recommended that you sand it first. This helps to remove any existing stain or finish, which can prevent the new stain from penetrating the wood properly. However, if the existing stain is in good condition and you are using a similar color or a darker color, you may be able to skip sanding and simply apply the new stain over the old one.
What are the consequences of not sanding before applying polyurethane?
If you do not sand before applying polyurethane, the finish may not adhere properly to the wood. This can result in a rough or uneven finish, or the finish may peel or flake off over time. Sanding also helps to smooth out any imperfections on the surface of the wood, which can enhance the overall appearance of the finished product.
Is it necessary to sand between coats of stain and polyurethane?
Yes, it is generally recommended that you sand between coats of stain and polyurethane. This helps to create a smooth and uniform surface, and it also helps to remove any dust or debris that may have settled on the surface during the drying process. Sanding between coats also helps to ensure that the subsequent coats adhere properly to the previous ones.
What are some tips for sanding stained wood without removing too much color?
When sanding stained wood, it is important to use a fine-grit sandpaper (220 grit or higher) and to sand lightly. Avoid using too much pressure, as this can remove too much color and damage the wood. Sand in the direction of the grain, and use a tack cloth or vacuum to remove any dust or debris before applying a new coat of stain or finish.
Will sanding make the stain darker or lighter?
Sanding does not typically affect the color of the stain. However, if you sand too aggressively or use a coarse-grit sandpaper, you may remove too much of the stain and lighten the color. It is important to sand lightly and use a fine-grit sandpaper to avoid removing too much color.