Tag Archives: staining pressure-treated wood

staining-process-1

How Long Before You Can Stain Pressure-Treated Wood? A Quick Guide

Are you planning to stain your pressure-treated wood but unsure of how long you should wait before doing so? If you’re not sure, you’re not alone. Many people are unsure of how long they should wait before staining pressure-treated wood. The answer to this question depends on several factors, including the type of treated wood used, the humidity level, and the temperature.

According to WoodHunger, you may have to wait from four weeks to six months before staining pressure-treated wood. However, this time may increase from four weeks to one month depending on the factors mentioned above. Wood is an extremely porous material, and it is likely to absorb moisture more quickly. This means that you need to wait until the wood dries completely before applying the stain. In this article, we will explore the factors that affect how long you should wait before staining pressure-treated wood and provide you with some tips on how to do it correctly.

Understanding Pressure-Treated Wood

If you are planning to build a deck or any outdoor structure, you may have heard about pressure-treated wood. Pressure-treated wood is a popular choice for outdoor projects because it is resistant to rot and decay. However, before you start working with pressure-treated wood, it’s important to understand what it is and how it’s made.

What is Pressure-Treated Wood?

Pressure-treated wood is lumber that has been treated with chemicals to make it resistant to rot, decay, and insect damage. The process involves placing the wood in a large cylinder and then pumping it with a solution of water and preservatives under pressure. This forces the preservatives deep into the wood, making it resistant to decay and insects.

Types of Pressure-Treated Wood

There are two types of pressure-treated wood: above-ground and ground-contact. Above-ground pressure-treated wood is designed for use in areas that are not in direct contact with the ground. This type of wood is typically used for decks, fences, and other outdoor structures. Ground-contact pressure-treated wood is designed for use in areas that are in direct contact with the ground, such as posts and retaining walls.

How to Identify Pressure-Treated Wood

Pressure-treated wood is easy to identify. It has a greenish tint due to the chemicals used in the treatment process. You may also see small slits or punctures in the wood, which are made during the treatment process to allow the preservatives to penetrate the wood.

How Long to Wait Before Staining Pressure-Treated Wood

One important thing to keep in mind when working with pressure-treated wood is that it needs to dry out before you can stain or paint it. The drying time can vary depending on a variety of factors, such as the type of wood used, humidity levels, and temperature. As a general rule, you should wait at least four weeks before staining or painting pressure-treated wood. However, if you want to speed up the process, you can purchase wood that has been air-dried or kiln-dried after treatment. This wood has a lower moisture content and can be stained or painted right away.

The Importance of Drying Time

the-importance-of-drying-time

When it comes to staining pressure-treated wood, drying time is an essential factor to consider. Proper drying of the wood is crucial to ensure that the stain adheres well and looks great. In this section, we will discuss the importance of drying time and factors that affect it.

Weather Conditions

Weather conditions play a significant role in the drying time of pressure-treated wood. If the weather is humid or rainy, the wood will take longer to dry. On the other hand, if the weather is dry and sunny, the wood will dry faster. It is essential to check the weather forecast before starting to stain your pressure-treated wood. If the forecast indicates rain or high humidity, it’s best to wait until the weather improves before staining.

Wood Type

The type of pressure-treated wood you are using also affects drying time. Some types of pressure-treated wood have a higher moisture content than others, making them take longer to dry. It’s essential to check the moisture content of the wood before staining. If the wood is still wet, the stain will not adhere well, and the finish will look uneven.

To determine if the wood is dry enough to stain, you can perform a simple test. Take a cloth saturated with distilled water and wipe it over the surface of the wood. If the cloth absorbs moisture, the wood is not dry enough to stain. If the cloth doesn’t absorb any moisture, the wood is ready to be stained.

In conclusion, drying time is a critical factor when it comes to staining pressure-treated wood. Weather conditions and wood type affect drying time, and it’s essential to consider them before staining. Waiting for the wood to dry properly will ensure that the stain adheres well and looks great.

General Waiting Period Before Staining

If you’re planning to stain pressure-treated wood, it’s important to wait for the wood to dry out before applying any stain. The general waiting period before staining pressure-treated wood is around 90 days after the project completion. However, the amount of time you need to wait depends on various factors such as the type of treated lumber, humidity in your area, and the size of logs.

For wet treated lumber, the wait time may exceed up to 6 months. External factors such as the weather and general environment can affect how quickly it dries. The best way to tell if the wood is ready to be stained is to test it.

You should keep in mind that staining pressure-treated wood too soon can cause the stain to not adhere properly, resulting in an uneven finish. Additionally, if the wood is not completely dry, the stain may not penetrate the wood properly, leading to a poor finish.

It is important to note that some pressure-treated lumber is kiln-dried, which means it dries faster than lumber that is air-dried. If you’re unsure whether your pressure-treated wood is kiln-dried or not, you can check with the manufacturer or supplier.

In summary, the general waiting period before staining pressure-treated wood is around 90 days, but it can vary depending on various factors. It’s important to wait for the wood to dry out completely before staining to ensure a proper finish.

Factors Affecting Staining Time

factors-affecting-staining-time

When it comes to staining pressure-treated wood, there are several factors that can affect the time it takes for the wood to be ready for staining. Here are some of the most important factors to consider:

Humidity

Humidity levels can have a significant impact on the time it takes for pressure-treated wood to dry out and be ready for staining. If the humidity is high, the wood will take longer to dry, which means you may need to wait longer before you can apply the stain. On the other hand, if the humidity is low, the wood will dry out more quickly, which means you may be able to apply the stain sooner.

Temperature

Temperature is another important factor to consider when staining pressure-treated wood. If the temperature is too low, the wood will take longer to dry out, which means you may need to wait longer before you can apply the stain. On the other hand, if the temperature is too high, the wood may dry out too quickly, which can cause the wood to crack and split. Ideally, you should aim for a temperature between 50 and 90 degrees Fahrenheit when staining pressure-treated wood.

Wood Porosity

The porosity of the wood can also affect the time it takes for pressure-treated wood to be ready for staining. Wood that is more porous will absorb moisture more quickly, which means it will take longer to dry out. This can be an issue if you are staining a large area, as it may take longer for the entire area to dry out before you can apply the stain. To speed up the drying process, you can use a fan or dehumidifier to help remove excess moisture from the air.

By taking these factors into account, you can ensure that your pressure-treated wood is ready for staining as quickly as possible. Keep in mind that it is always better to wait a little longer than to rush the process and end up with a subpar finish.

Choosing the Right Stain

When it comes to choosing the right stain for your pressure-treated wood, there are a few things to consider. The type of stain you choose will depend on your personal preference and the look you want to achieve. In this section, we will discuss the two main types of stains: oil-based and water-based.

Oil-Based Stains

Oil-based stains are a popular choice for pressure-treated wood because they penetrate deeply into the wood, providing excellent protection against water and weather damage. They also tend to last longer than water-based stains. However, oil-based stains can take longer to dry and may require more coats than water-based stains.

If you decide to use an oil-based stain, it is important to choose one that is specifically designed for exterior use. Look for a stain that contains a high percentage of oil and a low percentage of resin. This will help the stain penetrate deeply into the wood and provide long-lasting protection.

Water-Based Stains

Water-based stains are another popular choice for pressure-treated wood. They are easy to apply, dry quickly, and are available in a wide range of colors. Water-based stains are also environmentally friendly since they contain fewer chemicals than oil-based stains.

When choosing a water-based stain, look for one that is specifically designed for use on pressure-treated wood. These stains are formulated to penetrate deeply into the wood and provide long-lasting protection against weather damage.

In summary, both oil-based and water-based stains are suitable for pressure-treated wood. The choice you make will depend on your personal preference and the look you want to achieve. If you want a long-lasting stain that provides excellent protection against water and weather damage, an oil-based stain may be the best choice. If you prefer a stain that is easy to apply and dries quickly, a water-based stain may be the way to go.
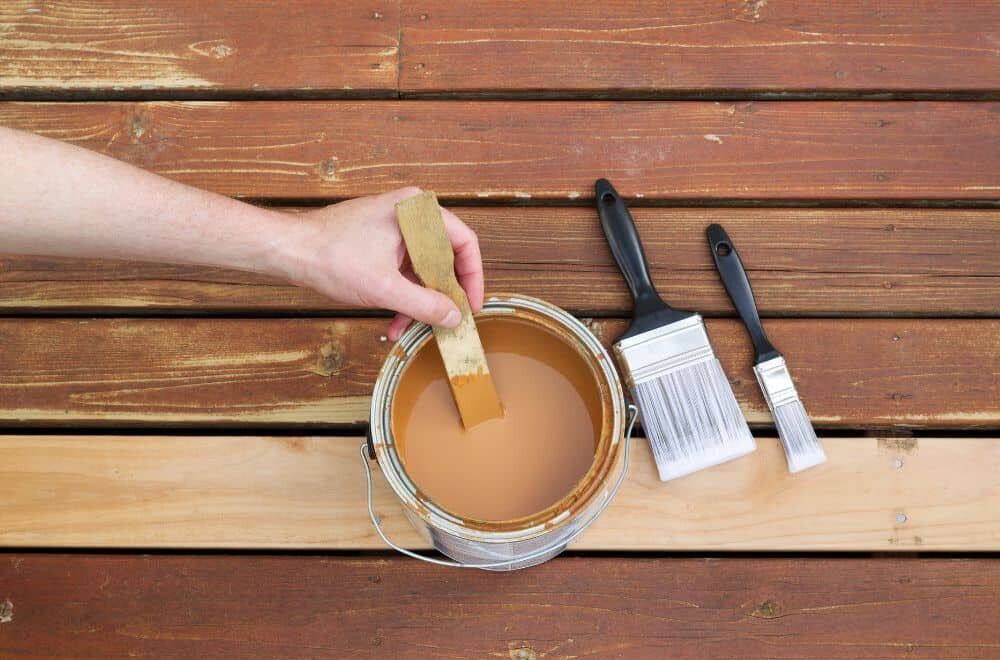
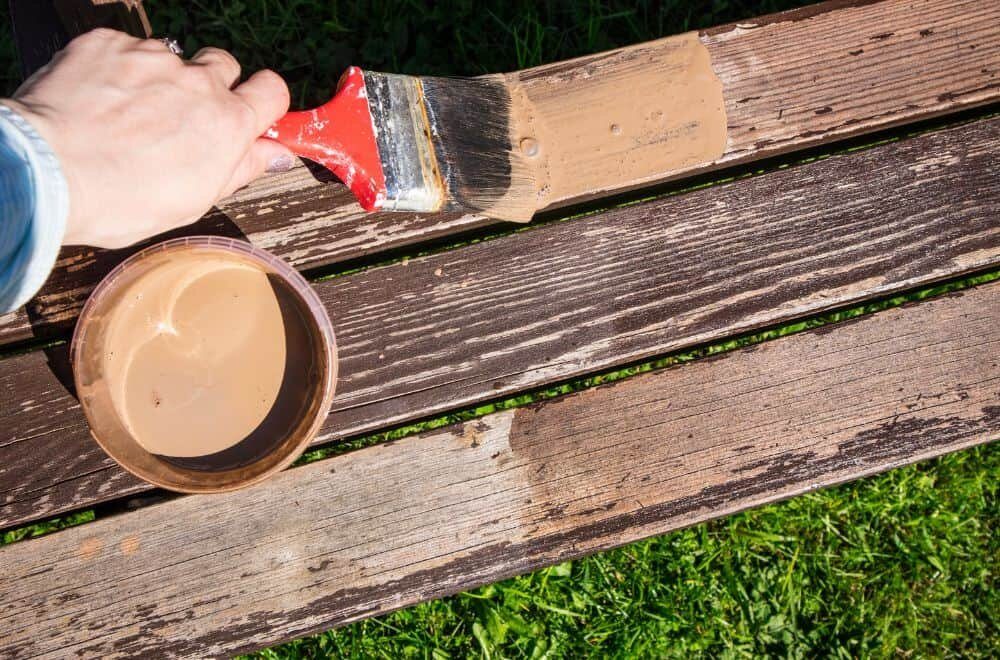
Staining Process

staining-process-1

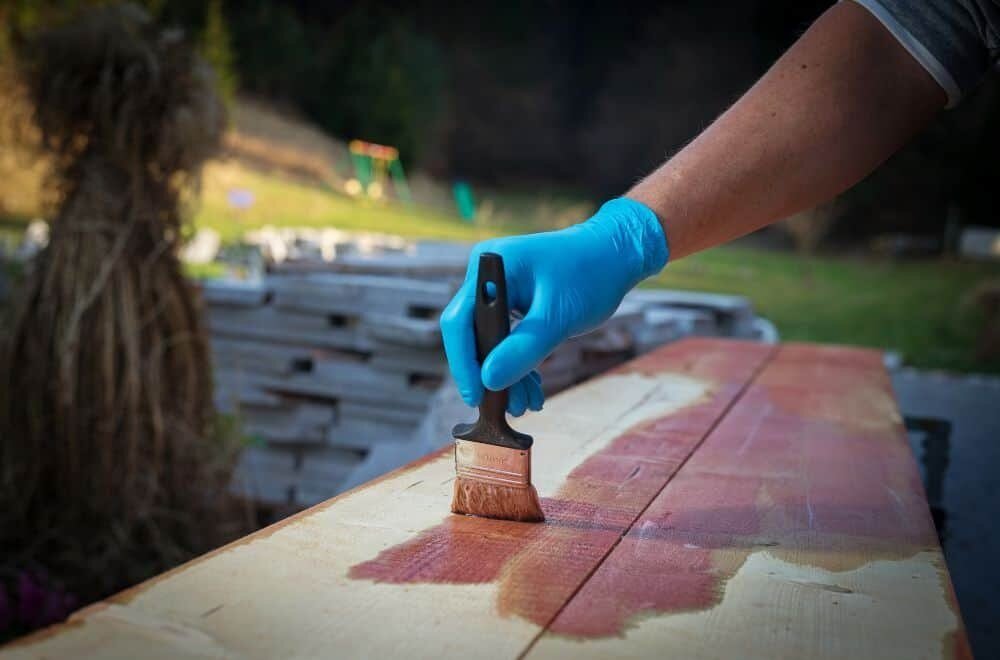
Staining pressure-treated wood is an effective way to enhance its appearance and increase its lifespan. Here are the steps you need to follow when staining pressure-treated wood:

Preparation

Before you start staining, make sure the wood is dry and free of any debris. Here are some preparation steps you should take:

  • Wait for the wood to dry: Depending on the type of treated wood used, humidity level, and temperature, you may have to wait from four weeks to six months before staining pressure-treated wood.
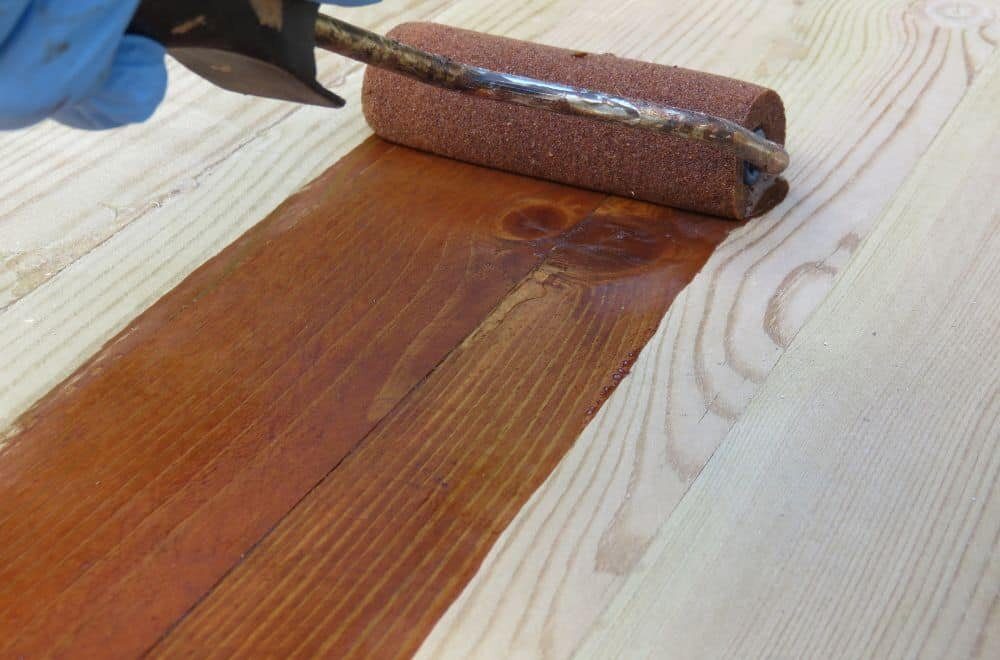
  • Clean the wood: Remove any dirt, dust, or debris from the wood surface using a stiff-bristled brush or a pressure washer.
  • Sand the wood: Use sandpaper to smooth out any rough spots or splinters on the wood surface. This will help the stain to adhere better to the wood.

Application

Once the wood is prepared, you can start applying the stain. Here are some tips to keep in mind:

  • Choose the right stain: Any stain that is designed for exterior use will work to stain pressure-treated wood. While you will find oil-based stains and latex stains, most experts recommend using an oil-based stain for pressure-treated wood.
  • Apply the stain: Use a paintbrush, roller, or sprayer to apply the stain evenly over the wood surface. Make sure to follow the manufacturer’s instructions for application and drying time.
  • Apply a second coat: Depending on the type of stain you use, you may need to apply a second coat for better coverage and protection.

Maintenance

To maintain the appearance and protection of the stained wood, you need to take some maintenance steps. Here are some tips to keep in mind:

  • Clean the wood: Regularly clean the wood surface using a mild detergent and water. This will help to remove any dirt or debris that can damage the wood over time.
  • Inspect the wood: Periodically inspect the wood surface for any signs of damage, such as cracks or splits. If you notice any damage, repair it as soon as possible to prevent further damage.
  • Reapply the stain: Depending on the type of stain you use and the weather conditions in your area, you may need to reapply the stain every few years to maintain its protection and appearance.

Following these steps will help you to effectively stain pressure-treated wood and maintain its appearance and protection for years to come.

Frequently Asked Questions

How long does pressure-treated wood take to dry before staining?

It is recommended to wait for at least 4 weeks before staining pressure-treated wood. However, the drying time may vary depending on the climate and humidity in your area. It’s essential to ensure that the wood is completely dry before applying any stain to avoid any unwanted results.

Can you stain pressure treated wood right away?

No, you should not stain pressure-treated wood right away. The wood needs time to dry out and for the chemicals to settle into the wood fibers. Staining the wood too soon may result in an uneven finish or the stain not adhering correctly.

When is the best time to stain pressure treated wood?

The best time to stain pressure-treated wood is when the wood is completely dry. It’s also recommended to stain the wood on a dry day with temperatures between 50-90°F. Avoid staining the wood in direct sunlight or when the wood is too hot.

How do I know if pressure treated wood is ready to be stained?

You can test if the pressure-treated wood is ready to be stained by performing a water droplet test. Sprinkle a few droplets of water onto the wood surface. If the water droplets absorb into the wood, it’s ready to be stained. If the water droplets bead up on the surface, the wood is not ready to be stained yet.

What happens if you stain pressure treated wood too soon?

If you stain pressure-treated wood too soon, the stain may not adhere to the wood properly, resulting in an uneven finish. The wood may also not absorb the stain evenly, resulting in blotchy or streaky areas.

Do I need to seal pressure treated wood before staining?

No, you do not need to seal pressure-treated wood before staining. The chemicals used in pressure treatment already provide a level of protection against rot and decay. However, it’s recommended to use a high-quality stain that contains a sealer to provide additional protection and prolong the life of the wood.

understanding-wood-stains

Can You Leave a Wood Stain on the Wood Without Wiping It Off? Tips and Tricks

Are you wondering whether you can leave a wood stain on the wood without wiping it off? Many people are unsure about the proper way to apply wood stain. While some believe that leaving the stain on without wiping it off can create a beautiful finish, others argue that it can result in a sticky mess that never dries.

In this article, we will explore the question of whether you can leave a wood stain on the wood without wiping it off. We will examine the potential benefits and drawbacks of this approach and provide expert advice on how to achieve the best results when staining your wood. Whether you are a novice woodworker or a seasoned professional, this article will provide you with valuable insights into the art of wood staining.

apapun situs yang anda temukan tidak ada yang lebih baik dan terpercaya seperti situs slot88 resmi. Temukan situs nya dan klik tombol daftar slot88, lanjutkan dengan deposit dan mainkan permainan yang sedang bagus menurut rtp saat itu dan nantikan menang besar nya.

So, if you are ready to learn more about the proper way to apply wood stain, read on! Whether you are staining a deck, a piece of furniture, or any other type of wood surface, this article will help you achieve the perfect finish.

Understanding Wood Stain

understanding-wood-stain

If you are new to woodworking, you may be wondering what wood stain is and how it works. Wood stain is a type of finish that is applied to wood to enhance its natural color and protect it from damage. Unlike paint, which covers the wood’s surface, wood stain is designed to penetrate the wood’s pores and bond with its fibers.

There are two main types of wood stain: oil-based and water-based. Oil-based stains are made from mineral spirits and natural oils, while water-based stains are made from water and synthetic resins. Oil-based stains are known for their durability and rich color, but they take longer to dry and emit strong fumes. Water-based stains are easier to clean up and dry faster, but they may not penetrate the wood’s surface as deeply as oil-based stains.

When applying wood stain, it is important to prepare the surface properly. Sand the wood to remove any rough spots or imperfections, and wipe it down with a clean cloth to remove any dust or debris. Apply the stain using a brush, roller, or sprayer, and wait for it to penetrate the wood’s surface.

Once the stain has penetrated the wood, you can wipe off any excess using a clean cloth. This step is important because leaving the stain on the wood without wiping it off can cause it to become tacky and difficult to remove later. For best results, follow the manufacturer’s instructions regarding how long to leave the stain on the wood before wiping it off.

In summary, wood stain is a type of finish that is applied to wood to enhance its natural color and protect it from damage. There are two main types of wood stain: oil-based and water-based. When applying wood stain, it is important to prepare the surface properly and follow the manufacturer’s instructions regarding how long to leave the stain on the wood before wiping it off.

Implications of Leaving Wood Stain On

Leaving wood stain on without wiping it off can have several implications on the final finish of your woodwork. Here are some of the implications you should consider before deciding to leave the stain on:

Uneven Color

One of the most significant implications of leaving wood stain on without wiping it off is that it can result in uneven color. When you apply the stain, it seeps into the wood fibers, and if you don’t wipe it off, it can create a blotchy or uneven appearance. This can be especially noticeable on light-colored woods like maple or birch. To avoid this, make sure to wipe off the excess stain after applying it.

Rough and Uneven Finish

Leaving wood stain on without wiping it off can also result in a rough and uneven finish. As the stain dries, it can create a hard, rough surface that can be difficult to sand down. This can be especially problematic if you plan on applying a clear coat or polyurethane finish, as the rough surface can interfere with adhesion and result in an uneven finish. To avoid this, make sure to wipe off excess stain after applying it, and sand the surface smooth before applying any additional finishes.

Permanent Color Change

Another implication of leaving wood stain on without wiping it off is that it can result in a permanent color change. As the stain seeps into the wood fibers, it can create a deep, rich color that can be difficult to remove. If you decide later that you don’t like the color, you may have to sand the wood down to remove the stain entirely. To avoid this, make sure to wipe off excess stain after applying it and test the color on a small, inconspicuous area before applying it to the entire surface.

In summary, leaving wood stain on without wiping it off can result in uneven color, a rough and uneven finish, and a permanent color change. To avoid these implications, make sure to wipe off excess stain after applying it and sand the surface smooth before applying any additional finishes.

The Science Behind Wood Staining

the-science-behind-wood-staining

When it comes to wood staining, there is actually a bit of science behind it. Understanding the science behind wood staining can help you achieve better results and avoid common mistakes.

The basic science behind wood staining involves the interaction between the stain and the wood. Stains are typically made up of pigments, dyes, and solvents. When a stain is applied to wood, the pigments and dyes are absorbed into the wood fibers, while the solvents evaporate, leaving the color behind.

The amount of pigment or dye in a stain determines how opaque or transparent the color will be. More pigment or dye will result in a more opaque color, while less pigment or dye will result in a more transparent color. It’s important to choose a stain with the right amount of pigment or dye for your project.

Gates of Olympus merupakan permainan yang sangat di gemari oleh kalangan slotter tanah air, bukan hanya itu game lain yang datang dari idn play pun seperti idn slot 777 juga juga sudah membumi, kedua games tersebut lah yang membawa banyak kemenangan untuk para member yang konsisten bermain di tahun kepopuleran nya. Oleh karena itu lah games produk pragmatic dan juga idn ini sangat dikenal dikalangan slotter indonesia.

Another factor that affects the color of the stain is the type of wood being stained. Different woods have different densities and porosities, which can affect how much stain is absorbed and how evenly it is distributed. It’s important to test the stain on a small, inconspicuous area of the wood before applying it to the entire surface.

The length of time the stain is left on the wood before wiping it off can also affect the final color. Leaving the stain on for a longer period of time will result in a darker color, while wiping it off sooner will result in a lighter color.

Overall, understanding the science behind wood staining can help you achieve better results and avoid common mistakes. By choosing the right stain, testing it on a small area, and adjusting the length of time it’s left on the wood, you can create a beautiful and lasting finish for your woodworking projects.

Effects on Different Types of Wood

Different types of wood can react differently when a wood stain is left on without wiping it off. Here are some of the effects you can expect on different types of wood:

Softwoods

Softwoods like pine and cedar are more porous than hardwoods, which means they absorb stain more easily. If you leave the stain on without wiping it off, the wood can become blotchy and unevenly colored. To prevent this, it’s important to apply a pre-stain conditioner before staining softwoods. This will help even out the absorption of the wood so that the stain can be applied evenly.

Hardwoods

Hardwoods like oak and maple are less porous than softwoods, which means they absorb stain less easily. If you leave the stain on without wiping it off, the wood can become sticky and tacky. This can make it difficult to apply a topcoat or finish. To prevent this, it’s important to wipe off the excess stain after applying it to hardwoods.

Exotic Woods

Exotic woods like teak and mahogany can have unique properties that make them more difficult to stain. If you leave the stain on without wiping it off, the wood can become discolored or blotchy. To prevent this, it’s important to test the stain on a small, inconspicuous area before applying it to the entire surface. This will help you determine how the wood will react to the stain.

Pressure-Treated Wood

Pressure-treated wood is treated with chemicals to make it more resistant to rot and decay. If you leave the stain on without wiping it off, the wood can become discolored or stained. To prevent this, it’s important to wait at least six months before staining pressure-treated wood. This will allow the wood to dry out and the chemicals to dissipate before applying the stain.

Remember, it’s always important to follow the manufacturer’s instructions when applying wood stain. If you’re unsure about whether or not you should leave the stain on without wiping it off, consult the instructions or contact the manufacturer for guidance.

Proper Wood Staining Techniques

proper-wood-staining-techniques

When it comes to staining wood, there are a few important techniques you need to keep in mind to achieve the best results. In this section, we’ll cover the key steps you should follow to ensure your wood staining project is a success.

Choosing the Right Stain

Before you begin staining your wood, it’s important to choose the right type of stain for your project. There are several different types of wood stain available, including oil-based, water-based, and gel stains. Each type of stain has its own unique properties, so it’s important to choose the right one for your specific needs.

Oil-based stains are great for outdoor projects, as they provide excellent protection against the elements. Water-based stains are ideal for indoor projects, as they dry quickly and are easy to clean up. Gel stains are thicker than other types of stain, making them ideal for vertical surfaces and for creating a more uniform finish.

Applying the Stain

Once you’ve chosen the right type of stain for your project, it’s time to apply it to the wood. To do this, you’ll need a clean, dry brush or rag. Begin by applying the stain in the direction of the wood grain, working in small sections at a time. Be sure to apply the stain evenly, and avoid leaving any excess stain on the surface of the wood.

Wiping Off Excess Stain

After you’ve applied the stain, it’s important to wipe off any excess to ensure a smooth, even finish. To do this, use a clean, dry rag to gently wipe away any excess stain. Be sure to work in the direction of the wood grain, and avoid applying too much pressure, as this can cause the stain to smear or become uneven.

By following these proper wood staining techniques, you can achieve a beautiful, long-lasting finish on your wood projects. Remember to choose the right type of stain for your project, apply the stain evenly, and wipe off any excess to ensure a smooth, even finish.

Common Mistakes to Avoid

When it comes to staining wood, there are a few common mistakes that many people make. These mistakes can lead to unsatisfactory results and even damage to your woodwork. Here are a few things to keep in mind to avoid these mistakes:

Not Wiping Off Excess Stain

One of the most common mistakes people make is leaving excess stain on the wood without wiping it off. This can result in a tacky finish that doesn’t properly adhere to the wood. To avoid this, make sure to wipe off any excess stain with a clean cloth before it has a chance to dry.

Using an Old Can of Stain

Using an old can of stain can also lead to unsatisfactory results. Over time, the drying agents in the stain can react with the oxygen in the can, causing it to become thick and clumpy. This can result in an uneven application and an overall poor finish. To avoid this, make sure to use a fresh can of stain and don’t use any that have been sitting around for too long.

Not Choosing the Right Color

Choosing the wrong color can also be a common mistake when it comes to staining wood. It’s important to choose a color that complements the natural grain and color of the wood. This can be a matter of personal preference, but it’s important to consider the overall look and feel you’re going for before making a decision.

Not Sanding the Wood Properly

Another mistake people often make is not sanding the wood properly before staining. Sanding helps to smooth out any rough spots or imperfections in the wood, allowing the stain to be applied evenly. If you skip this step, the stain may not adhere properly and the finish may be uneven.

By avoiding these common mistakes, you can ensure that your wood staining project turns out beautifully and that your woodwork is protected for years to come.

Professional Tips for Wood Staining

professional-tips-for-wood-staining

Staining wood is an excellent way to enhance its natural beauty and protect it from damage. However, if you want to achieve a professional-looking finish, you need to follow some essential tips. Here are some professional tips for wood staining that you should keep in mind:

1. Choose the Right Stain

Before you start staining, you need to choose the right type of stain for your project. There are two main types of wood stains: oil-based and water-based. Oil-based stains penetrate deeper into the wood and provide a more durable finish, while water-based stains dry faster and are easier to clean up. Choose the type of stain that best suits your needs.

2. Prepare the Wood Surface

Preparing the wood surface is crucial for achieving a smooth and even finish. Start by sanding the wood with a fine-grit sandpaper to remove any rough spots or imperfections. Then, use a tack cloth to remove any dust or debris from the surface. If you’re staining new wood, it’s essential to use a pre-stain conditioner to ensure that the stain is absorbed evenly.

3. Apply the Stain

When applying the stain, use a high-quality brush or applicator to ensure that the stain is spread evenly. Apply the stain in the direction of the wood grain, and work in small sections to prevent the stain from drying out too quickly. If you’re using an oil-based stain, you can leave it on the wood for up to 15 minutes before wiping it off. If you’re using a water-based stain, you should wipe it off immediately.

4. Wipe Off the Excess Stain

After applying the stain, wipe off any excess with a clean cloth. Make sure to wipe in the direction of the wood grain to prevent streaks or blotches. If you’re using an oil-based stain, you can use a clean cloth to buff the surface to a smooth finish.

5. Allow the Stain to Dry

Once you’ve wiped off the excess stain, allow the wood to dry completely before applying any finish. This can take anywhere from a few hours to a few days, depending on the type of stain and the humidity level in your area. Be patient and allow the stain to dry completely before moving on to the next step.

By following these professional tips for wood staining, you can achieve a beautiful and long-lasting finish on your wood projects. Remember to choose the right stain, prepare the wood surface, apply the stain evenly, wipe off the excess, and allow the stain to dry completely. With a little bit of patience and attention to detail, you can create stunning wood finishes that will last for years to come.

Frequently Asked Questions

How long should you leave wood stain on before wiping it off?

It’s best to allow the wood stain to set for at least 10 minutes before wiping it off. This will give the stain enough time to penetrate the wood and create a deep, rich color. However, the exact amount of time you should leave the stain on will depend on the type of wood you’re working with and the specific stain you’re using. Be sure to read the manufacturer’s instructions carefully to determine the recommended drying time for your particular stain.

Is it okay to leave wood stain on overnight?

It’s generally not recommended to leave wood stain on overnight. If you leave the stain on for too long, it can become sticky and difficult to work with. Additionally, the longer the stain sits on the wood, the darker and more intense the color will become. This can make it difficult to achieve the desired shade. If you need to leave the stain on for an extended period of time, cover it with plastic wrap to prevent it from drying out.

Do you have to wipe wood stain off?

Yes, it’s important to wipe wood stain off after applying it. If you leave the stain on without wiping it off, it can take forever to dry and may not adhere properly to the wood. Additionally, wiping off the excess stain helps to create an even, consistent color. Use a clean, dry cloth to wipe off any excess stain, being careful not to rub too hard or remove too much.

What happens if you put too much wood stain on?

If you put too much wood stain on, it can create a thick, gummy layer that won’t dry properly. This can result in a sticky, uneven finish that’s difficult to work with. Additionally, excess stain can create dark spots and blotches on the wood. To avoid this, be sure to apply the stain in thin, even coats, wiping off any excess as you go.

Can you leave wood just stained?

You can leave wood just stained, but it’s generally not recommended. If you leave the stain on without applying a protective finish, the wood will be vulnerable to damage from moisture, heat, and other environmental factors. Additionally, the stain may not adhere properly to the wood, resulting in a patchy, uneven finish. To protect the wood and ensure a smooth, even finish, be sure to apply a protective topcoat after staining.

Will wood stain come off if not wiped?

If you don’t wipe off the excess wood stain, it can create a sticky, gummy layer that won’t dry properly. This can result in a patchy, uneven finish that’s difficult to work with. Additionally, excess stain can create dark spots and blotches on the wood. To avoid this, be sure to wipe off any excess stain with a clean, dry cloth after applying it.