Tag Archives: oil-based wood stain

stain-a-wooden-fence

How to Stain a Wooden Fence: A Step-by-Step Guide

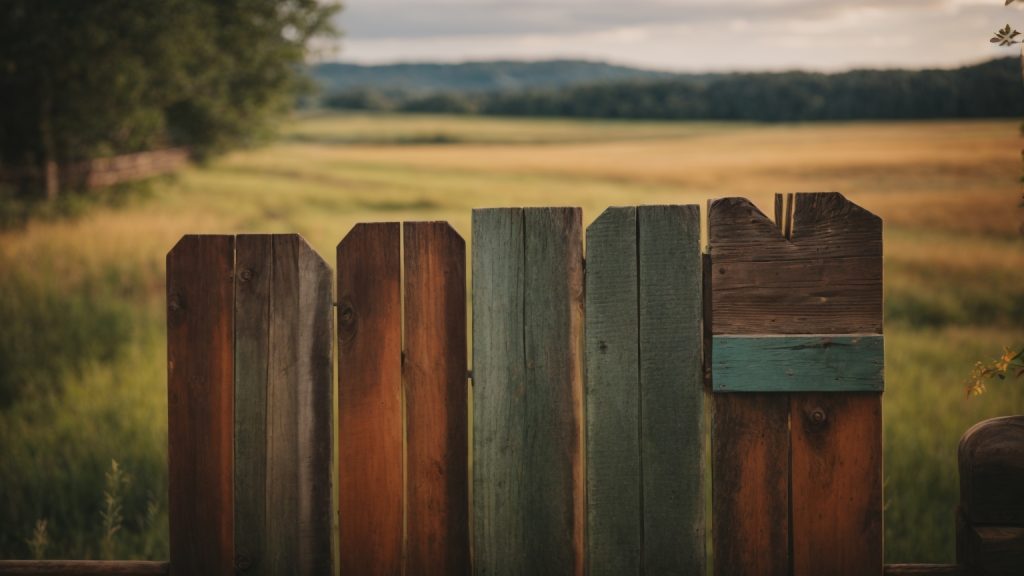
Staining a wooden fence is an excellent way to protect it from the elements while enhancing its natural beauty. If you’re looking for a cost-effective and easy way to spruce up your fence, staining is a great option. In this article, we’ll provide you with step-by-step instructions on how to stain your wooden fence like a pro.

Before we get into the nitty-gritty of staining, it’s important to choose the right day for your project. You’ll want to select a day with temperatures between 50-80 degrees Fahrenheit, low humidity, and no rain in the forecast. It’s also important to check the weather forecast for the next few days to ensure that your fence has enough time to dry completely before any rain or moisture hits.

Once you’ve chosen the right day, it’s time to prep your fence for staining. This involves cleaning the fence thoroughly to remove any dirt, debris, or mildew that may have accumulated over time. You’ll also need to sand the fence to remove any rough spots or splinters and ensure that the surface is smooth and even. By following these steps, you’ll be well on your way to achieving a beautifully stained wooden fence.

Understanding Wood Stains

stain-a-wooden-fence

When it comes to staining your wooden fence, there are a few things you need to know about wood stains. In this section, we will cover the different types of wood stains available and the benefits of staining your wooden fence.

Types of Wood Stains

There are three main types of wood stains: solid, semi-transparent, and transparent.

Solid stains provide the most coverage and hide the natural grain of the wood. They are best used on older fences that have a lot of wear and tear or on fences made from lower quality wood.

Semi-transparent stains allow some of the natural grain of the wood to show through while still providing good coverage. They are a good choice for newer fences that are in good condition and made from higher quality wood.

Transparent stains provide the least coverage and allow the natural grain of the wood to show through. They are best used on fences that are in excellent condition and made from high-quality wood.

Benefits of Staining a Wooden Fence

Staining your wooden fence has several benefits, including:

  • Protection from the elements: Staining your fence helps protect it from the sun, rain, and other weather conditions that can cause damage to the wood.
  • Increased lifespan: Staining your fence can help extend its lifespan by preventing rot and decay.
  • Improved appearance: Staining your fence can give it a fresh, new look and enhance the natural beauty of the wood.
  • Resistance to pests: Staining your fence can help repel pests like termites and carpenter ants that can cause damage to the wood.

Overall, staining your wooden fence is a great way to protect and enhance its appearance while also extending its lifespan. When choosing a wood stain, be sure to consider the type of wood your fence is made from and the condition it is in to ensure you choose the right type of stain for your needs.

Materials and Tools Needed

Staining your wooden fence is an excellent way to protect it from the elements while also giving it a fresh new look. Before you begin, it’s important to have all the necessary materials and tools on hand. Here’s what you’ll need:

Materials

  • Wood stain: Choose an oil-based wood stain that is specifically formulated for outdoor use. Be sure to select a color that complements your home’s exterior.
  • Wood sealant: After staining your fence, it’s important to apply a wood sealant to protect it from moisture and UV rays.
  • Bleach: Before staining your fence, you may need to clean it with bleach to remove any mold or mildew.
  • Painter’s tape: Use painter’s tape to protect any adjacent surfaces, such as your home’s exterior or your garden beds.
  • Drop cloth: Lay a drop cloth on the ground beneath your fence to catch any drips or spills.
  • Natural-bristle paintbrush: Use a high-quality natural-bristle paintbrush to apply the stain and sealant.
  • Stiff-bristle brush: Use a stiff-bristle brush to scrub your fence with bleach.
  • Garden hose: Use a garden hose to rinse your fence after scrubbing it with bleach.
  • Bucket: Use a bucket to mix your bleach solution.

Tools

  • Power washer: If your fence is particularly dirty, you may need to use a power washer to clean it before staining.
  • Screwdriver: Use a screwdriver to remove any loose or damaged screws or nails from your fence.
  • Sandpaper: Use sandpaper to smooth any rough areas or splinters on your fence.
  • Rubber gloves: Wear rubber gloves to protect your hands while working with bleach and stain.

By gathering all of these materials and tools before you begin staining your fence, you’ll be able to work efficiently and effectively. With a little bit of effort, you can transform your weathered wooden fence into a beautiful and functional outdoor feature.

Preparation Steps

Before staining your wooden fence, there are a few preparation steps that you should follow to ensure a smooth and successful staining process. In this section, we will discuss the three important preparation steps that you need to take before staining your fence: choosing the right weather, cleaning the fence, and sanding the fence.

Choosing the Right Weather

Choosing the right weather is crucial when it comes to staining your wooden fence. You should avoid staining your fence on a rainy or humid day, as the moisture can prevent the stain from adhering properly. It is recommended to choose a day with temperatures between 50 and 80 degrees Fahrenheit, low to moderate humidity, and no rain in the forecast for at least 24 hours after staining.

Cleaning the Fence

Before staining your fence, it is important to clean it thoroughly to remove any dirt, debris, or mildew that may have accumulated on the surface. You can use a pressure washer or a garden hose with a high-pressure nozzle to clean the fence. If there are any stubborn stains or mildew, you can use a mixture of water and bleach to clean the fence. Be sure to wear gloves and protective eyewear when working with bleach.

Sanding the Fence

After cleaning the fence, you need to sand it to remove any rough spots or splinters that may be present on the surface. Sanding will also help the stain adhere better to the wood. You can use a power sander or sandpaper to sand the fence. Start with a coarse-grit sandpaper and work your way up to a finer-grit sandpaper for a smooth finish. Be sure to wear a dust mask and protective eyewear when sanding the fence.

By following these preparation steps, you can ensure that your wooden fence is ready for staining and that the stain will adhere properly to the wood.

Staining Process

staining-process-2

Staining a wooden fence is a great way to enhance its natural beauty and protect it from the elements. Here’s a guide to help you through the staining process.
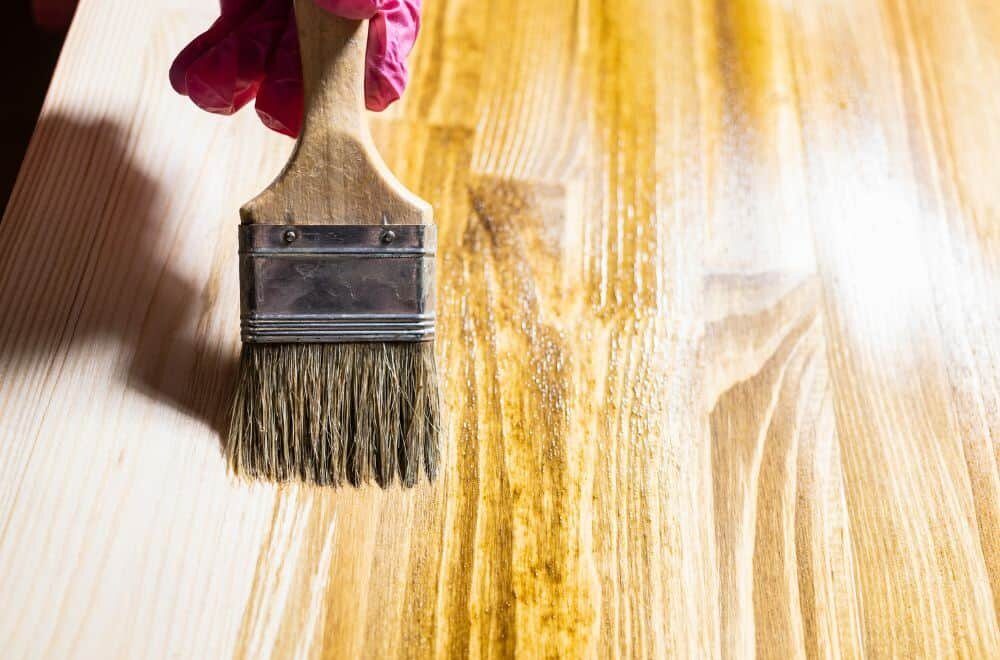
Applying the Stain

Before applying the stain, make sure the fence is clean and dry. Use a power washer or a scrub brush to remove any dirt, debris, or mildew from the surface. Once the fence is clean, allow it to dry completely before applying the stain.

When applying the stain, use a brush or a sprayer to evenly distribute the stain on the surface of the fence. Make sure to apply the stain in the direction of the wood grain to avoid streaking. You can also use a roller to apply the stain on larger surfaces.

It’s important to apply the stain evenly and not let it pool or drip. If the stain is too thick, it may not penetrate the wood properly, and if it’s too thin, it may not provide adequate protection.

Drying Time

After applying the stain, allow it to dry completely before touching or walking on the fence. The drying time will depend on the type of stain you use and the weather conditions. Generally, it takes about 24 hours for the stain to dry completely.

During the drying process, keep the fence protected from rain, direct sunlight, and foot traffic. If the weather is too hot or too cold, it may affect the drying time and the overall performance of the stain.

Once the stain is dry, inspect the fence for any missed spots or areas that need touch-up. If necessary, apply a second coat of stain to ensure complete coverage and protection.

By following these simple steps, you can achieve a beautiful and long-lasting finish on your wooden fence.

Maintenance Tips

Proper maintenance is crucial to ensure the longevity and appearance of your wooden fence. Regular cleaning and periodic re-staining are essential to keep your fence looking its best.

Regular Cleaning

Cleaning your wooden fence regularly is one of the easiest and most effective ways to maintain its appearance and prevent damage. Here are some tips for cleaning your fence:

  • Use a garden hose or pressure washer to remove dirt, debris, and mildew.
  • Scrub the fence with a mild detergent and water solution using a soft-bristled brush or sponge.
  • Rinse the fence thoroughly with water and allow it to dry completely before re-staining.

Regular cleaning will help prevent dirt and mildew buildup, which can cause discoloration and damage to your fence.

Periodic Re-Staining

Periodic re-staining is necessary to protect your wooden fence from weathering, fading, and other damage. Here are some tips for re-staining your fence:

  • Choose a high-quality stain that is specifically designed for wooden fences.
  • Check the weather forecast and choose a day with mild temperatures and low humidity to ensure optimal drying conditions.
  • Apply the stain using a brush, roller, or sprayer, following the manufacturer’s instructions.
  • Apply a second coat if necessary to achieve the desired color and coverage.

Re-staining your fence every 2-3 years will help maintain its appearance and protect it from damage caused by weathering and UV rays.

By following these maintenance tips, you can ensure that your wooden fence remains beautiful and functional for years to come.

understanding-polyurethane-types

Can You Use Water-Based Polyurethane Over Oil-Based Wood Stain? Explained

Can a water-based polyurethane go over an oil-based wood stain? This is a common question that many DIY enthusiasts and professional woodworkers ask themselves. The answer is yes, you can use a water-based polyurethane over an oil-based wood stain, but there are some important considerations to keep in mind.

Firstly, it’s important to ensure that the oil-based wood stain is fully cured before applying the water-based polyurethane. This can take anywhere from a few days to a few weeks depending on the type of stain and the conditions it’s exposed to. Applying the water-based polyurethane too soon can cause it to not adhere properly and ruin the finish. Additionally, it’s important to make sure that the surface is clean and free of any dust or debris before applying the polyurethane.

Understanding Polyurethane Types

understanding-polyurethane-types

When it comes to finishing wood, polyurethane is a popular choice due to its durability and versatility. However, there are two main types of polyurethane: water-based and oil-based. Each has its own unique properties that make it suitable for different applications.

Water-Based Polyurethane

Water-based polyurethane is a popular choice for those who want a clear finish that won’t yellow over time. It has a low odor and dries quickly, making it ideal for use in areas with poor ventilation. Additionally, water-based polyurethane is easy to clean up with soap and water.

One of the main advantages of water-based polyurethane is that it is less likely to crack or peel over time. It also has a lower VOC content than oil-based polyurethane, making it a more environmentally friendly option. However, water-based polyurethane may not be as durable as its oil-based counterpart.

Oil-Based Polyurethane

Oil-based polyurethane is a popular choice for those who want a durable finish that will stand up to heavy use. It has a high VOC content, which means it can be harmful to the environment and your health if not used in a well-ventilated area. Additionally, oil-based polyurethane takes longer to dry than water-based polyurethane.

One of the main advantages of oil-based polyurethane is that it provides a warm, amber glow that can enhance the natural beauty of the wood. It is also more durable than water-based polyurethane, making it ideal for high-traffic areas. However, oil-based polyurethane may yellow over time, which can detract from the natural beauty of the wood.

In summary, both water-based and oil-based polyurethane have their own unique properties that make them suitable for different applications. Water-based polyurethane is a good choice for those who want a clear finish that won’t yellow over time, while oil-based polyurethane is ideal for those who want a durable finish that will stand up to heavy use.

The Science Behind Polyurethane and Wood Stain Interaction

When it comes to finishing your wooden projects, you may have a lot of questions about the compatibility of different products. One common question is whether you can apply a water-based polyurethane over an oil-based wood stain. The answer is yes, but there are some important things to keep in mind.

First, let’s talk about the science behind polyurethane and wood stain interaction. Polyurethane is a protective coating that is applied over wood to protect it from damage and wear. It is made up of urethane resins, which are suspended in a carrier medium. The carrier medium can be either oil-based or water-based.

Wood stain, on the other hand, is a type of finish that is applied to wood to enhance its natural color and grain pattern. Stains are made up of pigments, dyes, and solvents, and they can be either oil-based or water-based.

When you apply a water-based polyurethane over an oil-based wood stain, the polyurethane will bond to the stain, but it may not adhere well to the wood surface underneath. This can lead to peeling and flaking of the finish over time.

To avoid this problem, it is important to make sure that the wood surface is clean and free of any contaminants before applying the polyurethane. You should also allow the stain to dry completely before applying the polyurethane. This will ensure that the polyurethane adheres well to both the stain and the wood surface.

In summary, you can apply a water-based polyurethane over an oil-based wood stain, but you need to take some precautions to ensure that the finish adheres well and lasts for a long time. By following these guidelines, you can achieve a beautiful and durable finish on your wooden projects.

Process of Applying Water-Based Polyurethane Over Oil-Based Stain

process-of-applying-water-based-polyurethane-over-oil-based-stain

If you are looking to apply a water-based polyurethane over an oil-based stain, it is important to follow the correct process. Here are the steps to ensure a successful application:

Surface Preparation

Before applying the water-based polyurethane, the surface must be properly prepared. This includes removing any dust, dirt, or debris from the surface. Wipe the surface with a cloth dipped in a mixture of water and detergent to remove any grease, wax, dust, and dirt that may be on the surface. As this step and the step before will be the primary factors for determining how well your polyurethane finish will hold, we highly recommend being thorough.

After cleaning the surface, it is important to roughen it by sanding it. This will help the polyurethane adhere to the surface better. Use a fine-grit sandpaper to sand the entire surface. Wipe the surface clean with a cloth to remove any dust or debris.

Application Technique

When applying the water-based polyurethane, it is important to use the correct technique. Start by stirring the polyurethane gently but thoroughly before each use. Apply the finish in a clean, well-ventilated area.

Use a high-quality brush or roller to apply the polyurethane. Apply a thin, even coat of polyurethane to the entire surface. Avoid over-brushing or over-rolling, as this can cause bubbles and streaks in the finish.

Drying Time

Allow the first coat of polyurethane to dry completely before applying a second coat. This can take anywhere from 2-4 hours, depending on the humidity and temperature of the room.

After applying the final coat, allow the surface to dry completely before using it. This can take up to 24 hours, depending on the humidity and temperature of the room.

Following these steps will help ensure a successful application of water-based polyurethane over an oil-based stain.

Potential Problems and Solutions

Uneven Finish

One potential problem when applying a water-based polyurethane over an oil-based stain is an uneven finish. This can occur when the polyurethane does not adhere properly to the stain, causing it to bubble or peel. To avoid this issue, it is important to properly prepare the surface before applying the polyurethane.

One solution is to lightly sand the surface with fine-grit sandpaper to create a rough surface for the polyurethane to adhere to. Additionally, you can apply a coat of dewaxed shellac as a barrier between the stain and polyurethane. This will help the polyurethane adhere better to the surface and prevent any potential issues with an uneven finish.

Peeling Issues

Another potential problem when applying a water-based polyurethane over an oil-based stain is peeling. This can occur when the polyurethane does not properly bond with the stain, causing it to peel off in layers. To avoid this issue, it is important to properly clean and prepare the surface before applying the polyurethane.

One solution is to clean the surface with a degreaser and allow it to completely dry before applying the polyurethane. Additionally, you can use a bonding primer to help the polyurethane adhere better to the surface. This will help prevent any potential issues with peeling and ensure a durable finish.

Overall, while there can be potential problems when applying a water-based polyurethane over an oil-based stain, these issues can be easily avoided with proper preparation and application techniques.

Maintenance and Longevity of the Finish

maintenance-and-longevity-of-the-finish

When it comes to maintaining the finish of your wood stain, there are a few things you can do to ensure its longevity. Here are some tips to keep in mind:

  • Regular cleaning: Keep your floors or furniture clean by regularly sweeping or dusting them. Use a damp cloth or mop to wipe away any spills or stains as soon as possible. Avoid using harsh chemicals or abrasive cleaners, as they can damage the finish.
  • Avoid heavy traffic: Try to avoid heavy foot traffic or moving heavy furniture over your stained wood floors, as this can cause scratches or dents in the finish.
  • Refinishing: If you notice that the finish is starting to wear down, you may need to refinish your floors or furniture. This involves sanding down the old finish and applying a new coat of stain and polyurethane.

In terms of longevity, water-based polyurethane typically has a shorter lifespan than oil-based polyurethane. Water-based finishes are more prone to wear and tear, and may need to be refinished more frequently. However, this can vary depending on factors like the type of wood, the amount of foot traffic, and the quality of the finish.

Ultimately, the key to maintaining the longevity of your finish is to take good care of your wood stain and avoid harsh chemicals or heavy traffic. With proper care, your wood stain can last for years to come.

Frequently Asked Questions

Can water-based polyurethane be applied over an oil-based wood stain?

Yes, water-based polyurethane can be applied over an oil-based wood stain as long as the stain is completely dry. If the stain is not dry, the polyurethane can rub off or cause damage to the stain. To avoid this, make sure the stain has completely dried before applying the polyurethane.

What is the difference between water-based and oil-based polyurethane?

Water-based polyurethane dries faster than oil-based polyurethane and has a lower odor. Oil-based polyurethane takes longer to dry, has a stronger odor, and can yellow over time. Water-based polyurethane is also easier to clean up with soap and water, while oil-based polyurethane requires solvents for cleanup.

Can you put Polycrylic over oil-based stain?

Yes, Polycrylic can be applied over oil-based stain as long as the stain is completely dry. Polycrylic is a water-based product and can be used as a substitute for water-based polyurethane.

How long should oil-based stain dry before applying water-based polyurethane?

Oil-based stain should dry for at least 24 hours before applying water-based polyurethane. However, it’s recommended to wait 48 hours to ensure the stain is completely dry and ready for the polyurethane.

What are the disadvantages of using water-based polyurethane?

Water-based polyurethane can be more expensive than oil-based polyurethane and may require more coats for the desired finish. It can also raise the grain of the wood, requiring additional sanding between coats.

How many coats of water-based polyurethane should be applied on stained wood?

A minimum of three coats of water-based polyurethane should be applied on stained wood, with four to five coats being optimal in most scenarios. A single coat of water-based polyurethane is very thin, and creating a layer that is thick enough requires at least three coats.