
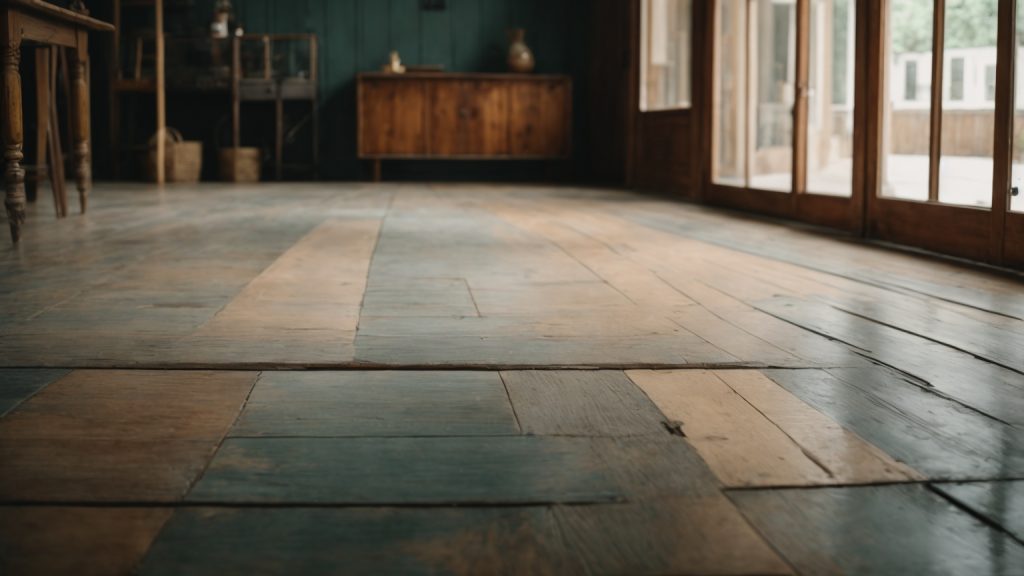
Preparing a wooden floor for tiling can be a daunting task, but with the right tools and knowledge, it can be done with ease. Before you begin, you should inspect the wooden floor to ensure that it is in good condition. Look for any existing nails, trim, or baseboards that may need to be removed or replaced. Also, check for any gaps between boards that need to be filled.
Once you have inspected the floor, the next step is to clean it thoroughly. Remove any dirt, dust, or debris using a broom or vacuum cleaner. You can also use a damp cloth to wipe the floor clean. Make sure that the wooden floor is completely dry before moving on to the next step. Any moisture left on the floor can cause the tiles to lift or warp over time.
Understanding the Importance of Preparation
Preparing your wooden floor for tiling is a crucial step that should not be overlooked. Proper preparation ensures that your tiles will adhere well, and your floor will be durable and long-lasting. Here are a few reasons why preparation is essential:
Leveling the Floor
Before you start tiling, you need to ensure that your wooden floor is level. If there are any bumps or dips, your tiles will not sit flat, and you will end up with an uneven surface. This can lead to tiles cracking or coming loose over time. By leveling your floor, you can guarantee that your tiles will be installed correctly, and your finished floor will be smooth and even.
Ensuring Structural Integrity
Another reason why preparation is important is to ensure that your wooden floor is structurally sound. If there are any weak spots or damage to the wood, your tiles may not adhere correctly, and your floor may not be stable. This can lead to tiles cracking or coming loose over time, which can be dangerous and costly to repair. By addressing any structural issues before tiling, you can guarantee that your floor will be safe and secure.
Preventing Moisture Damage
Wooden floors are susceptible to moisture damage, which can cause the wood to warp or rot over time. If you install tiles on a damp or wet wooden floor, you may end up with mold or mildew growth, which can be harmful to your health. By properly preparing your floor, you can prevent moisture damage and ensure that your tiles will adhere correctly.
Improving Adhesion
Finally, proper preparation is essential for ensuring that your tiles will adhere well to your wooden floor. By cleaning, sanding, and priming your floor, you can create a surface that is ideal for tile installation. This will help your tiles stick better, which will make your finished floor more durable and long-lasting.
Overall, preparation is a crucial step in the tiling process. By taking the time to properly prepare your wooden floor, you can ensure that your tiles will adhere well, and your finished floor will be smooth, even, and long-lasting.
Choosing the Right Materials
When it comes to tiling a wooden floor, choosing the right materials is crucial to ensure a successful and long-lasting installation. This section will guide you through the process of selecting the right tiles and adhesive for your project.
Types of Tiles
There are various types of tiles available in the market, each with its own unique properties. Here are some of the most common types of tiles that can be used for tiling a wooden floor:
- Ceramic tiles: These are the most popular type of tiles and are made from clay, which is fired at high temperatures. They are available in a wide range of colors, sizes, and patterns.
- Porcelain tiles: These are similar to ceramic tiles but are denser and more durable. They are ideal for high-traffic areas and can be used both indoors and outdoors.
- Natural stone tiles: These include marble, granite, slate, and limestone, among others. They are known for their unique patterns and textures and can add a touch of elegance to any space.
- Mosaic tiles: These are small tiles that are arranged in a pattern to create a larger design. They are perfect for adding a decorative touch to a wooden floor.
Selecting the Right Adhesive
Choosing the right adhesive is just as important as selecting the right tiles. Here are some factors to consider when selecting an adhesive for tiling a wooden floor:
- Type of adhesive: There are two main types of adhesives: cement-based and epoxy-based. Cement-based adhesives are more commonly used and are suitable for most types of tiles. Epoxy-based adhesives are more expensive but offer superior bonding strength.
- Flexibility: A flexible adhesive is necessary for tiling a wooden floor, as wood tends to expand and contract with changes in temperature and humidity.
- Moisture resistance: It is important to choose an adhesive that is moisture-resistant, as wooden floors are susceptible to moisture damage.
- Application method: The adhesive should be easy to apply and spread evenly.
By considering these factors when selecting your tiles and adhesive, you can ensure a successful and long-lasting installation of your tiled wooden floor.
Assessing Your Wooden Floor
Before you start tiling your wooden floor, it’s essential to assess the condition of the wood. This step is crucial because any underlying issues with the floor can cause problems with the tiles later on. Here are two sub-sections to help you assess your wooden floor:
Checking for Damages
The first thing you need to do is check the wooden floor for any damages. Look for any cracks, splits, or chips in the wood. These damages can cause problems with the tiles later on, so it’s essential to address them before you start tiling.
If you find any damages, you’ll need to repair them before you start tiling. You can use wood filler to fill in any cracks or chips in the wood. Once the wood filler has dried, you can sand it down to create a smooth surface.
Measuring the Floor Area
The next step is to measure the floor area. You’ll need to know the exact dimensions of the floor so you can purchase the correct amount of tiles. Measure the length and width of the room and multiply them together to get the square footage.
It’s also essential to measure any areas where the tiles won’t fit, such as around doorways or cabinets. You’ll need to cut tiles to fit these areas, so it’s important to know the exact dimensions.
By assessing your wooden floor before you start tiling, you can ensure that the surface is smooth and free of any damages. This will help you achieve a professional-looking finish that will last for years to come.
Preparing Your Wooden Floor
Before you start tiling your wooden floor, it is essential to prepare the surface properly. This process includes cleaning the surface, leveling the floor, and applying primer. Following these steps will ensure a smooth and durable surface for your tiles.
Cleaning the Surface
The first step in preparing your wooden floor for tiling is to clean the surface thoroughly. Sweep or vacuum the floor to remove all dust and debris. If there are any stains or spills on the floor, use a damp cloth to wipe them off. Make sure the floor is completely dry before moving on to the next step.
Leveling the Floor
It is essential to have a level surface before laying tiles on a wooden floor. Uneven surfaces can cause tiles to crack or become loose over time. To level the floor, use a self-leveling compound. Mix the compound according to the manufacturer’s instructions and pour it onto the floor. Spread the compound evenly using a trowel. Allow the compound to dry completely before moving on to the next step.
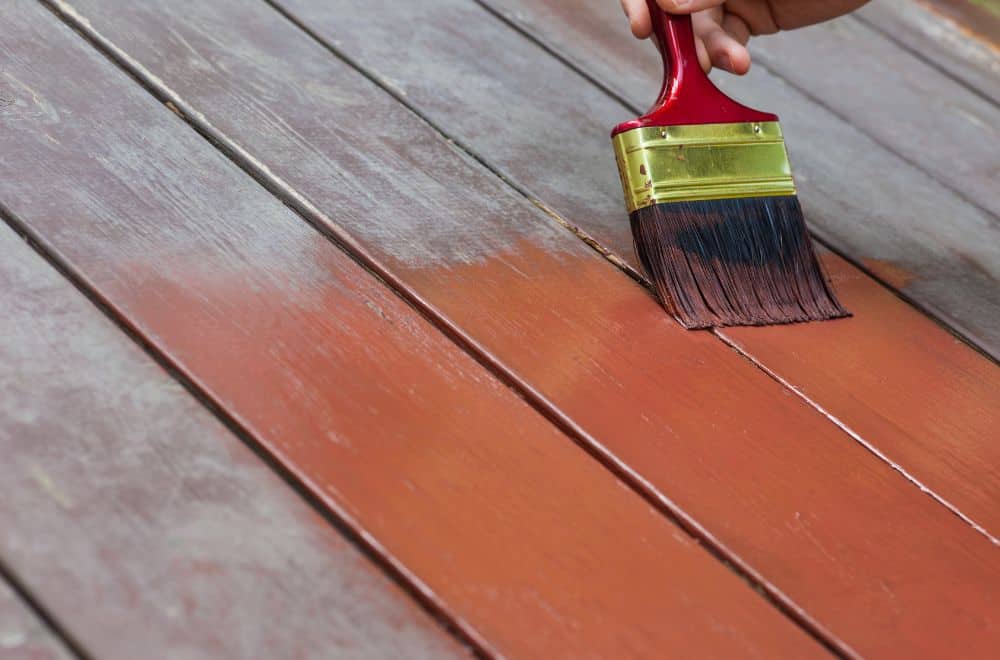
Applying Primer
Applying primer to your wooden floor will help the adhesive bond better to the surface. Apply a thin coat of primer using a paintbrush or roller. Make sure to cover the entire surface evenly. Allow the primer to dry completely before laying the tiles.
In conclusion, preparing your wooden floor for tiling is crucial to ensure a smooth and long-lasting surface. By following these steps, you can create a strong foundation for your tiles and avoid any potential issues in the future.
Laying Out Your Tiles
Once you have prepared your wooden floor for tiling, it’s time to start laying out your tiles. This can be a bit tricky, but with some careful planning and measuring, you can create a beautiful and functional tiled surface.
Planning Your Layout
Before you start laying your tiles, it’s important to plan out your layout. This will help you avoid any mistakes or miscalculations that could result in wasted tiles or an uneven surface. Here are some steps to follow when planning your layout:
- Measure the length and width of your room and mark these measurements on a piece of paper.
- Determine the center point of your room by drawing a line from the midpoint of one wall to the midpoint of the opposite wall. Repeat this process for the other two walls.
- Use a chalk line to snap a line across the center of your room in both directions. This will create a cross in the center of your room.
- Lay out your tiles on the floor along the lines you have drawn. This will give you an idea of how your tiles will look and help you determine if you need to make any adjustments to your layout.
Cutting Tiles to Fit
Once you have your layout planned out, it’s time to start cutting your tiles to fit. This can be a bit tricky, but with the right tools and some patience, you can create a seamless tiled surface. Here are some steps to follow when cutting your tiles:
- Measure the space where your tile needs to fit and mark the tile with a pencil or marker.
- Use a tile cutter or tile saw to cut the tile to the correct size. Be sure to wear safety goggles and follow all safety instructions when using these tools.
- If you need to make a curved cut, use a tile nipper to carefully chip away at the tile until it fits the space correctly.
- Test the tile in the space to make sure it fits correctly before moving on to the next tile.
By following these steps, you can lay out your tiles and cut them to fit with ease. With a little patience and some careful planning, you’ll have a beautiful tiled surface in no time.
Applying the Tiles
Once you have prepared your wooden floor for tiling, it’s time to apply the tiles. This process involves spreading adhesive, placing the tiles, and grouting the tiles. Here are the steps you should follow:
Spreading the Adhesive
Before you start spreading the adhesive, make sure to read the manufacturer’s instructions carefully. Different types of adhesive require different application techniques. Generally, you will need to apply the adhesive to the floor in sections using a notched trowel.
Start by spreading the adhesive on a small area of the floor, making sure to cover the entire area. Then, use the notched trowel to create ridges in the adhesive. The ridges will help the tiles adhere to the floor.
Placing the Tiles
Once you have spread the adhesive, it’s time to place the tiles. Start by placing the first tile in the corner of the room, using tile spacers to ensure that there is an even gap between each tile.
Continue placing tiles in a straight line, working your way across the room. It’s important to check that each tile is level as you go, adjusting the tile spacers as necessary.
When you reach the end of a row, you may need to cut tiles to fit. Use a tile cutter to make precise cuts, and always wear safety goggles to protect your eyes.
Grouting the Tiles
Once the tiles are in place and the adhesive has dried, it’s time to grout the tiles. Grout is a cement-based mixture that fills the gaps between the tiles, helping to keep them in place and preventing water from seeping underneath.
Start by mixing the grout according to the manufacturer’s instructions. Then, use a grout float to apply the grout to the gaps between the tiles. Work in small sections, making sure to remove any excess grout before it dries.
After you have applied the grout, use a damp sponge to wipe away any remaining grout from the surface of the tiles. Let the grout dry completely before walking on the floor.
That’s it! By following these steps, you can successfully apply tiles to your wooden floor.