
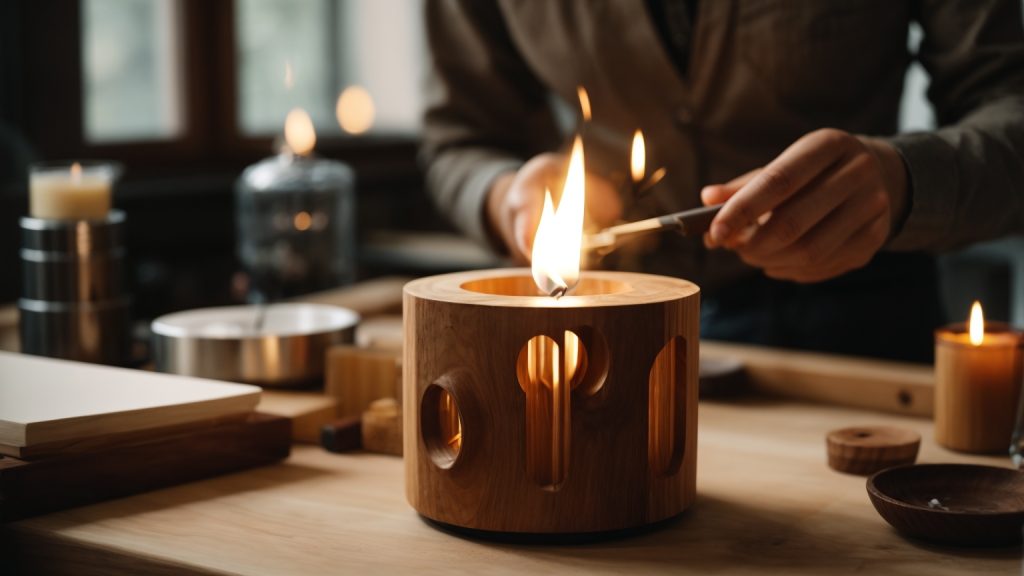
Are you looking for a fun and easy DIY project to spruce up your home decor? Why not try making your own wooden candle holder? With just a few simple materials and some basic tools, you can create a beautiful and functional piece that will add a touch of warmth and charm to any room.
One of the great things about making your own wooden candle holder is that you can customize it to suit your personal style and taste. Whether you prefer a sleek and modern look or something more rustic and natural, there are endless possibilities when it comes to design. Plus, you can choose from a variety of different woods, stains, and finishes to create a truly unique and personalized piece.
So what are you waiting for? Grab some wood, a saw, and some sandpaper, and let’s get started on creating a beautiful and functional wooden candle holder that you can enjoy for years to come.
Understanding Wood Types
When it comes to making a wooden candle holder, choosing the right type of wood is crucial. Different types of wood have different properties, which can affect the final product’s appearance, durability, and overall quality. In this section, we’ll discuss the two main categories of wood: hardwood and softwood.
Hardwood
Hardwood comes from deciduous trees, which are trees that lose their leaves annually. Hardwood is known for its density, strength, and durability. It’s also more expensive than softwood because it takes longer to grow. Some common types of hardwood include oak, maple, mahogany, and cherry.
Hardwood is an excellent choice for making candle holders because it’s sturdy and can withstand the heat of a burning candle. It also has a beautiful grain pattern that can add an elegant touch to your candle holder. However, hardwood can be challenging to work with because it’s dense and can be tough to cut and shape.
Softwood
Softwood comes from coniferous trees, which are trees that have needles instead of leaves. Softwood is less dense than hardwood and is typically less expensive. Some common types of softwood include pine, cedar, and spruce.
Softwood is a popular choice for making candle holders because it’s easy to work with and has a natural, rustic look. However, softwood is not as durable as hardwood and may not last as long. It’s also more prone to dents and scratches, which can detract from the overall appearance of your candle holder.
When choosing between hardwood and softwood, consider your budget, the final product’s intended use, and your woodworking skills. Both types of wood can make beautiful candle holders, but they have different properties that can affect the final product’s appearance and durability.
Essential Tools
If you want to make a wooden candle holder, you will need some essential tools. Here are some of the tools you will need to make a wooden candle holder:
Hand Saw
A hand saw is an essential tool for any woodworker. It is used to cut the wood to the desired length and shape. You can use a crosscut saw or a rip saw depending on the type of cut you want to make. A crosscut saw is used to make cuts across the grain of the wood, while a rip saw is used to make cuts along the grain.
Chisel
A chisel is a tool that is used to remove wood from a piece of lumber. It is an essential tool for making precise cuts and shaping the wood. You can use a bench chisel or a mortise chisel depending on the type of cut you want to make. A bench chisel is used for general woodworking, while a mortise chisel is used to make mortises.
Sandpaper
Sandpaper is used to smooth the surface of the wood and remove any rough spots. You can use sandpaper of different grits depending on the level of smoothness you want to achieve. Start with a coarse grit sandpaper and work your way up to a finer grit to achieve a smooth finish.
Drill
A drill is used to make holes in the wood. You will need a drill to make the holes for the candles in your wooden candle holder. You can use a hand-held drill or a drill press depending on the size of the holes you want to make.
In conclusion, these are the essential tools you will need to make a wooden candle holder. Make sure you have these tools before you start your project.
Selecting Your Wood
When it comes to making a wooden candle holder, the type of wood you choose is important. You want to select a wood that is strong enough to hold the weight of the candle and that will not easily crack or split. Here are some factors to consider when selecting your wood:
Type of Wood
There are many types of wood to choose from, each with its own unique characteristics. Some popular options for candle holders include pine, oak, and birch. Pine is a softwood that is easy to work with and has a natural grain pattern. Oak is a hardwood that is strong and durable, making it a good choice for larger candle holders. Birch is a light-colored hardwood that has a smooth, even grain.
Grain Pattern
The grain pattern of the wood can also affect the look of your candle holder. Some woods, like oak, have a prominent grain pattern that adds character to the piece. Other woods, like birch, have a more subtle grain pattern that creates a smoother look.
Size and Shape
Consider the size and shape of your candle holder when selecting your wood. If you are making a large candle holder, you will need a thicker and stronger piece of wood. If you are making a smaller candle holder, you can use a thinner piece of wood. The shape of your candle holder will also affect the type of wood you choose. If you are making a curved or rounded candle holder, you will need a wood that is easy to bend and shape.
Sustainability
Lastly, consider the sustainability of the wood you choose. Using sustainable wood sources helps to protect our environment and ensures that future generations will have access to natural resources. Look for wood that is certified by organizations like the Forest Stewardship Council (FSC) or that is harvested locally from sustainable forests.
By considering these factors, you can select the perfect wood for your candle holder project.
Designing Your Candle Holder
When it comes to designing your wooden candle holder, there are a few things to consider. In this section, we will explore the different aspects of designing a candle holder that is both functional and aesthetically pleasing.
Determining Size
The first thing to consider when designing your candle holder is the size. You will want to determine the size of the candle holder based on the size of the candles you plan to use. A good rule of thumb is to make the candle holder at least 1 inch larger than the diameter of the candle. This will ensure that the candle fits snugly in the holder and is stable.
Choosing Shape
The shape of your candle holder is another important consideration. You can choose from a variety of shapes, including round, square, or even a more unique shape. Keep in mind that the shape of your candle holder should complement the shape of the candles you plan to use.
Planning for Candle Size
In addition to the size and shape of your candle holder, you will also need to plan for the size of the candles you plan to use. This includes the height and diameter of the candles. You will want to make sure that the candle holder is tall enough to accommodate the height of the candle, and wide enough to accommodate the diameter of the candle.
One way to plan for the size of your candles is to create a template of the candle holder. This can be done by drawing the shape of the candle holder on a piece of paper and then cutting it out. You can then place the template over the candle to ensure that it fits properly.
By considering these factors when designing your candle holder, you can create a beautiful and functional piece that will enhance the ambiance of any room.
Cutting the Wood
When making a wooden candle holder, the first step is to cut the wood to the desired size. Here are the steps to follow:
Step 1: Choose the Wood
The type of wood you choose will depend on your personal preference and the tools you have available. Some good options include pine, cedar, and oak. Make sure the wood is dry and free of knots.
Step 2: Measure and Mark
Measure and mark the wood to the desired length. Use a straight edge to ensure a clean cut.
Step 3: Cut the Wood
Use a saw to cut the wood to the desired length. A handsaw or circular saw will work well. Make sure to wear safety goggles and gloves to protect yourself from flying debris.
Step 4: Sand the Edges
Use sandpaper to smooth the edges of the wood. This will help prevent splinters and give the candle holder a polished look.
Step 5: Add Decorative Touches
If desired, you can add decorative touches to the candle holder. This could include carving designs into the wood or painting it a different color.
By following these steps, you can create a beautiful wooden candle holder that will add warmth and charm to any room in your home.
Carving the Candle Holder
Now that you have gathered all the necessary materials, it’s time to start carving your wooden candle holder. Here are the steps to follow:
- Begin by marking the center of the wooden block using a ruler and pencil. This will help you know where to start carving.
- Use a carving knife to carve out the shape of the candle holder. Start by carving the outer shape of the holder, then work your way towards the center. Be careful not to cut too deep or too shallow.
- Once you have carved the outer shape of the holder, use a chisel to carve out the center of the holder. This is where the candle will be placed.
- Smooth out the edges of the holder using sandpaper. This will give it a polished and professional look.
- Finally, use a drill to create a small hole at the bottom of the holder. This will allow any melted wax to drain out of the holder.
Remember to take your time and be patient when carving your wooden candle holder. It may take some practice to get the shape and depth just right, but with some practice, you’ll be able to create a beautiful and functional candle holder that you can be proud of.
Sanding and Smoothing
Once you have cut your wooden pieces to size, it’s time to sand and smooth out any rough edges or splinters. This step is important to ensure that your candle holder looks clean and professional.
To sand the edges of your wood, you can use sandpaper or a rotary tool with a sanding attachment. Be sure to sand gently to avoid removing too much wood and altering the shape of your candle holder.
If you are using a rotary tool, set it to a low speed and gently run it along the edges of the wood. This will smooth out any rough spots and splinters. You can also use the rotary tool to sand the inside of any holes you drilled for your candles.
After sanding, wipe down your wooden pieces with a damp cloth to remove any sawdust or debris. This will ensure that your candle holder is clean and ready for finishing.
If you want to add a bit of texture to your candle holder, you can use a wire brush or sandpaper to create a distressed look. Simply run the brush or sandpaper along the surface of the wood in the direction of the grain.
Remember, sanding and smoothing is an important step in creating a beautiful wooden candle holder. Take your time and be gentle to avoid damaging your wood. With a little patience and effort, you’ll have a stunning candle holder that you can be proud of.
Creating the Candle Hole
To create the candle hole in your wooden candle holder, you will need a drill and a suitable drill bit. The size of the drill bit will depend on the size of the candle you plan to use. Here are the steps to create the candle hole:
- Mark the center of the area where you want to create the candle hole. You can use a ruler or a pencil to make the mark.
- Attach the drill bit to your drill. Make sure it is securely in place.
- Place the tip of the drill bit on the center mark you made earlier.
- Turn on the drill and apply gentle pressure to start drilling into the wood. Keep the drill bit perpendicular to the wood surface to ensure a straight hole.
- Drill to the desired depth. The depth of the hole should be slightly deeper than the height of the candle you plan to use.
- Remove the drill bit from the wood.
- Use sandpaper to smooth any rough edges around the candle hole.
- Repeat the process to create additional candle holes if desired.
Remember to take your time when drilling the candle holes. Rushing the process can result in an uneven or crooked hole. Also, be sure to wear appropriate safety gear, such as eye protection, when using power tools.
Finishing Touches
Once you have completed making your wooden candle holder, it’s time to give it the perfect finishing touches. Here are some tips on how to make your wooden candle holder look stunning.
Staining
Staining is an excellent way to enhance the natural beauty of the wood. It also helps to protect the wood from moisture and other environmental factors. Before staining, sand the wooden candle holder with fine-grit sandpaper to ensure a smooth surface. Then, apply the stain using a brush or cloth, following the manufacturer’s instructions. Allow the stain to dry completely before moving on to the next step.
Sealing
Sealing the wooden candle holder is essential to protect it from damage caused by heat and moisture. Use a clear, waterproof sealer to protect the wood. Apply the sealer with a brush or cloth, following the manufacturer’s instructions. Allow the sealer to dry completely before moving on to the next step.
Polishing
Polishing the wooden candle holder adds a beautiful shine to it. Use a soft cloth to apply a small amount of wood polish to the surface of the candle holder. Rub the polish into the wood in a circular motion. Allow the polish to dry completely before using the candle holder.
Remember, the finishing touches are what make your wooden candle holder stand out. Take your time and follow these tips to ensure that your candle holder looks beautiful and lasts for a long time.