Learning how to play a wooden flute can be a rewarding experience for anyone interested in music. Wooden flutes are popular among musicians because of their unique sound and versatility. Whether you are a beginner or an experienced musician, playing the wooden flute can be a great way to express your creativity and connect with others through music.
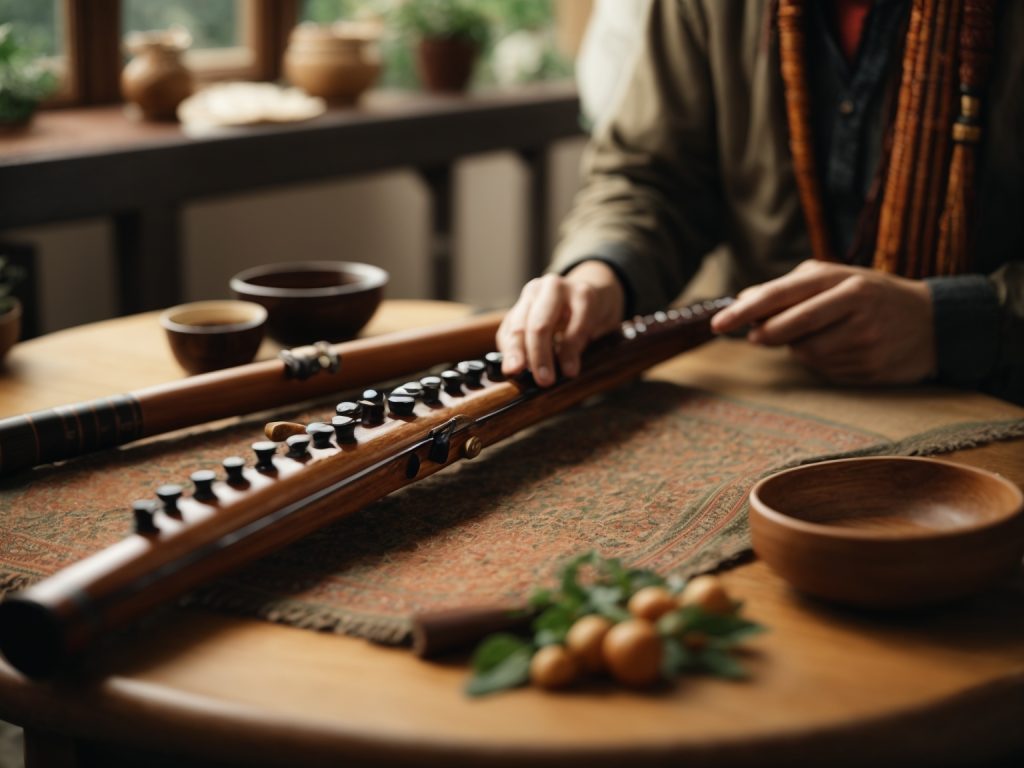
To begin playing the wooden flute, you will first need to learn how to hold the instrument properly. The left hand should be closest to the mouth hole, whether you are right-handed or left-handed. The flute should point to your right with open finger holes. Position the mouth hole edge against the lower lip’s center. Once you have the proper grip, you can start practicing the basic techniques of playing the wooden flute, such as producing sound and changing notes.
In this article, we will provide you with a comprehensive guide on how to play the wooden flute. We will cover the basics of holding the instrument, producing sound, and changing notes. Additionally, we will provide you with some tips and tricks to help you improve your playing skills. Whether you are a beginner or an experienced musician, this guide will help you take your wooden flute playing to the next level.
Understanding the Wooden Flute
If you’re interested in playing the wooden flute, it’s important to understand the history and different types of wooden flutes available. Here are some key things to keep in mind:
History of the Wooden Flute
The wooden flute has been around for centuries and has been used in various cultures around the world. In Europe, wooden flutes were commonly used during the Baroque and Classical periods. The flute was also popular in traditional Irish and Scottish music.
The wooden flute is made of wood, which gives it a unique sound. Different types of wood can be used to create different sounds and tones. Some of the most popular woods used for wooden flutes include African Blackwood, Boxwood, and Rosewood.
Types of Wooden Flutes
There are two main types of wooden flutes: end-blown and side-blown. End-blown flutes are played by blowing into the end of the flute, while side-blown flutes are played by blowing into a hole on the side of the flute.
One popular type of end-blown wooden flute is the Native American flute. This type of flute has a long history and is commonly used in Native American music and culture.
Side-blown wooden flutes come in a variety of shapes and sizes. One popular type is the Irish flute, which is commonly used in traditional Irish music. The Irish flute is typically made of wood and has six finger holes and a blow hole.
No matter what type of wooden flute you choose, it’s important to practice regularly and learn proper techniques to produce the best sound possible.
Basic Techniques
Learning to play the wooden flute requires some basic techniques that you need to master. These techniques include holding the flute, blowing techniques, and finger placement. Here’s what you need to know:
Holding the Flute
The first thing you need to learn is how to hold the flute properly. Hold the flute with your left hand closest to the mouth hole, whether you are right-handed or left-handed. The flute should point to your right with open finger holes. Position the mouth hole edge against the lower lip’s center. Use your right hand to hold the end of the flute. Keep your elbows relaxed and close to your sides.
Blowing Techniques
To make a sound on the wooden flute, you need to blow air across the mouth hole. Start by placing your lips over the hole and blowing a steady stream of air. Adjust the angle of your lips until you hear a clear tone. You can also experiment with different amounts of air pressure to produce different sounds. Practice blowing until you can produce a clear, sustained tone.
Finger Placement
Once you can produce a clear tone, the next step is to start learning some basic finger techniques for playing notes. The fingers of your left hand are positioned on top of the holes, while the right hand holds the end of the flute. Each finger represents a different note, and by covering or uncovering the holes with your fingers, you can produce different pitches. Use a fingering chart to help you learn the different finger positions for each note.
In summary, mastering the basic techniques of holding the flute, blowing techniques, and finger placement is essential for learning to play the wooden flute. Practice these techniques regularly to improve your skills and become a proficient player.
Reading Flute Music
Learning to read flute sheet music is an essential skill for any flutist. It allows you to play a wide range of music and communicate with other musicians. In this section, we will cover the basics of reading flute sheet music.
Understanding Musical Notation
Musical notation is a system of symbols and markings that represent musical sounds and rhythms. The most basic element of musical notation is the staff. The staff is made up of five horizontal lines and four spaces between them. Each line and space represents a different pitch.
Flute sheet music is written on the treble clef staff, which is the top staff on a piece of sheet music. The notes on the staff indicate which pitch to play on the flute. The higher the note on the staff, the higher the pitch.
Flute Sheet Music Symbols
In addition to the notes on the staff, flute sheet music also includes symbols that indicate how to play the notes. Here are some common symbols you will see in flute sheet music:
- Time Signature: The time signature tells you how many beats are in each measure and what type of note gets the beat.
- Key Signature: The key signature tells you which notes are sharp or flat throughout the entire piece.
- Dynamics: Dynamics indicate how loud or soft to play the notes. Common dynamic markings include forte (loud) and piano (soft).
- Articulation: Articulation symbols indicate how to play the notes. For example, a slur indicates that the notes should be played smoothly, while a staccato dot indicates that the notes should be played short and detached.
- Tempo: Tempo markings indicate the speed at which to play the piece. Common tempo markings include allegro (fast) and adagio (slow).
By understanding these symbols and markings, you will be able to read and interpret flute sheet music with ease. Practice reading sheet music regularly to improve your skills and become a better flutist.
Practicing Scales and Notes

To become proficient at playing the wooden flute, you need to practice your scales and notes regularly. This will help you to develop your finger placement, breath control, and tone quality. Here are some tips to help you practice your scales and notes effectively:
- Start with the basics: Begin by practicing the major and minor scales. These scales are the foundation of Western music and are essential for any flute player. Practice each scale slowly, making sure to hit each note accurately.
- Use a metronome: A metronome can help you keep a steady rhythm while practicing your scales and notes. Set the metronome to a slow tempo and gradually increase the speed as you become more comfortable.
- Practice in different keys: Once you have mastered the major and minor scales, try practicing in different keys. This will help you to become more familiar with the finger placement for each note and will improve your overall technique.
- Focus on tone quality: When practicing your scales and notes, pay close attention to your tone quality. Make sure that each note is clear and resonant. Experiment with different breath pressures and embouchure positions to find the best tone for each note.
- Practice with a tuner: A tuner can help you ensure that each note is in tune. Play each note slowly and adjust your finger placement and breath pressure as necessary until the tuner shows that the note is in tune.
By practicing your scales and notes regularly, you will develop the muscle memory and technique necessary to become a skilled wooden flute player. Remember to take your time and focus on accuracy and tone quality rather than speed. With practice and dedication, you will be able to play beautiful music on your wooden flute.
Playing Simple Tunes
Playing simple tunes on a wooden flute can be a great way to start your musical journey. With a little bit of practice, you can quickly learn to play some popular melodies and impress your friends and family. Here are some tips to help you get started:
1. Start with Easy Songs
When you’re just starting out, it’s best to stick with simple tunes that you already know. This will help you get a feel for the instrument and build your confidence. Some popular songs to start with include “Twinkle, Twinkle, Little Star,” “Mary Had a Little Lamb,” and “Row, Row, Row Your Boat.”
2. Master the Basics
Before you can start playing songs, you need to master the basics of playing the wooden flute. This includes learning proper finger placement, breath control, and posture. Make sure you practice these techniques regularly to build your skills.
3. Use Sheet Music
Sheet music can be a great resource when you’re learning to play the wooden flute. Look for simple sheet music for the songs you want to play, and practice playing along with the notes. This will help you learn the melody and timing of the song.
4. Play Along with Recordings
Another great way to learn how to play simple tunes on the wooden flute is to play along with recordings of the songs. This will help you get a feel for the rhythm and tempo of the music. You can find recordings of popular songs on YouTube or in music stores.
5. Practice Regularly
Like any skill, playing the wooden flute takes practice. Make sure you set aside time each day to practice playing simple tunes. This will help you build your skills and improve your technique over time.
By following these tips, you can quickly learn to play simple tunes on the wooden flute. Remember to be patient and practice regularly, and you’ll be playing your favorite songs in no time!
Advanced Techniques
Once you’ve mastered the basics of playing the wooden flute, it’s time to move on to more advanced techniques. In this section, we’ll cover some of the most common advanced techniques, including vibrato, staccato and legato, and trills and slurs.
Vibrato
Vibrato is a technique that involves creating a vibrating sound by rapidly altering the pitch of the note being played. To produce vibrato on the wooden flute, you’ll need to use your diaphragm and throat muscles to control the airflow and pitch of the note.
To practice vibrato, start by playing a sustained note and then gradually increase and decrease the pitch of the note by moving your diaphragm and throat muscles. As you get more comfortable with the technique, try experimenting with different speeds and intensities to create different effects.
Staccato and Legato
Staccato and legato are two techniques used to create different articulations and phrasing in your playing. Staccato involves playing short, detached notes, while legato involves playing long, connected notes.
To play staccato on the wooden flute, you’ll need to use a sharp, quick tonguing technique to create a crisp, clean sound. To play legato, you’ll need to focus on creating a smooth, connected sound by using a gentle, flowing tonguing technique.
Trills and Slurs
Trills and slurs are two techniques used to create ornamentation and embellishments in your playing. A trill involves rapidly alternating between two adjacent notes, while a slur involves smoothly transitioning between two or more notes without tonguing.
To practice trills, start by playing two adjacent notes and then rapidly alternate between them, gradually increasing the speed and intensity as you get more comfortable with the technique. To practice slurs, start by playing two or more notes in a smooth, connected manner, focusing on creating a seamless transition between each note.
Remember, mastering advanced techniques on the wooden flute takes time and practice. Take your time, be patient, and don’t be afraid to experiment and try new things to find your own unique style and sound.
Maintaining Your Wooden Flute
If you want to keep your wooden flute in good condition, it’s important to take proper care of it. Here are some tips to help you maintain your wooden flute.
Cleaning
Cleaning your wooden flute is an important part of maintenance. Here are some steps to follow when cleaning your flute:
- Use a soft cloth or a feather duster to remove any dust or debris from the surface of the flute.
- Use a cleaning rod with a cloth wrapped around it to clean the inside of the flute. Be sure to remove any moisture from the inside of the flute after playing.
- Use a small amount of natural oil, such as almond or walnut oil, to condition the wood. Apply the oil to a cloth and rub it onto the surface of the flute. Be sure to remove any excess oil with a dry cloth.
Storage
Proper storage is also important for maintaining your wooden flute. Here are some tips for storing your flute:
- Store your flute in a cool, dry place to prevent warping or cracking.
- Use a case or a flute bag to protect your flute when it’s not in use.
- Avoid exposing your flute to extreme temperatures or humidity, as this can damage the wood.
By following these tips, you can help ensure that your wooden flute stays in good condition for years to come.
Finding a Flute Teacher or Class
Learning to play the wooden flute can be a challenging but rewarding experience. Finding a good flute teacher or class can make all the difference in your progress and enjoyment. Here are some tips to help you find the right flute teacher or class for you:
- Check with local music schools or conservatories: Many music schools and conservatories offer flute lessons or classes. They may have a list of teachers or classes that they can recommend to you. You can also check their websites for information on their programs.
- Look for private flute teachers: Private flute teachers may be found through online directories or classified ads. You can also ask for recommendations from friends, family, or other musicians in your area.
- Attend flute workshops or festivals: Flute workshops and festivals are a great way to meet other flute players and learn from experienced teachers. They often offer classes for all levels and styles of playing.
- Consider online flute lessons: Online flute lessons are becoming increasingly popular and can be a convenient option for those who cannot find a local teacher or prefer to learn from the comfort of their own home. Look for reputable online teachers or programs that offer personalized instruction and feedback.
When choosing a flute teacher or class, it’s important to consider your goals, learning style, and budget. Be sure to ask about the teacher’s qualifications, experience, and teaching style before committing to lessons. With the right teacher or class, you can develop your skills and achieve your musical goals.