Are you a chess enthusiast looking to make your own wooden chess board? Making a wooden chess board can be a fun and rewarding project for woodworkers of all skill levels. With a few tools and materials, you can create a beautiful and functional chess board that will last for years to come.
To start, you’ll need to gather some materials. You’ll need two different types of wood, one light and one dark, to create the alternating pattern of a chess board. Maple and walnut are a classic combination, but you can use any type of wood you prefer. You’ll also need a saw, a router, wood glue, sandpaper, and a finish such as varnish or wax. Once you have your materials, you’re ready to get started!
Understanding Chess Board Basics

When it comes to making a wooden chess board, it’s important to understand some basic concepts of the game of chess. Here are some things you should keep in mind:
The Board Size
A standard chess board consists of 64 squares arranged in an 8×8 grid. Each square has a size of 2.25 inches (5.7 cm) and is alternately colored in black and white. The board itself should have a size of around 18-20 inches (45-50 cm) on each side.
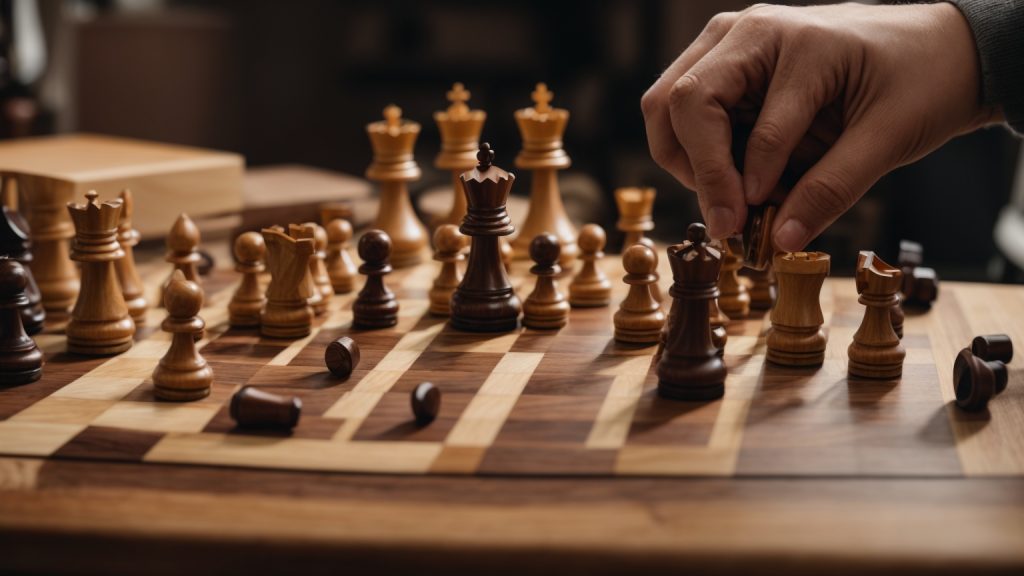
The Chess Pieces
A standard chess set consists of 32 pieces, 16 of which are white and 16 of which are black. Each player has one king, one queen, two rooks, two knights, two bishops, and eight pawns. The pieces should be proportionate to the size of the board, with the king being around 3.75 inches (9.5 cm) tall.
The Chess Notation
Chess notation is a system used to record the moves of a game of chess. It’s important to understand this system if you want to follow a game or record your own games. The notation consists of a letter and a number for each move, with the letter indicating the piece moved and the number indicating the square moved to.
The Chess Rules
Finally, it’s important to understand the basic rules of chess if you want to play the game on your new wooden chess board. Each player takes turns moving their pieces according to the rules, with the ultimate goal of putting the opponent’s king in checkmate. There are many resources available online that can help you learn the rules of chess.
By understanding these basic concepts of chess, you’ll be better equipped to create a beautiful and functional wooden chess board that you can enjoy playing on for years to come.
Choosing the Right Wood
When it comes to building a wooden chessboard, the type of wood you choose is crucial. You want to select a type of wood that not only looks good but is also durable and easy to work with. Here are some factors to consider when choosing the right wood for your chessboard:
Color Contrast
One of the most important factors to consider is the color contrast between the two types of wood you choose. The classic chessboard pattern consists of alternating light and dark squares, so you want to select two types of wood that have a good contrast. For example, you could use maple and walnut, or cherry and ebony.
Wood Hardness
Another factor to consider is the hardness of the wood. Harder woods tend to be more durable and resistant to scratches and dents. However, harder woods can also be more difficult to work with, especially if you’re a beginner. So, you need to find a balance between hardness and workability. Some good options for chessboard wood include maple, walnut, cherry, and mahogany.
Wood Grain
The grain of the wood can also affect the appearance of your chessboard. Some woods, like maple and birch, have a very subtle grain that can create a smooth, uniform look. Other woods, like oak and mahogany, have a more prominent grain that can add texture and character to your chessboard. Consider the style you’re going for and choose a wood with a grain that complements it.
Availability and Cost
Finally, you want to consider the availability and cost of the wood. Some types of wood may be harder to find or more expensive than others. Consider your budget and the availability of different types of wood in your area before making a final decision.
By considering these factors, you can choose the right wood for your chessboard that looks great, is durable, and is easy to work with.
Gathering Essential Tools
Making a wooden chess board requires some essential tools to get started. Here are the tools you will need:
Table Saw
A table saw is a must-have tool for this project. It will help you cut the wood pieces to the required size. Ensure that the table saw is in good condition and the blade is sharp before starting the project.
Miter Saw
A miter saw is used to make precise angle cuts on the wood strips. This tool is essential for making the chessboard pattern. You can also use a handsaw, but it will take more time and effort.
Drill
You will need a drill to make pilot holes for the screws and to drill the holes for the dowels. Ensure that you have the appropriate drill bits for the job.
Brad Nailer
A brad nailer is used to attach the wood pieces together. It is faster and more efficient than using screws or nails. Ensure that you have enough brad nails before starting the project.
Clamps
Clamps are used to hold the wood pieces together while the glue dries. They are available in different sizes and shapes. Ensure that you have enough clamps to hold the wood pieces firmly in place.
Sandpaper
Sandpaper is used to smooth out rough edges and surfaces. You will need different grits of sandpaper to achieve a smooth finish.
Wood Glue
Wood glue is used to attach the wood pieces together. Ensure that you have enough wood glue before starting the project.
Safety Gear
Safety gear is essential when working with power tools. Wear safety glasses to protect your eyes from sawdust and debris. Wear earplugs to protect your ears from the noise of the power tools. Wear a dust mask to protect your lungs from sawdust.
Preparing the Wood
Before you can begin building your wooden chess board, you need to prepare the wood. Here are a few steps to follow:
Step 1: Choose the Right Wood
The first step in preparing the wood for your chess board is to choose the right type of wood. You want to select two types of wood that have a strong contrast in color and grain. Common choices include maple and walnut, cherry and oak, or birch and mahogany.
Step 2: Cut the Wood
Once you have selected your wood, you will need to cut it into strips that are the same width and thickness. A table saw is the best tool for this job. Make sure that your strips are straight and free of knots or other imperfections.
Step 3: Glue the Strips Together
Next, you will need to glue the strips together to create the chess board. Apply a thin layer of wood glue to each strip and press them together. Use clamps to hold the strips in place while the glue dries.
Step 4: Sand the Board
After the glue has dried, you will need to sand the chess board to create a smooth surface. Start with a coarse grit sandpaper and work your way up to a finer grit. Use a sanding block or orbital sander to ensure that the surface is even and smooth.
Step 5: Apply a Finish
Finally, you will need to apply a finish to the chess board to protect the wood and enhance its natural beauty. There are many different finishes to choose from, including oil-based finishes, water-based finishes, and wax. Apply the finish according to the manufacturer’s instructions and allow it to dry completely before using the chess board.
By following these steps, you can prepare the wood for your wooden chess board and create a beautiful and functional piece that you can enjoy for years to come.
Creating the Squares
When it comes to making a wooden chess board, creating the squares is one of the most important steps. The squares need to be precise and uniform in size to ensure the board looks professional and is easy to play on. Here are the steps to create the squares:
Measuring and Marking
The first step is to measure and mark the squares on the wood. You can use a ruler, square, or other measuring tools to ensure accuracy. Here are some tips to keep in mind:
- Measure twice, cut once: Double-check your measurements before making any cuts.
- Use a pencil: Make sure to use a sharp pencil to mark the squares. This will help ensure accuracy and make it easier to see the markings.
- Mark both sides: When marking the squares, make sure to mark both sides of the wood. This will help ensure that the squares are aligned properly.
Cutting and Sanding
Once you have marked the squares, it’s time to cut them out. Here’s how to do it:
- Use a saw: A table saw or a circular saw with a guide will work well for cutting the squares.
- Cut carefully: Take your time when cutting the squares to ensure accuracy. Use a push stick to keep your hands safe.
- Sand the squares: After cutting the squares, sand them to ensure they are smooth and free of any rough edges.
When creating the squares, it’s important to take your time and be precise. With a little patience and attention to detail, you can create a beautiful wooden chess board that will be enjoyed for years to come.
Assembling the Board
Now that you have all the pieces cut and sanded, it’s time to assemble your wooden chess board. Follow these steps to put it all together:
- Lay out the chessboard pattern: Arrange the squares in the desired pattern. You can use the same wood for all the squares or alternate between two different types of wood. Make sure the pattern is aligned correctly.
- Glue the squares together: Apply a thin layer of glue to the back of each square and press it firmly onto the backing board. Use clamps to hold the squares in place until the glue dries. Be sure to wipe off any excess glue that seeps out from between the squares.
- Sand the board: Once the glue has dried, sand the board to make it smooth. Start with a coarse grit sandpaper and work your way down to a fine grit sandpaper. Be careful not to sand too much, or you may end up with uneven squares.
- Apply a finish: Apply a clear finish to protect the board and give it a polished look. You can use a clear lacquer, polyurethane, or varnish. Apply the finish in thin coats, allowing each coat to dry completely before applying the next.
- Attach the legs (optional): If you want to add legs to your chess board, you can attach them now. Use wood screws to attach the legs to the bottom of the backing board. Make sure the legs are level and securely attached.
Congratulations! You have now assembled your very own wooden chess board. It’s time to gather some chess pieces and start playing.
Finishing Touches
Once you have completed the construction of your wooden chess board, it’s time to put the finishing touches on it. This will not only enhance the beauty of your chess board but also protect it from wear and tear. In this section, we will discuss two important finishing touches: applying stain and adding a finish.
Applying Stain
Staining your wooden chess board is a great way to add color and depth to the wood. Here are the steps to follow:
- Sand the surface of your chess board with fine-grit sandpaper to remove any rough spots or blemishes.
- Apply wood conditioner to the surface of the board to help the stain penetrate evenly.
- Apply the stain with a brush or cloth, following the manufacturer’s instructions. Be sure to apply it evenly and wipe off any excess.
- Allow the stain to dry completely before applying a finish.
Adding a Finish
Adding a finish to your chess board will protect it from scratches, moisture, and other types of damage. Here are the steps to follow:
- Sand the surface of your chess board with fine-grit sandpaper to remove any rough spots or blemishes.
- Apply a sealer coat to the surface of the board to help the finish adhere better.
- Apply the finish with a brush or cloth, following the manufacturer’s instructions. Be sure to apply it evenly and wipe off any excess.
- Allow the finish to dry completely before using your chess board.
There are many types of finishes available, including polyurethane, lacquer, and varnish. Choose the one that best suits your needs and preferences.
In conclusion, applying stain and adding a finish are important steps in completing your wooden chess board. These finishing touches will not only enhance its appearance but also protect it from damage. Follow the steps outlined above to achieve a beautiful and durable chess board that will provide years of enjoyment.
Maintenance Tips
Once you’ve completed your wooden chessboard, it’s important to keep it in good condition so that it lasts for years to come. Here are some maintenance tips to keep your chessboard looking great:
Clean Regularly
Dust and debris can accumulate on your chessboard over time, so it’s important to clean it regularly. Use a soft, dry cloth to wipe down the surface of the board. If there are any stubborn spots, you can use a damp cloth with a little bit of soap to gently scrub the area. Make sure to dry the board thoroughly after cleaning.
Avoid Moisture
Wood is sensitive to moisture, so it’s important to keep your chessboard away from damp areas. Avoid placing it near windows or in areas with high humidity. If your chessboard does get wet, make sure to dry it off as soon as possible to prevent any damage.
Store Properly
When you’re not using your chessboard, it’s important to store it properly. Keep it in a dry, cool place away from direct sunlight. You can also cover it with a cloth or a chessboard cover to protect it from dust and debris.
Repair as Needed
If your chessboard gets scratched or damaged, you can repair it with a little bit of sandpaper and wood filler. Sand down the damaged area and apply the wood filler according to the manufacturer’s instructions. Once the filler is dry, sand it down again and apply a coat of finish to match the rest of the board.
By following these maintenance tips, you can keep your wooden chessboard looking great for years to come.